1
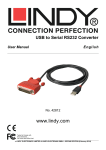
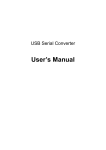
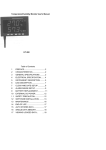
Advocate HealthCare System Owner’s Manual 1 2 3 4 Introduction 1.1 Intended Readership 1.2 Purpose 1.3 Related Documents 1.4 Conventions 1.5 Problem Reporting Instructions Overview 2.1 Basic Principle 2.2 Cautions and Warnings Installing Using the Software 4.1 Manu Command\ 4.1.1 Menu command – File 4.1.2 Menu command – options 4.1.3 Menu command – Data Transfer 4.2 Main Menu 4.2.1 4.2.2 4.2.3 4.2.4 Profile Maintenance Download Results Synchronize Meter Set-Up 4.2.5 4.2.6 4.2.7 4.2.8 View Readings View Charts View Statistics Report 4.2.9 Undo 4.2.10 Notes 4.2.11 PC Reminder 4.2.12 Data Export 5 6 Troubleshooting Reference Section 6.1 Error messages and causes 1. Introduction This is the owner’s manual for Advocate HealthCare System. It contains essential information for users to make full use of the information system. This manual includes descriptions of the system functions and capabilities, contingencies and alternate modes of operation, and step-by-step procedures for system access and use. Refer to figures whenever possible for a clearer understanding of this document. 1.1 Intended Readership This document is intended for all users of the Advocate HealthCare System, patients or health professionals. It is strongly recommended that knowledge of basic computer operation is acquired before attempting to read this manual or operate the software system. The Advocate HealthCare System was designed to only work with Advocate’s line of health products. If you have an incompatible instrument, please refer to its manual accordingly. 1.2 Purpose This document provides operational instructions for the Advocate HealthCare System. It should be referred to as the official guide on how to perform the functionalities offered by the system. For specifications of the system or installation instructions, please refer to the “Related Documents” section of this document. 1.3 Related Documents Document Content System Specification Software and Hardware requirements for the Advocate HealthCare System Installation Instruction Step‐by‐step instructions on how to set up the Advocate HealthCare System on your machine 1.4 Conventions The following terms are usually used to describe personal computer use and are used in this manual: Click To press and release the left button of your mouse. A click places the text cursor, activates a window, or activates a choice in a dialog box. Double‐click To press and release the left mouse button twice, rapidly in succession. Right‐click To press and release the right button of your mouse. Choose Refers to activating items, usually by clicking, in menus and dialog boxes that tell the system what to do. Select Refers to specifying files, windows, or text upon which the software will act. The “>” character is used in place of “choose” in descriptions of user interface pathways. For example, Start > Settings > Control Panel means, “Click Start, then choose Settings, then choose Control Panel.” Press Refers to pressing keys on your keyboard. A plus (+) sign between keys that you are instructed to press means that you should press the first key and continue to hold it down while pressing the second key. Dialogue box A window that pops up as an event of the application, to supply information to the / Popup user or to ask for the user’s choice between 2 or more options. Plug in To connect an electrical device to an electrical system or device so that it can be used, by pushing its plug into a socket. Background Part of the multitasking capability. A program can run and perform tasks in the background while another program is being used in the foreground. Port A connection socket. Spreadsheet A program designed to look like an electronic ledger. Upload To send a file(or data) from one computer to another through a network. 1.5 Problem Reporting Instructions If any problems occur during the usage of this software, please refer to the troubleshooting section of this document. Make sure you have already read the installation instructions and system specifications documents. If your problem is not listed in troubleshooting or the solutions provided cannot solve your problem, you may send an email to: [email protected] for further assistance. 2 Overview 2.1 Basic Principle The Advocate HealthCare System works with its own behind-the-scene database to store measurement data downloaded from the Glucose Shepherd Blood Glucose Monitoring System. Changes you make within the software system will not affect records and settings on the glucose meter, with the only exception of functions: Synchronize Meter Set-Up Duplicate records are not created in the software database if you download the same results from your glucose meter for a second time, so records on the meter do not have to be erased between your downloads. Measurement data downloaded to the software system are stored under the user profile that was selected before the download. If data was downloaded to a wrong user, make sure you take advantage of the “Undo” feature before the undo buffer is cleared (after another download or closing the software). In case of any major errors, you can always recreate a user and re-download measurement data from your glucose meter again. 2.2 Cautions and Warnings Make sure you have read and understand the “Important Safety Instructions” section of the Glucose Shepherd Blood Glucose Monitoring System owner’s manual before using it in conjunction with the Advocate HealthCare System. 3 Installing This document provides installation guidelines for Advocate HealthCare System version 1.0. Please refer to the software specifications for installation requirements and the user manual for operational instructions. Figure 3.1: Installer To begin the installation for Advocate HealthCare System, locate the Installer.exe (Figure 3.1) provided by your software vendor or meter instrument distributor. This should be in the form of Compact-disk (CD). Double click the icon to begin the installation process. Figure 3.2: PL2303 Prompt First, you will be prompted with a dialogue asking to install PL2303 driver (Figure 3.2). This package is required in order for Advocate HealthCare System to communicate with your purchased glucose meter. You may skip this step if it had been installed previously. Figure 3.3: Complete PL2303 driver installation Following the installation of PL2303 driver (if executed), you will be prompted with a second dialogue asking to complete install PL2303 driver installation (Figure 3.3). You may only skip this step if it had been installed previously. The installer application would then start to extract files required for installation (Figure 3.4-3.8). This is a necessary process and should take no longer than 5 minutes, depending on the performance of your machine. Figure 3.4: Initialization Figure 3.5: Select Installation Folder Figure 3.6: Confirm Installation Figure 3.7: Installing Advocate HealthCare System Figure3.8: Installation Complete Figure 3.9: Menu The installation is now complete. A shortcut will be placed on your desktop and a folder will be created under your Start menu. You may use either of these to launch the Advocate HealthCare System. 4 Using the software 4.1 Menu Command 4.1.1 Menu command – File Menu command – File includes Exit. You may click on the Exit button to terminate the software. See the following drawing: 4.1.2 Menu command – options Menu command – options have only a Set Scroll Layout to set the scrolling option. See the following drawing: 4.1.3 Menu command – Data Transfer Menu command –Data Transfer include Retrieve, Synchronize, Get Alarm, and Set Alarm. Retrieve: Click on the Retrieve button. The Download Result View is opened and data retrieval performed. Synchronize: Click on the Synchronize button. The Synchronize View is opened and synchronization performed. Get Alarm: Click on the Get Alarm button. The Meter Set-Up View is opened and the connected glucose meter alarm setting is retrieved and displayed. Set Alarm: Click on the Set Alarm button. The Meter Set-Up View is opened and the alarm setting on Meter Set-Up View is synchronized to the setting glucose meter. 4.2 Main Menu The Main Menu of Advocate Health System contains 12 sub-menu. They are profile maintenance (Personal Information), Download Results, Synchronize, Meter Set-Up, View Readings, View Charts, View Statistics, Report, Undo, Note, PC Reminder, and Data Export. 4.2.1 Profile Maintenance A user profile must be created for each Glucose device user; otherwise several functions of the software would not be available. Creating a user profile should also be the first thing you do following a successful installation of the software. Fill up the informations and click Save. You should then be prompted to download glucose results. This prompt is simply a shortcut to the next section of this document, please click No and ignore it for now. Figure 4.1: User Profile Figure 4.1 represents an example of a successfully saved profile. You may edit information of the profile anytime and click Save again to update it. Notice how the Name field is now greyed out and unusable, this is the only unchangeable part of a profile once it has been created. Even though some of these fields are optional entries. If you are creating a second profile in the system, you must click the New User button first as the existing profile will be already selected by default. To delete an existing profile, simply select it first and click the Delete User button. You will be prompted for confirmation before anything is actually deleted. Deleting a user also deletes any glucose data associated with that user! Make sure you have the correct user selected as this is an irreversible process. 4.2.2 Download Results Assuming you have read the previous section on Profile Maintenance, this is the section the system prompted you to go to when you saved a user profile. The purpose of this feature is to download glucose results stored on your glucose meter into the Advocate HealthCare System. To access this feature, navigate to the Download Results tab. You should see an image of glucose meters and a Retrieve button. Click the Retrieve button to begin the download process. Figure 4.2: Download Results Notice on the top right corner of the program there is a Connect box. Inside you may specify which port your glucose meter is plugged in to your computer. If you’re unsure what that means, click the connect button and you want to specify which one to communicate with. Click the Retrieve button to begin your download process, and make sure your glucose meter is plugged in. It may take 2 to 5 seconds for Windows and the software system to discover your meter from the instance it’s plugged in. The amount of time required to complete the download process is directly related to the number of records that exist in your glucose meter. However, no downloads should take longer than 30 seconds. You will be informed of the download status via a dialogue box once it is complete. 4.2.3 Synchronize The synchronize feature is used to set the date/time on the glucose meter directly from your computer. First navigate to the Synchronize tab sheet (Figure 4.3). Figure 4.3: Synchronize Like the Download Results feature, Synchronize connects using settings specified in the Connect section on the top right corner of the screen. The software system then takes the current time on your PC (Usually shown on your task bar) and sets it on the connected glucose meter. This process should take no longer than 5 seconds, and a dialogue box will be shown to inform you of the result. 4.2.4 Meter Set-Up The Meter Set-Up tab sheet provides Alarm-adjustment main features. Click the Current Settings button and the alarm settings on the meter would be shown to the left of the buttons (Figure 4.4). Figure 4.4: Meter Set-Up Use the SET button to do just the opposite: Settings to the left of the buttons are sent to the meter and reset as the new alarm time. 4.2.5 View Readings Fi Figure 4.5: View Readings The View Readings tab sheet (Figure 4.5) displays all glucose records under the current user profile. The latest records are shown on top for the sake of convenience viewing. Figure 4.6: Print Dialogue You may also print your glucose records by using the Print button. A common print dialogue would be shown (Figure 4.6) and you may adjust print settings before actual printing begins. 4.2.6 View Charts The View Charts tab sheet is used to display your glucose measurement data in chart form. First navigate to the View Charts tab sheet (Figure 4.7). Fi Figure 4.7: View Charts Begin by checking the type of glucose data you want to see included in your chart. All types of data are already checked by default. To see your glucose data based on an entire month, select the desired year and month in the By Month panel. Your glucose chart will be shown when you click the Show Chart button. To display a chart out of any date range, select your desired date range in the Custom Date panel and click the bottom Show Chart button. Fi Figure 4.8: Glucose Chart Depending on your glucose data, a chart similar to Figure 4.8 will be shown. You may zoom in or out using the zoom buttons, or initiate the print dialogue with the Print button. 4.2.7 View Statistics The View Statistics tab sheet is used to display statistical data based on your glucose records. A summary of your total records is shown when you first navigate to the View Statistics tab (Figure 4.9). Fi Figure 4.9: View Statistics To see statistics of data within a time range, enter the date range on the date boxes and click Filter. Statistical information you will see are: Number of Readings Number of Days with Readings Highest Lowest Average Within Target Zone Outside Target Zone Like View Chart and View Readings, you may also use the Print button to invoke the Windows print dialogue. 4.2.8 Report The Report feature is used to convert your glucose data into a CSV formatted report. The report may be opened by Microsoft Excel or your choice of spreadsheet viewer. Navigate to the Report tab to make use of this feature (Figure 4.10). Figure 4.10: Report Select the date range for the data you want included in the report, and you may check additional information you would like to include (ex. Weight). Once you hit the Export to CSV file button, a file dialogue will be shown where you must specify where you want your report to be saved. Once that is done, you will have your glucose data presented in a report form (Figure 4.11). Figure 4.11: Report in CSV format 4.2.9 Undo The Undo features are utility functions for your glucose data. The Undo feature simply deletes all of the glucose data created from your last download from the meter. This feature is particularly useful if you did a Download with the wrong user selected. An Undo buffer is created after a successful download, and it’s cleared if you shut down the application or perform another download. The Undo tab sheet can be seen in figure 4.12. Fi Figure 4.12: Undo 4.2.10 Notes Figure 4.13: Notes The Notes feature allows you to enter and store custom text. The primary purpose of this feature is for you to store health-related entries. You may enter the following types of notes: Comments, Exercise, Diet, Others. Every note is time stamped to the precision of seconds. Simply use the New button to create a note. Notes management works a lot like user profile management, which should be familiar to most users by now. 4.2.11 PC Reminder Fi Figure 4.14: PC Reminder With the exception of a master on/off button, the PC Reminder interface looks almost identical to Meter Set-Up’s. If you turn on a reminder (similar to an alarm), the application will pop up a dialogue to notify you when the time is reached. You may keep this software minimized in the background and this feature would still work. 5 Connection between your Advocate blood glucose meter and Advocate HealthCare System via USB cable This section describes how to download data from the Advocate blood glucose monitoring system to your PC. To download data, there are three steps to follow – Step1. Connect your Advocate blood glucose meter to your computer with USB cable. Step2. Start the software and establish an internal connection (between your gblood glucose meter and PC). Step3. Download data. 6 Troubleshooting The meter is plugged in but the software tells me “Device not found.” Make sure you give it around 2 to 5 seconds for Windows and the Advocate HealthCare System to detect the meter once it’s plugged in. Make sure you have a compatible glucose meter. Try a different USB port. If you believe something is wrong with your meter please contact your product distributor. The time it takes to download results seem to take longer and longer. The time required to finish the download process is completely related to the number of records stored in your glucose meter. No lines are shown when I use the View Charts features. Make sure glucose data is available in the time range selected for your chart. As it takes two points to construct a line, make sure you have at least two records of the same data type (Pre-Meal, Post-Meal…etc). 7 Reference Section 7.1 Error messages and causes Please create a user first! A user profile is required to access many of the software’s features. Refer to the Profile Maintenance section of this document on procedures for how to create a user profile. Must include at least 1 type of data to display When you ask the system to draw a chart, you must include at least one type of data to display. A type of data may be Pre-Meal, Post-Meal, or Unmarked. Simply select one to have it displayed in your chart. Invalid Date From Please recheck the format of your Date From field. All dates throughout this application use the format of month-day-year. Invalid Date To Please recheck the format of your Date To field. All dates throughout this application use the format of month-day-year. Date From must be before or equal to Date To When you specify a date range, the Date From value must be before or equal to the Date To value. The two dates specified are included within the date range. User basic information required All fields within a user profile are optional entries, with the exception of user name, Patient ID, Height, Weight, and value limit settings. You must enter a name for a profile in order for the software to identify between different profiles. You may simply use a nickname if desired. User already exists! A profile with the same name already exists within the system. Choose another name or select that profile first if you wish to update it. Device not found A compatible glucose meter cannot be found. Make sure your meter is compatible and plugged in correctly. Device error Your glucose meter or USB cable may have been damaged. Replace them and try the operation again. Note is empty! You cannot save a note that has no contents. A note that consists of only spaces is still regarded as empty. Operating Environment To run the Advocate HealthCare System, your computer system must have at least: IBM® and Intel®-compatible PC; 1G MHz or higher Pentium® compatible processor 256 MB RAM; 600 MB of available hard drive space Windows® XP, XP Professional 32bit, Vista® 32 bit and 64 bit or Windows® 7 32 bit and 64 bit CD-ROM drive; keyboard and mouse or compatible pointing device; available USB port Minimum display resolution of 1024 x 768