1
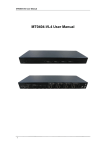
MATRIX HDMI 8X8 PS-508 User manual MT8080-HA2 User Manual www.SolidViewAV.com Contact: [email protected] 1 MATRIX HDMI 8X8 PS-508 User manual Thank you for purchasing this product. For optimum performance and safety, please read these instructions carefully before connecting, operating or adjusting this product. Please keep this manual for future reference. SURGE PROTECTION DEVICE RECOMMENDED This product contains sensitive electrical components that may be damaged by electrical spikes, surges, electric shock, lightning strikes, etc. Use of surge protection systems is highly recommended in order to protect and extend the life of your equipment. www.SolidViewAV.com Contact: [email protected] 2 MATRIX HDMI 8X8 PS-508 User manual Table of Contents 1. In tro d uc t i on .. .. .. .. .. ... .. ... .. .. .. .. .. .. ... .. .. .. .. .. .. .. ... .. .. .. .. .. .. ... .. .. .. .. .. .. .. ... .. .. .. . . .. .4 2. Features ............................................................................................... ......4 3. Panel Descriptions................................................................................. ........................4 4. Remote Control Descriptions...........................................................................................7 5. Application Diagram.................................................................... ....................................8 6. Specifications....................................................................................... ...................9 7. Pack age Contents................................................................................ .......9 8. RS-232 Pin Assignment.........................................................................................10 9. GUI Contr ol.................................. ........................... .................................10 10. Maintenance....................................................................................... ..........................20 11. Warranty Policy................................................... ....................................................20 12. Limitations of Warranty................................................................................. ........20 13. Exclusive Remedies.................................................................... ....................21 14. RM A Po l ic y. . . .. . .. .. .. . .. .. .. . .. .. .. . .. .. .. . .. .. . .. .. .. . . .. .. .. . .. .. . .. .. .. . .. .. . .. .. .. . . . . .. .. . .. .. . 21 www.SolidViewAV.com Contact: [email protected] 3 MATRIX HDMI 8X8 PS-508 User manual Introduction: The MT8080-HA2 8×8 Matrix with audio extractors for HDMI routes eight Hi-Def sources to any eight HDTV displays, supporting 1080p Full HD up to 4K plus all 3D formats, along with multichannel digital audio formats such as Dolby® True HD and DTS-HD® Master Audio™. The 8 coaxial audio loop-outs are designed for zone amplifiers or AVRs for best audio experience. Each source can be routed to any display using the front-panel push buttons, IR remote control, RS-232 interface, or via TCP/IP. Features: Supports resolutions up to 1080p@60HZ,48-bit deep color, 4k@30HZ Allows any source to be displayed on multiple displays at the same time Allows any HDMI display to view any HDMI source at any time Dolby TrueHD and DTS-HD master audio pass through HDMI output 8x Extra loop-out de-embedded S/PDIF audio for zone amplifier or AVR. Advanced EDID management for rapid integration of sources and displays Front-panel LCD display for status feedback Multiple switching mode, push-in button, IR remote control, RS-232 control, and TCP/IP control Easy installation with rack-mounting ears Full 3D pass through. HDCP compliant www.SolidViewAV.com Contact: [email protected] 4 MATRIX HDMI 8X8 PS-508 User manual Panel Descriptions Front Panel 1. LCD display---Show the status of input-output selection, EDID info and so on. 2. Power LED indicator---Indicate the status of the power for the matrix. 3. IR receiver window----Receive the IR from the remote control of MTO8080-HA2. 4. HDMI output selection button 1 to 8---Press to select the output from 1 to 8. 5. All button for HDMI outputs---Press to select all of the outputs from 1 to 8. 6. Menu button---Press to enter EDID set mode. Three EDID segments will display on the LCD panel formatted as: INPUT VIDEO AUDIO, for example: IN1 1080P 2.0CH, means to set 1080P 2.0CH EDID to INPUT1. The blinking segment is the one can be changed currently. Segment content items as below: www.SolidViewAV.com Contact: [email protected] 5 MATRIX HDMI 8X8 PS-508 User manual Note INPUT VIDEO AUDIO IN1 1080I 2.0CH. IN2 1080P 5.1CH IN3 3D 7.1CH IN4 4K2K NONE IN5 D1024 D1024=DVI 1024 x 768 IN6 D1080 D1080=DVI 1920 x 1080 IN7 D1200 D1200=DVI 1920 x 1200 IN8 OUT1 OUT1=Copy OUTPUT1 EDID to INPUTx ALL OUT2 ALL=Set EDID to ALL INPUTs OUT2=Copy OUTPUT2 EDID to INPUTx OUT3 OUT3=Copy OUTPUT3 EDID to INPUTx OUT4 OUT4=Copy OUTPUT4 EDID to INPUTx OUT5 OUT5=Copy OUTPUT5 EDID to INPUTx OUT6 OUT6=Copy OUTPUT6 EDID to INPUTx OUT7 OUT7=Copy OUTPUT7 EDID to INPUTx OUT8 OUT8=Copy OUTPUT8 EDID to INPUTx 7. Up selection button--- Press to change segment’s value. 8. ESC---Press to quit EDID set mode. 9. Lock LED indicator---Indicate the status of Lock. 10. Lock button---Press to lock the buttons of the front panel. 11. HDMI input selection button 1 to 8---Press to select the input from 1 to 8. 12. PTP button---Press to mirror all inputs and outputs (e.g. output 1 to input1, output 2 to input2 and so on). 13. Selection button---Press to select segment to change setting. Selected segment will be blinking. 14. Down selection button---Press to change segment’s value. 15. Enter button--- Press to set EDID to specified INPUT or copy EDID from specified OUTPUT to specified INPUT. www.SolidViewAV.com Contact: [email protected] 6 MATRIX HDMI 8X8 PS-508 User manual Back Panel 1. IR inputs 1 to 8 ---- 3.5mm stereo phone-jack 2. IR outputs 1 to 8 ---- 3.5mm stereo phone-jack 3. IR extension receiver input ---- 3.5mm stereo phone-jack 4. Coaxial audio outputs 1 to 8---- RCA connectors 5. RJ45 ----TCP/IP control 6. RS232 port----Connect to this port for control from a computer 7. HDMI inputs 1 to 8----Connect HDMI sources 8. HDMI outputs 1 to 8----Output for displays, AVR etc. 9. IR receiver window----Receive the IR from the remote control of MTO8080-HA2 10. Power port---Use included DC adaptor to power the matrix switcher. www.SolidViewAV.com Contact: [email protected] 7 MATRIX HDMI 8X8 PS-508 User manual Remote control descriptions Output and Input select A. OUTPUT-X select INPUT-Y: 1. Press OUTPUT-X (X means 1 to 8 of outputs)Press INPUT-Y ( Y means 1 to 8 of inputs ) 2. Press OUTPUT-X (X means 1 to 8 of outputs) press the left and right arrow buttons to select the input. B. All outputs select INPUT-Y: Press ALL button in zone OUTPUTPress INPUT-Y button ( Y means 1 to 8 of inputs ), then INPUT-Y switched to ALL OUTPUTS C. Mirror all inputs and outputs (Ex. Input 1 to output 1, input 2 to output 2, etc): Press PTP button in Zone OUTPUT www.SolidViewAV.com Contact: [email protected] 8 MATRIX HDMI 8X8 PS-508 User manual EDID Set Up A. Fixed EDID to INPUT-Y/ALL Press 1080I/1080P/3D/4KPress 2.0CH/5.1CH/7.1CHINPUT-Y/ALL button in Zone INPUT B. Copy EDID of OUTPUT-X to INPUT-Y/ALL Press COPY buttonPress OUTPUT-X buttonPress INPUT-Y/ALL button C. User defined EDID to INPUT-Y/ALL Press USER1/USER2 buttonPress INPUT-Y/ALL NOTE: Pressing button sequence should be finished in 5 seconds, otherwise, operation discarded. Application Diagram www.SolidViewAV.com Contact: [email protected] 9 MATRIX HDMI 8X8 PS-508 User manual Specifications: Bandwidth: Video Input Connectors: Video Output Connectors: Audio Output Connectors: RS-232 serial port: TCP/IP Control: IR Input ports: IR Output ports: Rack-Mountable: Dimensions (W x H x D): Shipping Weight: Operating Temperature: Storage Temperature : Power Supply: 2.97Gbps per color 8x HDMI Type A, 19-pin, female 8x HDMI Type A, 19-pin, female 8x RCA ,female DB-9, female RJ-45, female 8x 3.5mm stereo jack, 1x IR Extension 8x 3.5mm stereo jack 1 U rack height, rack ears included 428mm x 182mm x 43mm, without feet 2.7kg 32°F to 104°F (0°C to 40°C) -4°F to 140°F (-20°C to 60°C) 12V/5A DC Package Contents: 1. 1x MT0808-HA2 2. 1x 12V DC power supply 3. 1x Remote control 4. 8x IR Transmitter, 5. 9x IR Receiver. 6. 1x mounting kit. 7. 1x CD for control software. www.SolidViewAV.com Contact: [email protected] 10 MATRIX HDMI 8X8 PS-508 User manual RS-232 Pin Assignment MT8080-HA2 Remote Control Console PIN Assignment PIN Assignment 1 NC 1 NC 2 Tx 2 Rx 3 Rx 3 Tx 4 NC 4 NC 5 GND 5 GND 6 NC 6 NC 7 NC 7 NC 8 NC 8 NC 9 NC 9 NC GUI Control PC System: Microsoft Windows Operation System. Installation 8x8 HDMI Matrix controller is a green software. You just need to copy “8x8 HDMI Matrix Controller vx.x.exe” to the PC which is used to control the Matrix by RS232 COM or TCP to complete installation. Preparation 1. Connect PC and Matrix by RS232 cable or UTP cable 2. Power up Matrix (It will take about 5 seconds to be ready with “Di” beep sound ) 3. Double click “8x8 HDMI Matrix Controller vx.x.exe” icon to run it www.SolidViewAV.com Contact: [email protected] 11 MATRIX HDMI 8X8 PS-508 User manual How to control Matrix Common information Click to select tab page 1 2 3 4 ① COM port or TCP connect status ② Control command process status ③ Prompt message display area ④ Date and Time display “General” page 1 4 2 9 3 10 5 6 7 8 www.SolidViewAV.com Contact: [email protected] 12 MATRIX HDMI 8X8 PS-508 User manual ① Select control mode: RS232 COM mode (Auto COM ports detected) or TCP mode ② List detected COM ports ③ List all Matrix devices after search operation ④ Click to search all Matrix devices that connected in same subnet ⑤ Click to configuration the selected Matrix’s TCP control configurations ⑥ Click to connect or disconnect PC and Matrix ( Connection will be established automatically before control commands sending ) ⑦ Click to refresh device status: include device information displayed in ⑨area and Input/output port connection status in ⑩area. NOTE: Tab pages cannot be changed during control command is processing. ⑧ To enable or disable Input/output tags displaying when setting buttons on “Setting” page focused ⑨ Device information display area ⑩ Input/output port connection status Set TCP control configuration Click Config button to show TCP configuration window. 6 www.SolidViewAV.com Contact: [email protected] 13 MATRIX HDMI 8X8 PS-508 User manual ① Set tag to identify Matrix device ② Set IP mode: Subnet should support DHCP protocol when set Auto IP mode, then Matrix device 1 will obtain IP automatically. Otherwise, set Static IP mode and designate a useable IP for Matrix device 2 ③ Set IP address, not editable when Auto IP mode selected. Note: The last IP BYTE’s range is 2-252. ④ 3 Matrix device MAC address ⑤ Click OK to set configuration. If configuration is set OK, Matrix devices will be searched out again 4 ⑥ Click to Close the window and configuration cancelled 5 “Port Tag” page 1 3 2 4 ① Input port tags ② Click to edit Input port tags ③ Output port tags ④ Click to edit Output port tags NOTE: Edit boxes are read only, click “Edit” button to pop up window to edit the tags. One set of Input/output port tags can be set for Matrix device when COM control mode selected. Input/output port tags can be set for respective Matrix device according to device’s MAC address. Edit Input port tags After action of ②, edit form will pop-up as below: www.SolidViewAV.com Contact: [email protected] 14 MATRIX HDMI 8X8 PS-508 User manual Define tags for respective Input port, then devices connect the Input ports can be easily remembered. Click buttons with “×” caption to delete tag which is no use any more, if tag is still used by any other Input port, delete action will be discarded. Edit Output port tags After action of ④, edit form will pop-up as below: Define tags for respective Output port, then displays connect the Output ports can be easily remembered. Click buttons with “×” caption to delete tag which is no use any more, if tag is still used by any other Output port, delete action will be discarded. www.SolidViewAV.com Contact: [email protected] 15 MATRIX HDMI 8X8 PS-508 User manual “Setting” page 1 2 3 4 5 6 7 ① LED which displays Input number for respective Output port ② Click to select Input port for respective Output port ③ Click to select previous or next Input port for respective Output port ④ Display Output from Input with tag information when mouse moves over ②buttons ⑤ Pre-Setting items: Default is Port to Port ⑥ Click to edit selected pre-setting item ⑦ Set selected pre-setting item to Matrix NOTE: When Change to this “Setting” page, software will try to refresh source selection status of Output port. www.SolidViewAV.com Contact: [email protected] 16 MATRIX HDMI 8X8 PS-508 User manual Pop-up tag messages When “Display Input, Output tags when focus setting buttons” checkbox on “General” page is checked and Input/output port tag has been defined, tag messages will pop up like as: www.SolidViewAV.com Contact: [email protected] 17 MATRIX HDMI 8X8 PS-508 User manual Pop-up Menu When mouse moves over ②setting buttons, and click mouse right button, menu will pop up like as: All Outputs: All Outputs from same Input “1 Output” to “7 Outputs”: Set current Output (where mouse right clicked) and the next x-1 ( x range is from 1 to 7, set total x Outputs at the same time ) Output(s) from same Input Port to Port: Output1 from Input1, Output2 from Input2, Output3 from Input3, etc. Edit selected pre-setting item After action of ⑥, edit form will pop-up as below: www.SolidViewAV.com Contact: [email protected] 18 MATRIX HDMI 8X8 1 PS-508 User manual 2 3 ① Pre-Setting name ② Set all Output ports from same Input ③ Select Input for respective Output “EDID control” page 1 7 2 3 4 5 6 8 ① Set EDID mode for selected Input port or All Input ports, click “Set” button to complete action. NOTE: When set User1/User2 EDID mode, should Download EDID content to User1 Memory/User2 Memory first. User1/User2 default EDID content is 1080p, Stereo Audio 2.0. ② Copy EDID from Output port to selected Input port or All Input ports, click “Copy” button to www.SolidViewAV.com Contact: [email protected] 19 MATRIX HDMI 8X8 PS-508 User manual complete action. ③ Read EDID content from Output port and display in grid, click “Read” button to complete action. ④ Save EDID content which displayed in grid to binary file (file extension is “.bin”) ⑤ Open EDID binary file and display in grid ⑥ Download EDID content which displayed in grid to selected Input port or All Input ports, click “Download” button to complete action. When User1 Memory/User2 Memory selected, download EDID content to respective memory then User1/User2 EDID mode can be set. ⑦ EDID content displaying grid NOTE: EDID content displayed in grid is read only. ⑧ Click to clear EDID content displayed in grid “IR Configuration” page To enable or disable IR control function. When box checked, IR control function enabled, otherwise, IR control function disabled. This setting is not memorized. IR control function is always enabled after power up. “FW upgrade” page www.SolidViewAV.com Contact: [email protected] 20 MATRIX HDMI 8X8 PS-508 User manual 1 2 3 4 5 ① Click to open firmware file (file extension is “.fw”). ② Firmware upgrade progress ③ Click the button to upgrade firmware. NOTE: If failure occurs during upgrading firmware process, the following steps SHOULD be done sequentially to establish next upgrading procedure: 1. Power down the Matrix 2. Close the 8x8 HDMI Matrix Controller 3. Re-power up the Matrix, then wait for 10 seconds to ensure the Matrix is ready 4. Run 8x8 HDMI Matrix Controller, open firmware file and upgrade again ④ Firmware upgrading messages display ⑤ Click to clear the messages displayed in the memo box. www.SolidViewAV.com Contact: [email protected] 21 MATRIX HDMI 8X8 PS-508 User manual Maintenance Clean this unit with a soft, dry cloth. Never use alcohol, paint thinner or benzene to clean this unit. Warranty Policy SolidView products are warranted against defects in material and workmanship for two years from the date of shipment. During the warranty period, SolidView will, at its option, repair or replace products that prove to be defective. Repairs are warranted for the remainder of the original warranty or a 90 day extended warranty, whichever is longer. For equipment under warranty, the owner is responsible for freight to SolidView and all related customs, taxes, tariffs, insurance, etc. SolidView is responsible for the freight charges only for return of the equipment from the factory to the owner. SolidView will return the equipment by the same method (i.e., Air, Express, Surface) as the equipment was sent to SolidView. All equipment returned for warranty repair must have a valid RMA number issued prior to return and be marked clearly on the return packaging. SolidView strongly recommends all equipment be returned in its original packaging. SolidView’s obligations under this warranty are limited to repair or replacement of failed parts, and the return shipment to the buyer of the repaired or replaced parts. Limitations of Warranty The warranty does not apply to any part of a product that has been installed, altered, repaired, or misused in any way that, in the opinion of SolidView, would affect the reliability or detracts from the performance of any part of the product, or is damaged as the result of use in a way or with equipment that had not been previously approved by SolidView. The warranty does not apply to any product or parts thereof where the serial number or the serial number of any of its parts has been altered, defaced, or removed. The warranty does not cover damage or loss incurred in transportation of the product. The warranty does not cover replacement or repair necessitated by loss or damage from any cause beyond the control of SolidView, such as lightning or other natural and weather related events or wartime environments. The warranty does not cover any labor involved in the removal and or reinstallation of warranted equipment or parts on site, or any labor required to diagnose the necessity for repair or replacement. The warranty excludes any responsibility by SolidView for incidental or consequential damages arising from the use of the equipment or products, or for any inability to use them either separate from or in combination with any other equipment or products. A fixed charge established for each product will be imposed for all equipment returned for warranty repair where SolidView cannot identify the cause of the reported failure. www.SolidViewAV.com Contact: [email protected] 22 MATRIX HDMI 8X8 PS-508 User manual Exclusive Remedies SolidView’s warranty, as stated is in lieu of all other warranties, expressed, implied, or statutory, including those of merchantability and fitness for a particular purpose. The buyer shall pass on to any purchaser, lessee, or other user of SolidView’s products, the aforementioned warranty, and shall indemnify and hold harmless SolidView from any claims or liability of such purchaser, lessee, or user based upon allegations that the buyer, its agents, or employees have made additional warranties or representations as to product preference or use. The remedies provided herein are the buyer’s sole and exclusive remedies. SolidView shall not be liable for any direct, indirect, special, incidental, or consequential damages, whether based on contract, tort, or any other legal theory. RMA Policy When returning product to SolidView for any reason, the customer should fill out the official RMA form to obtain a RMA number. Without the permission or approval, SolidView will be no responsible for any return. This can be initiated by emailing or calling your related sales. All requests are processed within 48 hours. Standard Replacement For customers that agree to return defective product to SolidView first, a Standard Replacement option is available. An RMA number must first be issued by sales. This RMA number will need to be referenced on the outside of the return shipment. Upon receipt of the defective product, SolidView will, at its discretion, either repair or replace the product and ship it out in the most expeditious manner possible. Subject to availability, the replacement product will be shipped on the business day following receipt of the defective product. In the event the product returned to SolidView has been discontinued (i.e. the product is no longer being manufactured by SolidView but is still under warranty), SolidView will, at its discretion, either repair or replace with recertified product. Once you have obtained an RMA number After obtaining an RMA number from SolidView, you must send the product - freight prepaid - to SolidView Technology Co., Ltd. The SolidView RMA number must be prominently displayed on the outside of your package. If you send your product to SolidView without the RMA number prominently displayed on the outside of the package, it will be returned to you unopened. Please use a shipping company that can demonstrate proof of delivery. SolidView does not accept responsibility for any lost shipments unless proof of delivery to SolidView is provided. www.SolidViewAV.com Contact: [email protected] 23 MATRIX HDMI 8X8 PS-508 User manual Please note: Product shipped to SolidView must be properly packaged to prevent loss or damage in transit. Shipping your RMA to SolidView using regular mailing envelopes is not acceptable, as they do not protect the product from damage during shipping. SolidView will not repair or replace a module that is shipped in such a way that the product is not properly protected. SolidView will not accept any product that has been damaged as a result of accident, abuse, misuse, natural or personal disaster, or any unauthorized disassemble, repair or modification. www.SolidViewAV.com Contact: [email protected] 24