1
WWW.LIGHTEMOTION.COM.AU
P645QUADB2/P645QUADP2
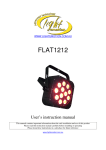
12 x 4in1 5W LEDs. Black / Polished.
User’s instruction manual
This manual contains important information about the safe installation and use of this product
Please read this instruction manual carefully before installing or operating
Please keep these instructions in a safe place for future reference
Congratulations on the purchase of your P64QUADB2/P64QUADP2 by Light Emotion. We are
confident that you will be satisfied with your purchase. We have prepared this manual to assist
you with the care and operation of this item.
This product uses 12 4in1 5W LEDs to produce vivid colours that the user can control in many
ways. The unit incorporates new lens technology which produces a narrower, more concentrated
beam allowing fewer LEDs to be used to give a brighter effect. The unit features thermal cut-out,
so it will shut down if its interior temperature reaches 85 degrees C – this will prevent damage to
the product in the event of a problem.
Please note that as part of out ongoing commitment to continuous improvement and
product development, the specifications in this manual are subject to change without
notice. Whilst every care has been taken in the preparation of this manual we reserve the
right to change specifications in the course of product improvement.
WHAT IS INCLUDED:
CAUTION: Do not use sharp objects whilst unpacking this product
• 1x P645QUADB2/P2 lighting effect
• 1x Manual & Warranty card
SAFETY INSTRUCTIONS:
Please read these instructions carefully. It includes important information about the
installation usage and maintenance of this product.
• Please keep this User Manual for future consultation. If you sell the unit to another user,
be sure that they also receive this instruction booklet.
• Always make sure that you are connecting to the proper voltage and that the line voltage
you are connecting to is not higher than that stated on the rear panel of the fixture.
• This product is intended for indoor use only! To prevent risk of fire or shock, do not
expose fixture to rain or moisture.
• Make sure there are no flammable materials close to the unit while operating.
• The unit must be installed in a location with adequate ventilation, at least 50cm from
adjacent surface. Be sure that no ventilation slots are blocked.
• Always disconnect from power source before servicing or replacing fuse and be sure to
replace with same fuse source.
• Secure fixture to fastening device using a safety chain.
• Maximum ambient temperature is 40°C. Do not operate fixture at temperatures higher
than this.
• In the event of serious operating problem, stop using the unit immediately. Never try to
repair the unit by yourself. Repairs carried out by unskilled people can lead to damage or
malfunction. Please contact the nearest authorized technical assistance centre.
• Never connect the device to dimmer pack.
• Make sure power cord is never crimped or damaged.
• Never disconnect power cord by pulling or tugging on the cord.
• Never carry the fixture directly from the cord. Always use the hanging/mounting
bracket.
• Avoid direct eye exposure to the light source while it is on.
2
POWER
CAUTION: This lighting effect is designed to operate at 240V. Power Consumption:
85W
FUSE
CAUTION:
Only use the correct fuse as specified on the rear panel of the lighting effect.
Disconnect the lighting effect from the mains before attempting to replace the fuse.
To replace the fuse please follow the following steps:
1. Remove the fuse by unscrewing the cap out with a screwdriver.
(Refer to Fig 1)
2. Remove existing fuse.
3. Fit new fuse.
4. Refit the fuse holder.
Fuse: M205 2.0A fast
FEATURES
Fig 1
Static colours
Colour changing
RBGW colour mixing
Audio Activated with sensitivity control
Master/Slave linkable
DMX-512 controllable
INSTALLATION
CAUTION: For safe mounting read the following instructions carefully.
• Use suitable hook clamps* for hanging the lighting effect.
• Use a safety wire* with a breaking strain of more than
double the lighting effect.
• Do not look directly into the light source.
• Make sure the lighting effect has suitable ventilation as
per the instructions below.
• This lighting effect is intended for indoor use only.
• To avoid electrical shock keep away from rain and
moisture.
• Keep unit out of reach from children.
NOTE:
Use washers* and spring washers* when attaching your
hook clamp* to the yoke.
1. For installation of the hook clamps* and safety wire*
please refer to Fig 2.
2. This lighting effect must be 0.5m away from any
flammable materials or any walls or ceilings.
3. Do not block or inhibit the air flow from the ventilation
holes.
3
Fig 2
Light Emotion have various hook clamps* and safety wires* suitable for your
P64LEDlite Please contact your local dealer for more information *Not included.
MAINTENANCE & PERIODIC CHECKS
CAUTION:
Some maintenance and checks may require the product to be opened and should only be
done by qualified persons. Warranty may be void if damage has been caused by improper
maintenance. Perspex lenses should be wiped with a clean moist cloth to remove dust and
residue.
OPERATION
This product has eight kinds of operation mode, as per the following:
Static colour select mode, Manual dimmer colour mode, Colour jumping mode,
Colour dreaming mode, Auto-run program mode, Sound active mode, Slave
mode, DMX mode.
The eight running modes are selected by MODE button. Press MODE and UP button
at the same time, when it is on, you can initialize it at extra factory setting, running on
the auto-run program mode.
Press the MODE and DOWN buttons at the same time to select LED digital display
means that the display will stay on all the
on/off.When the display shows
time, when the display shows
means that the display will turn off after 20
seconds.
MODE
manual
STATIC
COLOUR
SELECT
MODE
DIMMER
MODE
SET UP
manual
Colour select
Flash
UP/DOWN
manual
~
~
White
dimmer
Red dimmer
Green
dimmer
Blue dimmer
Flash
~
Select the 15 static colours
Adjust the auto run flash speed,
is
flash off,
is slowest,
is
fastest
Adjust the intensity of the white colour
~
~
Adjust the intensity of the red colour
Adjust the intensity of the green colour
~
~
Adjust the intensity of the blue colour
Adjust the flash speed,
is flash
off,
is slowest,
is fastest
Adjust the speed of colour jumping
mode,
is slowest,
is fastest
Adjust the colour jumping flash
speed,
is flash off,
is
slowest,
is fastest
Adjust the speed of colour dreaming
mode,
is slowest,
is fastest
Adjust the colour dreaming flash
speed,
is flash off,
is
COLOUR
JUMPING
MODE
Jumping
speed set
Flash
COLOUR
DREAMIN
G MODE
Dreaming
speed set
Flash
instruction
~
~
~
~
4
AUTO
RUN
MODE
Auto run
mode set
Flash
SOUND
MODE
Sensitivity
select
Slave mode
DMX
MODE
Slave mode
Address set
is fastest
slowest,
Set the unit into auto run mode
is
Adjust the auto run flash speed,
flash off,
is slowest,
is
fastest
Adjust the sensitivity of the sound-active,
is sound-active off,
is the
is the highest level
lowest level,
Set the unit into slave mode
Sets the DMX starting address
~
~
~
1. Static colour select mode
Press "MODE" button, select the static colour select mode. There are two modes in
the static colour select mode. You can select them by pressing the "SET UP" button.
1) Static colour select
Press "SET UP" button until the display shows "
~
", then press "UP" or
"DOWN" to select static colour 0-15 under this mode.
2) Flash speed select
Press "SET UP" button until the display shows "
~
",then press "UP" or
"DOWN" button to select the static colour flash speed 00-99,00 is flash off,01 is the
slowest flash speed,99 is the fastest flash speed.
2. Manual dimmer colour mode
1) Manual dimmer colour select
Press "MODE" button, select the manual dimmer colour select mode. At this time, the
four digital tube displays white"
~
",press the "SET UP" to choose
different colour, red"
~
", green"
~
", blue
"
~
",then press "UP" or "DOWN" button to set the dimming rate 0255.
2) Flash speed select
Press "SET UP" button until the four digital tube displays"
~
",then
press "UP" or "DOWN" button to select colour dimmer flash speed 00-99,00 is flash
off,01 is the slowest flash speed,99 is the fastest flash speed.
3. Colour jumping mode
Press "MODE" button, select the colour jumping mode. There are two modes in the
colour jumping mode. You can select them by pressing the "SET UP" button.
1) Colour jumping speed set
~
". Press
Press "SET UP" button until the four digital tube displays"
"UP" or "DOWN" button to select the colour jumping speed 01-99, 01 is the slowest
speed,99 is the fastest speed.
2) Flash speed select
Press "SET UP" button until the four digital tube displays"
~
",then
press "UP" or "DOWN" button to select the colour jumping flash speed 00-99,00 is
flash off, 01 is the slowest flash speed, 99 is the fastest flash speed.
5
4. Colour dreaming mode
Press "MODE" button, select the colour dreaming mode. There are two modes in the
colour dreaming mode. You can select them by pressing the "SET UP" button.
1) Colour-dreaming speed set
~
". Press "UP" or
Press "SET UP" button until the display shows "
"DOWN" button to select the colour dreaming speed 01-99, 01 is the slowest speed,
99 is the fastest speed.
2) Flash speed select
Press "SET UP" button until the display shows "
~
", then press "UP" or
"DOWN" button to select the colour dreaming flash speed 00-99,00 is flash off,01 is
the slowest flash speed,99 is the fastest flash speed.
5. Auto-run program mode
Press "MODE" button, select the auto-run program mode. There are two modes in the
auto-run program mode. You can select them by pressing the "SET UP" button.
1) Colour dreaming program mode select
Press "SET UP" button until the display shows "
", the unit runs into the auto
run program mode,the colour jumping program and colour dreaming program run
alternatively. Press UP or DOWN is no use under this mode. Running speed is the
current speed of colour jumping program and colour dreaming program.
2) Flash speed select
Press "SET UP" button until the display shows "
~
", then press "UP" or
"DOWN" button to select the auto run program flash speed 00-99,00 is flash off, 01 is
the slowest flash speed,99 is the fastest flash speed.
6. Sound active mode
Press "MODE" button, select the sound active program mode, display shows
"
~
", then press "UP" or "DOWN" to select the sound active the
sensitivity 0-31. 0 is off sound-active, 01 is the lowest sensitivity, 31 is the highest
sensitivity.
7. Slave mode
Press "MODE" button, select salve mode, display shows "
controlled by the master unit now.
6
".The unit will be
8. DMX mode
Press “MODE” button until the display is “
DOWN to set the DMX address 001-512.
DMX MODE:7 DMX channels
CH7
CH6
MOD
DMX
FUNCTION
E
VALUE
1
0-13
No function
2
14-26
Red
3
4
5
6
7
8
9
10
11
12
13
14
15
16
27-38
Green
39-51
Blue
52-64
White
65-76
77-89
90-102
103-114
115-127
128-140
141-152
153-165
166-178
179-190
191-204
R+G
R+B
R+W
G+B
G+W
B+W
R+G+B
R+G+W
R+B+W
G+B+W
R+G+B+W
17
205-217
18
218-230
19
231-241
20
243-255
~
CH5
CH3
CH2
CH1
White
0-255
(dim→
bright)
Blue
0-255
(dim→
bright)
Green
0-255
(dim→
bright)
Red
0-255
(dim→
bright)
No
No
No
function function function
Speed
0-255
(slow→
fast)
Auto run
Sensitivity
8-255
Sound active (insensitive
→
sensitive)
G---green
CH4
0-10=No use
11Dimmin
255=Flash
g
(slow→fast)
0-255 No
(dim→ function
bright)
Colour
change
Colour
dreaming
Note: R---red
”, then press UP or
B---blue
No
function
W---white
To determine the starting address for the each lighting effect you should refer to your
DMX controller user manual.
7
DMX LEAD
The DMX lead is used to link up multiple units. For Wiring connections refer to Fig 3.
Fig 3
DMX TERMINATOR
A DMX terminator helps to reduce ‘noise’ on the DMX chain, and makes the light
respond to control more accurately. It should be plugged in to the last fixture in any chain.
For Terminator connections refer to Fig 4
Fig 4
QUESTIONS
Symptom Fault
Unit does not power up - Check that the power outlet is turned on and fuse is OK Check
that the mode is set correctly and that you are controlling the unit correctly
Unit chases constantly and not to the beat of the music - Check that the microphone
sensitivity is not turned up too high and that the mode is set correctly
Units do not work or is uncontrollable when linked or in DMX mode - Check that the
mode is set correctly, check that all the leads are OK, check that the controller is set to pin
3 +ve) (If using DMX the lead should come out of the DMX output socket). See Fig 5
Fig 5
8
SPECIFICATIONS
• Voltage: 240V AC
• Power Consumption: 85W
• Operating Frequency: 50Hz
• Power lead: Fixed 1m
• Fuse: M205 2.0A fast blow
• Sound activated: Yes
• Stand alone mode Yes
• DMX: 7 channels
• Ch1-4: R, G, B, W control. Ch 5: Dimming. Ch 6: Strobing. Ch 7: Effects.
• Linkable: Yes
• Colours: 1.6M colours
• Output power / level: 12 LEDs
• 12 X 4IN1 RGBW 5W LED
• Beam angle: 25 degrees
• Four button LED digital display
• Built in thermal cut off.
• Input connection: DMX: Male 3 pin XLR
• Output connection: DMX: Female 3 pin XLR
• Colour: Black or sliver
• Weight: 5.5Kg
• Dimensions: L300mm x W270mm x D220mm
Copyright 2012.
LSW Imports and Distribution.
E & OE.
9