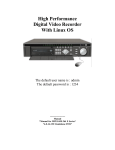
1
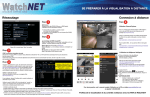
ENHANCED
CVI
GETTING READY FOR REMOTE VIEWING
Networking
Remote Connection
Step
1
Step
Free DDNS
Register with http://DVRid.com for a free DDNS, user will need the
following information
Using Internet Explorer
To Connect with Internet Explorer just use the DVRID sitename.
On the address Field for IE (example http://mydvr.dvrid.com)
System serial number (need during registration)
Register a Username and Password (with DVRID)
Create a Site name
Step
Active X is needed when using Internet Explorer
Please refer to our Guide on how to Enable Active X
http://watchnetinc.com/downloads/manuals/IE.pdf
2
For MAC system Please refer to our MAC guide
http://watchnetinc.com/downloads/Software/Embsystem/Multisite
manager/mac/mac_multisite.zip
DDNS setting on the DVR
Click Setup, then click DVR Setup, click Network, then click Advance
Setting and then double click on DDNS
Click OK and then Click Save to exit
Step
3
Sitename: sitename created with DVRID.com
Username: use to register with DVRID
Password: Password with DVRID
Port: 80 (Default DVRID Port Number)
UPNP auto Port Forwarding
Select UPNP function from network menu and select “ON”. The DVR will automatically forward the selected ports on UPNP enabled routers.
This function may take 10 to 30 minutes depend on network performance and communication. If not success proceed to Step 4
Step
4
Manually forward ports 80, 4000 and 554 to the IP address of the DVR according
to your router’s user manual or visit http://www.simpleportforwarding.com for helpful
PC Based application for many routers. After forwarding the above ports, test them
using following method:
Using Smart Phones
Click
Note:
When ports are successfully
forwarded the status line will show
“Success” and the IP addresses will
show up on the bottom.
Check the port forwarding
Use PC and open a web browser http://canyouseeme.org
It will show the current location public IP address and will ask for what port to check.
Check port 80, 4000 and 554, site should say successful or error.
If return error message follow below mentioned steps till successful
Check the portforwarding
Check the DVR's IP address, Subnet Mask and Gateway make sure the DVRs has the correct gateway
Check the routers WAN address, make sure it has a public IP. If the IP begins with (10.xxx or 172.xxx or 192.xxx), please contact your ISP to bridge the modem
Check DVR via Local IP connection (Use IE to connect http://local_ipaddress of the DVR. If your able to connect to the DVR with the local IP address that means DVR is working
5
Select to
add site
iPhone and Android has different App
MVS Pro (Has search and Push Notification)
MVS HD (For Tablets or iPADs)
Please go to iTunes for iPhone and iPAD
https://itunes.apple.com/ca/artist/videon-digitaltechnologies/id366176722?mt=8
Please go to Google Play for Android App
https://play.google.com/store/apps/developer?id=Videon
Install MVS Pro
Click the Menu button
on live Preview
Then Select Device Manager, Click Add
Fill-in the Fields
Register Mode: IP/Domain
Name: (Any)
Address: Sitename or IP address
Port: TCP port or 4000 by default
Username: admin (dvr username)
Password: 1234 (dvr password)
For any issue see the complete Instruction Manual on the CD or visit www.watchnetinc.com
or call 1-866-843-6865
Enjoy remote view & control with WatchNET DVR
ENHANCED
CVI
VIEW WHAT IS RECORDED
Play Back (Search a Recorded Video)
Video Back-Up to USB
The following steps will guide you through backing up the files from the "Search" window:
Insert USB Drive to the DVR before starting back up process
1. Login to the DVR by pressing the login button
2. Enter the Username/Password (Default: admin / 1234)
3. Select "Search", this will open the Search Window
The following steps will guide you through backing up the files from the
DVR for evidence or archiving.
3.1 Select the date at the top-left corner and on the left bottom the channel numbers you want to view.
3.2 Click on the grid to select the time or double click on the file to start playing the video.
3.3 To make a backup, place a check mark next to the videos you want to save using the file list on the right.
3.4 Select the "Back Up" button on the right side; this will open the backup window.
3.1
Select here the correct USB Drive
(if 2 USB drive is plug in)
1. Click on “Backup” button on main GUI
2. Enter the Username/Password (Default: admin/ 1234)
3. Backup Device Window will appear as shown on the right image
4. Select the USB drive for back-up
5. Click “More” button for next window to add files
Click More to continue
3.2
3.3
3.1
3.3
3.1 Select the event type and the channel
3.4
3.2 Set the Start Time and End Time
3.3 Click the Add File
3.4 Select the Files that is needed for backup
by placing a check mark on the files left side.
Space Required should not exceed the Space
Available
Insert USB Drive to the DVR before
starting backup process
3.2
3.5 Click Start to begin the backup process
When backup is successful system will
display “Backup is completed”, then remove
the USB drive and right click to exit back
Note:
The files copied to the USB will be in
DAV format (Digital Audio Video) which is
proprietary to WatchNET to keep authenticity.
A special AV Player will be automatically copied
to the USB to play back the DAV files on any
PC Based computer.
Click to start backup
www.watchnetinc.com
3.4
3.5