1
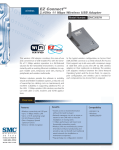
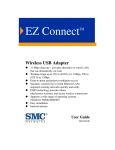
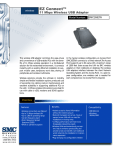
EZ Connect ™ Wireless USB Adapter 11 Mbps data rate – provides alternative to wired LANs that can dramatically cut costs Working range up to 160 m (528 ft) at 11 Mbps, 350 m (1,155 ft) at 1 Mbps Seamless connectivity to wired Ethernet LANs augments existing networks quickly and easily DSSS technology provides robust, interference-resistant, and secure wireless connections Supports a wide range of operating systems (Windows 98/Me/2000/XP) Easy installation Dual dipole antenna User Guide SMC2662W EZ Connect Wireless USB Adapter User Guide The easy way to make all your network connections 38 Tesla Irvine, CA 92618 Phone: (949) 679-8000 June 2002 Part Number: 01-111393-009 Copyright Information furnished by SMC Networks, Inc. (SMC) is believed to be accurate and reliable. However, no responsibility is assumed by SMC for its use, nor for any infringements of patents or other rights of third parties which may result from its use. No license is granted by implication or otherwise under any patent or patent rights of SMC. SMC reserves the right to change specifications at any time without notice. Copyright © 2002 by SMC Networks, Inc. 38 Tesla, Irvine, CA. All rights reserved. Printed in Taiwan Trademarks: SMC is a registered trademark; and EZ Connect is a trademark of SMC Networks, Inc. Other product and company names are trademarks or registered trademarks of their respective holders. LIMITED WARRANTY Limited Warranty Statement: SMC Networks, Inc. (“SMC”) warrants its products to be free from defects in workmanship and materials, under normal use and service, for the applicable warranty term. All SMC products carry a standard 90-day limited warranty from the date of purchase from SMC or its Authorized Reseller. SMC may, at its own discretion, repair or replace any product not operating as warranted with a similar or functionally equivalent product, during the applicable warranty term. SMC will endeavor to repair or replace any product returned under warranty within 30 days of receipt of the product. The standard limited warranty can be upgraded to a Limited Lifetime* warranty by registering new products within 30 days of purchase from SMC or its Authorized Reseller. Registration can be accomplished via the enclosed product registration card or online via the SMC web site. Failure to register will not affect the standard limited warranty. The Limited Lifetime warranty covers a product during the Life of that Product, which is defined as the period of time during which the product is an “Active” SMC product. A product is considered to be “Active” while it is listed on the current SMC price list. As new technologies emerge, older technologies become obsolete and SMC will, at its discretion, replace an older product in its product line with one that incorporates these newer technologies. At that point, the obsolete product is discontinued and is no longer an “Active” SMC product. A list of discontinued products with their respective dates of discontinuance can be found at http://www.smc.com/index.cfm?action=customer_service_warranty All products that are replaced become the property of SMC. Replacement products may be either new or reconditioned. Any replaced or repaired product carries either a 30-day limited warranty or the remainder of the initial warranty, whichever is longer. SMC is not responsible for any custom software or firmware, configuration information, or memory data of Customer contained in, stored on, or integrated with any products returned to SMC pursuant to any warranty. Products returned to SMC should have any customer-installed accessory or add-on components, such as expansion modules, removed prior to returning the product for replacement. SMC is not responsible for these items if they are returned with the product. Customers must contact SMC for a Return Material Authorization number prior to returning any product to SMC. Proof of purchase may be required. Any product returned to SMC without a valid Return Material Authorization (RMA) number clearly marked on the outside of the package will be returned to customer at customer’s expense. For warranty claims within North America, please call our toll-free customer support number at (800) 762-4968. Customers are responsible for all shipping charges from their facility to SMC. SMC is responsible for return shipping charges from SMC to customer. i LIMITED WARRANTY WARRANTIES EXCLUSIVE: IF AN SMC PRODUCT DOES NOT OPERATE AS WARRANTED ABOVE, CUSTOMER’S SOLE REMEDY SHALL BE REPAIR OR REPLACEMENT OF THE PRODUCT IN QUESTION, AT SMC’S OPTION. THE FOREGOING WARRANTIES AND REMEDIES ARE EXCLUSIVE AND ARE IN LIEU OF ALL OTHER WARRANTIES OR CONDITIONS, EXPRESS OR IMPLIED, EITHER IN FACT OR BY OPERATION OF LAW, STATUTORY OR OTHERWISE, INCLUDING WARRANTIES OR CONDITIONS OF MERCHANTABILITY AND FITNESS FOR A PARTICULAR PURPOSE. SMC NEITHER ASSUMES NOR AUTHORIZES ANY OTHER PERSON TO ASSUME FOR IT ANY OTHER LIABILITY IN CONNECTION WITH THE SALE, INSTALLATION, MAINTENANCE OR USE OF ITS PRODUCTS. SMC SHALL NOT BE LIABLE UNDER THIS WARRANTY IF ITS TESTING AND EXAMINATION DISCLOSE THE ALLEGED DEFECT IN THE PRODUCT DOES NOT EXIST OR WAS CAUSED BY CUSTOMER’S OR ANY THIRD PERSON’S MISUSE, NEGLECT, IMPROPER INSTALLATION OR TESTING, UNAUTHORIZED ATTEMPTS TO REPAIR, OR ANY OTHER CAUSE BEYOND THE RANGE OF THE INTENDED USE, OR BY ACCIDENT, FIRE, LIGHTNING, OR OTHER HAZARD. LIMITATION OF LIABILITY: IN NO EVENT, WHETHER BASED IN CONTRACT OR TORT (INCLUDING NEGLIGENCE), SHALL SMC BE LIABLE FOR INCIDENTAL, CONSEQUENTIAL, INDIRECT, SPECIAL, OR PUNITIVE DAMAGES OF ANY KIND, OR FOR LOSS OF REVENUE, LOSS OF BUSINESS, OR OTHER FINANCIAL LOSS ARISING OUT OF OR IN CONNECTION WITH THE SALE, INSTALLATION, MAINTENANCE, USE, PERFORMANCE, FAILURE, OR INTERRUPTION OF ITS PRODUCTS, EVEN IF SMC OR ITS AUTHORIZED RESELLER HAS BEEN ADVISED OF THE POSSIBILITY OF SUCH DAMAGES. SOME STATES DO NOT ALLOW THE EXCLUSION OF IMPLIED WARRANTIES OR THE LIMITATION OF INCIDENTAL OR CONSEQUENTIAL DAMAGES FOR CONSUMER PRODUCTS, SO THE ABOVE LIMITATIONS AND EXCLUSIONS MAY NOT APPLY TO YOU. THIS WARRANTY GIVES YOU SPECIFIC LEGAL RIGHTS, WHICH MAY VARY FROM STATE TO STATE. NOTHING IN THIS WARRANTY SHALL BE TAKEN TO AFFECT YOUR STATUTORY RIGHTS. * SMC will provide warranty service for one year following discontinuance from the active SMC price list. Un.der the limited lifetime warranty, internal and external power supplies, fans, and cables are covered by a standard one-year warranty from date of purchase. SMC Networks, Inc. 38 Tesla Irvine, CA 92618 ii COMPLIANCES FCC - Class B This equipment has been tested and found to comply with the limits for a Class B digital device, pursuant to Part 15 of the FCC Rules. These limits are designed to provide reasonable protection against harmful interference in a residential installation. This equipment generates, uses and can radiate radio frequency energy and, if not installed and used in accordance with instructions, may cause harmful interference to radio communications. However, there is no guarantee that the interference will not occur in a particular installation. If this equipment does cause harmful interference to radio or television reception, which can be determined by turning the equipment off and on, the user is encouraged to try to correct the interference by one or more of the following measures: • Reorient the receiving antenna • Increase the separation between the equipment and receiver • Connect the equipment into an outlet on a circuit different from that to which the receiver is connected • Consult the dealer or an experienced radio/TV technician for help Note: In order to maintain compliance with the limits of a Class B digital device, SMC requires that you use a quality interface cable when connecting to this device. Changes or modifications not expressly approved by SMC could void the user’s authority to operate this equipment. Attach unshielded twisted-pair cable (UTP) to the RJ-45 port and shielded USB cable to the USB port. Industry Canada - Class B This digital apparatus does not exceed the Class B limits for radio noise emissions from digital apparatus as set out in the interference-causing equipment standard entitled “Digital Apparatus,” ICES-003 of Industry Canada. Cet appareil numérique respecte les limites de bruits radioélectriques applicables aux appareils numériques de Classe B prescrites dans la norme sur le matérial brouilleur: “Appareils Numériques,” NMB-003 édictée par l’Industrie. iii COMPLIANCES EC Conformance Declaration - Class B SMC contact for these products in Europe is: SMC Networks Europe, Edificio Conata II, Calle Fructuós Gelabert 6-8, 2o, 4a, 08970 - Sant Joan Despí, Barcelona, Spain. This information technology equipment complies with the requirements of the Council Directive 89/336/EEC on the Approximation of the laws of the Member States relating to Electromagnetic Compatibility and 73/23/EEC for electrical equipment used within certain voltage limits and the Amendment Directive 93/68/EEC. For the evaluation of the compliance with these Directives, the following standards were applied: RFI Emission: • Limit class B according to EN 55022:1998 • Limit class B for harmonic current emission according to EN 61000-3-2/1995 • Limitation of voltage fluctuation and flicker in low-voltage supply system according to EN 61000-3-3/1995 Immunity: • Product family standard according to EN 55024:1998 • Electrostatic Discharge according to EN 61000-4-2:1995 (Contact Discharge: ±4 kV, Air Discharge: ±8 kV) • Radio-frequency electromagnetic field according to EN 61000-4-3:1996 (80 - 1000 MHz with 1 kHz AM 80% Modulation: 3 V/m) • Electrical fast transient/burst according to EN 61000-4-4:1995 (AC/DC power supply: ±1 kV, Data/Signal lines: ±0.5 kV) • Surge immunity test according to EN 61000-4-5:1995 (AC/DC Line to Line: ±1 kV, AC/DC Line to Earth: ±2 kV) • Immunity to conducted disturbances, Induced by radio-frequency fields: EN 61000-4-6:1996 (0.15 - 80 MHz with 1 kHz AM 80% Modulation: 3 V/m) • Power frequency magnetic field immunity test according to EN 61000-4-8:1993 (1 A/m at frequency 50 Hz) • Voltage dips, short interruptions and voltage variations immunity test according to EN 61000-4-11:1994 (>95% Reduction @10 ms, 30% Reduction @500 ms, >95% Reduction @5000 ms) LVD: iv • EN 60950 (A1/1992; A2/1993; A3/1993; A4/1995; A11/1997) TABLE OF CONTENTS EZ Connect™ Wireless USB Adapter . . . . . . . . . . . . . . .1 Hardware Description . . . . . . . . . . . . . . . . . . . . . . . . . . . . . . . 2 LED Indicator . . . . . . . . . . . . . . . . . . . . . . . . . . . . . . . . . 2 Applications . . . . . . . . . . . . . . . . . . . . . . . . . . . . . . . . . . . . . . 3 Installation . . . . . . . . . . . . . . . . . . . . . . . . . . . . . . . . . . . .4 Package Checklist . . . . . . . . . . . . . . . . . . System Requirements . . . . . . . . . . . . . . . . Hardware Installation . . . . . . . . . . . . . . . . Driver Installation . . . . . . . . . . . . . . . . . . Windows 98/Me Driver Installation . Setting Wireless Properties . . . . . . . Windows 2000 Driver Installation . . Windows XP Driver Installation . . . ... ... ... ... ... ... ... ... .... .... .... .... .... .... .... .... ... ... ... ... ... ... ... ... ... ... ... ... ... ... ... ... ... 4 ... 4 ... 5 ... 5 ... 6 ... 8 . . 21 . . 24 Configuration and Diagnostics . . . . . . . . . . . . . . . . . .27 Utility Installation in Windows 98, Me, and 2000 Using the EZ Connect Wireless USB Utility in Windows 98, Me, and 2000 . . . . . . . . . . Quick-Launch Icon . . . . . . . . . . . . . . . . . Monitor . . . . . . . . . . . . . . . . . . . . . . . . . Statistics . . . . . . . . . . . . . . . . . . . . . . . . . Site Survey . . . . . . . . . . . . . . . . . . . . . . . Encryption . . . . . . . . . . . . . . . . . . . . . . . Advanced Screen . . . . . . . . . . . . . . . . . . Using the Windows XP Configuration Tool . . . . Basic Settings . . . . . . . . . . . . . . . . . . . . . Advanced Settings . . . . . . . . . . . . . . . . . . . . . . . . . . . . 27 . . . . . . . . . . . . . . . . . . . . . . . . . . . . . . ... ... ... ... ... ... ... ... ... ... ... ... ... ... ... ... ... ... ... ... .. .. .. .. .. .. .. .. .. .. 28 29 30 32 33 34 36 37 37 39 v TABLE OF CONTENTS Network Configuration and Planning . . . . . . . . . . . . 41 Network Topologies . . . . . . . . . . . Setting the Communication Domain Stationary Wireless PCs . . . . Roaming Wireless PCs . . . . . . . . . . . . . . . . . . . . . . . . . . . . . . . . . . . . . . . . . . . . . . . . . . . . . . . . . . . . . . . . . . . . . . . . . . . . . . . . . . . . . . 42 . 44 . 44 . 44 Troubleshooting . . . . . . . . . . . . . . . . . . . . . . . . . . . . . . 46 Network Connection Problems . . . . . . . . . . . . . . . . . . . . . . . . 47 SMC Networks 802.11b SMC2662W Wireless USB Adapter Maximum Distance Table . . . . . . . . . . . . . . . . . . . . . . . . . 48 Specifications . . . . . . . . . . . . . . . . . . . . . . . . . . . . . . . . 49 Terminology . . . . . . . . . . . . . . . . . . . . . . . . . . . . . . . . . 51 vi EZ CONNECT™ WIRELESS USB ADAPTER SMC’s EZ Connect Wireless USB Adapter, SMC2662W, is an 11 Mbps wireless network adapter that seamlessly integrates with existing Ethernet networks to support applications such as mobile users or temporary conferences. This solution offers fast and reliable wireless connectivity with considerable cost savings over wired LANs, which include long-term maintenance overhead for cabling. Just plug wireless adapters into your desktop PCs and start networking. Using this adapter in conjunction with an SMC EZ Connect Wireless Access Point or Wireless Access Point/Bridge, you can create an instant network that integrates seamlessly with 10 Mbps Ethernet LANs. Moreover, moving or expanding your network is as easy as moving or installing additional Wireless APs/Bridges – no wires! 1 EZ CONNECT™ WIRELESS USB ADAPTER Hardware Description SMC’s EZ Connect Wireless USB Adapter supports an 11 Mbps half-duplex connection to Ethernet networks. This adapter is fully compliant with 2.4 GHz DSSS CSMA/CA wireless networking as defined in IEEE 802.11b. It can be installed in any notebook or desktop with a USB port. Support is currently provided for Windows 98/Me/2000/XP. LED Indicator The EZ Connect Wireless USB Adapter includes two LED indicators, as described in the following figure and table. Status 2 Description PWR On Power is being supplied to the adapter. Link On Adapter is receiving or transmitting data via a wireless connection. APPLICATIONS Applications EZ Connect wireless products offer fast, reliable, cost-effective network access for wireless clients in applications such as: • Remote access to corporate network information E-mail, file transfer, and terminal emulation • Difficult-to-wire environments Historic or old buildings, asbestos installations, and open areas where wiring is difficult to employ • Frequently changing environments Retailers, manufacturers, and banks who frequently rearrange the workplace and change location • Temporary LANs for special projects or peak time Trade shows, exhibitions, and construction sites that need to setup for a short time period. Retailers, airline, and shipping companies who need additional workstations for peak periods. Auditors who require workgroups at customer sites • Access to databases for mobile workers Doctors, nurses, retailers, white-collar workers who need access to databases while being mobile in a hospital, retail store, office, campus etc. • SOHO users SOHO (Small Office Home Office) users who need quick and easy installation of a small computer network 3 INSTALLATION Package Checklist The EZ Connect Wireless USB Adapter package includes: • 1 EZ Connect Wireless USB Adapter with one dipole antenna (SMC2662W) • 1 CD-ROM containing drivers, utility and documentation • 1 USB cable • This User Guide Please register this product and upgrade the product warranty at www.smc.com. Please inform your dealer if there are any incorrect, missing, or damaged parts. If possible, retain the carton, including the original packing materials. Use them again to repack the product if there is a need to return it for repair. System Requirements Before you install the EZ Connect Wireless USB Adapter, check your system meets the following requirements: 4 • An available USB port. • Windows 98/Me/2000/XP (have the Windows installation CD-ROM ready for use during driver installation). • A minimum of 1 MB of free disk space for installing the driver and utility program. HARDWARE INSTALLATION • Another IEEE 802.11b compliant device installed in your network, such as the SMC2655W Wireless Access Point, or another PC with a wireless adapter. Hardware Installation 1. Select an available USB port on the PC. 2. Carefully insert the USB cable’s Type-A plug (i.e., the flat plug) into the USB port and press until it is firmly seated in the port. 3. Insert the other end of the cable into the SMC2662W. Driver Installation Warning: Backup your driver CD and use the copy as the working disk to protect the original from accidental damage. The CD-ROM that comes with the package contains all the software/drivers available for the EZ Connect Wireless USB adapter. New or updated drivers can be downloaded from SMC’s web site at: http://www.smc.com For installation in Windows 98/Me see the following pages. For Windows 2000 go to “Windows 2000 Driver Installation” on page 21, and for Windows XP see “Windows XP Driver Installation” on page 24. 5 INSTALLATION Windows 98/Me Driver Installation 1. Windows 98/Me will automatically detect the new hardware and prompt you to install the driver. Click Next. 2. Check “Specify a location,” and type E:\Drivers\win982k (assuming E: is the location of your CD drive). Insert the CD into the CD drive and click Next. 6 DRIVER INSTALLATION 3. Click Next to copy files from the CD. Windows may ask you for the Windows 98 CD. If so, remove the EZ Connect Wireless USB adapter CD, insert the Windows 98 CD and click OK. 4. Click Finish to complete the driver installation. You may be asked to restart the computer. Click Yes. 7 INSTALLATION Setting Wireless Properties 1. Click Start/Settings/Control Panel. Double-click the Network icon. 2. Click on the “Identification” tab in the Network dialog box and specify your computer name and network workgroup. 8 DRIVER INSTALLATION 3. If you want to add more protocols after installation, go to the “Configuration” tab and click Add. 4. Double-click Protocol and add the network protocols you wish to use. If you install TCP/IP, be sure to set the appropriate Gateway, DNS Server, and Domain for your network. If you install an IPX/SPX compatible protocol, then you also need to install the Client for NetWare Networks. 5. Click File and Print Sharing and check the boxes as required. 6. On the Configuration tab, double-click the SMC2662W adapter. 9 INSTALLATION 7. On the Advanced tab you will find a list of properties. To communicate with SMC 11 Mbps Wireless devices, set the “Authentication Type” to “Shared Key.” Note: Products from some other vendors may use the setting “Open System.” Use the same setting as the other devices in your network. 10 DRIVER INSTALLATION 8. Set the “Channel” to the same radio channel as that used by the other wireless clients in your group. However, if you are connecting to a network via an access point, the adapter will automatically set the channel to the same as that used by the access point. 11 INSTALLATION 9. Wired Equivalent Privacy (WEP) is implemented in the adapter to prevent unauthorized access. For more secure data transmissions, set encryption to “128-bit” or “64-bit.” The 128-bit setting gives a higher level of security. The setting must be the same for all clients in your wireless network. (Default: Disabled) To completely configure WEP you must use the Configuration Utility. See “Encryption” on page 34. 12 DRIVER INSTALLATION 10. Set the “Fragmentation Threshold.” (The default 2,346 means “Disabled”) See “Terminology” on page 49 for a description of “Fragmentation Threshold.” 13 INSTALLATION 11. Set the “Operating Mode” to “Ad Hoc” or “Infrastructure” depending on the type of network to which you want to connect. 14 DRIVER INSTALLATION 12. “Preamble Type” offers a dropdown list with three options: Auto, Long, or Short. (see “Terminology” on page 49 for an explanation of “Preamble Type”) If you aren't sure whether all the Clients and Access Point radios in your wireless network support the Short RF preamble, then leave this setting on “Long.” (Default) 15 INSTALLATION 13. “Rate (Mbps)” is the data transmission/reception rate setting. It can be set to Auto, 1 Mbps, 2 Mbps, 5.5 Mbps, or 11 Mbps. Usually this should be set to Auto. In a radio frequency hostile environment, a lower rate can provide more stable transmission quality. 16 DRIVER INSTALLATION 14. Set the “RTS Threshold” to the same as that used by other devices in your network. (The default 2,347 means “Disabled”) See “Terminology” on page 49 for a description of “RTS Threshold.” 17 INSTALLATION 15. Set the “SSID” identifier to the same as that used by the ad hoc workgroup or access point to which you want to connect. (The SMC2655W Access Point default is WLAN) If you will be roaming among multiple access points with different BSS IDs, leave this field blank to allow connection to any SSID. 18 DRIVER INSTALLATION 16. The WEP encryption implemented in SMC’s Wireless USB adapter is based on the RC4 encryption algorithm. The security keys are four 10 digit keys for the 64-bit WEP setting, and one 26-digit key for the 128-bit WEP setting. WEP must be set in the configuration utility and all changes can be made there. See “Using the EZ Connect Wireless USB Utility in Windows 98, Me, and 2000” on page 28, or “Using the Windows XP Configuration Tool” on page 37, for details). 19 INSTALLATION 17. “WEP Key to use” shows the key that will be used (1~4) for encryption. 18. Click OK to exit the open screens and click Yes to restart the computer if asked to do so. Go to “Utility Installation in Windows 98, Me, and 2000” on page 27. 20 DRIVER INSTALLATION Windows 2000 Driver Installation 1. Windows 2000 will automatically detect the new hardware and prompt you to install the driver. 2. Click Next. 21 INSTALLATION 3. Type E:\Drivers\win982k (assuming E: is the location of your CD drive.) Insert the CD into the CD drive and click Next. 4. Click Next to copy files from the CD. 5. The “Digital Signature Not Found” screen will open. Click Yes to continue the installation 22 DRIVER INSTALLATION 6. On the “Completing the Found New Hardware Wizard” screen, click Finish to complete the driver installation. The “System Settings Change” box may ask you to restart the computer. If so, click Yes. 7. Driver installation is now complete. Go to “Utility Installation in Windows 98, Me, and 2000” on page 27 if you wish to install the optional configuration utility. 23 INSTALLATION Windows XP Driver Installation 1. Windows XP will automatically detect the new hardware and prompt you to install the driver. Check “Install from a list or specific location (Advanced)” and click Next. 24 DRIVER INSTALLATION 2. Check “Don’t search. I will choose the driver to install.” The Select Network Adapter screen will open. 3. Click Have Disk and the “Install From Disk” screen will open. Type E:\Drivers\xp and click OK. 25 INSTALLATION 4. Windows XP will find the SMC2662W EZ Connect Wireless USB Adapter. Click Next. 5. Though the software is fully compatible with Windows XP, it has not yet been Logo tested by Microsoft. On the Hardware Installation screen click Continue Anyway. 6. After the software has been installed, click Finish to complete the driver installation. 26 CONFIGURATION AND DIAGNOSTICS For Windows 98, Me, and 2000, SMC’s EZ Connect Wireless USB Adapter provides optional management software for quick network configuration and easy diagnostics. For Windows XP, use the built-in wirelesss configuration tool. Go to “Using the Windows XP Configuration Tool” on page 37. Utility Installation in Windows 98, Me, and 2000 To install the utility software: 1. Insert the CD-ROM into your PC’s CD drive. 2. Click Start/Run. 3. Type E:\Utility\Setup.exe and click OK. (assuming E:\ is your CD drive) 4. Follow the on-screen instructions to finish the installation. 27 CONFIGURATION AND DIAGNOSTICS Using the EZ Connect Wireless USB Utility in Windows 98, Me, and 2000 Once the installation is complete, the configuration utility can be accessed by clicking Start/Programs/EZ Connect Wireless USB/EZ Connect Wireless USB Utility. 28 USING THE EZ CONNECT WIRELESS USB UTILITY IN WINDOWS 98, ME, AND 2000 Quick-Launch Icon When the utility program is running, there will be a “Quick Launch” icon in the lower right-hand corner of the task bar. If the icon is GREEN, you have a good connection. If it shows RED, you may need to place the device in a higher position, or move closer to the device you wish to connect to. Double-clicking the Quick Launch icon will open the EZ Connect Wireless USB Utility program, providing quick access to the adapter settings. The configuration utility includes the following tools: Monitor – Allows you to monitor network status and configure wireless adapter parameters. Statistics – Shows wireless adapter statistics. Site Survey – Scans/Shows all the access points in range. Encryption – Provides WEP security control. Advanced – Allows you to configure the advanced settings. Version – Shows the version information. 29 CONFIGURATION AND DIAGNOSTICS Monitor When you start the wireless USB utility, the information window for the SMC2662W is shown as in the figure below. Click on the “Monitor” tab to view the network status of the wireless adapter. Click Modify to configure the “Operating Mode,” “Channel,” “SSID” and “Tx Rate.” After making a configuration change, the Apply button will become enabled. Click Apply to save the changes. Operating Mode – Set the station operation mode to “802.11 Ad Hoc” for network configurations that do not have an access point, or to “Infrastructure” for configurations with an access point. (“Infrastructure” is the default setting) 30 USING THE EZ CONNECT WIRELESS USB UTILITY IN WINDOWS 98, ME, AND 2000 Channel – If you are setting up an ad hoc wireless LAN (See “Network Topologies” on page 41.), set the channel number to the same radio channel as that used by the other wireless clients in your group. However, if you are connecting to a network via an access point, then the channel is automatically set to the channel of the access point to which the adapter connects. Note: The Channel can only be set when the Operating Mode is “802.11 Ad-Hoc.” SSID – Input an SSID string for the wireless network to which you want to connect (this setting is blank by default). If you will be roaming among multiple access points with different BSSIDs, leave this field blank to allow connection to any SSID. Tx Rate – Indicates the data transmission rate. Select an appropriate transmission speed. Lower speeds will give better range. See “SMC2662W 802.11b Wireless USB Adapter” on page 46. (Default: Auto) 31 CONFIGURATION AND DIAGNOSTICS Statistics The Statistics screen displays “Data Frames” and “Management Frames.” See “Terminology” on page 49 for a description of these terms. 32 USING THE EZ CONNECT WIRELESS USB UTILITY IN WINDOWS 98, ME, AND 2000 Site Survey The Site Survey screen displays all access points in the wireless LAN. You can choose one of them to connect to by double-clicking on an entry. SMCAP SMCAP SMCAP SMCAP 33 CONFIGURATION AND DIAGNOSTICS Encryption Encryption – Wired Equivalent Privacy (WEP) is implemented in the adapter to prevent unauthorized access. For more secure data transmissions, set encryption to “128-bit” or “64-bit”. The 128-bit setting gives a higher level of security. The setting must be the same for all clients in your wireless network (Default: Disabled). The WEP (Wired Equivalent Privacy) implemented in SMC’s EZ Connect Wireless USB adapter is based on the RC4 encryption algorithm. The security keys are four 10 digit keys for the 64-bit WEP setting and one 26-digit key for the 128-bit WEP setting. WEP security protects your wireless LAN against eavesdropping and unauthorized access by hackers or intruders. 34 USING THE EZ CONNECT WIRELESS USB UTILITY IN WINDOWS 98, ME, AND 2000 Create with Passphrase – Security keys for WEP encryption are generated from your Passphrase string, so you must use the same passphrase on all the other stations in your network. Manual Entry – “Manual Entry” allows you to manually enter key elements (two hexadecimal digits in each block). Default Key ID – Choose the Key ID that has the encryption string you prefer. If you are using a key generated from the passphrase, you must use the same passphrase and key on each station. To use the WEP function, take the following steps: 1. Select “128-bit” or “64-bit” in the “Encryption” field. 2. Choose “Create with Passphrase,” type a string in the Passphrase field, and click Generate. 3. Select the key, and click Apply. Note: A passphrase string can consist of up to 32 alphanumeric characters. Or 1. Check “Manual Entry” and enter hexadecimal numbers into one of the key fields. The bit key must be in hexadecimal numerals (0~9, A~F, e.g., D7 0A 9C 7F E5). 2. Click Apply. 35 CONFIGURATION AND DIAGNOSTICS Advanced Screen You can use this screen to set values for “Fragmentation Threshold” (Default: 2346 means Disabled), and “RTS/CTS Threshold” (Default: 2347 means Disabled). See “Terminology” on page 49 for a description of these terms. 36 USING THE WINDOWS XP CONFIGURATION TOOL Using the Windows XP Configuration Tool Basic Settings 1. Right-click the network connection icon on the toolbar. 2. On the popup menu, click “Status.” The Wireless Network Connection Status box will open. 37 CONFIGURATION AND DIAGNOSTICS 3. Click Properties. The Wireless Network Connection Properties box will open. Click the “Wireless Networks” tab. 4. In the lower section of the screen, click “Learn about setting up wireless network configuration” and complete the wireless configuration according to the Help and Support Center instructions. 38 USING THE WINDOWS XP CONFIGURATION TOOL Advanced Settings Click the “General” tab (see the previous screen). In the “Connect using” field, make sure that the adapter shown is the SMC2662W EZ Connect Wireless USB Adapter. 1. Click Configure. Click the “Advanced” tab. 2. Set the “Fragmentation Threshold.” (The default 2,346 means “Disabled”) See “Terminology” on page 49 for a description of “Fragmentation Threshold.” 3. “Preamble Type” offers a dropdown list with three options: Auto, Long, or Short. If you aren't sure whether all the Clients and Access points in your wireless network support the Short RF preamble, then leave this setting on “Auto.” (Default) See “Terminology” on page 49 for a description of “Preamble Type.” 39 CONFIGURATION AND DIAGNOSTICS 4. “Rate (Mbps)” is the data transmission/reception rate setting. It can be set to Auto, 1 Mbps, 2 Mbps, 5.5 Mbps, or 11 Mbps. Usually this should be set to Auto. In a radio frequency hostile environment, a lower rate can provide more stable transmission quality. 5. Set the “RTS Threshold” to the same as that used by other devices in your network. (The default 2,347 means “Disabled”) See “Terminology” on page 49 for a description of “RTS Threshold.” 40 NETWORK CONFIGURATION AND PLANNING SMC’s EZ Connect Wireless Solution supports a stand-alone wireless network configuration, as well as an integrated configuration with 10 Mbps Ethernet LANs. For a list of the maximum distances between the AP/Bridge and wireless clients, refer to page 46. The SMC2662W USB adapter can be configured as: • Ad hoc – for small departmental or SOHO LANs • Infrastructure – for enterprise LANs Network Topologies Ad Hoc Wireless LAN Ad-hoc Wireless LAN An ad hoc wireless LAN consists of a group of Notebook with computers, each equipped Wireless USB Adapter with a wireless adapter, connected via radio signals as an independent wireless LAN. Computers in a specific ad Notebook with Wireless PC Card hoc wireless LAN must be configured to the same radio PC with Wireless channel. PCI Adapter An ad hoc wireless LAN can be used for a small branch office or SOHO operation. 41 NETWORK CONFIGURATION AND PLANNING Infrastructure Wireless LAN The SMC2662W can also provide access to a wired LAN for wireless workstations. An integrated wired and wireless LAN is called an Infrastructure configuration. A Basic Service Set (BSS) consists of a group of wireless PC users, and an access point that is directly connected to the wired LAN. Each wireless PC in this BSS can talk to any computer in its wireless group via a radio link, or access other computers or network resources in the wired LAN infrastructure via the access point. The infrastructure configuration not only extends the accessibility of wireless PCs to the wired LAN, but also increases the effective wireless transmission range for wireless PCs by passing their signal through one or more access points. A wireless infrastructure can be used for access to a central database, or for connection between mobile workers, as shown in the following figure. Wired LAN Extension to Wireless Adapters File Server Desktop PC Switch Notebook with Wireless USB Adapter Access Point PC with Wireless PC I Adapter 42 SETTING THE COMMUNICATION DOMAIN Setting the Communication Domain Stationary Wireless PCs The Basic Service Set (BSS) is the communication domain for each access point (such as the SMC2655W). For wireless PCs that do not need to support roaming, set the domain identifier (SSID) for the wireless adapter to the BSS ID of the access point to which you want to connect. Check with your administrator for the BSS ID of the access point to which he wants you to connect. Roaming Wireless PCs A wireless infrastructure can also support roaming for mobile workers. More than one access point may be configured with the same SSID to create an Extended Service Set (ESS). By placing the access points so that a continuous coverage area is created, wireless users within this ESS can roam freely. All SMC EZ Connect Wireless adapters and EZ Connect Wireless Access Points within a specific ESS must be configured with the same SSID. File Server Desktop PC Switch Notebook with Wireless PC Card Adapter Switch Access Point Notebook with Wireless USB Adapter Access Point <BSS2> <ESS> <BSS1> Seamless Roaming PC with Wireless PC I Adapter Before setting up an ESS for roaming, choose a location for the access points that maximizes performance (Refer to “Using the EZ Connect Wireless USB Utility in Windows 98, Me, and 2000” on page 28 for information on using the “Monitor” and “Site Survey” tools.) 43 TROUBLESHOOTING USB Adapter Installation Problems If your computer cannot find the EZ Connect Wireless USB Adapter or the network driver does not install correctly, check the following items: • Make sure the adapter is connected to the USB port. Check for any hardware problems, such as physical damage to the adapter’s connector. • Try the adapter in another USB port. If this also fails, try using another SMC2662W wireless adapter that is known to operate correctly. • Make sure your computer is using the latest BIOS. • If there are other network adapters in the computer, they may cause conflicts. Disable or remove all other adapters from the computer and test the wireless adapter separately. • Check for a defective computer or USB port by trying the adapter in another computer that is known to operate correctly. • If there are still difficulties, remove the wireless adapter. Delete the file “Vnetusbr.sys” from: c:\windows\system (for Windows 98/Me) c:\winnt\system32\drivers (for Windows 2000) c:\windows\system32\drivers (for Windows XP) Then go to the Control Panel and delete the adapter from the network configuration menu. Restart the PC and reinstall the adapter. 44 NETWORK CONNECTION PROBLEMS Network Connection Problems If the LED on the USB adapter is not lit, or if you cannot access network resources from the computer, check the following: • Make sure the correct software driver is installed. Try reinstalling the driver. • Make sure the computer and other network devices are receiving power. • The access point you want to connect to may not be functioning correctly. Try using another access point. • If you cannot access a Windows or NetWare service on the network, check that you have enabled and configured the service correctly. If you cannot connect to a particular server, be sure that you have access rights and a valid ID and password. • If you cannot access the Internet, be sure you have configured your system for TCP/IP. If your wireless station cannot communicate with a computer on the Ethernet LAN when configured for Infrastructure mode, check the following: • Make sure the access point that the station is associated with is powered on. • Check that the wireless settings (i.e., WEP, SSID, Channel) match the access point or other stations to which you are attempting to connect. • If you still cannot connect, change the access point and all the stations within the BSS to another radio channel. 45 TROUBLESHOOTING SMC Networks 802.11b SMC2662W Wireless USB Adapter Maximum Distance Table Important Notice – Maximum distances posted below are actual tested distance thresholds. However, there are many variables such as barrier composition and construction, as well as local environmental interference that may impact your actual distances and cause you to experience distance thresholds far lower than those posted below. If you have any questions or comments regarding the features or performance of this product, or if you would like information regarding our full line of wireless products, you can visit us on the Web at www.smc.com, or you can call us toll-free at 800.SMC.4YOU. SMC Networks stands behind every product sold with a 30-day satisfaction guarantee and a limited-lifetime warranty. SMC2662W 802.11b Wireless USB Adapter Maximum Distance Table Speed and Distance Ranges Environmental Condition 46 11 Mbps 5.5 Mbps 2 Mbps 1 Mbps Outdoors: A line-of-sight environment with no interference or obstruction between the Access Point and users. 160 m (528 ft) 195 m (640 ft) 255 m (837 ft) 350 m (1,155 ft) Indoors: A typical office or home environment with floor to ceiling obstructions between the Access Point and users. 72 m (236 ft) 73 m (240 ft) 73 m (240 ft) 75 m (246 ft) SPECIFICATIONS Functional Criteria Data Rate Transmission Mode Network Connection Operating Range Radio Signal Signal Type Operating Frequency Sensitivity Modulation Output Power 1, 2, 5.5, 11 Mbps, Auto Half-duplex IEEE 802.11b wireless Max distance at 11 Mbps: 160 m (528 ft) Max distance at 5.5 Mbps: 195 m (640 ft) Max distance at 2 Mbps: 255 m (837 ft) Max distance at 1 Mbps: 350 m (1,155 ft) Direct Sequence Spread-Spectrum (DSSS) USA, Canada: 2.412~2.462 GHz Europe (ETSI): 2.412~2.472 GHz Japan: 2.412~2.484 GHz 1/2/5.5/11 Mbps: -90/-88/-83/-80 dBm min. 1/2/5.5/11 Mbps: BPSK/QPSK/CCK/CCK 14 dBm Physical Characteristics Current Consumption TX: 460 mA max. RX: 260 mA max. 20 mA Standby Size 95 x 65 x 13 mm (3.74 x 2.56 x 0.51 in) Weight 37 g (1.31 oz) Temperature Operating: 0 to 55 °C (32 to 131 °F) Storage: -20 to 70 °C (-4 to 158 °F) Humidity 95% non-condensing Antenna One Built-in Dielectric antenna One External Dipole antenna LED Indicator Host Interface Power, Link Mini USB/USB v1.1 47 SPECIFICATIONS Standards Conformance IEEE 802.11b USB specification revision 1.1 Compliances Software NDIS Driver NDIS Utility 48 FCC Class B, C CISPR 22 Class B Windows Windows Windows Windows 98 Me 2000 XP Windows 98 Windows Me Windows 2000 Windows XP uses built-in wireless configuration utility TERMINOLOGY The following is a list of terminology used in this document. Access Point – An internetworking device that seamlessly connects wired and wireless networks. Ad Hoc – An ad hoc wireless LAN is a group of computers each with LAN adapters, connected as an independent wireless LAN. BSS – BSS stands for “Basic Service Set.” It is an access point and all the LAN PCs that are associated with it. CSMA/CA – Carrier Sense Multiple Access with Collision Avoidance. Data Frame – Packets transmitted/received by the device that carry data (see Management Frame on the next page). ESS – ESS (ESS-ID, SSID) stands for “Extended Service Set.” More than one BSS is configured to become an Extended Service Set. LAN mobile users can roam between different BSSs in an ESS (ESS-ID, SSID). Ethernet – A popular local area data communications network, which accepts transmissions from computers and terminals. Ethernet operates on a 10 Mbps baseband transmission rate, using shielded coaxial cable or twisted-pair cable. Fragmentation Threshold – In the 802.11 Standard, the MAC Layer may fragment and reassemble directed MSDUs or MMPDUs. The fragmentation and defragmentation mechanisms allow for fragment re-transmission. 49 TERMINOLOGY Preamble Type – Some Access Points and Client card drivers have a radio setting for “Short” RF Preamble. If all the Clients and Access Points in your wireless network have this feature, then enabling it can boost your throughput. However, if a radio does not support this feature, then it will not be able to communicate with any other radios that have this set to “Short.” Infrastructure – An integrated wireless and wired LAN is called an Infrastructure configuration. Management Frame – Control frame for establishing a link between an access point and a client station. It includes Beacon, Probe, Authentication, and Association frames. MSDUs – MAC Service Data Units. MMPDUs – MAC Management Protocol Data Units. Roaming – A wireless LAN mobile user moves around an ESS and maintains a continuous connection to the Infrastructure network. RTS Threshold – Transmitters contending for the medium may not be aware of each other. RTS/CTS mechanism can solve this “Hidden Node Problem.” If the packet size is smaller than the preset RTS Threshold size, the RTS/CTS mechanism will NOT be enabled. USB – The Universal Serial Bus allows complete Plug and Play connection of peripheral devices to a computer. WEP – “Wired Equivalent Privacy” is based on the use of 64-bit or 128-bit keys and the popular RC4 encryption algorithm. Wireless devices without a valid WEP key are excluded from network traffic. 50 FOR TECHNICAL SUPPORT, CALL: From U.S.A. and Canada (24 hours a day, 7 days a week) (800) SMC-4-YOU; (949) 679-8000; Fax: (949) 679-1481 From Europe (8:00 AM - 5:30 PM UK Time) 44 (0) 118 974 8700; Fax: 44 (0) 118 974 8701 INTERNET E-mail addresses: [email protected] [email protected] Driver updates: http://www.smc.com/index.cfm?action=tech_support_drivers_downloads World Wide Web: http://www.smc.com/ http://www.smc-europe.com/ FOR LITERATURE OR ADVERTISING RESPONSE, CALL: U.S.A. and Canada: Spain: UK: France: Italy: Benelux: Central Europe: Switzerland: Nordic: Northern Europe: Eastern Europe: Sub Saharian Africa: North Africa: Russia: PRC: Taiwan: Asia Pacific: Korea: Japan: Australia: India: (800) SMC-4-YOU; 34-93-477-4935; 44 (0) 118 974 8700; 33 (0) 41 38 32 32; 39 02 739 12 33; 31 33 455 72 88; 49 (0) 89 92861-0; 41 (0) 1 9409971; 46 (0) 868 70700; 44 (0) 118 974 8700; 34 -93-477-4920; 27-11 314 1133; 34 93 477 4920; 7 (095) 290 29 96; 86-10-6235-4958; 886-2-2659-9669; (65) 238 6556; 82-2-553-0860; 81-45-224-2332; 61-2-9416-0437; 91-22-8204437; Fax (949) 679-1481 Fax 34-93-477-3774 Fax 44 (0) 118 974 8701 Fax 33 (0) 41 38 01 58 Fax 39 02 739 14 17 Fax 31 33 455 73 30 Fax 49 (0) 89 92861-230 Fax 41 (0) 1 9409972 Fax 46 (0) 887 62 62 Fax 44 (0) 118 974 8701 Fax 34 93 477 3774 Fax 27-11 314 9133 Fax 34 93 477 3774 Fax 7 (095) 290 29 96 Fax 86-10-6235-4962 Fax 886-2-2659-9666 Fax (65) 238 6466 Fax 82-2-553-7202 Fax 81-45-224-2331 Fax 61-2-9416-0474 Fax 91-22-8204443 If you are looking for further contact information, please visit www.smc.com or www.smc-europe.com. 38 Tesla Irvine, CA 92618 Phone: (949) 679-8000 Model Number: SMC2662W Part Number: 01-111393-009