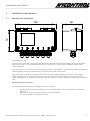
1
Dataflex Technical Manual and Specification
Revision 2.0
September 2013
Hycontrol Ltd
Larchwood House
Orchard Street
Redditch
Worcestershire
B98 7DP
United Kingdom
Tel: +44 (0)1527 406 800
Fax: +44 (0)1527 406 810
Contents
Contents
Contents .......................................................................................................................................................................... 1
1
General Information and Safety ............................................................................................................................ 3
1.1
Document Revision History ........................................................................................................................ 3
1.2
Proprietary Notice ....................................................................................................................................... 4
1.3
Safety ......................................................................................................................................................... 4
1.4
Battery Information and Safety ................................................................................................................... 4
1.5
Components supplied ................................................................................................................................. 6
1.6
Definitions / Glossary .................................................................................................................................. 6
1.7
Part numbers .............................................................................................................................................. 7
1.8
Symbols ..................................................................................................................................................... 7
2
Introduction to the Dataflex ................................................................................................................................... 8
2.1
How to install, setup and commission the Dataflex ..................................................................................... 8
2.2
Requirements for Technical Support .......................................................................................................... 8
2.3
Overview .................................................................................................................................................... 8
2.4
Specification ............................................................................................................................................... 9
3
Installation instructions ....................................................................................................................................... 10
3.1
Mechanical installation ............................................................................................................................. 10
3.2
Electrical installation ................................................................................................................................. 11
3.2.1
Power supplies and consumption .................................................................................................. 11
3.2.2
Sensor types and Input wiring ....................................................................................................... 13
0 - 10V output (three wire) ........................................................................................................................ 13
0 - 5V ratiometric (three wire) ................................................................................................................... 13
4 - 20mA loop (two wire, +V and IN) ........................................................................................................ 13
4 - 20mA or 0 - 20mA powered (three wire) .............................................................................................. 13
Switched input / Volt free contact (two wire, +V and IN) ........................................................................... 13
Other - Please contact Hycontrol with any other sensor type .................................................................... 13
3.2.3
Output wiring ................................................................................................................................. 14
3.3
SIM cards and Carriers ............................................................................................................................. 14
3.4
External Antennas .................................................................................................................................... 15
4
Using the unit and commissioning ..................................................................................................................... 15
4.1
How it works ............................................................................................................................................. 15
4.2
Using the menus and buttons ................................................................................................................... 15
4.2.1
Menu structure and functions ........................................................................................................ 16
4.2.2
Outline of operational modes ......................................................................................................... 18
4.2.3
Transmission Process - Flow Chart ............................................................................................... 19
4.2.4
Meanings of Icons ......................................................................................................................... 22
4.3
Important notes about how the Dataflex operates ..................................................................................... 22
SIM updates ............................................................................................................................................. 22
Timekeeping ............................................................................................................................................. 22
Network selection ..................................................................................................................................... 23
4.4
Types of Digital Inputs .............................................................................................................................. 23
4.5
Before you start ........................................................................................................................................ 23
4.6
General .................................................................................................................................................... 23
4.7
Configuration ............................................................................................................................................ 24
4.8
Configuration tool software ....................................................................................................................... 24
4.8.1
Installation of the config tool and driver ......................................................................................... 24
4.8.2
Using the config tool ...................................................................................................................... 25
System configuration ................................................................................................................................ 25
Input configuration .................................................................................................................................... 27
Output configuration ................................................................................................................................. 35
Communcations configuration .................................................................................................................. 36
4.8.3 Driver Issues............................................................................................................................................. 38
4.8.4 Updating the firmware using USB ............................................................................................................. 38
4.9
Important information ................................................................................................................................ 39
4.9.1 Decimal places and scaling ...................................................................................................................... 39
4.9.2 Cell ID 39
4.10
Commissioning Guidelines ....................................................................................................................... 39
5
Example Configurations ...................................................................................................................................... 40
All specifications are liable to change without notice. E&OE. Copyright 2012
2
General Information and Safety
5.1
5.2
5.3
6
7
How to calculate values for sensors ......................................................................................................... 40
Example 1 ................................................................................................................................................ 40
Example 2 ................................................................................................................................................ 41
Expansion Board (Pulse and Instant Digitals) ................................................................................................... 42
Troubleshooting .................................................................................................................................................. 43
7.
Frequently Asked Questions ..................................................................................................................... 43
1
Error messages ........................................................................................................................................ 45
7.
Other errors .............................................................................................................................................. 46
2
7.
3
General Information and Safety
1
Document Revision History
1.1
Revision
Date
Notes
V7.1.5.0.9
12/01/2012
Revised to suit latest firmware revision (0.6.0.3) & hardware variations
V2.0
7/1/2013
Combined all documents, new revision of user manual ready for print
V2.1
21/1/2013
Minor corrections / updates after review
All specifications are liable to change without notice. E&OE. Copyright 2012
3
General Information and Safety
1.2
Proprietary Notice
The information in this document is subject to change without notice. Company or product names mentioned in this
document may be trademarks or registered trademarks of their respective companies.
All rights reserved. Neither the whole nor any part of the information contained in this publication may be reproduced in any
material form except with the written permission of Hycontrol Ltd.
This publication is intended only to assist the reader in the use of the product. Hycontrol Ltd. shall not be liable for any loss or
damage arising from the use of any information in this publication, or any error or omission in such information, or any
incorrect use of the product.
1.3
Safety
Read carefully these instructions and notes before powering your Dataflex. For each situation please follow
the specific instructions.
The Dataflex is a low power radio transmitter and receiver. When it is powered, it will send and receive radio
frequency (RF) signals.
Operating the Dataflex close to other electrical equipment such as television, phone, radios and personal
computer, may cause interference.
Interference - The Dataflex, like all wireless devices, is subject to interferences that may reduce its
performance.
Road Safety - Do not use the Dataflex while driving. In case of use on cars, it is necessary to check that
electronic equipment is shielded against RF signal. Do not place the Dataflex over the air bag or in the air bag
deployment area.
Hospital Safety - Do not use the Dataflex near health equipment, especially pacemaker and hearing aids, to
avoid potential interferences. The Dataflex is a not mobile phone; do not use it in direct contact with the human
body. Switch it off in hospitals, and in any other type of medical centre. Hospitals or health care facilities may be
using equipment that could be sensitive to external RF energy.
Explosive Materials - Do not use the Dataflex in refuelling points, near fuel or chemicals. Do not use the
Dataflex where blasting is in progress. Observe restrictions, and follow any regulation or instruction.
Do not use the Dataflex in direct contact with the human body; do not touch the antenna if not necessary when
the Dataflex is powered. Use approved accessories and batteries only. Do not connect incompatible products.
1.4
Battery Information and Safety
The Dataflex is available with an integral battery.
Do not use if the battery casing appears damaged
Do not attempt to recharge the battery
Do not short circuit
Only use supplied battery with the Dataflex
The battery is a high energy density sealed battery containing dangerous (Lithium) and deleterious (Thionyl
Chloride) materials. For this reason, improper handling of the battery could lead to distortion, leakage,
overheating, explosion, fire, or generation of irritating/corrosive gases, causing bodily injury or equipment
trouble. Please observe the following instructions to prevent accidents.
All specifications are liable to change without notice. E&OE. Copyright 2012
4
General Information and Safety
Do not use if you suspect any damage to the casing, cabling or connector.
Do not connect to a Dataflex when the programmer is connected.
Be careful not to drop - if dropped please do not use.
Do not short circuit the battery - if you suspect this possible then disconnect and do not use. Do
not apply heat to the battery.
Do not expose the battery to open flames.
Never disassemble the battery.
Never deform the battery.
Do not reverse polarity the battery - take extra care to ensure connections are the right way round. Do
not connect 2 or more batteries together.
Do not store the batteries in direct sunlight.
Store batteries in non-conductive trays (e.g. plastic, wood or cardboard).
Do not use near water.
Do not have rings on your fingers when handling batteries, otherwise wear insulating gloves.
First aid measures
Only in case of contact with internal components of the battery:
Skin contact: flush with plenty of water
Eye contact: flush with plenty of water (eyelids held open)
Inhalation: breath fresh air and give oxygen or artificial respiration by specialist people
Ingestion: drink plenty of water and consult a doctor
Fire fighting measures
Evacuate the building and leave it to the professionals. Advise the fire fighters that there are batteries in the
building and the advice is to use extinguishers type D, Lith-X, DO NOT USE WATER in case of battery leakage
Special hazards: irritating vapour
Special protective equipment: wear protective clothing, use self-contained breathing apparatus with filtered
cartridge type ABEK
Leakage measures
In case of break of a battery, all the people must go away from the place where the incident happened and
come back only after the dissolution of the irritating gas.
Broken batteries or battery packs must be covered with sodium carbonate (Na2CO3) or dry sand, place them in
approved container and dispose in accordance with local regulation.
Disposal
Please return batteries to Hycontrol ltd for disposal. Ensure suitable packaging in used. Do not use air freight.
Replacing the Battery
The battery used in the Dataflex must be supplied by Hycontrol Ltd. Its warranty will be void if any other
battery is used as it may damage the Dataflex or cause it to malfunction. To remove the battery, undo the
Velcro strap
All specifications are liable to change without notice. E&OE. Copyright 2012
5
General Information and Safety
1.5
Components supplied
The Dataflex in its standard form comes with a number of standard parts. If you are an OEM customer, we may supply
you with a variation on this.
Dataflex Unit
4 x M12 Cable Glands (one fitted) with O rings
5 or 6 x M12 Blanking plugs (two fitted) with O rings depending on model
1 x Breather gland (fitted) with O ring
1.6
Definitions / Glossary
Modem - This is the part of the Dataflex that allows external communication (sending of data and text messages).
GSM - Global System for Mobile communications - This is the standard that the modem in the Dataflex uses to
communicate.
Carrier / Network - This is the network operator or service provider, e.g. AT&T or Vodafone
Volt Free Contact - A simple contact or switch that is either on or off.
Sensor - This is a part that measures a specific parameter, environmental condition
Cell ID - The specific cell that the Dataflex is connected to. It can be used for approximate location.
Booting - The process that occurs to switch on the modem. This normally takes less than one minute
Unit - The Dataflex may be referred to as the unit in some sections
Programming - Configuring the Dataflex may be referred to as this
RTU - Remote Telemetry Unit, refers to the Dataflex
All specifications are liable to change without notice. E&OE. Copyright 2012
6
General Information and Safety
1.7
Part numbers
Part number
Description
DATAFLEX/S
4 analogue inputs, 6-24Vdc power supply
DATAFLEX/SSM
4 analogue inputs, integral 3.6 volt battery
DATAFLEX/S/2RE
4 analogue inputs, 6-24Vdc power supply, 2 relay outputs
DATAFLEX/SSM/2RE
4 analogue inputs, integral 3.6 volt battery, 2 relay outputs
DATAFLEX/S/5DP
4 analogue & 5 digital/pulse inputs, 6-24Vdc power supply,
DATAFLEX/SSM/5DP
4 analogue & 5 digital/pulse inputs, integral 3.6 volt battery
DATAFLEX/S/2RE/5DP
4 analogue & 5 digital/pulse inputs, 6-24Vdc power supply, 2 relay outputs
DATAFLEX/SSM/2RE/5DP
4 analogue & 5 digital/pulse inputs, integral 3.6 volt battery, 2 relay outputs
D5DP
5 digital/pulse input expansion card
DER34615M/W
Battery (3.6 volt, 14AH, non-rechargeable)
1.8
Symbols
Symbol
What it means
Indicates that this is important information and should be adhered to
Indicates that this is very useful information and is essential to understand the Dataflex
All specifications are liable to change without notice. E&OE. Copyright 2012
7
Introduction to the Dataflex
2
Introduction to the Dataflex
2.1
How to install, setup and commission the Dataflex
If you are new to the Dataflex, the following basic process must be followed:
1.
2.
3.
4.
5.
6.
Read through the remainder of the introduction to the Dataflex
Mechanically mount and understand how to seal the Dataflex (section 3.1)
Electrically wire in the Dataflex, observing requirements (section 3.2)
Fit SIM card
Understand and then configure the Dataflex (section 4)
Follow strictly the commissioning guidelines (section 4.10)
If you are experiencing problems with the Dataflex, please refer to the troubleshooting guides and FAQ. If you
still require support, please look at the checklist below (2.2) and contact your distributor, or Hycontrol if
purchased directly.
2.2
Requirements for Technical Support
Please note that if you wish to contact us for technical support setting up a unit, before we can help you we will
need some information from you.
Necessary:
Serial Number
SIM card information
Access to the unit and its physical location
What you would like the Dataflex to do
Information about the sensors or inputs into the Dataflex
Ideally:
An exact configuration you would like
A laptop or computer with the software running
A mini USB cable
A multi-meter
Specific part numbers for the sensors or inputs to the Dataflex
A SIM card that you have sent a SMS message from using a normal phone (important!)
2.3
Overview
This document describes all the functions, features and interfaces of the Dataflex telemetry device.
Applications
A few of the applications that this device has been designed for include:
Remote Tank Level Monitoring
Environmental Monitoring
Meter Reading
Condition Monitoring
Alarm Reporting
All specifications are liable to change without notice. E&OE. Copyright 2012
8
Introduction to the Dataflex
Summary of Technical Features
Ability to interface with up to four analogue (0-10V or 4-20mA), digital (ON/OFF)
On-board excitation, 3.6 volts (non-regulated), 5 v, or 21.6 volts (max 31.25mA)
Internal battery powered with a long life, or external 6 to 24 V DC power source (0.5 amps).
Back lit LCD Display, 40 x 40mm, 128 x 128 pixels, to help with on-site setup & diagnosis
Quad-band operation
USB port for programming & firmware upgrade.
Expansion board socket for future use.
As the Dataflex is normally a battery powered device it has been designed in such a way to extend this life to a
maximum. This means during normal operation the display will be off, the sensors excitation will be off and the
GSM engine will be powered down. As required these are switched on by the processor and when finished with
they are switched off. If the unit is powered from an external source then the unit can be configured so that the
GSM engine is always on.
2.4
Specification
General
Enclosure
Communications
Number of input channels
4
Connectors
4 x 3 Pin 3.81mm Pitch for Sensors, 1 x 2 PIN for power
Warranty
24 Months RTB. Does not cover above or incorrect
installation
Environmental
IP67 Rated
Dimensions
125 x 75 x 65 (mm)
Operating Frequency
850/900/1800/1900Mhz
Output power
Class 4 (2W) 850/900 MHz
Class 1 (1W) 1800/1900 MHz
Electrical
Analogue input
channels
Power Supply (IN)
3.6, or 6 to 24 V DC @ 0.5A - please ensure supply is
smooth. Check the type of Metron2 you have.
Excitation Supply (To
sensors)
3.6 v (unregulated), 5 v or 21.6 v. 31.25mA maximum
Input types
Digital or Analogue
Resolution
10 bit (1024 Increments)
Accuracy
0.25%
Antenna
Internal or external (via SMA connector)
Display
40 x 40mm, 128 x 128
pixels
Backlit
General
Number of input channels
4
Connectors
4 x 3 Pin 3.81mm Pitch for Sensors, 1 x 2 PIN for power
Number of input channels
5
Input type
Digital or Pulse
Maximum pulse frequency
10Hz
Expansion Card
All specifications are liable to change without notice. E&OE. Copyright 2012
9
Installation instructions
3
Installation instructions
3.1
Mechanical installation
68
75
138
All dimensions in mm.
Open the lid to reveal the 2 mounting holes. These should be used to fasten the Dataflex down to a baseplate,
wall or other surface. To access these two holes, you may have to remove two M12 blanking plugs. These
must be replaced.
The two screws on the front of the enclosure should not be over tightened - otherwise it is possible to break the
watertight seal by tearing or deforming the ‘O’ ring below the head of each screw.
The unit needs a mobile phone signal to work - the stronger the signal the better so try and avoid mounting
inside metal cabinets or underground. Mounting it on the outside of a metal container may help improve the
signal, depending on the direction and location. Use the ‘Get config / signal’ feature to find the optimum location
first.
Weatherproofing Information
It is essential that the following is checked if being used outdoors
All cable glands and breather glands on the unit should have an ‘O’ ring fitted and are sufficiently
tightened
Both screws on the top are tightened, but not over tightened
The seal around the lid is correctly in place
All specifications are liable to change without notice. E&OE. Copyright 2012
10
Installation instructions
3.2
Electrical installation
com
9
8
7
6
5
3.2.1 Power supplies and consumption
Your choice of power source needs to suit your application. You can use an internal lithium battery (not rechargeable)
but for now you must use an external 5 to 24 Vdc power source (could be solar, wind, a larger battery, or a 110/230 Vac
to 6-24Vdc power supply). The supply needs to be quite well regulated and capable of delivering a peak of 0.5A.
Important: only configure the unit to operate in power states 1 (GPRS pollable), 2 (SMS pollable) or 3 (transmit on power
up). Power state is part of the system command.
The power consumption will vary depending on how the unit is programmed. If Powering from the internal battery then be
sure to configure the ‘modem power scheme’ as ‘power off between transmit events.’
When ‘asleep’ the device will draw approximately 85 micro amps.
Please note that the battery capacity quoted by the manufacturers is not always fully available to the Dataflex. Please
consult Hycontrol for advice on how long the battery will last in your application.
The current consumption varies depending on the state of the unit. The figures below are based on a power supply
between 3.6 to 4.2 volts.
Deep sleep
Screen on
USB connected
GSM on
(in ‘polling’ mode)
During analogue read now
With ‘M25DP’ board added
85 micro amps (screen, sensors and GSM modem off)
add 28mA
add 8mA
add 24mA (typically)
add 50mA average - depends on settling time per sensor but allow at least 5 seconds
add ~10 micro amps when in deep sleep mode
The device will not function correctly if the supply voltage is between 4.2 and 5 volts.
If the supply voltage is greater than 5v there is additional components are in use within the Dataflex and it therefore
draws 2mA in ‘deep sleep’ mode. If you intend to use in an application where the power demand is too great for the
integral battery option (Dataflex/SSM) then you will need to consider this and select the supply accordingly.
All specifications are liable to change without notice. E&OE. Copyright 2012
11
Installation instructions
When the unit is communicating over GSM/GPRS the current consumption fluctuates over time and varies depending on the
signal strength. The length of time the communications takes depends on how long it takes to charge the on board
super-capacitors, how long it takes to register onto the network and how long communications takes (with GPRS
communications t is up to the host to ‘kill’ the connection).
Battery safety is important. The D2ER34615M/W has a very high power density and needs to be treated with care. It is
possible to find lower cost alternatives but these are unlikely to include suitable fusing and ventilation and should not be
used
After each transmission the Dataflex stays connected to the mobile phone network for 45 seconds providing time for
SMS messages to be received should they have been sent to reconfigure the unit.
Source
Notes
5V USB power supply
USB cable needs to be spliced. Red = Positive (+), Black = Negative (-). Only use
very high quality supplies that can provide 500mA or greater. Cheap, non-genuine
versions commonly cause problems and damage to many products.
5 - 24V open frame or DIN
rail mount power supply
Double check polarity before powering on. Mains wiring must be carried out by
someone who is suitably qualified. High quality switch mode or linear supplies
should be acceptable.
6 - 24V lead acid battery
(trickle charged)
Extra care should be taken while wiring and a separate external fuse should always
be used.
Lead acid battery charged
from alternator
Often the charging method means that the supply will not be smooth (from an
alternator or generator for example) and can cause problems. A maximum of a 24V
system is allowed.
3.9V Lithium battery
Only use Hycontrol supplied battery.
3.6 - 4V power supply
Not recommended. Do not use this method.
All specifications are liable to change without notice. E&OE. Copyright 2012
12
Installation instructions
3.2.2 Sensor types and Input wiring
Run the cable through the glands & tighten. Unplug the green connectors and wire in as required. Ensure
unused glands are replaced with blanking plugs to prevent water from getting inside the unit.
Each input channel has its own plug and corresponding socket. On each socket, three connections are
available.
0V: This is the 0V / -Ve connection for the channel, although they are all common to each other.
+V: This will provide the supply voltage to the channel, also known as the excitation voltage. This is
configurable to either 21.6V, 5V or 3.6V (un-regulated). It is important that the load on this does not exceed
31.25mA.
IN: This is the input for the channel, also known as ‘signal.’ This will accept 0-10V or 4-20mA.
Note: It is important that the channel used for the sensor excitation and the sensor inputs are the same.
0 - 10V output (three wire)
This sensor type will typically have a greater than 14V input, while the output will vary between 0 and 10V
depending on the readings. Generally, but not always, these use less power than the same sensor type with a
4-20mA output.
0 - 5V ratiometric (three wire)
The sensor will be supplied with 5V (+/- 2.5%) - with this the sensor feeds a proportion of the voltage back to the
input. Usually this type requires very little power.
4 - 20mA loop (two wire, +V and IN)
The sensor is measured using a current loop. This means that the total power consumption of the sensor varies
between 4 and 20mA depending on the measurement of the sensor. The benefit of using a current based
output is that it is generally more immune to external interference than a voltage output.
4 - 20mA or 0 - 20mA powered (three wire)
This type is powered from a separate supply and the output varies depending on the measurement of the
sensor. This type of sensor is usually used when the minimum current requirement exceeds 4mA meaning a
two wire system is not possible.
Switched input / Volt free contact (two wire, +V and IN)
This is simply a switch - the contact will be supplied with 3.6V from the +V contact. The input will monitor the
state of the switch using this wetting voltage.
Other - Please contact Hycontrol with any other sensor type
All specifications are liable to change without notice. E&OE. Copyright 2012
13
Installation instructions
3.2.3 Output wiring
The two outputs are the two right hand side three way connectors. The internal relays for the outputs are
optional and are not supplied in the Dataflex as standard, though the connectors will still be present.
The outputs should not be used for switching high voltages (mains voltages). They are each rated to switch 2A
at 30V DC.
3.3
SIM cards and Carriers
SIM card selection is often the cause of connectivity issues. There are a number of requirements needed from
the SIM card for it to operate correctly
It is the correct type (full size SIM, not micro or nano SIM)
It does not have a PIN enabled on the SIM
There is network coverage where you plan to use it
Roaming is enabled if using outside of the country of purchase
The APN, username and password for the SIM contract are correct.
Replacing the SIM
1. Open the lid to reveal the SIM card holder.
2. Note the orientation of the SIM socket, using the drawing behind the socket
3. Slide the SIM into the socket
4. If the installation is going to be moving or vibrating, you may wish to use a piece of high-tack tape across the
back to prevent the SIM from moving in these conditions
Manually selecting a carrier
If you are using a roaming SIM that is capable of using multiple carriers in the installation location, then you
may want to select a specific carrier to use by default. This may also be especially useful if there are two weak
differing networks in the area and the unit switches between them frequently. To do this, follow these
instructions.
1. Verify if you have a roaming SIM. Do not proceed if you do not.
2. Go to the menu option ‘System’ and then ‘Carrier Select’
3. It will take a little while to boot the modem if necessary and query the networks
4. A list of operators that are available in the area will appear. It does not mean you will have permission to
connect to them all.
5. Select the operator that you wish to use in the future.
If the unit is not able to connect to the carrier that you have selected next time, it will fall back to automatic
selection.
All specifications are liable to change without notice. E&OE. Copyright 2012
14
Using the unit and commissioning
3.4
External Antennas
The Dataflex has an integral antenna. The system has been designed to gain optimum signal strength to the
mobile phone network but it is possible to use an external antenna. If you are in an area of poor signal strength, or
mounting the unit inside a metal enclosure then you may need to connect an external antenna. If using an external
antenna then select this option when programming or use the menu option to enable.
Special fittings for the external antenna
The SMA connector that is present on the board usually requires a mating connector that is too large to fit
through the standard M12 cable glands that are supplied. We can provide a M12 to M16 gland adaptor that
allows fitting of this.
4
Using the unit and commissioning
4.1
How it works
Unit Asleep &
modem off
Wake up interval powers the
sensors and takes
readings
Transmit interval (or upon alarm) it
powers up
Unit Asleep &
modem off
The wakeup interval and transmit intervals operate independently. So it is possible to wake up and check the
sensors many times per day, but only transmit far less frequently.
Between each wake up interval and each transmit interval, the unit is effectively shut down to minimise the
power required. During this time, no communication (SMS or GPRS) will be possible to or from the unit. The
only exception to this is if you have configured polling mode, where the modem is continuously powered.
4.2
Using the menus and buttons
Up
Go back a menu
Select the highlighted
level
option
Down
Use the arrow buttons on the front of the display to navigate the menus. When wanting to leave a menu
selection, or return to the previous menu, you will need to press and hold the left button.
Multi-tasking - The Dataflex can only do one thing at once, and there are times when it may be taking actions
in the background. For example if you have Idle set to 1 in the ‘system configuration’ command then at power
up the unit will be setting up the gsm modem in order to make it pollable and you may find it is a little slow to
respond to any button presses.
All specifications are liable to change without notice. E&OE. Copyright 2012
15
Using the unit and commissioning
4.2.1 Menu structure and functions
Channels
Read Now
Read Now
Info
Thresholds
Notes
Output 1 - 2
State
Info
Temperature
System
Get Config / Signal
Phone Book
Unit Info
Intervals
GPRS Settings
Antenna
Carrier
SMS
Selection
Acknowledge
SIM Activation
GSM Information
ENS State
Autoconfig
Display
LCD
Errors
Orientation
Last Transmission
Statistics
Firmware
Version
Calibration Values
Update
Force Transmit
Safe Shutdown
About
All specifications are liable to change without notice. E&OE. Copyright 2012
16
Using the unit and commissioning
Option
What it does
Read Now
This allows the sensor to be powered up and read. A number of other real time
measurements will be read out which will help setting up the sensor (Vo = Voltage Out,
Vin = Voltage on input, Iin = Current on input, A/D = raw analogue to digital value)
Info
Displays the various settings relating to the input selected
Thresholds
Displays each of the high and low thresholds that has been set on the channel
Notes
Displays any notes that have been set on that channel
State
Displays the current state of the output
Info
Displays the current configuration of the output
Temperature
Displays the Internal temperature of the Dataflex
Get Config / Signal
Powers on the modem and checks for SMS messages. Waits for 60 seconds after
powering on. Also shows the network / carrier that it is connected to and the signal
quality. The signal quality is a value from 0 to 31, with 31 being the best and zero being
the worst. We recommend a signal of 10 or better for GPRS connections.
Phone Book
Displays the phone numbers that are programmed into the device
Unit info
Displays most of the system programmable parameters
Intervals
Displays the timings that have been programmed
GPRS Settings
Displays the GPRS settings on the unit
Antenna
Allows selection of the internal or external antenna to be used. This setting cannot be
changed remotely and must be set using this option.
Carrier Selection
This option boots the modem and performs a carrier scan. It then presents the list of
available operators to choose from. Selecting one causes it to attempt to connect to that
carrier in the future, though does not guarantee success.
SMS Acknowledge
The SMS acknowledge option, if enabled, means that each SMS received will have a
SMS sent to the originating number. This message will either confirm successful receipt
of the message or a description of the problem with the message. When the unit goes
back into run mode (LCD off), this will be automatically disabled.
SIM Activation
Allows the modem to be kept powered for a fixed period of time - this is useful when
SIM cards need to be activated.
GSM Information
This shows various information about the network and SIM card.
ENS state
ENS is ‘Enhanced Network Services’. This is not normally required and should be left
disabled unless problems with roaming SIMs are found.
Autoconfig
This allows the ‘autoconfig’ flag in the Hycontrol protocol to be set to on, indicating a
configuration is required.
Display Errors
Makes all errors visible on the LCD when encountered, including non-critical issues.
This can be especially useful when troubleshooting connectivity problems.
LCD Orientation
If you wish to mount the unit at a specific angle, you can adjust the orientation of the
screen here.
Last Transmission
Displays various information relating to the last transmit, such as data transmitted and
received.
Statistics
Displays a lot of statistics about the unit. Some of these statistics are not used.
Version
Shows the version number of the firmware, MCU revision and other various details
Calibration Values
This shows a complete list of the factory set calibration values
Update
Used to enter the USB bootloader mode
Force Transmit
This will initiate the transmit process. It will give an error if the unit does not have
All specifications are liable to change without notice. E&OE. Copyright 2012
17
Using the unit and commissioning
enough settings entered to complete the process.
Safe Shutdown
If the unit is in polling mode, you should use this option before disconnecting the power
About
Displays information about the Dataflex
4.2.2 Outline of operational modes
There are four modes that can be configured for the Dataflex to run in - these change how the Dataflex
behaves between transmits and when it is connected to the GSM network. It is configured under the ‘system’ tab
using the config tool or using the ,2, (system) command if configuring manually.
Mode
What it does
Normal (0)
The modem will power down between transmit intervals. During this time it will be
unable to receive any SMS messages, GPRS communications or connect to any
network.
GPRS Pollable (1)
The modem will idle between transmit intervals and be pollable using GPRS.
Unit auto detects if internal battery is used and will default to 0 if this is the case to
optimise battery life. It will be able to receive both SMS messages and GPRS
communications and it will always be connected to a network.
SMS Pollable (2)
Modem will idle between transmit intervals and be pollable using SMS only. No GPRS
capable SIM is required for this to work correctly.
SMS Pollable (3) with
transmit
Modem will idle between transmit intervals and be pollable using SMS only. No GPRS
capable SIM is required for this to work correctly. It will also initiate a transmit upon
power on. This may be useful as an indicator of when the unit loses power
All specifications are liable to change without notice. E&OE. Copyright 2012
18
Using the unit and commissioning
4.2.3 Transmission Process - Flow Chart
Both the log and alarm process follow the same process for transmission. The blue diamonds are complete processes
that can be found separately.
Transmission is
cancelled, error
message displayed
Transmission
Triggered
No
Are there any backup
GPRS settings?
No
Are there any
GPRS or SMS
settings available?
Yes
Yes
Power Up Modem
(Typically < 60
seconds
Load Backup
settings into Normal
memory
Transmission is
cancelled, error
message displayed
No
Is a SIM inserted?
Transmission is
cancelled, error
message displayed
No
Retry for 300
seconds. Successful
network connection?
Yes
Set up modem
Is it connected
to a network?
No
Yes
Are any GPRS
settings programmed?
Yes
Yes
No
Follow ‘GPRS
transmit’ process.
Successful?
Yes
Yes
No
Are any SMS settings
programmed?
Transmission
Complete
Yes
Follow ‘SMS
transmit’ process.
Successful?
No
No
Set ‘Failed GPRS
transmit flag’ (retry
in 15 minutes)
All specifications are liable to change without notice. E&OE. Copyright 2012
Transmission
is
cancelled, error
message displayed
19
Using the unit and commissioning
Follow ‘GPRS
transmit’ process.
Successful?
GPRS Transmit Process
Apply GPRS
settings
If GPRS attach is
not present,
request GPRS
attach
If GPRS PDP
context is not
active, request
activation
Wait 15 s
No
Greater than 300
seconds requesting
activation?
No
Is GPRS PDP context
active?
Yes
GPRS Transmit
has not been
successful
Set socket 50200
to listen
Attempt to connect
to configured
socket on gateway
No
Greater than 3
attempts connecting
to gateway?
No
Connected to
gateway?
Yes
GPRS Transmit
has not been
successful
Communicate with
Gateway
GPRS Transmit
has been
successful
All specifications are liable to change without notice. E&OE. Copyright 2012
20
Using the unit and commissioning
Follow ‘SMS
transmit’ process.
Successful?
SMS Transmit Process
Build SMS
Message and
attempt to send
Greater than 3
attempts sending
SMS?
No
Was the SMS sent
successfully?
Yes
Yes
SMS Transmit
has not been
successful
Are there any other
numbers to SMS to?
Yes
GPRS Transmit
has been
successful
All specifications are liable to change without notice. E&OE. Copyright 2012
21
Using the unit and commissioning
4.2.4 Meanings of Icons
Icon
What it means
Going into polling mode
In polling mode
Failed to get into polling mode. Waiting for 15 minutes before retry
In polling mode but temporarily disabled because user is using the menu
USB is connected
Device is in SIM update mode. This means the modem will be kept powered on for a fixed
period of time, in case you are waiting for a SIM update to come through.
This is the signal strength indicator. This ranges from five flat lines (no signal) to 5 bars
increasing in height.
This replaces the signal strength indicator when the modem is switched off. It means that
the modem is fully powered off and that no communications to or from the network can
currently be made.
4.3
Important notes about how the Dataflex operates
SIM updates
If the unit is in polling mode then it will automatically receive sim updates. Options are available from the
system menu to force the unit into a sim update mode for varying lengths of time, as well as the facility to view
the log of received updates (though please note these messages are inconsistent and cannot be relied upon please refer to your network provider to verify if relevant updates have been delivered to the device.
Timekeeping
All specifications are liable to change without notice. E&OE. Copyright 2012
22
Using the unit and commissioning
The Dataflex has 3 potential time sources. The first is manual setting of the time - this can be set using the
config tool under the tools menu and ‘set clock to PC time’. If you wish to set it using a command (locally or
remotely), see the ,0, command in the ‘configuration commands guide’. The second method is using NITZ this is when the network provides the time for you. It is only supported on some networks, so it cannot be relied
upon if many different networks are used. The third method is being set by the GPRS gateway you are
connected to. The GPRS gateway will always take priority over other methods if set.
Network selection
There are two factors that influence the network selection
If you have chosen ‘carrier select’ and have actually selected a network to operate on. When in this
mode, it will attempt to connect to the network that you have selected when powering on the
modem. If it is unable to connect for any reason, it will fall back to the automatic selection that is
dictated by the SIM card.
The SIM card - This has a table (the PLMN table) built in that dictates which networks it is allowed
on. In automatic mode, it will follow whatever data is present in the table.
4.4
Types of Digital Inputs
Normal
This sampling method occurs when you have at least one channel configured as analogue input in addition to at
least one digital. It will wake up at each wakeup interval and sample both analogue and digital inputs in the same
way a normal analogue input is sampled. This will take a longer period of time, so battery life must be considered
if checking very frequently (once per minute for example).
Quick
If only digital inputs are configured then it will use this sampling method. Every wakeup interval it will very
quickly sample the state of each input, taking a few milliseconds per input. Because of the dramatically reduced
sample time it will use far less power if sampling frequently.
Instant
These only occur when digitals are programmed on channels 5 - 9 using the expansion board. These will be
continuously monitored by the expansion board.
4.5
Before you start
Please make sure you have the following to hand
4mm Allen key
A SIM card with at least the ability to send a text message (see 3.3)
A battery or appropriate power source (see 3.2.1)
4.6
General
With the power connected press either the right or the down button to ‘wake the unit up.’ Enter the PIN (default
= 1234) followed by the right arrow. Navigate around the menu. Use the menu to check signal strength, look at
inputs, check the configuration and much more. Some of the common uses for the display are:
All specifications are liable to change without notice. E&OE. Copyright 2012
23
Using the unit and commissioning
Checking the signal strength (System > Get config / signal)
Select external antenna (System > Antenna
Checking the readings from the sensors (Channels > Channel # > Read Now)
Rotating the display (System > LCD Orientation)
The complete list of functions available through the menus can be found in section 4.2.1
4.7
Configuration
There are three methods that can be used to configure a Dataflex. These are:
Local configuration using a computer and USB connection (recommended)
Using SMS messages
Remotely via GPRS (requires a pre-existing and functioning config)
All three methods are based around the same command structure that can be found in the separate guide
‘Configuration commands specification’. The recommended method for sending these commands is to use a
USB connection and the Dataflex config tool (software that runs on your computer).
4.8
Configuration tool software
The following guide shows the recommended method of configuring the Dataflex, using a computer and USB
connection. It is strongly advised to follow this method unless you are very familiar with the Dataflex.
4.8.1 Installation of the config tool and driver
NOTE: YOU CANNOT USE THE MENU ON THE METRON 2 TO CONFIGURE THE DEVICE - YOU HAVE
TO EITHER CONNECT VIA USB OR SEND IT TEXT MESSAGES
Please download the installer package from the Hycontrol website or request it from
[email protected]
1.
2.
3.
Run the installer file that you have been sent or downloaded
Follow the instructions - a shortcut on the desktop will be created on the desktop when installed
If installing a newer version of the installer, there is no need to remove the old one first.
Installing drivers
If using the Dataflex with a new laptop for the first time
1.
2.
3.
4.
5.
6.
7.
8.
Open device manager (go to start menu and search for ‘device’ in the text box)
Power on Dataflex
Plug in USB cable
It should appear as a new device (usually SERIAL DEMO or similar).
Wait for 30 seconds or until loading light on your laptop has stopped flickering
Right click on the ‘Serial Demo’ device and choose update software
Follow instructions and if asked, choose the option to select the driver to install
Choose the driver in ‘Program Files/Dtaaflex Config Tool/drivers’ folder
Troubleshooting when using config tool
All specifications are liable to change without notice. E&OE. Copyright 2012
24
Using the unit and commissioning
If you are experiencing any connectivity issues, follow this procedure
1.
2.
3.
4.
5.
Disconnect USB, power to the Dataflex and close the Dataflex config tool
Double check that there are no other copies of the Dataflex config tool running
Plug in power
THEN plug in USB
THEN load the Dataflex config tool, pressing ‘Scan for Ports’ once loaded.
4.8.2 Using the config tool
You should only run the config tool once you have plugged in the Dataflex while powered on and have
successfully installed the driver (see 4.8.1). Double check that there is not more than one copy of the Dataflex
config tool running at any time - it will not work correctly if multiple copies are accidentally run.
After loading the config tool, you will be presented with the home screen with the system tab selected. The first
thing to do is establish the connection to the Dataflex by pressing ‘Scan Ports for Dataflex’. If you encounter
problems, please refer to the troubleshooting guide.
The config tool is split into four separate tabs that control the various aspects of the Dataflex. You should start at
the leftmost tab and work to the right.
The buttons ‘read device’ and ‘program device’ allow the configuration to either be read from the Dataflex, to
replace the parameters listed in each box, or send each parameter in each box to the Dataflex. When you are
satisfied with the configuration, using the ‘file’ menu on the top left allows you to save the complete
configuration from all available parameters as a single file (.csv file).
System configuration
All specifications are liable to change without notice. E&OE. Copyright 2012
25
Using the unit and commissioning
For each tab there is a breakdown of configurable options in the following section.
Option
What it does
Unit Name
This is the name of the unit - it should ideally uniquely identify it
Transmission reference time
This is the time of the day that it will synchronise and transmit using. The hours
should be entered in the 24 hour format.
Transmission interval
How often in minutes the unit will take readings and then transmit them. If set to
zero unit will transmit every day. If not evenly divisible into 24 then unit resets at
the time defined by the HH MM / variance part of this command. Unit will not
transmit if the user is working with the menu.
Transmission variance
The variance of the transmit time each day - e.g. If this is set to 60, it will
randomly select a time + / - 30 minutes of each transmit hour and minute for
transmission. Must be less than the transmit interval
Sensor wake-up interval
How often in minutes the unit will power the sensors and take a reading.
Applies only to analogue inputs. Unit will not take regular readings if the user is
working with the menu. The readings will be compared to alarm thresholds and if
required will transmit them.
All specifications are liable to change without notice. E&OE. Copyright 2012
26
Using the unit and commissioning
Temperature transmission
This dictates if the temperature is transmitted along with the data using either
GPRS or SMS
Antenna selection
You can choose between the internal antenna (default) and the use of an
external antenna, using the SMA connector.
Modem power scheme
The modem that is built in to the Dataflex uses additional power - you can choose
how the modem is configured when the unit is not transmitting. There are five
options:
‘Power off between transmit events’ - modem will power down between transmit
intervals.
‘Always on (GPRS pollable when idle)’ - modem will idle between transmit
intervals and be pollable using GPRS. This should be used if GPRS
communications are used and polling is required.
‘Always on (SMS pollable when idle)’ - modem will idle between transmit
intervals and be pollable using SMS only. It should not be used if GPRS
communications are used and polling is required.
‘Transmit on power up’ - modem will idle between transmit intervals and be
pollable using SMS only, it also transmit upon power on.
‘modem will idle between transmit intervals and be pollable using GPRS, it will
also transmit upon power on.
Unit autodetects if internal battery is used and will default to ‘power off between
transmit events’ if this is the case to optimise battery life.
Read on wakeup
‘Go to pin screen when any button pressed’ - When a button is pressed to wake
the unit up, the PIN number will be displayed. Pressing left will not activate
anything.
‘Read sensors if left button pressed’ - After pressing a button to wake the unit
up, you can then use the left button to read each of the sensors individually. It
may be useful for allowing visibility of the reading without giving permission to
change settings in the menu.
Log readings every
If you wish to data log, you can use this feature. Every X sensor wakeups will
record a reading and store it in memory. The data will be sent upon the next
transmit.
Data Formatting
Dictates the formatting of SMS messages sent. If sending to a mobile phone, use
‘Human-readable text message’ otherwise use ‘Gateway’.
Input configuration
The inputs tab allows each input to be configured as an analogue or digital input. Channels 5 - 9 can only be
configured as pulse or digital when there is a pulse count board plugged into the unit. For each type, the
parameters are explained on the following pages.
All specifications are liable to change without notice. E&OE. Copyright 2012
27
Using the unit and commissioning
The common variables for each input, regardless of configuration are:
Option
What it does
Input channel name
A unique name for the channel that identifies what it connected to it, for example
‘pump house’
Input channel notes
This can be used to set any notes that may be useful for future use.
Alarm to phone book entries
These correspond to the phone numbers you can set under the
‘communications’ tab. If you tick a box, it will attempt to send a SMS message to
the phone number you have selected when it transmits.
All specifications are liable to change without notice. E&OE. Copyright 2012
28
Using the unit and commissioning
The variables that can be set for the Analogue channels are:
Option
What it does
Excitation voltage
The voltage that will be sent to the sensor channel +V connection when the
sensor is being read. This can be 3.6V, 5V or 21.6V.
Settle time
The length of time the sensor is powered before the reading is taken. Longer
times lead to shorter battery life.
Low value (zero)
Engineering value for low (zero) reading. Depending on configuration, this value
will be used when the input is 0mA (when configured to 0-20mA), 4mA (when
configured as 4-20mA) or 0V (when configured as 0-10V)
High Value (span)
Engineering value for high (zero) reading. Depending on configuration, this value
will be used when the input is 20mA (when configured to 0-20mA or 4-20mA) or
10V (when configured as 0-10V)
Input type
Selects whether the input pin (IN connection) mode and scaling is set up for 010V, 4-20mA or 0-20mA
LO-LO alarm threshold
LOLO alarm value (can be overwritten by value1 of Command 3(l) - see section
2.9 for more details)
LO alarm threshold
LO alarm value (can be overwritten by value2 of Command 3(l) - see section 2.9
for details)
HI alarm threshold
HI alarm value (can be overwritten by value9 of Command 3(h) - see section 2.8
for details)
HI-HI alarm threshold
HI alarm value (can be overwritten by value9 of Command 3(h) - see section 2.8
for details)
Alarm call out delay
Callout delay (in minutes) - how long an alarm condition must occur for before
the alarm is sent.
Hysteresis
This value, in the engineering units set creates a ‘window’ around each threshold
set on the channel. It is used when you have a noisy input that may trigger a
threshold multiple times if around a threshold value. It should be set to a value
that is larger than the maximum ‘noise’ expected on the input. For example,
sloshing in a water tank could be eliminated using this.
All specifications are liable to change without notice. E&OE. Copyright 2012
29
Using the unit and commissioning
In total, there are 10 low thresholds (if the input goes from above a value to below a value) and 10 high
thresholds (if the input goes from below a value to above a value). Two of each of these can be programmed
without using the ‘Advanced analogue settings’ - these are the ‘LO-LO, LO, HI and HI-HI’ settings. If you would
like more than two of each kind of threshold, up to 10 can be set by clicking on the advanced analogue settings
button.
All specifications are liable to change without notice. E&OE. Copyright 2012
30
Using the unit and commissioning
Dynamic log intervals allow the rate that transmit and wake-ups occur to change depending on a single
threshold. Only threshold number 1 is used from either the high threshold set or the low threshold set. When
this threshold is triggered, the values for ‘new transmit interval’ and ‘new wakeup interval’ will be used instead.
All specifications are liable to change without notice. E&OE. Copyright 2012
31
Using the unit and commissioning
Linearisation should be used when the sensor reading against actual measurements is non-linear (for example,
the storage containers shape changes area throughout its height)
All specifications are liable to change without notice. E&OE. Copyright 2012
32
Using the unit and commissioning
The variables that can be set for the Digital channels are:
Option
What it does
Threshold
Threshold voltage, measured in millivolts - the example is 2.5V. On an
expansion port any value other than 0 sets the threshold to 1 (ON)
Alarm Trigger Event
‘Low to high transition only’ - When an input goes from below the threshold to
above the threshold, then it will trigger the alarm
‘High to low transition only’ - When an input goes from above the threshold to
below the threshold, then it will trigger the alarm
‘Any transition’ - When an input crosses the threshold in any direction, it will
trigger the alarm
Low to high event message
The text entered for this parameter will be displayed on the RTU when the input
is in an ON (1) state. The RTU will transmit ON to the host system which then in
turn will decide what to display to the remote user.
High to low event message
The text entered for this parameter will be displayed on the RTU when the input
is in an OFF (0) state. The RTU will transmit OFF to the host system which then
in turn will decide what to display to the remote user.
Alarm call out delay
Callout delay (in minutes)
All specifications are liable to change without notice. E&OE. Copyright 2012
33
Using the unit and commissioning
The variables that can be set for the Pulse channels are:
Option
What it does
Input type
‘Reset’ - when the unit has transmitted the readings, it will reset the pulse count
value
‘Continue counting’ - when the unit has transmitted the readings, it will continue
on from the current pulse value
Prescaler
The number of counted pulses is divided by this value. So if the prescaler = 2,
100 pulses is reported as 50 units.
Units
The engineering units that you are measuring each count in.
All specifications are liable to change without notice. E&OE. Copyright 2012
34
Using the unit and commissioning
Output configuration
The outputs can be run in two different modes:
1/ Manual - This is when each output is manually controlled. When in the mode, the only thing you have to set is
the name of the output. The output can be controlled by sending the unit a text message:
PIN,[output name],ON,
Would switch the output on.
1234,[output name],OFF,
Would switch the output off.
2/ Automatic - You can program the unit to switch on and off the outputs by associating them with a specific
threshold on an input.
Option
What it does
Input number
The input number of the threshold you wish to associate the output with
High or low
If the alarm that you wish to monitor is a ‘Hi alarm’ or ‘Lo alarm’
All specifications are liable to change without notice. E&OE. Copyright 2012
35
Using the unit and commissioning
Alarm number
The number of the threshold that you wish for it to change state on.
You can override the automatic control of an output by sending one of the manual commands to the unit. If you
then wish to return it back to automatic, you can do this by sending:
1234,[output name],AUTO,
Would hand control back over to the threshold rule specified in [reference] if a rule has been configured.
When breaching the threshold the relay would be switched on, and then switched off when the alarm clears,
following the rules configured for call out delay and hysteresis. The state of the relays can be manually
overridden by sending one of the manual control commands, under this circumstance the threshold control is
then switched off. The threshold control of the output can be switched back on by sending the AUTO command.
Communcations configuration
The communications tab sets all of the options for communicating using SMS and GPRS.
Option
SMS settings phone book
What it does
Each of these can contain a phone number that can be used for communication.
When you program an input, you can choose which of these phonebook entries
All specifications are liable to change without notice. E&OE. Copyright 2012
36
Using the unit and commissioning
to communicate to.
GPRS settings
You should tick the ‘Use connection’ box if you wish to use a GPRS connection.
Gateway protocol
You should set this to the protocol you wish to use
‘Gateway’: should be used with ‘SpotOn’
‘Bulk Protocol’: should be used with Dataflex View or compatible gateway
‘XML’: should be used with an XML compatible gateway
APN
Access point name. This should be provided by your SIM card provider. It will not
work correctly without this being correct
GPRS user name
The username that was provided with your SIM card
GPRS password
The password that was provded with your SIM card
Gateway address
The web address or IP address of the server that you are attempting to contact.
For example 24.24.24.24 or gprs.yourdomain.com
All specifications are liable to change without notice. E&OE. Copyright 2012
37
Using the unit and commissioning
4.8.3 Driver Issues
Please refer to the troubleshooting section for more information (section 7)
4.8.4 Updating the firmware using USB
It is possible to update the firmware over USB. Unless there is a unknown bug or a new feature has been
released, it is not advised to do this. Please contact Hycontrol for more information.
All specifications are liable to change without notice. E&OE. Copyright 2012
38
Using the unit and commissioning
4.9
Important information
4.9.1 Decimal places and scaling
The Dataflex is designed scale the input readings according to your high and low scales. These high and low
scales can be set to the following limits:
Without decimal place: -999999 to +999999
With decimal place: Six numeric digits, plus an optional negative symbol and a decimal place. For example:
-0.00123
1234.00
-1.23456
99999.9
Are all valid numbers that can be used in the Dataflex.
4.9.2 Cell ID
The Cell ID is a unique identifier of the cell that the Dataflex is connected to. When the Dataflex is programmed to
report the Cell ID, it will send this unique ID as channel 99, via SMS or GPRS. This code can be used to look
up the location of the Cell that the Dataflex is connected to, to give you an idea of its approximate location.
To look up the location using the Cell ID, we recommend you download a smartphone app to do this. One that we
recommend (free) is iCell ID for iOS devices. You just need to enter the Cell ID into the app and it will load the
location of the cell it is connected to.
4.10 Commissioning Guidelines
If you are installing a Dataflex on-site, it is critical that the following information is kept safely once complete:
Location and site name
The SIM card provider, IMSI number on the back of the SIM card and the phone number
Any sensors connected, including part numbers
Site contact information, if any.
It will help everybody tremendously if this information is available.
All specifications are liable to change without notice. E&OE. Copyright 2012
39
Example Configurations
5
Example Configurations
5.1
How to calculate values for sensors
5.2
Example 1
Four 4 - 20mA sensor, once per day transmit checking every 12 hours
Four analogue inputs, each 4-20mA
1234,1,+447111111111,
1234,2,Dataflex_demo,12,0,0,359,359,1,0,0,0,0,0,0,
1234,3,1,a,tank1,2,2,litres,0,100,0,0,0,0,0,0,1,
1234,3,2,a,tank2,2,2,litres,0,100,0,0,0,0,0,0,1,
1234,3,3,a,tank3,2,2,litres,0,100,0,0,0,0,0,0,1,
1234,3,4,a,tank4,2,2,litres,0,100,0,0,0,0,0,0,1,
Change the phone number in the 1234,1,... command to your own. The unit will power the sensors every 6
hours and send the readings to you. Each sensor will be powered for 2 seconds at 21.6 volts.
Connect the 2 wires sensors to +V and IN.
0V
+V
IN
All specifications are liable to change without notice. E&OE. Copyright 2012
40
Example Configurations
5.3
Example 2
4 digital inputs, each volt free contacts
1234,1,+447111111111,
1234,2,Dataflex_demo,12,0,0,1439,1,1,0,0,0,0,0,0,
1234,3,1,a,alarm1,1,1, ,0,100,0,20,0,40,0,0,0,
1234,3,2,a,alarm2,1,1, ,0,100,0,20,0,40,0,0,0,
1234,3,3,a,alarm3,1,1, ,0,100,0,20,0,40,0,0,0,
1234,3,4,a,alarm4,1,1, ,0,100,0,20,0,40,0,0,0,
1234,3,1,s,1,1,1,1,
1234,3,2,s,1,1,1,1,
1234,3,3,s,1,1,1,1,
1234,3,4,s,1,1,1,1,
Change the phone number in the 1234,1,... command to your own. You can add 3 more numbers if you like by
using:1234,1,+447111111111, +447111111112, +447111111113, +447111111114,
Every minute the device will apply 5 volts to +V for each input (one at a time).
The device will send a text message once per day as a health check. To stop this change the ‘1439’ in the
1234,2, command to ‘0’.
The inputs are configured as voltage, scaled 0 to 100 so when the circuit is made the input is read as 50.
For each channel there are 2 thresholds shown - a LOW alarm at 20, so when the circuit opens and the
reading drops to 0 this alarm is breached and a text sent. There is also a HIGH alarm set at 40 so when the
circuit is made the reading increases to 50 and this alarm is breached and a text message sent.
Connect the volt free contact to +V and IN.
All specifications are liable to change without notice. E&OE. Copyright 2012
41
Expansion Board (Pulse and Instant Digitals)
6
Expansion Board (Pulse and Instant Digitals)
com
9
8
7
6
5
The expansion board can be fitted (supplied separately) to allow an additional five channels of digital or pulse
connections. These channels can be configured as either, with the digitals allowing ‘instant wakeup’ of a transmit.
Wiring
Each input is designed to have a switch or volt free contact connected between the common (com) and the relevant
numbered input (5 - 9). Voltage or current inputs should not be used. Do not wire any other input type into these, as they
have not been designed for it. It is recommended to avoid using heavy gauge wiring because of the limited space
available.
Configuration
Each input on the expansion board should be configured in the same way as a normal digital input. Only the following
commands and sub-commands can be used in conjunction with the expansion board channels.
‘D’ (digital configuration) command
‘P’ (pulse configuration) command
‘X’ (disable channel) command
‘S’ (alarm number configuration) command
‘N’ (input notes) command
‘H’ (high level alarm configuration) command
‘L’ (low level alarm configuration) command
‘I’ (dynamic logging interval configuration) command
There are a few important notes that must be considered when configuring these extra channels
When configuring as a digital channel, any value other than zero as a threshold will be automatically changed to a value of
1 (the ON state). Thresholds should either be configured as 1 or 0.
When configuring as a pulse channel, it will count each change in level (not each cycle) and the total will be divided by the
value that has been configured for the pre-scaler.
Installation
The expansion board should simply be installed by plugging it into the expansion port, marked Ex. The jumper on the
expansion board enables the LED indicators if plugged in. The jumper should always be removed when powering the
unit from a battery, as these LEDs will use significant power.
All specifications are liable to change without notice. E&OE. Copyright 2012
42
Troubleshooting
7
Troubleshooting
7.1
Frequently Asked Questions
Why is my driver not installing?
If your computer fails to find the driver automatically, please follow the manual driver install process. It should
prompt you to select a driver. Choose ‘manually select driver’ or ‘have disc’ (this will vary depending on
operating system).
Why can’t I find the Dataflex COM port?
The COM port should appear in device manager. If you do not see the COM port then you should instead see
The Dataflex is appearing as the Dataflex ATEX in device manager, why?
The Dataflex uses the same driver as the Dataflex ATEX. Because of this, it will appear as ‘Dataflex ATEX’
Why is my alarm not being triggered when it should?
Alarms are triggered when thresholds are crossed. Common reasons for no alarm triggering are:
It has not yet had one wakeup interval (alarm becomes active after the first wakeup)
The threshold has been programmed on the incorrect channel
It has not actually crossed a threshold (check reading using ‘read now’)
Why is the progress bar stuck on 70%?
When it reaches 70%, it has connected to the network successfully and is trying to establish a connection to the
remote server. Part of this include GPRS attach and context activation. These processes sometimes require a
retry. Additionally the server may be unreachable if there are problems elsewhere. In general, it will take longer on
the first few transmits. Please be patient as all of the previous described processes take time. If the unit
cannot establish a connection it will fail and present an error to you.
Why is my pulse not being counted?
Pulses are only supported on the expansion card, channels 5 - 9. Please double check the wiring of the
expansion card. Additionally, if you have set a pre-scaler, you will need to account for this when counting
pulses.
My sensor is already fitted, powered and part of a 4-20mA loop. Can I still use it with the Dataflex..?
Yes, wire to IN and 0V.
Can I fit the Dataflex in an explosive environment?
No - the Dataflex needs to be mounted in a safe area and if you are connecting to sensors in potentially
explosive areas you will need to use suitably approved barriers. Please do not proceed unless you understand the
regulations surrounding explosive environment and electrical equipment.
I have no signal, what can I do..?
Move the unit or fit an external antenna. Make sure you are NOT using a 3G only SIM
All specifications are liable to change without notice. E&OE. Copyright 2012
43
Troubleshooting
Can Hycontrol help in supplying an external antenna..?
Yes - please contact us to discuss your requirements. If we do not have stock we can hopefully help by
recommending a suitable supplier.
The connector on my external antenna is too big to fit through the gland on a Dataflex. What can I do?
A standard SMA connector will not fit through the supplied M12 glands. We can supply a kit that allows an M16
gland to be fitted without drilling a new hole.
I want to mount my Dataflex inside a metal enclosure. Will it still work?
It may do. Some radio waves could pass through the metal but it will likely reduce the signal significantly. It is
best to mount the unit outside the enclosure or use an external antenna.
I am using an AT&T SIM card in the USA - what should my ENS settings be?
AT&T have a set of features called ENS (Enhanced Network Services). By default this is disabled, but if for any
reason you are using are having problems and using an AT&T SIM, you may want to change ‘ENS State’
(under System menu) to enable.
How do I find out what to put in the GPRS settings?
This depends on your SIM card and where you are sending your data. If you are using SIM cards or data
collection services from Hycontrol then please contact us and we will provide you with the details. Generally your
SIM provider will have the APN, username and password required.
What data collection options do you have to work with the Dataflex?
You can send data either directly to your mobile phone or a computer. We have a hosted data collection
service available as well as solutions for interfacing to SCADA systems. Please contact Hycontrol to discuss your
requirements further.
Can I convert my Dataflex/S to work from an integral battery?
No. Please contact us to discuss the options available to you.
Can I convert my Dataflex/SSM to work from a power supply?
No. Please contact us to discuss the options available to you.
Do you have any options so I can run my Dataflex from a solar panel?
Yes - we have available some elegant, affordable and well proven solar options with intelligent charge
regulators that maximise performance. Please contact us to discuss your requirements.
How do I know that the Dataflex has received a SMS message?
When the Dataflex receives a text message, a letter icon will appear at the top of the screen followed by a
double beep. This double beep indicates if the text message is in a valid format or not by having a higher pitch
note first (invalid) or second (valid). An error will appear on the screen telling you about the problem if it is
invalid.
All specifications are liable to change without notice. E&OE. Copyright 2012
44
Troubleshooting
7.2
Error messages
The messages that the unit can produce
Error
Details
Channel X disabled
You have attempted to access a channel that has not been configured.
Modem power up failure
The modem cannot power up. This may be because of a hardware
problem or a power supply issue. Please contact us.
No response from modem.
The modem is failing to respond properly. Please contact us.
No GPRS or SMS settings configured
The settings required for the action you are taking have not been
programmed or are incomplete.
Input not configured to phone book or bad It is unable to send an SMS to the number that you have configured.
phone book. Cancelled.
Unable to connect to network. Check SIM
activation and Carrier Selection.
It is unable to connect to the carrier. You should check that the SIM is
activated, the network is operating normally and you have a valid
choice in ‘Carrier Selection’ selected.
Unable to send SMS, check signal
strength and SIM credit
There was an error when attempting to send an SMS. This could be a
very poor signal, a busy network, insufficient credit or the SIM may not
allow sending of SMS messages.
Unable to get GPRS context activation.
Check GPRS settings and/or try again.
It could not activate the GPRS function - you should double check all
GPRS settings
Unable to get GPRS attach
It could not get a GPRS attach - you should double check all GPRS
settings
Unable to connect to server, check GPRS It could not contact the server you have specified. This could be down
address
to a server issue (not accessible) or something relating to web access
from the SIM.
Unable to connect to server, check GPRS As the above issue, except it has noticed that there is low signal
address and signal strength
strength.
Trying to get into polling mode. Not
allowed.
Usually occurs when you attempt to go to ‘Force Transmit’, but the unit
is attempting to enter polling mode. Please wait a little while until the
‘P’ icon has a box around it before retrying.
All specifications are liable to change without notice. E&OE. Copyright 2012
45
Troubleshooting
7.3
Other errors
When trying to diagnose problems, you may find it useful to enable ‘Display Errors’. You can enable this in the
menu by going to System -> ‘Display Errors’ and choosing enable. When this is enabled, any problems that are
encountered by the modem will be displayed on the screen too. The format of the message will be
‘X - please refer to manual’
When this message appears, it is coming directly from the modem. It should be self-explanatory, but if you
would like more information, please contact us. The following errors can be found.
Errors
Errors (2)
phone failure
generic undocumented error
No connection to phone
wrong state
phone-adaptor link reserved
wrong mode
operation not allowed
context already activated
operation not supported
stack already active
PH-SIM PIN required
activation failed
SIM not inserted
context not opened
SIM PIN required
cannot setup socket
SIM PUK required
cannot resolve DN
SIM failure
time-out in opening socket
SIM busy
cannot open socket
SIM wrong
remote disconnected or time-out
incorrect password
connection failed
SIM PIN2 required
tx error
SIM PUK2 required
already listening
memory full
invalid index
ok
not found
connect
memory failure
disconnect
text string too long
error
invalid characters in text string
wrong state
dial string too long
can not activate
invalid characters in dial string
can not resolve name
no network service
network time-out
can not allocate control socket
network not allowed - emergency calls only
can not connect control socket
network personalization PIN required
bad or no response from server
network personalization PUK required
not connected
network subset personalization PIN required
already connected
All specifications are liable to change without notice. E&OE. Copyright 2012
46
Troubleshooting
context down
network subset personalization PUK required
no photo available
service provider personalization PIN required
can not send photo
service provider personalization PUK required
corporate personalization PIN required
generic undocumented error
corporate personalization PUK required
wrong state
wrong mode
unknown
context already activated
stack already active
Illegal MS (#3)*
activation failed
Illegal ME (#6)*
context not opened
GPRS service not allowed (#7)*
cannot setup socket
PLMN not allowed (#11)*
cannot resolve DN
Location area not allowed (#12)*
time-out in opening socket
Roaming not allowed in this location area (#13)*
cannot open socket
remote disconnected or time-out
service option not supported (#32)*
connection failed
requested service option not subscribed (#33)*
tx error
service option temporarily out of order (#34)*
already listening
unspecified GPRS error
can not resume socket
PDP authentication failure
wrong APN
invalid mobile class
wrong PDP
service not supported
Network survey error (No Carrier)*
QOS not accepted
Network survey error (Busy)*
NSAPI already used
Network survey error (Wrong request)*
LLC or SNDCP failure
Network survey error (Aborted)*
network reject
All specifications are liable to change without notice. E&OE. Copyright 2012
47
Troubleshooting
End of user manual. This page is intentionally left blank.
All specifications are liable to change without notice. E&OE. Copyright 2012
48