1
Contents
RIDER
Introduction
......................................................................................................... 3
Technical description
..........................................................................................
3
Adjusting your Rider
...........................................................................................
4
The alternative methods of emergency parachute connection
Speed systém
Towing
6
...................................................................................................
10
................................................................................................................
10
Tandem flying
.....................................................................................................
Harness check before take off
Maintenance and repairs
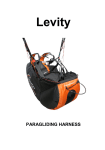
PARAGLIDING HARNESS
...........................
............................................................................
10
10
..................................................................................... 10
Introduction
Particular settings
We congratulate you on your purchase of a new Rider harness. You have chosen a state
of the art product which is one of most comfortable paragliding harnesses available on
the market today.
We thank you for placing your trust in us, and hope that comfortably seated you will get
maximum enjoyment during many nice flights.
The basic setting of the angle between your back and the vertical axis.
Please devote sufficient time to setting the harness correctly. Preferably hang it on a
simulator or similar, and check it, spending long enough to simulate long periods of flight.
This gives you the opportunity, to easily try a number of different settings at one time
before undertaking your first flight.
Please carefully read this user manual and use it as a guide to adjusting the harness
properly for your size and shape; and to obtaining the most comfortable flight position. In
addition to instructions you will find a few important suggestions and tips on how to care
for, clean and use your new harness.
Adjusting of lateral straps
The Rider harness is built to comply with the high standards and demands for
paragliding harnesses.
Adjustments can be made to the lateral straps leading trough the flat buckles to your
back.
When correctly adjusted you feel only light pressure on both back and shoulder. If the
lateral straps are too loose you will feel pressure on your shoulders from the shoulder
straps. By pulling on them you change the position. If you feel pressure on your back,
release the lateral straps by pulling the loop on the flat buckles.
The manufacturer can not be held responsible for any accidents or injuries caused by
improper usage or failure to comply with this user manual.
We wish you maximum enjoyment from your discovery of this fantastic aerial sport and
of course happy landings.
Technical description
The Rider harness was developed to satisfy the demand for a modern paragliding harness, and incorporates feed-back from pilots. MAC's long experience with design and
development of harnesses combined with use of the best selected materials warranty a
combination of longevity, comfort during use and perfect flying characteristics.
Adjusting of lateral straps
Adjusting of bottom lateral straps
Adjusting of ABS straps
Adjusting of chest strap
The Rider harness is suitable for all pilots, from beginners to the more experienced pilot
who prefers a slightly inclined sitting position. The seat material provides pleasant leg
support and comfort. The harness is equipped with an 12. cm. foam back-protector with
a plastic reinforcing plate to protect against any penetrating impact. The foam protector
tapers toward the front of the seat to reduce thickness between seat and rescue system.
The harness can additionally be equipped with lateral protection with plastic plates
providing increased protection in the hip area.
The harness is produced from CORDURA, a first-rate abrasion resistant material.
The Rider harness is supplied inclusive of speed bar system and brummel-hooks, as
usually delivered on MAC paragliders
Adjusting your Rider
The Rider harness offers you several adjustment choices, making it possible for the pilot
to find his ideal position according to his size and shape. The harness is adjustable using
shoulder, back, chest and legs straps. The harness is correctly adjusted when you feel
comfortable without any pressure on shoulders or back
3
4
Adjusting of bottom lateral straps - angle of seat
The Rider harness is equipped with lateral 25mm straps leading from the mainstraps to
the bottom rear of the seat plate. Using these straps you can change angle of the seat
plate to find your preferred position. Adjustments are made with the narrower strap
leading trough the flat buckles. When they are tightened you will feel better stabilization
and support to the hips. You can release them by pulling on the buckle loop.
Attention: These straps are used solely to change the angle of the seat plate. They can
not replace the function of the main straps and for this reason there is a stop point on the
lateral straps. If you prefer a more prone position then we recommend the choice of
either the XCL or HOWGH harness.
Adjusting of shoulder straps
Adjusting of leg straps
Adjusting of shoulder straps
Adjustments can be made to the shoulder straps leading trough the flat buckles to your
shoulders.
When correctly adjusted you feel only light pressure on both back and shoulder. If
shoulder straps are too loose you will feel pressure on your back from the lateral straps.
By pulling on them you change the position. If you feel pressure on your shoulders
release the shoulder straps by pulling the loop on the flat buckles.
Shoulder straps don't slip down thanks to an auxiliary adjustable strap with a plastic clip.
Adjusting of chest strap and ABS straps
The chest strap is secured with automatic Cobra buckle. The click must be audible ! By
adjustment of the chest strap the pilot determines the sensitivity of the harness.
Adjustment of the distance between the main carabineers is made by pulling loops on
chest strap. The harness is most sensitive to weight-shift when the chest strap is
released. The shorter the distance between the main carabineers the less sensitive the
harness becomes to weight shift and the effect of the special ABS-system is increased.
By pulling the loop on chest buckle the chest strap can be released. The special ABSnarrower straps are leading from front of seat plate to the chest strap. By adjustment of
ABS straps the pilot determines sensitivity of the harness specially by use of speed
system. When they are released the harness will be not stabilized by ABS system.
Emergency parachute assembly
The Rider harness is compatible with most available emergency parachutes. The
envelope system outer container is integrated into the harness shape. The inner
container is big enough to hold a rescue canopy up to 43 m2 in size. The reserve bridle is
integrated into the harness, being attached to the shoulder straps and covered by a
tunnel on the right side of the harness. The rescue canopy must be inserted in the
original Rider inner container with attached handle and pins. You must not use an inner
container from other manufacturers.
Attention: Rescue canopies from other manufacturers must be refolded following
original instructions into the supplied Rider inner container without their originally
provided container.
Possibilities of emergency parachute connections
1. The lines of the rescue canopy are directly connected (slipped onto) the integrated
connection bridle.
2. A rescue canopy with a short bridle can be attached directly to the integrated
connection bridle. Alternatively connection can be made with a carabineer with a
minimum strength of 2000 kg.
Adjusting of leg straps
The leg straps are secured with automatic Cobra buckles. The click must be audible!
Correctly adjusted, the leg straps control the freedom of movement of the legs, before
and during take off. If the leg straps are too tight your upright position in the harness is
limited and not comfortable. If they are too slack you can have trouble sitting in the
harness after take off.
Never forget to close buckles on leg straps !
5
6
Connection 2
Connection 1,2
3.Rescue canopies with an attached long “Y” bridle can be attached to the harness
shoulder straps with two trapezoid karabiners. Ensure you place them only on the
correct loops on the shoulder straps. See picture "Connection 3".
Assembly in outer container
1. Place the Rider inner container with rescue canopy onto the outer container as shown
in the picture below. The rescue canopy bridle leads to the tunnel on the right-hand side.
The line loop of the rescue canopy is placed between the seat plate and reserve and the
handle leads to its correct place on the harness.
Attention! Other placements leads to malfunction of the system!
2. You need 50 cm of spare line to place through the loop nearer to the handle. Ensure
the correct positioning of the handle bridle between the two lateral flaps on the right side.
. Step by step lace the spare line through the holes on the lateral flaps, followed by the
rear and front flap. See picture below! Finally secure the loop using the pin nearest to
the handle. Then lace the spare line step by step through the left lateral flap, followed by
the rear and front flap. Secure this second loop with the pin furthest from the handle. The
rescue system is now installed in the harness and it remains only to tuck the end of the
front flap into the pocket on the rear flap.
Connection 3
Assembly in outer container
7
8
Speed system
The Rider harness is equipped with a speed system and includes Brummel hooks as
supplied on MAC paragliders. The speed bar lines feature stoppers preventing free
movement of the speed bar unless required. The first step of the speed bar should
maintain its position to the front after first use and be operated by foot without hand help.
Towing
The Rider harness is excellent for towing. The release system must be connected to the
same carabineers attaching the paraglider risers! To attach the release system properly,
insert the release bridle in such a way that the release itself is in front of the risers, in the
direction of flight.
Tandem flying
The Rider harness is suitable for tandem flying as passenger harness. Thanks to a well
designed leg strap system it offers an outstanding freedom of leg movement. This
facilitates an easy run during take off. If the passenger is not an advanced pilot, then
remove the emergency parachute from the harness to avoid an involuntary deployment.
Harness check before take off
Checking the Rider harness before take-off is crucial. Always check the following points:
- Is the rescue system handle attached properly?
- Are rescue system securing pins inserted correctly?
- Are all pockets closed properly?
- Make sure that each buckle is fastened properly. Check for correct fastening by pulling
on both straps leading to the buckle.
- Make sure that the main carabineers are fastened properly
Attention! Pay special attention during winter in ice or snow. Always clear any ice or
snow before fastening the buckles.
Maintenance and repairs
3. Correct assembly must be checked by a test release of the rescue system. If the
system is working then reassemble in the same way as described.
Attention! Before each take-off check the locking pins securing the outer container.
Attention! If you are unsure of the correct assembly of your rescue system ask your
dealer, or contact the MAC PARA importer in your country direct.
We suggest you have your harness checked by an authorised person once every two
years. If you have your reserve repacked, ask for a harness check. The main aluminium
carabineers must be replaced after 500 hours of use. Impacts may create undetectable
cracks that, because of continual cyclic loads, could result in structural damage. Avoid
dragging your harness on the ground and rocks etc. Protect from unnecessary
exposure to UV rays, avoid storing when damp and avoid exposure to extreme
temperatures.
Clean the harness only with lukewarm water with a light soapy solution. Use of chemical
cleaners or thinners is expressly prohibited. Keep automatic buckles clean. They may
be lubricated once in a year with a silicon spray.
The customer may not do any harness repairs or replacements of spare parts
him/herself. This can lead to limitation of functionality, or can even endanger your life.
For this reason any repair or corrections must be made directly by the manufacturer.
9
10
Technical description
Description:
Max. load:
Karabiner distance:
Weight inclusive back protection
(without rescue chute):
paragliding harness
100 kg
38-60 cm
5,1 kg
Back protection: Styrofoam protection; 12 cm with plastic plate penetration protection
Rescue system: Integrated container (envelope system) under the seat plate with a
lateral handle.
MAC PARA TECHNOLOGY Ltd.
1. máje 823
Rožnov pod Radhoštìm
756 61 CZECH REPUBLIC
tel: +420 571 842 235
tel./fax: +420 571 842 332
web: http://www.macpara.com