1
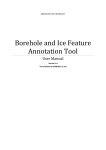
Eye Gaze Tracking System
User Manual
Greg Book -Wajid Ahmed - Hardik Dave
© 2002 University of Connecticut
Starting the Program
To start eye-gaze tracking, first start the program. The first screen you will see will direct you what
to do next.
First click the See Preview button, to begin the video stream
A preview window will appear in the middle of the screen. It may display static, and you must also
select the video capture device driver by clicking the Source button. The following dialog box will
appear.
Select the correct Video Device and the correct Video Source. Capture devices may have different
video sources, so select the one that will be used with the eye tracking system. Click Ok. Next Click
the Format button. The following dialog box will appear.
Select the video format that is effective for your CPU speed. A larger image format will be slower,
but more accurate. A smaller image will be faster, but less accurate. Choose the largest image format
that allows reasonable speed. If everything is configured correctly, you will see an image like the
following.
You should have already placed the helmet on your head, so you should see an image of your eye.
Once your satisfied that you have a decent image of your eye, click Continue and the following dialog
box will appear.
This dialog box asks you to take a snapshot of your eye as you look at the center of the screen. The
offset from this center gaze will determine the gaze projection on the screen. When you are satisfied
you have a good image of your eye, click Continue and the following screen will appear.
This dialog box asks you click the center of your eye, and then click the edge of the iris. Click
those two points in succession. This will mark the radius of the iris that will be searched for in the
subsequent images. Once your done, click Ok and another dialog box will appear.
This dialog box will stay open during the gaze tracking session. Use it to control the gaze tracking.
When you feel ready, check the Track Eye Gaze box to start the tracking. Toggle this box to track or
not. When gaze tracking is on, it will look like the following.
This screen shows the preview window, canny edge detected image, and the circle that the
computer thinks is the iris overlaid on the canny edge image. Data is also displayed in the upper left.
The little red dots are numbered and correspond to where the computer thinks the user is looking. The
video preview will appear in the center and can be moved by the following menu options.
You can also change video configuration by using the following menu options.
If you need to, you can re-calibrate the system and start and stop tracking by using the following
menu.
Here is another picture of the working system, with the gaze tracking toolbar moved off the screen.