1
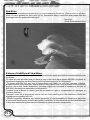
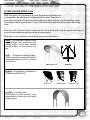
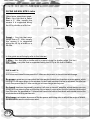
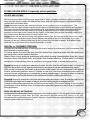
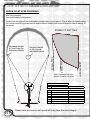
Kite Manual 2009
User’s Tips
FAQ
Bar Manual 2009
KITE MANUAL 2009
TECHNICAL ADVANTAGE
09 KITE MANUAL
Dear Rider
We would like to express our gratitude to you for purchasing an Airush kite. We are sure you will have
hours of action packed fun each time you fly. Remember safety comes first and please read the
following instruction guide before taking off.
Have fun!
Airush Development Crew
Release of Liability and Claim Waiver
In consideration of the purchase of this product you hereby agree to the fullest extent permitted by law
as follows:
To waive any and all claims that you have or may in the future have against AIRUSH, its parent or
associated companies, resulting from use of this product and any of its components.
To release AIRUSH from any and all responsibility and liability for any loss, damage, expense,
accidents and/or injury to people, objects and/or product which may occur as a result of the use of the
product, due to any cause whatsoever, including negligence or breach of contract on the part of
AIRUSH in the design or manufacture of this product.
Possible faults or delays in repairs give the purchaser no right of compensation for damages or
warranty extension.
Transport costs are at purchasers cost as well as costs resulting from the inspection he/she has
applied and accepted by AIRUSH.
AIRUSH expressly disclaims any implied warranties of merchantability of fitness for a particular
purpose and disclaims any and all responsibility and liability for consequential and incidental damage
or any other losses arising from the use of these parts, products and/or components.
#02
09 KITE MANUAL
Release of Liability, Claim Waiver and Assumption of Risk Agreement
By assembling this product, you are agreeing to;
1. be bound to the terms set forth below; and
2. require anyone using this product to be bound by such terms. If you are unwilling to be bound by
these terms return this product (before use) for a full refund.
ASSUMPTION OF RISK / IMPORTANT
WARNING!
Use of this product and any of its components
involves certain inherent risks, dangers and
hazards, which can result in serious personal injury
or death. In using this product you freely agree to
assume and accept any and all known and
unknown risks of injury while using the equipment.
The risks inherent in the sport can be greatly
reduced by abiding by the Warning and Safety
guidelines listed in this User’s Manual and by using
common sense.
If under the age of 18 years do not kiteboard without
the clear consent from a parent or guardian and the
correct supervision. If you are learning for the first
time, we strongly recommend lessons from a
professional instructor connected to an authorized
training center.
Arbitration
The purchaser agrees that the laws of Thailand shall govern any disputes, controversy or claims
involving AIRUSH. Such disputes, controversy or claims shall be referred to and finally settled by
arbitration in accordance with the Rules of Arbitration of the Thailand International Arbitration Center.
The language to be used in arbitrate proceedings shall be English. Arbitration shall be commenced
within one (1) year from the date on which any alleged claim first arose.
Entire Agreement
In entering into this Agreement, you are not relying upon any oral or written representations other than
what is set forth in this Agreement and Users Manual.
#03
09 KITE MANUAL
Contents
#04
#05 - #06
#07 - #10
#11 - #12
#13 - #16
#17 - #18
#19
#20
#21
#22
#23 - #26
#27
#28
#29
#30 - #31
#32 - #37
#38
#39
#40
#41 - #53
#54
#55
Safety
Kite Bar
Control Bar
Trigger Release
Kite Setup
Line Setup
NEW Stability Pigtails
Powering and De-powering,
Packing
Stopper Ball fitting instruction
Retrofit Swivel
Attaching the safety leash to the kite and retrofit
Removing and inserting wingtip Battens
Removing and repairing a bladder
Flying new school Airush kites - Contents
Vapor II Flat 5 Performance
Vapor II ABS
Airush Bar Manual extra info - Contents
Warranty Policy
Care and Maintenance
Warranty Policy
09 KITE MANUAL
Safety information and Guide lines:
Kiteboarding can be a dangerous sport and should be taken very seriously.
It is strongly recommended that you receive expert tuition from a registered instructor prior to use of
this product.
Power kites, their lines and control system can be dangerous to flyers and to anyone within the vicinity
of their use.
Do not use your kite near or around power lines, airports, streets, trees, and keep clear of other people
and obstacles.
Never allow anyone who is not familiar with traction kiting to use this product without
experienced assistance.
Always learn to use a small-sized, power kite (2m – 3m Trainer foil) before attempting to use
this product for the first time.
Always use your kite with safety release system and familiarize yourself with the system prior
to use.
Make sure you spend time to become familiar with the operation of your kite and remember that you
are responsible for its safe operation and for the safety of those around you.
As you learn the sport make sure to work within your limitations and do not exceed them.
Do not for any reason permanently attach yourself to the kite or its safety system.
The kite is not intended for use as a flying device nor is it intended as means for a flotation device.
A good rule of thumb when kiteboarding is, to always try and ride with a buddy.
#05
09 KITE MANUAL
Contents
Kite bag
AIRUSH kite
AIRUSH Control Bar, components and flying lines
Pump
Bladder patch repair kit
Sliding stopper STD
What to wear:
Life jacket
Helmet
Wetsuit
Foot protection - booties
Beginning Setup:
When setting up your kite and system for the first time we
recommend you find some place out of the wind and
preferably a nice area so that you can become familiar with
the kites system and make sure that it is set up correctly.
Choose an area that has enough room to fully layout your
kite lines and control bar without any obstructions.
If there is any wind at all make sure to position yourself with
your back into the win.
Choose an area that has enough room to fully layout your
kite, lines and control bar without any obstructions. If there is
any wind at all make sure to position yourself with your back
into the wind.
#06
RIGHT
RIGHT
09 KITE MANUAL
RONSTAN
#07
RIGHT
RIGHT
09 KITE MANUAL
RONSTAN
#08
RIGHT
RIGHT
Centre
09 KITE MANUAL
RONSTAN
#09
RELEASE
LOCK
#10
RIGHT
RIGHT
Centre
RIGHT
09 KITE MANUAL
09 KITE MANUAL
01
AIRUSH Control Bar
Start by pulling your bar setup from the bag and set everything
else aside for later.
Your bar has been pre-setup at the factory to try and help
decrease the setup time and allow you more time to fly, but you
should always check everything and make yourself
familiar with the system.
02
03
04
Airush Kitebars feature a leash safety system. One end of the
safety leash must attached to either your harness handle
,spinning leash System or a wrist connection.
(Picture 1, 2 and 3)
The other end of the leash is attached either to the stainless
ring on the outside Left end of the bar, or the 5th line (VAPOR II
and GENERATOR) When the bar is released, the bar simply
slides up the line and lays the kite out flat so it has no power.
Airush SLE kites rely on a bar release safety system. When you
let go of the bar, it slides further up the lines than on a C-Kite,
releasing the majority of the kites power. This gives you time to
regain control, grab the bar and re-launch the kite.
In a more serious situation, the De-power loop has a quick
release trigger which when pulled, releases the bar completely.
The safety leash then comes into action as with a normal C-Kite
set up.
The safety leash that is used to secure you to your kite is also
supplied with a safety release if you ever need for some reason
to be completely disconnected from your rig. By simply pulling
the foam section back, the safety leash will disengage from
you. This is only to be used in absolute emergencies, as the
result can be loss of your kite.
The de-power loop system is supplied with a safety release
trigger if you need to be disconnected from your bar. By simply
pulling the red quick release Lever you will free yourself from
the de-power loop, the kite will de-power completely as the
safety leash takes hold. We recommend you practice activating
the safety system before you fly the kite and check the
functionality of the trigger safety before every session.
(Picture 4, 5)
05
To re-set the Quick release safety system you need to reset the
trigger pin.
#11
09 KITE MANUAL
01
02
03
Layout your lines and separate them parallel to each other
starting at the bar. (Picture 01)
Notice that the line ends are colored, Grey and Red. The rule to
remember is GREY is back. Meaning that the GREY ends
should always be connected to the back, or trailing edge
connection points on their corresponding sides of the kite. Red
is for the front, or leading edge connections, to their
corresponding sides.
With your lines laid out and separated, connect all the kite ends
to a solid object, such as a tree, car bumper or pole, using a
piece of strong line. (Picture 02)
With the ends attached to a solid safe object and your de-power
loop all the way against the bar and sheeting system all the way
out (powered up position) (Picture 03, 04) grab your bar and pull
back with a good amount of pressure. As you apply and release
pressure, all lines should rise and lower evenly and the bar
should be perpendicular to the center lines. If this is not correct
you will need to do small adjustments to all lines to compensate
for this difference. It is important to weight each line individually
and then do adjustments. As you pull, each line will begin to lock
the fibers into place and minimize a stretch feel in the line. The
more time you spend locking down the lines the less work and
adjustments you will do later.
The goal for all the adjustments is to end up with all lines even at
the ends with the de-power loop and sheeting system
positioned all the way out (powered up position).
04
The first few times you fly on your bar system, the lines and
knots will settle in and slightly change. So always make a
point to check your lines after the first new sessions of
flying or if your kite feels to pull to one side.
Now that you have your bar setup and ready, take your time and
wrap your lines back onto the bar. You will learn that taking your
time wrapping your lines will result in less line wraps when you
lay them out the next time. (Picture 05)
05
#12
06
Once you get to the end of the
lines wrap the remainder
around the end of the bar, and
put the elastic bungee over to
hold it all tight
(Picture 06)
09 KITE MANUAL
AIRUSH Trigger Release Maintenance Manual
This manual is written to ensure the function and longevity of
the AIRUSH Trigger safety device. If any points are not clear,
please contact us via our website www.airush.com
Import Notes:
The Trigger mechanism should be tested before each kite
session.
Service this part regularly or after long periods between uses.
In any doubts, replace the complete part and do not try to
service it by yourself.
*Warning: do not use the locking tube unless you are an
advanced level rider.
Summary
1. Part list
2. Removing the locking tube
3. Replacing the de-power loop
4. Replacing the centerline
5. Servicing the metal parts
6. Replacing the springs
1. Part List
The AIRUSH Trigger Release system consists the following
parts:
1 Center/de-power line
1 Zytel plastic housing - top part (with round depressions for the
screw head)
1 Zytel plastic housing - bottom part (with hexagon
depressions for the locknut)
1 Stainless 5mm screw and locknut
2 Stainless 4mm screws and locknuts
1 Red rubber end cap for Trigger lever
1 Metal part A (Trigger lever)
1 Metal part B
1 Metal part C (swing arm)
3 Metal pins (only 2 springs for the advanced trigger)
1 Stainless 4mm screw for spring attachment
1 Spring A (18mm length)
1 Spring B (30mm length)
1 Spring C (30mm length)
1 De-power loop long
1 locking tube
DON'T FORGET THE NEW TRIGGER ADVANCED HAS TWO
SPRINGS, AND THE STANDARD TRIGGER HAS THREE!
#13
09 KITE MANUAL
01
2. Removing the locking tube (for easier unhooked
manoeuver)
Remove the center 4mm screw.
Remove the locking tube.
Reinsert the locknut and tighten the screw. (Picture 01, 02,03)
02
03
04
05
#14
3. Replacing the de-power loop
Release the Trigger mechanism to get out the steel ring off the
swing arm.
Loosen the middle 4mm screw till the locknut can be taken out.
It is not necessary to remove the screw completely.
Take out the outer 4mm screw and locknut.
Remove the existing de-power loop.
Place the new de-power loop so the hole of the loop is aligned
with the plastic housing.
Insert the screw till the thread reaches the backside.
Insert the locknut and tighten the screw till the gaps in the
plastic housing are closed and the screw passes through the
total thread of the locknut. (Picture 04, 05)
09 KITE MANUAL
01
02
03
04
4. Replacing the center / de-power line
Remove all screws and nuts from the Trigger Release.
Open the plastic housing carefully by holding down the metal parts
and lifting up the top plastic. (Picture 01, 02)
Remove the old centerline, de-power loop and locking tube.
Place the 5mm screw in the top plastic housing.
Pull the new centerline over the 5mm screw till it is touching the top
plastic housing. (Picture 02)
Push top and bottom housing together, taking care not to jam /
wedge the parts. (Picture 03, 04)
Position the 5mm locknut and tighten the screw till all gaps at upper
part are closed.
Position the de-power loop and locking tube as explained in
paragraph 2 and 3.
Check the Trigger mechanism is working properly.
5. Servicing the Trigger System and / or replacing the metal
parts
Remove all screws and nuts.
Open up the plastic housing.
Remove all metal pins.
Remove all metal parts.
Clean and remove all sand, salt and dirt with warm water and soap.
Do not use aggressive chemical solvent who could affect the
different materials.
Dry the parts
Check all parts for function, condition and shape and replace any
defective parts.
Remove small burs and scratches on the metal parts and plastic
housing by using fine sandpaper.
When necessary, service the spring blades as explained in
paragraph 6
Slightly lubricate all metal parts with grease, oil or silicone spray.
Remove any excessive lubricant.
#15
09 KITE MANUAL
01
Insert metal part B a few millimeters into the bottom plastic
housing. (Picture 01)
Place metal part A (Trigger lever) in the correct position and fix it
with a metal pin. Make sure the springs are aligned with the gap.
(Picture 02)
Place metal part C (swing arm) in the correct position and fix it
with a metal pin. (Picture 03)
Push metal part B down as much as possible and place in the
third remaining pin.
Place the 5mm screw in the top plastic housing.
Pull the centerline over the 5mm screw until it is touching the top
plastic housing.
Close the plastic housing as explained in paragraph 4.
Check the Trigger mechanism is working properly.
02
DON'T FORGET THE NEW TRIGGER ADVANCED HAS TWO
SPRINGS, AND THE STANDARD TRIGGER HAS THREE!
03
04
STANDARD TRIGGER
05
ADVANCED TRIGGER
#16
6. Servicing and replacing the metal springs (Picture 04, 05)
Under intense use, the springs on the Trigger Release
mechanism can be prone to wear, this can cause the
mechanism to unintentionally release. An indication is a loose
and movable
Trigger lever.
Open up the Trigger system as explained in paragraph 5.
Unscrew the small M4 screw at the springs without removing
the red rubber end cap.
Remove all springs from the lever, check the condition and
shape. Do not try to bend the springs.
In any doubts of the performance of the springs, replace the
whole set (3springs and screw).
Lubricate the springs with an appropriate grease, oil or silicone
spray.
Combine spring 1,2 and 3 that the hole for the screw is aligned
(all 3 springs have an individual shape!)
Apply thread locker (i.e. Loctite) on the screw and thread to
prevent screws loosening during use.
While tightening the screws, make sure that the springs remain
aligned.
Assemble all parts carefully as explained previously.
* WARNING!
Due to many external factors and the inherent dangers of
Kiteboarding, do not rely on this release system to activate
under all conditions. Kite within your limitations and stay
far away from dangerous obstacles.
09 KITE MANUAL
01
Kite Setup:
Layout your kite with struts facing up. If you are in any wind at
all put some sand or weight on one wing tip and let the kite
lay out down wind away from the weight.
On a SLE kite, pull all the bridle lines apart to form four
separate sections ie, front left, front right, back left, back
right. (Picture 01)
Inflation of the struts is done by using the pump supplied with
your kite.
If your kite has the SPS system (one pump inflation system),
plug the pump to the centre valve on the leading edge. Then
lock tube on each strut.
If not inflate the struts from one side to the other. When you
are doing this for the first time inflate each strut till it begins to
take shape applying only a light amount of air pressure.
Then squeeze each strut from end to end making sure that
the internal bladder fills all the internal space and that there
are no voids. Then continue
inflating.
#17
09 KITE MANUAL
01
DO NOT OVER INFLATE THE STRUTS. Once it is firm to the
touch, it is fully inflated. (Should you have a pump gauge this is
around 9 PSI)
Once you have a strut fully inflated remove the pump and if the
pressure is high enough the internal one-way “ball valve” should
close off* (if the ball valve doesn’t close, rotate the strut so the
valve is pointing down. This should make the ball fall and block
the hole) and allow you time to insert the plug. At this time wrap
the Velcro over the valve to protect it from inadvertently
opening.
Due to different heat conditions around the world, the plug may
be slightly tight or loose in the valve hole, if its too loose, wrap
the plug with plumbing tape.
02
With the struts fully inflated attach the pump leash and begin
pumping up the main leading edge strut. If at this time you have
weight on a wing tip remove it so that the tips can rise as you
pump the main strut. (Picture 02)
The main leading edge strut is important to pump up correctly
with the right amount of pressure. Over inflate and you can
damage the strut. Under inflate and the kite will be difficult to relaunch off the water. Should you have a pump gauge this is 6.5
PSI. more pressure makes your kite performance increase
dramatically, to a point though, don't use an airline or
compressor as they can go over 10 - 12 psi which may burst
your kite. Firmly secure the deflate valve with the Velcro.
Securing your kite on the beach:
At this point you are ready to attach your fly lines. Turn your kite
over, struts facing down, and leading edge facing into the wind
and secure with sand or weight bag.
Always secure your kite with more weight than you think you
need. An unmanned kite can be very dangerous. If you don’t
have a sandy beach consider getting an Airush kite weight bag.
Never secure your kite with sharp objects, such as rocks or a
board with sharp fins.
Be aware of other beach users and riders. When you are not
launching or ready to ride, keep your lines wrapped on the bar,
so that the beach or area is clear of lines that can easily get in
the way of someone.
Don't leave your kite flapping on the beach all day in the wind
and sun, it can damage your kite
#18
09 KITE MANUAL
01
Lines to kite connection:
Begin by laying out your fly lines down wind from the bar and close
to your kite. Lay the lines out so they are no twisted (Picture01)
Separate the lines so that your two Red ended center lines are a
good distance apart from each other then lay the two Grey ended
lines on either side of the red lines that correspond to that side. On
a C-Kite bar The fifth line (white) should be in the center of the two
red lines SLE kites (with bridles) need to have the bridles
separated from each other and not twisted. (Picture 01 page 18)
The bridle has four connection points, two red (in the center) and
two black (connected to the wingtip part of the bridle)
02
C-Kites - On each wing tip you will notice two connection points,
the one that is closest to the ground is the front or leading edge
connection point, this is for connecting the RED ended fly lines to.
The other one on each tip is the Back or Trailing Edge connecting
point, this is for connecting the GREY ended fly lines to.
(Remember GREY is back)
On the back lines there are three connection points (knots) The
recommended setting is the center setting.
03
On the side that corresponds with that side of the kite take the Red
and Black ends of the fly lines and pull them to that tip, keeping
them apart.
Start by attaching the Red, Front line, using a larks-head, slipknot.
(Picture 02)
Then take the GREY ended line and attach it just behind the
second knot. (Picture 03)
04
Once you have finished attaching the lines to one side of the kite,
repeat for the other wing tip, making sure to attach to the same
positions as you have done on the first wing tip knots.
For the Vapor II kite there is Adjustable Bar Pressure and a
Adjustable Steering Speed System. Please see below.
ABS Adjustable Bar
Pressure
Adjustable Steering
Speed
ABS
H
E
A
V
I
E
R
Increased
bar
Pressure
& Feedback
ABS
L
I
G
H
T
E
R
Reduced
bar
Pressure
Slower
Steering Faster
Steering
#19
09 KITE MANUAL
NEW STABILITY Pigtail
For 2009, FLOW, DNA and VAPOR II kites are
supplied with this new back pigtail, to increase the
stability and reduce the backfly tendencies of the kites
The positions on the pigtails are shown below :
1st knot :
Very fast steering advanced riders in strong wind only
2nd knot :
Standard AIRUSH setting for majority of riders
5th knot :
Reduced backflying position.
(please note steering is reduced slightly with this
setting)
#20
09 KITE MANUAL
01
04
02
03
Power and de-powering:
The two lines that come to the center of the bar that attach to the front
or leading edge of the kite or bridle (Red) are for changing the angle
of the kite allowing the Rider to increase or decrease the power of the
kite.
05
Whist hooked in to the chicken loop, the kite’s power can be
increased or decreased by moving the bar towards or away from
your body. Pushing the bar away decreases the power of the kite,
whereas pulling the bar increases the power. (Picture 01, 02)
The kite’s power can also be adjusted using the de-power strap or
de-power line. Pulling in on the strap or line (reducing the length)
causes the kite’s power to decrease. (Picture 03,05)
Pulling on the power up loop or releasing some of the de-power line
will increase the length of the strap / line and will make the kite to
power up and cause more pull. (Picture 04,06)
06
These adjustments should only be done in small amounts. If you over
De-power the kite you can decrease your control inputs to the kite by
making your back (control) lines to become to slack.
WINDDIRECTION
Neutral Zone/Less Power
More Power
Most Power
#21
09 KITE MANUAL
01
02
03
04
Deflating and packing your Kite:
05
1. Place your kite with the Leading edge facing down with the
nose into the wind and remove the flying lines from their
connection points, on the kite. (Place any long bridles into the
rescue handles)
2. Holding the kite by its leading edge flip the kite so that the tips
are facing upwards.
3. Open the deflate valve and allow the Leading edge to deflate.
(Picture 01)
4. If your kite has the SPS system, unlock the tubes and open
the main deflating valve on the leading edge.
5. If not, starting at one of the tips, open each strut valve and
insert deflator. This ensures that the valve ball does not re
engage.
6. Once all the struts have been deflated, roll the kite from the
tips inwards towards the center strut. (Picture 02) Remove the
deflators from the valve as they can get damaged when rolling.
7. Fold the kite and insert into bag. (Picture 03,04,05)
Packing your Kite without deflating the struts:
06
1. Starting at the tips roll the kite towards the center strut.
(Picture 06)
2. Extend the top section of the bag.
3. Extend the bottom of the bag.
4. Insert the kite from the base of the bag with the Leading Edge
towards the base if the bag. (Picture 07)
Note : If your kite has the SPS system, leave the tubes locked
and open the main deflating valve on the leading edge.
07
07
#22
09 KITE MANUAL
Partial lock Stopper Ball
Full lock Stopper Ball
RELEASE
LOCK
RELEASE
LOCK
This can be used to rest the bar against, and to
stop the bar from sliding all the way up to the
swivel.
If de-power is needed, the stopper can be
pushed up the de-power line by forcing the bar
against it.
The Full Lock mode is for advanced riders only, it
TOTALLY stops the bar from sliding up the depower line, even if the rider pushes the bar
against it.
When the bar is not pushing against the stopper,
it can be moved up the de-power line by pulling
the top section, and moved down by pulling the
bottom section.
#23
09 KITE MANUAL
Remove the sliding stopper ball from a cleat bar
01
The stopper ball is great for resting the bar against and for
spinning the bar, but slightly reduces the kites de-power safety.
Please make sure you read this before you go kiteboarding
If you are a beginner, we recommend you remove this stopper
before you ride.
1. Untie the de-power handle and un-thread the line from the
cleat, (Picture 01)
02
2. Then un-thread the line from the hole in the bar, from the
stopper ball and from the pulley (Picture 02)
3. Then thread the line back through the pulley (Picture 03)
4. Thread the line back through the bar, cleat and de-power
handle and re-tie the knot.(Picture 04)
03
04
#24
09 KITE MANUAL
Remove the sliding stopper ball from a strap bar
01
The stopper ball is great for resting the bar against and for
spinning the bar, but slightly reduces the kites de-power safety.
Please make sure you read this before you go kiteboarding
If you are a beginner, we recommend you remove this stopper
before you ride.
1. Untie the knots between the de-power ropes and the strap
(Picture 01)
02
2. Then un-thread the line from the strap, from the de-power
handle guide and from the stopper ball(Picture 02)
3. Then thread the line back through the de-power handle guide
(Picture 03)
4. Thread the line back through strap and re-tie the
knot.(Picture 04)
03
04
#25
09 KITE MANUAL
01
Full stopper fitting
Supplied with the bar, the Full Stopper Ball is used by advanced
riders only. It is fitted onto the de-power line, above the bar and gives
the rider the ability to “rest” the bar in any position along the de-power
line. The stopper can be moved easily along the line but is firm when
the bar reaches it.
02
Attaching onto the freeride bar:
1. Untie the de-power handle and un-thread the line from the cleat,
(Picture 01,02,03) Then un-thread the line from the hole in the bar
and from the pulley.
2. Then thread one side of the stopper ball.
3. Thread the line through the pulley and back through other side of
the stopper ball.(Picture 05)
4. Thread the line back through the bar, cleat and de-power handle
(Picture 06,07) and re-tie the knot.
5. Put the cover on the top section of the stopper ball. Tie the cabletie.(Picture 08)
03
06
04
07
05
08
#26
09 KITE MANUAL
01
Retrofit Swivel (On 4 Line set up Only)
The Retrofit swivel is designed to be used in conjunction with most
standard spreader bars. This component allows the rider to spin
the bar without having the leash tangling.
*Note: In certain instances the retrofit swivel may not be
compatible with your spreader bar. In this instance please
revert to the wrist leash for safety.
02
Fitting the Retrofit Swivel
Installation
1. Unscrew bolts from back swivel unit. (Picture 01)
2. Place plastic component of unit over hook of spreader bar as
indicated. (Picture 02)
3. Fit U plate to back of spreader bar holding nuts in place with
other hand. (Picture 03)
4. Reinsert bolts and tighten, take care to align Swivel to allow
room for the harness line to hook in and out. (Picture04)
03
*Note: Additional EVA should be added if the clamp is not tight
enough on the spreader bar.
04
#27
09 KITE MANUAL
01
Attaching the safety leash to the kite and retrofit
Swivel
1. Attach leash needle release to stainless ring as indicated.
(Picture 01,02,03)
2. Clip karabiner into harness until bar and kite is setup and ready
to fly. (Picture 04)
3. Clip karabiner onto re-ride ring BEFORE launching the kite.
(Picture 05)
02
03
#28
04
05
09 KITE MANUAL
01
Removing and inserting wingtip Battens
To remove
1. Slide flat object (such as a flat screwdriver) between Velcro as
indicated. This will loosen the Velcro. (Picture01)
2. Pull on the rope loop to slide batten end cover out. (Picture 02)
3. Slide batten out. (Picture03)
02
To insert wingtip batten
1. Insert Batten into batten pocket (Picture 03)
2. Place tip of flat object (such as a flat screwdriver) into pocket on
end of batten end cover. (Picture 04)
3. Slide Batten end cover between inside of batten pocket and
batten. (Picture 05)
4. Apply tension and then remove screwdriver. Velcro will connect.
*Note: It is not recommended to remove wingtip battens after each
use as the Velcro has a limited life span. Battens can be removed
when travelling.
03
04
05
#29
09 KITE MANUAL
01
Bladder Repair:
For any major cuts or rips make sure to consult your local Airush
dealer or kite repair center for assistance.
Before attempting any bladder repairs make sure your kite is clean
and dry.
Avoid repairing your kite on the beach, on dirty or windy areas.
A grassy clean place out of the wind area is preferred.
02
Make sure to deflate all bladders when doing repairs. You will need
one of your fly lines, or an extra piece of line before you start
removing a bladder from the kite.
Lay the kite out flat, struts facing up.
Detach the Velcro closure at the base of the damaged strut. This will
open up the strut casing and allow you to access the bladder. (Picture
01 page 28)Next tie on an end of the extra line to the air valve of the
strut being removed. (Picture 02)
03
Gently push the valve down through its hole in the strut casing.
Go to the end of the strut and slowly pull the bladder out as the line
you tied to the valve feeds into the valve hole. Having the line through
the strut sleeve will allow you to easily replace the bladder once it is
repaired.
Inflate the bladder using your pump.
04
Most of the time you will usually hear the leak. But you can also
submerge the tube in water to locate the hole.
Once you have located the leak, dry the area and mark with a
permanent marker. (Picture 03)
Select a patch from the self adhesive pack. Next lightly sand the area
where the leak is.
Remove the paper backing from the patch and apply to the leak apply pressure to ensure good adhesion.
Again inflate the bladder and check that the leak has been taken care of. (Picture 04)
Deflate once again and tie the line back onto the valve.
Slowly pull the bladder back into the casing from the end.
Making sure the bladder aligns itself inside the casing.
Once the bladder is replaced gently work the valve and Velcro back into its hole.
Make sure to close the Velcro at the end and then slowly inflate the bladder.
As the strut begins to take shape make sure the bladder fills the inside casing and that there are no
voids.
#30
09 KITE MANUAL
01
Main Strut Repair:
Repairing the main leading edge strut is done exactly the same way,
except you will have to feed a line from each direction from the tips.
(Picture 01)
Pulling the bladder through the zippered opening located on the
inside of the main strut off to the side of the valve. (Picture 02)
02
It is very important to fold the bladder flat off to one side of the
opening when reinserting it so that you do not get any twists while it is
fed into the slot. (Picture 03)
It is also very helpful to apply a baby powder to the bladder before
reinserting. It will allow it to easily align itself when pumping it back
up.
Kite Canopy Repair:
03
Any major tears or repairs to the sail area, we recommend you
consult your local Airush Dealer or Airush kite repair loft for
assistance.
Minor tears can be taken care of with the supplied sail repair tape.
Make sure to thoroughly clean and dry the surface being repaired.
Lay the kite out flat on a smooth table or surface.
Cut two matching pieces of material, one for each side of the sail that
covers the tear at least one inch all the way around.
Carefully place one piece onto one side, making sure that the tear
lays together along the rip.
Then cover the other side matching the piece placed on the first side.
#31
09 KITE MANUAL
FLYING NEW SCHOOL AIRUSH KITES
Contents
#33 - #34
#35 - #17
#38
#39
#32
Intro
Frequently asked questions
Vapor II Flat 5 Performance
Vapor II ABS
09 KITE MANUAL
FLYING AIRUSH KITES: intro
With this guide, we just want to go over the basics of what the kite
Is designed to do and how it is supposed to be used. There are a
Few myths and a lot of hype about kites that have been release over the last few years
This guide hopefully will answer a few of the frequently asked questions that riders may
have
Ever since the first bow kite was released, the idea of a kite with huge De-power and easy roll
over re-launch has been getting more and more popular.
Most types of kite terms are explained as best as possible below:
BOW = Any kite that is swept on the
leading edge, and concave on the
trailing edge, it can also include
having pulleys on the ends of the
bar.
RONSTAN
RONSTAN
RONSTAN
SLE = “Supported Leading Edge”
which means the center of the kite is
supported along the LE by a bridle
or a 5th line.
BOW / SLE KITE
BOW BAR
Hybrid = Somewhere in between a
C- kite and a BOW, SLE.
BOW KITE
HYBRID KITE
C-SHAPE KITE
C-Kite or “C-shape” kite =
This refers to a kite which is only
supported by 4 lines at the far ends
of the canopy.
#33
09 KITE MANUAL
FLYING AIRUSH KITES: intro
Other terms sometimes used:
Flat = Any kite that is flatter
than a C Kite, usually this
means it is supported along
the LE by a bridle or a 5th line.
C-SHAPE KITE
Swept = Any kite that more
swept than a C Kite, usually
this means it is supported
along the LE by a bridle or a
5th line.
BOW KITE
In this guide we will simply refer to the kites as:
C-Kites = four line with no bridle and no support along the leading edge (5th line)
SLE - Kites = any kite that is supported along the LE by a 5th line or bridles
SLE’s and C’s:
SLE kites main benefits compared to C-kites are de-power, re-launch and wind range.
De-power is great as you can adust the kites angle of attack so it has less or more power, while
leaving it in the same place in the window. Its also safe as when the bar is released, the kite has
much less power than a C-kite causing much less danger and injuries.
Re-launch has been improved by making “roll over re-launch” possible, which means you can
simply pull one steering line and the kite can re-launch, even when the kite is straight downwind
from the rider. As apposed to C-kites which have to be laid on their back and moved across the
wind window until they can launch.
Wind range just means, because of the de-power and being able to adjust the angle of attack,
the kite can be used in much more wind.
#34
09 KITE MANUAL
FLYING AIRUSH KITES: Frequently asked questions
BACKFLYING
Due to the swept set up of a SLE kite, they can tend to back fly and stall a little easier than CKites.
This is simply because the kite has not enough wind or a too high angle of attack, so the kite
actually goes in reverse. To fix this problem, the kite needs to be “sheeted out” or the angle of
attack reduced, then the kite regains forward motion. Kites tend to backfly more in light wind
with big kites that are set-up to fly really fast. Big kites have much more weight, so when they
have momentum from the downward swoop, then turned to rise up again, the kite is prone to
stall or backfly. As it turns, it slows down, so there is less airflow over the kite also.
Remember to push your bar when you see your kite backflying.
CORRECTING BACKFLYING
You can reduce the chances of your kite from backflying, by increasing the length of the back
lines (with a small piece of line or pigtail) or shortening the front lines. This reduces the angle of
attack, similar to slightly sheeting the kite out.
#Please note: increasing the length of your backlines or reducing your frontlines will slightly
reduced you kites ability to steer.
Probably the best way to stop backflying, is for the rider to experiment themselves. Fly the kite
in light winds and TRY to make the kite backstall, this then gives the rider a feel for when its
about to happen and they can adjust the kite accordingly. Either by reducing the angle and
agressivness of the swoop so the kite is not forced to stall, or by pushing the bar away
(reducing the angle of attack)
HIGH ANGLE OF ATTACK
Increase back line tension
LOW ANGLE OF ATTACK
Reduce back line tension
BRIDLE OVERLOAD
Having the Leading edge supported works well, but in insane conditions and very high
winds, the support is eventually going to fail. This does not mean the lines snap, what
happens is the pressure in the kite starts to become un-even (pulls more on one section
than another). Then the support will become inconsistent and the kite will fold, distort or
just generally loose its shape which will affect the way the kite flies. This is normally an
indication the kite is outside of its recommend range our under inflated.
5TH LINE TENSION
We have had a lot of variance in opinion on how much tension the 5th line should have on
each kite. More so on the Vapor and Vapor II than the generator, but its very much a
personal preference issue with the 5th line, some riders like to have it loose so the 5th line
does not really effect the kite at all, it just stabilizes the canopy in a gust.
Other riders find they like to tighten the 5th line which gives the kite a little more feedback
on the bar, but tends to make the kite pivot turn, rather that forward turn.
As an intermediate to advanced kite, the Vapor II comes straight out the factory as
a fast kite, where we try to aim a bit more at forward steering than pivotal, thats
why the 5th line is set up relatively loose when the kite is brand new.
#35
09 KITE MANUAL
FLYING AIRUSH KITES: Frequently asked questions
ROLL-OVER-RE-LAUNCH
Because of a really curved Leading edge shape and swept wingtips, a SLE kite can usually be relaunched from the water much easier than a C-kite.
When the kite lands face down (Leading edge down) on the water directly downwind of the rider, it can
be made to “roll-over” on itself and take off almost immediately.
#Please note this is as long as there is sufficient wind to allow this.
There are a few variances to how this can be achieved.
LIGHT WIND RE-LAUNCH
In super light wind or with larger kites, it may become difficult for the kite to roll-over or take off.
In this situation the rider can slightly swim toward the kite, or even pull the opposite front line on the kite
to help it roll-over. Usually the rider will also need to wait for the kite to move itself around toward the
edge of the wind window before it will take off.
SELF LAUNCH - sliding the LE along the beach
Also from the really curved Leading edge shape and swept wingtips, a SLE kite can usually be selflaunched quite easily.
This can be very convenient for the rider, but can lead to massive wear along the Leading edge as
sometimes it slides fast along the beach, into the direct downwind position before it rolls over and
launches.
It is impossible to make the kite strong enough to endure this launching technique, if a
“car tire” like material was fitted along the LE, the kite would be so heavy that it would hardly
fly. Also beaches can have very sharp shells, rocks, or even glass which can cut the kite.
DE-POWER
As the tow-point (basically the point at the end of the kiteline) is relatively further forward on SLE kites
compared to C-Kites, its possible for the kite to have a much bigger de-power range, and angle of
attack adjustment range.
This is great for safety, but sometimes can get riders into trouble, using either too bigger kite for the
conditions, or thinking that one kite will be adequate for any situation.
Basically, SLE kites do have a great deal of de-power, but eventually if too much de-power is applied,
the back lines become so loose that it becomes very difficult to steer the kite. Also, the angle of attack
becomes so low that the kite does not fly properly, the canopy can distort and loose tension, causing it
to flap.
BAR THROW (amount the bar can move away from the rider)
Using the large de-power of new kites, it may be necessary to have a long bar throw. This is to allow the
kite to reduce its angle of attack enough for the kite to loose all its power. However when the bar is
released, the bar throw may be so long that the bar may be out of reach of the rider. In this situation,
pulling on the de-power line to retrieve the bar, the same way someone would ab-sail up a cliff.
STOPPER BALLS
Stopper balls are designed to stop the bar from moving far up the de-power line (as mentioned above),
to rest the bar against, and to make it possible for the rider to release the bar and untwist their lines.
This works well but can reduce the safety of the kite. Also some kites are becoming so light on the bar
that they can be ridden without a stopper, and the rider does not have tired arms, even after all day.
#36
09 KITE MANUAL
FLYING AIRUSH KITES: Frequently asked questions
CLEATS AND STRAPS
With the long bar throw and de-power range of SLE kites, it became difficult to make a de-power
strap that was easy to reach, still had the bar throw, and still had the range of adjustments that's
needed with new school kites.
Cleats below the bar are fairly popular because its very easy to have a long bar throw. The
problem with the cleat is there must be some tension in the kite lines for the cleat to work properly.
Also some people find that the cleat is hard to pull, they become unhooked when they adjust the
de-power or they find the cleat slips. All of these problems are due to there not being enough
pressure on the rope to pull it back into the “teeth” of the cleat, once a rider has used a cleat for a
few sessions they become used to it and it works fine.
Straps above the bar are becoming more popular again also, but they generally reduce the length
of the bar throw / de-power length, which reduces the safety of the kite. Put simply, if you can
release you bar so it slides a long way up the line and your kite has no power, a de-power strap
fitted that far up the lines will be almost impossible to reach.
PIVOTAL vs FORWARD STEERING.
All kites have a different way of steering due many factors including size, and the amount that
the kite twists in order to steer.
It’s much easier to check the way the kite steers from watching when the kite goes from
swooping down, to the upward direction.
Riders have a very personal preference with which turning characteristics they like, some
freestyle riders like pivotal kites, and others like forward steering. It's the same in all other
disciplines of kiteboarding, there is no right or wrong way to ride, or which style to prefer.
Pivotal steering is a really accurate way to steer the kite, the kite will tend to stay in the place
that the rider wants it to be, and the direction and movement can be calculated very easily.
With pivotal turning the kite tends to slow down a little when it turns, sometime it can almost
slow to a stationary position where it “rotates on the spot” and then increases speed again as
soon as it stops turning (as soon as the bar is made straight again). Its easy to think of an army
tank steering by pulling the break on the inside set of tracks, making the tank turn.
Forward turning is where the kite does not slow down as much to turn, but twists itself so the
outside wingtip reduces its angle of attack, and the inside wingtip increases its AOA.
Forward turning kites generally do not have quite as much of an instant feeling of steering as a
pivotal kites, but as the kite turns, it keeps more speed and generates more of a constant pull
through the turn.
BRIDLES AND 5th LINE TANGLES
Unfortunately the downside of having supports on the leading edge it if the kite gets turned inside out,
or rolled completely inside itself, the lines can become tangled around the canopy of the kite.
Sometimes this is referred to as the “bow tie” situation. Some Airush kites offer a release for the 5th line
simply to get the rider out of the issue.
#37
09 KITE MANUAL
VAPOR II FLAT 5 PERFORMANCE
Kite Trim Overview
Low wind Stability Configuration
Please note the optional low wind stability configuration for the Vapor II. This is ideal for riders looking
for a more pivotal flying characteristic and increased stability with reduced chance of back stalling in
low winds.
STABILITY SETTING
Increase length
of front lines as
indicated below
Reduce length
of 5th line as
indicated below
MORE TENSION
I N
LESS TENSO
MORE TENSION
RED = STANDARD SETTING
GREEN = STABILITY SETTING
Stability System measurements
Size Front line extension loop Shorten 5th line amount
RONSTAN
16m
14m
12m
10m
8.5m
7m
5m
135mm
95mm
95mm
75mm
75mm
60mm
60mm
300mm
270mm
260mm
250mm
200mm
160mm
130mm
Please note all kites are set up will all flying lines the same length.
#38
09 KITE MANUAL
VAPOR II - ABS
Adjustable bar pressure system
For 2009 we introduced an Adjustable Bar-pressure System, to let the rider customize the amount of bar pressure they
have Brand new we offer the “medium” setting which is quite similar to the Vapor I
To maintain the kites flying characteristics, the front lines must be the same length relative to the kite on each setting. Three
“pigtail” sections are fitted to allow for this, they are referred to as, SECTIONS A, B and C.
To use the system, check the guide below.
Please note: The “light” bar pressure setting my slightly reduce the bar feedback.
Light
B
C
B
The HEAVY setting, must
use all line sections,
( A , B and C)
A
Light
Heavy
A
Standard
B
C
Light
C
Standard
Standard
Heavy
The LIGHT setting, uses
line sections A and B.
Heavy
New - the kite is fitted in the
STANDARD setting, using
line sections A and B.
A
#39
09 KITE MANUAL
09 AIRUSH BAR MANUAL extra info
Contents
#41
#42
#43
#44
#45
#46 - #47
#48
#49
#50
#51
#52
#53
#40
De-power lengths and bar throw
Using each bar with each kite
How to use the cleat
De-power strap instead of cleat
De-power distance
Airush Strap fitting
VAPOR II Constant Canopy Support
VAPOR II Release the 5th line
Where to attach your leash
09 Airush 4 line bar specification
09 Airush 5 line bar specification
09 Airush 5 line Generator bar specification
09 KITE MANUAL
De-power lengths and bar throw.
Airush uses a very long bar throw which allows the kite to fully de-power when the bar is released
their brands of kites don't allow the bar to move far enough along the de-power line, causing the
kite to keep pulling with lots of power, even though the “bar release safety” has been activated
(ie, the bar has been released)
With Airush bars, in the event of the bar being released accidentally the rider can simply pull back
the bar, by holding the de-power line farther up the rope and pull it back within reach.
Alternatively, if the rider does not want the safety option, they can either
a: use the partial lock stopper (See page 40)
b: reduce the length of the back lines and de-power line to make it so the bar only moves a certain
“reachable” distance from the rider. (Se page 45) (Please note this reduces the safety of the kite)
RONSTAN
Other brands
40 cm
Standard
“SAFE”
depower
distance
AIRUSH BAR
STANDARD MARKET BAR
#41
09 KITE MANUAL
Using each bar with each kite:
The airush bar is adaptable to fit almost any kite:
The Cleat bar is the most popular option, and works with 100% of the airush range of kites
it comes in both the 4 line and 5 line configuration.
4 - line bar = DNA, FLOW.
5 - line bar = VAPOR II and GENERATOR.
Also available is the strap bar. Some riders much prefer to use a de-power strap rather than a
cleat. The idea behind the strap bar is to have a similar de-power range (or bar throw) for safety,
but have extension handles that allow the strap to be reached and adjusted easily.
The strap bar is available in both 4 and 5 line options and can be used with the same kites as listed
above.
(See page 49-50)
#42
09 KITE MANUAL
Brand new, we make your kite bar to have maximum safety.
This means the rider is almost 100% safe when hooked into the chicken loop at all times.
Simply by releasing the bar when the rider gets out of control, the bar slides up the de-power line
until the kite has almost no power.
Then the rider can just pull the de-power line toward themselves and retrieve the bar, hold the bar
close to the body and the kite will “power up” again.
How to use the Cleat
Using the cleat can be tricky at first, but once you get used to it, the cleat is very simple.
1. Make sure you are hooked into the chicken loop.
2. The cleat works under tension, so the rope is pulled deep into the “teeth” of the cleat. Try to only
adjust it when you are riding along on the board, if you have to adjust it on the beach, manually pull the
rope back against the cleat to make it jam (see pic 4).
3. Make sure you “seat” the rope into the cleat fully so it cant come out (see pic 2).
4. The “left over” section of de-power line needs to be held down towards your feet when you release
(see pic 1).
5. The cleat works better when the rope is wet.
6. DO NOT at an angle that lets the rope slide through the cleat, this damages the “teeth” on the cleat so
it wont hold the rope properly in the future (pic 3. If this does happen, you will may need to replace your
cleat. You can buy them from any airush dealer,
01
02
03
04
PULL
#43
09 KITE MANUAL
DE-POWER STRAP INSTEAD OF CLEAT
Some riders prefer to adjust their kites power with a strap instead of a cleat, this can be changed very
easily by fitting the airush de-power strap
This however slightly reduces the safety of the kite, as the de-power length is shortened. Thats why we
supply the cleat as standard
.
#44
61 cm
Standard
strap
depower
distance
75 cm
Standard
“SAFE”
cleat
depower
distance
61 cm
RONSTAN
09 KITE MANUAL
Adjusting the de-power distance
Brand new, we make your kite bar to have maximum safety.
Confident riders may prefer not to have so much distance for the bar to move, as they do not need
100% safety.
This makes the bar much easier to reach when released. To do this simply reduce the length of the
outside leader lines, and de-power line until you can easily reach the bar when it is released
RONSTAN
Standard
“SAFE”
depower
distance
50 cm
75 cm
RONSTAN
ADVANCED
depower
distance
SHORTEN
these lines
(see page 6
for details)
#45
09 KITE MANUAL
01
09 Airush Strap Fitting
1. The part needed = AZCB08DSC - 2009 DE-POWER STRAP
02
2. Fitting the strap onto the cleat bar
03
3. Using pliers, remove the D-SHACKLE from the swivel and
pulley
04
05
#46
4. Thread the D-SHACKLE onto the strap
5. Attach the strap to the swivel using pliers (Super glue or
loctite)
09 KITE MANUAL
06
6. Untie the knot on the de-power line and unthread the line from
the cleat, bar and pulley
07
7. Thread the de-power line through the de-power handle guide
and through the base of the strap
08
8. NOTE: Make sure all the lines are the correct length before
you cut off the de-power line
09
9. Thread the rope back through the guide, stopper, bar and
cleat. Tie a knot and cut the extra line off
#47
09 KITE MANUAL
1. The Vapor II Swivel / bullet leash, operates as a 5th
line leash, as per previous years (2006, 07, 08)
It also has the CONSTANT CANOPY
SUPPORT system as previous Vapor, to keep
both front lines, and the 5th line the same
length when fully de-powered.
02
01
Airush Constant Canopy Support
RONSTAN
#48
Without Constant Canopy
Support
Changes in depower trim
cause the canopy to have
reduced support reducing
the kites performance,
depower and stability.
09 KITE MANUAL
Release the fifth line.
1. When kiteboarding in waves, the kite may be rolled through the 5th line creating a “bow tie”
situation. This may cause the kite to be torn in half if it accidentally relaunches. Please see the diagram
below to solve this problem.
01
2. The 5th line “Bow-tie” release works by un-threading the 5th line from the bar (un-clipping the
leash and removing the stainless ring = not pictured) and un-screwing nylon “nut” section (white).
02
3. Then remove the Stainless insert to fully release the 5th line.
#49
09 KITE MANUAL
Where to attach your leash
There are many places to attach the leash, these vary due to your location, personal preference and
your ability.
Position A: is used for launching your kite and extreme safety.
Position B: is the fifth line, this a very safe leash point
Position C: hold straight onto the chicken loop, it does not have as much safety as positions “A” or “B”
Position D: is a beginner leash point, it is very safe but makes the leash hang on the bar and can
become annoying when riding
D
RONSTAN
A
A
B
#50
C
09 KITE MANUAL
09 4-line strap bar (FLOW/DNA optional)
- 750mm
End of
Bar
Throw
10000mm GREY
Flying line
10000mm RED
Flying line
15000mm RED
Flying line
- 980mm
base of
D-shackle
Front line leaders as
per 2007 (no knots)
PLEASE COLOUR
Left side = RED
Right side = GREY
1140mm 3mm dyneema.
RONSTAN
10000mm RED
Flying line
- 1055mm
to top of
swivel rings
2009 Depower strap
- 866mm
top of
swivel
rings
To end of
leaders
RIGHT
RIGHT
- 1140mm
New 275mm x 3mm
front line leaders
Left side = RED
Right side = GREY
15000mm RED
Flying line
10000mm GREY
Flying line
15000mm GREY
Flying line
10000mm GREY
Flying line
10000mm RED
Flying line
15000mm RED
Flying line
15000mm GREY
Flying line
10000mm RED
Flying line
To end of
leaders
1140mm 3mm dyneema.
- 1140mm
15000mm RED
Flying line
10000mm GREY
Flying line
- 26140mm
to end of lines
15000mm GREY
Flying line
- 26140mm
to end of lines
RIGHT
RIGHT
09 4-line cleat bar (FLOW / DNA)
- 610mm
End of
Bar
Throw
STOPPER
WARNING
HANG TAG
ATTACHED
09 Trigger release Complete
220mm
Trigger Release Depower
Loop standard (33cm)
09 Trigger Release
Locking Tube S
Measure from the bottom edge of the bar
220mm
Measure from the bottom edge of the bar
- 360 mm
webbing handles
09 Trigger release Complete
Trigger Release Depower
Loop standard (33cm)
09 Trigger Release
Locking Tube S
220mm to bottom of loop
#51
09 KITE MANUAL
09 5-line cleat bar (Vapor II std)
09 5-line strap bar
- 26255mm
to end of lines
1140mm 3mm dyneema.
5th line = 3 m
m Dyneema
RONSTAN
Depowerli ne long
1140mm 3mm dyneema.
Bullet with
clip section
1025mm
16140mm
- 1030mm
top of
swivel
New SMALL
Bullet with
clip section
- 980mm
base of
D-shackle
RIGHT
RIGHT
25000mm GREY Flying line
25000mm RED Flying line
- 610mm
End of
Bar
Throw
- 360 mm
webbing handles
Measure from the bottom edge of the bar
Measure from the bottom edge of the bar
220mm to bottom of loop
08 Trigger release Complete
Trigger Release Depower
Loop standard (33cm)
09 Trigger Release Locking Tube S
New 120mm x 3mm
front line leaders
Left side = RED
middle = GREY
Right side = GREY
2009 Depower strap
New 09 Swivel
New SMALL
To end of
leaders
1140mm 3mm dyneema.
- 1140mm
- 1025mm
top of
swivel
rings
1140mm
25000mm RED Flying line
- 5000mm to base
of stopper ball
- 1140mm
220mm
25000mm GREY Flying line
25000mm GREY Flying line
25000mm RED Flying line
25000mm WHITE Flying line
25000mm RED Flying line
25000mm GREY Flying line
- 26140mm
to end of lines
- 5000mm to base
of stopper ball
#52
Centre
RIGHT
Centre
RIGHT
(VAPOR II and Generator optional)
09 Trigger release Complete
Trigger Release Depower
Loop standard (33cm)
09 Trigger Release
Locking Tube S
09 KITE MANUAL
RIGHT
RIGHT
RIGHT
Centre
09 AIRUSH Generator bar
25000mm GREY Flying line
25000mm RED Flying line
25000mm WHITE Flying line
25000mm RED Flying line
25000mm GREY Flying line
- 26140mm
to end of lines
- 5000mm to base
of stopper ball
- to top of
leeders
New 440mm x 3mm
front line leaders
Left side = RED
middle = GREY
Right side = GREY
- 700mm
Top of swivel
New SMALL
Bullet with
clip section
- NEW 2009 Generator
Depower strap as per
sample sent 15 feb 08
650mm top
of webbing
1140mm 3mm dyneema.
- 1140mm
300mm to base of
Neoprene sleeve
RELEASE
LOCK
220mm
220mm
Measure from the bottom edge of the bar
09 Trigger release Complete
Trigger Release Depower
Loop standard (33cm)
09 Trigger Release
Locking Tube S
#53
09 KITE MANUAL
Care and Maintenance:
To prolong the life of your kite and equipment you should follow these very
important instructions.
Never store kite for any extended time in bag if at all wet or moist. Doing so
can cause colors to fade and bleed into each other. If canopy is wet allow the
kite to dry completely out of direct sunlight.
After use in saltwater it is always good to wash all gear thoroughly using fresh
water and allow to dry out of direct sunlight. Never use high-pressure water
against the kite canopy.
Be sure to either cover or store your kite out of the sun light while not in use.
Many fliers store their kites with the struts inflated rolled up and placed in their
bags. This will never cause any serious damage to your kite. But we highly
recommend after use, to lower the pressure for storage, to decrease an
unwanted stretch in strut material.
A significantly damaging affect on a kite is leaving it sitting, inflated, main strut
down facing into the wind. The wind can cause the trailing edge to flap loosely.
If allowed to flap in this manner the trailing edge material will begin to break
down and cause unwanted material stretch along the trailing edge, which will
drastically decrease kite performance.
#54
Periodically throughout the life of your kite, check all connection points and
canopy for damage and make sure to repair small tears as needed. Small
tears can become large tears with one bad crash. Having a connection point
break can result in a long unwanted swim to shore.
09 KITE MANUAL
WARRANTY POLICY
Airush warrantees this product to be free of major manufacturing
defects in material or workmanship to the original purchaser for a
period of 12 (twelve) months from the date of purchase. This warranty is
subject to the following conditions:
1. The warranty is valid ONLY when the warranty card is properly filled
out and returned
to the dealer where the purchase was made or to the national distributor
within 7 days of purchase.
2. The warranty is valid only when product is used for normal
recreational activities.
3. Airush will make the warranty determination, which may require
inspection and/or photos of product, which clearly show defect.
4. If a product is deemed to be defective by Airush, the warranty covers
the repair or replacement of the defective product only. Airush will not
be responsible for any cost, losses, or damages incurred as a result of
loss of use of product.
5. The warranty does not cover damage caused by misuse, abuse,
neglect of normal wear and tear including, but not limited to, punctures,
rigging with other than Airush components, damage due to excessive
sun exposure or seam failure due to over inflation in the sun, damage
caused by improper handling and storage, damage caused by use in
waves or shore break and damage caused by anything other than
defects in material and workmanship.
6. The warranty is voided if any unauthorized repair, change or
modification has been made to any part of the equipment.
7. The warranty for any repair or replacement equipment is good for the
date of the original purchase only.
8. The original purchase receipt must accompany all warranty claims.
The name of the retailer and date of purchase must be clear and legible.
9. There are no warranties, which extend beyond the warranty specified
here.
#55
WWW.AIRUSH.COM