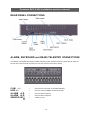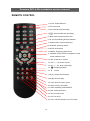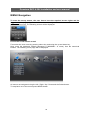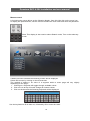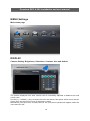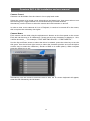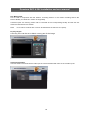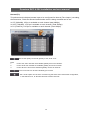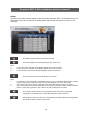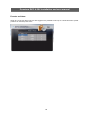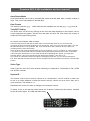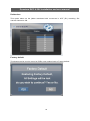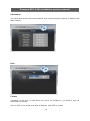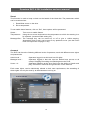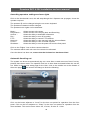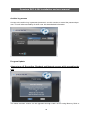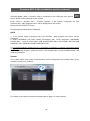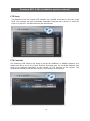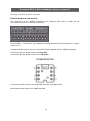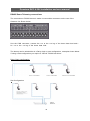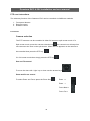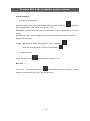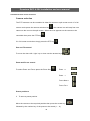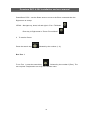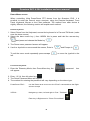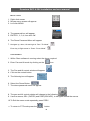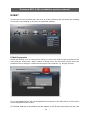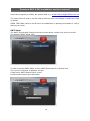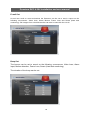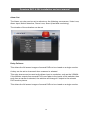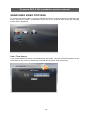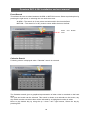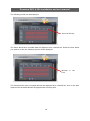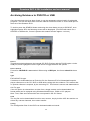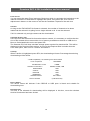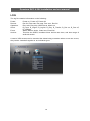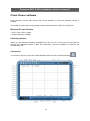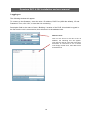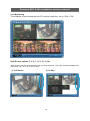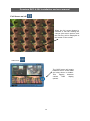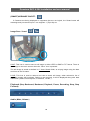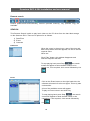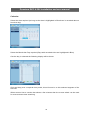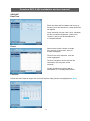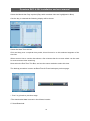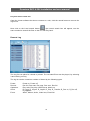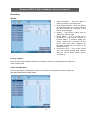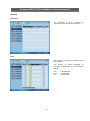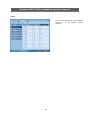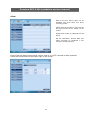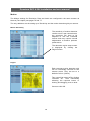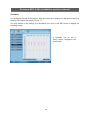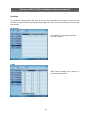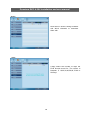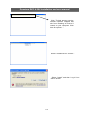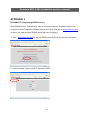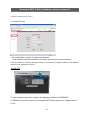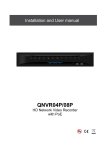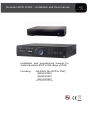
1
Quantum EVO H.264 – Installation and User manual Installation and programming manual for Vista‟s Quantum EVO H.264 range of DVR. Including: Q4-XXXh (No DVD or FSK) QE04-XXXhf QE08-XXXhf QE16-XXXhf (XXX – denotes hard drive size) Quantum EVO H.264 installation and user manual This page is intentionally left blank 2 Quantum EVO H.264 installation and user manual CE INFORMATION The product must be installed according to the currently valid installation regulations for EMC to guarantee the designed use and to prevent EMC problems. The device supplied with this manual is according to the EC, EMC Directive, 89/336/EEC & LVD 73/23/EEC Standard used for showing compliance with the essential requirements of the device: EN 55022 EN 61000-3-2 EN 61000-3-3 EN 50130-4 EN 55024 LVD: EN60950-1 ELECTRICAL SAFETY Explanation of electrical safety symbols 3 Quantum EVO H.264 installation and user manual Contents SAFETY PRECAUTIONS ..................................................................................................................... 6 CONTENTS OF PACKAGING .............................................................................................................. 7 FEATURES........................................................................................................................................... 8 FEATURES........................................................................................................................................... 8 FRONT PANEL..................................................................................................................................... 9 Q4-xxxh ( No FSK telemetry) .............................................................................................................................. 9 QE04/8/16-xxxhf.................................................................................................................................................. 9 REAR PANEL CONNECTIONS.......................................................................................................... 12 ALARM, KEYBOARD AND RS485 TELEMTRY CONNECTIONS ..................................................... 12 REMOTE CONTROL .......................................................................................................................... 13 OSD DESCRIPTION........................................................................................................................... 14 MENU TREE....................................................................................................................................... 15 DEFAULT PASSWORDS ................................................................................................................... 17 MENU NAVIGATION .......................................................................................................................... 18 MENU SETTINGS .............................................................................................................................. 20 Main menu page................................................................................................................................................ 20 DISPLAY ............................................................................................................................................ 20 Camera Setting: Brightness, Saturation, Contrast, Hue and default ................................................................ 20 Camera Covert .................................................................................................................................................. 21 Camera Name ................................................................................................................................................... 21 Spot Setting ....................................................................................................................................................... 22 OSD Setting ...................................................................................................................................................... 23 Live Setting ........................................................................................................................................................ 24 RECORDING ...................................................................................................................................... 25 Alarm ................................................................................................................................................................. 28 Presets on Alarm ............................................................................................................................................... 29 When any of the four alarm sensors are triggered it is possible to send up to 4 PTZ cameras to preset positio ns or activate preset tours. ................................................................................................................................ 29 Motion ................................................................................................................................................................ 30 Schedule............................................................................................................................................................ 31 Duration ............................................................................................................................................................. 32 Priority ............................................................................................................................................................... 32 SYSTEM ............................................................................................................................................. 33 Basic .................................................................................................................................................................. 33 Disk.................................................................................................................................................................... 36 Account.............................................................................................................................................................. 37 Program Update ................................................................................................................................................ 39 Sensor ............................................................................................................................................................... 40 PTZ Setup ......................................................................................................................................................... 41 PTZ Controller ................................................................................................................................................... 41 NETWORK ......................................................................................................................................... 50 EVENT ................................................................................................................................................ 54 SEARCHING VIDEO FOOTAGE ........................................................................................................ 58 Date / Time Search ........................................................................................................................................... 58 Event Search ..................................................................................................................................................... 59 4 Quantum EVO H.264 installation and user manual Calendar Search ............................................................................................................................................... 59 ARCHIVING EVIDENCE TO DVD/CD OR USB ................................................................................. 61 LOG .................................................................................................................................................... 63 CLIENT VIEWER SOFTWARE ........................................................................................................... 64 Installing software.............................................................................................................................................. 64 Connection ........................................................................................................................................................ 64 Logging on ......................................................................................................................................................... 65 Live Monitoring .................................................................................................................................................. 66 Remote search .................................................................................................................................................. 69 ARCHIVE........................................................................................................................................................... 71 Remote Log ....................................................................................................................................................... 73 Info..................................................................................................................................................................... 74 Remote Setup: (Menu settings - Same as DVR) .............................................................................................. 75 Recording .......................................................................................................................................................... 78 System............................................................................................................................................................... 87 Event ................................................................................................................................................................. 98 Local Search (viewing downloaded footage) ..................................................................................................100 Local Setup .....................................................................................................................................................103 PAN, TILT, Zoom, Focus (Remote telemetry control) .....................................................................................105 Firmware Upgrade...........................................................................................................................................107 Quit (Exiting Client program) ...........................................................................................................................107 APPENDIX 1 .................................................................................................................................... 108 ALARM SENSOR INSTALLATION .................................................................................................................108 APPENDIX 2 ..................................................................................................................................... 111 SETTING INTERNET SECURITY SETUP FOR WEB CLIENT ON ............................................................... 111 WINDOW XP/2000 & WINDOW VISTA SERVICE PACK 2. .......................................................................... 111 APPENDIX 3 .................................................................................................................................... 115 DYNAMIC IP (Supporting DDNS Server) ....................................................................................................... 115 APPENDIX 4 .................................................................................................................................... 118 SETUP FOR DVR PORT/ WEB SERVER PORT USING IP SHARING ROUTER ........................................ 118 APPENDIX 5 .................................................................................................................................... 119 MAKING A PARTITION ON AN EXTERNAL USB HARD DRIVE .................................................................. 119 5 Quantum EVO H.264 installation and user manual SAFETY PRECAUTIONS CAUTION BEFORE USE Please read this manual before installing or using the Vista Quantum DVR. Please keep this manual in a safe place, to allow for future reference For the safety and proper use, The DVR is marked with various symbols. Please read these to prevent injury of financial loss. INSTALLATION SITE Ensure installation position is level, secure and adequately ventilated. Avoid installing close to sources of humidity or water. 6 Quantum EVO H.264 installation and user manual CONTENTS OF PACKAGING Power Cable Quickl user guiderl Remote Controller Installation CD USB2.0 Mouse 7 Battery Quantum EVO H.264 installation and user manual FEATURES ● Convenience - User-friendly GUI (Graphical User Interface) - Easy-to-use menu structure - Easy-to-use recorded data search (Time, Date, Motion, and Alarm) - Easy-to control via Front Panel, IR remote control and USB 2.0 mouse. ● Stability - Auto restart after power interruption DB structure offers data stabilisation and better storage utilisation ● Expandability - Remote DVR‟s can be controlled using the supplied software client viewer. ● Technology -Embedded LINUX OS -Maximum record rate 100 fps -High-resolution & high-quality H.264 algorithm -Uses watermarking & scrambling technologies, -H.264: 1 ~ 2 Kbytes per image with resolution 360x240 ● Functionality - Variable recording function (normal, alarm, motion, schedule, audio, Time Lapse) - Vista Coax FSK and multi-protocol RS485 Telemetry - Full channel real-time monitoring - Live monitoring, recording, playback, backup, remote access simultaneously - Multi channel playback - Variable events notification to e-mail, buzzer or PC Client system 8 Quantum EVO H.264 installation and user manual FRONT PANEL Q4-xxxh (No FSK telemetry) QE04/8/16-xxxhf (1)LEDs - REC: Recording status (When recording is on, the red light will flash) - POWER: System Power On/Off (When power is on, the green light will be illuminated) - NET: Network status (When network is connected, the light will lash) - HDD: HDD status (When the system is reading or writing to the HDD, the light will flash) (2) USB 2.0 PORT - USB2.0 connector, for downloading to USB pens / drives (plus upgrading firmware) (3) POWER BUTTON - System Power On/Off 9 Quantum EVO H.264 installation and user manual (4) NUMERIC & CHARACTER - Used for individual camera selection and selection of numbers & letters within the setup menus and searches (5) MENU - Displays the menu on the screen (6) SEARCH - Entering search mode (7) PLAY ( ) - Playback of the recorded data - When in play mode press again to enter fast forward mode. (8) REWIND ( ) - Reverse play of recorded data - When in play mode press again to enter fast rewind mode. (9) PAUSE ( ▌▌) - To freeze picture on playback mode and live mode. (10) STOP / EJECT ( █ ) - To stop playback and go back to live mode. - To eject DVD-RW (11) REC (●) - It starts & stop manual recording, password protected. (12) VOLUME UP & DOWN ( ) - To increase or decrease the volume. (13) ARROW KEY 10 Quantum EVO H.264 installation and user manual - Moves the cursor while in menu mode (14) SELECT - Menu selection (15) PTZ Selection - PTZ Channel selection (16) Screen Split - Selection of multi screen functions (17) AUDIO Selection - Switches between audio channels (18) PAN / TILT - To control P/T/Z, press this button to browse virtual key on screen. (19) ZOOM - ZOOM P/T/Z camera in and out 11 Quantum EVO H.264 installation and user manual REAR PANEL CONNECTIONS ALARM, KEYBOARD and RS485 TELEMTRY CONNECTIONS Connection for Remote Keyboards, RS485 telemetry, Alarm inputs and Alarm outputs are all made via the pull out screw terminal connectors on the rear of the unit as shown below: CAM + /KBD +/ALARM A/ ALARM B/ SENSOR IN/ : : : : : Used for the connection for RS485 Telemetry Used to connect VKBD4 remote keyboards Used for Alarm output A Used for Alarm output B 4 Alarm Inputs 12 Quantum EVO H.264 installation and user manual REMOTE CONTROL 1. Power: Power ON/OFF 2. PTZ: Not used 3. Rec: Start & Stop Recording 4. ~ : Camera selection and titling 5. INFO: Direct access system Info. 6. ID: use for selecting DVR IR address 7. AUDIO: Audio channel switching 8. SEARCH: Entering search 9. MUTE: Audio Mute 10. MENU: Entering system menu 11. ARROW & SPLIT: Menu navigation or split screen selection keys 12. SEL: Enter key in menus 13. VOL”+,-“: Up, down volume 14. CH “+,-“: Up, down channel(s) 15. █: Stopping playback 16 II : Pause 17. ( ) : Play(or fast forward) 18. ( ): Reverse play 19. LOG: Direct access Log list 20. SEQ: Hot key Spot SEQ 21. OSD: Operating OSD ON/OFF 22. DIS: Channel Division 23. Z/F: Zoom/& Focus 24. P/T: Pan & Tilt 25. Cam: camera selection for PTZ control 13 Quantum EVO H.264 installation and user manual OSD DESCRIPTION PTZ icon Record Standby: It is shown when recording is not activated. The Status Bar shows HDD capacity, Network This screen shows PTZ control of connection, Time, etc using by icons. camera 2. The on screen arrows -HDD capacity will allow control of this camera. : 1.7GB is used out of 298.0GB -Network connection : It is shown that admin or user is connected. -Date/Time *Others : -Backup -Mute -USB Stick: -Mouse connected: 14 Quantum EVO H.264 installation and user manual MENU TREE Camera Setting Camera Covert Apply Main Menu Camera Name Spot Setting Display OSD Setting Live Setting Apply HDD Overwrite Post Duration Global Normal (TL) Recording Quality Audio Alarm Resolution Motion FPS Schedule Audio On/Off Recording Quality Audio Event Duration Setup Motion Setup Schedule Priority Apply Language System Basic Disk Account Program Update Sensor Sensor PTZ Setup PTZ Controller Etc. 15 Auto Delete Mode Date Format Time/DST Set Video Type System ID Deinterlace Quantum EVO H.264 installation and user manual Network Set DDNS IP SET NTP Event Notification DDNS User ID User Password Domain Dynamic IP IP Gate Way Net Mask DNS Server DSL ID DSL PW DVR Port Web Port E-Mail Registration SMTP Mode E-Mail Out Beep Out Alarm Out Video Loss Alarm Motion Power Loss Smart Search Date/Time Search Search Event Calendar Device Archive Type/Log/Config From/To/Channel All Log Power Record Operation Client Event Archive 16 Duration Quantum EVO H.264 installation and user manual DEFAULT PASSWORDS Front Panel A Password is required if you need to: Log on; enter the menus; down power; stop recording or changing an IP setting. Logging ON Before the system can be used it is necessary to Log On as a user, he rights of each user can be managed by an administrator level log on Press MENU on the front panel, or right click and select the MENU icon. The following box will be displayed played asking for password. The default Password is: 00000000 (8 zeros) To select a different use press the Select key in the centre of the unit, use the up and down arrows to choose, then press the Select key again to confirm. Then enter this users password. Viewer Software When using the supplied Viewer software, the default logon details are: User ID is “admin” (not case sensitive). Password is “00000000” i.e. 8x Zero‟s (Admin ID cannot be changed, as this is the full administrator ID) Click on arrow to view a quick connection address book for the last 22 units that the software has been connected to. This uses the description to quickly identify each unit. 17 Quantum EVO H.264 installation and user manual MENU Navigation To enter the set-up menus, the user has to have the required access rights and be logged on (see page 19) press the Menu button or right click with mouse on screen and select the menu icon. The following screen will be displayed. Front Panel or IR remote control First select the user name by pressing select key and using the up and down key. Next, enter the password (default password is 00000000 – 8 zeros). Use the numerical buttons. The following menu page will be displayed. All menus are navigated using the left / Right / Up / Down and the Select button. To step back out of the menus press MENU button 18 Quantum EVO H.264 installation and user manual Mouse control Left clicking the mouse brings up the following display, from this right click on the menu icon to display the password box, use the mouse to select the user name and enter the password. Note: This display is also used to select Search mode, Turn on the telemetry mode. If Menu has been selected the following screen will be displayed. Select Sub menus by clicking on the relevant title. The method of altering t he value of a segment within a menu page will vary slightly depending on the page: 1. Clicking on a segment will toggle through available values 2. Click on icon at top of list will change all channel values 3. Click on the box and the following keyboard will be displayed: Use the keyboard to fill in titles etc, followed by OK to enter the value. 19 Quantum EVO H.264 installation and user manual MENU Settings Main menu page DISPLAY Camera Setting: Brightness, Saturation, Contrast, Hue and default The picture displayed from each camera can be individually adjusted to balance the multi screen view. Use UP() / DOWN() keys to select the cell to be altered, then press select to turn the box green, then use the numeric keys to change the values. Alternatively use the mouse to select the cell, the on screen keyboard will appear select the value and click OK 20 Quantum EVO H.264 installation and user manual Camera Covert Cameras can be hidden from the viewer in live or play back mode. Select the camera to be made covert using the up and down keys, then press select to turn the camera green, toggle between on and off with the up and down buttons. Alternatively use the mouse to select the camera and click between on and off. In order to view covert cameras in Live or Playback, it needs to be turned off in the menus, this is requires the necessary user rights. Camera Name Each camera can be titled using the alphanumeric buttons on the front panel or the mouse. Each title can have up to 32 characters, if there are too many characters to display in 1 line, it will be shown as _... For example, „FIRST MEETING ROOM‟ -> „FIRST MEETIN…‟ Use the Up and Down arrows to select the title to be altered, press the select key to turn the title green. Use the left and right arrows to select the character position and use the Alphanumeric keys to select the character ( Similar to SMS on a mobile phone). When complete press the select key to exit. Alternatively use the mouse to select the title to alter, the on screen keyboard will appear, enter the title followed by the OK button. 21 Quantum EVO H.264 installation and user manual Spot Setting <Single Screen> <Quad Screen> <9 Channel Divisions> <16 Channel Divisions> Spot output is used to configure the second monitor output. The Spot monitor can respond to Motion or can be configured for full or multi-screen sequences. Use the Select key to turn the Mode box from Blue to Green, use the up and down arrows to select the mode between multi-screen options; Motion. Once the mode has been selected, you can select either a duration or On/Off option (Mode dependant). Use the Select button to turn the box from blue to green then use the Up and Down keys to alter value. Press select to turn back to blue. Alternatively, use the mouse to select mode by repeatedly clicking in the Mode box. Then select the duration or On/off for each channel. 22 Quantum EVO H.264 installation and user manual OSD Setting On Screen Display Setting: Selecting information to be displayed on screen along with the video. Status Bar The display bar at the bottom of the screen can be set to be permanently on or to disappear after a preset period of time. Event Display Icons such as recording mode, motion detection can be displays or not (On /Off) Camera Names The camera title can be displayed or not (On/Off) Blending The opacity of the menus and Status bar can be set between 0 and 6, 0 is solid, 6 being very opaque. Menu The menu display can be set to time out after either 1 or 5 minutes. Password Entry The password entry display can be set to time out after 1 or 5 minutes. PTZ display When in telemetry mode the on screen telemetry display can b e set to be Always on or to disappear after a set period of inactivity 5 or 10 second or Off. 23 Quantum EVO H.264 installation and user manual Live Setting Sequence settings The live settings are used to set up a sequence of either full screen camera images or multi screen displays Use the Up and Down arrows to select either: Full Screen, Quad or Nine way split sequences. The display will change to allow individual sequence times to be set per channel or split screen option. Use the select key to turn the cell green and then the Up and Down keys to change the values. Use the right button to move to “Start” press select, the main monitor out put will display this sequence. Alternatively use the mouse to select the sequence required, and then select the duration. Click “Start” to turn the sequence on. To interrupt the sequence, simply select any camera. Event Popup The Main screen can be set to display events, the options are: Alarm: if the single alarm input is activated, then any camera that has the alarm function turned on will be sequenced Motion: Any camera with motion will be displayed, multiple motion cameras will be sequenced Alarm + Motion: this will display both alarm and motion cameras OFF: No action taken APPLY: In order to save any modified setting value, press “SEL” key when the “APPLY” section is highlighted. This action can be carried out within each Sub Menu. 24 Quantum EVO H.264 installation and user manual RECORDING All recorded data is watermarked to ensure that it is not tampered with. Using the software supplied the legitimacy of this data can be verified. Global HDD Overwrite Generally this should be set to on to ensure that the DVR does not stop recording when the hard drives are full. Post Event Duration This is the time after which an event or alarm clears that the system continues recording for in the event or alarm mode. Quality The amount of compression applied to the recording can be changed between Best, Good and Standard. 25 Quantum EVO H.264 installation and user manual Non Motion FPS This is used in conjunction with the “Motion” recording section. In the motion recording section the Record Quality for cameras in motion is set globally. Cameras inputs not showing motion will be recorded at the corresponding Quality and the rate set within the Non Motion FPS section. Note: If non motion cameras are not to be recorded then set the FPS to 0 (Zero). Privacy Region A Privacy zone can be set to blank out any part of the image Audio Configuration Use this section to allocate which video input is to be associated with each of the 4 Audio inputs. 26 Quantum EVO H.264 installation and user manual Normal (TL) This allows each individual camera input to be configured for Normal (Time Lapse ) recording, the Resolution, Fields Per Second and whether audio is being recorded can be set. In CIF (360x288), 25 fps is available to each channel (total 400fps). In 2CIF (720x288), 12.5 fps is available to each channel (Total 200fps). In D1 (720x576), 6.25 fps is available to each channel (Total 100fps). The record quality can be set globally to CIF, 2CIF or D1 Note: 1. 2. 3. If set to CIF, then 100 FPS are available globally across all cameras. If set to 2CIF then 50 FPS are available globally across all cameras If set to D1 then 25 FPS are available globally across all cameras. The record rate can be set individually per camera The 4 Audio inputs can be set to record during the alarm event. See Audio configuration, in the Global menu, to allocate cameras to audio channels. 27 Quantum EVO H.264 installation and user manual Alarm There are four alarm sensor inputs on the rear of the Quantum EVO, an activation on any of these inputs can have a specific recording profile and control the actions of up to 4 PTZ cameras. To enable the alarm/sensor input set this to ON The record quality can be set globally to CIF, 2CIF or D1 Note: 1. 2. 3. If set to CIF, then 100 FPS are available globally across all cameras. If set to 2CIF then 50 FPS are available globally across all cameras If set to D1 then 25 FPS are available globally across all cameras. The record rate can be set individually per camera. Note: 1. 1. 2. If a camera is to be related to an individual sensor input, it is recommended that this camera is give a higher record rate and other cameras are dropped to a lower record rate . Any camera input set to zero (0 FPS) will not be recorded while that sensor is active. Any camera given a record rate other than zero will be considered in alarm mode and will be shown in the event log search, and a alarm icon will be displayed on screen. The 4 Audio inputs can be set to record during the alarm event. See Audio configuration, in Global menu, to allocate cameras to audio channels. Selecting this column will bring up a separate menu page to allow the configuration of “Preset On Alarm” actions. See below: 28 Quantum EVO H.264 installation and user manual Presets on Alarm When any of the four alarm sensors are triggered it is possible to send up to 4 PTZ cameras to preset positions or activate preset tours. 29 Quantum EVO H.264 installation and user manual Motion When operating in Motion detection mode the EVO will only record the cameras that motion is being detected on, the record rate for that camera will be at the rate set by the operator in the table below If motion is detected on multiple cameras, all motion cameras will be recorded. The record rate for Camera inputs not showing motion can be set in the Non Motion FPS section of the Global record menu. The DVR will display either a single camera if motion is only detected on one camera or a sequence of cameras if motion is detected on multiple cameras. Set the Quality, FPs rate and Audio channel s as previous NORMAL record section. The sensitivity per channel can be set to Low, med or High, this should be tailored each individual camera position. Clicking on the associated icon will display a motion detection grid The detection area is divided into a grid of 10x8 cells. Default is all cells in active mode (Pink). Use the Left right up down to move cursor and the Select key to toggle between active and inactive. The mouse can also be used to select cells and toggle them on and off. The motion detection is not recommended for external cameras. 30 Quantum EVO H.264 installation and user manual Schedule The schedule allows the Quantum DVR to be set to only record at particular times of the day. The timing setting, resolution and audio are global for all channels. However Images per second can be configured per channel. Set the Quality, FPs rate and Audio channel s as previous NORMAL record section. To set the timetable select the large SET box on the right of the menu page, the following page will appear. It allows each hour within the week to be set to be either Active (Orange) or Inactive (Grey) Use the Up / Down / Left / Right buttons to navigate around the schedule and the Select button to toggle between on (Orange) and Off (Black). Alternatively use the mouse to toggle between On and Off. 31 Quantum EVO H.264 installation and user manual Duration The Duration mode allows the user to set the: the number of days that they require to record for; the resolution; whether cameras are active or not; whether audio is being recorded. The user then sets the number of days of recording required, then the Quantum will automatically calculate best record rate to achieve these settings Priority The RECORD PRIORITY allows the mixing of the various record methods to customise the individual site requirements. Example: A site may require Alarm recording at night, then a standard FPS recording during the day. In this case the Schedule would be set for required FPS and resolution, and the timetable set for this recording between 8am and 8pm each day. Schedule would be set as 1 st Priority. The Alarm settings would be configured as required and this would be set as the 2 nd priority. The Quantum would then record between 8am and 8pm at the Scheduled rate, then once beyond 8pm would look to the second priority and only record Alarm Events. 32 Quantum EVO H.264 installation and user manual SYSTEM Basic User can set Language, Auto Delete Mode, Date Format, Time/DST Set, Video Type, System ID. Also, Deinterlacing, Initialisation and system Information are set from this page. Language The default is English. Italian, French, Hungarian, Slovak, German, Russian, Chinese, Dutch, Spanish, Portuguese, Japanese Danish and Polish are available. 33 Quantum EVO H.264 installation and user manual Auto Delete Mode Auto Delete Mode can be set to automatically erase recorded older than a certain number of days. This can be set between 0 and 99 days. Date Format The default is dd-mm-yyyy. Other date formats available are: mm-dd-yyyy / / yyyy-mm-dd. Time/DST Setting The DVRs time can be set by clicking on the time and date displayed in this section, the on screen keyboard will appear. Set the time and date and click Ok, next select the country to enable the Day Light Saving mode. PLAYBACK FOLLOWING TIME CHANGE The DVR uses the time and date to index video on the hard disk drive so you can find it later. Changing the time can cause the DVR to work improperly, when you try to play back video. If you set the hour ahead, this is not a problem. But, if you set the hour back, there will be more than one recording with the same time stamp. Such as during the October Daylight Saving Time changeover, if you try to search for video between 1 am and 2 am, the recorder may not operate properly because there will be two hours of recorded video during this time period. To view video during this overlapping time period, you must start playback before 1 am, then recorder will play both hours between 1 am and 2 a.m. You cannot do a backward search through the overlapping time. But, you can do forward search. The Time and Date and the DST time can be changed from the front panel, the Mouse or the Remote Control Video Type Video Type can set in this menu without rebooting or initialisation. The default is PAL, NTSC can also be selected System ID The remote control can be used to control up to 16 Quantum‟s, the ID number on each can be set to a unique address so that the remote will only control one at a time if they are in close proximity. The default is 11. Repeated click on the ID value to change to the required number. To select a unit on the remote control press the ID button, followed by the number, followed by the ID button again. The LED will flash slowly. 34 Quantum EVO H.264 installation and user manual Deinterlace This option takes out the judder associated with movement in 4CIF (D1) recording. Set camera channel to ON Factory default This button can be used to return he DVRs menu setting back to Factory default 35 Quantum EVO H.264 installation and user manual Information The Information Screen shows the hard disk size, current firmware revisions, IP address and MAC address Disk Format Formatting of the drive is used when new drives are installed or you need to wipe all information on the disk. Click on OFF to turn to ON, then click on Execute, click YES, to confirm 36 Quantum EVO H.264 installation and user manual Smart This function is used to keep a check on the health of the Hard disk. The parameters which can be monitored are: 1. Read/Write errors on the drive 2. Drive temperature. To set enable these features, click on “Set”, three options will be presented: Smart – Turn to on to enable feature Temperature – Using the on screen keyboard set the temperature at which the warning is to be reported. (recommended setting 45) Message Box - The message box can be turned on or off to give a visible warning. Alternatively and E-mail; can be sent if any problems occur (see the Event menu set-up section on page 51-53) Account The DVR can have the following different levels of operators, each with different users rights and passwords: Admin level – Manager level – Users 1-4 - Operators logged in at this level has full rights Operators logged in that this level as default have access to all except: Stopping Recording and Shutting down the DVR. Operators logged in at this level Only have the ability to Search and play, Control PTZ cameras and get access via the network. Each users rights, can be individually tailored to their own requirements, the amending of these rights can only be done by an Administrator level log on. 37 Quantum EVO H.264 installation and user manual Amending operators settings and user rights Click on the box beside Level, this will step through the 6 Operator set up pages, chose the operator required. The operator ID can be changed using the on screen keyboard The operators Password can be changed The operators user rights can be amended: Menu – Play/Search – Archive – Rec PTZ – Network – Covert – Shutdown – Allows access to the menu Allows access to the Playing back and Searching Allows the ability to download information Allows the ability to turn off recording Allows the ability to control PTZ cameras Allows the ability to view remotely with the client software Allows the ability to view coverted cameras Allows the ability to turn the power off from the front panel Click on the “Rights “ box to show camera selection: The cameras which each user can view can also be allocated. Once the above has been set, ensure that the Activate box has been ticked. Automatic timed log out The system can be set to automatically log out a user after a certain amount of time if no key presses have been made. The operator level has to have been activated before this can be set. While in the account setup page for the User, click on the middle icon at the bottom of the menu page , the screen will change to show the following: Click on the boxes adjacent to “Local” for the time out period for operation form the front panel. Click on the box adjacent to “Client” for the time out period for operation form the client software. This can be set to either: Off, 15 mins, 30 mins or 1 Hour. 38 Quantum EVO H.264 installation and user manual Archive log access Access to the archive log is password protected, use this section to amend the password per user. This will allow traceability of which user has downloaded information. Program Update Always turn off: Recording, Playback and Network access while upgrading the unit The latest firmware version can be upgraded through U SB 2.0 Port using Memory Stick or 39 Quantum EVO H.264 installation and user manual CD/DVD Media. When a memory stick is connected to the USB port, this symbol will be shown in the status bar of the screen. Enter “menu”-> “System Set”-> “Program Update”. If the system recognizes the new firmware then, “New program found” will be displayed on the screen. Next press the “SELECT” button. Processing percentage will be displayed. NOTE. 1. If the system doesn‟t recognize the new firmware, “New program not found” will be displayed. 2. USB compatibility has been tested successfully with: Lexar Jumpdrive 128/256MB, Sandisk Mini Cruzer & Cruzer Micro 2GB, KINGSTONE 2GB, A-DATA 2GB, IMATION 2GB, SANDISK 1GB, SANDISK 512MB, MARUZEN 1GB 3. For system stability, please turn off 1) recording 2) playback 3) network connection during upgrading. 4. After updating program, reboot the DVR. The simplest way is press POWER button and enter the password. Sensor The 4 alarm inputs on the rear of the Quantum can be configured to be normally open (N.O), normally closed (N.C) or None. For details on the alarm connections please refer to page 12 of this manual. 40 Quantum EVO H.264 installation and user manual PTZ Setup The Quantum EVO can control PTZ cameras via a RS485 connection on the rear of the DVR. The cameras can have individually selectable Protocols with a choice of : Vista PD, Pelco P or Pelco D. The Baud rate can also be selected. PTZ Controller The Quantum DVR needs to be setup to accept the VKBD3im or VKBD4 keyboard, as a default this will be set to the correct Protocol and Baud rate, the ID RS485 Address may need to be adjusted dependant on the number of PTZ cameras on the system. The Keyboard ID should not be the same as any of the domes on the system. 41 Quantum EVO H.264 installation and user manual Telemetry connections and User Instructions Remote Keyboard Connections The connection of the VKBD4 keyboard to the Quantum EVO DVR, is made via the removable connectors on the rear of the DVR: Use the KBD +/- connections, on a standard cat5 lead these are the Green/White for +ve and Green for -ve If using the break out box and one of the RJ45 Leads supplied with the VKBD4 keyboard. Connect pin 3 of the break out box the Kbd(+VE) Connect pin 6 of the break out box to the Kbd(-VE) 3 6 Connect the break out box to the keyboard using the RJ45 patch lead. More detail can be found in the VKBD4 manual 42 Quantum EVO H.264 installation and user manual RS485 Dome Telemetry connections The connection to RS485 domes is made via removable connectors on the rear of the Quantum. As Shown below: Use the CAM connector, connect the +ve to the +ve leg of the dome data lead and t he –ve to the –ve leg of the dome data lead. The domes can be wired either in a Daisy chain or star configuration, examples shown below. If using a Star configuration you require a “VSD16” RS485 star driver. Daisy Chain configuration Star Configuration 43 Quantum EVO H.264 installation and user manual PTZ user instructions The telemetry function of the Quantum EVO can be controlled via 3different methods: 1. Front panel buttons 2. Remote control 3. Software viewer Front Panel Camera selection The PTZ cameras can be controlled in either full screen or split screen mode. If in Split screen mode, press the camera selection key , the camera icon will step from one camera to the next on the split screen. When the icon appears on the camera to be controlled then press the PTZ key . If in full screen mode then simply press the PTZ key . Pan and Tilt control To move the dome left / right / up or down use the arrows keys Zoom and Focus control To select Zoom and Focus press the Zoom Key , Zoom + = Zoom - = Focus Near = Focus Far = 44 . Quantum EVO H.264 installation and user manual Preset positions 1. To store a preset position Move the camera to the required position then press the record key followed by the number key of the preset to be stored (1 – 9) Dependant on Dome or protocol you may then have to enter a password or exit from menus. PowerDome PRO – use the Down arrow to move to the Enter command then the Right arrow to accept VPDL6 – Navigate up, down, left and right in “Pan / Tilt Mode” Enter key is Right arrow in “Zoom /Focus Mode” 2. To recall a Preset Press the search key followed by the number (1 -9). Run Tour 1 To run Tour 1, press the search key followed by the number 0 (Zero). The tour requires a keyboard to set it up in the domes menu. 45 Quantum EVO H.264 installation and user manual Infra Red Remote control functions Camera selection The PTZ cameras can be controlled in either full screen or split screen mode. If in full screen mode press the camera selection key , the camera icon will step from one camera to the next on the split screen. When the icon appears on the camera to be controlled then press the PTZ key . If in full screen mode then simply press the PTZ key . Pan and Tilt control To move the dome left / right / up or down use the arrows keys Zoom and Focus control To select Zoom and Focus press the Zoom Key , Zoom + = Zoom - = Focus Near = Focus Far = Preset positions 3. To store a preset position Move the camera to the required position then press the record key followed by the number key of the preset to be stored (1 – 9) 46 . Quantum EVO H.264 installation and user manual PowerDome PRO – use the Down arrow to move to the Enter command then the Right arrow to accept VPDL6 – Navigate up, down, left and right in “Pan / Tilt Mode” Enter key is Right arrow in “Zoom /Focus Mode” 4. To recall a Preset Press the search key followed by the number (1 -9). Run Tour 1 To run Tour 1, press the search key followed by the number 0 (Zero). The tour requires a keyboard to set it up in the domes menu. 47 Quantum EVO H.264 installation and user manual Dome Menu access When controlling Vista PowerDome PTZ domes from the Quantum EVO, it is possible to enter the Dome‟s menu structure, using the Remote Keyboard, Front Panel Keyboard, Mouse or the Client software. The method from each device is slightly different; the following section will explain each method . Remote Keyboard 1. Select Dome from the Keyboard, ensure the keyboard is in Pan and Tilt Mode ( make sure the dome moves) 2. Select the dome menu key ( from VKBD4 this is press and hold the camera key and press and release the Mode key 3. The Dome menu password screen will appear. 4. Use the Joystick to move around the menus, Enter is To exit the menu mode repeatedly press escape left. and Escape is , or move the joystick to the Front Panel Keyboard. 1. Enter the Telemetry Mode, then Press Menu key, the will appear password box 2. Enter 1,2,3,4, then hit select key 3. The Dome Password Menu will appear 4. The method for entering the password will vary depending on the dome type: PowerDome PRO – use the Down arrow to move to the “Enter” command then the Right arrow to accept VPDL6 – Navigate up, down, left and right in “Pan / Tilt Mode” Enter key is Right arrow in “Zoom /Focus Mode” 48 Quantum EVO H.264 installation and user manual Mouse control 1. Right click mouse 2. Mouse menu screen will appear: 3. Left click MENU 4. The password box will appear 5. ENTER 1, 2, 3,4, then click OK 6. The Dome Password Menu will appear 7. Navigate up, down, left and right in “Pan / Tilt Mode” Enter key is Right arrow in “Zoom /Focus Mode” Client Software 1. While Client software is running select the dome required. 2. Enter Pan and tilt mode by clicking on the icon 3. The Pan and tilt control window will appear 4. Click on the central button 5. The following box will appear 6. Select the Dome Button 7. The dome password menu will appear 8. The pan and tilt control window will change to the following 9. Use the arrows, SEL ( ENTER) and PREV(ESCAPE), to navigate around the menus 10. To Exit the menu mode repeatedly press PREV. 11. To return to PTZ mode press the button. 49 Quantum EVO H.264 installation and user manual NETWORK (If the DVR is connected to a network, this icon will be shown in the OSD display) This menu can only be accessed if the user has the necessary rights. (Default password is 00000000). With in the Network menu the DDNS (Dynamic Domain Named Server), IP addresses, NTP and Live can be set. 50 Quantum EVO H.264 installation and user manual DDNS What is DDNS? DDNS is a service that maps Internet domain names to IP addresses. DDNS serves a similar purpose to DNS: DDNS allows anyone hosting a Web or FTP server to advertise a public name to prospective users. Unlike DNS that only works with static IP addresses, DDNS works with dynamic IP addresses, such as those assigned by an ISP or other DHCP server. What this means is that the DVR does not need a Static IP address to be available for viewing remotely over the World Wide Web. Please refer to Appendixes 4 on how to set up the DDNS service. Using factory configured DDNS setup To make using the DDNS service easier each DVR has been pre configured in the factory with it‟s own individual DDNS set-up, this uses the DDNS-DVR.COM service. To access this feature select: DDNS-DVR.COM (Auto) The Domain section of the menu will display the MAC address of the unit ( 16 digit number). Note: 1. DYNAMIC IP must be set to: YES 2. Port forwarding has to be set-up in the router using the dynamically assigned IP address and the DVR Port set in the IP set section 3. When connecting to the unit from the client software, the address to enter will have to be in the following format: http://(16digitMACaddress)@ddns-dvr.com 51 Quantum EVO H.264 installation and user manual IP SET When a fixed IP address is being used, Dynamic IP should be set to NO The IP Address, Gateway and Subnet Mask need to be set, these will generally be given by the Network Manager. DSL refers to all types of Digital Subscriber Line such as ADSL and SDSL. The DVR Port and WEB Port can both be changed if required, default are 2000, and 80 respectively. 52 Quantum EVO H.264 installation and user manual NTP The Network Time Protocol Setting allows the DVR time to be synchronised with an external time server. The default is NTP OFF. When turned ON the type of service can be selected, options are Default (time.bora.net), Domain and IP. As shown in next diagram: The Time zone can also be chosen within the City selection, use the right arrow on the front panel to change the city settings. 53 Quantum EVO H.264 installation and user manual EVENT This section is used to inform the user as to an event occurring, this can be by the sounding of a buzzer or by sending an E-mail to a predefined address. E-Mail Registration Within this section up to 3 users can be set-up to receive an email on the occurrence of an event such as Video Loss / Alarm / Motion or Power Loss. An E-mail will only be sent if the Quantum EVO is sitting on a network with access to the Internet, e.g. through a router. The e-mail addresses are set via the alphanumeric buttons on the front panel, or from the on screen keyboard via the mouse. The Sender Address is the address that will appear on the E-mail received by the user, this 54 Quantum EVO H.264 installation and user manual should be set logically to identify the specific DVR. e.g. [email protected] The report period is used to set how often e-mails are sent: Immediately on and event, Daily or Weekly SEND TEST MAIL sends a test E-mail to the addresses so allowing the installer to verify if the setup is correct . SMTP Mode The SMTP (Simple Mail Transfer Protocol) function allows e-mails to be sent over a LAN The default is SMTP Mode “OFF”. In order to activate SMTP Mode, choose SMTP Mode either IP or Domain first. Then, put ID, Password, IP address, and port. Finally press “SMTP Status Check” to test. Please see the screen shots that follow: 55 Quantum EVO H.264 installation and user manual E-mail Out As well as e-mail on event activations the Quantum can be set to send a report on the following occurrences: Video Loss; Alarm; Motion: Power Loss and Smart (Hard disk monitoring). Still images from selected cameras can also be sent with the e-mail Beep Out The buzzer can be set to sound on the following occurrences: Video Loss; Alarm input; Motion detection; Power Loss; Smart (Hard disk monitoring). The duration of the beep can be set. 56 Quantum EVO H.264 installation and user manual Alarm Out The Alarm out relay can be set to activate on the following occurrences: Video Loss; Alarm input; Motion detection; Power Loss; Smart (Hard disk monitoring). The duration of the activation can be set. Relay Follower This allows the full screen images of several DVRs to be viewed on a single monitor. A relay can be set to close each time a camera is selected. This relay closure can be used as the Alarm input to a switcher, such as the VS042A. If the Monitor outputs from several EVO‟s are taken to the inputs of this switcher, then each time a camera is selected, the switcher will change it‟s output to the relevant DVR monitor picture. This allows the full screen images of several DVRs to be viewed on a single monitor. 57 Quantum EVO H.264 installation and user manual SEARCHING VIDEO FOOTAGE To access the search option, press the SEARCH button on the front panel or right click the mouse and select Search, (A password may have to be entered) after which the following screen will be displayed. Date / Time Search If you select date/time search, the following will be shown. Use the numerical number on the front panel or the mouse to select the time and date required, then select Play. 58 Quantum EVO H.264 installation and user manual Event Search This allows the user to select between ALARM or MOTION events. Select required option by pressing the right arrow, or selecting the icon with the mouse. ALARM – The search is for any alarm activation within the times defined. MOTION – The search is for any motion events within the times defined. Alarm icons and Motion Calendar Search Following screen is displayed when “Calendar” search is selected. The Calendar search gives a graphical representation of when video is recorded on the hard drive. The year and month can be selected. This month is shown as a calendar on the screen, any day which contains recorded video will be indicated by a highlighted number in white. Move to the desired day by using the up / down / left / right buttons, Select the day by pressing SEL. 59 Quantum EVO H.264 installation and user manual The following screen will be displayed. Hours of the day The hours which have recorded data are displayed as a coloured bar. Select the hour which you want to review, the following screen will be displayed. Minutes hour in the The minutes which have recorded data will be displayed as a coloured bar, click on the time required; the recorded data will be played back from this point. 60 Quantum EVO H.264 installation and user manual Archiving Evidence to DVD/CD or USB Once the required video has been found, it may be necessary to down load it for evidential purposes. This can be done either onto the internal CD/DVD -R writer or via the USB port on the front of the Quantum EVO. To do this press the SEARCH button and using the down button move to ARCHIVE, once highlighted press SEL, the following screen will be displayed. (The DVR will search for a CD/DVD or USB device, if none is present this search will take approx 1 minut e) Device This allows selection between the internal CD /DVD -R writer and the FLASH option via the USB port, when highlighted use the right arrow to toggle between the options. Device Format Format for CD/DVD-R is not needed. When using a USB pen, the format should be done first. Type EXCLUSIVE file type If evidence is downloaded as an Exclusive file, the Quantum EVO will download bespoke player software on to the CD / DVD or USB device along with the evidence. This means that no special software is required, by the reviewing PC. This format is secure and watermarked. AVI File type If the AVI option is selected then a video from a single camera can be downloaded in a format which can be replayed using Windows Media Player, GOM or VLC players. Note: Time, Date and camera titles are not exported in the AVI format LOG The Log file can be downloaded from this menu screen, simply tick the LOG box and do not select any camera channels, then select transfer. Config The Configuration files for the DVR can be downloaded and saved. 61 Quantum EVO H.264 installation and user manual From and To You can set up the start (From) and stop (Stop) time which is required to be backed up to the internal CD/DVD-R or USB device. Highlight this option, then press SEL, then use the alphanumeric buttons or the mouse to set the time and date. Repeat for the end time. Channel As long as the EXCLUSIVE file format is selected, the number of channels to be down loaded can be selected. Anything from a single channel to all 16 can be selected. If AVI is selected only a single camera can be downloaded. Calculate Archive size Once the time and date and file format have been entered, it is necessary to confirm that the size of file created will not exceed the size of memory available on the disk or USB de vice. Move to Calculated Archive size and press SEL. The Quantum EVO will then calculate storage space required for download file. This will be displayed in the Required Size section. As long as the Required Size is smaller than the Free/ total space, then move to Transfer and select it. Transfer When Transfer is highlighted press SEL, the downloading will start. Percentage done during downloading will be shown. * USB compatibility: the following have been tested Lexar JumpDrive 128/256MB SanDisk Mini Cruzer SanDisk Cruzer Micro 128MB 256MB, 512GB, 1GB KINGSTONE 2GB A-DATA IMATION MARUZEN DVD/RW Plextor 2GB 2GB 1GB PX-716UFL Lite-On CD/RW (LTR-52327SX) Device Status The device status will indicate if the CD/DVD or USB open is blank and suitable for downloading onto. Required Size The size of file selected for downloading will be displayed in this box, once the calculate Archive Size button has been clicked. 62 Quantum EVO H.264 installation and user manual LOG The log file contains information on the following: Power: Record: Operation: Client: Event: Archive: Power on, Power off, Power fail Rec fail, Rec start, Rec stop, Rec error, Rec full Play start, Play stop, HDD format, Menu set R_Login, R_Logout, R_Logfail, R_Play, R_Transfer, R_Rec on, R_Rec off, R_Upgrade Alarm, Motion, Audio, Video loss, Email fail This lists the USER, time/date when Archive was done, and time range of archived section. A total of 2500 events can be recorded the oldest being overwritten when a new one occurs, they can be viewed all together or as individual types. 63 Quantum EVO H.264 installation and user manual Client Viewer software Each Quantum comes with license free viewer software to view the Quantum across a network. To be able to do this the recommended minimum specification for the PC is as follows: Minimum PC specification > CPU: Core 2 Duo 1.8GHz, > Graphic Memory: 256MB Installing software When you put Quantum Network installation CD into your PC, it will auto run and lead you through an installation wizard. Follow the instructions. Once the software is loaded it will automatically run. Connection To connect to the Unit, open the Viewer Software and click the connection button, Software version 64 Quantum EVO H.264 installation and user manual Logging on The following window will appear. To connect to the Quantum, enter the units: IP address; DVR Port (2000 ids default), ID and Password. Then, click “OK”, to start the live monitoring. Description field is the name of area / Building / location of the DVR, this should be typed in he first time the unit is connected to, this will store it in the address book . Address book Click on the Arrow to the left of the IP address, the following box will appear. This lists the last 22 units that have been accessed. To reconnect to one of these units simply double click, then add the ID and Password. 65 Quantum EVO H.264 installation and user manual Live Monitoring The software is best viewed with the PC monitor resolution, set to: 1024 x 768. Split Screen options (1, 4, 6, 7, 8, 9, 10, 13,16): Spilt Screens can be viewed during both live and playback. The splits screens available are: full screen,4,6,7, 8,9,10,13 and 16 way. 1) Full Screen 2) 10 Way 66 Quantum EVO H.264 installation and user manual Full Screen on/ off When the full screen button is selected, a tool bar offering the various split screen options, and the Exit key will be displayed at the bottom of the screen. OSD on/off: The OSD button will toggle between the on screen titles etc being shown or hidden. This toggles between various OSD display options. 67 Quantum EVO H.264 installation and user manual (SMART)ARRANGE ON/OFF: If Cameras are being displayed in segments that are not logical, the Smart button will rearrange and put camera input 1 into segment 1 (Top Left) etc. Image Save / Load: / SAVE: This icon is used to save a still image in either JPEG or BMP or TIF format. There is no change on the main screen when the “Save” icon is pressed. The still image is stored as default in C: Vista: Saved folder, as a Jpeg image using the date and time as the file name. LOAD: This icon is used to retrieve and view a saved still image, when selected a list of available images will be shown. Select to one required, it will be displayed along with data information (Status-Live/Playback, IP address, CH No.) Playback (Step Backward, Backward, Playback, Pause, Recording, Stop, Step Forward) Audio (Mute, Volume) 68 Quantum EVO H.264 installation and user manual Remote search Search (Date/Time/Event/Calendar), Archive (Remote Archive), Log (Remote Log) are available. SEARCH This Remote Search is able to play back video on the PC direct from the hard disk storage on the Quantum EVO. There are 3 options for as follows. 1) Date/Time 2) Event 3) Calendar Date/Time When the cursor is placed over a part of the time and date a drop down arrow will appear, use this to set the required value. When set. Click “Play” button, this window disappears and Remote Playback will start. To stop playing back press Stop the search screen will appear to allow another search to be carried out, if not required, click cancel followed by live . Event Click on the Event button on the right hand side, the software will search for all event types. This may take a short while. A list of the available events will appear. To play an Event select it and click Play. To stop playing back press Stop the search screen will appear to allow another search to be carried out, if not required, click cancel followed by live . 69 Quantum EVO H.264 installation and user manual Calendar Select the date required (as long as the date is highlighted in Blue there is recorded data on from that day). Select the Month then Day required (Days with recorded video are highlighted in Blue) One the day is selected the following display will be shown: Click and drag over a required time period, this will zoom in on this selected segment of the time line. When zoomed into a section that shows a few minutes then the mouse wheel can be used for more accurate time searching. 70 Quantum EVO H.264 installation and user manual ARCHIVE Date/Time Enter the Start and End dates and times, by hovering over the selections, a drop down box will appear. Once selection is made, then “click” calculate, the file size will be displayed. Finally click “Archive”, the file will be transferred to C:\Vista\Download. Event Select either: Alarm, Motion or Audio from the top of the screen. A list of events will appear. Click on the event required, it will be come highlighted. Click on Calculate, the file size will be calculated, this may take a few seconds. Finally click Archive; the file will be transferred to C:\QTplayer\Download. Calendar Select the date required (Days with recorded video a data present are highlighted in Blue) 71 Quantum EVO H.264 installation and user manual Select the Month then Day required (Days with recorded video are highlighted in Blue) One the day is selected the following display will be shown: Select the Start Time tick box Click and drag over a required time period, this will zoom in on this selected segment of the time line. When zoomed into a section that shows a few minutes then the mouse wheel can be used for more accurate time searching. Next select the End Time Tick Box, and use the same method to select this time. The backup procedure is same as Date/Time & Event backup as previous page. * “Prev” to go back to previous stage. *The downloaded data is saved in the follows location: C:\Vista\Download. 72 Quantum EVO H.264 installation and user manual Play back down loaded files Open the viewer software but do not connect to a unit, click the cancel button to remove the log on box. Next click on the Local search button the normal search box will appear, use the same method to search the files on the PC and Play back. Remote Log The Log file can either be viewed or printed. The recorded Event can be played, by selecting it and clicking on Play. The log list can be viewed as a whole or filtered by the following types: Power: Record: Operation: Client: Event: Power on, Power off, Rec fail, Rec start, Rec stop, Rec error, Rec full Play start, Play stop, HDD format, Menu set R_Login, R_Logout, R_Logfail, R_Play, R_Transfer, R_Rec on, R_Rec off, R_Upgrade Alarm, Motion, Audio, Video loss, Email fail. 73 Quantum EVO H.264 installation and user manual Info - “System Info” of the Remote Log - “Status Info” of the Remote Log This shows the status of both the Hard disk and the recording modes of each channel. The system info displays the Mac address and software version information. 74 Quantum EVO H.264 installation and user manual Remote Setup: (Menu settings - Same as DVR) Display – Camera Setting Within this setting the Hue, Saturation, Contrast and Brightness can be adjusted on a camera by camera basis. – Camera Covert Cameras can be remotely set into Covert Mode, they are still being recorded but cannot be viewed local to the system, or by any remote user apart from the Administrator on line. 75 Quantum EVO H.264 installation and user manual - Camera Name Up to 32 Characters are available for each camera name. - Spot Monitor settings 1) Set “Mode” (Split screen/ Alarm Motion or Event), by click the ON button for the required state – It will turn red. 2) Next select Duration for a sequence using the white time bar, next click OK. 76 Quantum EVO H.264 installation and user manual OSD On/Off The Symbols and text displayed on screen can be controlled: 1. The status bar can be set to be off/ Always on or be on for 5 or 10 seconds after a key press. 2. The Event symbols such as Motion, Audio, Pan / Tilt can be displayed or turned off. 3. The camera name can be displayed or turned off. 4. The PTZ display can be made to time out 5. The Password entry box can be made to time out 6. The darkness of the status bar can be varied. Camera Info If channels are set to Disconnected, then: 1. No OSD info will be displayed in associated screen spilt segments. 2. Cameras cannot be allocated recording rates within the record set up 3. Camera inputs will not be included in sequences. 77 Quantum EVO H.264 installation and user manual Recording Global 1. HDD Overwrite – Sets the HDD to either overwrite or stop when full 2. Post Event Duration – Sets the period of time after which an event ends that the DVR carries on recording in the Event mode settings 3. Quality – This set the quality level to either Low, Med of High 4. Event Mode – This is can be set to Exclusive to only record cameras in Events states, or Normal where the Event camera are recorded at the Event rates and other cameras ae recorded at the rate set below in th Non-Event FPS 5. Non-Event FPS – This is the record rate and quality setting that camera that are not in Event mode will be recorded at Privacy regions Click on the Privacy Regions button to access the set up of individual privacy regions on each camera view Audio Configuration Click on the Audio Configuration button to access the set up which cameras inputs are associated with which Audio inputs. 78 Quantum EVO H.264 installation and user manual Normal Resolution The resolution at which cameras are recorded is global for the Normal setting. Rate Each camera can have its individual record rate adjusted. The amount of frames available for recording is dependant on the Resolution setting. CIF 2CIF D1 79 = 100 FPS total = 50 FPS total = 25 FPS total Quantum EVO H.264 installation and user manual Audio The audio recording can be individually turned on or off against specific cameras. 80 Quantum EVO H.264 installation and user manual Alarm Each of the four Alarm inputs can be activated and given there own alarm recording profile. Select each input profile by using the left and right arrows at the bottom of the screen. Enable each profile by selecting the ON button. Set the Resolution, Record Rate and Audio recording as explained in the “Normal” recording section. Each of the four alarm inputs can be used to send up to 4 PTZ cameras to alarm positions. Select the Preset button at the bottom right on the screen. . 81 Quantum EVO H.264 installation and user manual Motion The Motion settings for Resolution, Rate and Audio are configured in the same manner as Normal (Time lapse) see pages 76 and 77. The only additions are the setting up of Sensitivity and the motion detection grid per camera. Motion Sensitivity The sensitivity of motion detection can be set on a per camera basis, the sensitivity will have to be adjusted to suit the individual scenes and may require several adjustments to achieve optimum performance. The detection region setup screen is displayed by clicking the Region button. Region Each cameras motion detection grid can be individually tailored for the camera scene. They are set to a default of all on (Yellow). They can all be turned off by clicking “Unselect all”. Then individually selecting the required boxes or clicking and dragging over an area. Once set click OK. 82 Quantum EVO H.264 installation and user manual Schedule The Schedule settings for Resolution, Rate and Audio are configured in the same manner as Normal (Time lapse) see pages 76 and 77. The only addition is the setting up of Schedule grid, click on the SET button to display the following screen.. A timetable can be set in hourly blocks throughout the whole week. 83 Quantum EVO H.264 installation and user manual Duration The duration setting allows the user to choose the Resolution and length of time the unit records for, then the DVR will automatically adjust the rate at which it records to achieve this time period. -Resolution First select the resolution required for each camera. -Video Next select whether the camera is connected to the DVR. 84 Quantum EVO H.264 installation and user manual -Audio Next select if Audio is being recorded and which channels to associate them with. -Days Finally select the number of days the DVR should record for. The choice is between; 5, 10,20,30,40,50,60,70 80 or 90 Days. 85 Quantum EVO H.264 installation and user manual Priority The RECORD PRIORITY allows the mixing of the various record methods to customise the individual site requirements. Example: A site may require Alarm recording at night, then a standard FPS recording during the day. In this case the Schedule would be set for required FPS and resolution, and the timetable set for this recording between 8am and 8pm each day. Schedule would be set as 1st Priority. The Alarm settings would be configured as required and this would be set as the 2nd priority. The Quantum EVO H.264 would then record between 8am and 8pm at the Scheduled rate, then once beyond 8pm would look to the second priority and only record Alarm Events. 86 Quantum EVO H.264 installation and user manual System Basic This section is used to select: Language Date format Video type System ID Deinterlace This option takes out the judder associated with movement in 4CIF (D1) recording. Set camera channel to ON 87 Quantum EVO H.264 installation and user manual Account The Quantum EVO H.264 allows for : 1 Administrator level log on 1 Manger level log on 4 User level log on Each of the 6 log-on accounts can be given individual passwords and user rights To amend the Name and on the name beside the box. This will display the box and it can be edited changed and confirmed. password, click Client Account name in the ID and passwords User rights can be applied. Auto Log out After a certain amount of time (15mins, 30mins or 1 hour) of inactivity. The users can be automatically logged off both the Local front panel control, and the Client viewer, 88 Quantum EVO H.264 installation and user manual Archive Log password A password is required in order to access the Archive Log, Sensor The alarm inputs can be configured to be either inactive (NONE), or Normally Open (N.O), or Normally Closed (N.C). 89 Quantum EVO H.264 installation and user manual Auto Delete Mode In Auto Delete Mode the DVR can be set to delete recordings that are a certain numbers of days old. This allows the DVR to comply with data protection laws in certain countries such as France. 90 Quantum EVO H.264 installation and user manual PTZ Setup for Cameras -ID Each camera input can be allocated an RS485 ID between 1 and 255. -Protocol Each camera output can have an individual protocol associated with it, the choices are: Vista PD Pelco D Pelco P LG Samsung Vista C (FSK) 91 Quantum EVO H.264 installation and user manual -Baud Rate The Baud rate of each PTZ camera can be set the choices are: PTZ set up for Keyboard -ID The DVR can be allocated an RS485 ID between 1 and 255. Note: The DVR RS485 address must be different to that of the keyboards connected to it. Vista VKBD4 keyboard address is set via the keyboard‟s engineering mode, please refer to the keyboard manual. 92 Quantum EVO H.264 installation and user manual Protocol Each keyboard can have an RS485 protocol associated with it, for the Vista VKBD4, VKBD3 or NPX keyboards select: Vista-KBD -Baud rate The Baud rate of each PTZ camera can be set the choices are: Choose 9600 for the VKBD4 and VKDB3im 93 Quantum EVO H.264 installation and user manual DST Setup (Daylight Saving Time) The Quantum EVO H.264 can be set to automatically reset its clock when the clocks change for Day Light Saving time. As default this is set to Off. USER Define Change “Off” to User Define, this will allow the exact date and time for the change to occur. Alternatively Select Region Select the required country. Then click “Ok”. 94 Quantum EVO H.264 installation and user manual NTP Setup NTP setup allows the DVR to have its internal clock synchronised with an External clock. The default setting is “Off” To set up hover on the “Off” a drop down arrow will appear giving the option to turn “On”. Once “On”, two other options will appear: Type allows selection between: Default – Time server is “time.bora.net”. Domain – Where another time server name can be added. IP – Where an IP address for a time server can be input. Select City Once the NTP settings have been set, you must then tell the DVR which time zone you are in. This will allow it to offset any time differences if the time server you contact is in a different zone. Select City, the map screen will appear. Hover over the city selection box, a drop down arrow will appear, click on the arrow. A list of time zones will be displayed. Select the time zone where the Quantum is located. Then click OK. 95 Quantum EVO H.264 installation and user manual Smart (HDD Watch Dog) The Smart function allows the health of the Hard disk Drives to be monitored for bad sectors and high temperatures. Note: Over time all Hard drives will develop bad sectors, this does not mean they have failed, it is an indication that they are beginning to fail, this can be used as a preventative maintenance tool, so drives can be swapped out before failing completely, so preventing the loss of recorded images. Smart can be turned on or off to monitor the Disk sectors The temperature can be set to a value, above which it will alarm. The Quantum EVO H.264 is rated to work up to +50 degrees C. It is recommended to det the Temp to approx +45 degrees. This will give the opportunity to take preventative action, such as improving ventilation to the unit. Message can be turned On or Off, if On a message will appear on the screen to warn of potential problems. 96 Quantum EVO H.264 installation and user manual ETC 1. 2. 97 Key Beep – This can be turned on or off Mouse sensitivity – This can be set to Low, med or high, to match the users dexterity Quantum EVO H.264 installation and user manual Event Email Registration The Quantum EVO H.264 will send Emails to up to 3 defined addresses under certain conditions such as Alarms or video loss. The screen is where you setup the receiving address and address that the DVR will send from. The mails can be set to be sent immediately an event occurs, Daily or Weekly. Email Out The actions which cause an e-mail response can be defined within this screen. 98 Quantum EVO H.264 installation and user manual Beep Out The internal buzzer can be set to sound on the following occurrences: Video Loss Alarm activation Motion Detection Power loss Smart Duration – This sets the length of time for which the buzzers sounds. Alarm Out The Alarm output relay can be set to activate on the following occurrences: Video Loss Alarm activation Motion Detection Power loss Smart Duration – Set the length that the relay is active. Relay follower: If set to YES the relay closes when a camera is selected. This output can trigger an alarmed switcher to switch the video output to the input relating to that DVR, This allows a single monitor to be used to view multiple DVRs. ( One at a time) 99 Quantum EVO H.264 installation and user manual Local Search (viewing downloaded footage) This allows playback of video which has been downloaded top the PC. Search Searches can be done by Date/Time, Even and Calendar. Date/Time Hovering over the Date and Time bars will allow drop down boxes to select the required time and Date. Once set, click Play. Event Choose the Event search box then choose the type of Event you are searching for, options are: Alarms, Motion or Audio. Once the selection is made, a list will appear, showing the start and stop time and date of the event. Choose the Event required and click Play. 100 Quantum EVO H.264 installation and user manual Calendar When the Calendar option is chosen this screen will appear, any day with recording available will be highlighted in Blue. Select the required day. Any downloaded events will be shown, click on the event, the red line will move to that event. Then click Play to review the recording. 101 Quantum EVO H.264 installation and user manual Log Clicking on Log will display the log file from the unit. This file can be printed, by clicking Print. Info Click on Info. This will display the version of the software client being used. 102 Quantum EVO H.264 installation and user manual Local Setup This allows the setup of the viewing of the software on the PC. Global This screen allows the following: Draw mode to be set to YUV or RGB Date Format to be set to: DD/MM/YYY, MM/DD/YYYY or YYYY/MM/DD. Save Format, for the saving of stills as either JPEG, Bit Map or TIF. Setting the clock to 12 or 24 hour display Turning the Watermark On or OFF recommended to leave ON The location of where stills afre saved. Opacity The opacity or “boldness” of the OSD can be individually set per function. The lower the number the more see through the box. ? 103 Quantum EVO H.264 installation and user manual Audio Buffer Audio Buffer settings are there to adjust the audio over the network, this will compensate for different network speeds ( LANs, WANs etc). This can only be adjusted if the LIVE video is switched off. Adjust each variable to achieve best quality video for Network bandwidth available, this is best done through trial and error. Deinterlace The Deinterlacing function should be switched to ON for cameras recorded in D1 resolution, this removes the picture judder seen when viewing still images of D1 recordings. 104 Quantum EVO H.264 installation and user manual PAN, TILT, Zoom, Focus (Remote telemetry control) When PTZ button is being pressed, PTZ control icon will be pop-up on the live image. 105 Quantum EVO H.264 installation and user manual PAN/TILT/ZOOM/FOCUS When PAN/TILT button is clicked the Pan/Tilt control appears, this allows Left, Right, Up and Down Control of PTZ cameras When Zoom/Focus button is clicked, the control changes to Zoom in on the up arrow, Zoom out on the down arrow. Focus near on the left button and focus far on the right arrow. PRESET/LEARN PRESET&LEARN icon The presets button can be activated by clicking on the centre of the control icon, the preset symbol will appear and the Preset selection box will appear. To save a preset, move the camera to the desired position then click “Set” followed by the desired number. To recall the preset, click “Call” followed by the desired number. 106 Quantum EVO H.264 installation and user manual Firmware Upgrade User can select Firmware Upgrade menu, if a new version of firmaware exits in the C:/Vista/Upgrade folder ,then the message „New program found!‟ will be displayed if there is no file then „New program not found!‟ message will be displayed. To proceed with upgrading press the OK button and select each firmware files to upgrade it to the system, by ticking the boxes. Once the upgrade has been completed the following message will appear. Next press the OK button to reboot the DVR, the firmware will only be applied completely once the system is rebooted. Quit (Exiting Client program) To exit the Client viewer program click the Quit button. 107 Quantum EVO H.264 installation and user manual APPENDIX 1 ALARM SENSOR INSTALLATION 1. Components 1) External Sensor: 1 2) DVR System: 1 2. Inner Circuit for Sensor Input The inner circuit of Quantum DVR is as follows, DVR 12V DC 5V DC 2.2k 2.2k Internal Check Point 0.1uF PC817 SENSOR IN Outlet Point GND ① PC817 : Photo Coupler ② The Specification of PC817 108 Quantum EVO H.264 installation and user manual Absolute Maximum Ratings Parameter Forward current *1Peak forward current Input Reverse voltage Power dissipation Collector-emitter voltage Emitter-collector voltage Output Collector current Collector power dissipation Total power dissipation *2Isolation voltage Symbol IF I FM VR P V CEO V ECO IC Rating 50 1 6 70 35 6 50 Unit mA A V mW V V mA PC 150 mW P tot V iso 200 5 000 -30 to + 100 -55 to + 125 260 mW V rms Operating temperature T opr Storage temperature T stg *3Soldering temperature T sol °C °C °C *2 40 to 60% RH, AC for 1 minute *3 For 10 seconds Electro-optical Characteristics Input Output Parameter Forward voltage Peak forward voltage Reverse current Terminal capacitance Collector dark current *4Current transfer ratio Collector-emitter saturation voltage Isolation resistance Transfer characteristics Symbol VF MIN. - TYP. 1.2 MAX. 1.4 Unit V IFM = 0.5A - - 3.0 V IR V R =4V - - 10 µA Ct V = 0, f = 1kHz - 30 250 pF V CE = 20V - - 10 -7 A 50 - 600 % - 0.1 0.2 V 5x 10¹⁰ 1011 - Ω V FM ICEO CTR V CE( sat) R ISO Conditions IF = 20mA IF = 5mA, V CE = 5V IF = 20mA, I C = 1mA DC500V, 40 to 60% RH Floating capacitance Cf V = 0, f = 1MHz - 0.6 1.0 pF Cut-off frequency fc V CE = 5V, I C = 2mA, R L = 100 W, -3dB - 80 - kHz - 4 18 µs 3 18 µs Response time Rise time Fall time tr tf V CE = 2V, I C = 2mA, R L = 100 Ω 109 - Quantum EVO H.264 installation and user manual 1. SENSOR Install Processing ① Please refer the below block diagram . AC SENSOR DVR 12V DC ?? V DC 2.2k N.C 3.3k Or 10k PC817 SENSOR IN Outlet Point GND 110 Quantum EVO H.264 installation and user manual APPENDIX 2 SETTING INTERNET SECURITY SETUP FOR WEB CLIENT ON WINDOW XP/2000 & WINDOW VISTA SERVICE PACK 2. 1) Security Setup > Window XP / 2000 Tools-> Internet Options-> Security -> Select “Customer Level” > Window Vista Tools-> Internet Options-> Security -> Unselect square box -> Select “Customer Level” Select “ Allow script-initiated windows Without Size or position constraints”-> Enable. 111 Quantum EVO H.264 installation and user manual Select “Download unsigned Active X Controls”-> Prompt Select “ Automatic Prompting for Active X Controls”-> Disable 112 Quantum EVO H.264 installation and user manual 2) Connection Click here as described Select “Temporary Allow Pop-ups” 113 Quantum EVO H.264 installation and user manual Click “To help protect security, Internet Explorer stopped this site from installing an Active X control on your computer. Click here for options…” Select “Install Active X Control “ Select “Install” and then „Log-In‟ box will be shown. 114 Quantum EVO H.264 installation and user manual APPENDIX 3 DYNAMIC IP (Supporting DDNS Server) With DDNS Server, This allows a user to connect to the unit remotely without the need for a fixed IP address.(Please register your ID & Domain at www.ddns-dvr.com in which you can use their DDNS server as free of charge) 1. Visit www.ddns-dvr.com to get the DDNS user ID & PW as well as Host name. 2. Click to create / set account of “Dynamic DNS”. 115 Quantum EVO H.264 installation and user manual 3. Select “Create Account” menu. 4. Create Account. > Fill in all blanks in order to create new account. ID & Password will be emailed to you when the account is setup correctly. Once the DDns-Dvr account has been setup, it is necessary to add the details in the Network section of the Quantum‟s menus. DDNS SET To enter Network set menu, system ask password (Default is 00000000). In DDNS environment, need to be changed DVR & Web server port, please refer to IP set. 116 Quantum EVO H.264 installation and user manual Set up DDNS 1. Change DDNS to ON 2. Input User ID 3. Input User PW 4. Input Domain 5. Click “DDNS Status Check” if it is “ok” Click “Apply” > Note; In DDNS Setup, The Domain Name has to be filled in. 117 Quantum EVO H.264 installation and user manual Appendix 4 SETUP FOR DVR PORT/ WEB SERVER PORT USING IP SHARING ROUTER (Port Forwarding) 1) To use IP sharing Router, “Use Dynamic IP” should be set to “NO”. - DVR Port: This can be set to any number between 2000 to 65535. - Web Server Port: this can be set to any number between 2000~65535, as long as it is not the same as the DVR Port number 2) Setup “virtual server” on IP sharing Router It is for setting virtual server to forward IP which is allotted to DVR. > For example, DVR-1, IP : 192.168.10.107, DVR Port : 7000, Web Server Port : 7001 If DVR-1 is configured as above, the virtual server on IP sharing router is as follows. 1) PC Server Name : DVR-1(IP 192.168.10.107) Protocol : TCP, Internal Port : 7000, External Port : 7000 2) PC Server Name : DVR-1 (IP 192.168.10.107) Protocol : TCP, Internal Port : 7001, External Port : 7001 * For more detail, please refer to relevant IP sharing manual. (3) „DDNS‟ Setup on IP sharing router DDNS configuration is not needed in case of fixed IP. (4) To connect DVR-1 with Internet Explorer, http://dvr-1.ddns-dvr.com:7001, to connect DVR-1 with CD installer, http://dvr-1.ddns-dvr.com:7000. 118 Quantum EVO H.264 installation and user manual APPENDIX 5 MAKING A PARTITION ON AN EXTERNAL USB HARD DRIVE To back up to USB HDD, the USB HDD should be formatted first on PC. The Quantum EVO supports the FAT32 & NTFS file system, of which maximum size is 500GB for one partition. Please refer to the following procedure to make a partition and format on PC. *If the HDD capacity is under 500GB, you don‟t need to make a partition and simply connect to the DVR directly. 1. Select Control panel-> administrative Tools. 119 Quantum EVO H.264 installation and user manual 2. Select “Computer Management” 3. Select “Disk Management”. 120 Quantum EVO H.264 installation and user manual 4. Click right mouse button and select “New Partition”. 5. Follow “New Partition Wizard” procedure as below. 121 Quantum EVO H.264 installation and user manual 6. Select the Primary partition option. 7. Maximum is 500GB at FAT32 file format. 122 Quantum EVO H.264 installation and user manual 8. Assign drive letter 9. Format the partition to FAT32 123 Quantum EVO H.264 installation and user manual 10. At this stage, New Partition has been made. 11.Check New partition was created correctly.(Format will run automatically) 124 Quantum EVO H.264 installation and user manual 12. Check New Partition was created correctly 125 Quantum EVO H.264 installation and user manual 126 Quantum EVO H.264 installation and user manual NORBAIN SD LTD 210 Wharfedale Road Winnersh Triangle Wokingham Berks RG41 5TP 01189 125 000 Subject to change without notice 127