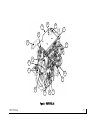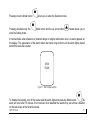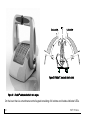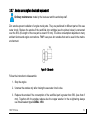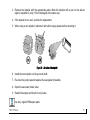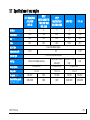
1
Owner’s Manual Marine Diesel Engines HPE Series HPE 40S/80/80SD/110/110JD HPE/P 40/150/150JD/170/170JD/190/190JD HPE/P 100/225/225JD/250/250JD/250H HPE/P 300 HPEL 45/80/65/90 Table of contents 1 General information 1.1 1.2 1.3 1.4 1.5 1.6 1.7 2 Using the FNM® engine, HPE series 2.1 2.2 2.3 2.4 2.5 2.6 3 About this manual Guidance on identification of important information Notes on FNM® engines servicing Identification of your engine General safety regulations Main components of FNM® engine, HPE Series Engine delivery Analog Instrument Panel Digital Instrument Panel First engine starting and sea trial Engine starting and stopping operations Throttle Notes on daily use of the engine Maintenance of FNM® engines, HPE Series 3.1 3.2 3.3 General information on maintenance Periodic organization and frequency of maintenance operations Details of maintenance operations FNM® HPE Series 3 5 6 7 9 11 15 22 23 24 27 38 41 49 58 60 61 64 68 1 3.4 3.5 3.6 3.7 4 Maintenance booklet 4.1 4.2 2 Engine treatment and maintenance products Periods of engine inactivity Other useful information for maintenance Specifications of your engine 98 101 106 108 129 Engine Identification Data | Dati identificativi del motore 130 Ordinary and Extraordinary Maintenance Register | Registro della manutenzione periodica programmata e straordinaria 131 FNM® HPE Series 1 General information FNM® HPE Series 3 Dear customer Fratelli Negri Motori (hereinafter FNM ) is pleased to thank you for choosing an engine of HPE range. FNM® engines are designed and developed according to the demand and the needs of customers and builders of pleasure and work boats. CMD S.p.A., the company that produces and distributes worldwide the marine diesel engines with the FNM® brand, offers a wide range of products and models according to each customer's request. FNM engines ® are known around the world: - for their performances; - for their compact structure and outstanding power-to-weight ratio; - for their long life and low fuel consumption. This means that, when buying an FNM® engine, you have chosen not only a technologically advanced engine, but also an engine designed to satisfy the anti-pollution standards and regulations. Mariano Negri CEO of CMD S.p.A. 4 Giorgio Negri Sales Manager of FNM® brand FNM® HPE Series 1.1 About this manual This manual is integral part of the engine and is written by the manufacturer to inform the end user of the procedures necessary for the proper use and maintenance of marine diesel engine FNM, HPE Series. Please keep this manual for the entire life of the product so that you always get quick information on the engine during use. The manufacturer reserves the right to modify this document without prior notice. The observance of the installation procedures and routine maintenance in this manual and in the installation manual ensures compliance at the declared performance at the and gas exhaust emission and noise parameters for which your engine is approved in accordance with the Directives 2003/44/EC and EPA/TIER/3. This manual provides important information on maintenance, operations to be carried out periodically and handling of your engine. Before starting your engine, we advise you to read this manual in order to get the information necessary to operate your engine. The proper use of the FNM® engine, as well as proper maintenance plan during the period of activity and inactivity of the engine, ensures its durability and performance. FNM® HPE Series 5 1.2 Guidance on identification of important information In the manual you will find a color guide that indicates the degree of importance of information for use or maintenance of your FNM® engine. There are three levels of importance: Danger icon: dangerous situations that may compromise the safety of persons and engine functionality. Beware icon: indicates the need to follow the instructions as presented in this manual, otherwise the engine functionality can be reduced. Informations: indicates important technical information. To these are added the environmental information, as indicated below: Respect the environment, do throw away pollutants The important information is shown in the rest of this manual with the color for one of these levels, as shown above. 6 FNM® HPE Series 1.3 Notes on FNM® engines servicing For your engine service and maintenance always refer to an authorized service centers and to the FNM® service network. Only by using original spare parts and relying on our specialized staff you can get the best performances from the engine and ensure a long life. The FNM® service centers offer low costs and a high degree of specialization. Our service centers ensure the correct operation of the engine according to all your expectations. Visit our website www.fnm-marine.com to know the nearest service point. The reliability of the total propulsion unit is dependent on the quality of the installation. Nearly all the problems are caused by faults or inaccuracies which occur during the installation. FNM® is not responsible for damages (engine and/or persons) caused by wrong installation. Ask your installer the effective compliance of the installation of your engine, as well as a copy of the installation form, necessary so as the warranty is held invalid for the FNM® service. If the installer does not transmit the installation form to FNM® this may invalidate the warranty. To get help on your engine and for warranty information, please feel free to contact FNM® at [email protected]. FNM® HPE Series 7 1.3.1 Spare Parts The exclusive use of FNM® original spare parts is an essential condition for a good maintenance of the engine. The use of non-original spare parts may cause the warranty to expire and it also exempts the company CMD S.p.A (owner of the FNM® brand name and logo) from any responsibility. 1.3.2 Responsibility The responsibility of the Manufacturer is subject to the correct execution of the “Maintenance Procedures” operations that are described in this manual. For this purpose, it will be necessary to demonstrate that all the maintenance procedures and operations have been carried out according to the manual and that, in case of extraordinary maintenance, the procedures and operations have been carried out by FNM® Service centers. The information featured in this manual only refer to the engine itself; more specifically, the illustrations serve as a pure indication and the instructions are described in a purely functional way with the purpose of providing help and guidance in carrying out the ordinary maintenance. The execution of such operations may vary based on the configuration of the controls and/or accessories of the boat where the engine has been installed. The information featured in this manual is correct at the time of printing. The Engine Manufacturer reserves the right to make modifications without notice at any time for technical or commercial reasons as well as for the need to abide by new regulations or norms. The Engine Manufacturer declines any responsibility that may arise from possible mistakes and/or omissions during the installation. It is forbidden to alter the characteristics of the engine and in particular the configuration of the control unit (or ECU box) because such modifications and/or alterations will invalid the warranty and safety terms. 8 FNM® HPE Series 1.4 Identification of your engine The ID label is applied on your engine and on the control unit (or ECU box) in the position indicated in the table below (see also paragraph Main components of FNM® engine, HPE Series on page 15): Engine HPE 40S/80/80SD/110/110JD HPE/P 40/150/150JD/170/170JD/190/190JD HPE/P 100/225/225JD/250/250JD/250H HPE/P 300 HPEL 45 HPEL 80 HPEL 65/90 Label location On the engine cover. On top of the engine, attached to the intercooler housing. On the cooled exhaust manifold on the right side of the engine. On the engine cover. The data on the ID label will include: - FNM® HPE Series Engine Type Engine Family Serial No. Year of manufacture Test speed (Rpm) Power in kW (kW) Horsepower (HP) Costruzioni Motori Diesel SpA Z.I. Valle di Vitalba 85020 Atella (PZ) Italy Engine Type: HPE110 Engine Family: 13T4L550 Serial N°: 47110XX Year: 2011 Rpm: 4400 kW: 80.88 HP:110 9 The engine serial number is also printed on the engine block. The position is indicated in the table below (see also paragraph Main components of FNM® engine, HPE Series on page 15): Engine HPE 40S/80/80SD/110/110JD HPE/P 40/150/150JD/170/170JD/190/190JD HPE/P 100/225/225JD/250/250JD/250H HPE/P 300 HPEL 45 HPEL 80 HPEL 65/90 10 Engine serial number position On the crankcase, right side, bell housing connection. On the crankcase, front side, above the bell housing. On the crankcase, right side, bell housing connection. FNM® HPE Series 1.5 General safety regulations Read carefully the information contained in this chapter in order to avoid unpleasant incidents. The manufacturer cannot be held responsible for any damage resulting from misuse of the engine, from the failure to follow the indications contained in this manual and for every tampering with or change made without the manufacturer’s authorization. Do not drive the boat if you consume alcohol or other substances that may alter your state of attention and reflexes. - Use the engine only for the tasks authorized by the manufacturer, do not tamper any device to obtain different performances. - Consult only technical staff, with experience and specific technical skills. The lack of these requirements could result in damage to people’s safety as well as damage to the engine. - Pay attention to the meaning of the symbols and the labels applied. Keep them visible and follow the warnings indicated. - Carry out the engine handling in accordance with the information provided directly on the engine and on the packaging. During the engine lifting and transportation, use means with appropriate load capacity. - During the installation the installer shall follow the manufacturer’s instructions. Do not make changes to the engine components for any reason! FNM® HPE Series 11 12 - Before using the engine for the first time simulate a few trial maneuvers to identify the controls and their main functions, especially those related to start -stop operations. Do not keep using the engine if anomalies are detected. - In case of anomaly, stop immediately the engine or reduce the speed as far as possible. Start again only when the normal operating conditions are restored. - Keep the engine and related components in conditions of maximum efficiency and carry out the maintenance operations established by the manufacturer and repeated in this manual. - Replace only original spare parts. Use only oil, lubricants and grease recommended by the manufacturer in accordance with the specifications of this manual. - Pay attention to the disposal of polluting residues (used oil, diesel fuel, etc.) following the local legislation and disposal procedures. - Do not unscrew the expansion tank cap of the cooling system when the engine is hot! Slowly turn until any steam under pressure comes out, and then remove the cap. - Do not start the engine without the air filter: the detachment of rotor parts of the compressor during operation could cause damage to persons, furthermore any aspirated particles could damage the blades. Avoid contact of hands with the rotor. - Do not touch the turbocharger and the turbine cover with hands immediately after using the engine, risk of burns. Let engine cool before interacting with the hot parts. FNM® HPE Series - Do not smoke near the battery compartment and the fuel tank! The battery can release flammable gases. Wrong battery connection could provoke sparks and explosion. - Don’t provoke short circuits, electrical risk. - If you use pressure water jet to clean the engine never point this to rubber pipes or electrical connections. - Use proper protection (clothing, gloves, etc.) during maintenance and/or work on the engine. - During maintenance operations provide correct ventilation. Avoid stagnation of toxic and/or flammable vapors. - Do not remove the protections included in your engine (such as housing or protective coatings), to avoid danger of fires. 1.5.1 Residual risks Potential/additional risks to persons: Risk of injury: do not put hands in any moving parts (pulleys, flywheel, belts, etc.). Risk of burns: attention to hot surfaces (exhaust manifold, turbocharger, raiser, etc.) FNM® HPE Series 13 Risk of poisoning: watch out for oil splashes, hot fuel and battery acids in case of malfunction: use gloves and safety glasses. Risk of shock: use safety shoes when lifting the engine and/or working in the engine compartment. FNM ® is not responsible for damage caused by misuse of the engine and the failure to follow procedures issued, as well as for damage caused by unauthorized personnel. 14 FNM® HPE Series 1.6 Main components of FNM® engine, HPE Series The main components present on HPE marine engines are listed below. (1) Intercooler (except HPEL45): Reduces the temperature of the compressed air from the compressor that flows into the engine intake duct using a bundle of finned tubes crossed by sea water. (2) Expansion tank: contains engine coolant. (3) Oil sump: contains engine lubrication oil. (4) Zinc anodes: prevent the galvanic oxidation of metal parts. (5) Oil exchanger: reduces the temperature of the engine lubrication oil. (6) Diesel fuel exchanger: reduces the temperature of the fuel in the return line to the exchanger. (7) Air filter: retains the impurities in the air intake. (8) Dual heat exchanger (as an alternative to diesel fuel exchanger and in the presence of steering): reduces the temperature of steering oil and diesel fuel. (9) Turbocharger (except HPEL45): compresses the intake air exploiting the energy of exhaust gases through the use of a turbine-compressor group. (10) Diesel fuel filter: filters diesel fuel in inlet to the supply line of the engine It can be wallmounted in the engine compartment. FNM® HPE Series 15 16 (11) Raiser: reduces the temperature of the exhaust gases coming out of the turbine, conveys fumes towards the exhaust and prevents the return of sea water into the turbine. (12) Starter: starts the engine. (13) Water to water exchanger: reduces the temperature of engine coolant through heat exchange with sea water. (14) Low-pressure electric fuel pump: sucks fuel from the low pressure line and sends it to the high pressure line. (15) Thermostat housing: contains the thermostatic valve of the cooling circuit. (16) Sea water pump: sucks water from the sea water intake and pushes it in the cooling circuit. (17) Alternator: generates electric power, the output voltage is 12 Volt. (18) Oil filler cap: useful in filling the engine oil. (19) Lifting eyes: allow the movement of the engine outside the engine compartment. (20) Engine label position (21) Serial number position on the crankcase (22) Oil drain valve FNM® HPE Series 18 19 20 7 2 9 13 19 4 11 21 1 5 16 17 10 6 15 14 12 3 Figure 1 – FNM® HPE 40S/80/80SD/110/110JD – FNM® HPEL 80 FNM® HPE Series 17 19 20 7 2 9 1 18 11 19 22 16 8 21 10 13 17 12 15 14 3 Figura 2 – FNM® HPE/P 40/150/150JD/170/170JD/190/190JD – FNM® HPEL 65/90 18 FNM® HPE Series 7 1 2 9 20 19 18 11 19 22 16 8 21 10 13 17 12 15 14 3 Figura 3 – FNM® HPE/P 100/225/225JD/250/250JD/250H FNM® HPE Series 19 19 18 10 14 1 19 16 20 2 7 13 19 21 9 17 8 13 12 22 11 15 3 Figure 4 – FNM® HPE/P 300 20 FNM® HPE Series 20 18 19 2 19 11 13 7 21 5 16 17 15 14 12 3 Figure 5 – FNM® HPEL 45 FNM® HPE Series 21 1.7 Engine delivery At moment of receiving an HPE engine please check: - The integrity of the packaging, if the engine was supplied not installed (the wood box must be integral, the engine must be fixed on the wood support and secured to it). - The ECU box must be integral and with no obvious signs of breakage. - The engine wiring and any extensions must be integral with no cuts, the Amphenol® connector must be integral and all the pins of the connector must be correctly positioned. - The instrument panel and connection cable must be integral. - Any fluids leaks. At the time of shipment engines are bench tested and packaged according to internal specifications. FNM® is not responsible for damages caused by the carrier/transport company. 22 FNM® HPE Series 2 Using the FNM® engine, HPE series FNM® HPE Series 23 2.1 Analog Instrument Panel If your FNM® HPE engine is equipped with an analog instrument panel, it can have an instrument panel complete with key lock, indicators and indicator lights (Figure 7 - Analog instrument panel in separate configuration on page 26), or only an instrument panel with lock key and indicator lights (Figure 7 on page PAGEREF _Ref320107452 \h 26) with separate analog instruments, depending on the type of installation. In both cases, all indicators are also available as an option. The elements present on the instrument panels are as follows: 24 (1) Key Lock: allows to start and stop the engine (2) Test Button: allows checking the indicator lights operation on the panel. (3) Backlight: turns on or off the backlight of the panel. (4) Fuse: Protects the panel instruments against overcurrent. (5) Coolant high temperature indicator light: (6) Oil low pressure indicator light: (7) Glows plugs indicator light: active (at the start-up). (8) Alternator indicator light: lights up when the coolant is too hot. lights up when the oil pressure is too low. lights up when the preheating system of the engine is lights up when the alternator is not charging the battery. FNM® HPE Series (9) Voltmeter: measures the battery voltage in volts. (10) Engine oil pressure indicator: measures the engine oil pressure in bar or psi. (11) Crankshaft revolutions counter: measures the engine crankshaft speed rotation in RPM. (12) Coolant thermometer: measures the engine coolant temperature in °C and °F. (13) Hourmeter clock: indicates the number of hours that the engine has run. Each panel has an alarm buzzer that signals the situations of potential danger. For information on the operating status of indicators and indicator lights on the engine panel refer to chapter 3.7.2 - Meaning of the indicators on the analog panel on page 112. FNM® HPE Series 25 11 2 10 3 4 12 4 13 9 1 8 3 8 7 6 5 2 7 6 5 Figure 7 - Analog instrument panel in separate configuration 1 Figure 6- Complete analog instrument panel 26 FNM® HPE Series 2.2 Digital Instrument Panel If your FNM® HPE engine is equipped with digital instruments, it can have an instrument panel complete with key lock, lights and indicators (Figure 8- Complete digital instrument panel on page 29), or only an instrument panel with lock key and indicators (Figure 9 - Analog instrument panel in separate configuration on page 29) with separate digital instruments, depending on the type of installation. In both cases, all indicators are also available as an option. The elements present on the instrument panels are as follows: (1) Key Lock: allows to start and stop the engine. (2) Crankshaft revolutions counter: measures the engine crankshaft speed rotation in RPM. (3) CANBUS universal instrument: allows to display all the engine operating parameters. The integrated display allows to view also the alarms related to the engine. Consult the table on page 116 for a list of the situations reported and the management of situations of potential danger. The instrument also has a buzzer and some warning lights to indicate anomaly situations. (4) Mode Button: (5) Direction buttons: instrument. To change the operating mode of the CANBUS universal instrument. and (6) Glows plugs indicator light: (at the start-up). FNM® HPE Series to scroll through menus and views of the CANBUS universal lights up when the preheating system of the engine is active 27 (7) Transmission oil anomaly indicator light: lights up when the transmission has low oil pressure, or the level of the oil tank is below the minimum. (8) Other indicator lights: Optionals (depend on boat installation). 28 FNM® HPE Series 6 6 8 7 8 7 1 4 Figure 9 - Analog instrument panel in separate configuration 3 2 5 1 Figure 8- Complete digital instrument panel 2.2.1 The universal CANBUS instrument The digital instrument panel features a LCD display and some buttons that make up the CANBUS universal instrument. The instrument is capable of displaying various information of the engine. FNM® HPE Series 29 When turned on the instrument performs the self-control mode of check the operation of its electronics. So it moves to normal mode and for factory settings, it displays the battery voltage (Volts), the engine coolant temperature (Coolant Tmp) as shown in Figure 10: VOLTS 13.8 Volts Coolant Tmp 100° C Figure 10 - CANBUS universal instrument normal mode The instrument has three operating modes: Normal, Selection and Setting. 2.2.2 Normal Mode It is used during normal operation of the instrument. The screen looks like the image in Figure 10, unless you set the screen of another view as a standard normal mode screen. In normal mode the pressure of the arrow keys LCD contrast for better viewing. 30 and allows you increase or decrease the FNM® HPE Series Pressing once the Mode button Pressing simultaneously the enter the Setting mode. allows you to enter the Selection mode. Mode button and the up arrow button instead allows you to In normal mode, when situations of potential danger or engine malfunction occur, an alarm appears on the display. The appearance of the alarm makes the buzzer ring and turns on the alarm lights, placed behind the revolution counter. CHECK ENGINE ! Figure 11 - Alarm display example To disable the warning, turn off the buzzer and the alarm lights and press the Mode button . The alarm will recur after 15 minutes if not resolved. Once disabled the alarms they can still be consulted on the last screen of the Selection mode. FNM® HPE Series 31 Consult 32 the possible alarm messages that may be displayed in 3.7.3 FNM® HPE Series - Meaning of the indicators on the digital panel- on page 115. 2.2.3 Selection Mode The Selection mode allows you to check the parameters that are not normally shown on the instrument. From normal mode, pressing once the Mode button allows you to enter the Selection mode. Pressing the Mode button or staying for more than 4 seconds in the Selection mode without pressing any key makes it return to Normal mode. In Selection mode, the arrow keys and can be used to display alternative screens containing other parameters monitored by the instrument: FNM® HPE Series 33 VOLTS 13.8 Volts Coolant Tmp 100° C Oil Press 2.76 bar Fuel Used 10 Ltrs Trans Gear 2 Forward Trans Temp 165° C Trans Press 13.8 bar Boost Press 0.3 bar Screen 1 (displayed in Normal Mode) Screen 2 Screen 3 Screen 4 Fuel Level Throttle 33 % Engine Load 20 % TRIM Engine Hour 35 Hrs Fuel Level ALARM SCREEN WILL DISPLAY ENGINE and LOCAL Alarms When occuring Screen 5 Screen 6 Screen 7 Screen 8 Figure 10 - Possible displays in Selection mode 34 FNM® HPE Series In Selection mode pressing the down arrow allows to switch from screen 1 to screen 2, and so on. Pressing the up arrow allows you to go back. Screen 8 is displayed only if there are errors or warnings to report. The information you can see are the following: (1) Volts: is the operating voltage of the battery in volts. (2) Trim: is the position proportional to the trim inclination angle. The Trim location information is only available in applications that require the adjustment of the trim, such as the stern drive. (3) Oil Press: is the engine oil pressure in bar or PSI. (4) Engine Hour: is the total number of running hours of your marine engine. (5) Fuel Level and Fuel Left: it is an indication of the fuel level in the tank. (6) Water Press: is the engine coolant pressure. (7) Fuel Used: is the amount of fuel used since last reset of the instrument. Information relating to the fuel (Fuel Level, Fuel Left, Fuel Used) are available only with a special float for the level measurement. Get information from your installer if it is installed on your boat. (8) Trans Gear: shows the current gear engaged in the transmission. (9) Trans Temp: Indicates the current oil temperature in the transmission. FNM® HPE Series 35 (10) Trans Press: indicates the current oil pressure in the transmission. Information relating to the transmission (Trans Gear, Trans Temp and Trans Press) are available only with the sensors properly installed on the transmission. Get information from your installer they are installed on your boat. (11) Boost Press: shows the current engine boost pressure (turbocharger boost pressure). (12) Throttle or Engine Load: show the percentage relative to the position of the throttle. (13) Coolant Tmp: shows the engine coolant temperature. For more information about the displayed information and warning views that may appear, see the paragraph 3.7.3 - 36 FNM® HPE Series Meaning of the indicators on the digital panel- on page 115. 2.2.4 Setting Mode The setting mode allows you to set all the parameters of the instrument. In normal mode pressing simultaneously the Mode button you to enter the Setting mode. and the up arrow button allows Pressing the Mode button or staying for more than 40 seconds in the Selection mode without pressing any key makes it return to Normal mode. In Setting mode, the arrow keys and can be used to display alternative screens containing other functions that allow you to set the instrument To enter a function press and hold the arrow keys and simultaneously for at least 2 seconds. Use the same key combination to give a confirmation, and the Mode button to go back. The functions which can be modified on the instrument are shown in the figure below. For more information consult the manual of digital instrument (available also on the website www.fariainstruments.com). FNM® HPE Series 37 Select Default Screen Reset Fuel Used Set Fuel Tank Full Set Amount Of Fuel Organize User Screens Function 1 Function 2 Function 3 Function 4 Function 5 Select Gauge Range Select Fuel Sender Select Display Units Select Fuel Tank Size Fuel Tank Calibrate Function 6 Function 7 Function 8 Function 9 Function 10 Low Fuel Alarm Select Self Test Software Id & Revision Minigatewa y J1939 PGFxxxx Function 11 Function 12 Function 13 Figure 11 - Possible functions of the Setting Mode 38 FNM® HPE Series 2.3 First engine starting and sea trial 2.3.1 Checks and preliminary operations Follow the directions before starting the engine for the first time. It is preferable and highly recommended to follow the directions together with your installer. 1. Check the weather conditions, do not put into the sea if the sea is too rough or bad weather is forecasted. 2. Make sure you have carefully read this instruction manual. The information contained in it will be useful in the management of your engine. 3. Check the fuel supply line and the presence of any leaks. Be careful to avoid sharp bends or kinks along the fuel supply line. Also be sure that the line is clean and free of air bubbles. 4. Verify if you need to lubricate or grease the pinion of the starter and transmission couplings. 5. Check and verify the correct installation of electrical connections. Wrong connection may cause short circuits and cause damage to persons and to the engine. FNM® HPE Series 39 6. Check the battery integrity and the correct state of charge. Turn ON the battery main switch. 7. Check the sea water circuit and verify that the valve is open. 8. Check the belts and tighteners status. 9. Check all the engine oil levels and verify that they are correct, then check the fuel level in the tank. 10. Turn ON the red button on ECU box and verify that all the LEDs are lighted. 11. Verify the lever command status and that it is in Neutral position. 12. Verify the oil level in the gearbox or in the stern drive. 13. Check the correct propulsion-engine assembly alignment. Compile the installation form in all parts with the installer and make sure that it is sent it to the engine manufacturer after the first engine start and boat test in the sea in order to start the guarantee. 2.3.2 First engine start To carry out the actual first engine start: 1. Start the engine, turning the key to position I for some seconds (Figure 12 - Situation of the panel with engine off, key to position I. 40 FNM® HPE Series 2. on page 42) and then to position II when the light of the glow plugs turn off (Figure 13 - Hold the key to position II until the engine starts. on page 43). 3. Let the engine warm up for few minutes at minimum RPM. 4. Carry out the engine diagnosis with the installer, so that it acquires the reference data. These data must be copied into the installation form in order to validate the FNM® engine warranty. 5. Check for any leaks, verify the correct operation of the sea water pump, the proper flow of water from the engine exhaust, all the lights on the instrument panel are off and there is no audible alarm. Check also the oil pressure, coolant temperature and battery charging status. 6. If you heard strange noise, vibration or black smoke stop immediately the engine and refer to assistance point. 7. Take the command of the boat. 8. Verify that all persons are on board and then engage the gear. Do not exceed the speed of the engine during the first hours of operation! On each occasion in which the engine is used for a long period at high revs, FNM® advises not to turn it off at once, but to let it operate at low RPM without gear engaged for at least another two minutes in order to facilitate gradual cooling of the stressed parts (turbine, etc..) avoiding any thermal stress. FNM® HPE Series 41 2.4 Engine starting and stopping operations Below are listed the operation to carry out for the normal operation of your FNM® HPE marine engine. 2.4.1 Preliminary operations at the ordinary engine startup Make sure that the sea water inlet valve is open. The dry run of the sea water pump causes irreparable damage to the impeller and serious damage to the engine after a few minutes of running. Check the fluids levels: - Fuel - Engine oil - Coolant Before starting the engine, make sure at last that in the engine room there is no presence of combustible gases or vapors. 2.4.2 Engine ordinary use, analog panel To carry out the engine ordinary startup, follow these instructions: 1. Check the indicator lights and the engine preheating When turning the key to position (I) the alternator and oil pressure indicator lights are ON and the alarm buzzer is ON. 42 FNM® HPE Series Figure 12 - Situation of the panel with engine off, key to position I. The glow plugs indicator light remains ON during this step until the engine pre-heating is completed (according to the ambient temperature). After few seconds the light turns OFF. It is now possible to start the engine (position II). 2. Start the engine. Turn and hold the key in position (II) and release immediately when you hear that the engine starts. FNM® HPE Series 43 Figure 13 - Hold the key to position II until the engine starts. Avoid the engine starter overload;; release the key after max 5 sec. if engine doesn’t start. Repeat the operation if necessary. 3. Engine functioning While the engine is running (in normal functioning conditions) all the lights and the buzzer must be OFF. Figure 14 – The indicator lights on the panel are turned off when the engine is functioning properly. 44 FNM® HPE Series 4. Engine stop Turn counterclockwise the key to position (0) to turn off the engine. Figure 15 - Move the key to 0 to turn off the engine. If the lights indicate the presence of a fault or an anomaly, immediately reduce speed and turn off the engine. Consult paragraph 3.7.2 – Meaning of the indicators on the analog panel – on page 112 and paragraph 3.7.4 – Troubleshooting – on page 120. Check and resolve any problems before restarting to avoid serious engine damage. 2.4.3 Engine ordinary use, digital panel To carry out the engine ordinary startup, follow these instructions: FNM® HPE Series 45 1. Check the indicator lights and the engine preheating When you turn the key in position (I) the instrument starts the automatic test and the display shows "The Self Test Mode Is In Operation." The test mode lasts 10 seconds during which time the buzzer sounds three times and the instrument flashes. Do not start the engine during the instrument testing phase. The Self Test Mode Is In Operation Figure 16 - Situation of the panel with engine off, key to position I. The glow plugs alarm ("PRE HEAT CHECK" on the instrument or the related indicator light, if included in the panel) is turned on during the initial phase until the complete pre-heating of the engine (the time depends on ambient temperature). At the end of the preheating phase it turns off. Do not start the engine if the glow plugs alarm (or its indicator) is not turned off. 46 FNM® HPE Series It is now possible to start the engine (position II). 2. Start the engine Turn and hold the key in position (II) and release immediately when you hear that the engine starts. Figure 17 - Hold the key to position II until the engine starts. Avoid the engine starter overload; release the key after max 5 sec. if engine doesn’t start. Repeat the operation if necessary. The digital instrument sometimes (as in the case of low battery voltage) can redo the test mode. 3. Engine functioning While the engine is running (in normal functioning conditions) all the lights and the buzzer must be OFF. FNM® HPE Series 47 VOLTS 13.8 Volts Coolant Tmp 100° C Figure 18 – The indicator lights on the panel are turned off when the engine is functioning properly. The digital instrument is in normal operating mode, for default it shows the battery voltage (Volts), the engine coolant temperature (Coolant Tmp). 4. Engine stop Turn counterclockwise the key to position (0) to turn off the engine. 48 FNM® HPE Series Figure 19 - Move the key to 0 to turn off the engine. If the lights or the alarms of the CANBUS universal instrument indicate the presence of a fault or an anomaly, immediately reduce speed and turn off the engine. Consult paragraph 3.7.3 – Meaning of the indicators on the digital panel – on page 115 and paragraph 3.7.4 – Troubleshooting – on page 120. Check and resolve any problems before restarting to avoid serious engine damage. FNM® HPE Series 49 2.5 Throttle FNM® HPE marine engines are provided with an electronic throttle or with a mechanical throttle to control the engagement of the gear and the engine acceleration. 2.5.1 Mechanical throttle The mechanical throttle can be installed on a wall or console. It can also be equipped with a safety lanyard that causes the engine shutdown in case of accidental departure of the driver from the boat. Figure 20 - Wall mounted mechanical throttle 50 Figure 21- Mechanical throttle installed on the console (in single and twin-engine configuration) FNM® HPE Series The mechanical throttle can also be provided with a security system that does not allow starting the engine with the gear engaged. The purpose of this is to avoid inadvertently starting the engine with propeller spinning causing damage to people in the water. The elements of the mechanical throttle are as follows: a. Neutral lock button - Prevents accidental gear engagement. b. Throttle only button - With the command entered the throttle enables only the accelerator without engaging the gear. c. Lanyard stop switch - Turns off the engine in case the conductor accidentally moves away from the driver's seat. d. Control handle - Allows controlling the engines engaging the gear and acting on the accelerator. e. Trim/Tilt - Activates the trim pump. f. Trailer - Activates the trim pump and pulls the stern drive completely out of the water. 2.5.2 Flexball® electronic throttle The electronic throttle works similarly as the mechanical throttle, allowing the command, depending on the configuration, of one or two engines. Moving the lever 16° forward or reverse from the neutral position, the system respectively engages the forward or reverse gear. The accelerator has a stroke of 67° both in forwards or reverse gear. FNM® HPE Series 51 Figure 23- Flexball®. electronic throttle stroke Figure 22 - Flexball® electronic throttle for twin-engine. On the lever there is a membrane control keypad consisting of 4 buttons and 4 status indicator LEDs. 52 FNM® HPE Series Figure 24 - Flexball® .electronic throttle control keypad In installations with single engine, both LEDs near the Engine buttons refer to the same engine. In systems with two engines, the engine button and the corresponding LED refer to the physical location on the keypad, namely: the button and the LED on the right refer to the right engine while the button and the LED on the left refer to the left engine. 2.5.2.1 Acquisition of the command The electronic throttle allows taking the control of the boat from any position, after the acquisition of control with that position. FNM® HPE Series 53 To acquire the command with stopped boat. 1. Position all the command stations in neutral; 2. Keep the Command button pressed for at least 1 second; 3. The Command LED will light and the Warm/Sync LED will begin blinking; 4. Now you are in the warm-up mode, i.e. the gearboxes are disabled. It is only possible to accelerate to carry out the engines preheating operation; 5. To definitely take the command of the station you must reposition the levers in neutral position and hold the Warm/Sync button for 2 seconds; Now the command lever is enabled and ready for use. To acquire the navigation command: 1. Synchronize the 2 levers of the station of which you want to acquire the command with respect to the station which has the command; 2. the Engine led starts blinking when the lever of the calling station is in phase with the lever of the station that has the command (with an accuracy of 10 degrees). ; 3. when both levers are synchronized (and therefore the corresponding Engine leds are blinking) it is possible to acquire the command by pressing the Command button for 2 seconds. 54 FNM® HPE Series Once finished the command acquisition procedure, the station is enabled to command the boat! 2.5.2.2 Engine Warm-up If both levers are in neutral, by pressing for 3 seconds the Warm/Sync button of station which has the command you enter in Warm-up mode. In Warm-up mode the Warm/Sync LED is blinking and it is possible to accelerate the engine with clutch disengaged. After positioning again both levers in neutral and pressing the Warm/Sync button for other 3 seconds the function is disabled and the Warm/Sync LED stops flashing. 2.5.2.3 Synchro mode operation This function is available only for twin-engine systems. This function allows to command both engines at the same speed and direction with only one lever. With both levers in neutral position, press the Engine buttons at the same time for 3 seconds. The command of both engines is now on the right lever. In Synchro mode operation the Warm/Sync and Command LEDs are always lighted on, except for the neutral position where all the LEDS are permanently ON. FNM® HPE Series 55 Bringing the two levers in neutral while pressing the Engine buttons for 3 seconds the command of the individual engines will be assigned again to the respective levers. The Warm/Sync LED is off again. 2.5.2.4 Trim control unit (stern drive application) Figure 25 - Trim control for twin engine installation. Figure 26 - Trim control for single engine installation. The trim command, if included in your configuration, can be activated by the Command Station by means of the "+" and "-" buttons. The command signals are transferred to the Actuator from the Command Station. The relay board mounted in the actuator enables the in-trim, trim-out and trailer functions. The “+” and “-“ buttons pressed together for at least 3 sec. activate the trailer function that allows to pull the stern drive totally out of water. 2.5.2.5 Emergency lever In an emergency you can quickly disable the electronic system and command the propulsion engines directly with the emergency mechanical levers that are already mounted on the actuator. Simply unscrew the knob completely. This procedure will allow you to control the gearbox manually, using the B levers, and with gas to a minimum. 56 FNM® HPE Series Figure 27 - Electronic throttle control box emergency lever 2.5.2.6 ID Labels Under the base of each command station a level there are n. 2 labels with the serial number and the code of the command station. 2.5.2.7 Commands and meaning of indicator lights Command - Signalling Engine LED - Command LED - Warm/Sync LED FNM® HPE Series Meaning If the LED is on, the corresponding propulsion engine is idle. If it is OFF the Station does not command the system. If it is ON the Station commands the system. If the LED is blinking the navigation system is in WARM-UP mode that means that the engines can be warmed up because the clutch is disengaged. If the LED is lighted, the system is in Synchro mode. With the right lever both 57 58 Command Signalling Warm-up - Acquisition of the command - - All LEDs with fixed light Meaning engines are controlled and the right trim device controls both trims (if any) If both the levers of the Station which has the command are in neutral position and you press for 3 seconds the warm/sync button, the WARM-UP function is activated. If you press the Command button for 3 seconds the station takes the command of the system, only if the control lever is in neutral Situation of system fault FNM® HPE Series 2.6 Notes on daily use of the engine Please follow these instructions to ensure the daily use of FNM® marine engines in total safety: - Take care to maintain the engine room dry and well aerated. Residual water in bilge could vaporize and condensate on the engine, vapor created in this process damages the protection varnish. Humidity and corrosive vapor damage the electrical connections. Bilge water may wet engine parts during the boat navigation. The engine room shall be well aerated and the aeration holes must guarantee a good air ventilation. In this way long life is guaranteed to the engine protection varnish, to the plastic and rubber parts, increases the engine performances and prevents excessive overheating of hot parts (exhaust, turbine, etc.). Always keep the engine room dry and well ventilated! - The ventilation holes must ensure a good flow of air, but should prevent the entrance of salt, water and dirt in the engine room. The seals of doors and hatches must prevent the entrance of water in the engine room. Engine room ventilation, in respect of what discussed above, could be even forced. - Take care of the distance between the turbocharger and the plastic part. The turbocharger heats up during use and may damage the plastic and fiberglass parts (follow the installation manual instructions). Insulate with a coating that ensures good thermal protection to structures and bulkheads of the boat next to the hot parts of the engine to reduce the risk of fire. - Take care to oil or fuel leaks. The oil or fuel may come into contact with the turbocharger during operation resulting in fire. FNM® HPE Series 59 - Take care to the turbocharger protection varnish. The housing of the turbocharger is painted with heat resistant varnish. Excessive use and high temperatures could remove this protection. Periodically check the housing of the turbocharger and, if necessary, spray with new varnish resistant to high temperatures. The turbocharger heats up during use. Be careful to avoid fire hazards. Never rapidly increase the speed of the engine if the engine does not reach the correct temperature. - Electrical and electronic parts are affected by moisture and the attack of corrosive agents. Pay attention to the state of battery charge, recharge during the engine inactivity, if required periodically. Maintain the battery compartment aerated and dry to avoid risk of fire. - Discharge the sea water circuit by draining through the zinc anodes if the engine isn’t utilized for a long time and if exposed to high temperature. Take care, avoid short-circuits. Short circuit can cause damage to people and engine parts. Toxic and flammable vapors may be created in the battery compartment, aerate the battery compartment. Avoid all risks of fire. 60 FNM® HPE Series 3 Maintenance of FNM® engines, HPE Series FNM® HPE Series 61 3.1 General information on maintenance FNM® marine engines of HPE class require some regular operations to ensure long engine life and avoid incurring the dangers to the engine itself and the people on board. 3.1.1 Staff responsible for maintenance The pages will describe the procedures necessary to carry out regular maintenance. The control and maintenance operations indicated below require training, competence and compliance with the standards required for safety; therefore they must be completed by staff involved, as indicated below. Ordinary maintenance: made by the boat user and the workshop staff. The interventions are marked by the symbol shown on the side. Periodic maintenance: performed by qualified personnel equipped with appropriate work tools and adequate means of protection. These interventions are marked by the symbol shown on the side. Extraordinary maintenance: performed by qualified staff and authorized FNM® service centers, in possession of detailed technical information and specific equipment. Interventions identified by the symbol shown on the side. It is necessary, to carry out every maintenance operation, taking note of all the operations carried out in the Warranty and Maintenance booklet attached to the end of this manual (page 129). 62 FNM® HPE Series 3.1.2 Safety Carefully follow the instructions below for each operations that you are going to do on FNM® diesel marine engines. - Always wear safety shoes and overalls. - Do not wear loose clothing, rings, bracelets and/or necklaces near engines or moving parts. - Wear protective gloves and goggles during these operations: o filling batteries with acid solutions; o supply with inhibitors or anti-freeze; o replacement or supply of the lubricating oil. Hot engine oil can cause burns. It is recommended to carry out the interventions only when it has reached a temperature below 50°C. - When working in the engine room, pay the utmost attention to your movements to prevent contact with rotating or high temperature parts. - Wear goggles when using compressed air. The maximum air pressure used to clean is equal to 200kPa (2bar, 30psi, 2kg/cm2). - Wear a protective helmet when working in an area with suspended loads, or with systems at height of the head. FNM® HPE Series 63 - Use protective cream on your hands. - Replace immediately your suit if wet. - Keep the engine clean at all times, removing stains of oil, gas and coolants. - Put used rags in fireproof containers. - Do not leave foreign objects on the engine. - Prepare adequate and safe containers to collect exhaust oil. - After a repair, take appropriate measures to stop the intake of air from the engine when, after starting, there is an uncontrolled increase in the engine rpm. Avoid maintenance in the presence of electrical voltage: check the effective grounding of all the equipment. During diagnostic operations and maintenance make sure you have hands and feet dry whenever possible and use insulating boards. 64 FNM® HPE Series 3.2 Periodic organization and frequency of maintenance operations FNM® HPE marine engines require periodic maintenance to be kept always efficient. The maintenance table is shown in the following pages. The first two lines refer to inspections and operations that the user can and must do. The remaining operations are handled by technical staff or an authorized FNM® service point. To avoid voiding the original warranty of your HPE engine always make interventions be carried out on the engine by the staff of a FNM® authorized service point. For information about individual maintenance operations See section 3.3 - Details of maintenance operations - on page 68. FNM® HPE Series 65 User Operations | Operazioni dell’Utente - FNM First Service | Primo Tagliando FNM Tagliando Annuale FNM | FNM Annual Service FNM Advanced Service | Tagliando Avanzato FNM Wintering | Invernaggio Before first start after wintering | Prima dell'avvio dopo l'invernaggio 66 Engine and propellers shafts lubrification | Lubrificazione degli alberi motore ed elica Every 10h | Ogni 10h Oil change (engine and trasmissions) | Cambio olio (motore e trasmissione) User Inspection | Ispezione dell’Utente Air filter replacement | Sostituzione filtro aria Running hours | Ore di moto Diesel filter replacement | Sostituzione filtro gasolio Scheduled Interventions 1/3 First 30h |Prime 30h X X X X X X X Every 100h | Ogni 100h Ogni anno | Every year X X X X X X X Every 800h | Ogni 800h Every 2 years | Ogni 2 anni - - Fluid leaks inspection | Verifica delle perdite fluidi X X X X X X X X X X X X X Auxiliaries Drive Belts inspection and tensioning | Ispezione e tensionamento delle cinghie ausiliaria Engine re-alignement and suspensions tightening | Riallineamento motore e serraggio supporti elastici Andodes inspection | Verifica consumo anodi Raw water filters cleaning | Pulizia dei filtri acqua mare X Check battery status | Verifica stato batteria Coolant level inspection | Verifica liquido refrigerante X Diesel filter inspection and draining | Ispezione e drenaggio filtro gasolio Oil levels inspection (engine and transmissions) | Verifica livelli olio (motore e trasmissione) Alternatively | Alternativa Before engine starts | Prima di ogni partenza Ogni settimana durante l'uso | Every week during use X X FNM® HPE Series User Inspection | Ispezione dell’Utente User Operations | Operazioni dell’Utente Raw water pump impeller inspection | Ispezione della girante pompa acqua mare FNM First Service | Primo Tagliando FNM Tagliando Annuale FNM | FNM Annual Service FNM Advanced Service | Tagliando Avanzato FNM Wintering | Invernaggio Before first start after wintering | Prima dell'avvio dopo l'invernaggio Every 10h | Ogni 10h Wiring inspection | Ispezione cablaggio Running hours | Ore di moto Blots tightening | Serraggio bulloneria Scheduled Interventions 2/3 - First 30h |Prime 30h X X X Every 100h | Ogni 100h Ogni anno | Every year X X X Every 800h | Ogni 800h Every 2 years | Ogni 2 anni - - FNM® HPE Series Anodes rplacement | Sostituzione degli anodi Raw water circuit cleaning | Pulizia del circuito acqua mare Oil filter replacement | Cambio filtro olio Raw water pump impeller replacement | Sostituzione girante pompa acqua mare Exchanger pipes cleaning | Pulizia fasci tubieri Mechanical couplings inspection and lubrication | Ispezione e lubrificazione accoppiamenti meccanici Starter pinion greasing | Ingrassaggio pignone motorino di avviamento Mercathode® system check (if available) | Verifica del sistema Mercathode® (se presente) Steering system greasing | Ingrassaggio sistema sterzante Alternatively | Alternativa Before engine starts | Prima di ogni partenza Ogni settimana durante l'uso | Every week during use X X X X X X X X X X X X X X 67 Running hours | Ore di moto User Inspection | Ispezione dell’Utente Every 10h | Ogni 10h User Operations | Operazioni dell’Utente - FNM First Service | Primo Tagliando FNM Tagliando Annuale FNM | FNM Annual Service FNM Advanced Service | Tagliando Avanzato FNM Wintering | Invernaggio Before first start after wintering | Prima dell'avvio dopo l'invernaggio 68 Ogni anno | Every year Every 800h | Ogni 800h Every 2 years | Ogni 2 anni - X X X X X X X X X X Engine cleaning for salt removal and antirust treatment | Pulizia del motore per rimozione salsedine e trattamento antiruggine Electrical wiring reconnection | Riconnessione cablaggio elettrico Fuel tank cleaning | Pulizia serbatoio carburante Raw water antifreeze additive addition (if needed) | Aggiunta additivo antigelo acqua mare (se necessario) Coolant antifreeze additive addition (if needed) | Aggiunta additivo antigelo liquido di raffreddamento Turbine inspection and actuators greasing (if present) | Ispezione turbina e ingrassaggio attuatore (se presente) Raw water pump impeller greasing | Ingrassaggio girante pompa acqua mare X Electrical wiring disconnection | Disconnessione cablaggio elettrico X Diesel antifreeze additive (if needed) | Additivo antigelo carburante (se necessario) Thermostat replacing | Sostituzione valvole termostatiche Every 100h | Ogni 100h Flexible coupling inspection | Ispezione parastrappi - Coolant replacement | Sostituzione liquido refrigerante First 30h |Prime 30h Distribution belt-thigteners and belts replacement | Sostituzione cinghie e tendicinghie distribuzione Alternatively | Alternativa Before engine starts | Prima di ogni partenza Ogni settimana durante l'uso | Every week during use Auxiliaries drive belts replacement | Sostituzione cinghie ausiliari Scheduled Interventions 3/3 X X X FNM® HPE Series 3.3 Details of maintenance operations 3.3.1 Engine and transmission oil levels check Ordinary maintenance: made by the boat user and the workshop staff. For topping up the oil levels only uses the type specified in paragraph 3.4 - Engine treatment and maintenance products – on page 98. 3.3.1.1 Engine oil level check The engines are filled by the manufacturer sent with the correct amount of oil: in many cases it is not necessary to fill the engine with oil. However, some installations may affect the reading of the oil level in the sump because of the particular circumstances of inclination. If your engine oil level has is abnormal at the delivery, inform your installer. To check the engine oil level: Before working on the engine or entering inside the engine compartment, please make sure you read the safety instructions. 1. Make sure that the engine is stopped from at least 5 minutes to support the complete draining of oil in the sump. 2. Extract the oil dipstick from the oil dipstick tube and clean it with blotting paper or similar. 3. Reintroduce the oil dipstick in the guide pipe, take it out and check the level. FNM® HPE Series 69 A: If the oil level is between A and B it is not necessary to refill. B: If the level of the indicator is less than B it is necessary to refill. C: If the oil is at level C or lower, it is necessary to refill up to level A if possible, in any case the level must be equal to or greater than B. Figure 28- Terminal part of the oil dipstick The level should never exceed the reference A. The oil topping up is made through the oil fill cap on the engine. During the use and the storage of lubricating oil take care for water and dirt contamination .Take care to avoid the entrance of contaminants (debris, water) during oil refilling. To measure the engine oil level pay attention to the engine inclination both longitudinally and laterally. Do not exceed 3° the horizontal inclination during the test (do not make the measurement in the presence of excessive loads on the bow - stern or starboard-port side of the boat such as to distort the test overtilting the boat-engine assembly. The engine is delivered with the correct amount of oil (MAX) excessive angles can distort the reading. For installation with high angles, make a reference mark on the level dipstick corresponding to the level achieved (with the maximum amount of oil as shipped by the manufacturer). 70 FNM® HPE Series 3.3.1.2 Transmission oil level check To check the transmission oil level refer to the user manual provided by the manufacturer of your transmission. 3.3.2 Coolant level check Ordinary maintenance: made by the boat user and the workshop staff. To verify the coolant liquid level, take care to the boat and/or engine inclination. 1. Unscrew the coolant fill cap, then check that the fluid level is between minimum and maximum limits (if present), or not excessively low. 2. If necessary top up to a maximum level. In any case the coolant liquid level must be over the engine head to ensure a correct operation. Always verify the good seal of the filter cap to avoid leakage after reassembly. Never refill the coolant circuit with sea water! Be careful when opening the cap of the expansion tank: pressurized liquid may splash out and cause damage to property or persons. FNM® HPE Series 71 3.3.3 Cleaning and inspection of sea water filters Ordinary maintenance: made by the boat user and the workshop staff. During the engine period of use check daily the sea water filter. The filter should allow the smooth passage of water (100 liters/minute at 4000 RPM). Also check that the seawater intakes are clean from elements that can block the passage of water. Close the sea water intake valve when you dismount the filter. For the filter cleaning: 1. Open the sea water intake cap after closing the valve. Figure 29 - Sea water filter 72 FNM® HPE Series 2. Clean or wash the filter with fresh water to remove the clogging elements. Figure 32 - Sea water filter cleaning under running water 3. Re-close the filter and check for any leaks. Always verify for the good seal of the filter cap to avoid leakage after reassembly. 3.3.4 Fluids leakage check Ordinary maintenance: made by the boat user and the workshop staff. Periodically check that the engine does not lose any kind of fluid before, during and after its operation. FNM® HPE Series 73 Check if there are drips from the engine on the bottom of the engine compartment, if there are leaks from tanks and hoses and that all the ducts that depart from the engine (sea water, fuel, steering oil) are free of condensation. When there is excessive reduction of any level while using the engine, immediately shut down the engine and find the source of the leak. 3.3.5 Fuel filter draining and inspection Ordinary maintenance: made by the boat user and the workshop staff. The fuel filter of your engine may be on the engine itself, or be placed on the wall in the engine compartment (HPE/P 300). To drain the fuel filter: 1. Remove the water in fuel presence sensor plug from under the filter. 74 FNM® HPE Series Figure 30 - Removing the water in fuel presence sensor 2. Use a small clean container of about half a liter to collect diesel fuel in excess. Don’t smoke during the operations. 3. Unscrew the drain cap under the filter ad wait that fuel comes out. Close when you notice that the fuel is clean and free of impurities or contamination of water. Fuels such as waste oils are highly polluting. Respect the environment and pay attention to the disposal of oil. 4. Replace the cover re-screwing it and replace the sensor connector. In the low pressure circuit diesel fuel is kept under pressure by the electric pump. Be careful to avoid the formation of air bubbles in this part of the circuit, otherwise you will have irregular operation of the engine. To put the circuit under pressure after the drainage operations turn the ignition key to position (I) and wait that the electric pump stops working, before turning on. FNM® HPE Series 75 Repeat the operation if necessary. 3.3.6 Battery status check Ordinary maintenance: made by the boat user and the workshop staff. Be careful when operating near the battery compartment. Disconnect the battery cables before working on it. Do not smoke near the battery. Flammable gases could be left by the battery. 3.3.6.1 Batteries that are maintenance-free This type of battery is equipped with an indicator of the battery charge status (1). Depending on the color of the indicator you can see the level of battery charge: 76 FNM® HPE Series Green color: charge level above 65%. No maintenance required. Dark color: charge level below 65%. Recharge immediately. Yellow color: replace the battery. Figure 31 - Maintenance free batteries The data are for information, always read the producer’s instructions. Never try to refill with any type of fluid with this type of battery. 3.3.6.2 Traditional lead-acid batteries To check the electrolyte level refer to the level marks on the battery side. To refill: 1. Remove the caps on the upper part. FNM® HPE Series 77 Figure 32 - Traditional lead-acid batteries Acid liquids contained, use appropriate protections! 2. The electrolyte level should cover the plates. 3. If the level is insufficient, fill up to Max level with distilled water. 4. Replace the caps after the charging cycle. Battery state of charge could influence the engine performance. Avoid discharging excessively the batteries. Grease the battery poles with basic grease periodically. The battery electrolyte status can be measured with a manual densimeter. 78 FNM® HPE Series 3.3.7 Anodes consumption check and replacement Ordinary maintenance: made by the boat user and the workshop staff. Zinc anodes prevent oxidation of engine metal parts. They are positioned in different parts of the sea water circuit. Replace the anodes if the sacrificial zinc cartridge (see the picture below) is consumed over the 50% (the length of the new part is around 15 mm). The zincs consumption depends on many ambient factors and engine connections. FNM® uses pure zinc anodes that can be used in the marine environment. Figure 33 - Zinc anode Follow the instruction to disassemble: 1. Stop the engine 2. Unscrew the anodes only after closing the sea water circuit valve. 3. Replace the anodes if the consumption of the sacrificial part is greater than 50% (less than 8 mm). Together with the anodes replace also the copper washer. In the re-tightening always use thread sealant type LOXEAL 1810. FNM® HPE Series 79 Take care when reassembling to maintain the electrical continuity (contact between the metal parts). 4. Reopen the sea water circuit and verify for leaks. 3.3.8 Fuel filter replacement Ordinary maintenance: made by the boat user and the workshop staff. To replace the fuel filter follow the instructions: 1. Turn OFF the engine and take care to close the fuel suction line. 2. Let the engine cool down if it is hot. 3. Prepare a container to collect any leaks. 4. Remove the sensor plug and the sensor from the filter (take care to gasket). Pay attention to possible fuel leakage. 80 FNM® HPE Series Figure 34 - Removing the water in fuel presence sensor 5. Unscrew the filter using the appropriate wrench. Be careful to follow procedures for disposal of the fuel filter in accordance with regulations. 6. Assemble the sensor on new filter and tighten the lower cap. 7. Fill the new filter with fuel. 8. Reassemble filter on the engine and open the fuel supply circuit. 9. Bleed the fuel supply circuit. Turn the key to (I) position and wait few seconds until the low pressure electric pump takes the circuit under pressure again. Repeat the operation if necessary. 10. Start the engine and check for any leaks. FNM® HPE Series 81 Don’t smoke during the assembly-disassembly operations! 3.3.9 Air filter cleaning or replacement Ordinary maintenance: made by the boat user and the workshop staff. The air filter integrity and cleaning is important for the engine life and performances. FNM® engine series air filters are developed for marine applications When cleaning the filter elements only with compressed air, never use pressures above 2 bar to avoid damaging them (filters are dry and need no film of oil on the filtering part). To remove the air filter: 1. Stop the engine 2. Loosen the collar at the base of the filter 3. Pull out the air filter 4. Clean the filtering sponge, or replace the part. For the HPE/P 300 engine alternatively it is possible to clean the metal filter with appropriate products. 5. Reassemble the filter and tighten the collar 82 FNM® HPE Series Never start the engine without the air filter in place! It can produce serious damage to the engine. 3.3.10 Engine and transmission oil change Ordinary maintenance: made by the boat user and the workshop staff. To change engine and transmission oil, comply with the procedures listed below: 3.3.10.1 Engine oil change 1. Turn off the engine. 2. If you have used recently used it, let the engine cool down for at least 20 minutes, to help oil flowing in the sump. 3. Prepare a container of proper capacity to collect exhaust oil 4. Connect a hose to the drain valve on the sump. The exhaust valve position changes depending on the model of your engine, and is indicated in Chapter 1.6 - Main components of FNM® engine, HPE Series – on page 15. 5. Connect a pump to the hose end, then open the drain valve. 6. Open the oil refill cap to facilitate the suction. The cap is located on top of the engine and is described in section 1.6 - Main components of FNM® engine, HPE Series – on page 15. 7. Operate on the pump to transfer the oil. ® FNM HPE Series 83 8. Disconnect the pump and close the valve. 9. Refill the engine with new oil up to proper level. Respect the environment. Exhaust oils are strongly polluting .Follow the local regulations for disposal. 3.3.10.2 Transmission oil change To properly change oil in your transmission, carefully follow the instructions indicated in the use and maintenance manual of the manufacturer. You can refer to Chapter 3.7.1 - Specifications of transmissions on page 110 for specifications on oil to use. 3.3.11 Service belts inspection and tensioning Ordinary maintenance: made by the boat user and the workshop staff. Always be careful when working on the belts. To check the status of the service belt it is necessary to remove the belts cover from your engine. Follow the instructions: 1. Remove the cover located on the front of the engine. Attention: In case of HPE/P 40/150/150JD/170/170JD/190/190JD and HPEL 65/90 it is also necessary to remove the whole intercooler and its support. 84 FNM® HPE Series Attention: In case of HPE 80/80SD/110/110JD and HPEL 45 it is necessary instead to remove the sea water pump fixing unit. 2. Loosen the belt tensioner. 3. Verify the belt status. If it is worn, as shown in the figure, it should be replaced. Figure 35 - Worn service belt 4. Reassemble the belt, then tighten the tensioner. 5. Reassemble the belt cover. FNM® HPE Series 85 3.3.12 Sea water pump impeller inspection and replacement Periodic maintenance: performed by qualified personnel equipped with appropriate work tools and adequate means of protection. The position of the sea water pump varies depending on the model of your engine. You can verify the position in paragraph 1.6 - Main components of FNM® engine, HPE Series – on page 15. The pump shaft is driven in rotation by the movement of the crankshaft. The function of the sea water pump is to draw water from the sea intake and to put it into circulation in the cooling systems (heat exchangers, exhaust manifold, etc..). Water circulation is ensured by the rotation of a rubber impeller (nitrile) into the center housing of the pump. The indications on the suction side are shown on the cover of the pump. The impeller never rotates without water for more than 1 minute, dry rotation increase the impeller temperature and quickly wears the vanes. Pay attention to the extreme conditions of the impeller to prevent engine overheating. It is necessary that you have a backup impeller on board to replace in case of damage during navigation. To dismount the impeller : 1. Stop the engine and close the sea water intake valve. 2. Remove the fastening screws from pump cap (take care to the gasket). 86 FNM® HPE Series 3. Remove the impeller with the appropriate puller. Mark the impeller with a pen on the side at sight to reposition it (only if it isn’t damaged) in the same way. 4. If the impeller is too worn, provide for replacement. 5. When using a new impeller, lubricate it with silicon spray grease before mounting it. Figure 36 - Lubrication of the impeller 6. Install the new impeller on the grooved shaft. 7. Re-close the pump cap and replace the seal gasket if possible. 8. Open the sea water intake valve. 9. Restart the engine and check for any leaks. Use only original FNM spare parts. FNM® HPE Series 87 3.3.13 Sea water circuit cleaning Periodic maintenance: performed by qualified personnel equipped with appropriate work tools and adequate means of protection. Keep sea water circuits clean from salt deposits and from any external intrusion to ensure proper cooling of the engine. In any case you should run the engine with fresh water for at least 5 minutes every 50 hours, in order to prevent the accumulation of salt deposits in the cooling circuits related to the sea water section. The seawater system cleaning must be done even during the winter season operations. After flushing the circuits and after circulated fresh water in the cooling circuit (sea water circulation side), to avoid freezing during long rest of the engine in cold weather conditions, we recommend to: 1. Close the sea water tap 2. Open the sea water filter cap 88 FNM® HPE Series Figure 37 - Sea water filter opening 3. Insert the antifreeze liquid (antifreeze mixture) in the filter and put the engine to minimum rpm to facilitate the antifreeze additive aspiration in the cooling circuits up to overboard discharge. In the case of applications with stern drive follow the same operation using the casings on the suction intakes of the stern drive and sucking from a tank containing the antifreeze mixture. FNM® HPE Series 89 Figure 38 - Casings for cleaning the circuit in applications with stern drive The coolant fluid is polluting. Use appropriate precautions to avoid releasing it into rivers or the sea! The sea water freezing in the cooling circuit causes damage to the circuit itself. During the winter in areas where temperatures are particularly cold you should follow the instructions below to avoid the circuit freezing when the engine is not used for short periods. 1. Drain the circuit. 2. Close the sea water intake valve. 3. Unscrew the zinc anodes on the cover of the water to water exchanger and on the intercooler cover. Facilitate the release of water from the circuit by unscrewing also the anode on the cover of the exhaust manifold. 90 FNM® HPE Series 3.3.14 Oil filter change Ordinary maintenance: made by the boat user and the workshop staff. To change the oil filter, follow the instructions carefully: 1. Turn off the engine and let it cool down adequately. 2. Prepare a container to collect any leaks. Take care to dismount the oil filter only after removing oil from the sump during the engine oil change operation. 3. Unscrew the filter using the appropriate wrench. 4. Clean the housing with blotting paper or a dry cloth. 5. Lubricate the rubber O-ring seal and the ring seat before remounting the filter cover. FNM® HPE Series 91 Figure 39 - New oil filter lubrication 6. Reposition the new filter and re-screw it. Fill the engine with new oil. 7. Turn the engine ON and leave it running at minimum RPM for few minutes until it reaches the working temperature. Increase the speed until reaching the maximum and check the oil pressure level. 8. Check for any leaks. Respect the environment. Exhaust oils are strongly polluting .Follow the local regulations for disposal. 92 FNM® HPE Series 3.3.15 Cleaning the tube bundles Periodic maintenance: performed by qualified personnel equipped with appropriate work tools and adequate means of protection. Your marine engine is equipped with a different tube bundle exchangers for cooling different fluid circuits and improve overall performance. Each of these must be thoroughly cleaned to prevent incrustations that after long time can block the fluid flow and lead to engine damage. 3.3.15.1 Cleaning the tube bundle of the water to water exchanger To clean the tube bundle follow these indications: 1. Stop the engine and close the sea water circuit inlet valve. 2. Drain the sea water circuit as described in Section 3.3.13 - Sea water circuit cleaning - on page 87. 3. Drain the coolant from the circuit and disassemble the pipes. 4. Remove the water to water exchanger from its support (see the paragraph 1.6 - Main components of FNM® engine, HPE Series – on page 15 to identify the heat exchanger). 5. Dismount the covers of the exchanger. 6. Take care of the seal gaskets, respect their integrity. In any case, replace them if damaged. FNM® HPE Series 93 7. Remove the bundle and clean the pipes with a brush. Pay attention to the two O - rings. 8. After cleaning, re-assemble the assembly, replacing the seal gaskets. Verify the exchanger seal after the assembly! 9. Reposition the exchanger on the bracket. 10. Reposition the pipes and seal collars. 11. Fill the coolant circuit. 12. Start the engine, letting it warm up to 80°C. 13. . Check for any leaks and if necessary drain air from the circuit. 3.3.15.2 Cleaning the intercooler tube bundle To clean the intercooler follow these instructions: 1. Stop the engine and let it cool down adequately. 2. Drain the circuit unscrewing the anodes as described in section 3.3.13 - Sea water circuit cleaning – on page 87. 3. Unscrew the collars of the intercooler hoses (see the section 1.6 - Main components of FNM® engine, HPE Series – on page 15 to identify the intercooler) and pull it out. 94 FNM® HPE Series 4. Remove the cap. Pay attention not to damage the seal gaskets. 5. Pull off the tube bundle. Pay attention to the fins during the tube bundle dismounting operations, to not affect the exchanger performances. 6. Clean inside the tubes with a cleaning brush, remove any salt incrustations and wash with fresh water. 7. Clean the outer part and the fins of the tube bundle from oil deposits using fuel and then dry preferably with compressed air (max. 2 bar). 8. Reposition the tube bundle in the housing (take care of the fins during the bundle placing in the casing). Properly position all the gaskets and the O-rings into the housing at the base of the casing. 9. Reposition the cap. 10. Reposition the inlet pipes and screw the pipe clamps. 11. Verify for any leaks after tightening the screws. 3.3.15.3 Cleaning the fuel exchanger To clean the exchanger follow the instructions: 1. Stop the engine and close the sea water circuit valve. 2. Empty the sea water circuit by unscrewing the anodes as described in paragraph 3.3.13 - Sea water circuit cleaning – on page 87. FNM® HPE Series 95 3. Remove the sleeves and covers of the fuel exchanger (see paragraph 1.6 - Main components of FNM® engine, HPE Series – on page 15 to identify it). 4. Clean inside the tubes with a cleaning brush and rinse with water. 5. Reposition the lateral caps (take care to gaskets). 6. Check for any leaks. 3.3.16 Grease the engine starter pinion Periodic maintenance: performed by qualified personnel equipped with appropriate work tools and adequate means of protection. The pinion of the starter must be greased with grease for gears. During engine operation grease is expelled from the pinion, so the pinion must be greased periodically. Unscrew the mounting screws and disconnect the electrical connections of the starter. 96 FNM® HPE Series Figure 40 - Electrical wiring of the starter Remove the starter from the housing. Clean the pinion with paper or a clean cloth and grease again. Figure 41- Starter pinion Reassemble the starter and electrical connections. FNM® HPE Series 97 3.3.17 Other advanced maintenance operations Periodic and extraordinary maintenance: The following operations can be performed only by qualified and authorized FNM® service centers, in possession of detailed technical information and specific equipment. - 98 Lubrication of the crankshaft and propeller. Engine alignment and engine mounts retorque. Bolts tightening. Wiring inspection. Mechanical couplings inspection and lubrication. Mercathode® system verification. Steering system greasing. Auxiliary belts replacement. Timing belts, timing belts tensioners and timing chain tensioners replacement. Engine coolant replacement. Flexible coupler inspection. Thermostatic valves replacement. Antifreeze fuel additive. Electrical wiring disconnection. Turbine inspection and actuator greasing (if present). Fuel tank cleaning. Engine cleaning to remove salt and anti-rust treatment. Electrical wiring reconnection. FNM® HPE Series 3.4 Engine treatment and maintenance products Here are some warnings on the type and quality of products to be used for normal engine treatment. 3.4.1 Maintenance products For the engine maintenance products read and follow the instructions indicated by producers or turn to FNM service. Some products and use are linked to the operating temperatures. Type of fluid Engine oil Transmission oil for ZF gearbox Transmission oil for Technodrive gearbox Transmission oil for Mercruiser stern drive Engine oil additive Fuel additive (long storage) Fuel winter storage Fuel Additive Metal protector/unlocker Grease for gears Turbine lubrication Engine oil long storage, washing, cylinders antirust FNM® HPE Series Recommended product FNM® XTC SAE 5w40 Synthetic Bardahl® XTC SAE 5w40 Synthetic Consult section 3.7.1 – Transmission specifications– on page 110 Bardahl® 2 Oil Treatment BARDAHL® DAB or IOSSO Fuel Anti Bacterial Bardahl® Diesel Antifreeze Bardahl® Diesel Injector Cleaner Bardahl® Spray K9 Bardahl® Viscogrease ZEP® 2000 Grease Spray ZEP® Red lithium grease Vanguard® Storage 30 oil MIL-L-2104B 99 Be careful not to mix different types of engine oil. FNM® engine oil equivalent characteristics recommended: Synthetic Multigrade SAE5W40 - ACEA A3-B3-B4, API SL SM CF, MB 229.3, VW 505.00-502.00, BMW Longlife 98. Recommended products: 3.4.2 Fuel characteristics Use only commercially available diesel according to DIN EN 590. Winter diesel fuel: For winter use, (if used at temperatures lower than 0°C), common diesel fuel may cause problems because it may become too dense and thick because of paraffin freezing. For this reason, during the winter we suggest that you use winter diesel fuel or antifreeze additives for diesel fuel. In fact, you may use this type of fuel without any problems up to temperatures between –15° C and –22° C. In countries with a different climate, it is usually possible to find types of diesel fuel with different thermal properties. 3.4.3 Paint For engine maintenance (avoid to spray the turbocharger) and touch up of small rusted parts, use acrylic polyurethane-based paint RAL 9006. For rusted engine parts: 100 FNM® HPE Series - Remove the rust with abrasive paper or similar until the surface is perfectly clean. - Clean the surface accurately. - Spray the paint (follow the producer instructions). Paint is commonly toxic and flammable, take care during use. Aerate the room and read the producer’s instructions. 3.4.4 Cleaning the panel FNM® panels are specially designed for the marine environment. Avoid using strong cleaning agents to clean them to prevent damage to surface finishes. FNM® HPE Series 101 3.5 Periods of engine inactivity If the engine remains inactive for a long period you need to protect it from oxidation and freezing; FNM® advises its customers who want to personally carry out the preparatory work to the inactivity of the engine, to follow the instructions below. 3.5.1 Operations to prepare the engine inactivity 1. Dismount, clean and remount the heat exchangers, preventing in this way to leave them exposed to oxidizing substances. Check and if necessary replace the zinc anodes. 2. Dismount and spray the sea water pump impeller with silicon grease spray or replace if necessary. 3. Connect the engine suction line to the fresh water line. Take care to the water flow: the sea water pump flow at maximum engine speed is around 100 liters / min. Let the engine run for about 15 min at 800 RPM to aid the circuit cleaning. 4. Fill a proper tank with an opportune mixture of water and antifreeze fluid (depending on the degree of protection that you would like to offer circuits) and connect the sea water suction pipe to the tank. Start the engine at 800 RPM and wait for the mixture, sucked by the pump, to fill completely the sea water circuit (until it comes out of the exhaust riser). 5. Drain the old oil from the sump and fill with clean oil appropriate for cleaning. Then start the engine (when the engine is still warm, drain the oil that is in the sump, and repeat the operation: this oil can be used for another two or three times). After the lubrication circuits washing operation, drain again and fill the engine with new oil, properly added with the proper additives till the oil level indicated by the dipstick is correct. 102 FNM® HPE Series For the oil treatment FNM® advises Bardahl® Oil Treatment for long storage; while for washing and storage it recommends Vanguard® Storage 30 oil MIL-L-2104B. 6. After filling with oil and any additive, start the engine and run for about 15 min at minimum RPM to support lubrication of the engine internal mechanism. 7. Check the coolant. Drain the circuit and fill with the proper mixture of antifreeze. Read the coolant producer instructions and the mixing table! 8. Check the fuel tank for dirt or deposits, if necessary clean it. During the end of season or before the engine storage, if possible, add an injector cleaning additive to the fuel and take care to leave the tank empty after the treatment and cleaning. FNM® advises Bardahl injector cleaner. Respect the environment, do throw away pollutants 9. Dismount the fuel filter and clean it, if necessary replace it. Fill the fuel filter with a proper mixture of fuel and additive for injector cleaning (leave empty if new). FNM® HPE Series 103 10. Fill a tank with a proper mixture of fuel and injectors additive, like Bardahl® Injector Cleaner. Connect the fuel suction hose to the tank return line. Run the engine for some minutes at the minimum speed. 11. To prevent cylinders rusting, FNM® advises to spray or nebulize Vanguard® storage 30 protective oil (MIL-L-2104, MIL-L-21260A) through the suction manifold (dismounted air filter) and spin the engine without starting it to facilitate oil suction (this operation can be carried out by spinning the starter motor and consequently the engine with the fuel supply line disconnected to avoid starting and to facilitate only the movement/lubrication of the internal parts). 12. Disconnect the electrical connections. Push the red stop button on the ECU box . 13. Clean the engine metal parts and spray the engine metal parts and the engine leverages with a protective/unlocking spray to prevent rust. FNM® advises to use Bardahl® K9spray. 14. Lubricate the starter pinion and the mechanical connections (grooved joints, etc.) 15. Dismount the belts and store them preventing their deformation. 16. Disconnect the fuel line (inlet and outlet). 17. Spray the electrical connections with electrical connections protective spray. 18. Store the engine in a well aerated place avoiding humidity and steam to prevent rust forming. 19. For long storage of fuel in tank, FNM® advises to use Bardahl® DAB or IOSSO® Diesel fuel antibacterial additives to prevent the proliferation of algae and deposits. 104 FNM® HPE Series 20. For fuel winter storage, FNM® advises (for very cold storage) to use diesel fuel antifreeze additive. FNM® advises use of Bardahl® Diesel Antifreeze. Take care of the engine storage room out of the boat or maintain the boat engine room dry and free from salt vapor. 3.5.2 Operations to restore the engine after periods of inactivity After a period of inactivity, it is necessary to carry out few maintenance interventions before starting the engine again to ensure its efficiency and duration. 1. Verify the battery charge level conditions. Make sure that the battery voltage is greater than 12 Volt. 2. -Make sure that the electric contacts are intact and properly greased with basic grease. Assure the correct electrical connections. 3. Carry out the engine electronic diagnosis at the first starting after a long period of inactivity. 4. -Check the oil level conditions, and if necessary, top up or replace with synthetic oil FNM® SAE 5W40. 5. Verify the clogging level and if necessary replace the oil filter. 6. Check the coolant level and if necessary top up. Drain the sea water circuits. 7. Verify and if necessary replace or clean the fuel filter. 8. Clean the air filter. ® FNM HPE Series 105 9. Verify the belts and tighteners status. 10. Verify the integrity of the sea water pump impeller. 11. Check the integrity of the anodes in order to provide a correct one. 12. Verify and if is necessary grease: the starter pinion, (with white grease for gears Bardahl® Viscogrease), and the turbocharger actuator leverages. 13. Keep the engine on for some minutes then turn it off and check again the engine oil and coolant levels. 14. Check for any leaks. The engine is now ready to resume normal operation. 106 FNM® HPE Series 3.6 Other useful information for maintenance 3.6.1 Wiring and electrical parts The ECU (Electronic Control Unit) BOX contains the electronic control unit of the engine, the electric connections and relays, the red stop button, the Amphenol® plugs for the engine wiring, the fuses indicator lights. The degree of protection of the box is IP 67 that prevents damage from dust and splashing water. Press the Red Stop Button in case of emergency and in every emergency condition that could cause damage to persons! Take care to disconnect the ECU box by pushing the stop button during long inactivity period, during the battery replacement and during all operations on the engine. It is advisable to let carry out any operation on the engine and in particular on the electrical wiring by authorized personnel. The ECU box is equipped with a LED indicators panel to indicate the fuses integrity status. The fuses are on the connectors of the circuit in order to make the replacement procedure easier. In order to replace the fuses, refer to the following table: FNM® HPE Series 107 Fuse Fuse F7 Fuse F8 Fuse F9 Fuse F11 Fuse F10 Fuse F4 Fuse F3 Fuse F5 Fuse F2 Fuse F1 108 Service Fuel heating Low pressure fuel pump Glow plugs main relay Pin 4 ECU Pin 5 ECU Key-on EOBD Diagnosis Main relay Not Used Not Used FNM® HPE Series 3.7 Specifications of your engine HPE/P HPE/P 40/150/150JD/170/ 100/225/225JD/ 170JD/190/190JD 250/250JD/250H HPEL 65/90 4 4 5 1248 1910 2387 69,6 82,0 82,0 82,0 90,4 90,4 Four stroke diesel engine 17,6:1 18:1 Direct Common Rail Injection Turbine with cooled Turbine with variable geometry turbocarter 16-Valve DOHC 20-Valve DOHC 1-3-4-2 1-2-4-5-3 800-850 800 750-800 HPE 40S/80/80SD /110/110JD HPEL 80 Cylinders Displacement [cm3] Bore [mm] Stroke Engine type Compression ratio Injection Type Boosting Timing system Firing order Idle speed [rpm] Max revolution speed (with load) [rpm] FNM® HPE Series 4000-4200 4000 4200 HPE/P 300 HPEL 45 4 2988 95,8 104,0 4 1248 69,6 82,0 17,6:1 Turbine with cooled none body 16-Valve DOHC 1-3-4-2 750-850 800-850 4000-4200 4000-4200 109 HPE 40S/80/80SD /110/110JD HPEL 80 Maximum power [kW @ rpm] 80,8 @ 4000-4400 (HPE 110/110JD) 58,8 @ 4000 (HPE 80) 55,1 @ 3800 (HPE 80SD) 66 @ 4000 (HPEL 80) Maximum torque [Nm @ rpm] 230 @ 2600 (HPE 110/110JD) 157 @ 2200 (HPE 80/80SD) 66 @ 4000 (HPEL 80) Alternator Engine oil capacity (without filter) [l] 110 29,4 @ 3200 (HPE/P 40) 110 @ 4000 (HPE/P 150/150JD) 125 @ 4000 (HPE/P 170/170JD) 140 @ 4000 (HPE/P 190/190JD) 47,8 @ 4000 (HPEL 65) 66 @ 4000 (HPEL 90) 91.4 @ 2600 (HPE/P 40) @ 2600 (HPE/P 150/150JD) 338 @ 2200 (HPE/P 170/170JD) 372 @ 2400 (HPE/P 190/190JD) HPE/P 100/225/225JD/ 250/250JD/250H HPE/P 300 HPEL 45 184 @ 4200 (HPE/P250/250JD) 80,8 @ 3000 (HPE/P250H) 165 @ 4000 (HPE/P225/225JD) 217 @ 4000 33 @ 3000 460 @ 2600 (HPE250/250JD) 416 @ 2500 (HPE225/225JD) 560 @ 2600 - 75A 12V 105A 12V 140A 12V 110A 12V 75A 12V 3,2 4,0 4,5 7,5 3,2 8,5 65°C±1,5°C 80°C ±1,5°C 14,0 Thermostatic valve Cooling capacity [l] Sea water pump flow [l/min] Engine starter Wet weight (excluding transmission) [kg] HPE/P 40/150/150JD/170/ 170JD/190/190JD HPEL 65/90 65°C±1,5°C 7,5 7,5 90 (24,0 gal/min) 100 (26,6 gal/min) 1,3 kW 12V 188 1,8 kW 12V 240 295 65°C±1,5°C 7,5 90 (24,0 gal/min) 2,6 kW 12V 1,3 kW 12V 335 150 FNM® HPE Series 3.7.1 Specifications of transmissions The FNM marine engine is generally coupled to high reliability transmission systems. For the use and maintenance of transmissions, please refer to the manufacturer's manual. In the following table you will find the specifications of the transmission oil, as reported by the individual producers: Producer ZF Technodrive Mercruiser Transmission model ZF 45 ZF 45-1 ZF 63-A ZF 63 ZF 63-IV TM 345 TM 345-A TM 485-A TM 880-A Seaprop 60 Bravo I Bravo II Bravo III FNM® HPE Series Oil Type ATF SAE 20W40 SAE 20W40 SAE 15W40 SAE 20W40 ATF Quicksilver® High performance Gear Lube* Oil Capacity (liters, excluded exchangers) 2,5 3,0 4,0 3,6 3,8 1,6 (with standard exchanger) 2,6 3,7 3,0 See the producer’s manual. 111 *: The one specified is gear oil. For all other fluids using the stern drive always consult the producer’s manual. For transmissions that are not listed, consult the data provided by the respective producer. 112 FNM® HPE Series 3.7.2 Meaning of the indicators on the analog panel The engine control panel has a number of indicators and indicator lights to monitor the operation. If one of these should turn on, see the table below for an explanation of the meaning. Indicator or light Oil pressure indicator Crankshaft revolutions counter Engine coolant temperature Status Needle included between 1 and 6 bar Needle below 1 bar Around 800 revolutions per minute Above 800 rpm Between 75°C and 90°C Above 90 ° C Between 12V and 16V Voltmeter Alternator FNM® HPE Series Below 12V Lit, engine off Meaning Indicates the normal engine oil pressure. Involves a loss of engine oil or an insufficient amount of engine oil. The "Low Oil Pressure" indicator light turns on together to the alarm buzzer of the panel. Turn off the engine immediately and check the oil level. Indicates the operation of the engine idle speed, i.e. when the gear is not inserted. Indicates the normal operation of the engine with gear engaged. Indicates the temperature of normal engine operation. Indicates an operating temperature too high. If the needle remains above 90 ° C for a long time the "Coolant high temperature" indicator light turns on with the alarm buzzer of the panel. Reduce the engine speed and if necessary stop the engine. Indicates the voltage of the battery for the engine normal operation. Indicates that the voltage is not enough for the proper functioning of all electrical services. At the restart, the battery may not have the necessary voltage to start the engine. During operation, the alternator indicator light may turn on. It is a condition of normal operation. 113 Indicator or light indicator light Status Lit, indicates running engine Glow plugs indicator light Lit, engine off Blinking Off Low oil pressure indicator light On Off High coolant temperature indicator light Generic failure 114 On Off Meaning Indicates no recharge of the battery by the alternator. Turn off the engine and check the belts status. If the belts are in good condition, the malfunction may depend on the regulator of the alternator or the alternator itself. Contact a FNM® service point. It indicates the glow plugs preheating required to properly start the engine. Indicates a critical engine failure. Contact a FNM® service point to make the diagnosis. Indicates the normal operation of the engine. Indicates low engine oil pressure. At the same time the alarm buzzer of the panel turns on. Turn off the engine immediately, because the lubrication system is unable to work properly. Check the engine oil level and the erroneous connection of the sensor to the electrical wiring. Indicates the normal engine operation. Indicates an engine overheating. At the same time the alarm buzzer of the panel turns on. Turn off the engine immediately and check if the sea water filter is clogged, the sea water valve is opened and the coolant is sufficient. Also check the cooling system and any losses, verify that the impeller sea water pump is in good condition: Bleed air from the cooling system and check the connection of the sensor to the electrical wiring. Indicates normal operation FNM® HPE Series Indicator or light indicator light Status On Off Water in fuel indicator light On Off Transmission oil anomaly indicator light On, stern drive or gearbox installations On, saildrive installations FNM® HPE Series Meaning The reason for which the indicator light turns on can be: - Problem on injection system - ECU malfunction - Engine over heating The FNM® authorized service point must make an immediate diagnosis. Indicates normal operation The indicator light may turn on for: - Water presence in the fuel filter - Malfunction of the water in fuel sensor Check and drain the fuel filter. If the problem persists, make a diagnosis by an authorized FNM® service point. Indicates normal operation Indicates the low level of oil in the transmission. Check and fill the transmission system with proper lubricant, then turn on the engine again. If the problem persists, contact an authorized FNM ® service point. Indicates leakage of seawater from the saildrive seals. Check the seal status. 115 3.7.3 Meaning of the indicators on the digital panel If the installation includes a digital instrument panel, consult this table to interpret the information that the system can display. Display views Crankshaft revolutions counter Status Needle around 800 rounds per minute Needle between 800 and 4500 revolutions per minute Needle over 4500 revolutions per minute Between 12V and 15V Volts Below 12V Above 15V Trim Oil press 116 From 0 to 8 units Value between 0.7 and 6 bar Meaning Indicates the operation of the engine idle speed, i.e. when the gear is not inserted. Indicates the normal operation of the engine with gear engaged. Indicates a too high regime of operation. The "Rev Limit Exceeded Critical" indicator light turns on together with the alarm buzzer of the panel. Lower the position of the throttle to bring it up gradually to 0 and turn off the engine. If the engine does not turn off, act on the emergency red button located on the control box. Indicates the voltage of the battery for the engine normal operation. Indicates that the voltage is not enough for the proper functioning of all electrical services. At the restart, the battery may not have the necessary voltage to start the engine. During operation, the “Low System Voltage Amber Warning” alarm turns on " with the buzzer and the warning lights. Indicates excessive voltage to the battery, which can lead to electrical short circuits. The "High Voltage Warning System" alarm turns on with the buzzer and the warning lights. Turn off the engine immediately. Indicates the position relative to the Trim inclination angle. Indicates the engine oil normal pressure. FNM® HPE Series Display views Status Value below 0.7 bar Engine Hour Over 0h Fuel Level From 0 to 8 units Water Press Fuel Left Fuel Used Fuel Inst Greater than 0 bar Greater than 0 litres Greater than 0 litres Greater than 0 liters/hour Forward Neutral Reverse From 60 to 150°C From 0 to 40 bar Between 0 and 3 bar Trans Gear Trans Temp Trans Press Boost Press Throttle or Engine Load Coolant Temp FNM® HPE Series Between 0 and 100% Between 75°C and 90°C Meaning Involves a loss of engine oil or an insufficient amount of engine oil. The "Low Oil Pressure" alarm Turns on with the buzzer and the warning lights. Turn off the engine immediately and check the oil level. Indicates the total number of hours of use that has the engine since it was first turned on. Indicates the amount of fuel still in the tank. Each unit represents 1 / 8 of the fuel maximum volume that can be contained. Indicates the engine coolant pressure. Indicates the amount of fuel still available in the tank. Indicates the amount of fuel used since last reset. Indicates the engine fuel time consumption in liters per hour. Indicates the forward gear engaged. Indicates the neutral position. Indicates reverse gear engaged. Indicates the oil temperature inside the transmission. Indicates the oil pressure inside the transmission. Indicates the operating pressure of the turbocharger. Indicate the percentage corresponding to the position of the throttle relative to the engine acceleration. Indicates the temperature of normal engine operation. 117 Display views Status Above 90 ° C Glow plugs indicator light (if present) Lit, engine off Blinking Off Transmission oil anomaly indicator light On, stern drive or gearbox installations On, Saildrive installations Alarm: CHECK ENGINE! Displayed Alarm: ENGINE EMERGENCY STOP! Displayed 118 Meaning Indicates an operating temperature too high. If the needle remains above 90 ° C for a long time the "High Engine Temp! Critical” alarm turns on together with the buzzer and the warning lights. Turn off the engine immediately and check the coolant level. It indicates the glow plugs preheating required to properly start the engine. Indicates a critical engine failure. Contact a FNM® service point to make the diagnosis. Indicates normal operation Indicates the low level of oil in the transmission. Check and fill the transmission system with proper lubricant, then start the engine again. If the problem persists, contact an authorized FNM® service point. Indicates leakage of seawater from the Saildrive seals. Check the seal status. Indicates a failure of the engine. At the same time the alarm buzzer of the panel turns on. The reason for which the indicator light turns on can be: - Problem on injection system - ECU malfunction - Engine over heating Make a diagnosis at a FNM® authorized service point. Indicates a serious malfunction of the engine. At the same time the alarm buzzer of the panel turns on. Turn off the engine immediately and check it. Make a diagnosis at a FNM® authorized service point. FNM® HPE Series Display views Status Alarm: LOW OIL PRESSURE CRITICAL Displayed Alarm: HIGH VOLTAGE SYSTEM Amber Warning Displayed Alarm: LOW SYSTEM VOLTAGE Amber Warning Displayed, engine running Displayed, engine off FNM® HPE Series Meaning Indicates low engine oil pressure, less than 0.7 bar. At the same time the alarm buzzer of the panel turns on. Turn off the engine immediately, because the lubrication system is unable to work properly. Check the engine oil level and the erroneous connection of the sensor to the electrical wiring. Indicates an excessive electrical voltage (above 15V) and a problem with the battery or the alternator. Turn off the engine immediately to prevent short circuits or electrical overloads. Make the engine be checked by an authorized FNM® service point. Indicates a low voltage (less than 12V) and a problem with the battery or the alternator. When switching off the engine, it may fail to start. The most common cause is due to the alternator not charging the battery. Turn off the engine and check the belts status. If the belts are in good condition, the malfunction may depend on the regulator of the alternator or the alternator itself. Contact a FNM® service point. Indicates a too low voltage (less than 10V) of the battery, likely resulting in difficulty to restart the engine. Contact an authorized FNM® service point to verify the electrical system and engine. 119 Display views Status Alarm: WATER IN FUEL Maintenance Required Displayed Alarm: HIGH BOOST PRESSURE Displayed Alarm: REV LIMIT EXCEEDED CRITICAL Displayed Alarm: HIGH ENGINE TEMP! CRITICAL Displayed 120 Meaning Indicates an obstruction in the fuel filter. At the same time the alarm buzzer of the panel turns on. The reason for which the indicator light turns on can be: - Water presence in the engine fuel filter. - Malfunction of the water in fuel sensor Check and drain the fuel filter. If the problem persists, make a diagnosis by an authorized FNM® service point. Indicates excessive pressure of the turbocharger to the engine (greater than 3 bar). Lower the position of the throttle to bring it up gradually to 0 and turn off the engine. If the problem persists when turned on, keep low RPM without accelerating excessively and make the engine be checked by an authorized FNM® service point. Indicates a rotation speed of the engine too high, higher than 4500 rpm. Lower the position of the throttle to bring it up gradually to 0 and turn off the engine. If the engine does not turn off, act on the emergency red button located on the control box. If the problem recurs, make the engine be checked by an authorized FNM® service point. Indicates overheating of the engine, above 100 ° C. At the same time the alarm buzzer of the panel turns on. Turn off the engine immediately and check if the sea water filter is clogged, the sea water valve is opened and the coolant is sufficient. Also check the cooling system and any losses, verify that the impeller of the sea water pump is in good condition: Bleed air from the cooling system and check the connection of the sensor to the electrical wiring. FNM® HPE Series 3.7.4 Troubleshooting In the following table you will find, divided by the issue, the list of possible faults that cause a malfunction of your engine, complete with the action to be taken to resolve it. Possible Fault The starter will not crank Control lever not in neutral. The emergency stop button is pushed in (ECU Box) . Faulty or discharged battery (too low voltage ) . Fuses blown. Loose or corroded connections in the starting circuit. Starter relay is not operated due to too low voltage caused by a very long intermediate cable from engine to control panel Wrong engine electric ground connection Faulty starter-switch or faulty starter-relay. Faulty starter-motor or pinion does not engage. Seized components. Water in the cylinders. FNM® HPE Series Possible Remedy Put operating lever in neutral Release it. Check / charge the battery and check the alternator and its connections. Replace. Clean and tighten the connections. Install an auxiliary starter relay. Inspect / review Check / replace. Check / replace the starter-motor. Repair. Repair. 121 Possible Fault Possible Remedy If the engine spins but does not start, no smoke comes out from the exhaust Fuel supply valve closed. Open. (Almost) empty fuel tank. Fill the tank. Air in fuel supply system. Check and bleed. Fuel filter clogged with water and/or contamination. Check or replace. Fuel pre-filter clogged . Clean/replace Fuses burnt. Check/replace. Leaking in the fuel supply line or fuel injection line Check / replace. Vent line of fuel supply tank clogged. Check/clean. Clogged exhaust. Check . Check the electrical connection, check the pump, clean or Fuel low pressure electrical pump is not working. replace. Fuel electric pressure regulator clogged Unclog / replace Faulty ECU. Diagnosis / replace. If the engine spins but does not start, smoke comes out from the exhaust Air in fuel supply system. Check and bleed the air. Intake air filter clogged . Clean/replace Wrong fuel quality or contaminated fuel. Check fuel. Drain and flush fuel tank. Replace with new fuel. Faulty glow plugs. Check / replace. Incorrect lube oil SAE class or quality for ambient Replace. temperature. 122 FNM® HPE Series Possible Fault If the engine starts but runs unevenly or stops (Almost) empty fuel tank. Wrong fuel quality or contaminated fuel. Clogged fuel supply line . Vent line of fuel supply tank clogged. Air in fuel supply system. Fuel filter clogged with water and/or contamination. Leaking in the fuel supply line or fuel injection line Low battery voltage Fuel high pressure line regulator fault Faulty fuel injection injectors/pump. Clogged exhaust. FNM® HPE Series Possible Remedy Fill the tank. Check fuel. Drain and flush fuel tank. Replace with new fuel. Check/clean. Check/clean. Check and bleed. Check or replace. Check / replace. Recharge/ replace Replace Check, replace if required. Check . 123 Possible Fault If the engine does not reach maximum rpm under load Engine overloaded. Dirty hull/propeller Insufficient comburent air. Air in fuel supply system. Fuel filter clogged with water and/or contamination. Fuel pre filter clogged Leaking in the fuel supply line or fuel injection line Incorrect lube oil SAE class or quality for ambient temperature. Wrong fuel quality or contaminated fuel. Oil level too high. Leak in the air manifold. Dirty intercooler. Clogged exhaust. Damaged turbocharger Dirty injectors Transmission. 124 Possible Remedy Check the propeller size /incorrect propeller Clean Check . Check and bleed. Check or replace. Clean /replace. Check / replace. Replace. Check fuel. Drain and flush fuel tank. Replace with new fuel. Reduce the level. Check /replace and clean Check/clean. Replace. Check, replace if required. Check. FNM® HPE Series Possible Fault If the engine overheats excessively Seacock closed Leaks in the sea water suction system. Sea water filter clogged. Sea water impeller damaged Coolant level too low Leaks in the coolant circuit. Heat exchanger damaged or clogged by rubber parts of the damaged impeller. Oil level too high. Oil level too low. Insufficient comburent air. Engine becomes apparently overheated as a result of faulty temperature switch, sensor or meter. Faulty thermostat . Faulty coolant pump Faulty oil filter/dirty oil exchanger. Faulty turbo compressor. If not all cylinders are working Air in fuel supply system. Fuel filter clogged with water and/or contamination. Leaking in the fuel supply line or fuel injection line Faulty injectors. Locked suction valves. FNM® HPE Series Possible Remedy Open. Check / replace. Check/clean. Check / replace. Check / fill up. Check . Check/clean. Reduce the level. Raise the level. Check/clean the filter. Check / replace. Check / replace. Check/clean. Replace. Check /replace Check and bleed. Check or replace. Check / replace. Check, replace if required. Check, replace if required. 125 Possible Fault If the oil pressure is low Oil level too low. Excessive inclination of engine. Oil pressure apparently too low due to faulty oil pressure switch, sensor or meter. Incorrect lube oil SAE class or quality for ambient temperature. Oil leaks . Clogged oil filter Faulty oil pump If the oil consumption is excessive Oil level too high. Excessive inclination of engine. Insufficient comburent air. Incorrect lube oil SAE class or quality for ambient temperature. Engine overloaded. Leak in lubricating oil system. Oil steams condenser clogged . Turbocharger oil leaks . 126 Possible Remedy Raise the level. Check / Adjust. Check /replace Replace. Check /replace Replace. Repair / replace. Reduce the level. Check / Adjust. Check . Replace. Check size of propeller. Repair / replace. Replace Replace or repair. FNM® HPE Series Possible Fault If the fuel consumption is excessive Incorrect fuel quality or dirty fuel. Insufficient comburent air. Fuel leaks . Faulty injector/injector pump. If black smoke comes out of the exhaust (idling) Oil level too high. Excessive inclination of engine. Faulty injectors/sprayers. If blue smoke comes out of the exhaust (idling) Oil level too high. Leaking from turbo compressor oil seal. If black smoke comes out of the exhaust (full load) Insufficient intake air, dirty air filter. Leak in the air manifold. Dirty intercooler. Incorrect oil level . Engine overloaded, max. rpm is not reached. Engine overloaded, dirty propeller -boat hull. Excessive weight on board. Turbocharger actuator blocked Faulty turbo compressor. FNM® HPE Series Possible Remedy Check fuel. Drain and rinse fuel tank. Replace with new fuel. Check . Check and repair. Check, replace if required. Reduce the level. Check / Adjust. Check / replace. Reduce the level. Check /replace the seal Check/clean. Check / replace. Check/clean. Check. Check sizes of propeller and/or boat weight. Check and clean if required. Unblock / replace. Check / replace. 127 Possible Fault If white smoke comes out of the exhaust (full load) Air in fuel supply system. Wrong fuel quality or contaminated fuel. Water in fuel system. Faulty glow plugs. Faulty injector/injection pump. Vapors condensing at the exhaust for very low ambient temperature If you find burnt oil traces at the exhaust. Oil level too high . Faulty turbocharger . Excessive wear of cylinder / piston, piston rings. 128 Possible Remedy Check and bleed. Check fuel. Drain and flush fuel tank. Replace with new fuel. Check water separator. Check / replace. Check, replace if required. Check . Check, Repair / Replace . Check compression; refurbish engine. FNM® HPE Series 3.7.5 Diagnosis All HPE engines are equipped with a plug for electronic diagnosis connection. Make the diagnosis only to an authorized FNM® service point. FNM® HPE Series 129 4 Maintenance booklet 130 FNM® HPE Series 4.1 Engine Identification Data | Dati identificativi del motore Thiss data is to be compiled by the dealer and is necessary to the customer to verify the engine warranty. | Questi dati sono da compilare a cura del rivenditore e sono necessary al cliente per verificare la garanzia del suo motore. Engine type | Modello motore: Engine serial number | Matricola motore: Transmission type | Modello trasmissione: Transmission serial number | Matricola trasmissione: 1st Owner Name | 1° Proprietario: Sea trial date | Data test a mare: Dealer stamp and signature | Timbro e firma del rivenditore: FNM® HPE Series 131 4.2 Ordinary and Extraordinary Maintenance Register | Registro della manutenzione periodica programmata e straordinaria Maintenance | Intervento Hourmeter and Date | Ore motore e Data 1st Service (30h) | Primo tagliando (30h) Hourmeter | Ore: ______________ Date | Data: ______________ 2nd Service | Secondo tagliando Hourmeter | Ore: ______________ Date | Data: ______________ Ordinary | Ordinario (100h) Advanced | Avanzato (800h) 3rd service | Terzo tagliando Hourmeter | Ore: ______________ Date | Data: ______________ Ordinary | Ordinario (100h) Advanced | Avanzato (800h) 132 Notes | Note Type | Tipo Assistance Center Stamp and Signature | Firma e Timbro del Centro Assistenza 30h FNM® HPE Series Maintenance | Intervento Hourmeter and Date | Ore motore e Data 4th service | Quarto tagliando Hourmeter | Ore: ______________ Date | Data: ______________ Ordinary | Ordinario (100h) Advanced | Avanzato (800h) 5th service | Quinto tagliando Hourmeter | Ore: ______________ Date | Data: ______________ Ordinary | Ordinario (100h) Advanced | Avanzato (800h) 6th service | Sesto tagliando Hourmeter | Ore: ______________ Date | Data: ______________ Ordinary | Ordinario (100h) Advanced | Avanzato (800h) 7th service | Settimo tagliando Hourmeter | Ore: ______________ Date | Data: ______________ Ordinary | Ordinario (100h) Advanced | Avanzato (800h) FNM® HPE Series Notes | Note Type | Tipo Assistance Center Stamp and Signature | Firma e Timbro del Centro Assistenza 133 Maintenance | Intervento Hourmeter and Date | Ore motore e Data 8th service | Ottavo tagliando Hourmeter | Ore: ______________ Date | Data: ______________ Ordinary | Ordinario (100h) Advanced | Avanzato (800h) 9th service | Nono tagliando Hourmeter | Ore: ______________ Date | Data: ______________ Ordinary | Ordinario (100h) Advanced | Avanzato (800h) 10th service | Decimo tagliando Hourmeter | Ore: ______________ Date | Data: ______________ Ordinary | Ordinario (100h) Advanced | Avanzato (800h) 11th service | Undicesimo tagliando Hourmeter | Ore: ______________ Date | Data: ______________ Ordinary | Ordinario (100h) Advanced | Avanzato (800h) 134 Notes | Note Type | Tipo Assistance Center Stamp and Signature | Firma e Timbro del Centro Assistenza FNM® HPE Series Maintenance | Intervento Hourmeter and Date | Ore motore e Data 12th service | Dodicesimo tagliando Hourmeter | Ore: ______________ Date | Data: ______________ Ordinary | Ordinario (100h) Advanced | Avanzato (800h) 13th service | Tredicesimo tagliando Hourmeter | Ore: ______________ Date | Data: ______________ Ordinary | Ordinario (100h) Advanced | Avanzato (800h) 14th service | Quattordicesimo tagliando Hourmeter | Ore: ______________ Date | Data: ______________ Ordinary | Ordinario (100h) Advanced | Avanzato (800h) 15th service | Quindicesimo tagliando Hourmeter | Ore: ______________ Date | Data: ______________ Ordinary | Ordinario (100h) Advanced | Avanzato (800h) FNM® HPE Series Notes | Note Type | Tipo Assistance Center Stamp and Signature | Firma e Timbro del Centro Assistenza 135 Hourmeter and Date | Ore motore e Data Notes | Note Type | Tipo Assistance Center Stamp and Signature | Firma e Timbro del Centro Assistenza Hourmeter | Ore: ______________ Date | Data: ______________ Hourmeter | Ore: ______________ Date | Data: ______________ Hourmeter | Ore: ______________ Date | Data: ______________ Hourmeter | Ore: ______________ Date | Data: ______________ 136 FNM® HPE Series Copy this page and attach it to this book for additional maintenance operations | Fotocopi questa pagina e la alleghi al libretto per interventi aggiuntivi operations. Maintenance | Intervento Notes: FNM® HPE Series 137 Notes: 138 FNM® HPE Series Notes: FNM® HPE Series 139 Notes: 140 FNM® HPE Series Document 6.045.320.1 – HPE Series Owner’s Manual – ENG Language Release Update 0 First release 1 Added Glow Plug signaling at the pages 27, 28 and 29 FNM® HPE Series Date 21/03/2012 31/05/2012 141 To obtain service: FNM Service C.M.D. Costruzioni Motori Diesel S.p.A. Nucleo Industriale Valle di Vitalba 85020 – Italia Tel. +39 0972 715757 – int. 183 Fax. +39 0972 715696 Email: [email protected] Web: www.fnm-marine.com Printed in Italy Order code 6.045.320.1 – Rev. 1 dated 31/05/2012 © CMD S.p.A. All rights reserved. FNM® is a registered trademark of C.M.D. – Costruzioni Motori Diesel S.p.A.