1
GENERAL INFORMATION
1
TOOLS NEEDED
1
TECHNICAL DATA
1
DIMENSIONS
2
INSTALLING VARIANTS
2
PACKAGE
2
MOUNTING AND INSTALLING OF OPERATOR
3
ADJUSTMENT OF LIMITS
5
EMERGENCY RELEASE OF MOTOR
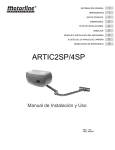
ARTIC2SP/4SP
Installation and Operating Manual
REV.: 1.00
VER.: 09/2011
6
TOOLS NEEDED - TECHINACAL DATA
1.1. PREPARATION
•
•
•
•
•
Read carefully this manual.
Check the product for damage after
af
transport.
Check the gate structural strength and smooth travel of gate leaves.
The gate leaves must move without jamming.
Prepare the gate before the installation of the automation. The gate must meet the requirements including installing
of mechanical stops.
• Check compliance of the supply mains characteristics with the requirements specied in this manual.
• All metal parts of the operator and the gate must have reliable earth connection.
• Check operation of the manual emergency release.
1.2.
BASIC SAFETY RULES
Correct installation and use of the operator will ensure its safety.
To avoid diculty at operation, follow the fundamental operating rules.
Do not go through the moving gate. W ait until full opening of the gate and only then go through the gate.
Do not block up the gate aper ture.
Keep people and children away from the automated systems. No one should cross the path of the moving gate.
Keep the remote controls away from children and outsiders to avoid unauthorized starting of the gate.
Never let children play with the automation.
Do not obstruct moving of gate leaves.
No branches and shrubs shall be within the gate moving area are as they can impede moving of gate leaves.
The signal lamps must be placed where easily visible and kept clean.
Do not try to move the gate leaves if the operator is blocked.
In the event of automation failure, release the operator to enable free pass and call repair specialists.
After change of operation mode, turn o power supply of the system before manual restoration of the gate’s normal
position.
• Do not make any alterations in the automated system.
• Do not make modernization or adjustment of the automated system. Call the qualied specialist to do that.
• For effcient work of the automated system, its safety devices and earth connection must be checked at least once a
half year.
•
•
•
•
•
•
•
•
•
•
2.
TOOLS NEEDED
1. Set of spanners
2. Set of cross and straight-blade screwdrivers
3. Set of drill bits for metal
4. Set of drill bits for concrete
5. Pliers
6. Hacksaw for metal
7. Electric drill
8. Tape measure (folding rule)
3. TECHNICAL DATA
Power
W
Use intensity
%
Torque
Nm
1.3
110
50
380
10
1.5
180
INTENSIVE USE
470
-
Supply voltage Rated current
V
A
Model
Weight
kg
ARTIC2SP
14
220
ARTIC4SP
14
24
Capacitor
mF
1
DIMENSSIONS - INSTALLING VARIANTS - PACKAGE
DIMENSIONS
168 mm
4.
340 mm
5.
INSTALLING VARIANTS
Behind-column installation
5.1.
178 mm
On-leaf installation
REQUIREMENTS
Leaf width,
m
2
2.50
3
3.50
4
Leaf weight,
m
800
600
500
450
400
It is recommended to use an electric lock if leaf width exceeds 2.50m .
6.
PACKAGE
When you receive your operator, unpack it and check that the operator is not damaged. If any damages are found,
contact the supplier of the operator.
Standard package
No.
Name
1
Electric operator
2
Fastening set
3
User manual
2
Q-ty
1
1
1
MOUNTING AND INSTALLING OF OPERATOR
7. MOUNTING AND INSTALLING OF OPERATOR
7.1. BEFORE INSTALLING
If Dimension B is 0–300 mm, Dimension A must not be less than 110 mm.
If Dimension B is 300–380 mm, Dimension A must not be less than 150 mm.
7.2. INSTALLING OF MOUNTING BASE AND CLAMP A
Front view
Use bolts 8 and anchors 14 mm to mount a mounting base on the pole.
Mounting base should be placed at a distance of not less than 1 50 mm from the ground.
Fix the clamp A on the gate leaf (use bolts or welding). The clamp A should be placed at a distance of 450 mm from
hinge, horizontally, and 19 mm from mounting base installed on the pole, vertically (see picture).
3
MOUNTING AND INSTALLING OF OPERATOR
7.3.
INSTALLING OF OPERATOR
Pic.1
Install the operator on the mounting base: match four holes and fix using 2 supplied bolts M8x110mm
To install the operator on the right leaf, change the position of the oper ator and use other two pairs of holes
(see Picture 1).
7.4.
INSTALLING OF STRAIGHT AND CURVED ARMS
Insert the straight arm in the driving shaft of the reducer. Level the ends of the shaft and of the arm, x the washer using
screw M6x20 and fix the axis of the arm using 2 pairs of lock screws.
Connect 2 arms using screw M6x16 and washer. Unblock the reducer by turning the handle clockwise and secure
the curved arm to the clamp A using screw M12x50 and nut M12
When installing the operator on the right leaf, follow the install ation procedure showed in Picture 2.
4
ADJUSTMENT OF LIMITS
Pic.2
8.
ADJUTMENT OF LIMITS
1) Unblock the reducer and open the gate leaf until the necessary position.
2) Turn the upper cam on the reducer shaft until actuation (disconnection)of microswitch. Close the leaf and fix
the cam using screw.
3) Unblock the reducer and close the gate leaf leaving 100 mm before completely closed position. Turn the bottom
cam of reducer until actuation of (closing) microswitch. Open the leaf and fix the cam using screw.
After you complete installation, make all electrical connections and adjustments of the operator, put on the cover
fixing it with 4 bolts.
5
EMERGENCY RELEASE OF MOTOR
9. EMERGENCY RELEASE OF MOTOR
Emergency release is used to release the motor in case of power cut.
To release the motor, turn the handle by 90 degrees.
ATTENTION!!!Release the motor only if the power supply is off.
6