1
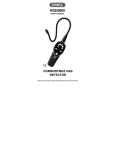
Model C-380
Refrigerant
Leak Detector
Instruction
Manual
www
reedinstruments
com
Table of Contents
Safety............................................................................................. 3
Features.......................................................................................... 3
Specifications................................................................................. 4
Instrument Description................................................................... 5
Operating Instructions.................................................................6-8
Power-Up & Reset....................................................................... 6
Testing the Unit............................................................................ 6
Measuring.................................................................................... 6
Ambient Concentration Reset...................................................... 7
Sensitivity Adjustment.................................................................. 8
Sensor Replacement.................................................................... 8
Cleaning...................................................................................... 8
Battery Replacement...................................................................... 9
For service on this or any other REED product or information on other
REED products, contact REED Instruments at [email protected]
www
reedinstruments
com
2
Safety
Read through your instruction manual before operation for correct and safe
usage.
Warning
This refrigerant leak detector is not equipped with any anti-explosive
designs or measures. Do not use this unit in an environment with flammable
gasses present.
Note
Be sure to test the unit (see testing the unit) often to ensure your safety and
the proper use of this unit.
Features
• Detects and pinpoints even the smallest leaks of refrigerant gases
• An increasing tick rate sounds as a leak is pinpointed and the red
indication light flashes more rapidly
• Flexible gooseneck probe is ideal for hard to reach areas
• Use in domestic and commercial refrigeration systems, automotive, air
conditioning, and quality control testing environments
• Microprocessor control with advanced digital signal processing
• Detects all halogenated refrigerants
• Quickly and accurately mark any leak spot
• Instantaneous response time
• Audible and visual leak indication
• No user calibration required
• All new ergonomic design
• Semiconductor gas sensor
• Multi color visual display
• High-Low leak sensitivity selector
• Ambient concentration reset
www
reedinstruments
com
3
Specifications
Gases Sensed: CFCs: R11, R12, R13; HCFCs: R22, R502,
R500; HFCs: R134a, R123, R125, R23, R404A,
R407C, R410A & other halogen based compounds
Sensitivity: R22, 134a: Hi 6g/year, L: 30g/year
R404A, 407C, 410A: Hi 8g/year, L: 40g/year
Alarm Settings: Buzzer, Tricolour LED bar indicator
Sensor: Advanced ionization detection
Response Time: Less than 1 second
Warm-up Time: 10 seconds
Probe: 390mm (15”) flexible stainless probe
Ambient Conditions: 32 to 104°F (0 to 40°C), 0 to 80% RH
Power Supply: Four AA alkaline battery, Low battery indication
Auto Power Off: 10 minutes
Battery Life: Approx. 40 hours
Dimensions: 6.8 x 2.6 x 2.2” (17.3 x 6.6 x 5.6 cm)
Weight: 18 oz. (500 g)
Includes:
Reference leak source,
carrying case and batteries
Optional Accessories:Replacement Sensor (Model R-134A)
Replacement Reference Leak Source (Model LC-R01)
www
reedinstruments
com
4
Instrument Description
1) Sensor
2) Sensor Protector
3) LED Leak Indicators
4) Low Sensitivity Button
5) High Sensitivity Button
6) Low Battery Indicator
7) Power ON/OFF & Reset Button
8) Battery Cover
9) Battery Cover Screw
LED Leak Indicator Definition
Ambient Concentration Indication
www
reedinstruments
com
5
Operating Instructions
Note: There are some environmental conditions that might cause an
inaccurate reading: high pollutant environments, large temperature variations, high wind velocity and environments with large amounts of freon
gasses. Organic solvents, adhesive vapors, fuel gasses and vesicants will
cause an abnormal response from the sensor. Avoid these environments.
Fast movement of the sensor probe or blowing into the sensor tip will
affect the air flow over the sensor and cause the unit to alarm.
Power-Up & Reset
The
button turns this refrigerant leak detector instrument ON, OFF
and serves as an ambient concentration reset button (see ambient
concentration reset for more information).
ON
OFF
Press
once to turn on the refrigerant leak detector. The LED leak indicators will then illuminate. Please take note, you have to wait for 1.5 minutes
to heat up the sensor for proper functionality.
ON
OFF
Press the
ON
OFF
again to reset the ambient concentration for the unit.
Press and hold the
for 5 seconds to turn the unit OFF. If the unit is left
inactive for 10 minutes it will automatically turn off.
ON
OFF
Testing the Unit
Turn the unit ON and set the sensitivity level to “Hi”. Open the cover to the
leak-check bottle and slowly move it closer to sensor tip. If the unit is in
working condition the LED leak indicators will light up, from low to high.
Repeat this process to confirm that the closeness of the leak-check bottle
results in the leak indicators to fluctuate from low to high. If the unit does
not perform as stated you must send your unit in for maintenance. For service on this or any other REED product, contact REED Instruments at info@
reedinstruments.com.
www
reedinstruments
com
6
Measuring
Position the tip of the sensor probe within 1/4 inch (6 mm) of the
suspected leak source. Slowly move the sensor probe past each possible
leakage point. When the unit detects a leak source an audible tone will
sound and visual indicators will light on the LED leak indicator display, appearing from left to right; green to orange to red (red being the highest
concentration, green the lowest). Increasing levels indicates the proximity
of the leak location is getting closer. When the unit signals a leakage, pull
the probe away from the leak for a moment and then bring it back slowly
to pinpoint the location. If the refrigerant leak is large setting the sensitivity
switch to LOW (see sensitivity adjustment) will make it easier to find the exact site of the leak. Return the sensitivity switch to HIGH before searching
for any additional leaks. When you’ve finished testing for leaks turn the unit
OFF and store it in a cool, dry, clean place to protect the sensor and unit
from any possible damage.
Ambient Concentration Reset
This combustible leak detector features an ambient concentration reset function that sets the unit sensors to ignore the ambient concentrations of refrigerant present.
Automatic Ambient Setup - When turned ON the unit’s sensor will set itself to
ignore the level of refrigerant present at the tip. Only a level or concentration
great than this will cause the unit to alarm.
Ambient Reset Feature - Resetting the unit during operation performs a similar function, it programs the circuit to ignore the level of refrigerant present at
the tip of the sensor. This allows the user to “home-in” on the source of the
leak (higher concentration). Similarly, the unit can be moved to fresh air and
reset for maximum sensitivity. Resetting the unit with no refrigerant present
(fresh air) causes any level above zero to be detected.
CAUTION
Be aware that this feature will cause the unit to ignore any refrigerant present when powered ON. If the unit sensor is pointing towards a leak when
you turn the unit ON the alarm will not sound.
www
reedinstruments
com
7
Sensitivity Adjustment
This unit provides two levels of sensitivity. When the unit is switched
ON it is set to high sensitivity by default. To change the sensitivity, press
Sensitivity
the Lo button. The two left green LED’s will then flash indicating low sensitivity has been selected. To switch the unit back to high sensitivity, press
Sensitivity
the Hi button. The two right red LED’s will then flash indicating that high
sensitivity has been selected.
Sensor Replacement
To ensure the accuracy of the unit, the sensor must be replaced periodically. This unit’s sensor has a limited operative period and under normal
operation it should stay operative for over a year. To prolong the sensor’s
life-cycle ensure that the sensor’s surface is free from water droplets, vapor,
oil, grease, dust and any other form of contaminant as well as any exposure
to high density coolants (>30000ppm).
WARNING
When replacing the sensor, the old sensor may be very HOT
1) Remove the sensor protector cover from the tip of the sensor probe.
2) Pull out the old sensor and insert the new sensor into the plug
(see below).
3) Place the sensor protector over the new sensor.
Cleaning
This plastic housing can be cleaned with isopropyl alcohol or standard
household detergents. Do not allow any cleaner to enter the unit or to come
into contact with the sensor as it may cause damage. Gasoline and any
other solvents may damage the plastic and should be avoided.
WARNING: The detergent or isopropyl alcohol could damage the sensor,
be sure to keep them from the sensor when cleaning the unit.
www
reedinstruments
com
8
Battery Replacement
Note: When the battery power is running low, the red LED low battery
indicator will illuminate. The batteries should be replaced as quickly as
possible.
1) Loosen the battery cover screw and remove the battery cover
located on the bottom of the instrument as shown below.
2) Install 4 “AA” size alkaline batteries.
3) Replace battery cover by aligning it with the handle and sliding
back onto the unit.
4) Tighten the battery cover screw so the battery cover is
securely into place.
For service on this or any other REED product or information on other
REED products, contact REED Instruments at [email protected]
www
reedinstruments
com
9
Notes _ _________________________________________
________________________________________________
________________________________________________
________________________________________________
________________________________________________
________________________________________________
________________________________________________
________________________________________________
________________________________________________
________________________________________________
________________________________________________
________________________________________________
________________________________________________
________________________________________________
________________________________________________
________________________________________________
________________________________________________
________________________________________________
www
reedinstruments
com
10
Notes _ _________________________________________
________________________________________________
________________________________________________
________________________________________________
________________________________________________
________________________________________________
________________________________________________
________________________________________________
________________________________________________
________________________________________________
________________________________________________
________________________________________________
________________________________________________
________________________________________________
________________________________________________
________________________________________________
________________________________________________
________________________________________________
www
reedinstruments
com
11
Notes _ _________________________________________
________________________________________________
________________________________________________
________________________________________________
________________________________________________
________________________________________________
________________________________________________
________________________________________________
________________________________________________
________________________________________________
________________________________________________
________________________________________________
________________________________________________
________________________________________________
________________________________________________
________________________________________________
________________________________________________
________________________________________________
www
reedinstruments
com
12