1
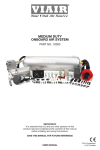
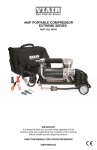
X’TREME DUTY
ONBOARD AIR SYSTEM
PART NO. 10009
IMPORTANT:
It is essential that you and any other operator of this
product read and understand the contents of this manual
before installing and using this product.
SAVE THIS MANUAL FOR FUTURE REFERENCE
USER MANUAL
*Only Compressor
is CE Certified
X’TREME DUTY ONBOARD AIR SYSTEM
Thank you for purchasing this complete, self-contained onboard air system. Contained in one package,
you’ll find everything you’ll need to install a high performance, onboard air source for your vehicle.
Please follow these instructions to install your new system.
OBA Components:
1 - 2.0 Gallon, 6 port VIAIR Air Tank
2 - 350C model VIAIR compressors
1 - 35-ft. Length of 1/4” Air Line (for accessory and gauge installation)
(Please check to make sure that you have seven labeled packages in your Onboard Air System kit.
Each package contains the parts needed for specific areas of onboard air installation, and may contain
smaller bags within each package labeled for specific use.)
PARTS PACKAGES
Package #1 – Air Tank Installation:
A
BCD
Package #3 – Pressure Switch & Relays:
Z
E
BB
AA
Pressure Switch
CC
86
Fused
12-Volt
87
30
Compressor
(+) Lead
85
F
G
H
I
J
A. Mounting Bolts (4pcs)
B. Flat Washers (8pcs)
C. Locking Washers (4pcs)
D. Nuts (4pcs)
E. Rubber Tank Mount Bushings (6pcs)
F. 1/4” NPT Drain Cock (1pc)
G. 1/4” NPT 175 PSI Safety Valve (1pc)
H. 1/4” NPT Compression Fittings (4pcs)
I. 1/4” NPT F Quick Connect Coupler (1pc)
J. T-Fitting – (1/4” M x 1/4” F x 1/8” F NPT) (1pc)
L MN
R
U
O
P
S
W
DD
EE
FF GG HH
II
20
25
15
1
2
5
0
30
35
0
JJ
Q
X
RELAY WIRING SCHEMATIC
10
T
V
Z. Pressure Switch
(110 PSI on, 145 PSI off) (1pc)
AA. 40-amp Relays (2pcs)
BB. Female Terminals (10pcs)
CC. Male Spade Terminals (10pcs)
Package #4 – Gauge Panel Installation:
Package #2 – Compressor Installation:
K
To Ground
Y
K. Mounting Bolts (4pcs)
L. Flat Washers (8pcs)
M. Locking Washers (4pcs)
N. Nuts (4pcs)
O. Remote Mount Air Filter Assemblies (2pcs)
P. Remote Mount Air Filter Fittings for
Compressor and Air Filters (2pcs)
Q. 2-pack of Replacement Air Filters (2pcs)
R. Leader Hose Bracket Clips (2pcs)
S. Air lines for Remote Mounting Air Filter (2pcs)
T. 4-inch Strip of continuous Grommet Material (2pcs)
U. Fuse Holder & 20 ft. 12 Gauge Wire (1pc)
V. 60-amp Tube Style Fuse (1pc)
W. 12-gauge Ring Terminal (1pc)
X. 12-gauge Butt Connectors (2pcs)
Y. Self-tapping Screws (2pcs)
KK
LL
DD. Dash Panel Gauge with ON/OFF Switch (1pc)
EE. Mounting Bolts (2pcs)
FF. Flat Washers (4pcs)
GG. Locking Washers (2pcs)
HH. Nuts (2pcs)
II. Push-on Female Terminals (2pcs)
JJ. 12-gauge Ring Terminal (1pc)
KK. 12-gauge Butt Connector (1pc)
LL. Self-tapping Screw (1pc)
Package #5 – Coil Hose with Couplers:
MM
MM.35-ft. Coil Hose with 1/4” NPT
Quick Connect Coupler and 1/4” NPT stud
USER MANUAL
X’TREME DUTY ONBOARD AIR SYSTEM
PARTS PACKAGES (CONT’D)
Package #6 – Accessories:
NN
OO
Package #7 – Air Tools / Carry Bag:
PP
RR
QQ
NN. 1/8” BSP F to 1/4” NPT M Adaptors
(for air locker use) (2pcs)
OO. T-Fitting (1/4” M x 1/4” F x 1/4” F NPT (1pc)
PP. 1/4” M NPT Plug (for regulator port block-off) (1pc)
QQ. 0-150 PSI Air Pressure Regulator Assembly (1pc)
RR.
SS.
TT.
SS
Inflation Gun with 0-200 PSI
Pressure Gauge with 1/4” NPT
Quick Connect Stud (1pc)
Blowgun Tool (1pc)
Air Tool Carry Bag (1pc)
2.0 GALLON AIR TANK & PLUMBING (USE CONTENTS OF PARTS PACKAGE #1)
Your 2.0 Gallon air tank is shorter than most tanks on the market and has been designed for use with vehicles
P/N 10008, 10009
without much room underneath. The tank comes with six 1/4” NPT port openings to allow installation in many
OBA PLUMBING
DIAGRAM
configurations on your vehicle. To insure safe and trouble-free
use of your air tank,
we strongly recommend
Typical System Configuration, May Vary Depending on Installation
that you install the supplied drain cock and a safety
pressure relief valve. (See Figure 1)
Plumbing Diagram:
(Figure 1)
Dash Panel
Gauge
Pressure
Switch
Safety
Valve
Leader Hose
From Compressor #1
2.0
Gallon
Tank
Leader Hose
From Compressor #2
BSP Adaptors
To Air Lockers
90
75
•
50
Drain
Cock
125
•
•
150
••
••
175
•
25
••
•
0
bar
200
220
psi
Coil Hose
Compression
Fitting
Quick Connect
Couplers
Tank Fittings:
Install the supplied fittings for the air tank in areas where they are most appropriate for your installation
using thread sealant or Teflon tape. (Not all installations will be plumbed exactly as shown in schematic.)
Make sure that the safety valve is installed in the top most position on the tank, and that the drain cock is
installed in the lowest position on the tank if the tank is to be installed in any other position than upright on
the tank’s mounting legs. Be sure that all fittings are accessible later in the installation process since you
will have to plumb air lines to each fitting as needed to utilize the air tank.
USER MANUAL
X’TREME DUTY ONBOARD AIR SYSTEM
2.0 GALLON AIR TANK & PLUMBING (CONT’D)
Mounting the Tank:
We have included 6 pieces of rubber bushings in your tank mounting hardware. You have the option of
using two layers of rubber bushings on one of your tank lags to slightly tilt tank toward the drain cock port to
improve drainage properties. Use the provided longer bolts, and corresponding washers, lock washers and
nuts to mount the tank to a suitable chassis or other place on your vehicle.
IMPORTANT:
- Tank is rated for 150 PSI maximum working pressure.
- Tank is NOT to be used as a breathing device.
- Bleed pressure from tank before servicing or adding attachments.
- Use only attachments or tools rated for 150 PSI working pressure or less.
CAUTION! DO NOT PRESSURIZE YOUR TANK UNTIL YOU HAVE INSTALLED
ALL NECESSARY PORT FITTINGS AND ACCESSORIES.
- Apply sealant to threads of fittings prior to assembly and tighten each part with a wrench.
- Do not over tighten if your port fittings are made from brass, since brass threads can be stripped.
- Always release air from tank before servicing.
WARNING: FAILURE TO DRAIN TANK AND REMOVE CONDENSATION
WILL CAUSE TANK TO RUST PREMATURELY.
- To remove accumulated condensation inside the tank, bleed pressure from tank until pressure is
approximately 5-20 PSI using drain cock
- Drain tank by opening the drain cock drain valve and close after draining tank.
- If drain cock valve is plugged, release all air pressure from tank, remove drain valve and clean, then reinstall.
IMPORTANT: Please observe air tank’s Date of Manufacture (stamped on tank leg).
Replace air tank 2 to 5 years from date air tank was first used, or use the date of manufacture as reference.
Adhering to air tank draining guidelines will prolong the life of your air tank.
PLEASE NOTE: RUSTED TANKS CAN FAIL CAUSING EXPLOSIONS OR FATAL INJURIES.
Discard tank immediately if tank is rusted.
SAFETY VALVE: When using a safety pressure relief valve, point the safety pressure relief valve away
from your body when releasing air. Use the pull ring on the safety relief valve to vent pressure from the
tank before servicing.
USER MANUAL
X’TREME DUTY ONBOARD AIR SYSTEM
DUAL 350C AIR COMPRESSOR INSTALLATION (USE CONTENTS OF PARTS PACKAGE #2)
Your Onboard Air System comes complete with two, 100% Duty Cycle compressors.
Please follow these installation instructions to enjoy the best use of your onboard air system.
CAUTION - To reduce risk of electrical shock or electrocution:
- Do not disassemble the compressor. Do not attempt repairs or modifications.
Refer to qualified service agencies for all service and repairs.
- Do not use this product in or area where it can fall or be pulled into water or liquids.
- Do not reach for this product if it has fallen into liquid.
- Use this compressor with 12-volt DC systems only.
- This product should never be left unattended during use.
Guidelines for Selecting Mounting Location:
The selection of proper mounting location for your air compressor will help ensure a long
and trouble free compressor service life. Please pay close attention to the following:
-
-
-
-
-
-
-
-
-
Select a FLAT, UPRIGHT & SECURE LOCATION where the compressor can be mounted.
To maximize air compressor performance, locate compressor as CLOSE TO THE BATTERY
as possible so that length of positive lead wire required is at a minimum.
Choose mounting location that is as cool as possible and away from heat sources.
This compressor is moisture & dust resistant, but NOT WATERPROOF or DUSTPROOF. Do not mount
compressor in locations where the unit is likely to come in contact with water or excessive dirt.
For compressor with remote filter mounting, select compressor’s mounting location where air line can be routed from compressor air inlet to remote inlet air filter. Make sure that the remote inlet air filter is located in a dry location, away from water.
You will also want to select a compressor mounting location where the leader hose bracket can be mounted to secure the 2 ft. leader hose.
If it is necessary to mount the air compressor further from the battery, such as inside your vehicle or in the bed of your pickup, use a minimum 8 AWG positive lead wire for remote installation.
Do not mount compressor near areas where flammable liquids are stored.
Use thread sealant for proper fitting installation. Teflon tape is not recommended.
Properly sealed, recommended torque is 12 to 15 ft. lbs
350C Compressor Wiring: (See Figure 3 on back of manual)
1. Disconnect ground cable from vehicle’s battery.
2. Temporarily position the air compressor in the location where it will be mounted.
3. Route ground wire to the negative post of the battery or to an appropriate grounding point and
cut ground wire to length as needed.
4. Mount the air compressors with the eight sets of 13/64” (5 mm) bolts, nuts, washers, and locking
washers provided. Use of thread locker is recommended.
5. NOTE: For Remote Inlet Air Filter Installation, refer to Remote Inlet Air Filter Installation Instruction
included in the Remote Inlet Air Filter Pack for installation of Remote Inlet Air Filter.
6. This air compressor comes with a heavy duty heat resistant stainless steel braided leader hose with
1/4” NPT fittings. This leader hose is designed to prolong the life of your air line. Do not remove this leader hose from air compressor.
7. IMPORTANT: Please note; the leader hose that came with your compressor has a built-in inline check
valve pre-installed. Do not remove inline check valve from leader hose.
8. Select a proper location to mount leader hoses with hose brackets provided. Avoid locations where
leader hose may become tangled with wires and other hoses.
9. To mount hose bracket, drill holes with 3/16” drill bit and push self–anchoring hose bracket pin into hole. Route leader hose through hose bracket and secure hose by pressing bracket clamp into locked position.
10. To remove hose from the hose bracket, simply press down on the hose clamp release tab to
release bracket clamp.
11. Tie compressor’s positive lead wires together and connect to pressure switch lead.
12. Make sure that your compressor setup is properly fused.
Dual 350C compressors pull approximately 40 maximum amps of power.
13. Always locate fuse as close as possible to power source.
14. Before connecting to power source, check to make sure that all connections are made properly.
15. Connect and test compressor system by running the compressor for a short time to build up pressure
in your air tank.
16. Once air pressure reaches preset cut out pressure of your pressure switch, the compressor will shut off.
Inspect all air line connections for leaks with soap and water solution. If a leak is detected, the air line
may not be cut squarely or pushed all the way in. Tighten connections if needed.
USER MANUAL
X’TREME DUTY ONBOARD AIR SYSTEM
DUAL 350C OPERATING INSTRUCTIONS
IMPORTANT: The compressors have a maximum working pressure of 150 PSI. Always operate the
compressor at or below the MAXIMUM PRESSURE RATING of the compressor. Operation exceeding
maximum pressure ratings and or duty cycle will result in damage to air compressor.
1.Your air compressor is equipped with an AUTOMATIC THERMAL OVERLOAD PROTECTOR.
This feature will protect the air compressor from overheating and causing permanent damage to your air compressor. The thermal overload protector will automatically cut off power to your air compressor should
the internal operating temperature of the air compressor rise above safe levels during excessive use.
2. Should your air compressor automatically shut off during use, turn power to the system off. The automatic
thermal overload protector will automatically reset when internal temperature of the air compressor drops below safe levels. After allowing air compressor to cool off for about 30 minutes, you can safely resume use of the air compressor by turning on the system.
3. To prevent discharge of your battery and to provide peak performance, it is recommended that you keep
the engine running while the air compressor is in use.
4. ONLY OPERATE THE AIR COMPRESSOR IN WELL-VENTILATED AREAS.
Dual 350C Compressor Maintenance & Repairs:
1. Periodically check all electrical and fitting connections. Clean and tighten as needed.
2. Periodically check all mounting screws. Tighten as needed.
3. Replace air filter element periodically. Replacement frequency depends on operating frequency and operating environment. For frequent use in dusty environment, you should replace air filter element
more often.
4. Regularly clean dust and dirt from compressor.
5. Your air compressor is equipped with permanently lubricated, maintenance-free motor.
Never lubricate compressor.
6. Repairs should be performed by Manufacturer or Manufacturer’s Authorized Service Agencies only.
CAUTION: Never touch the air compressor or fittings connected to the air compressor with bare hands during
or immediately after use. Leader hose and fittings will become very HOT during and after use.
Dual 350C Compressor Installation Tips:
1.Always use the remote intake filter option when possible. This will extend the service life of your compressor.
2.If noise reduction from vibration is desired, using the remote mount option for the inlet filter can reduce operation noise by up to 25%.
3.Always mount the compressor at a point higher than the inlet port of the tank.
This will keep moisture from being able to seep back to the tank.
4.When mounting the compressor, use a paint pen on the rubber isolators and cover the side to go against the
chassis or mounting location. Then, simply stamp the compressor against the chassis to make an imprint of
exactly where to drill the mounting holes for the compressor.
PRESSURE SWITCH INSTALLATION (USE CONTENTS OF PARTS PACKAGE #3)
Your VIAIR Onboard Air System comes complete with a heavy duty pressure switch that will turn on the
compressor at 110 PSI, and off at 145 PSI. The pressure switch has a 1/8” NPT inlet at the bottom that will fit
directly into the provided T-fitting in the kit (using thread sealant) to allow it to be plumbed into your air tank.
Pressure Switch with Relay Installation Tips:
1.Both terminals of the pressure switch are positive (+) leads. One is connected to the compressor positive
lead wire and the other to switched, fused power. Use of a relay is always recommended.
2.Never install your pressure switch in direct line from the inlet port coming from the compressor.
Tank pressure could be misread by the pressure switch. Instead, mount the pressure switch on the
tank where it receives air pressure reading from deflected air in the tank.
2.Never use a pressure switch that is rated beyond your compressor’s rated Maximum Working Pressure
(150 PSI).
3.Replace with Pressure Switch with Relay P/N 90217 if the pressure switch becomes faulty or
fails in the future.
USER MANUAL
X’TREME DUTY ONBOARD AIR SYSTEM
DASH PANEL GAUGE INSTALLATION (USE CONTENTS OF PARTS PACKAGE #4)
Your VIAIR Onboard Air System comes complete with a Dash Panel Gauge to monitor the pressure of your
2.0 gallon VIAIR air tank. Additionally, the Dash Panel Gauge has an ON/OFF switch preinstalled that will
allow you to turn the system off by cutting power to the pressure switch with relay that you have already
installed. We recommend that you install a master ON/OFF switch to allow the system to be turned off any
time you anticipate leaving the vehicle parked for any length of time, and to avoid draining the vehicle’s battery
unnecessarily due to a slow air leak in your system. (See Figure 3 on back of manual)
IMPORTANT: Each Dash Panel Gauge has been tested and calibrated. The air inlet on this gauge has a factory
installed compression fitting. DO NOT attempt to tighten or loosen the body of this compression fitting.
Any adjustments will cause the gauge to malfunction and void warranty. The Dash Panel Gauge included in
this kit is rated for 150 PSI. Do not pressurize gauge over 150 PSI.
1. Select Mounting Location for Dash Panel Gauge:
Select a mounting location with a rigid mounting surface such as the bottom edge of the dashboard.
Use the gauge mounting panel as a template; mark off two mounting points to be drilled.
Carefully drill two 13/64” diameter holes as marked. Do not mount Dash Panel Gauge at this time.
2. Air Line Connection to Dash Panel Gauge:
Remove only the collar of the compression fitting from the back of the Dash Panel Gauge. Do not loosen of
tighten the body of the compression fitting, which is permanently affixed to the air inlet of the gauge. Insert air
line tubing through this collar, and then push air line tubing onto the barb of the compression fitting until the air
line completely covers the barb. Tighten collar onto the body of the compression fitting with a wrench.
3. Routing Air Line to Air Source:
Route the air line tubing on the Dash Panel Gauge to the air source. Do not cut air line yet. In some cases a
hole may need to be drilled to enable the air line to pass through to the air source. Make sure that the air line
tubing is protected from any sharp edges of the drilled hole using grommet strip supplied. Connect to the tank
using the 1/4” compression fitting supplied.
Installation Tips:
- When cutting air line tubing, always cut as squarely as possible. Use a hose cutter or razor blade.
- When routing air line tubing, always remember to avoid sharp edges, heat sources and tight bends.
(Air line must be routed at least 12 inches from exhaust systems & other heat sources.)
IMPORTANT - Drilling through firewall:
Always be sure of what is on the other side of the firewall before drilling.
Take care not to damage your vehicle’s electronic systems or components.
4. Wiring the ON/OFF Switch:
Attach one of the two remaining female terminal connectors to the wire that was routed from the pressure
switch trigger wire (Small Red Wire on pressure switch with relay) There are two male spade connectors on
the back of the ON/OFF switch. Connect this female terminal connector to one of the male spade connector
on the ON/OFF switch. Next, attach appropriate size ring terminal provided in the kit to the end of the wire
with the Inline Fuse. (The ring terminal should be about 12” from the inline fuse.) This wire is referred to as the
power wire. Temporarily position the ring terminal at the power source and route power wire to the dash panel
gauge, measure and cut to appropriate length. (If additional wire is necessary, use 16 AWG wire.) Attach the
remaining female terminal connector to end of power wire, and connect to male spade connector on the
ON/OFF switch. (Note: Do not connect gauge to power source at this time.)
5. Wiring the Dash Panel Gauge for Illumination:
There are two wires, one red and one black connected to the light bulb of the gauge. Connect the red wire
to a suitable fused dash panel circuit. Use the quick splice connector included in the kit for wire connections.
The black wire is to be connected to a suitable ground source.
6. Mounting the Dash Panel Gauge:
With all electrical and air line tubing routed and connected properly, mount the dash panel gauge using the two
13/64” nuts, bolts, and washers included with the Dash Panel Gauge. Make sure that no electrical wires or air
line can be contacted by vehicle pedal operation, or by use of any safety equipment. Use provided zip ties to
secure air line and electrical wiring.
USER MANUAL
X’TREME DUTY ONBOARD AIR SYSTEM
DASH PANEL GAUGE INSTALLATION (CONT’D)
7. Connect to Power Source:
Before connecting the power wire to a power source, check to make sure that the ON/OFF switch on
the dash panel gauge is in the OFF position. Connect the ring terminal of the power wire to power source.
(This is the wire described in Step 4, which is connected to the ON/OFF switch of the dash panel gauge.)
8. Testing Your Onboard Air System:
Your Onboard Air System installation is now complete. Run the compressor to build pressure in the air tank.
When air pressure reaches the pressure switch cut out pressure, the compressor will shut off. Inspect all air
line connections for leaks with soap and water solution and spray with a spray bottle onto connections
to check for leaks. If leaks are detected, push air line may not be cut squarely or pushed all the way in.
Fix connections as needed. Periodically check your system’s fitting in this manner should your compressor
turn on more often than normal without frequent air use.
INLINE PRESSURE REGULATOR INSTALLATION
(USE CONTENTS OF PARTS PACKAGE #6)
Your Onboard Air System comes complete with an adjustable inline air pressure regulator that may be
used to regulate the pressure in your air tank down to any pressure below 150 PSI. This is especially
useful for installations that will supply air to a locking differential, or may be used to operate air tools.
Never attempt to use the regulator to adjust any tank pressure over 150 PSI, since the component is
only rated to a maximum of 150 PSI.
1. Mounting the Inline Pressure Regulator:
Select a mounting location with a rigid mounting surface such as the bottom edge of a chassis.
Use the inline pressure regulator mounting bracket as a template to mark the two mounting points to be drilled.
Carefully drill the two holes as marked, but do mount the Pressure Regulator at this time.
2. Air Line Connections to Inline Pressure Regulator:
Use a 1/4” NPT compression fitting on the “IN” side of the regulator receiving air from the air tank.
On the “OUT” side of the regulator, you may install a 1/4” NPT quick connect coupler, or use another 1/4” NPT
compression fitting to route the air line to the source of the item that pressure is being regulated to. If you are
plumbing to air locking differentials, we have included two 1/8” BSP Female to 1/4” NPT Male Adapters for this
use. You may require a T-fitting (not included), depending on your application.
3. Adjusting pressure 0-150 PSI:
The pressure regulator knob locks when pushed towards the unit. To adjust pressure, simple pull knob
away from the regulator body and adjust as needed. Always lock the adjustment knob in place before using
pressure-adjusted air supply to keep pressure regulated at a fixed pressure. (See Figure 2)
Pressure Regulator Diagram:
(Figure 2)
USER MANUAL
X’TREME DUTY ONBOARD AIR SYSTEM
TIRE INFLATION GUN OPERATING INSTRUCTIONS (USE CONTENTS OF PARTS PACKAGE #7)
Your Onboard Air System also comes with a Tire Inflation gun for airing up tires, and adding compressed air
to any inflatable item with a valve stem. The Tire Inflation Gun has a normally closed lever style air chuck at
the end of its rubber hose. After connection to an air source such as an air tank via the quick connect stud
preinstalled in the unit, air may be discharged from the gun by simply squeezing the inflation trigger.
To check air pressure, simply release the trigger and check the onboard air pressure gauge.
1. Using the Tire Inflation Gun:
Using a 1/4“ Quick Coupler, connect the Tire Inflation Gun to an air hose and connect to a tire valve stem or
similar inflation collar by securing the folding lever on the Inflation Gun air chuck.
2. Filling Tires and other Inflatable Items:
Squeeze the Inflation Trigger on the Inflation Gun by pressing it towards the handle of the gun. This will allow
stored air from the air tank to flow through the gun and through the chuck into your tire or other inflatable.
3. Checking Tire Pressure:
To check tire pressure, release Inflation Trigger on Inflation Gun and allow the needle of the 0-200 PSI gauge
to settle. Tire pressure will be able to be read only when the inflation trigger is released.
WARNING:
- Never operate the Inflation Gun at any pressure exceeding 150 PSI.
- Use caution when attached or removing air chuck from valve stems.
- Always ensure that tire valve stems are tight before inflating tires.
- Be careful to never inflate any tire or other inflatable past its rated pressure to avoid explosion,
or possible injury or death.
Please Note: Not intended for use with regular portable compressors or units meant to be operated with an
open ended air chuck. The Tire Inflation Gun is equipped with a close ended chuck and will hold pressure back,
which could cause the hose to burst.
USER MANUAL
X’TREME DUTY ONBOARD AIR SYSTEM
TROUBLESHOOTING GUIDE:
PROBLEM
POSSIBLE CAUSE(S)
CORRECTIVE ACTION
Tank pressure drops when
compressor (s) shut off
1. Loose drain cock
2. Check valve leaking
3. Loose connections
1. Tighten drain cock
2. Replace check valve or
compressor(s)
3. Check all connections with
soap and water solution and
tighten
Compressor runs continuously
and air flow lower than normal
1. Excessive air usage
2. Loose connections
3. Worn piston ring or inlet
valve.
4. Clogged air filter element
1. Decrease air usage
2. Check all connections with
soap and water solution and
tighten.
3. Repair or replace compressor
4. Replace air filter element
Compressor runs continuously
1. Bad pressure switch
causing safety valve (if equipped) 2. Defective safety valve
to open
1. Replace pressure switch
2. Replace safety valve
Excessive moisture in discharge
1. Excessive water in air tank
2. High humidity
1. Drain tank, tilt tank to drain.
Drain tank more frequently
2. Move compressor to area
with less humidity, or use air
line filter.
Compressor will not run
1. No power, or power switch
in OFF position
2. Blown fuse
3. Motor overheats
4. Faulty pressure switch.
1. Make sure compressor
switch is ON
2. Disconnect compressors
from power source, replace
fuse. (Refer to Specifications
section for correct fuse
amperage.)
3. Let compressors cool off for
about 30 Minutes to allow
thermal overload switch reset.
4. Replace pressure switch
Thermal
overload protector cuts out
repeatedly
1. Lack of proper ventilation or
ambient temperature too high
2. Compressor valves failed
1. Move compressor to well
ventilated area, or area with
lower ambient temperature
2. Repair or replace compressor
Excessive
knocking or rattling
1. Loose mounting bolts
2. Worn bearing on eccentric or
motor shaft
3. Cylinder or piston ring is worn
1. Tighten mounting bolts
2. Repair or replace
compressor
3. Repair or replace
compressor
CAUTION: NEVER DISASSEMBLE COMPRESSOR WHILE
COMPRESSOR IS PRESSURIZED.
USER MANUAL
X’TREME DUTY ONBOARD AIR SYSTEM
COMPRESSOR APPLICATION GUIDE
To ensure that you get the highest level of satisfaction from your compressor performance, refer to
information below:
VIAIR COMPRESSOR REFERENCE CHART
COMPRESSOR SERIES
DUTY CYCLE
100 SERIES
15%
215 SERIES
17%
225 SERIES
20%
265 SERIES
22%
275 SERIES
25%
300 SERIES
30%
400 SERIES
33%
450 SERIES
100%
500 SERIES
33% 550 SERIES
100% WORKING PRESSURE
130 PSI
150 PSI
150 PSI
150 PSI
150 PSI
150 PSI
150 PSI
150 PSI
150 PSI
150 PSI
ABOUT COMPRESSOR DUTY CYCLE:
Compressor Duty Cycle refers to amount of time a compressor can be operated in a given time
period, at 100 PSI & at a standard ambient temperature of 72°F.
Duty Cycle is commonly expressed as:
Compressor On Time / (Compressor On Time + Off Time)
As an example, a compressor that is rated for 20% duty cycle means that compressor can be
operated at 100 PSI @ 72°F for 8 Minutes and rested for 32 Minutes.
8 min. on / (8 min. on + 32 min. off) = 20% Duty Cycle
DUTY CYCLE REFERENCE CHART
DUTY CYCLE @100PSI / 72°F
MINUTES ON / OFF
15%
6 Min. On / 34 Min. Off
17%
7 Min. On / 30 Min. Off
20%
8 Min. On / 32 Min. Off
22%
9 Min. On / 30 Min. Off
25%
10 Min. On / 30 Min. Off
30%
13 Min. On / 30 Min. Off
33%
15 Min. On / 30 Min. Off
100%Continuous Duty
ABOUT RATED WORKING PRESSURE:
To ensure trouble free service life of your compressor, always operate compressor within rated
working pressure of the compressor. Never use a pressure switch with a higher cut-off pressure
than compressor’s rated working pressure.
USER MANUAL
X’TREME DUTY ONBOARD AIR SYSTEM
WIRE GAUGE GUIDE 12-VOLT:
Amp Draw
10
15
20
25
30
40
50
60
Length of wire from battery to compressor
10
15
20
25
30
14
12
10
10
10
12
10
10
8
8
10
10
8
6
6
10
8
6
6
6
10
8
6
6
4
8
6
6
4
4
6
6
4
4
2
6
4
4
2
2
P/N 10008, 10009
COMPRESSOR WIRING DIAGRAM
Wiring Diagram:
(Figure 3)
To Lamp Circuit
Dash Panel
To Keyed
Power Source
12V 40A
Relay
87
30
85
86
12V 40A
Relay
87
30
85
86
Pressure
Switch
Fuse
-
+
Battery
15 Edelman
Irvine, CA 92618
949-585-0011
www.viaircorp.com
Rev.1
LIMITED WARRANTY:
VIAIR Corporation warrants this product, when properly installed and under normal conditions of use, to be
free from defects in workmanship and materials for a period of one year from its original date of purchase.
To receive warranty service or repair, please contact VIAIR Corporation.
Returns should be made within one year of the date of purchase, after a Return Goods Authorization
(RGA) number has been assigned by VIAIR Corporation. To obtain RGA, fax a copy of your receipt to
(949) 585-0188. For complete warranty details, please visit: www.viaircorp.com/warranty
PLEASE NOTE:
THIS WARRANTY COVERS PRODUCT DEFECTS ONLY; IT DOES NOT COVER INCIDENTAL
OR CONSEQUENTIAL DAMAGES AS RESULT OF MISUSE OR ABUSE.
15 EDELMAN • IRVINE, CA 92618
TEL: (949) 585-0011 • FAX: (949) 585-0188
www.viaircorp.com
USER MANUAL