1
CAUTION – READ THESE INSTRUCTIONS BEFORE USING THE MACHINE
User instructions
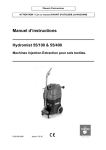
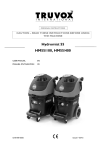
Hydromist 55/100 and 55/400
Carpet Soil Extraction Machines
03-8196-0000
Issue 5 05/10
Contents
1.
Page
General Information .................................................................................................3
1.1. Important safety advice......................................................................................3
1.2. Guidelines for the operator ................................................................................3
1.3. Transporting the machine ..................................................................................3
1.4. Electrical connection..........................................................................................4
2. Controls………………………………………………………………………………………..4
3. Preparing the Machine ..............................................................................................4
4. Operation..................................................................................................................4
4.1. Priming and starting the machine.......................................................................4
4.2. Using the machine.............................................................................................4
4.3. Cleaning Carpets...............................................................................................5
4.4. Cleaning Stairs..................................................................................................5
4.5. Cleaning Upholstery ..........................................................................................5
5. When Cleaning is Finished........................................................................................5
5.1. Draining and Cleaning .......................................................................................5
5.2. Storage .............................................................................................................5
5.3. Maintenance......................................................................................................6
6. After Sales Service ...................................................................................................6
7. Guarantee.................................................................................................................7
8. Waste Electrical & Electronic Equipment ...................................................................7
9. Technical Specification .............................................................................................8
10. Accessories and Cleaning Chemicals........................................................................8
11. Fault Diagnosis .........................................................................................................9
12. Declaration of Conformity........................................................................................ 11
2
IMPORTANT
BEFORE USE READ THESE INSTRUCTIONS AND RETAIN FOR FUTURE REFERENCE
• The power supply cord must be regularly
inspected for signs of damage.
• Do not operate the machine with a damaged
supply cord or plug, or after the machine
malfunctions or is damaged in any way.
Contact an authorised Service Agent for
repair or adjustment.
• Do not use where hazardous dust is present.
• Do not use in an explosive atmosphere.
• Do not pick up oil or other flammable material
with the machine.
• Take care when using a machine near the top
of stairs to avoid overbalancing.
1. General information
The Hydromist 55 litre range of upright carpet soil
extraction machines are designed for the efficient
cleaning of carpets and upholstery. They have
been designed for the professional user to
ensure long service life and safe operation.
We recommend that any user not familiar with
carpet cleaning should read these user
instructions fully before using the machine. If you
have any queries please contact the supplier who
you purchased the machine from or Truvox
International on the contact details provided at
the back.
1.2 Guidelines for the operator
• Operators must be fully trained in the use of
the machine in accordance with these
instructions,
able
to
perform
user
maintenance and the correct selection of
accessories.
• Operators should be physically capable to
manoeuvre, transport and operate the
machine.
• Operators should be able to recognise
unusual operation of the machine and report
any problems.
• Wear suitable footwear to avoid slipping.
• Wear suitable clothing to keep dry and warm.
• Where possible implement job rotation and
adequate rest periods to avoid continuous use
of the same muscles.
• Do not leave the machine running
unattended.
• Do not allow children to crawl on carpets until
thoroughly dry.
• Keep cleaning solutions away from children
and pets at all times.
• Do not smoke when using the machine.
• Do not put any objects into openings. Do not
use with any opening blocked: keep free of
duct, lint, hair, or anything that may reduce air
flow.
• CAUTION - This machine is for indoor use
only and should not be used or stored
outdoors or in wet conditions.
• WARNING – Should water or foam emit from
the machine exhaust switch off immediately
and refer to instructions for Using the
Machine.
These machines must only be used for the
manufacturer’s approved application.
The
Hydromist 55 litre range is designed for the
cleaning and removal of normal carpet soil. Do
not use the machine where it is suspected that
the carpet or upholstery contains health
endangering dust or debris such as asbestos or
chemical waste. If this is suspected do not
proceed, contact your supervisor, supplier or
Truvox International for advice.
The following instructions contain important
information about the machine and safety advice
for the operator.
Equipment must be operated, serviced and
maintained
in
accordance
with
the
manufacturer’s instructions. If in doubt contact
the supplier of your machine.
These instructions are valid for the following
models:
Hydromist 55/100 and Hydromist 55/400.
1.1 Important Safety Advice
When using electrical equipment basic safety
precautions should be followed including the
following.
• Read all instructions carefully before use.
• Keep children and unauthorised persons
away from the machine when in use.
• Do not leave the machine connected to the
electricity supply when not in use; always
remove the plug from the socket-outlet.
• Switch off the machine before removing the
plug.
• When unplugging pull the plug, not the supply
cord.
• Do not operate switches or touch the mains
plug with wet hands as this may cause electric
shock.
• The plug of the power supply cord must be
removed from the socket-outlet before
commencing cleaning of the machine or
undertaking maintenance operations.
1.3 Transporting the machine
When transporting the machine ensure that all
components, tanks and removable parts are
securely fastened, and that the supply cord and
plug are not trailing. Detach hose and wand from
machine for ease of carriage.
Do not lift or transport the machine whilst
containing liquid as this will add considerably to
the weight.
3
Fig 1
Take extreme care when moving the machine up
or down steps or stairs.
CAUTION – Incorrect lifting techniques may
result in personal injury. We advise that the
manual handling regulations are followed.
1.4 Electrical connection
• Before connecting the machine to the power
supply, check that your supply voltage
corresponds with that marked on the rating
label on the rear of the machine.
UK only
• The supply cord is fitted with a non rewireable
plug containing a 13 amp fuse. Should the
fuse require replacement it must only be
replaced by a 13 amp fuse conforming to
BS1362, and the fuse cover must be refitted.
If the fuse cover is lost the plug must not be
used until the correct replacement cover is
fitted.
• IMPORTANT - If the supply cord is damaged,
it must only be replaced by a special cord
available from the manufacturer or an
authorised service agent.
Should an extension cord be used, ensure cord
rating is adequate for the equipment. Do not use
extension cord in coiled condition as this could
result in overheating of the cord.
4 Operation
4.1 Priming and starting the machine
Hydromist 55/100
• Connect the solution and vacuum hoses to
the machine and the other end to either the
carpet or upholstery wand / tool.
• Switch on the pump and one by one the
vacuum switches to begin operation.
Hydromist 55/400
• Connect the priming hose into the solution
outlet and the other end into the solution
tank.
• Switch on the heater (if required) and pump
on to circulate the solution to remove air from
system.
Let the heater heat up for
approximately 3 to 5 minutes.
Warm water can be used to aid cleaning however
this can increase the risk of colour fastness and
carpets to shrink.
NOTE: When the heater is on, the orange
indicator light on the switch panel will be lit.
• Remove the prime hose and connect the
vacuum and solution hose to the machine
and the other end to either the carpet or
upholstery tool.
• Adjust the pressure gauge to the required
level.
• Switch the vacuum switches on one by one
to begin cleaning.
NOTE: use only one vacuum for more delicate
fabrics and upholstery.
2 Controls
Œ• Ž •
1
2
3
4
Vacuum
Vacuum
Pump
Heater (Hydromist 55/400 model only)
4.2 Using the machine
• Using the wand drag the head slowly over
the carpet whilst at the same time squeezing
the solution lever thus releasing the spray.
Repeat using overlapping strokes. There is
no need to apply downward pressure to the
wand as no improvement in performance is
obtained.
• For best results, clean an area approx.
1 metre × 1 metre as above, and then go
over the same area with only the vacuum
running, and not releasing any solution.
Proceed to the next area.
• The machine should be switched off
periodically to check there is no excess foam
in the recovery tank. If foam is present,
either add defoamer or if using an all in one
product, empty the recovery tank, rinse out
and continue, checking regularly for foam
build up.
3 Preparing the machine
• Fill the fresh water solution tank with water
and approved carpet cleaning chemical to a
maximum of 30 litres (Fig 1). When inserting
the power cord ensure that it is quarter
turned clockwise to ensure it is locked in
place.
NOTE: Ensure chemical is diluted correctly
according to instructions on container.
4
•
5 When Cleaning is Finished
When solution spray ceases the solution tank
is empty. Switch off the machine, empty the
recovery tank and refill the solution tank.
IMPORTANT – Ensure recovery tank is emptied
whenever solution tank is filled.
IMPORTANT – Do not run the pump motor when
the solution tank is empty, as this will damage the
motor.
IMPORTANT – Should solution seep from the
drain hose cap, stop work immediately and drain
recovery tank.
5.1 Draining and Cleaning
• When the recovery tank is full, empty by
using the drain hose at the rear of machine
(Fig 2). If a bucket is used to empty the
recovery tank, do not use the same bucket to
fill the solution tank as this can result in
putting dirt and grit into the solution line that
can block filters, orifices, and generally
degrade the solution line system (do not
reuse solution). Take care if using a bucket
to empty the machine. Stop flow before
bucket overflows. Empty bucket and repeat.
4.3 Cleaning Carpet
Colour fastness - Before using cleaning solution
or pre-spotter, test carpet for colour fastness on
an inconspicuous area. Apply solution to a small
piece of clean white material or tissue, and then
rub on carpet vigorously. Excessive amounts of
dye showing on the material indicate that the
colours are not fast, and the carpet should not be
wet cleaned.
Please note temperature of
cleaning solution will also affect colour fastness.
• Move furniture around to give a clear working
area. Cover bottoms of furniture legs where
necessary (aluminium cooking foil is ideal).
Pin up curtains and drapes.
• Vacuum carpet thoroughly to remove any
residual dust or debris.
• Areas of heavy carpet soiling can be removed
more easily if first treated with a concentrated
cleaning solution or pre-spotting solution.
• Rate of cleaning will depend upon the
thickness of the carpet and the degree of dirt
in the area being cleaned.
• Do not over wet carpets. Carpets may shrink
if they are over-wet or not properly fixed
down.
Fig 2
•
4.4 Cleaning Stairs
• CAUTION – when cleaning on stairs exercise
great care to ensure that the machine is
stable and cannot overbalance, possibly
causing injury to either operator or third
party. Use the upholstery tool for cleaning in
place of the wand assembly.
4.5 Cleaning Upholstery
This is done in the same way as carpet cleaning
except using the upholstery tool in place of the
wand assembly. Cleaning is achieved using a
gentle dragging motion of the upholstery tool over
the material.
• An inconspicuous area of the item to be
cleaned should always be tested for colour
fastness prior to cleaning. Should doubt exist
as to the suitability of the fabric for wet
cleaning, the chemical manufacturer should
be consulted for advice.
• Loose cushions should be removed and
cleaned separately.
• Do not over-wet upholstery.
5
To empty solution tank, detach the wand
from the end of the vacuum hose and insert
the vacuum hose into the solution tank. Turn
the vacuum switches to the "on" position and
transfer solution to recovery tank and
dispose of as outlined above. Clean recovery
filter at this time.
5.2 Storage
• After use check that water tanks are empty
and clean. Dry the machine as described
below.
• We recommend running the vacuum motor
for approx. 2 minutes after use to eliminate
condensation within the machine body, thus
ensuring the motor and particularly the
bearings remain dry.
• Store machine with recovery tank lid
removed and dump valve open (Fig 3).
Deodoriser may be left in the tank to prevent
unpleasant odours.
•
Fig 3
IMPORTANT – All other servicing and repairs
should only be performed by a Truvox engineer
or Authorised Service Agent.
•
•
•
•
Do not allow fluid either in solution or waste
tank to sit overnight. The unit should be
emptied and cleaned daily.
Clean the filter in the solution tank, the filters
on the vacuum stack in vacuum tank and all
lint filters in the inlet or vacuum tanks daily.
Do not use the same bucket to fill solution
tank that is used to remove waste from
recovery tank.
When the unit is not in use, leave the
recovery tank lid open.
At the end of each day, run the vacuum for 2
minutes with lid open and filter off.
IMPORTANT – Should the machine fail to
operate please refer to the fault diagnosis section
in the back of this instruction manual. If the
problem / remedy is not listed please contact
Truvox Customer Service Department for rapid
attention.
•
•
•
Wrap supply cord around handle ensuring
that plug is not trailing on the floor.
Store extractor indoors in a dry area.
Do not store in freezing temperatures.
6 After Sales Service
Should you require after sales service please
contact the supplier from whom you purchased
the machine, who will arrange service. Repairs
and servicing of Truvox products should only be
performed by trained staff. Improper repairs can
cause considerable dangers to the user.
Enquire about the Truvox low cost and efficient
Maintenance Contract.
5.3 Maintenance
WARNING - Before undertaking maintenance
operations or adjustments switch off machine
and unplug from the electricity supply.
To receive reliable service from this equipment,
regular daily maintenance is a requirement.
Cleaning carpet and upholstery is a very dirty
environment for any equipment.
The following recommendations are offered.
•
•
•
•
•
•
•
Keep the equipment clean, both inside and
out.
Supply cord - Regularly inspect sheath, plug
and cord anchorage for damage or loose
connection.
Solution tank – check filter is clean and
undamaged.
A damaged filter must be
replaced or damage to pump head and spray
jet could occur.
Vacuum head – Check and remove any
debris or lint build-up from the head.
Spray jet – Check jet for blockage and full
spray pattern. Blow through jet to clean. Do
not use a pin, as this could damage the jet.
Lubricate brass quick disconnects and drain
valves with a quality lubricant such as WD40.
Flush solution systems after use with clear,
clean water. (A white vinegar solution may
also be used). This will counter-act hard
water and alkaline deposits and aid in
keeping orifices clean.
6
• Periodic maintenance, and repair or
replacement of parts due to normal wear
and tear.
• Damage caused by accident, misuse or
neglect, or the fitting of other than genuine
Truvox parts.
• Defects in other than genuine Truvox
parts, or repairs, modifications or
adjustments performed by other than a
Truvox service engineer or authorised
service agent.
• Costs and risks of transport relating directly or
indirectly to the guarantee of this product.
• Consumable items and wear parts such as
drive belts and filters.
7 Guarantee
Your product is guaranteed for one year from the
date of original purchase, or hire purchase,
against defects in materials or workmanship
during manufacture. Within the guarantee period
we undertake at our discretion, to repair or
replace free of charge to the purchaser, any part
found to be defective, subject to the following
conditions.
CONDITIONS
1. Claims made under the terms of the
guarantee must be supported by the original
invoice/bill of sale issued at the time of sale,
or the machine Serial Number.
2. For claims under this guarantee contact the
supplier from whom you purchased the
product who will arrange the appropriate
action. Do not initially return the product as
this could result in transit damage.
3. Neither Truvox nor its distributors shall be
liable for any incidental or consequential loss.
4. This guarantee is governed by the laws of
England.
5. This guarantee does not cover any of the
following:
This guarantee does not affect your statutory
rights, nor your rights against the supplier arising
from their sales or purchase contract.
8 Waste Electrical & Electronic Equipment
Do not dispose of this device with unsorted
waste. Improper disposal may be harmful to the
environment and human health.
Please refer to your local waste authority for
information on return and collection systems in
your area.
7
9 Technical Specification
230 V ~ 50 Hz, Class I construction. Enclosure to IPX4. With 15m supply cord.
Hydromist
Hydromist
Model
55/400
55/100
HM55/400
Code
HM55/100
230
Voltage
v
230
500
Pump power
W
240
27.6/400
Pump Pressure
Bar / psi
6.8/100
3.8
Flow rate
l/min
6.8
6
Vac hose length
m
6
2 x 1200
Vac motor
W
2 x 1200
5400
Water lift
mm
5400
55
Solution tank capacity (max) *
litre
55
45
Recovery tank capacity (max) *
litre
45
86
Sound pressure level
dB(A)
86
3000
In-line heater
W
N/A
87 x 61 x 115
Size ( L x W x H)
cm
87 x 61 x 115
15
Cable length
m
15
60.5
Weight empty
kg
47
1 year
Warranty
1 year
Truvox International is a BSI Registered Company and our policy is one of continuous development.
We reserve the right to change specifications without prior notification.
* NOTE combined operational solution and recovery tank capacity 76 litres
10 Accessories and Cleaning Chemicals
Machine
Accessory
Part Number
20-0177-0000
Hydromist 55
Cleaning Wand
Double Bend
Single jet
Cleaning Wand
Double bend
Double jet
Drain hose valve
Hydromist 55/100
Hydromist 55/400
02-3893-0000
15m Low Pressure
Hose
Upholstery tool
20-0176-0000
15m High pressure
Hose
Stainless steel
upholstery tool
20-0181-0000
20-0179-0000
20-0182-0000
Clear plastic 89mm head for up to
120 p.s.i
15m vac and hose assembly
Stainless steel 89mm head for up to
400 p.s.i., width.
Part No.
Description
500ml
Bottles
per case
10
HMC01005
1 litre
10
HMC01010
5 litre
4
HMC01050
500ml trigger
spray
10
HM003005
The quality way to beautify
carpets and upholstery.
Formulation lifts dirt and stains
out of your carpets and helps
prevent re-soiling. Leaves carpets
and upholstery soft and fresh.
Formulated to help remove
stubborn stains from carpet and
upholstery
Chemical
Bottle size
Hydromist Carpet
Cleaning Solution
Hydromist
Pre-spotter
20-0178-0000
Description
Single brass tip low pressures up to
125 p.s.i.
One piece stainless steel tube and
head. Adjustable stainless steel
handle.
Double brass tips for up to 400 p.s.i.
One piece stainless steel tube and
head with adjustable padded grip.
PVC-U Compact ball valve that fits
onto the drain hose and allows for
easy emptying of the recovery tank.
15m vac and hose assembly
IMPORTANT: Genuine accessories and chemicals are only available from authorised Service Agents
or the Truvox Customer Service Department.
8
11 Fault Diagnosis
Problem
No electrical power
Switch is turned on.
Intermittent power to
motor(s).
Vacuum motor on
Little or no vacuum on wand
head.
Not enough vacuum power at
the machine.
Motor running and no
vacuum.
No exhaust from the
blowport
Premature closing of ball
type shutoff.
Ball type shutoff failing to
release after ball recovery
tank is drained.
Foam/dirty solution - coming
out of vacuum exhaust port.
Pump motor on – no spray
through jets.
Uneven spray from jet.
Spray weak or uneven.
Leaking or stuck solution
Reason
Remedy
ELECTRICAL SYSTEM
1. Defective power cord.
1. Replace
2. Fuse blown.
2. Replace fuse. Unplug any
equipment using the same circuit.
1. Faulty electrical cable.
1. Replace cable
2. Defective switches.
2. Contact service agent
3. Loose terminal
3. Contact service agent.
VACUUM SYSTEM
1. Close drain valve. Recovery tank
1. Drain valve open
lid must be closed
2. Repair or replace hose. Remove
2. Defective vacuum hose
kinks in vacuum hose.
3. Open machine, connect vacuum
3. Vacuum disconnected
hose to recovery tank.
1. Replace
1. Damaged recovery tank
lid.
2. Remove screen. Clean out fibres
2. Lint clogging ball - type
and accumulated dirt.
shutoff screen
3. Vacuum hose connection 3. Check for leaks around clamps
and cuffs (tighten). Replace
between stand pipe and
damaged hose(s).
vacuum motor.
4. Check air flow by removing hose
4. Vacuum motor exhaust
from machine and feel the exhaust
blocked.
under the machine. Remove
obstruction.
1. Faulty vacuum motor.
1. Replace.
2. Float valve blocked.
2. Clean water shutoff screen.
1. Dirty or clogged shut off
filter screen.
2. Ball coated with detergent
or other foreign material.
3. Screen slightly out of
round.
1. Foam from carpet by
passing water shutoff.
2. Elbow in vacuum tank is
not positioned correctly
1. Remove and clean screen.
2. Remove and rinse ball with clean
water.
3. Bend screen by squeezing slightly
by hand until there is an obvious
space between ball and inside of
screen.
1. Use additional defoamer.
2. The elbow should be pointed
directly at the side wall of the tank
away from the ball type shutoff.
SOLUTION SYSTEM
1. Clogged or faulty solution
1. Check intake on valve and remove
control valve.
lint or other foreign material.
2. Clogged or faulty quick
2. Depress plunger on solution hose
disconnect on housing.
against inside wall of solution tank.
If solution is flowing at this point,
the system is O.K. If no solution
flows, check the quick disconnect
for lint and other foreign matter.
3. Punctured pump diaphragm. 3. Replace with diaphragm repair kit.
4. Clogged jets
4. Clean jets on wand or tool.
1. Clogged strainer in solution
1. Unscrew strainer and remove lint
tank.
and any other foreign material from
screen.
2. Clogged jet.
2. Remove and clean.
1. Foreign material in valve.
1. Remove brass hex plug, clean
9
valve.
2. Loose brass hex nut.
3. Valve worn or seals worn.
Pump motor not working.
Pump pressure low
1. Loose wiring
2. Defective pump pressure
switch
3. Motor burnout
1. Clogged filters
2. Punctured pump diaphragm.
3. Defective rectifier or motor.
4. Pump not primed
Pump pressure varies.
1. Worn carbon brushes.
2. Defective pump pressure
control switch.
10
valve and replace.
2. Reseal hex and plug.
3. Replace worn parts with solution
valve repair kit.
1. Check and replace connections
2. Replace with new pressure switch
assembly
3. Replace pump motor
1. Unscrew in solution tank remove
lint and any other foreign material
from screen.
2. Replace with diaphragm repair kit.
3. Replace.
4. Plug priming hose into solution
connection and place end in
solution tank. Run pump for 4
minutes
1. Replace brushes.
2. Replace.
12 EC Declaration of Conformity
We
Truvox International Ltd.
Of
Third Avenue
Millbrook
Southampton
SO15 0LE
England
declare that the machinery
Make
Type
Model
Carpet Soil Extraction Machines
Hydromist
HM 55/100
HM 55/400
Serial Number:
Year of Construction: 2008
has been manufactured using the following transposed harmonized European Standards and
technical specifications.
BS EN 61000-6-2, BS EN 61000-6-3, BS EN 60335-1 and BS EN 60335-2-68, and is in conformity
with:
the Machinery Directive 98/37/EEC and subsequent amendments,
the Low Voltage Directive 73/23/EEC and subsequent amendments,
and the EMC Directive 89/336/EEC and subsequent amendments.
Signed in: SOUTHAMPTON, England
on the 1st day of March 2008
Signature
Name
Position
M. R. Eneas
New Product Development Manager
11
Truvox International Limited
Third Avenue, Millbrook, Southampton, Hampshire SO15 0LE, England
Tel: +44 (0) 23 8070 2200 Fax: +44 (0) 23 8070 5001
e-mail: [email protected] Web: www.truvox.com
12