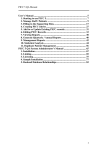
1
User manual Turtel 1 V2012-1 2 Index 1 WARANTY ............................................................................................................................ 5 2 INTRODUCTION ................................................................................................................... 6 3 2.1 User manual .................................................................................................................. 6 2.2 Huka BV ........................................................................................................................ 6 2.3 Modifications ................................................................................................................. 6 2.4 General ......................................................................................................................... 6 PRODUCT DESCRIPTION ...................................................................................................... 7 3.1 Adjusting the seat height and angle ................................................................................ 8 3.1.1 5 degrees seat angle:.................................................................................................. 9 3.1.2 9 degrees seat angle:................................................................................................ 10 3.1.3 13 degrees seat angle: .............................................................................................. 11 4 3.2 Adjusting the footplate (optional) .................................................................................. 12 3.3 Adjusting the headrest ................................................................................................. 13 3.4 Adjusting the headrest angle and depth ........................................................................ 14 3.5 Installing the sceptic bowl ............................................................................................ 15 3.6 Installing the foot straps .............................................................................................. 16 MAINTANANCE ................................................................................................................... 18 4.1 Instruction................................................................................................................... 18 4.2 Cleaning ...................................................................................................................... 18 5 Technical specifications 3 4 1 Warranty Huka BV gives two years of warranty on its products. Your supplier will carry out this warranty. The guarantee does not apply to damage or faults of the tricycle caused by wrong or improper use. The evaluation of it is the privilege of Huka or a representative to be appointed by Huka. N.B. This warranty does not apply to components susceptible to wear. The Turtel is CE market and fulfils the European requirements for medical equipment. warnings are always marked with a warning icon using bolt italic text. recommendations are always marked with an icon using bolt italic text. 5 2 INTRODUCTION 2.1 User manual This manual is meant to give you all detail required for using this product in the best possible and safest way. It tells you all about each component, adjustment and maintenance. Before using the products, we strongly recommend you to read this manual carefully. Store this manual in a way which you can always find and read in case of some problems or questions. 2.2 Huka BV Huka is a Dutch company that manufactures appliances for the handicapped. If you have any queries about our products or their applications please contact your dealer. Huka BV Münsterstraat 13 7575 ED Oldenzaal The Netherlands tel: +31 (0)541 - 572 472 fax: +31 (0)541 - 520 415 mail: [email protected] web: www.huka.nl 2.3 Modifications Huka reserves the right to make modifications to the product described in this users manual without incurring liability. 2.4 General Your Huka product is a quality product. Every component of your Huka product has been tested and checked extensively. The finishing of the frame and the mounted components are of high quality. There for you are assured of an excellent product. When supplying your new Huka product, in principle all described components are adjusted well and / or are turned to you wishes. But no matter how modern, even a Huka product is not completely free of maintenance. There are some things that require attention from time to time. This small manual provides instructions for maintenance that you possible can do yourself and provides information about activities of your (Huka) dealer. To do a little maintenance can be quite fun, because it contributes to a greater pleasure whilst using the product.. 6 3 PRODUCT DESCRIPTION 5 2 1 7 6 3 4 1) Seat frame 2) Seat shell 3) Height adjustment tubes 4) Caster wheels 5) Headrest 6) Foot plate 7) sceptic bowl rail 7 3.1 Adjusting the seat height and angle The front tubes are marked with two holes, the rear tubes are marked with one hole. front tube with two hole marking rear tube with one hole marking The seat height of the Turtel can be adjusted in steps of 4 centimetre. The seat angle can be adjusted at 5, 9 or 13 degree backwards stilt. Determine the required seat height and seat angle of the Turtel. Loosen up the bolts of the height adjustment tubes using an Allan key size 6. Leave the bolts in the bolt holes so you can release them by hand and also tighten by hand. make sure the bolts are firmly tightened before using the seat. Lose bolts might result in personal or material damage. 8 3.1.1 5 degrees seat angle: For the 5 degrees seat angle, all leg tubes must be extended the same length. 1) loosen up one bolt so far that you can move the tube outwards. 2) set the right height and make sure the bolt is be positioned into a setting hole of the tube. 3) tighten the bolt by hand. 4) repeat these steps for the other legs as well. 5) if the required height has been set tighten the bolts firmly by using the Allan key. make sure the bolts are firmly tightened before using the seat. Lose bolts might result in personal or material damage. 9 3.1.2 9 degrees seat angle: to achieve a seat angle of 9 degrees, there must be a difference between the front tubes and rear tubes of one hole (4cm). 1) loosen up one bolt so far that you can move the tube outwards. 2) set the right seat angle and make sure the bolt is be positioned into a setting hole of the tube. 3) tighten the bolt by hand. 4) repeat these steps for the other legs as well. 5) if the required height has been set tighten the bolts firmly by using the Allan key. make sure the bolts are firmly tightened before using the seat. Lose bolts might result in personal or material damage. 10 3.1.3 13 degrees seat angle: to achieve a seat angle of 13 degrees, there must be a difference between the front tubes and rear tubes of two holes (8cm). 1) loosen up one bolt so far that you can move the tube outwards. 2) set the right seat angle and make sure the bolt is be positioned into a setting hole of the tube. 3) tighten the bolt by hand. 4) repeat these steps for the other legs as well. 5) if the required height has been set tighten the bolts firmly by using the Allan key. make sure the bolts are firmly tightened before using the seat. Lose bolts might result in personal or material damage. 11 3.2 Adjusting the footplate (optional) 1) loosen up both bolts so far that you can move the footplate up or down. 2) set the right footplate height. 3) tighten the bolts firmly using the Allan key. make sure the bolts are firmly tightened before using the seat. Lose bolts might result in personal or material damage. 12 3.3 Adjusting the headrest Adjusting the headrest height. 1) loosen up the bolts of the plastic clamp (6x) until you can move the headrest tubes. 2) set the right headrest height. 3) tighten the bolts firmly using the Allan key. make sure the bolts are firmly tightened before using the seat. Lose bolts might result in personal or material damage. 13 3.4 Adjusting the headrest angle and depth 1) loosen up the headrest fixation by pulling the red lever upwards. 2) now move the headrest into the required angle and depth. 3) push the lever down to tighten the headrest and fix it. make sure the lever is firmly tightened before using the seat. A not fixed headrest might result in personal or material damage. 14 3.5 Installing the sceptic bowl 1) put the sceptic bowl into the guide rail. 2) now move the sceptic bowl forward underneath the seat. 3) lock the sceptic bowl into the fixation pins. Now the Bowl is positioned is ready for use. make sure the sceptic bowl in fixed into the fixation pins. If not, the bowl might slide backwards and fall out of the rail. make sure the sceptic bowl in fixed between both rails.. If not, the bowl might fall out of the seat. 15 3.6 Installing the foot straps The foot straps can be mounted into different positions on the footplate. 1 2 1) take the strap out of the plastic. 2) open up the lever (1) of the clip and pull the strap out (2). 3 4 3) unscrew the nut plate (3) from the clip. 4) insert the clip into the footplate (4). 16 5 6 5) tighten the clip in to the footplate using both screws and the nut plate (5). 6) mount the other clip the same way in to the footplate (6). 9 7 8 7) take the strap and bend the end of the strap. this way, it will slide into the clip easier (7). 8) mount the other clip the same way in to the footplate (8). 9) push the lever down to fixate the strap (9). 17 4 MAINTANANCE 4.1 Instruction The Turtel toilet seat need a little maintenance to guarantee a safe product for many years to come. For this you need to do some frequently checking of the product. We advise you to check the following points every month: 1) check the surface of the seat shell if there are any sharp edges or surfaces. 2) check all bolts if they are still tightened. If not tighten them again. 3) check the fixations if they are working properly. 4) check the caster wheels if they are ok and if the brakes still work. 4.2 Cleaning The Turtel toilet seat will get in contact with human fluids like urine and sweat. It will also come in contact with chemical cleaning fluids. This substances might leave signs and traces in to the product. This might lead to “spots” on the product itself. To prevent the product being influenced by spots and coloration, we advise you to take the following precautions: 1) clean the seat, after usage, immediately with some warm water. 2) clean the seat regularly using some hot water and deterging soap. 3) avoid aggressive (chloral) soap and cleaning fluids. 4) do not use acetone or other aggressive chemical to clean the seat. 5) dry the seat after usage and cleaning to prevent it from forming stains. aggressive soap or cleaning fluids can damage the plastic seat and the coating on the frame. Bolts and nut could oxidise when using aggressive cleaning fluids. 18 19 your supplier: Huka BV Post Box 194, 7570 AD Oldenzaal Tel.: +31-(0)541-572472 . e-mail: [email protected] www.huka.nl 20