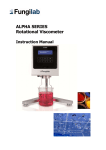
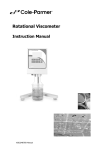
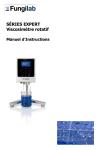
Download SMART SERIES Rotational Viscometer
Transcript
SMART SERIES Rotational Viscometer Instruction Manual SMART SERIES Rotational Viscometer Software Version: 1.0 Instruction Manual FUNGILAB, S.A. C/ Constitució, 64 – Nau 15 – Pol. Ind. Les Grases 08190 Sant Feliu de Llobregat (Barcelona) SPAIN Tel: +34 93 685 35 00 Fax: + 34 93 685 37 50 Email: [email protected] www.fungilab.com Manual Smart 2/61 0. Table of Contents 0. 1. 2. 3. 4. 5. 6. 7. Table of Contents ............................................................................................................... 3 Introduction ...................................................................................................................... 5 Safety Instructions............................................................................................................. 5 Symbols used in this manual............................................................................................... 5 Conditions for use.............................................................................................................. 6 Maintenance ...................................................................................................................... 6 Equipment presentation ...................................................................................................... 7 Equipment Description ........................................................................................................ 8 7.1 Equipment set-up.......................................................................................................... 9 7.2 The keyboard and screen..............................................................................................10 7.3 Start-up.......................................................................................................................11 7.4 Autotest ......................................................................................................................12 8. Menu system.....................................................................................................................13 8.1 The Main Menu ............................................................................................................13 8.2 Instrument Setup menu ................................................................................................13 8.2.1 Language (language change submenu).....................................................................14 8.2.2 Units. (Unit change submenu) ..................................................................................15 8.2.3 Calibration (Calibration submenu).............................................................................15 8.2.3.1 Reset ...............................................................................................................16 8.2.3.2 Viscotiy (Viscosity Calibration) ............................................................................17 8.2.4 Time Settings...........................................................................................................19 8.3 Measurement Configuration ..........................................................................................20 8.3.1 Measurement Screen...............................................................................................21 8.4 Test Profiles.................................................................................................................22 8.4.1 Select Profile............................................................................................................23 8.4.2 Edit Test Profile........................................................................................................24 8.4.2.1 Viscometer programmig......................................................................................24 8.4.2.1.1 TTT and TTS................................................................................................25 8.4.2.2 Output options...................................................................................................25 8.5 Programming................................................................................................................26 8.6 Options........................................................................................................................28 8.6.1 Output....................................................................................................................28 8.6.2 Information.............................................................................................................28 9. Important Rheological Information......................................................................................29 10. Accessories .....................................................................................................................34 10.1. Low viscosity adapters (LCP and LCP/B) ......................................................................34 10.1.1 Mounting ..............................................................................................................34 10.1.2 Dismounting and clearing.......................................................................................35 10.1.3 Technical specification for LCP accessories ..............................................................36 10. 2. Small sample adapters APM and APM/B ......................................................................36 10. 2. 1 Assembly............................................................................................................37 10. 2. 2 Dismounting and Cleaning ...................................................................................38 10. 2. 3 Technical specifications of APM and APM/B............................................................38 10.3 HELDAL UNIT – Helicoidal Movement Unit ....................................................................39 10. 3. 1 Heldal unit mounting ...........................................................................................40 11. Model/Spindle correspondence tables ................................................................................42 12. Model/Spindle/Oil calibration tables ...................................................................................44 Table 8. SMART L standard spindle selection ...........................................................................45 Table 9. SMART L Special spindle selection ..............................................................................46 Table 10. LCP Adaptor with SMART L ......................................................................................47 Manual Smart 3/61 Table 11. SMART R Standard spindle selection .........................................................................48 Table 12. SMART R special spindle selection ............................................................................49 Table 13. LCP Adaptor with SMART R......................................................................................50 Table 14. SMART H standard spindle selection .........................................................................51 Table 15. SMART H special spindle selection ...........................................................................52 Table 16. HELDAL’s special spindle selection for SMART L .........................................................53 Table 17. HELDAL’s special spindle selection for SMART R.........................................................54 Table 18. HELDAL’s special spindle selection for SMART H ........................................................55 Appendix A. Software "Datalogger" for PC................................................................................56 Appendix B. Installation Guide - USB Driver..............................................................................59 1. Introduction Thank you for acquiring the SMART rotational viscometer model from Fungilab, SA. The SMART is a rotational viscometer, based on the measurement of the torque of a rotating spindle in a sample at a specified velocity. Three different models, as well as various accessories, allow it to cover a wide range of viscosity measurement. 2. Safety Instructions • It is not the purpose of this manual to outline all of the safety instructions recommended for the use of the rotational viscometer, its accessories, and samples. It is the responsibility of the user to establish health and safety practices and to determine the application’s limits before use. • Fungilab, S.A. guarantees the satisfactory operation of the viscometers and its accessories only if there have not been any unauthorized adjustments to the mechanical pieces, the electronic components, and the software. • The operator should follow all of the warnings and instructions of this manual to ensure the safe and proper operation of the equipment. • Do not use the equipment for any other purpose that is not described in this manual. • Do not use any accessory that is not supplied and approved by Fungilab, S.A. • Do not use the viscometer or its accessories if there is any suspicion of malfunction. Do not use the equipment in situations or conditions that can provoke personal injuries or material damage. The rotational viscometer is not an inflammable, non-hazardous instrument and therefore should not be used in areas where there is an explosion risk. Before using the viscometer, carefully read and observe the following precautions: those who do not follow them may cause serious harm or personal injuries. To avoid an electric shock: • Do not use the rotational viscometer without a solid connection to the ground. 3. Symbols used in this manual The following symbols are used in this instruction manual: This symbol warns us of an operational, practical, or similar procedure that, if it is not carried out properly, may damage the equipment. This arrow indicates additional information that should be used by the user. This symbol warns us of an operational, practical, or similar procedure that, if it is not carried out correctly, may irreparably damage the equipment. Do not proceed further unless the indicated conditions are fulfilled and have been perfectly understood. 4. Conditions for use - Indoor use Maximum altitude 2000 m. Surrounding temperature range: from +5 to 40ºC 80% maximum relative humidity for up to 31ºC, and going as low as 50% of relative humidity for up to 40ºC. The power source fluctuations should not surpass ±10% of the nominal voltage Installation category II Pollution level II 5. Maintenance • • Always clean all of the parts after each use! Clean the spindles and the spindle protector well, and then immediately dry them. Make sure that there is not any sample remaining especially in the delicate zones like the spindle connector. Detergents or solvents to clean the spindles and the protector: - For food samples, use lukewarm water and if necessary, use soft detergents (like those which are used at home) - Other solvents that generally give good results are acetone, gasoline, or something with a high percentage of alcohol - If you use any other solvent, make sure that it does not corrode the spindles or the protector. The spindles are made in AISI 316. . Warning: Handle the volatile and inflammable solvents with extreme care. It is the user’s responsibility to establish safety conditions at work. • • • Regularly check the spindle’s thread and the viscometer shaft. During the working life of the viscometer, the equipment will require certain check-ups. In this case, please contact the local distributor. Regular maintenance is important. We recommend an annual check-up by the service technician of your local distributor. Manual Smart 6/61 6. Equipment presentation - When the equipment package is received, verify and confirm the delivery note. If some discrepancy or problem is found, immediately notify the supplier. - Check that the model corresponds to the equipment that was ordered. - Carefully read the use instructions. - All modifications, eliminations, or lack of maintenance of any of the machine’s mechanisms, defy directive 89/655/CEE and the manufacturer is not responsible for any damages that may result. In the attached photograph (Figure 1) you see the position of each piece inside the equipment’s carry-case. Please, keep the carry-case in a safe location. In the case of needing to transport the equipment or store it for a long period of time, always use the carry-case by placing each part as shown in the drawing. In the case of incorrect packing, where any of the pieces of equipment could suffer some damage, this damage will not be covered by the manufacturer’s guarantee. FUNGILAB recommends using the carry-case provided with the equipment for making any kind of delivery. Parts included with the equipment for standard delivery: - Viscometer head with serial number Foot or base, 3 height adjustable knobs for the base Nut Indented rod Standard spindles Spindle protector Spindle support Power cable USB cable Software Datalogger provided on a CD Carry-case Calibration Certification Instruction manual Standard spindles Model L: L1, L2, L3, L4 Models R y H: R2, R3, R4, R5, R6, R7 Fig 1. The viscometer in its carry-case Manual Smart 7/61 7. Equipment Description 1 2 3 4 5 6 7 8 9 Fig. 3 Frontal view of the equipment 1. 2. 3. 4. 5. 6. 7. 8. 9. Screen Certified keyboard Nut Spindle Protector Fastening rod Spindle Sample container (not included) Base (viscometer support) Height adjustable knob 2 1 3 4 Fig.4 Back view of the equipment Manual Smart 8/61 1. 2. 3. 4. 1 Serial number label Switch Feeder cable slot USB output connector FUNGILAB, S.A. 3 C/ Constitución, 64 – 08980 Sant de Feliu Llobregat (Barcelona) Spain TYPE: SMART R 2 CODE: V200002 SERIAL: SMR200001 AC 100/240V 50/60Hz 22VA 4 Fig. 5. Equipment identification label Description of the equipment identification label: 1. 2. 3. 4. Viscometer model Viscometer code Serial number of the equipment Voltage, frequency, and power of the equipment 7.1 Equipment set-up • • • • Remove all of the parts from the carry-case. Note the figure below (fig 6). Correctly place the three height adjustable knobs (B) on the Y-shaped base (A). Mount the fastening rod (C) with the holding screw (D) at the base (A). Attach the nut (F) to the fastening rod. The viscometer should be connected to the nut (F) by means of its rod (E). Note: The following process should be done carefully in order to harm to the shaft of the viscometer. Immediately remove the shaft’s plastic protector before beginning to use the viscometer. Fig. 6 Set-up for the viscometer base • • • • Insert the horizontal rod of the viscometer (E) into the nut (F).Fig. 6 Set-up for the viscometer base The viscometer should be placed on a stable laboratory table or on a stable surface free of vibrations (i.e. caused by other machines or equipment). Do not put the viscometer in direct contact with sunlight or in the middle of any air flow (the temperature of the sample can be easily influenced by the surrounding conditions). The viscometer has been designed to work indoors! Turn the height adjustment knobs until the height of the viscometer (located in rod E) is correctly adjusted. Plug the power cable into its correct slot located on the back of the equipment (Fig. 3 position 4) and plug it into the power source. WARNING: The socket by which the viscometer will be connected should have a ground. Always use a power cable with a ground connection! Verify that the voltage and the frequency coincide with the specifications for the viscometer (look at the identification label Fig. 4, for more information). Before turning on the machine, let it sit for some time so that it acclimates to the surrounding temperature in order to avoid a short-circuit caused by condensation. The fluctuations of the power source should not surpass ±10% of the nominal voltage. 7.2 The keyboard and screen Before starting up the machine, one should become familiar with the viscometer controls seen in the previous section. The instrument has a 6 key keyboard (Fig. 7) and a 4-lined Vacuum Fluorescent Display screen (number 1 Fig. 3) on the frontal part ready to use and they allow the user to interact with the machinery. The screen always shows the operations that the user is carrying out by showing menus that will be explained later on. The measurements collected by the instrument will also be explained in this manual. The keyboard gives the user the mobility throughout all of the menus, the selection of different options, and the creation and/or modification of viscosity measurement configurations to suit the user’s needs. Manual Smart 10/61 The keyboard has the following configuration: Fig. 7 The keyboard for the SMART viscometer The different numbered keys will always allow you to type in the proper numerical value (if a modifiable field has been selected). Tecla ‘Δ’ ‘∇’ ‘TAB’ ‘QUIT’ ‘ENTER’ ‘ON’ Función Go to the previous option; increase a value when a field has been selected.. Go to the next option; decrease a value when a field has been selected. Field select change in some menus. Return to previous screen. Motor stop during measurements. Accept an option or value in a field. It also allows editing to fields that can be modified. Stop/Start the motor during measurements. In the following sections, the function of each key in the corresponding menus will be explained in full detail, including the exceptions to the general operation. 7.3 Start-up Turn on the switch on the back of the machine (number 2, Fig. 4). If after doing this, the machine does not turn on: • Verify that the power cable is connected to the equipment (back part, number 3, Fig. 4) and that the power cable is connected to the power. The machine will beep, indicating that it has started and it will show the following screen: FUNGILAB S.A V.1.0 SMART SERIES English The screen informs the user of the version and the instrument model in addition to the selected language. After a few seconds, the Start-up screen will disappear and the Main Menu screen for the viscometer is shown (section 8.1 of this manual). The equipment initially comes configured with: - English - Viscosity units in centipoises (cP). If these are not the desired basic configurations, the equipment can be configured and changed to meet the user’s needs. The method of configuring the apparatus by varying these and other Manual Smart 11/61 parameters is explained in detail in a later section of this manual called ‘Configuration menu’ (section 8.2). Any changes made to the machine will stay configured to the last modification made at the configuration menu and will not return to the factory settings after a restart. Once the configuration information is given will submit the system to a Autotest. 7.4 Autotest The Autotest menu allows you to verify the operation of the viscometer in a way that allows detection of motor malfunctions in a simple and practical way. The following message will appear on the screen: AUTOTEST Remove the Spindle and Press <ENTER> VERY IMPORTANT: The Autotest should be carried out without a spindle. Once this message is shown on the screen, we should confirm that the spindle is not connected. Afterwards, press ‘ENTER’ and the auto-check process will begin. While this test is running, the screen will show this message: Testing ... The dots that appear below the Word ¨Testing¨ will continue to appear and reappear in a progressive manner every half second. If the Autotest is allowed to finish, two possible messages will appear, depending on the type of diagnostic test that was run. If the instrument detects an anomaly, it will show the following message on the screen: AUTOTEST ERROR The system is not working properly, press <ENTER> If this message appears, the machine will let off a whistle and a service technician from the supplier or manufacturer should be contacted. To get the manufacturer’s contact information, press the <ENTER> key and it will appear in the following format. TECHNICAL SERVICE FUNGILAB, S.A. +34 93 685 35 00 www.fungilab.com If it is a system error, the equipment will stay blocked, meaning the motor will not function. If the machine is turned off and restarted, the same screen will reappear. Manual Smart 12/61 In the case of a successful check, the machine will beep once it is finished and the main menu, as shown below, will appear. > Instrument Setup Measurements Test profiles Programming Options 8. Menu system 8.1 The Main Menu Fungilab viscometers work with a simple system of menus that allow the user to go through the instrument in a quick and simple way. The basic actions in the menus are: moving through the options (‘Δ’ and ‘∇’ keys), selecting an option (‘ENTER’ key) or returning to the previous menu (‘QUIT’ key). The main menu is the one that appears after the opening screen. It is accessed by turning on the machine normally, and after a satisfactory result from the test run. The main menu screen will show: > Instrument Setup Measurements Test profiles Programming Options By default, the cursor ‘>’ is placed on the ‘Instrument Setup’ option. The menu can be navigated with the ‘Δ’ and ‘∇’ keys, with which you select the desired option and press ‘ENTER’, which takes the user to the desired submenu (for more information about each function in particular see the corresponding sections). The first time the machine is used, it is advisable to access the ‘Instrument Setup’ option as the first step in order to establish the values for certain parameters of the viscometer such as language and measurement units. In the following sections, each of the 3 submenus of the main menu can be seen beginning with the configuration submenu. 8.2 Instrument Setup menu The configuration menu contains those functions that are not standardized and that modify the state and/or operations of the instrument. Once the ‘Instrument Setup’ option is selected by pressing the ‘ENTER’ key, the following screen will appear: Manual Smart 13/61 ---Instrument Setup-->Language Units Calibration Time/Settings Move through the options using the ‘Δ’ and ‘∇’ keys and select a submenu with the ‘ENTER’ key. The main menu provides the possibility of: - Changing the working language - Selecting the measurement units (viscosity and temperature) - Carrying out calibrations (the machine comes calibrated from the factory, therefore it is not necessary to do any calibrations when the machine is received) - Adjusting the date and time. The language, time, and units should be selected by the user before beginning to work with the equipment so that it functions properly. 8.2.1 Language (language change submenu) Once the configuration menu has been accessed, the first option that the cursor ‘>’ points to is ‘Language’. To make a change to the language, this option must be selected by hitting the ‘ENTER’ key. When we enter in this submenu, the viscometer will show a screen like the following one: -Select languageEnglish By using ‘Δ’ y ‘∇’ the different working languages for this equipment can be seen, which are: English French German Italian Japanese Portuguese Spanish Dutch Polish Catalan Once the language has been selected, press ‘ENTER’ and it will automatically change the language of the menus and return to the configuration main menu screen. Manual Smart 14/61 8.2.2 Units. (Unit change submenu) The SMART-type viscometer allows the user to select the units that are used for measuring viscosity and temperature. The possible choices for dynamic viscosity are: - International system of units (Pa·s or mPa·s) - Centimetre-gram-second system of units (Poise or centipoises) When the cursor key, ‘>’, points to the units submenu, it can be accessed by pressing the ‘ENTER’ key and the viscometer will show the following screen: -Select the units> Viscosity cP/P (CGS) By default, this submenu screen for ‘Units’ comes configured with the viscosity unit’s field selected. Once the desired field has been selected, the units to be used with the viscometer can be varied viscosity, by using the ‘Δ’ y ‘∇’ keys to switch the options. After the desired units have been selected, press the ‘ENTER’ key to save the changes and return to the configuration main menu screen. 8.2.3 Calibration (Calibration submenu) This submenu contains the viscosity calibration options that the user can exploit to recalibrate his equipment. IMPORTANT: The viscometer contains a default calibration element, which is installed during the manufacturing process. It is for this reason that it is unnecessary to calibrate the equipment when using it for the first time. Nevertheless, certain norms of quality recommend that the equipment be recalibrated once a year, which is why we offer the user the possibility of realizing this calibration without needing to send the viscometer back to the usual provider, or to FUNGILAB. FUNGILIAB, S.A. cannot be held responsible for the measurements taken by an independently recalibrated viscometer, and it is essential to follow the instructions given by Fungilab to the letter when recalibrating. Calibration Norms: • To execute a viscosity calibration it is necessary to have on hand at least a little standard calibration oil and a thermo statization system to maintain the sample at a constant temperature. If you do not possess this equipment then you will not be able to guarantee good postcalibration measurements. FUNGILAB, S.A. provides upon request the standard oils necessary for the calibration, as well as the accessories need to thermo-statize the oils. Manual Smart 15/61 • • There are two types of calibration: o Calibration of reference spindle: These spindles are coaxial spindles, with which the accessories APM or APM/B must be used. By calibrating these spindles, you’re changing the calibration of all of the viscometer’s spindles. Reference spindles: Model L TL7 Model R TR11 Model H TR9 o Calibration of the rest of the spindles: The calibration of any spindle, which is different from the reference spindle, will only modify the values of that individual spindle. The rest of the equipment’s spindles will not be affected by this calibration. If you want to calibrate more than one spindle and you don’t do it with the reference spindle, the spindles will have to be calibrated one by one. The oils used for each spindle will also be different, so for calibration you should have standard silicon oil for each spindle you’re calibrating. Tables 5 and 6 (page 36) specify the standard oils necessary for each spindle. This submenu is accessed through the main configuration menu, by choosing the Calibrate menu and pressing ‘ENTER’. Once at the submenu, the following screen will appear: ----Calibration---> Reset Viscosity Using the ‘Δ’ and ‘∇’ keys, you can select the different options of this submenu, placing the ‘>’ cursor over each option and pressing ‘ENTER’ to chose it. 8.2.3.1 Reset This submenu contains the equipment’s RESET option. Resetting the equipment’s configurations implies recuperating the different calibrations present in the equipment at the factory stage. Thus, after resetting, the equipment will recuperate the original viscosity calibration. Upon entering this submenu, the following screen will appear: WARNING: RESET THE EQUIPMENT <ENTER> <QUIT> If you want to continue with this process, press ‘ENTER’ and you will be brought to the following screen. Manual Smart 16/61 Once the ‘ENTER’ key is press, a second confirmation will be solicited by way of a security measure. The following screen will appear: Are you sure? <ENTER> <QUIT> If you press ‘ENTER’ here, the factory-stage calibration will be restored (calibration, language), the memory will be erased as well as the programming and you will return to the main configuration screen. 8.2.3.2 Viscosity (Viscosity Calibration) If you select the viscosity option (moving through the menu with the ‘Δ’ and ‘∇’ keys and press ‘ENTER’ you will access the following screens, depending on the model of your viscometer: Model L Spindle L1 v 100.0 cP Models R and H Spindle R1 v 100.0 cP The list of possible spindles to use depends on the model of your viscometer (L, R or H). Thus, in tables 8 through 18 (page 37 on) you can see the different spindles available for each model. Once this field is selected and situated in the list of corresponding spindles, you can select the spindle that you wish to calibrate using the ‘Δ’ and ‘∇’ keys. Once the spindle is selected, go to the “Viscosity” field using the ‘TAB’ key. Pressing ‘ENTER’, accept the field and introduce the value of the standard oil corresponding to the viscosity calibration. To introduce the data, use the ‘Δ’ and ‘∇’ keys to increase or decrease the value of each digit. Then press ‘TAB’ again to go from one digit place to another. Once the value of the oil is determined, press ‘ENTER’ to continue with the calibration process Next, press the ‘ON’ key and the following screen will appear: Attach the spindle and press <ENTER> Manual Smart 17/61 Once the spindle is in position in the device, press ‘ENTER’ again and the following screen will appear: Delay time: 00h 00m 00s In this screen it is necessary to introduce the time required from the moment you give the command to start the calibration to the moment the device begins the calibration process. This time lapse is frequently used to allow the whole of the sample and spindle to arrive at thermal stability before starting the actual calibration. NOTE: When the digits of this field are not selected, the whole line will be blinking. When the field is selected using the ‘ENTER’ key, only the place of the digit to be modified will be blinking The field will be permanently open to modification. To modify the value, use the ‘Δ’ and ‘∇’ keys to increase or decrease the value of each digit. Then press ‘TAB’ again to go from one digit place to another. By pressing ‘ENTER’ again, you can finalize the field modification and start the calibrating process by pressing ‘ON’. Pressing the ‘ON’ key will start a countdown back to zero. The spindle must already be submerged in the liquid once you confirm the start time. When the countdown gets to zero, the viscometer will start the calibrating sequence. While the equipment is calibrating, the following screen will appear (example): Calibrating 1/11 ... On this screen, each step of the calibrating process is displayed. When the process is over, information on the values of the angles and linearity of the calibration are displayed. If the curvature is lower to 2%, press ‘ENTER’ to confirm the calibration and you will be taken back the main calibration screen. NOTE: Exiting mid-calibration denies the equipment a proper calibration and therefore it cannot guarantee accurate results. Manual Smart 18/61 8.2.4 Time Settings When the cursor “>” is placed over “Adjust date/time”, press the ‘ENTER’ key to select this option and the viscometer will display the following page: ---Time settings--> Date Time At this point you must choose either the date or the time using the ‘Δ’ and ‘∇’ keys to move through the options and ‘ENTER’ to choose the desired field. If you choose the ‘time’ option, the following screen will appear: Time hh:mm:ss Current: 00:00:00 New: 00:00:00 In the third line you can see the equipment’s current time, which is presented as information only and cannot be modified. In the forth line you can modify the time (New Time). To change the time, hit ‘ENTER’ once and the whole field will be selected. Now you must use the ‘Δ’ and ‘∇’ keys to enter the values desired. Once the right value is entered, press ‘ENTER’. The date change functions in much the same way as the time change. Once this option is selected, the following screen will appear: Date dd:mm:yyyy Current: 00:00:0000 New: 00:00:0000 In the third line you can see the equipment’s current date, which is presented as information only and cannot be modified. In the forth line you can modify the date (new date). To change the date, press ‘ENTER’ once and the whole field will be selected. Now you must use the ‘Δ’ and ‘∇’ keys to enter the values desired. Once the right value is entered, press ‘ENTER’. If you press the ‘QUIT’ key the modification will be cancelled and the previous field value will be restored. By pressing ‘ON’, the equipment will start the measurements over again with the same configurations. Manual Smart 19/61 8.3 Measurement Configuration The measurement configuration menu allows access to the basic functions of the device: measuring fluid viscosity. From the main menu screen, with the ‘>’ cursor over the ‘Measurements’ field, press the ‘ENTER’ key to choose this option. After choosing this option, you will see one of these screens, depending on the model viscometer you have: Model L ----Measure Conf.---SP: L1 RPM:100.0 d: 1.0000 g/cm3 Max: 60.0 Model R and H ----Measure Conf.---SP: R1 RPM:100.0 d: 1.0000 g/cm3 Max: 100.0 To move through the fields cyclically use the ‘TAB’ key and with the ‘ENTER’ ‘Δ’ and ‘∇’ keys you can proceed to edit each one of the fields. Let’s first look at what each field represents and how to modify it. • • • • SP: the field that indicates which spindle we use for the measurement. RPM: the field indicating the working speed. d: indicates the density of the sample Max: Maximum viscosity to be determined with the speed and the spindle selected. The SP field together with the selected speed will determine the maximum and minimum viscosity values (from 8 to 18, from page 38, on), as well as the existence of a shear stress measurement (if you’re using coaxial spindles). To modify the spindle, you first need to select the field using the ‘ENTER’ key. The viscometer will only show the spindles that are compatible with your model. Once the spindle field is selected, we use the same direct selection method previously explained in the section about viscosity calibration. IMPORTANT: Selecting a spindle that doesn’t correspond to the ones adapted to your model will cause measurement problems. The RPM field (revolutions per minute) indicates the speed at which the test will be done. The SMART series incorporates 18 pre-determined speeds: 0.3, 0.5, 0.6, 1, 1.5, 2, 2.5, 3, 4, 5, 6, 10, 12, 20, 30, 50, 60, 100 rpm. The viscosity of the liquid and the spindle used determine the speed (refer to tables 8 to 18). Manual Smart 20/61 Speed modification: once the corresponding field is selected using the ‘TAB' key, you can move through the pre-established speed using the ‘Δ’ and ‘∇’ keys. If you want to keep the selected speed, press the ‘TAB’ key to change parameters. You also have a quicker option of changing the speed. When the speed field is selected (it will be blinking), press the ‘ENTER’ key to access this option. All of the digits will be blinking and you can modify them according to your needs. Using the ‘Δ’ and ‘∇’ keys, you can modify each digit, cyclically, between 0 and 9. The ‘,’ will be used as a decimal market. If two commas are accidentally entered, the value with be considered invalid and thus will not be saved. At this time, you would have to repeat the process. To change the digits you use the ‘TAB’ key and to confirm the entered value (as long as it is a coherent and valid one), press ‘ENTER’ again. These options are not exclusive, meaning that you can use the speed edition mode to modify the speed and then change it again using the ‘Δ’ and ‘∇’ keys to choose a speed that is closest to the desired speed amongst the predetermined equipment speed. NOTE: If, during modifications, you introduce a speed that doesn’t exist amongst the pre-programmed speeds, the machine will automatically replace your introduced speed by the closest one to it amonst the pre-determined speeds. If, once the values of all of the fields are confirmed, you press the ‘ON’ key, you will go on to the measurement screen. If instead you press the ‘QUIT’ key, you’ll return to the main menu screen, losing all of the data introduced in measurement configuration. 8.3.1 Measurement Screen You can access this screen by pressing the ‘0N’ key after the introduction of the measurement parameters. The viscometer will start moving the spindle, which means that the equipment is ready to start collecting data. We will now see an example of the data presented on screen at this stage: ------Measuring-----SP: L1 RPM:100.0 v: 30.4 cP 50.1 % As the equipment goes about collecting viscosity data (one piece of data for each rotation of the spindle), the information on the screen will be updated. On the screen you will see: • • • • • SP: Current spindle. Selected on the previous screen. RPM: Revolutions per minute. Value selected on previous screen. V: Viscosity. Value expressed in cP or mPa·s, or cSt (in the case that a density different from the default one is introduced). %: Certain percentage of the base scale. Percentage value of the curvature of the spring in relation to the base of the same scale. T: Temperature of the sample (ºC or ºF) NOTE: The speed field will be blinking until the motor speed is stable. Manual Smart 21/61 NOTE: Depending on the selected speed, it is possible that the speed reading will take a few seconds or minutes to appear. It’s important that the viscometer has made at least five rotations (which equals five measurements) before considering the measurements to be valid, as the device needs that time to stabilize. It’s also important to only take into account the temperature of a stable sample. In addition to visualizing measurements made on the sample, the user can also do other things from this screen. Using the ‘Δ’ and ‘∇’ keys, you can increase or reduce the speed of the spindle’s rotation (RPM). When you press one of these two keys, the rotation speed increases (‘Δ’) or decreases (‘∇’), respectively, from the previous speed. This way, we can comfortably modify the turning speed without having to leave the measurement screen. When you make a speed change, the field will start blinking again until the motor speed stabilizes. To make a unit change, whether it’s in viscosity or in temperature, the equipment will have to take into account the stabilized rotation (speed field (RPM) not blinking). With the ‘TAB' key, the viscosity field will blink for five seconds. If you then use the ‘Δ’ and ‘∇’ keys, you can vary the units. To save the changes, press ‘ENTER’. If you do not do this within five seconds the changes will go unsaved. The units in the temperature field can be modified using the same process but you will have to use the ‘TAB' key again when you’ve selected the viscosity field (it will be blinking). IMPORTANT: When the certain percentage of the base scale is lower than 15% or is as high as 100%, the measurement cannot be considered valid and the equipment will emit a warning beep with every rotation made under these circumstances. With the ‘ON’ key you can stop or start the motor, which allows for momentary pauses in an experiment. We you press this key, the equipment will show the following message: Motor stop If you press the ‘QUIT’ key when you see the message above, the viscometer will abandon the measuring and return to the main screen. If you press the ‘ON’ key, the equipment will restart the measurements with the same configuration. 8.4 Test Profiles FUNGILAB viscometers incorporate a group of programmable logs that allow configurations to be saved in order to speed up use of the machine when carrying out measurements of a certain frequency. From the main menu screen, select the Logs option by using the ‘Δ’ y ‘∇’ arrows and press the ‘ENTER’ key to accept. The viscometer will show the following screen: Manual Smart 22/61 ------Profiles-----> Select profiles Edit profile The first option will start a measurement with some configurations already recorded in the instrument’s log and the second is for saving the measurement options of a new configuration. Select one field or the other by using the ‘ENTER’ key. 8.4.1 Select Profile If the user wants to use some of the machine’s logs, the ‘ENTER’ key should be hit once the cursor “>” is positioned on this option and the following screen will appear: ---Select a profile--M1 M2 M3 M4 M5 M6 M7 M8 M9 Once the log is chosen and the ‘ENTER’ key pushed (use ‘TAB’ key to move through them), the following screen will appear (In the sample figure all of the possibilities are shown. Only one of the two words, ON/OFF, will appear depending on which function is active): ------Status-----TTT: xx.x% ON/OFF TTS: ON/OFF Output: ON/OFF This screen is the same one as the auxiliary screens of the measurements for this machine. The information shown will not be able to be modified under any condition, it is only shown to inform the user. Once the user has this information on the screen, by pressing the ‘ON’ key the measurement can begin and then the user must go to the measurement screen. If the ‘ENTER’ key is press the measurement configuration page is accessed and if the key is press again, the status page appears. ----Measure Conf---SP: L1 RPM:100.0 d: 1.0000 g/cm3 Max: 60.0 Once on the measurement configuration screen, its details can be seen but not modified. Now if the ‘ON’ key is press, the measurement can begin. ----Measuring---SP: L1 RPM:100.0 V: 30.4 cP 50.1 % Manual Smart 23/61 If by error a log is selected that has not been recorded on previously (the viscometer comes from the factory with empty logs), and if the ‘ENTER’ key is hit, a screen like the following will appear: Not defined X “X” being a log number from 1 to 9. If the following screen is visualized: Not defined 3 the slot M3 would have been selected and it would be there without having been recorded on (empty). By pressing the ‘ENTER’ key again, the log selection screen will reappear to be able to select another log. 8.4.2 Edit Test Profile To select this option, the ‘ENTER’ key should be press when the cursor “>” is placed on the “Edit profile” option line. The viscometer will show the following screen: ---Select a profile--M1 M2 M3 M4 M5 M6 M7 M8 M9 To choose one of the logs, use the ‘TAB’ key. In the log recording there are three option blocks that you must to configure once the desired log has been chosen. We will now explain viscometer programming, output conditions and specific configurations for the measurement. 8.4.2.1 Viscometer programming Once the log is chosen, the following screen will appear: -----TTT and TTS----Time to torque OFF Torque: 0.0% Time to stop OFF Time: 00h 00m 00s Manual Smart 24/61 8.4.2.1.1 TTT and TTS As stated before, these abbreviations mean: TTT: Time to Torque. You must set a torque value (%), at which the viscometer will have to stop the measurement. The screen will show the obtained viscosity at this moment in the torque. (see section 8.5) TTS: Time to Stop. You must set a time for the experiment, and a time for the viscometer to stop. Once the device has arrived at the determined time, the equipment will stop and display the value of the viscosity (see section 8.5) The two fields to activate in this screen are the TTT and TTS. To select a field, use the ‘TAB’ key to go through the options cyclically. The field that is selected at each moment will intermittently show the necessary information. TTT and TTS can only be ON or OFF. To change from one to the other you must have the field selected and use the ‘Δ’ or ‘∇’ keys to change modes. If neither mode is chosen, you cannot access the ‘Torque’ or ‘Time’ fields. These fields need to be activated (‘ON’ in the fields TTT and TTS, respectively) in order to access them. Once the ‘Time to Torque’ field is activated by pressing ‘ENTER’, you can access the ‘Torque’ option by pressing ‘TAB’, and then ‘ENTER’ again to edit. Use ‘TAB’ and the ‘Δ’ or ‘∇’ keys to reach the desired value and press ‘ENTER’ again to save the changes (it should be a numerical value between 15 and 95). This value will remain saved even if the option is deactivated (‘OFF’). ‘Time’ is modified in a similar way. You should have the ‘TTS’ option activated (hitting the ‘Δ’ or ‘∇’ keys to change the mode to ‘ON’). Once it is selected, use ‘TAB’ to enter the desired value. The selected field will be blinking on the screen until it is modified, which you can do used the ‘Δ’ or ‘∇’ key and ‘TAB’. By hitting ‘ENTER’ again, you save these changes until the next time they are modified through the same procedure. If the ‘TTS’ option is deactivated, the value will still be save in the memory. NOTE: It is impossible to select both the TTT and TTS functions at the same time. 8.4.2.2 Output options By pressing the ‘ON’ key from the previous speed configuration screen, the viscometer will show you the following screen: Manual Smart Mode Ini End ------File-----OFF 00h 00m 00s 00h 00m 00s Inc 00h 00m 00s 25/61 The default mode is ‘OFF’. To activate this option, use the ‘Δ’ or ‘∇’ keys to turn it ‘ON’ and vice versa. While the option is deactivated (‘OFF’), we cannot select the time fields that regulate this function. • • • Ini: record start time, ‘Beginning’ End: data record end time. Inc: the increments by which samples are taken. Once the field in active, you can select different fields, jumping for one to another using the ‘TAB’ key. To modify each field, press ‘ENTER’. The selected field will blink on the screen until it is modified, using the ‘Δ’ or ‘∇’ keys or the ‘TAB’ key. To save the changes press ‘ENTER’, which will unselected the field and save the values entered. When you’re in the ‘options and output configuration’ screen (as we will now see), you can begin the configuration of the measurement or experiment. The ‘ON’ key will bring you to a screen resembling this one: ----Measure Conf---SP: L1 RPM:100.0 d: 1.0000 g/cm3 Max: 60.0 The modification on this screen has already been explained in detail in section 8.3 Measurement configuration menu. Once the measurement parameters are configured, hit the ‘0N’ key to save it to the memory. The equipment will move on to the next screen, and the recording process will be finalized. ------Profiles-----> Select profile Edit profile To make sure that the memory has been accurately recorded you can check the process in ‘Use Log’ 8.5 Programming The Programming menu contains the functions that allow some optional applications to be programmed for the measurements. The TTT (Time to Torque), TTS (Time to Stop) and the Speed Configuration are applications that are complementary to the normal measurements. From the main menu screen you must place the cursor “>” on “Programming”, as seen in the following diagram: Manual Smart 26/61 Instrument setup Measurement Test profile >Programming Options By pressing “ENTER”, you will see the following screen: -----TTT and TTS----Time to torque OFF Torque: 0.0% Time to stop OFF Time: 00h 00m 00s This screen will allow us to activate and configure the ‘Time to Torque’ (TTT) and ‘Time to Stop’ (TTS) options that we will currently explain: • • Time to Torque (TTT): the viscometer’s spindles measure viscosity using a spring, by measuring the degree to which the spring opens. The ‘Time to Torque’ field tells us how much the viscometer can tolerate. If at any time the overture is greater than the degree previously introduced into the viscometer the measuring will stop. When the viscometer stops because the program is finished, the viscosity measurement is displayed on the screen. Time to Stop (TTS): the ‘Time to Stop’ field is where you program the amount of time you want the measurement or experiment to last. Programming this field with a time limit will define the maximum duration of the viscometer’s measurement. When the viscometer stops because the program is finished, the viscosity measurement will be displayed on the screen. To select the field that you want to activate (TTT or TTS) you use the ‘TAB’ key, and you can jump from field to field cyclically. The selection of fields will start in ‘Time to Torque’. The field that is selected will be intermittently displayed for further information. The options for the two fields TTT and TTS can only either be ‘ON’ or ‘OFF’. To vary this option you need to have the right field selected and use either the ‘Δ’ or ‘∇’ keys to jump from option to option. If the ‘Time to Torque’ or ‘Time to Stop’ fields are not activated (on the ‘ON’ position), than the ‘Time’ and ‘Torque’ fields cannot be accessed. Once the ‘Time to Torque’ field is activated (‘ON’ position), you can access the ‘Torque’ field by typing the ‘TAB’ key. The field should begin to blink. You hit ‘ENTER’ to proceed to the modifications. By using the ‘TAB’ key you can introduce the desired torque value (between 15.0 and 95.0), and by hitting the ‘ENTER’ key again, you can keep this amount. This number will remain saved, unchanged, even if the ‘Time to Torque’ option is deactivated (by changing the field option to ‘OFF’). The ‘Time’ field works in a similar way. You need to first activate the ‘Time to Stop’ option (on ‘ON’ position) and select it using the ‘TAB’ key. Once the field is selected you need to hit the ‘ENTER’ key and enter the desired numerical amount into the ‘Time’ fields using the ‘Δ’ or ‘∇’ keys. Hitting the ‘ENTER’ key again saves the changes and these will remain unchanged until a new amount is entered in the same way. If you deactivate the ‘Time to Stop’ option (in ‘OFF’ position), the value will be saved. Manual Smart 27/61 8.6 Options The Options menu contains the information and output options that can be set in the Fungilab Viscometers. When the ‘>’ cursor is on the ‘Options’ field of the main menu, you must select it by pressing ‘ENTER’. The viscometer will show the following screen: ------Options-----> Output Information Using the ‘Δ’ and ‘∇’ keys, you can move our cursor through the options in a cyclical way and to choose one of them, the ‘>’ cursor must be on the field when you press ‘ENTER’. 8.6.1 Output If you choose this option, you will be activating the option of recording an experiment or past measurement saved in the Viscometer’s memory. For this you will see the following screen: ------Test profile-----State OFF Ini 00h 00m 00s End 00h 00m 00s Inc 00h 00m 00s By default, the ‘State’ field will be inactive (in the OFF position). To activate it you need to use either the ‘Δ’ or the ‘∇’ keys to switch the status to ON or back to OFF as desired. While the ‘State’ field is deactivated (in the OFF position) you cannot select the time fields that regulate this function. Once the ‘State’ field is activated (in the ON position), you can select the different field, jumping from one to another using the ‘TAB’ key. The selected field will remain blinking on the screen until it is chosen for modifications. To modify each field you must press ‘ENTER’ once the field is selected and then introduce the values using ‘Δ’ or ‘∇’ keys or the ‘TAB’ key to enter a number in each digit place. To save the changes, press ‘ENTER’, whereupon the field will be unselected and the changes saved. Screen Information: • • • Ini: Begin time of recording. Fin: End time of data recording. Inc: By which increments of time a sample is taken. 8.6.2 Information If you select the ‘Information’ option, you will be brought to a screen in which the contact information of the manufacturer will be displayed, resembling this: Manual Smart 28/61 Fungilab Tel: 34 93 685 35 00 [email protected] www.fungilab.com This option is incorporated as a means of security in the case of loss of the present document or the displacement of any reference to the company in technical support or on paper. 9. Important Rheological Information To obtain precise results it is necessary to know the most important rheological properties of the sample. Newtonian fluids The viscosity of these fluids does not depend on the shear rate meaning that at any speed the viscosity is the same. Only temperature affects the viscosity; changes of 1ºC can provoke a change in the viscosity of up to 10%. Non-Newtonian fluids The viscosity of this type of products changes with the speed variable. Due to this inconsistency, the term Apparent Viscosity is habitually used. Within the classification you can find two different groups: Time-independent non-Newtonian fluids Time-dependent Newtonian fluids Time-independent non-Newtonian fluids The viscosity of a time-independent non-Newtonian fluid depends on the temperature and the speed gradient. Pseudo plastic Fluids: The viscosity diminishes when the speed gradient increases. Practical examples: paints, shampoos, fruit juice concentrate, adhesives, polymers, grease, starch, etc. Dilatants-Fluids: The viscosity increases with the speed gradient. Practical examples: clay, sweets components, etc. Plastic Fluids: These fluids only start to flow after having been submitted to a certain force (shearing force). They behave like solids in static conditions. Practical example: Ketchup. Time-dependent non-Newtonian fluids. The viscosity of time-dependent non-Newtonian fluids is dependent on the temperature, on the speed gradient and on time. Manual Smart 29/61 Tixotropical fluids: In these substances the viscosity diminishes with time when the fluid is subjected to a constant speed gradient. These substances tend to return to their previous viscosity once the speed gradient ceases to be applied. Practical examples: Many products in industrial food production (yogurt, etc.) Reopectic fluids: In these fluids, the viscosity increases with time when the fluid is subjected to a constant speed gradient. These substances tend to return to their previous viscosity once the speed gradient ceases to be applied. These fluids are not very common. NOTE: The turbulent behaviour of a fluid can produce falsely high results in viscosity tests. Normally, turbulent behaviour is due to an excessively high rotation speed in relation to the viscosity of the sample (see detailed Warning further on). FACTORS AFFECTING VISCOSITY There are many variables that affect the rheological properties of products, so it is very important to take the following factors into account. Temperature Temperature is one of the most obvious factors affecting rheological behaviour. It is essential to consider the effects of temperature on viscosity in the evaluation of materials that are subject to changes in temperature during its use or other processes. Some examples of this are motor oils, greases and adhesives. Shear Rate When a fluid is subjected to variations in the speed gradient during its process or use, it is essential to know its viscosity at the projected speed gradients. Examples of materials, which are subjected to and affected by important variations in speed gradient during its process or use, are: paints, cosmetics, liquid latex, some food products such as ketchup, and blood in the human circulatory system. Measurement conditions The measurement conditions of a material during its viscosity reading can have a considerable effect on the results of this measurement. Consequently, it is important to be careful and control the environment and conditions of any sample subjected to analysis. Variables such as the type of viscometer, the speed/spindle combination, the sample’s container, the absence or presence of a spindle protector, the temperature of the sample and the sample preparation techniques, etc, can affect not only the precision of the reading but also the real viscosity of the sample. Time Ageing under the same speed gradient conditions affects tixotropical and reopectical fluids. In some fluids the action of time combined with the proportion of the shear is very complex. In these cases, one can observe, with time, a return to the original fluid state. Previous conditions The conditions that the sample is subjected to before the viscosity reading can significantly affect the results, especially with heat-sensitive fluids or ageing. Manual Smart 30/61 Thus, the storage condition and the sample preparation techniques should be conceived to minimize effects on the viscosity measurements. Composition and additives A material’s composition is a determining factor in its viscosity. When the composition is altered, whether this is by changing substance proportions that compose it or adding other substances, important changes can be observed in their viscosity. For example, adding solvent to printing ink reduces the viscosity of the ink, and other types of additives are used to control the rheological properties of paints. VISCOSITY MEASURING PROCEDURES Data history We recommend documenting the following information each time you take a viscosity measurement: - Model or type of viscometer Spindle (and accessory) Rotation speed Sample container Sample temperature Sample preparation procedure (if existent) Spindle protection use The process is necessary in the event of comparison of results with other organizations, in the interest of being able to guarantee the possibility of reproduction of the results obtained. The spindle and its protection Examine each spindle before using it. If it’s damaged or eroded in such a way that its dimensions are changed, it will provide false results for your viscosity reading. The spindle protector (provided with every Fungilab rotational viscometer) protects the spindle and the viscometer axle, and it is important for the reading of low viscosities with standard spindles. The protector should always be used. In the event that it is not used, its absence must be reported in the measurement procedure notes. The protector isn’t used with most of the accessories. Speed selection and spindle If there is no described work procedure, the best method for the selection of the spindle for each speed is “trial and error”. The objective is a torque reading between 15 and 95%, according to the type of product in question, and a percentage higher than 50% is recommendable. If you know the fluid’s approximate viscosity, the quickest spindle/speed selection method is referring to the tables of maximum approximate viscosity. When you do tests at different speeds, you should select a spindle with which all of the speeds show a torque reading of between 15 and 95% GENERALLY: RPM INCREMENT ⇒ READING PRECISION INCREMENT SPINDLE SIZE-REDUCTION ⇒ READING PRECISION INCREMENT (Except for the non-Newtonian fluids that change their viscosity value when the rotational speed is modified. In these cases we recommended measuring with a determined speed and using a comparison method.) Manual Smart 31/61 Size of the sample container For measurements using the Fungilab viscometer, we recommend working with containers with an interior diameter of 83 mm or more. The usual container is a 600 ml precipitation vase. If a smaller container is used, the viscosity values could be greater, especially with low-viscosity fluids. Sample conditions The sample should be free of air bubbles. It should be exposed to a constant and uniform temperature. Before doing the viscosity readings, make sure that the spindle and its protection are the same temperature. Usually, thermostatic baths are used to maintain the sample at the desired temperature. The sample should have the properties of a homogeneous liquid; this means that it cannot have particles capable of being precipitated, deformed by the shear rate or decomposed into smaller particles. The measured substances shouldn’t be subject to chemical or physical changes during the measurement. Other essential conditions Experiments in conditions in which turbulent behaviour can be encountered should be avoided. The condition should be that of stationary fluid. Accelerations or retarding processes are excluded from the parameters of measurement. Spindle immersion The standard spindle should be submerged to the halfway mark in the axle. An erroneous immersion can compromise the result of the viscosity measurement. With the disc spindles you should avoid the creation of air bubbles, which could remain under the disc. To this end you should insert the spindle laterally and smoothly, and bring it over to the centre of the sample. Once it is there, attach it to the viscometer’s axle. Precision and Repetition FUNGILAB viscometers guarantee a precision of ±1% from the bottom of the speed/spindle combination scale, and a repetition of ±0.2%. Getting a viscosity reading Before working with the viscometer you should make sure of the following points: The viscometer is properly fastened to the stick and level. Both spindle and speed are selected. (read attentively the section about speed and spindle selection). The spindle is carefully placed and fastened. The instructions and necessary parameters for obtaining a viscosity reading have been carefully read in the user’s manual. Once the readings have been initiated, allow some time for stabilization, the length of which will be in function of the rotational speed during the measurement. IMPORTANT WARNING When you wish to obtain viscosity reading with FUNGILAB rotational viscometers, there are two considerations to take into account: The obtained viscosity results must be between 15% and 100% of the torque range, for whichever spindle/rotational speed combination. The viscosity reading must be executed under laminar flow condition, not turbulent flow conditions. The first consideration is linked to the precision of the instruments. All of the FUNGILAB rotational viscometers guarantee a precision of (±) 1% from the bottom of any spindle/rotational speed combination scale. Manual Smart 32/61 Working with less than 15% of the bottom of the scale is not recommended due to that the potential (±) 1% error in the viscosity is relatively big compared to the equipment reading. The second consideration has to do with fluid mechanics. All of the rheological measurements of fluid flow properties must be taken under laminar flow conditions. Laminar flow is when all of the movements of the fluid particles are in sheets, directed by an external applied force. The flow lines represent speed and fluid flow direction. Laminar flow: “straight” flow lines. Relatively easy to predict. Generally slow. Turbulent flow: “non-linear” flow lines. Impossible to predict the exact movement of the fluid. Very quick. For rotational systems, this means that the fluid’s movement must be circumferential. When the internal forces of a fluid end up being too great, the fluid can become a turbulent flow, in that the particles that make it up become unpredictable, making it impossible to analyse it with standard mathematical models. This turbulence creates a false reading which is a lot higher than the real one, without linear growth and totally unpredictable. For the following geometries, these transition points have been found to be approximate to turbulent flow: 1) Spindle L1: 2) Spindle R1: 3) Adaptor LCP: 15 cP to 60 rpm 100 cP to 50 rpm 0.85 cP to 60 rpm Turbulent flow conditions will always exist in these conditions as long as the RPM/cP ratio exceeds the values listed above. Manual Smart 33/61 10. Accessories 10.1. Low viscosity adapters (LCP and LCP/B) Low viscosity adapters (LCP y LCP/B) do not come with the standard delivery. Any of these two versions (with or without thermo station jacket) must be ordered as an additional accessory. Both LCP and LCP/B accessories are supplied complete with a spindle. Low viscosity adapters allow more precise measurements than using the standard spindle. The viscometer can measure very low viscosity levels, from 1 cP (when using the L model). Thanks to its cylindrical geometry shape, it is possible to get Shear Rate determinations and Shear Stress. Only a small quantity of a sample is needed (16-18 ml.) Fig.9: LCP adapter set in the viscometer Fig. 8: LCP parts 10.1.1 Mounting The mounting process is the same for both types of low viscosity accessories (LCP and LCP/B). The sketches here only show the LCP. Manual Smart 34/61 • • • Unplug the viscometer. Attach the extension (X) between the base Y shaped (A) and the rib (C). Use a 19 mm adjustable spanner in order to fasten the nut (D). Assemble the viscometer again starting with the base. The extension (X) is necessary because of the length of the LCP adapter. Without this extension the assembly of this accessory would be difficult, especially the assembly of the spindle. Fig. 10: Mounting the LCP adapter extension. • • • • • • • Fasten the circulation jacket (J) to the connector (G) (figure 7). Fasten the connector (G) to the hole in the back of the viscometer’s metallic base. Connect the hook (H) and the spindle (L) Insert the spindle (L) in the circulation jacket, and screw it with the viscometer axle by turning it clockwise. Close the sample (K) container with the stopper (M). Fill the sample container with a 20 ml syringe, or less, and fill the 16-18 ml sample container. Insert the container (K) to the lower part, in the circulation jacket (J). Important: Do this slowly since the spindle must be inserted correctly in the sample. When working with a more viscous sample, be careful to avoid pulling the spindle upwards. Hold the spindle connector. • Insert the sample container (K) by turning it gently. Fit the spindle together with the lower stopper (M). • Check the level of the sample. It should be approximately in the middle of the cone, which is connected to the spindle connector(H). Figure 10 shows more information about this • Place the upper stopper (N) over the sample container. Fig. 11: Full LCP adapter. NOTE: Before starting with the measurements, make sure the viscometer is correctly balanced (check it with the bubble level). The spindle that should be selected is ‘LCP/SP’. 10.1.2 Dismounting and clearing • • • Place the viscometer upright. Remove the upper stopper (N). Unscrew the spindle of the viscometer axis and lower the spindle slowly in the sample container (K). Unscrew the bottom stopper (M) and remove the container(K) from below the thermo station jacket (J). Once the container is removed, remove the spindle carefully (L). Manual Smart 35/61 • Remove the container, wash it or use compressed air. Wash the circulation jacket too if necessary. Important: Do not use any cleaner or tool that can damage the metallic surface. Make sure you only use liquids that agree with the LCP adapter material! Solvents that can be used: water, ethanol or high concentrations of alcohol. For other solvents, check the chemistry compatibility table. 10.1.3 Technical specification for LCP accessories Measurements rank: • Sample L: 0.9*) until 2 000 mPa.s or cP • Sample R: 3.2**) until 21 333 mPa.s or cP *) Limited by turbulences **) For the measurements that represent 10 % of the base scale Sample volume: 18.0 ml Shear rate factor for the LCP spindle: 1.2236 x RPM ***) ***) Shear rate is calculated based on the features of Newtonian liquids. Temperature rank of the circulation jacket & thermo station conditions: • Temperature rank allowed: -10 a +100°C (14 a 212 °F) • Use a thermo station wash with demineralised water or special refrigeration liquid. Change thermostat liquid regularly. Recommended flow: 15 l/min. Materials: • The metallic parts are made of stainless steel; the leads are made of black delrin plastic. The parts that come into contact with the sample (sample container and spindle) are made of AISI 316 and are suitable for the food industry. • The lead inferior washer is made with black delrin. It is designed to withstand a maximum temperature of 100ºC (212 ºF) • The circulation jacket is made of acetyl and Delrin. • The O-ring on the plastic stopper (M) of the LCP Adapter is made of delrin. The softening point is 110 °C (230 °F). 10. 2. Small sample adapters APM and APM/B NOTE: Small sample adapters (APM and APM/B) do not belong to the standard delivery. Any of these two versions (with or without thermo station jacket) must be ordered as an additional accessory. APM and APM/B accessory are not supplied with a spindle. Special spindles (TL or TR) are used according to the viscometer sample (L, R or H). Small sample adapters allow more precise measurements than the standard spindles. The measurement rank of a viscometer can get lower viscosity levels. Manual Smart 36/61 Thanks to its known cylindrical geometry shape, it is possible to get Shear Rate and Shear Stress determinations. Only a small quantity of the sample is needed. Fig. 13 Set APM Fig. 12 APM accessory parts 10. 2. 1 Assembly NOTE: The assembling process is the same for both types of low viscosity accessories (APM and APM/B). The sketches here only show the APM. • • • • • • • • • • The digital viscometer must be correctly fastened to the base. Fasten the circulation jacket (J) to the connector (G) (figure 11). Fasten the connector (G) to the hole at the back of the viscometer metallic vase. Connect the hook (H) and the spindle (L). Insert the spindle (L) in the circulation jacket, and screw it in to the viscometer axle by turning it clockwise. Close the sample (K) container with the bottom stopper (M). Fill the sample container with a 20 ml syringe, or less, and fill the container with the necessary sample quantity in proportion with the spindle (16 to 13 ml). Insert the sample container (K) by turning it gently, in the circulation jacket (J). Insert the screw (L) in the lower stopper (M), and screw it to the viscometer axle by turning it counterclockwise. Make sure that the spindle is correctly submerged (the level in the sample must be above the upper part of the spindle). If necessary, add some more of the sample. Place the upper stopper (N) over the sample container. Manual Smart 37/61 NOTE: Before starting with the measurements, make sure the viscometer is correctly balanced (check it with the bubble level). 10. 2. 2 Dismounting and Cleaning • • • • Place the viscometer upwards. Remove the superior lead (N). Unscrew the spindle of the viscometer axis and lower the spindle slowly into the sample container (K). Unscrew the bottom stopper (M) and place the container (K) below the thermo station jacket (J). Once the container is removed, remove the spindle carefully (L). Remove the container, wash it or use compressed air. Wash the circulation jacket too if necessary. Important: Do not use any cleaner or tool that can damage the metallic surface. Make sure you only use liquids that agree with the LCP adapter material! Solvents that can be used: water, ethanol or high concentrations of alcohol. For other solvents, check the chemistry compatibility table. 10. 2. 3 Technical specifications of APM and APM/B Measurement rank: Sample L: 1.5*) until 200 000 mPa.s Sample R: 25*) until 3 300 000 mPa.s Sample H: 0.2*) until 26 660 Pa.s *) Measurement represents a 10 % of the full scale. Spindles features and APM filling: • L Sample & TL spindles Spindle Shear rate [ s-1 ] *) Sample volume [ ml ] TL5 1.32 x RPM 8.0 TL6 0.34 x RPM 10.0 TL7 0.28 x RPM 9.5 Manual Smart 38/61 • R sample or H & TR spindles Spindle Shear rate [ s-1 ] *) Sample volume [ ml ] TR8 0.93 x RPM 8.0 TR9 0.34 x RPM 10.5 TR10 0.28 x RPM 11.5 TR11 0.25 x RPM 13.0 *) Shear rate is calculated based on the features of Newtonian liquids. Temperature rank of circulation jacket and thermo station conditions: • Permitted temperature rank: -10 a +100°C (14 a 212 °F) • Use a thermostatic bath with demineralised water or refrigeration special liquid. Change the liquid form the thermostat regularly. Recommended flow: 15 l/min. Materials: • The metallic parts are made of stainless steel, the leads are made of plastic in Delrin Negro. The parts in contact with the sample (sample container and spindle) are made of AISI 316 suitable for food industry. • The lead inferior washer is made in black Delrin. It is designed to get a maximum temperature of 100ºC (212 ºF) • The circulation jacket is made of acetyl and Delrin. • The O-ring on the plastic stopper (M) of the LCP Adapter is made of Delrin. The softening point is 110 °C (230 °F). 10.3 HELDAL UNIT – Helicoidal Movement Unit NOTE: The Heldal adapter doesn’t come with the standard delivery. It can be ordered as an accessory. The unit is supplied complete with T-shaped spindles, in this case. The Heldal accessory is used with substances that do not flow by themselves (like ice or pastas). Is engine moves the viscometer slowly in a vertical movement and at the same time the spindle makes the rotation movement. This generates a helicoidal movement that makes that the T-shaped spindle is always in contact with the sample. The measurements obtained with Heldal do not measure absolute viscosity! They are only comparative measurements with the same geometry as T-shaped spindles. Fig. 13 Heldal Unit in its case Manual Smart 39/61 10. 3. 1 Heldal unit mounting Fig. 14 Heldal unit set in the viscometer 1. 2. 3. 4. 5. 6. 7. 8. Rib joint Lower stop ring Displacement command Viscometer fastening bolt Upper stopper ring Heldal fastening group ON/OFF switch Fastener 9. Base 10. Levelling knobs 11. Heldal engine unit 12. Knobbed fastening rib 14. Functioning pilot 15. Nut bolt 16. Viscometer fastening rib 6.1 6.2 6.3 6.4 6.5 Manual Smart Spindle connector Upper spindle receptor Lower spindle receptor Counterweight, spindle connector Spindle 40/61 • • • Place the fastener (8) facing the short end of the Y-shaped base (9). Place the safety shell (1) over the fastening rib (8) on the base of the viscometer (9). Place the lower ring in the fastener (8) as explained in the sketch, and fasten it with the knobbed fastening rib (12). Important: Do not fasten the stop rings to the fastening ribs (12) too tightly. They are plastic pieces and they can be damaged. Both stopper rings (upper and lower) look exactly the same, and can be changed. • • • • • Place the Heldal engine (11) in the fastener(8) while pressing the displacement command (3). Connect the upper stop ring to the fastener (8) and fasten it with the fastening rib (12). Insert the viscometer by placing the fastening rib (16) in the Heldel bolt (4), and fasten it with the nut bolt (15). Balance the viscometer – Heldal set with the balancing knobs (10). Fasten the T-shaped spindle (PA to PF samples) to the viscometer. In order to choose the right one, look at the selection tables (T.3). - Screw the counterweight (6.4) in the lower part of the spindle receptor (6.3). Insert the spindle receptor (6.5) between both upper and lower parts of the spindle receptor (6.2 and 6.3). Do not separate these two parts. Fasten the spindle and screw in the lower part of the receptor (6.3) until it is completely fastened. Important: Do not fasten the spindle tighter than necessary. There should always be a small hole between both parts of the receptor. • Fasten the spindle receptor and the spindle to the axis of the viscometer, by connecting the thread. • Place the sample container under the viscometer and insert the spindle into the sample fluid by pressing the displacement button (3). • The stopper rings limit the vertical movement of the spindle. Therefore, these two rings must be fastened correctly and in their correct positions. Important: Placement of stopper rings as explained here: • Upper ring: the spindle should be kept in the same fluid • Lower stopper ring: The spindle must not touch the edge of the container. If so, the viscometer’s axle can be damaged and the results can be wrong. • Once the rings are fastened, connect the viscometer and the Heldal to the power point. Switch the viscometer on and insert the speed and the spindle, as always. Manual Smart 41/61 • Set the Heldal unit on with the ON/OFF switch (7). Check if the pilot is on. If not, check the main connection. OPERATION: The Heldal unit (which moves helicoidally) is moved up and down between the two stopper rings. When the engine touches one of them, the unit changes direction. The Heldal unit will keep moving, until turned with the ON/OFF switch (7). 11. Model/Spindle correspondence tables Standard Spindles + R1 (Table 1): Viscometer model SMART L SMART R SMART H Spindle L1 L2 L3 L4 R1 R2 R3 R4 R5 R6 R7 R1 R2 R3 R4 R5 R6 R7 SPECIAL SPINDLES (Table 2): Viscometer model SMART L SMART R SMART H Manual Smart Spindle TL5 TL6 TL7 TR8 TR9 TR10 TR11 TR8 TR9 TR10 TR11 42/61 SPECIAL HELDAL SPINDLES (Table 3): Viscometer model SMART L SMART R SMART H Spindle PA PB PC PD PE PF PA PB PC PD PE PF PA PB PC PD PE PF SPECIAL SPINDLES (Table 4): Viscometer model SMART L SMART R Manual Smart Spindle LCP/SP LCP/SP 43/61 12. Model/Spindle/Oil calibration tables MODEL L (Table 5): Spindle L1 L2 L3 L4 TL5 TL6 TL7 LCP Standard Oil RT50 RT500 RT1000 RT5000 RT50 RT500 RT500 RT5 Spindle R1 R2 R3 R4 R5 R6 R7 TR8 TR9 TR10 TR11 LCP Standard Oil RT50 RT500 RT500 RT1000 RT5000 RT5000 RT30000 RT500 RT5000 RT5000 RT5000 RT50 Spindle R1 R2 R3 R4 R5 R6 R7 TR8 TR9 TR10 TR11 Standard Oil MODEL R (Table 6): MODEL H (Table 7): Manual Smart 44/61 Table 8. SMART L standard spindle selection Maximum guideline values in cP (mPa·s ) RPM / SP L1 L2 L3 0,3 20K 100K 400K 2000K 0,5 12K 60K 240K 1200K 0,6 10K 50K 200K 1000K 1 6K 30K 120K 600K 1,5 4K 20K 80K 400K 2 3K 15K 60K 300K 2,4K 12K 48K 240K 3 2K 10K 40K 200K 4 1,5K 7,5K 30K 150K 5 1,2K 6K 24K 120K 6 1K 5K 20K 100K 10 600 3K 12K 60K 12 500 2,5K 10K 50K 20 300 1,5K 6K 30K 30 200 1K 4K 20K 50 120 600 2,4K 12K 60 100 500 2K 10K 100 60 300 1,2K 6K 2,5 ATENTION: K Indicates miles. M Indicates Millions L4 Example: 7,8K = 7.800 Example: 1,56M = 1.560.000 NOTE: It is not recommended to work with viscosity values of less than 15% of the lower part of the selected scale. Manual Smart 45/61 Table 9. SMART L Special spindle selection Maximum guideline values in cP (mPa·s ) RPM / SP TL5 TL6 TL7 0,3 10K 100K 200K 0,5 6K 60K 120K 0,6 5K 50K 100K 1 3K 30K 60K 1,5 2K 20K 40K 2 1,5K 15K 30K 2,5 1,2K 12K 24K 3 1K 10K 20K 4 750 7,5K 15K 5 600 6K 12K 6 500 5K 10K 10 300 3K 6K 12 250 2,5K 5K 20 150 1,5K 3K 30 100 1K 2K 50 60 600 1,2K 60 50 500 1K 100 30 300 600 ATTENTION: K Indicates miles. M Indicates millions Example: 7,8K = 7.800 Example: 1,56M = 1.560.000 NOTE: It is not recommended to work with viscosity values of less than 15% of the lower part of the selected scale. Manual Smart 46/61 Table 10. LCP Adaptor with SMART L Maximum guideline values in cP (mPa·s ) RPM LCP 0,3 2.000,00 0,5 1.200,00 0,6 1.000,00 1 600,00 1,5 400,00 2 300,00 2,5 240,00 3 200,00 4 150,00 5 120,00 6 100,00 10 60,00 12 50,00 20 30,00 30 20,00 50 12,00 60 10,00 100 6,00 NOTE: It is not recommended to work with viscosity values of less than 15% of the lower part of the selected scale. Sample Volume = 18 ml. Shear Rate = 1,2236·rpm Manual Smart 47/61 Table 11. SMART R Standard spindle selection Maximum guideline values in cP (mPa·s ) RPM / SP R1 R4 R5 R6 R7 0,3 33,3K 133,3K 333,3K 666,6K 1,3M 3,33M 13,3M 0,5 20K 80K 200K 400K 800K 2M 8M 0,6 16,6K 66,6K 166,6K 333,3K 666,6K 1,6M 6,6M 10K 40K 100K 200K 400K 1M 4M 6,6K 26,6K 66,6K 133,3K 66,6K 666,6K 2,6M 2 5K 20K 50K 100K 200K 500K 2M 2,5 4K 16K 40K 80K 160K 400K 1,6M 3 3,3K 13,3K 33,3K 66,6K 133,3K 333,3K 1,3M 4 2,5K 10K 25K 50K 100K 250K 1M 5 2K 8K 20K 40K 80K 200K 800K 6 1,6K 6,6K 16,6K 33,3K 66,6K 166,6K 666,6K 10 1K 4K 10K 20K 40K 100K 400K 12 833 3,3K 8,3K 16,6K 33,3K 83,3K 333,3K 20 500 2K 5K 10K 20K 50K 200K 30 333 1,3K 3,3K 6,6K 13,3K 33,3K 133,3K 50 200 800 2K 4K 8K 20K 80K 60 166 660 1,6K 3,3K 6,6K 16,6K 66,6K 100 100 400 1K 2K 4K 10K 40K 1 1,5 ATTENTION: K Indicates miles. M Indicates millions R2 R3 Example: 7,8K = 7.800 Example: 1,56M = 1.560.000 NOTE: It is not recommended to work with viscosity values of less than 15% of the lower part of the selected scale. Manual Smart 48/61 Table 12. SMART R special spindle selection Maximum guideline values in cP (mPa·s ) RPM / SP TR8 TR9 TR10 TR11 0,3 166,6K 833,3K 1,6M 3,3M 0,5 100K 500K 1M 2M 0,6 83,3K 416,6K 833,3K 1,6M 50K 250K 500K 1M 33,3K 166,6K 333,3K 666,6K 2 25K 125K 250K 500K 2,5 20K 100K 200K 400K 3 16,6K 83,3K 166,6K 333,3K 4 12,5K 62,5K 125K 250K 5 10K 50K 100K 200K 6 8,3K 41,6K 83,3K 166,6K 10 5K 25K 50K 100K 12 4,16K 20,83K 41,6K 83,3K 20 2,5K 12,5K 25K 50K 30 1,6K 8,3K 16,6K 33,3K 50 1K 5K 10K 20K 60 833,3 4,16K 8,3K 16,6K 500 2,5K 5K 10K 1 1,5 100 ATTENTION: K Indicates miles. M Indicates millions Example: 7,8K = 7.800 Example: 1,56M = 1.560.000 NOTE: It is not recommended to work with viscosity values of less than 15% of the lower part of the selected scale. Manual Smart 49/61 Table 13. LCP Adaptor with SMART R Maximum guideline values in cP (mPa·s ) RPM LCP 0,3 21.333,00 0,5 12.800,00 0,6 10.666,00 1 6.400,00 1,5 4.266,00 2 3.200,00 2,5 2.560,00 3 2.133,00 4 1.600,00 5 1.280,00 6 1.066,00 10 640,00 12 533,00 20 320,00 30 213,00 50 128,00 60 106,00 100 64,00 NOTE: It is not recommended to work with viscosity values of less than 15% of the lower part of the selected scale Volume of the sample = 18 ml. Shear Rate = 1,2236·rpm Manual Smart 50/61 Table 14. SMART H standard spindle selection Maximum value guidelines, in units of poise RPM/SP R1 R2 R3 R4 R5 R6 R7 0,3 2,6K 10,6K 26,6K 53,3K 106,6K 266,6K 1,06M 0,5 1,6K 6,4K 16K 32K 64K 160K 640K 0,6 1,3K 5,3K 13,3K 26,6K 53,3K 133,3K 533,3K 800 3,2K 8K 16K 32K 80K 320K 533,3 2133 5,3K 10,6K 21,3K 53,3K 213,3K 2 400 1,6K 4K 8K 16K 40K 160K 2,5 320 1,28K 3,2K 6,4K 12,8K 32K 128K 3 266,6 1066 2,6K 5,3K 10,6K 26,6K 106,6K 4 200 800 2K 4K 8K 20K 80K 5 160 640 1,6K 3,2K 6,4K 16K 64K 6 133,3 533,3 1,3K 2,6K 5,3K 13,3K 53,3K 10 80 320 800 1,6K 3,2K 8K 32K 12 66,6 266,6 666 1,3K 2,6K 6,6K 26,6K 20 40 160 400 800 1,6K 4K 16K 30 26,6 106,6 266 533 1066 2,6K 10,6K 50 16 64 160 320 640 1,6K 6,4K 60 13,3 53,3 133,3 266,6 533 1,3K 5,3K 100 8 32 80 160 320 800 3,2K 1 1,5 ATTENTION: K Indicates miles. M Indicates millions Example: 7,8K = 7.800 Example: 1,56M = 1.560.000 NOTE: It is not recommended to work with viscosity values of less than 15% of the lower part of the selected scale. Manual Smart 51/61 Table 15. SMART H special spindle selection Maximum value guidelines, in units of poise RPM / SP TR8 TR9 TR10 0,3 13,6K 66,6K 133,3K 266,6K 0,5 8K 40K 80K 160k 0,6 6,6K 33,3K 66,6K 133,3K 4K 20K 40K 80K 2,6K 13,3K 26,6K 53,3K 2K 10K 20K 40K 2,5 1,6K 8K 16K 32K 3 1,3K 6,6K 13,3K 26,6K 4 1K 5K 10K 20K 5 800 4K 8K 16K 6 666 3,30K 6,6K 13,3K 10 400 2K 4K 8K 12 333 1,6 3,3K 6,6K 20 200 1K 2K 4K 30 133 666 1,3K 2,6K 50 80 400 800 1,6K 60 66 333 666 1,3K 100 40 200 400 800 1 1,5 2 ATTENTION: K Indicates miles. M Indicates millions TR11 Example: 7,8K = 7.800 Example: 1,56M = 1.560.000 NOTE: It is not recommended to work with viscosity values of less than 15% of the lower part of the selected scale. Manual Smart 52/61 Table 16. HELDAL’s special spindle selection for SMART L Maximum guideline values in cP (mPa·s) RPM/SP PA PB PC PD PE PF 0,3 62,4K 124,8K 312K 624K 1,56M 3,12M 0,5 37,44K 74,88K 187,2K 374,4K 936K 1,872M 0,6 31,2K 62,4K 156K 312K 780K 1M 1 18,72K 37,44K 93,6K 187,2K 468K 936K 1,5 12,48K 24,96K 62,4K 124,8K 312K 624K 9,36K 18,72K 46,8K 93,6K 234K 468K 7,488K 14,976K 37,44K 74,88K 187,2K 374,4K 3 6,24K 12,48K 31,2K 62,4K 156K 312K 4 4,68K 9,36K 23,4K 46,8K 117K 234K 5 3,744K 7,488K 18,72K 37,44K 93,6K 187,2K 6 3,120K 6,24K 15,6K 31,2K 78K 156K 10 1,872K 3,744K 9,36K 18,72K 46,8K 93,6K 12 1,560K 3,12K 7,8K 15,6K 39K 78K 2 2,5 ATTENTION: K Indicates miles. M Indicates millions Example: 7,8K = 7.800 Example: 1,56M = 1.560.000 NOTE: It is not recommended to work with viscosity values of less than 15% of the lower part of the selected scale. Manual Smart 53/61 Table 17. HELDAL’s special spindle selection for SMART R Maximum guideline values in cP (mPa·s ) RPM/SP PA PB PC PD PE PF 0,3 666,6K 1,3M 3,3M 6,6M 16,6M 33,3M 0,5 400K 800K 2M 4M 10M 20M 0,6 333,3K 666,6K 1,6M 3,3M 8,3M 16,6M 200K 400K 1M 2M 5M 10M 133,3K 266,6K 666,6K 1,3M 3,3M 6,6M 100K 200K 500K 1M 2,5M 5M 80K 160K 400K 800K 2M 4M 3 66,6K 133,3K 333,3K 666,6K 1,6M 3,3M 4 50K 100K 250K 500K 1,25M 2,5M 5 40K 80K 200K 400K 1M 2M 6 33,3K 66,6K 166,6K 333,3K 833,3K 1,6M 10 20K 40K 100K 200K 500K 1M 12 16,6K 33,3K 83,3K 166,6K 416,6K 833,2K 1 1,5 2 2,5 ATTENTION: K Indicates miles. M Indicates millions Example: 7,8K = 7.800 Example: 1,56M = 1.560.000 NOTE: It is not recommended to work with viscosity values of less than 15% of the lower part of the selected scale. Manual Smart 54/61 Table 18. HELDAL’s special spindle selection for SMART H Maximum guideline values in poise RPM/SP PA PB 0,3 53,3K 106K 266,6K 533,3K 1,3M 2,6M 0,5 32K 64K 160K 320K 800K 1,6M 0,6 26,6K 53,3K 133,3K 266,6K 666,6K 1,3M 16K 32K 80K 160K 400K 800K 10,6K 21,3K 53,3K 106K 266,6K 533,3K 8K 16K 40K 80K 200K 400K 2,5 6,4K 12,8K 32K 64K 160K 380K 3 5,3K 10,6K 26,6K 53,3K 133,3K 266,6K 4 4K 8K 20K 40K 100K 200K 5 3,2K 6,4K 16K 32K 80K 160K 6 2,6K 5,3K 13,3K 26,6K 66,6K 133,3K 10 1,6K 3,2K 8K 16K 40K 80K 12 1,3K 2,6K 6,6K 13,3K 33,3K 66,6K 1 1,5 2 PC PD PE PF ATTENTION: K Indicates miles. M Indicates millions Example: 7,8K = 7.800 Example: 1,56M = 1.560.000 NOTE: It is not recommended to work with viscosity values of less than 15% of the lower part of the selected scale. Manual Smart 55/61 Appendix A. Software ‘Datalogger’ for PC. The Datalogger application is provided free of change with EXPERT. The objective of this software is the transfer of data from the stored file in the viscometer to the PC, assuming that the latter disposes of the adequate input/output configuration. When the data is received, the program will generate a Microsoft Excel-compatible file containing the received data. At the start of the program, you will see the following window: In the first figure you can see different controls and edition lines. Starting from top to bottom, you can see an edition line where you should edit the name of the file where the data from the viscometer will be saved. It will be necessary to introduce the complete path for the file, which should have the extension *.xls. If you want to see the standard window for file selection, click the Browse bottom. If you select the name of the file through this window, the extension *.xls will be added automatically. Once the file with the data that you wish to use is selected, you will have to choose the communication port through which you will make the connection. You can choose either COM1 or COM2, to select port series 1 and 2, respectively. Manual Smart 56/61 Once the port series you wish to use is selected, you can proceed to download the information from the viscometer. To execute this download you will have to press the ‘Download from device’ bottom. Upon doing this for the first time you will see that the majority of commands in the main window will be deactivated (Browse, Close and even Download from device), while the Stop command will become active and information messages about the progress of the importation process will appear. The first messages are about the connection status, as you can observe in the following figure. The program will indicate the port and the connection speed used with the equipment. If the user sees that the connection is not satisfactory, the user can always interrupt the transmission by clicking the Stop command. In this case, the window stays in its initial state, reactivating the commands, which are deactivated during transmission, and deactivating the Stop command. In the information window, the information concerning the interruption of the downloading process will be displayed. Manual Smart 57/61 In the case that the connection is satisfactory, the program will start the data download from the set. The program user will see the percentage of data received and its progress through the status bar on the lower-screen command bar. When the bar shows 100%, the program will generate the exit file with the path originally indicated. In the following figure you can observe the progress of the exit bar and the file generation process. Manual Smart 58/61 Appendix B. Installation Guide - USB DRIVER In this simple guide you will find step-by-step instructions for properly installing the USB driver for the Fungilab measurement device. Please following these instructions (before connecting the USB cable): 1) Find the folder containing the TUSB3410 drivers and execute T1341Inst.exe 2) In some cases, a warning window will appear when you install a driver that isn’t certified by Windows. Press continue and wait until the same warning appears again. Once you’ve accepted the two warnings, you can connect the device using the USB cable and, once this is done, turn the machine on. 3) If no screen appears, you will have to go manually to the Device Manager. (Start menu – Execute – devmgmt.msc), locate the USB – Serial Port and activate the installation from there. An exclamation mark usually appears next to the USB – Serial Port icon, indicating that the driver is missing. Manual Smart 59/61 On the next screen, you will tell the computer not to look in Windows Update. Following… Manual Smart 60/61 4) Choose “Install software automatically” and continue. 5) If you have already executed T13410Inst.exe, located in the USB driver folder, Windows will begin to install the “Multi-Port Adaptor series” automatically (if the Windows certification warning appears again, click ‘Continue’). 6) When the process is finish, wait until Assistant re-appears, and go over the same steps again, which this time will install the ‘USB- Serial Port (COM X)’ device. 7) The PC is now ready to use any program connected by USB to the equipment. The COM number is different in each case. Any program connected through this port must be configured according to the number found in the Device Management window (this COM number can be changed in ‘Properties’ for the ‘USB – Serial Port (COM X)’ device. If a problem occurs during the installation of the drivers, clean the record by looking for the TUSB3410 entries and eliminating each one of them. If you see a folder with contents referring to the drivers that you cannot eliminate, right-click on the folder and select ‘Permissions’. Once the ‘Allow Total Control’ option is selected for the corresponding user, you will be able to erase that folder. Once the record is clean, re-start the computer and start the process again. Manual Smart 61/61