1
Pyrodigital®™ Consultants, Inc. - Infinity Visions, Inc.
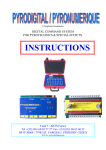
Pyrphoros System
ITU Region 1: Europe, Russia and Middle East
Pyrodigital®™ Consultants, Inc. Officially Certified Product
User Manual
Pyrodigital RF System User Manual 6.15.2009
v.12.02.2009
1/14
User Manual
Contents:
1 Abstract
3
2 System Overview
4
2.1
2.2
2.3
2.4
System Setup
Operating States
Operating with the Pyrodigital Field Controller
Changing the operating state with the Pyrodigital Field Controller
3 Getting started
3.1
3.2
3.3
3.4
3.5
Wiring
System
Prior to the show
When the show starts
After the show
4 Pyrodigital RF Firing Unit
4.1
4.2
4.3
4.4
4.5
4.6
6
7
Terminal blocks
Igniter Check
Address setting
Power On
Battery management
Battery replacement
5 Technical Data
Pyrodigital RF System User Manual 6.15.2009
9
2/14
1 Abstract
The Pyrodigital RF Firing Unit is a radio-controlled unit to fire electrical igniters for fireworks.
It features 16 terminal blocks to attach igniters. A Pyrodigital RF Field Controller or the
Pyrodigital FC-3 Field Controller combined with a PD RF Transceiver is used to control the
Firing Unit(s).
The Pyrodigital RF Firing Unit is especially rugged designed for safe outdoor operation.
However, still keep in mind that it is electronic equipment and therefore handle the units
with appropriate care.
Pyrodigital Consultants Inc. / Infinity Visions, Inc. do not take any responsibility due to
malfunction of their products and thereof caused damage or loss.
User is responsible for operation the system in ITU Region 1: Europe, Russia, and Middle
East, or obtaining authorizations in Regions 2 and 3, as required.
Pyrodigital RF System User Manual 6.15.2009
3/14
2 System Overview
2.1 System Setup
The Pyrodigital RF System consists of one PD FC-3 Field Controller connected to a PD RF
Transceiver unit that acts as a master and multiple Firing Units which act as slaves. The PD
FC-3 Field Controller and the PD RF Transceiver are located in close proximity to each other
for full operator control.
Each Firing Unit has to be located within an optimal radius of 500 meters around the PD RF
Transceiver. The system has fired up to 800+ meters, but the range is reduced, if they are
not in line of sight (inter-visibility) between the Transceiver and the Firing Unit(s).
During the setup of the system, the Transceiver is constantly scanning each Firing Unit and
reading back the occupied state of its terminal blocks as well as the field strength received.
During the fireworks display, the Field Controller sends the firing commands through the PD
RF Transceiver to each Firing Unit in real-time.
2.2 Operating States
The Pyrodigital RF System identifies three operating states: SAFE, ARMED and FIRE.
The state of the system is shown on the display of each Firing Unit.
SAFE
The Firing Unit is automatically set into SAFE state when powered on. In the SAFE state, the
capacitors, which accumulate energy to fire off the igniters, are empty. Also any firing
command will simply be ignored. This double security concept protects against any firing by
accidental errors in the operation.
While in SAFE state, the operator is allowed to be near by the Terminal and handle the
igniters.
ARMED
In ARMED state, any firing command will still be ignored. However, the capacitors, which
accumulate energy to fire off the igniters, are now charged. As soon as the system is in
ARMED state, any operator shall move to a safe place for security reasons.
FIRE
In FIRE state, the capacitors, which accumulate energy to fire off the igniters, are charged
now and any received fire command will be executed. While in FIRE state, any operator
MUST be in a safe position.
NOTE:
While using the check function with the aerial in low position, the Firing Unit is in the SAFE
state. In addition, the radio receiver is internally switched off and therefore no commands
can be received. This will prevent the Firing Unit from changing into ARMED state, even if
demanded by the Transceiver, and therefore enhance the security of the operator.
NOTE:
Changing from SAFE to ARMED state means, that the capacitors, which accumulate energy
to fire off the igniters, have to get charged. The capacitors need a few minutes to charge.
This gives anyone enough time to reach a safe place before any ignition possibly can take
place.
Pyrodigital RF System User Manual 6.15.2009
4/14
2.3 Operating with the Pyrodigital Field Controller
The Pyrodigital Field Controller is the controller for the Pyrodigital RF wireless Firing Units.
In this case, the PD RF Transceiver is the interface between the wire-based Pyrodigital Field
Controller and the radio communication of the Pyrodigital RF System.
The Pyrodigital RF Transceiver for the radio communication is connected to the Pyrodigital
Field Controller like a Pyrodigital Firing Module.
Consequently all wireless Pyrodigital RF Firing Units act like wired Firing Modules to the
Pyrodigital Field Controller. A mix of wired Pyrodigital Firing Modules and wireless Pyrodigital
RF Firing Units in combination with the Pyrodigital Field Controller is possible.
During the system setup, the Transceiver display shows a character map referring to all
Firing Units found and indicating their field strength received. You are now able to check
with the Pyrodigital Field Controller the conventionally connected wired igniters as well as
the wireless linked igniters.
2.4 Changing the operating state with the Pyrodigital Field Controller
SAFE
The Transceiver is operated in the setup mode, which also sets the system in SAFE state.
During the setup of the display AND after the display, the Transceiver MUST always be
operated in the setup mode.
During setup mode, it is allowed to turn the Pyrodigital Field Controller key on, to carry out
the igniter check.
ARMED
To enter ARMED state, set the Transceiver into armed mode. This mode is prevented to be
entered unintentionally.
During ARMED state, you MUST NOT perform any igniter check and do not turn the
Pyrodigital Field Controller key on!
FIRE
To set the system into FIRE state, turn the Pyrodigital Field Controller key on while the
Transceiver is in armed mode.
Pyrodigital RF System User Manual 6.15.2009
5/14
3 Getting started
To setup a display the following procedure has to take place:
3.1 Wiring
Connect the igniters to the Firing Units and set the appropriate addresses. Replace batteries
if required. Leave the aerial in the low position at this stage. If all Firing Units are wired at
site, turn the Firing Units on by bringing the aerial of each Terminal to the upright position.
3.2 System check
If all firing sites are ready, turn on the Field Controller and set it into the setup mode. Give
the system some time to wake up all the Firing Units and collect its information. If some
Firing Units do not show up, check if they are turned on (aerial in upright Position) and that
there is no request to change its batteries. If the display shows no or a low field strength
(below 40%), make sure that they are in line of sight (inter-visibility). To enhance
communication you might bring the Firing Unit in a position several feet above ground. Make
sure no wires are placed close to the aerial.
3.3 Prior to the show
Turn on the Field Controller and set it into ARMED state about 15 minutes prior to the
display. The Firing Units will now again be woken up and start charging their capacitors.
After about 10 minutes, the capacitors are charged to fire off the igniters. Remain in ARMED
state until the display actually starts, since in ARMED state there is a higher security level as
compared to the FIRE state.
NOTE:
Do not change back to SAFE state if not necessary. For security reasons, in SAFE state the
capacitors will be discharged immediately. After switching back to SAFE state you will have
to remain for at least 10 minutes in ARMED or FIRE state again, before being able to fire off
any igniter.
3.4 When the show starts
Shortly before the display starts change into FIRE state. Any fire command will now be
executed and fire off the corresponding igniter.
3.5 After the show
Set the Transceiver back to SAFE state after the display.
All capacitors will immediately be discharged and therefore it is ensured that no igniter will
be fired off unintentionally.
Pyrodigital RF System User Manual 6.15.2009
6/14
4 Pyrodigital RF Firing Unit
4.1 Terminal blocks
The 16 terminal blocks (8 terminals on each side) of the Firing Unit are located in a
protected position right underneath the wings.
After attaching an igniter, wind its cable twice around the corresponding bar
4.2 Igniter Check
Press any button on either side of the Firing Unit to set it into the check state. Now the
display powers up and each connected igniter is indicated.
The Firing Unit does measure the electrical resistance of each igniter. An igniter resistance
between about 1 ohm and 25 ohms is accepted, shown on the display and reported back to
the Field Controller. In case of a result of less then about 1 ohm the system assumes
a short and above 25 ohms, it assumes that there is nothing connected. The short is also
shown on the display with a circle and a bar in the centre.
4.3 Address setting
Press any button on either side of the Firing Unit to set it into check state. Now the display
powers up and the currently set terminal block address is shown in big letters in the central
area of the display. Press the button in the same corner where the up/down arrows are
shown in the display. The Display shows up and down arrows now to indicate that the
address can be changed with the corresponding buttons in small and big steps.
Pyrodigital RF System User Manual 6.15.2009
7/14
IMPORTANT:
The initially pressed button at the up/down position has to be held to change the address.
This ensures that no address will be changed by mistake!
4.4 Power On
Lift up the aerial to power on the Firing Unit. The Unit is now ready to operate within the
Pyrodigital RF System. Igniter state and address as well as SAFE state and field strength
received are shown. If the Transceiver is within reach the quality of the radio connection can
be verified. If no data is received, the Firing Unit switches to standby mode and shows
"standby" in the display.
4.5 Battery management
The Firing Unit contains two battery sets to achieve a full redundancy to battery failure. The
Terminal always runs on the older set and keeps the new set as a spare. If the old battery
set is empty, the Unit automatically switches to the new set and the request for replacement
is shown on the display. After replacing the batteries, the user has to confirm the
replacement.
4.6 Battery replacement
To replace the batteries, the bottom cover has to be removed. Press hard in the corners of
the cover and slide it to the side.
Replace the battery set as shown in the display. After changing the batteries, confirm the
replacement.
Depending on the quality of the batteries their lifetime may vary. It is recommended
changing the batteries after operating 75h, or and standby 400h per battery set.
5.0 Communication Quality and Safety
The Communication System of all PD-Pyrphoros components is protected from external
interferences by the following means:
Redundant Communication
During the System installation, the control unit defines two interference-free frequencies,
which are subsequent constantly used to transmit the signals. In case of frequency
interferences, the firing units automatically switch to the second frequency. To achieve an
optimal transmission the controlling unit is equipped with two antennas.
Frequency ranges
Frequency ranges can be chosen to set clear limitations towards other transmitting systems.
As agreed, the operators can use completely different frequency ranges. To guarantee the
immunity and the interference-free operation of the system, do not choose adjacent ranges.
If there is no agreement possible, the controlling unit automatically defines a free frequency
range, for used frequency ranges are identified as faulty. Though it is possible, the system
chooses adjacent ranges.
Pyrodigital RF System User Manual 6.15.2009
8/14
System identification
The system connection of each PD-Pyrphoros component is defined by personal system
identification.
Operating distance
Under standard conditions and in line of sight the operating distance of the PD-Pyrphoros
systems is in the range of 500 meters.
With absolutely perfect conditions, an operating distance up to 1000 meters is possible. On
the other side, with bad conditions the operating distance can be reduced to 200 meters.
The following factors can influence the operating distance:
Line of sight, weather conditions, interferences, using adjacent frequency ranges.
Please note the PD-Pyrphoros system is designed as a wireless firing system, which allows
for example to place fireworks on both sides of the river. To overcome very long distances is
not the mean target of the system development.
6.0 Technical Data
Pyrodigital RF Transceiver Europe and Pyrodigital RF Firing Unit Europe
Pyrodigital RF System User Manual 6.15.2009
9/14
1
Pyrphoros Transceiver
To power on the transceiver lift up any aerial
Operate by touchscreen and keyboard
ARM-Key
Channel
Battery state /
Powernet
Time/Date
Status bar
Info display
Feature bar
Firemode
Service
Setup
Battery state
One bar graph for each battery. Empty bar mean empty battery.
Pyrodigital RF System User Manual 6.15.2009
10/14
Feature: Service
Operate by touch screen, keyboard or jog wheel
Status bar
Radiofrequency
FU Parameter
Date / Time
change bundle
change last address
change time and date
Info display
Language
About
change display language
Systeminform
Back
Feature bar
Back
Feature: Setup
Operate by touchscreen or keyboard
FU Progressbar
Number and field strength
Status bar
Info bar
Info display
Feature bar
Back
Ignitor Table Field Intensity
Table
Pyrodigital RF System User Manual 6.15.2009
OK
and store?
11/14
Feature: Arm- and Firemode
Enter ARM code by using the touchscreen
Back
Start up:
Loop progress bar and FU progress bar:
All FU’s and ignitors as accepted during the Setup are scanned.
A full bar indicates, that all FU’s are found.
Back
Next step
Start up:
Ignitor Table: Indicates all ignitors found
Field Intensity Table: Indicates field strength received
If you are ok with the result, although it does not match
the setup, you can go on with arming
only shown if the start up shows differences
Safe:
You can safe the system despite the differences to the setup.
If you want to change something, you have to go back
and restart the setup
Back
Pyrodigital RF System User Manual 6.15.2009
Arming
12/14
Arming
The Firing Units will be woken up and start charging their
capacitors.
After about 10 minutes, the capacitors are charged to fire off the
igniters.
During the Arming this LED display shows the state of arming:
- fast blinking > still arming
- slow blinking > armed
- continuous glow > firemode
Arming
Volts progress bar
FU progress bar
PD Controller Key
Fire
To set the system into FIRE state, turn the Pyrodigital Controller
key on
while the Transceiver is in armed mode.
During the show the info display indicates each last FU and ignitor
fired off.
After the display / quit the Firemode
Turn off the Pyrodigital controller Key and set the Transceiver
back to SAFE state.
All capacitors will immediately be discharged and therefore it is
ensured that no
igniter will be fired off unintentionally.
Pyrodigital RF System User Manual 6.15.2009
13/14
Technical Data
Pyrphoros Transceiver Europe
Pyrphoros Firing Unit Europe
RF
Frequency
Power
Sensitivity
Modulation
Protocol
434MHz ISM Band
10mW
-111dB
GFSK
Proprietary
Interface
Type
Connector
Pyrodigital Firing Module Bus
Dsub-9 female
Ignition
Circuits
Voltage
Energy
16
25V
300mJ
Supply
Voltage
Battery
Battery
lifetime
6V
Rechargeable NiMH Package, 2 x
~ 25h per Package
4.5V
Alkaline LR6 (AA-size), 2 x 3 pcs.
operating: 75h; standby: 400h per
battery set (3 pcs.)
Mechanical
Dimensions
Weight
Surface
160mm x 252mm x 65mm
270mm x 190mm x 98mm
2kg incl. Batteries
2kg incl. Batteries
Stainless steel / PE-HD
Temperature
Operating
Storage
- 20°C - + 50°C
- 30°C - + 60°C
Display
Graphical LCD Display with backlight
Colors
stainless steel grey, black
Pyrodigital RF System User Manual 6.15.2009
14/14