Download User Manual - Primo Water Store
Transcript
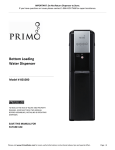
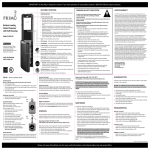
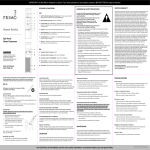
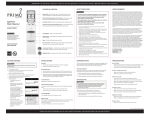
Professional Series Bottom Load Cold Dispenser for Plumbable Single Serve Brewing System (Shown but Not Included) Model # 601126 TO REDUCE THE RISK OF INJURY AND PROPERTY DAMAGE, USER MUST READ THIS MANUAL BEFORE ASSEMBLING, INSTALLING & OPERATING DISPENSER. SAVE THIS MANUAL FOR FUTURE USE Notice: This product is not affiliated with or licensed by Keurig, Incorporated or Green Mountain Coffee Roasters, Inc. Keurig® is a registered trademark of Green Mountain Coffee Roasters, Inc. This product does not meet Energy Star standards for cold water dispensers. If you have questions or issues please contact 1-866-429-7566 for expert assistance. _______________________________________________________________________________________ TABLE OF CONTENTS Page Welcome ………………………………………………….………………………………………….. 2 Notices …………………………………………………………………………………………………. 2 Features and Functions ………………………………………………………………………… 3 Warnings ………………………………………………………………………………………………. 4 Getting Started ……………………………………………………………………………………... 5 Using Dispenser Without Plumbable Single Serve Brewing System …..……. 6 Using Dispenser With Plumbable Single Serve Brewing System ….…………. 8 Replacing Empty Water Bottle ……………………………………………………………… 11 Troubleshooting ……………………………………………………………………………………. 12 Limited Warranty ………………………………………………………………………………….. 13 ……………………………………………………………………………………………………………………………………………………………………………………… WELCOME Thank you for selecting this Professional Series water dispenser from Primo. It is the world’s first bottled water dispenser that can automatically refill a Keurig® K150P Plumbable Single Serve Brewing System. This dispenser is designed for heavy use office applications that want great tasting cold water and single serve beverages without having to install direct water lines, regulators and water filtration systems. ……………………………………………………………………………………………………………………………………………………………………………………… NOTICES This is dispenser has been engineered specifically for use with a Keurig® K150P Plumbable Single Serve Brewing System. Do not attempt to connect other brands or models. This dispenser is distributed and warranted by Primo - America’s leading supplier of water dispensers. Primo Water Corporation does not warranty or service Keurig® brewers. Notice: This product is not affiliated with or licensed by Keurig, Incorporated or Green Mountain Coffee Roasters, Inc. Keurig® is a registered trademark of Green Mountain Coffee Roasters, Inc. This product is UL Listed but does not meet Energy Star standards for cold water dispensers. Some states and local laws may prohibit the sales or lease of dispensers that are not Energy Star rated. Please visit www.PrimoWater.com for more useful information, instructional videos, tips and special offers. Page | 2 If you have questions or issues please contact 1-866-429-7566 for expert assistance. _______________________________________________________________________________________ FEATURES & FUNCTIONS Cold Dispense Control - Touch sensitive. Blinking ring and snowflake indicator dispenser is chilling water. Snowflake and ring light up blue when dispensing. Empty Bottle Indicator - Blinks orange to alert you water bottle is empty. Spout - Cold water comes out here. Silver coating helps kill bacteria. Bottle Support – Helps align sports bottles and glasses with spout to eliminate spills. LED Nightlight – Located behind bottle support. Helps in low light. Full Tray Indicator – Red float warns when tray needs to be emptied. Drip Tray – Collects spills. To remove and empty, lift upward. Probe – Located inside cabinet. Connects to bottle to allow water to be pumped into cold tank. Probe Hanger – Located inside door at top. For best results, place probe here when not in use. Water Bottle – Not included. Uses 3, 4 or 5 gallon round or rectangular bottles. Visit PrimoWater.com to find Primo Water at a store near you. Nightlight Switch – Flip blue control to ON to activate nightlight. Cold Water Switch – Flip green control to ON to activate chilling of water. Water Flow Switch – Flip red control to ON to activate flow of water from dispenser to brewer. (Warning – Follow all directions before activating.) Water Supply Line to Brewer – Insert to connector provided with brewer. (Warning – Follow all directions before activating.) Power Cord – Plug only into 110v ground fault interrupting receptacle. Drain – Remove cap and plug to empty all water from the cold tank for transportation or cleaning. Stability Base – Helps reduce tip over. Notice - Do not operate this dispenser without stability base properly installed. Please visit www.PrimoWater.com for more useful information, instructional videos, tips and special offers. Page | 3 If you have questions or issues please contact 1-866-429-7566 for expert assistance. _______________________________________________________________________________________ ! WARNING SAFETY PRECAUTIONS To reduce risk of injury and property damage, user must read this entire guide before assembling, installing & operating dispenser. Failure to execute the instructions in this manual can cause personal injury or property damage and may void warranty. When operating this dispenser, always exercise basic safety precautions, including the following: Prior to use, this dispenser must be properly assembled and installed in accordance with this manual. This dispenser is intended for water dispensing only. Do NOT use other liquids. Do NOT use for other purposes. Never use any other liquid in the dispenser other than known and microbiologically safe bottled water. For indoor use only. Keep water dispenser in a dry place away from direct sunlight. Do NOT use outdoors. Install and use only on a hard, flat and level surface. Do NOT place dispenser into an enclosed space or cabinet. Do NOT operate dispenser in the presence of explosive fumes. Position back of dispenser no closer than 4 inches from wall and permit free airflow between wall and dispenser. There must be at least 4 inches clearance on the sides of the dispenser to permit airflow. This dispenser is intended to be plugged into a ground fault interrupting receptacle. Do not connect your water dispenser to an extension cord or surge protector. Always grasp plug and pull straight out from outlet. Never unplug by pulling on power cord. Do NOT use dispenser if cord becomes frayed or otherwise damaged. To protect against electric shock, do NOT immerse cord, plug, or any other part of dispenser in water or other liquids. Ensure dispenser is unplugged prior to cleaning. Never allow children to operate without proper and direct supervision. Unplug unit to prevent unsupervised use by children. Service should be performed only by a certified technician. Please contact us at 866-429-7566 for assistance. Please visit www.PrimoWater.com for more useful information, instructional videos, tips and special offers. Page | 4 If you have questions or issues please contact 1-866-429-7566 for expert assistance. _______________________________________________________________________________________ GETTING STARTED Install Stability Base 1. Remove box from inside of cabinet. 2. Remove base halves and hardware from box. 3. Place dispenser on its side. 4. Slide both halves of base together. 5. Connect base to bottom of dispenser using hardware provided – (4) screws and (4) washers. Notice – do not over tighten. Locate Dispenser 1. Place dispenser upright. Notice: To avoid damage to compressor, allow dispenser to sit upright at least 45 minutes before connecting cord to power outlet. 2. Locate dispenser on a hard and level surface in a cool shaded location near a grounded wall outlet. Notice: Do NOT plug cord into power outlet yet. 3. Position dispenser so back is at least 4 inches from wall and there are at least 4 inches of clearance on both sides. Install Drip Tray 1. Align drip tray pegs with holes in dispenser door. 2. Slide drip tray downward. 3. Insert stainless steel cover onto tray. Please visit www.PrimoWater.com for more useful information, instructional videos, tips and special offers. Page | 5 If you have questions or issues please contact 1-866-429-7566 for expert assistance. _______________________________________________________________________________________ USING DISPENSER WITHOUT Plumbable Single Serve Brewing System Install Water Bottle 1. Open dispenser door. 2. Place probe on hanger. 3. Place fresh bottle of water outside of cabinet. 4. Remove entire plastic cap from top of bottle. 5. Clean outside of new bottle with a cloth. 6. Place probe into bottle. 7. Slide probe down until it clicks in place. 8. Slide bottle into cabinet and close door. Provide Electricity to Dispenser 1. Plug dispenser cord into a ground fault interrupting receptacle. 2. At this time dispenser will begin to move water from bottle to chilling tank. It will take up to 20 minutes to fill the tank for the first time. During this period the pump may run continuously. This is normal. Activate Cooling Notice: This unit will not dispense cold water until the green switch is in the ON position. To activate, push top side of green power switch in. The snowflake icon on the control panel will light up blue, indicating the unit is chilling water. Once water in the tank is properly chilled, the blue light will turn off automatically. Please visit www.PrimoWater.com for more useful information, instructional videos, tips and special offers. Page | 6 If you have questions or issues please contact 1-866-429-7566 for expert assistance. _______________________________________________________________________________________ Activate Nightlight Push top side of blue power switch in to turn light on. Push bottom side in to turn light off. Dispense Cold Water (37°F to 50°F) After setup, it will take up to 1 hour to get water to maximum cold temperature. During this time the compressor may run continuously. This is normal. For your convenience, this dispenser features touch control dispensing. You do not need to push the snowflake in. Simply rest your finger on the icon. 1. Center bottle, glass, pitcher or cooking pot below spout. 2. Touch cold water control to start cold water flow. 3. Release control once desired fill level is achieved. NOTICES: This unit has been tested and sanitized prior to packing and shipping. During transit dust and odors can accumulate in the tank and lines. Dispense and dispose at least one quart of water prior to drinking any water. Do not remove plug from dispenser spout unless connecting a plumbable single serve brewer system. Please visit www.PrimoWater.com for more useful information, instructional videos, tips and special offers. Page | 7 If you have questions or issues please contact 1-866-429-7566 for expert assistance. _______________________________________________________________________________________ USING DISPENSER WITH Plumbable Single Serve Brewing System Install Brewer Notice: This dispenser has been engineered specifically for use with a Keurig® K150P Plumbable Single Serve Brewing System. Do not attempt to operate with any other model brewer. Consult brewer User Manual for setup and operating instructions before attempting assembly or use. 1. Place brewer on top of dispenser. 2. Make sure the brewer’s power cord is led through the notch in the back of the top panel. 3. Remove plug dispenser spout. Insert water line into dispenser spout and hand tighten connector on brewer. Notice: Do NOT plug in power cords from brewer or dispenser yet. Install Water Bottle 1. Open dispenser door. 2. Place probe on hanger. 3. Place fresh bottle of water outside of cabinet. 4. Remove entire plastic cap from top of bottle. 5. Clean outside of new bottle with a cloth. 6. Place probe into bottle. 7. Slide probe down until it clicks in place. 8. Slide bottle into cabinet and close door. Provide Electricity to Dispenser 1. Plug dispenser cord into a ground fault interrupting receptacle. 2. At this time the dispenser will begin to move water from bottle to chilling tank. It will take up to 20 minutes to fill the tank for the first time. During this period the pump may run continuously. This is normal. Please visit www.PrimoWater.com for more useful information, instructional videos, tips and special offers. Page | 8 If you have questions or issues please contact 1-866-429-7566 for expert assistance. _______________________________________________________________________________________ Activate Cooling Notice: This unit will not dispense cold water until the green switch is in the ON position. To activate, push top side of green power switch in. The snowflake icon on the control panel will light up blue, indicating the unit is chilling water. Once water in the cold tank is properly chilled, the blue light will turn off automatically. Activate Nightlight Push top side of blue power switch in to turn light on. Push bottom side in to turn light off. Provide Electricity to Brewer 1. Plug brewer cord into a ground fault interrupting receptacle. 2. Activate ON switch. Activate Water Pump to Brewer Notices: Do not proceed until the dispenser chilling tank is full. This can take up to twenty minutes from the time you provide power to the dispenser. Dispenser will not pump water to brewer until the switch is activated. Do not activate the switch until the water line is properly installed. To activate, push top side of red power switch in to start pumping water. Once the switch is activated, the unit will begin its test cycle and start pumping water to brewer. Please visit www.PrimoWater.com for more useful information, instructional videos, tips and special offers. Page | 9 If you have questions or issues please contact 1-866-429-7566 for expert assistance. _______________________________________________________________________________________ Dispense Cold Water (37°F to 50°F) After setup, it will take up to 1 hour to get water to maximum cold temperature. During this time the compressor may run continuously. This is normal. For your convenience, this dispenser features touch control dispensing. You do not need to push the snowflake in. Simply rest your finger on the icon. 1. Center bottle, glass, pitcher or cooking pot below spout. 2. Touch cold water control to start cold water flow. 3. Release control once desired fill level is achieved. NOTICE: This unit has been tested and sanitized prior to packing and shipping. During transit dust and odors can accumulate in the tank and lines. Dispense and dispose at least one quart of water prior to drinking any water. Use Plumbable Single Serve Brewing System The dispenser will keep brewer reservoir fully automatically as long as there is water in the bottle. Consult your Plumbable Single Serve Brewing System User Manual for instructions on making beverages and maintaining performance. Please visit www.PrimoWater.com for more useful information, instructional videos, tips and special offers. Page | 10 If you have questions or issues please contact 1-866-429-7566 for expert assistance. _______________________________________________________________________________________ REPLACING EMPTY WATER BOTTLE When your bottle needs to be replaced, the empty bottle icon will flash orange to alert you. Replace with a full water bottle as soon as possible. Notice: For your safety, this dispenser is programmed to not dispense water if the indicator light is blinking. 1. Open dispenser door. 2. Slide empty bottle out of cabinet. 3. Slide probe up from empty bottle but do not remove until all water stops dripping from bottle. Once dripping has stopped, place probe on hanger. 4. Place fresh bottle outside of cabinet. Remove entire plastic cap from top of bottle. Clean outside of new bottle with a cloth. 5. Place probe into bottle. Slide down until it clicks in place. Water will begin to pump to chilling tank and within one minute the empty indicator light will stop blinking. Dispensing of water can resume. 6. Slide bottle into cabinet and close door. Please visit www.PrimoWater.com for more useful information, instructional videos, tips and special offers. Page | 11 If you have questions or issues please contact 1-866-429-7566 for expert assistance. _______________________________________________________________________________________ TROUBLESHOOTING Water is leaking. Unplug dispenser, remove bottle and call 866-429-7566 for assistance. No water is coming from the spout. Make sure the bottle is not empty. If empty, replace it. Make sure there is power to the unit and you are operating controls per instructions. If the empty indicator is blinking water the dispense control cannot be activated. Replace empty bottle. Cold water is not cold. It takes up to one hour after setup to dispense cold water. Make sure the power cord is properly connected to a working outlet. Make sure the back of the dispenser is at least 4 inches from a wall and there is free airflow on all 4 sides of the dispenser. Make sure top of green switch on back of dispenser is pushed in. If water still isn’t cold, please call 866-429-7566 for assistance. Nightlight is not working. Make sure the power cord is properly connected to a working outlet. Make sure top of blue switch on back of dispenser is pushed in. Please visit www.PrimoWater.com for more useful information, instructional videos, tips and special offers. Page | 12 If you have questions or issues please contact 1-866-429-7566 for expert assistance. _______________________________________________________________________________________ LIMITED WARRANTY Primo Water Corporation, (“Vendor”) warrants to the original purchaser of this dispenser, and to no other person, that if this dispenser is assembled and operated in accordance with the printed instructions accompanying it, then for a period of two (2) years from the date of purchase, all parts in such dispenser shall be free from defects in material and workmanship. Vendor may require reasonable proof of your date of purchase from an authorized retailer or distributor. Therefore, you should retain your sales slip or invoice. The Limited Warranty shall be limited to repair or replacement of parts, which prove defective under normal use and service and which Vendor shall determine in its reasonable discretion upon examination to be defective. Before returning any parts, you should contact Vendor’s Customer Service Department using the contact information listed below. If Vendor confirms, after examination, a defect covered by this Limited Warranty in any returned part, and if Vendor approves claim, Vendor will replace such defective part without charge. If you return defective parts, transportation charges must be prepaid by you. Vendor will return replacement parts to original purchaser, freight or postage prepaid. The Limited Warranty does not cover any failures or operating difficulties due to accident, abuse, misuse, alteration, misapplication, improper installation or improper maintenance or service by you or any third party, or failure to perform normal and routine maintenance on the dispenser, as set out in the User’s Manual. In addition, the Limited Warranty does not cover damages to the finish, such as scratches, dents, discoloration or rust after purchase. The Limited Warranty is in lieu of all other express warranties. Vendor disclaims all warranties for products that are purchased from seller other than authorized retailers or distributors. AFTER THE PERIOD OF THE ONE (1) YEAR EXPRESS WARRANTY, VENDOR DISCLAIMS ANY AND ALL IMPLIED WARRANTIES, INCLUDING WITHOUT LIMITATION THE IMPLIED WARRANTIES OF MERCHANTABILITY AND FITNESS FOR A PARTICULAR PURPOSE. FURTHER, VENDOR SHALL HAVE NO LIABILITY WHATSOEVER TO PURCHASER OR ANY THIRD PARTY FOR ANY SPECIAL, INDIRECT, PUNITIVE, INCIDENTAL, OR CONSEQUENTIAL DAMAGES. Vendor assumes no responsibility for any defects caused by third parties. This Limited Warranty gives the purchaser specific legal rights; a purchaser may have other rights depending upon where he or she lives. Some jurisdictions do not allow exclusion or limitation of special, incidental or consequential damages, or limitations on how long a warranty lasts, so the above exclusion and limitations may not apply to you. Primo Water Corporation 104 Cambridge Plaza Drive Winston-Salem, NC 27104 866-429-7566 www.PrimoWater.com PN O-072 B © 2013 Primo Water Corporation Please visit www.PrimoWater.com for more useful information, instructional videos, tips and special offers. Page | 13