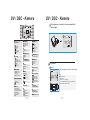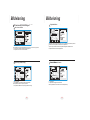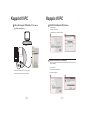
1
1.
:XR4041117 2.
3.
105mm+-2
80P
,
105mm+-2
150mm+-2
Bruksanvisning
User Manual
XR4041117
Den
bruksanvisningen
gerthis
digcamera
This här
manual
can guide you to use
instruktioner
om hurand
ducorrect
använder
den
setting.
with proper operation
it
carefully
and
optimize
the
Please
read
här kameran på rätt sätt. Läs igenom
accordance
withsom
your möjligt
performance
den
för att fåin ut
så mycket
preference.
av din kamera.
Innehållsförteckning
Table Of Contents
VCautions.................................................................................................................
a r n i n g ! . . . . . . . . . . . . . . . . . . . . . . . . . . . . . . . . . . . . . . . . . . . . . . . . . . . . . . . . . . . . . . . . . . . 04
04
IOverall
n t r o dIntroduction................................................................................................
uktion............................................................0
055
T
i l l b e h ö r. . . . . . . . . . . . . . . . . . . . . . . . . . . . . . . . . . . . . . . . . . . . . . . . . . . . . . . . . . . . . . . . . . 05
05
Accessories............................................................................................................
K
a m e r aView........................................................................................................
n f r å n u t s i d a n . . . . . . . . . . . . . . . . . . . . . . . . . . . . . . . . . . . . . . . . . . . . . . 0066
External
KGetting
o m m aReady.........................................................................................................
igång..........................................................0
077
S
ä
t
t
a
p
/ SOff
t ä The
n g aCamera..............................................................................
a v k a m e r a n . . . . . . . . . . . . . . . . . . . . . . . . . . . . . . . . 0077
Turn On OråTurn
S
ä t t a i The
n b Battery................................................................................................
atteriet.....................................................07
Loading
078
LCharging
a d d a bThe
a t tBattery..............................................................................................
eriet med laddaren..................................0
S ä t t a i n o c h t a u t m i n n e s k o r t e t . . . . . . . . . . . . . . . . . . . . . . . . . . . . . . 0089
Inserting Or Removing A Memory Card......................................................................
S ä t t a f a s t h a n d l e d s r e m m e n . . . . . . . . . . . . . . . . . . . . . . . . . . . . . . . . . . . . . 0099
Strap............................................................................................
L äAttaching
g e s i n t rThe
o d Wrist
uktio
n . . . . . . . . . . . . . . . . . . . . . . . . . . . . . . . . . . . . . . . . . . . . . . . . . . . . . . . . . 09
10
Modes
Ö v r i gIntroduction...................................................................................................
t . . . . . . . . . . . . . . . . . . . . . . . . . . . . . . . . . . . . . . . . . . . . . . . . . . . . . . . . . . . . . . . . . . . . 1101
Others.....................................................................................................................
A V u t . . . . . . . . . . . . . . . . . . . . . . . . . . . . . . . . . . . . . . . . . . . . . . . . . . . . . . . . . . . . . . . . . . . . . . . . . . 1111
AV
H
ö Out.....................................................................................................................
r l u r a r. . . . . . . . . . . . . . . . . . . . . . . . . . . . . . . . . . . . . . . . . . . . . . . . . . . . . . . . . . . . . . . . 1111
Earphone..............................................................................................................
DV
/ D S C - k a m e r a n . . . . . . . . . . . . . . . . . . . . . . . . . . . . . . . . . . . . . . . . . . . . . . . . . . . . 1112
DV
Mode............................................................................................................
I k/DSC
o n e r.
...............................................................1
122
Icon
T
a eIntroduction....................................................................................................
t t k o r t . . . . . . . . . . . . . . . . . . . . . . . . . . . . . . . . . . . . . . . . . . . . . . . . . . . . . . . . . 1123
FBasic
o k u sPhotography.....................................................................................................
. . . . . . . . . . . . . . . . . . . . . . . . . . . . . . . . . . . . . . . . . . . . . . . . . . . . . . . . . . . . . . . . . . . . . . 13
13
B
l i x t . Range.........................................................................................................
. . . . . . . . . . . . . . . . . . . . . . . . . . . . . . . . . . . . . . . . . . . . . . . . . . . . . . . . . . . . . . . . . . . . . . . 13
14
Focus
D
i g i tMode...............................................................................................................
al zoom.........................................................1
Flash
144
S
jälvu
t l ö s n i n g . . . . . . . . . . . . . . . . . . . . . . . . . . . . . . . . . . . . . . . . . . . . . . . . . . . 1145
Digital
Zoom.............................................................................................................
A
t t s p e lMode.......................................................................................................
a i n v i d e o . . . . . . . . . . . . . . . . . . . . . . . . . . . . . . . . . . . . . . . . . . . . . . . 1156
Self-timer
A
t t To
t a Record
e n b iAl Video...........................................................................................
d . . . . . . . . . . . . . . . . . . . . . . . . . . . . . . . . . . . . . . . . . . . . . . . . . . . . 1167
How
A
u
t
o
l
ä
g
...........................................................18
How To Takee .A.Picture..............................................................................................
P
r o gMode.............................................................................................................
r a m l ä g e . . . . . . . . . . . . . . . . . . . . . . . . . . . . . . . . . . . . . . . . . . . . . . . . . . . . . . . . . 1178
Auto
189
Porträtt.....................................................................1
Program Mode.........................................................................................................
189
S
kymning...............................................................1
Portrait
Mode...........................................................................................................
190
Bakgrundsljus.........................................................2
Dawn
Mode...............................................................................................................
190
Fyrverkeri..........................................................2
Backlight
201
N
a t t . . . .Mode........................................................................................................
.............................................................2
Fireworks
Mode.....................................................................................................
202
A v a n c e r a d e i n s t ä l l n i n g a r. . . . . . . . . . . . . . . . . . . . . . . . . . . . . . . . . . . . . . . . . . . . . 2
Night
V
i d e Mode.............................................................................................................
o s t o r l e k . . . . . . . . . . . . . . . . . . . . . . . . . . . . . . . . . . . . . . . . . . . . . . . . . . . . . . 2212
Advanced
Setting
Introduction....................................................................................
B i l d s t o r l e k . . . . . . . . . . . . . . . . . . . . . . . . . . . . . . . . . . . . . . . . . . . . . . . . . . . . . . . . 2222
Video
Ä
n d r Size
a l ä Setting.................................................................................................
g e . . . . . . . . . . . . . . . . . . . . . . . . . . . . . . . . . . . . . . . . . . . . . . . . . . . . . . . . 2223 ...
Image
B
i l d k Size
v a l i Setting....................................................................................................
t é . . . . . . . . . . . . . . . . . . . . . . . . . . . . . . . . . . . . . . . . . . . . . . . . . . . . . . . . . . 2223
E
I S . .Set...............................................................................................................
. . . . . . . . . . . . . . . . . . . . . . . . . . . . . . . . . . . . . . . . . . . . . . . . . . . . . . . . . . . . . . 2234
Mode
B
l ä n d aSetting........................................................................................................
re................................................................2
Quality
234
S
k ä r p a . . . . . . . . . . . . . . . . . . . . . . . . . . . . . . . . . . . . . . . . . . . . . . . . . . . . . . . . . . . . . . . . 2245
EIS..........................................................................................................................
E
f f e k t .Setting.......................................................................................................
. . . . . . . . . . . . . . . . . . . . . . . . . . . . . . . . . . . . . . . . . . . . . . . . . . . . . . . . . 2245
Metering
V
i t b a l a n sSetting....................................................................................................
............................................................2
Sharpness
256
FEffect
o t o rSetting...........................................................................................................
a m . . . . . . . . . . . . . . . . . . . . . . . . . . . . . . . . . . . . . . . . . . . . . . . . . . . . . . . . . . . . . 2257
B
i
l
d
t
a
g
n
i
n
g
.
.
.
.
.
.
.
.
.
.
.
.
.
.
.
.
.
.
.
.
.
.
.
.
.
.
.
.
.
.
.
.
.
.
.
.
.
.
.
.
.
.
.
.
.
.
.
.
.
.
.
.
.
.
.
.
.
.
.
.
.
.
.
.
2
8
White Balance Setting..............................................................................................
268
IPhoto
S O . .Frame
. . . . . .Setting...............................................................................................
..........................................................2
S e t u p . . . . . . . . . . . . . . . . . . . . . . . . . . . . . . . . . . . . . . . . . . . . . . . . . . . . . . . . . . . . 2279
FShooting
i l e r . . . Setting.....................................................................................................
. . . . . . . . . . . . . . . . . . . . . . . . . . . . . . . . . . . . . . . . . . . . . . . . . . . . . . . . . . . . . 2289
ISO
E
n eSetting.............................................................................................................
r g i s p a r. . . . . . . . . . . . . . . . . . . . . . . . . . . . . . . . . . . . . . . . . . . . . . . . . . . . . . . . . 3280
Setup.......................................................................................................................
290
Språk......................................................................3
290
FSetting
o r m aFile................................................................................................................
tering........................................................3
Setting
Power
Saving...............................................................................................
D a t u m . . . . . . . . . . . . . . . . . . . . . . . . . . . . . . . . . . . . . . . . . . . . . . . . . . . . . . . . . . . . 3300
Setting
T
i d . . .Language......................................................................................................
. . . . . . . . . . . . . . . . . . . . . . . . . . . . . . . . . . . . . . . . . . . . . . . . . . . . . . . . . 3301
Setting
D
a t u m sFormat..........................................................................................................
t ä m p l i n g . . . . . . . . . . . . . . . . . . . . . . . . . . . . . . . . . . . . . . . . . . . . . . . . . . . . . . . . . . . . . . . . . . . 30
31
LSetting
j u d . .Date............................................................................................................
. . . . . . . . . . . . . . . . . . . . . . . . . . . . . . . . . . . . . . . . . . . . . . . . . . . . . . . . . 3301
V
i d e o Time............................................................................................................
. . . . . . . . . . . . . . . . . . . . . . . . . . . . . . . . . . . . . . . . . . . . . . . . . . . . . . . . . . . . . . 3311
Setting
FSetting
ö r h aImprint.......................................................................................................
n d s v i s n i n g . . . . . . . . . . . . . . . . . . . . . . . . . . . . . . . . . . . . . . . . . . . . . 3312
R
e s e t .System
. . . . . . . .Sound..............................................................................................
.............................................................3
Setting
312
S
t a r t l Video
j u d . .System................................................................................................
. . . . . . . . . . . . . . . . . . . . . . . . . . . . . . . . . . . . . . . . . . . . . . . . . . . . . . . . . 3312
Setting
Setting Quick View..................................................................................................
32
Setting Reset...........................................................................................................
32
Setting Start-up Sound.............................................................................................
32
2
Innehållsförteckning
Table Of Contents
S t ä l l a Start-up
i n s t a rImage......................................................................................
t b i l d . . . . . . . . . . . . . . . . . . . . . . . . . . . . . . . . . . . . . . . . . . . . . . . . . . . . . . . . . .32
.32
Setting
Album
. . . . . . . . . . . . . . . . . . . . . . . . . . . . . . . . . . . . . . . . . . . . . . . . . . . . . . . . . . . . . . . . . .33
.33
Album
Mode......................................................................................................
V ä l j The
a l b uMode
m l ä gButton
e . . . . . And
. . . . .Choose
. . . . . . . .The
. . . . .Album
. . . . . . Mode............................................
. . . . . . . . . . . . . . . . . . . . . . . . . . . . . . . . . .33
.33
Press
A t t To
a nUse
v ä nAlbum
d a aMode....................................................................................
lbum....................................................33
How
A t t a nYou
v ä Can
n d a Do
A rWith
c S oArcsoft
f t M e dMedia
ia Co
n v e r t e r. . . . . . . . . . . . . . . . . . . . . . . . . . ........
. .33
.35
Things
Converter..........................................
M u s i kMusic
spela
r e n . . . . . . . . . . . . . . . . . . . . . . . . . . . . . . . . . . . . . . . . . . . . . . . . . . . . . . . . .35
.38
Digital
Mode..............................................................................................
38
V
ä
l
j
m
u
s
i
k
s
p
e
l
a
r
e
n
.
.
.
.
.
.
.
.
.
.
.
.
.
.
.
.
.
.
.
.
.
.
.
.
.
.
.
.
.
.
.
.
.
.
.
.
.
.
.
.
.
.
.
.
.
.
.
.
.
.
.
38
Press The Mode Button And Choose The Digital Music Mode..................................
F u n k t i o n e r. . . . . . . . . . . . . . . . . . . . . . . . . . . . . . . . . . . . . . . . . . . . . . . . . . . . . . . . . . . . . . . . .38
.40
L jFeatures...........................................................................................................
u d i n s p e l n i n g . . . . . . . . . . . . . . . . . . . . . . . . . . . . . . . . . . . . . . . . . . . . . . . . . . . . . . . .40
.42
Voice
V ä l jRecording
l j u d i n s Mode.......................................................................................
p e l n i n g . . . . . . . . . . . . . . . . . . . . . . . . . . . . . . . . . . . . . . . . . . . . . . . .42
.42
S Press
p e l . . The
. . . . Mode
. . . . . .Button
. . . . . . .And
. . . .Choose
. . . . . . . The
. . . . Voice
. . . . . .Recording
. . . . . . . . . . Mode............................
. . . . . . . . . . . . . . . . . . . . .42
.43
Game
Mode.........................................................................................................
V ä l j s p e l . . . . . . . . . . . . . . . . . . . . . . . . . . . . . . . . . . . . . . . . . . . . . . . . . . . . . . . . . . . . . . . . . . .43
.43
A Press
V I NThe
. . . .Mode
. . . . .Button
. . . . . .And
. . . .Choose
. . . . . . .Game
. . . . . Mode.................................................
. . . . . . . . . . . . . . . . . . . . . . . . . . . . . . . .43
.44
AVV In
ä lMode.........................................................................................................
j A V I N . . . . . . . . . . . . . . . . . . . . . . . . . . . . . . . . . . . . . . . . . . . . . . . . . . . . . . . .44
.44
B Press
i l d v iThe
s n iMode
n g . Button
. . . . . . .And
. . . .Choose
. . . . . . .The
. . . AV
. . .In
. . Mode..............................................
. . . . . . . . . . . . . . . . . . . . . . . . . . . . .44
.45
Playback
V ä l j b iMode.....................................................................................................
l d v i s n i n g . . . . . . . . . . . . . . . . . . . . . . . . . . . . . . . . . . . . . . . . . . . . . . . . . . . . . . . .45
.45
I k o n e r.
. . .Playback
. . . . . . . . .Mode.................................................................................
. . . . . . . . . . . . . . . . . . . . . . . . . . . . . . . . . . . . . . . . . . . . . . . . . . . . . .45
.45
Choose
The
Förh
a n d s v i s n i n g . . . . . . . . . . . . . . . . . . . . . . . . . . . . . . . . . . . . . . . . . . . . . . . . . . . . . .45
.46
Icon
Introduction................................................................................................
D i g i t a l z o o m . . . . . . . . . . . . . . . . . . . . . . . . . . . . . . . . . . . . . . . . . . . . . . . . . . . . . . . .46
.47
Thumbnails......................................................................................................
A v a n c The
e r aEnlarge
t . . . . . .Still
. . . .Image
. . . . . And
. . . .Trimming
. . . . . . . . The
. . . .Image.....................................
. . . . . . . . . . . . . . . . . . . . . . . . 47
.48
Viewing
A t t t a bSetting
o r t b iIntroduction..............................................................................
l d e r. . . . . . . . . . . . . . . . . . . . . . . . . . . . . . . . . . . . . . . . . . . . . . . . . . . . 4 8
Advanced
B i l dTo
s hDelete
o w . . .Image(s).......................................................................................
. . . . . . . . . . . . . . . . . . . . . . . . . . . . . . . . . . . . . . . . . . . . . . . . . . . . . . . . . . . .48
.48
How
S k y To
d dPlay
a b iSlideshow........................................................................................
l d e r. . . . . . . . . . . . . . . . . . . . . . . . . . . . . . . . . . . . . . . . . . . . . . . . . . . . . . . . . . . .48
.49
How
R o tAeFile
r a With
b i l dProtection....................................................................................
e r. . . . . . . . . . . . . . . . . . . . . . . . . . . . . . . . . . . . . . . . . . . . . . . . . . . . . . . .48
.49
Set
49
K
o
p
i
e
r
a
t
i
l
l
m
i
n
n
e
s
k
o
r
t
.
.
.
.
.
.
.
.
.
.
.
.
.
.
.
.
.
.
.
.
.
.
.
.
.
.
.
.
.
.
.
.
.
.
.
.
.
.
.
.
.
.
50
How To Rotate An Image........................................................................................
D P O F - S t a n d a r d . . . . . . . . . . . . . . . . . . . . . . . . . . . . . . . . . . . . . . . . . . . . . . . . . . . . . . .49
.51
Copy
D P O To
F - Card....................................................................................................
i n d e x . . . . . . . . . . . . . . . . . . . . . . . . . . . . . . . . . . . . . . . . . . . . . . . . . . . . . . . . . . .50
.51
DPOF-Standard...............................................................................................
D P O F - S t o r l e k . . . . . . . . . . . . . . . . . . . . . . . . . . . . . . . . . . . . . . . . . . . . . . . . . . . . . . . . .51
.51
DPOF-Index.......................................................................................................
D P O F - Ta b o r t . . . . . . . . . . . . . . . . . . . . . . . . . . . . . . . . . . . . . . . . . . . . . . . . . . . . . . . .51
.51
DPOF-Size..........................................................................................................
P C - k a m e r a . . . . . . . . . . . . . . . . . . . . . . . . . . . . . . . . . . . . . . . . . . . . . . . . . . . . . . . . . . . . . . . .51
.52
DPOF-Cancel......................................................................................................
A t t a n v ä n d a P C - k a m e r a . . . . . . . . . . . . . . . . . . . . . . . . . . . . . . . . . . . . . . . . . . . . . . . . .51
.52
PC
F j äCamera...........................................................................................................
r r k o n t r o l l . . . . . . . . . . . . . . . . . . . . . . . . . . . . . . . . . . . . . . . . . . . . . . . . . . 52
.53
How
Camera
A t t To
a nUse
v ä PC
nda
f j ä r rFunction.........................................................................
k o n t r o l l . . . . . . . . . . . . . . . . . . . . . . . . . . . . . . . . . . . . . 52
.53
IR
K oRemote
p p l a tController............................................................................................
i l l s k r i v a r e . . . . . . . . . . . . . . . . . . . . . . . . . . . . . . . . . . . . . . . . . . . . . . . . . .53
.54
A t t Can
k o pUse
p l aRemote
t i l l s kController
r i v a r e . . To
. . . Operate
. . . . . . . . .The
. . . .Camera.........................................
. . . . . . . . . . . . . . . . . . . . . . . . . . . . . . .53
.54
You
V ä l j aConnection
b i l d e r f ö(PictBridge
r u t s k r i f tMode).....................................................................
. . . . . . . . . . . . . . . . . . . . . . . . . . . . . . . . . . . . . . . . . . . .54
.55
Printer
A U T O S E The
T. . .Camera
. . . . . . . To
. . .A. .PictBridge-Supported
. . . . . . . . . . . . . . . . . . .Printer.....................................
. . . . . . . . . . . . . . . . . . . . . . . . .54
.56
Connecting
C U S TPictures
O M S E T.
. . . . . . . . . . . . . . . . . . . . . . . . . . . . . . . . . . . . . . . . . . . . . . . . . . . . . . . . . . .55
.56
Select
To.Print.......................................................................................
D P O F.
...............................................................57
AUTO
SET............................................................................................................
Skriva u
t b i l d e r. . . . . . . . . . . . . . . . . . . . . . . . . . . . . . . . . . . . . . . . . . . . . . . . . . . . .56
.57
CUSTOM
SET......................................................................................................
Å t e r sPRINT.........................................................................................................
t ä l l a . . . . . . . . . . . . . . . . . . . . . . . . . . . . . . . . . . . . . . . . . . . . . . . . . . . . . . . . .56
.58
DPOF
t i l l T V . . . . . . . . . . . . . . . . . . . . . . . . . . . . . . . . . . . . . . . . . . . . . . . . . . . . . . . . . . .57
.59
K Printing
o p p l a Pictures...................................................................................................
K o p p l a t i l l P C . . . . . . . . . . . . . . . . . . . . . . . . . . . . . . . . . . . . . . . . . . . . . . . . . . . . . . . . . . .57
.60
Reset....................................................................................................................
H u r d u k o p p l a r t i l l P C . . . . . . . . . . . . . . . . . . . . . . . . . . . . . . . . . . . . . . . . . . . . . . .58
.60
TVI n
Connection.........................................................................................................
s t a l l e r a d r i v r u t i n e r. . . . . . . . . . . . . . . . . . . . . . . . . . . . . . . . . . . . . . . . . . . . . . . . . . . . . . . .59
.61
PCI nConnection.....................................................................................................
s t a l l e r a A r c s o f t M e d i a C o n v e r t e r. . . . . . . . . . . . . . . . . . . . . . . . . . . . . . . . . . . . . .60
.61
How
I n s tTo
a l lConnect
e r a A r cWith
s o f tA Computer.........................................................................
V i d e o I m p r e s s i o n . . . . . . . . . . . . . . . . . . . . . . . . . . . . . . . . . . . .60
.63
Installing
I n s t a l l eCamera
r a P C - kDriver......................................................................................
a m e r a . . . . . . . . . . . . . . . . . . . . . . . . . . . . . . . . . . . . . . . . . . . . . . . . . . . . . .61
.65
Installing
I n s t a l l eArcSoft
r a U l e Media
a d P hConverter.........................................................................
o t o E x p l o r e r. . . . . . . . . . . . . . . . . . . . . . . . . . . . . . . . . . . . . . . .61
.66
A Installing
p p e n d i ArcSoft
x . . . . . .Video
. . . . . .Impression.........................................................................
. . . . . . . . . . . . . . . . . . . . . . . . . . . . . . . . . . . . . . . . . . . . . . . . . . .63
.69
Installing PC Camera Driver......................................................................................
65
Installing Ulead Photo Explorer..............................................................................
66
Appendix.................................................................................................................
69
Error Message Table...............................................................................................
69
Specifications.........................................................................................................
70
About ArcSoft ,Inc...................................................................................................
72
Things You Can Do With "ArcSoft VideoImpression"...................................................
73
About Ulead Photo Explorer........................................................................................
74
Things You Can Do In Ulead Photo Explorer 8.5 SE Basic...........................................
75
.
3
•
Varning!
Cautions
Försök inte ta isär kameran själv, du kan skada kameran eller få en elektrisk
Do not try to disassemble the camera by yourself, which may damage the
camera or cause electric shock.
stöt.
•
Do not fire the flash in a close distance (less than 1 meter); it may hurt your eyes.
Accessories
Tillbehör
Digital Camera
Digitalkamera
Utlös inte blixten nära ansiktet (närmare än en meter) då det kan skada ögo-
Drivrutiner
&
Camera Driver
& Software CD
programvara
Li-ion &
Battery
&
Batteri
laddare
Charger
Keep the camera away from the reach of children or animals to prevent them
from swallowing the batteries or small accessories.
nen.
•
Introduktion
Overall Introduction
Stop using the camera if any kind of liquid or foreign object enters the camera.
If it happens, power off the camera and contact your dealer for help.
Förvara kameran utom räckhåll för barn och djur för att förhindra att små
Do not operate this camera with wet hands; it may cause electric shock.
tillbehör eller batterier sväljs.
The camera may be damaged in an environment of high temperature.
•
Om
To avoid electricity leakage, please remove the battery if the camera is
kameran
utsätts för vätska, ta genast ut batterierna och ta kontakt med
expected not to be in use for a long period.
Bruksanvisning
User Manual /
Quick Start Guide
USB Cable
USB-kabel
AV Cable
Ljud/bild-kabel
närmaste åteförsäljare.
It is normal that the temperature of the camera body rises if the camera works
for a long time.
•
message
of "Low
onkan
the LCD
is a stöt.
warning to
Använd A
inte
kameran
medLight!"
våta appearing
händer, du
få enMonitor
elektrisk
•
suchskadas
cases shown
as utsätts
follows, please
release
the shutter button, then try to
KameranInkan
om den
för höga
temperaturer.
•
en
•
remind you to go to the Flash Mode and select Auto Flash or Fill-in flash to get
more light sources so as to compose a superior quality image.
re-compose the shot and focus again because the Auto Focus function may
be difficult to use with.
The subject is far away from the photographer or in the dark.
Ta ut batterierna
ur iskameran
om du
inte of
har
föroravsikt
att använda den under
The subject
viewed through
a piece
glass
window.
A fast-moving or a flashing subject is passing through.
längre tid.The subject has a reflection attribute like a mirror, a luminous body, or a lustrous
subject.
Earphone
Hörlurar
Wrist Strap
Handledsrem
Do not touch
the lens when
is in use.
Det är normalt
att kameran
blir itvarm
efter en tids användning.
Ett tips som kan bespara dig huvudvärk!
Fjärrkontroll
Remote Controller
Fodral
Camera Pouch
Small Tip
SaveOm
You
Big Heada
En digitalkamera är väldigt
lik entodator.
kameran
låserche
sig medan du
A digital
is in a way
veryför
similar
a computer.
If the digital
använder den,
följcamera
nedanstående
steg
att to
återställa
kameran.
camera hangs itself during operation, please follow the procedures
1. Ta ut batteriet.
below and most likely the camera can be re-activated.
2. Sätt i batteriet
igen.
1. Remove the battery.
3. Sätt på kameran.
2. Reload the battery.
3. Switch on the camera.
4
5
Tripod
Stativ
Knapparnas
funktioner
Overall Introduction
External
View
U
tsidan
Front
Front
Side
Sida
Turn
On på
Or Turn
The Camera
Sätta
ochOffstänga
av
Back
Baksida
Zoom
Tele/Wide
Switch
Lens
Lins
Lampa för
Self-timer
LED
Indicator
självutlösare
Still Image
Avtryckare
Shooting
stillbilder
IR Receiver
Ögla
Strap
Eyelet
BatteriBattery
Cover
lucka
Minneskort
Memory
Card Cover
Top
Ovan
Styrspak
Joystick
can turn on the camera.
Tryck på den igen för att stänga av
By pressing the Power Button
kameran.
again can turn off the camera.
InspelningsVideo Clip
Recording
knapp
Button
USB
USB
Connector
kameran
Tryck ner “Power”-knappen för att sätta
på By
kameran.
pressing the "Power" Button
LED
LEDIndicator
lampa
Flash
Blixt
Bottom
Under
Komma
igång
Getting Ready
Button
AV In /
Ljud/bild
AV
Out/
utgång,
Earphone
hörlurar
Jack
LägesMode
Button
väljare
Loadingin
Thebatteriet
Battery
Sätta
Internal
InsidaView
LCDSkärm
Monitor
Tripod
FästeSocket
stativ
Uppspelning
Playback
Button
talare Delete/Exposure
Button
Ta bort/exponering
HögSpeaker
Focus
Fokus
Side
Sida
Power
Button
På/av-knapp
Switch
Joystick
Styrspak
Up (By sliding
Upp up.)
Vänster/SjälvutLeft/Self-timer
(By sliding
lösareto
the left.)
Microphone
Mikrofon
Bekräfta (genom att
Menu/OK
(Bytrycka
pressing
stick.)
på the
spaken)
Höger/blixt
Right/Flash
Mode
(By sliding to the right.)
Down/Play/Pause
Ner/ Spela upp/
(By sliding
down.)
Pausa
6
1.
av off
kameran
1. Stäng
Power
the camera.
2.
batteriluckan
för att to
öppna
den
2. Tryck
Slideutout
Battery Cover
open
it.
3. Följ
Following
the polarity
indications
3.
anvisningarna
för polaritet
och sätt
and
load
the
battery.
in batteriet
4. Close the Battery Cover.
4. Stäng batteriluckan
En indikator på LCD-skämen indikerar följande batteristatus
Batteriet
är fullt
The below
symbols on the TFT LCD Monitor are the indication of the battery status.
Batteriet
är halvfullt
(
):Battery
power is full.
Batteriet
är
tomt,
ladda
batteri
(
):Battery power
is half
drained. Have a new battery ready.
(
):Battery power is drained. Replace with a new batter y.
Batteriet kan ta slut av sig själv om det förvaras i kameran under lång tid utan att anThe
electricity
of
the
battery
outattif the
battery
is keptinom
inside
the
vändas. Ta ut batteriet om du inte harmay
för run
avsikt
använda
kameran
överskådlig
camera for a long time without using. Please remove the battery when the
framtid.
camera is not in use.
Batteriet
inte
fungerar
normalt
underunder
0 C och
40 C.40 C.It's normal
Thekanske
battery
may
not work
normally
0 Cöver
or over
Det är dock normalt att kameran blir varm efter en tids användning.
that the temperature of the camera rises after used for a long period.
7
Komma
igång
Getting Ready
Charging
L
a d d a bThe
a t tBattery
eriet
OBS!
Ett fabriksnytt
batteri
är
The battery
is not charged
when
oladdat,
ladda
batteriet
innanthe
du
the camera
is shipped.
Charge
använder
det!
Komma igång
Getting Ready
Inserting
Removing
Card
Sätta
inOroch
ta utA Memory
minneskort
1. Power off the camera.
2. Open the Memory Card Cover.
Insertavthe
memory card into the card slot
1.3.Stäng
kameran
2. Tryck
ut batteriluckan
för att
öppna
den
and press
it down until
a click
sound
3. För
in
minneskortet
tryck
så du hör
press
thetillmemory
happens. (Pleaseoch
card
ett klickljud (tryck igen för att få ut minneskortet)
again
to
get
it
out
once
a
click
sound
4. Stäng batteriluckan
happens.)
4. Close the Memory Card Cover.
battery before use.
Laddningsprocedur
Charging Procedure
(a) Sätt in batteriet i laddaren
(a) Insert
the battery
to the battery
(b) Sätt
in laddaren
i stickkontakten
(c) En röd
under laddning
slotlampa
by thekommer
polaritylysa
indications.
(d) Laddningen
är
klar
när
lampan
(b) Connect the charger
to thelyser grönt
(e) Ta bort batteriet när laddningen är avslutad
electrical outlet.
(c) The LED will light up in red color
when charging.
(d) The charging is completed when
the LED turns green.
(e) Remove the battery when the
charging is completed.
Vi rekommenderar att du laddar ett fabriksnytt batteri i minst 4 timmar.
Det är normalt att batteriet blir varmt efter en tids laddning.
It is recommended to charge a new battery for more than 4 hours.
It's normal that the temperature of the battery and camera body
rises after a period of time of using.
Formatting a brand new memory card is strongly
recommended for first use.
Bilderna kan
på både
minne
och påflash
ett separat
minneskort.
Thesparas
image(s)
cankamerans
be storedegna
either
in built-in
memory
Om du harorsatt
in ett minneskort
kommer
därinserted,
om du inte
in memorycard.
When
thebilderna
memorysparas
card is
theanger
annat. Saknas
minneskort
kommer
sparascard
på kameran
istället.
images
willbe stored
inbilderna
the memory
rather than
the
built-in flash memory.On the other hand, the images will be
stored in the built-in flashmemory when a memory card is
not inserted.
Attaching
The handledsremmen
Wrist Strap
Sätta
fast
1
8
2
3
9
105mm+-2
105mm+-2
Överblick
- funktioner
Modes Introduction
This camera is a -multi-functional
device which includes
Överblick
funktioner
the modes listed below.
1.
DV / DSC Mode
thishär
mode
you kan
can take
a still image
pressing
the Still Image
IAtdet
läget
du spela
in filmbyeller
ta stillbilder.
Shooting Button (
) or a movie clip by pressing the Video Clip
Recording Button (
).
Överblick
- funktioner
Modes Introduction
8. Övrigt
Others
AV Out
Ut
AV
Den feature
här funktionen
ut ljudoch
bildsignal
till to
enTV.
TV.
This
will outputskickar
audio/video
signal
from
the camera
AV MODE?
EARPHONE
AV OUT
2.
AV IN
Album Mode
This
is to play
image
and
movieeller
clipsvisa
stored
in
I detmode
här läget
kanthe
dustill
spela
upp
filmer
bilder
the
memory or minne
the memory
no matter if the
sombuilt-in
liggerflash
på kamerans
ellercard
minneskort.
files are recorded by this camera or other devices.
Digital Music Mode
enables
play the
digital
music.
IThis
detmode
här läget
kanyou
dutospela
upp
musik.
4.
Voice Recording Mode
enables
you
do thein
voice
IThis
detmode
här läget
kan
dutospela
medrecording.
den inbyggda mikrofonen.
Game Mode
offers kan
four välja
games.
IThis
detmode
här läget
mellan fyra olika spel.
Hörlurar
Earphone
Om
dennawill
funktion
ärfrom
valdthe
kommer
ljudet
ur hörlurarna
The audio
come out
Earphone
Jackut
instead
of the built-in
speaker
if this
feature is chosen.
istället
för det
inbyggda
högtalarna.
AV MODE?
EARPHONE
6.
7.
AV OUT
AV In Mode
This
enables
you
recordin
the
videos
or t.ex.
DVD
I detmode
här läget
kan
dutospela
ljud
och from
bild TV
från
player
or devices that have video output.
eller DVD.
TV
Playback Mode
IThis
detmode
här läget
kanplays
du spela
upp
film och
visacamera.
bilder som
can only
the files
recorded
by this
är inspelade eller tagna med kameran.
10
AV IN
CONFIRM:OK
Sätt
in hörlurarna
i hörlursjacket.
At any
mode plug
the earphone in the
AV In / AV Out / Earphone Jack (
).
Välj EARPHONE och tryck OK.
Choose EARPHONE and press
Menu/OK Button.
11
150mm+-2
Sätt
in kabeln
AV in/AV
ut/Hörlurs-uttaget
At any
modei plug
the Video
Cable in the(AV).
AV In / AV Out / Earphone Jack ( AV ).
Välj AV OUT och tryck OK.
Choose AV OUT and press Menu/OK Button.
För
avbryta
dra ut disconnect
kabeln.
To att
cancel
thisfunktionen,
feature, simply
the video cable from the camera.
3.
5.
CONFIRM:OK
DV
- Kamera
DV/ /DSC
DSC Mode
1
2
3
4
5
6
7
8
9
12
2
Arbetsläge
Working Mode
( )DV/ DSC
( )Album
( )Digital Music
( )Voice Recording
( )Game
( )AV In
( )Playback
3
Batteristatus
Battery Status
( )Battery Full
( )Battery Half
Drained
( )Battery Drained
4
Löpande
bildtagning
Continuous
Shooting
Mode
( 1 ) Single
( ) Continuous
5
Blixt Mode
Flash
( )Auto Flash
( )Auto Flash with
Red-eye Reduction
( )Slow Sync
( )Fill-in Flash
( )Flash Off
21
20
07 : 03 AM
2006/01/31
AUTO
ISO
11
6
Självutlösare
Self-timer
( )10 Seconds
( ) 2 Seconds
( ) Double
2S
7
Fokus
Focus Range
( ) Macro
8
Avståndsmätning
Metering
( )Spot
( )Multi
9
( )Minneskort
Memory Card
Inbbygt minne
( INT )Internal
Memory
10
Sharpness
Skärpa
( )Soft
( )Normal
( )Vivid
11
Effekter
Effect
(NOR)Normal
( )B & W
( )Sepia
( )Negative
( RGB )RGB
12
(
)EIS
13
Tid
&&
datum
Time
Date
14
ISO
( AUTO ) AUTO
( 100 ) ISO=100
( 200 ) ISO=200
( 400 ) ISO=400
ISO
ISO
ISO
ISO
12
När
slås
på är
automatiskt
Whenkameran
the camera is
switched
on,den
it's automatically
set i
at this mode
(
).
detta
l äge.
19
18
17
16
15
14
13
6M
1
10
1
Shooting Mode &
Kameraläge
Scene Mode
( )Auto
( )Program
( )Portrait
( )Dawn
( )Backlight
( )Fireworks
( )Night
22
X1.2 00 : 01 :07
26
DV
- Kamera
DV/ /DSC
DSC Mode
X1.2
15
Vitbalans
White
Balance
( )Auto
( )Daylight
( )Cloudy
( )Fluorescent
( )Tungsten
( )Sunset
( )Custom
16
(
07 : 03 AM
2006/01/31
Exponering 2EV
)Exposure
(0.5EV/Steps)
17
Image Quality
Bildkvalité
( )Super Fine
( )Fine
( )Normal
18
Bildstorlek
Video Size video
( )640 x 480
( )320 x 240
19
Bildstorlek
Image Sizestillbild
(
) 3264 x 2448
(
) 2816 x 2112
(
) 2560 x 1920
(
) 2304 x 1728
(
) 2048 x 1536
(
) 1600 x 1200
20
Återstående
Estimated Available
utrymme
(bilder)
Shots
Ta
en bild
Basic
Photography
FFocus
o k u s Range
Sätt
fokusläge
på Switch
normal
eller närbild
Please
set the Focus
at normal
(
) (makro)
26
or macro (
).
6M
AUTO
ISO
1. Fokusområde
1.
Focus range
Makro:
20cm
Macro:
20cm
Normal 1.2m -> oändlighet
Normal: 1.2m~ infinity
2. Se till att alltid använda korrekt fokusinställning för
att Please
undvika att
bildenmake
blir suddig.
2.
always
sure the Focus Switch
is set at the correct focus range or the
image will be out of focus (blurred).
21
Återstående
Estimated Available
utrymme
Video Time(video)
22
Zoom
Zoom IN/Out Indicator
13
DVDV/ /DSC
- Kamera
DSC Mode
B
l i x t Mode
Flash
DVDV/ /DSC
- Kamera
DSC Mode
S
j ä l v u t l ö sMode
are
Self-timer
26
6M
Välj
blixtläge
genom
dramode
styrspaken
till höger.
Please
choose
theatt
flash
you prefer
by
sliding the Joystick to the right. The modes
available are:
AUTO
ISO
Auto Flash
The flash fires automatically
as required under shooting mode.
Auto Flash
with
Red-eye
Reduction
To avoid the subject's eyes appear
red in the picture, use this mode
can effectively minimize the
likelihood of the red-eye effect.
Slow Sync
The flash will fire and the camera
will set the shutter speed at a
proper speed.
26
6M
AUTO
ISO
Välj
självutlösarläge
genom
att you
draprefer
styrspaken
tillthe
vänster.
Please
choose the Self-timer
mode
by sliding
Joystick to the left.
The modes available are:
Fill-in Flash This m ode will enable the flash
to fire in any c ircumstances.
Flash Off
The mode will disable the flash to
fire in any circumstances.
Digital Zoom
With the 10 sec. Self-timer (
):
The image will be taken after an interval of 10 seconds
once the Shutter Button is released.
):
With the 2 sec. Self-timer (
The image will be taken after an interval of 2 seconds once
the Shutter Button is released.
2S
Use the Tele/Wide
Switch för
for zooming.
Använda
zoom-spaken
att zooma.
With the Double self-timer (
):
The image will be taken twice once the Shutter Button is
released.
X3.0
W
The first image will be taken after an interval of 10 seconds.
The second one will be taken after an interval of 2 seconds
continuously right after the first shooting .
T
Ju
kraftigare
du använder,
desto sämre
The
biggerzoom
the zoom
is the poorer
the quality
bildkvalitet.
of the image will be.
14
15
DVDV/ /DSC
- Kamera
DSC Mode
DVDV/ /DSC
- Kamera
DSC Mode
Hur
spelar A
inVideo
ett videoklipp
Howman
To Record
Hur man
tar en
stillbild
How
To Take
A Picture
Tryck
påthe
inspelningsknappen
för att
stoppa videoin1. Press
Video Recording Button
( starta
) to startoch
recording.
spelning.
2. Press the Video Recording Button again to stop the recording (the LED
Indicator blinks while recording).
26
6M
Blinking
RECORD
1.
för
kameran
1. Tryck
Press ner
downpå/av-knappen
the Power Button
to att
turnsätta
on thepå
camera.
2.
zoom-spaken
zoomin and zoom out (maximum 5x).
2. Använd
Use Tele/Wide
Button to för
haveatt
thereglera
digital zoom
3.
fokusen
3. Justera
Adjust the
focus switch before you take a shot.
4.
stadigt
avtryckaren
4. Håll
Keepkameran
your hands
steadyoch
andtryck
press ner
the Still
Image Shooting Button (
).
5.
slutat
blinka
kan
du the
ta ett
kort
5. När
The LED-lampan
LED Indicator will
start
blinking
after
Stillnytt
Image
Shooting Button is
pressed.
6. After the LED Indicator stops blinking, the camera is ready to take another
shot..
7. If you would like to see the image you just took, press the Playback Button
(
) to play the image.
8. If you would like to delete the image,please press the Delete / Exposure
Button (+/-) to delete the image.
14
6M
AUTO
ISO
If you would like to pause the recording, slide
down the Joystick (
). To slide down the
Joystick again can reactivate the recording.
If you would like to see the video you just
recorded, press the Playback Button (
) to
play the video.
1
1
2
3
4
5
6
5
Blinking
8
7
100-0021
16
17
DVDV/ /DSC
- Kamera
DSC Mode
Auto
A
u tMode
o
(
DVDV/ /DSC
- Kamera
DSC Mode
Portrait Mode (
Porträtt
)
)
MODE SET
MODE SET
AUTO
AUTO
PROGRAM
S
S
PORTRAIT
PROGRAM
PORTRAIT
DAWN
DAWN
Med
denna
följande
inställningar
låsta till fabriksinställningar
Under
thisinställning
mode thekommer
following
settings
will be vara
automatically
locked at the och
Med
denna
kommer
följande
vara
till följande inställningar.
Under
thisinställning
model the
settings
will inställningar
be locked up
aslåsta
below.
(a)(a)Metering:
Multi Multi
Avståndsmätning:
(b) Sharpness: Normal
(b) Skärpa: Normal
(c) Effect: Normal
Effekt:
Normal
(d)(c)WB
(White
Balance): Auto
Vitbalans:
AutoFrame): Off
(e)(d)Frame
(Photo
(f (e)
) Shooting
Shooting): Single
Tagning: (Continuous
Single
(g)(f)Flash:
Onlyför
(1)attAuto
Flashröda
withögon
Red-eye
Reduction
(2) Flash Off are available.
Blixt: Red.
motverka
eller Blixt
av
(a)
Multi Multi
(a)Metering
Avståndsmätning:
(b)
Normal
(b)Sharpness
Skärpa: Normal
(c)
Effect Normal
(c) Effekt: Normal
(d) White Balance Auto
(d) Vitbalans: Auto
(e) Photo Frame Off
Fotoram: Av
(f(e)
) Shooting(Continuous
Shooting) Single
(f)Flash
Tagning:Only
Single(1) Auto Flash with Red-eye Reduction (2) Flash Off are
(g)
available.
(g) Blixt: Red.
för att motverka röda ögon eller blixt av
således
gå attsettings
ändra. and cannot be adjusted.
factoryinte
default
Program
P
r o g rMode
a m(
Dawn Mode (
)
Skymning
)
MODE SET
MODE SET
AUTO
S
AUTO
PROGRAM
S
PORTRAIT
PROGRAM
PORTRAIT
DAWN
Efter ovanstående procedur kan du trycka ok igen för att göra dina egna inställningar för
After the above procedure, you can press the Menu/OK Button again to
en bild.
set up your own settings for the image.
In program mode, the metering, sharpness, effect, WB, frame, shooting
Flash, Exposure & ISO can be adjusted.
18
DAWN
Med
denna
inställning
kommer
följande
låsta
till följande inställningar.
Under
this
model the
settings
willinställningar
be locked vara
up as
below.
(a)
Multi Multi
(a) Metering
Avståndsmätning:
(b) Sharpness Normal
(b) Skärpa: Normal
(c) Effect Normal
(c) Effekt: Normal
(d) White Balance Auto
(d)Photo
Vitbalans:
Auto Off
(e)
Frame
Fotoram: Av
(f(e)
) Shooting(Continuous
Shooting) Single
(g)
(f) Flash
Tagning:Flash
Single Off
(g) Blixt: Blixt av
19
DV
- Kamera
DV/ / DSC
DSC Mode
Backlight
( s) l j u s
B
a k g rMode
und
DV
- Kamera
DV/ /DSC
DSC Mode
Night Mode (
Natt
)
MODE SET
MODE SET
DAWN
FIREWORKS
NIGHT SCENERY
Med
denna
inställning
kommer
följande
varaaslåsta
till följande inställningar.
Under
this
model the
settings
willinställningar
be locked up
below.
(a)
Spot Punkt
(a)Metering
Avståndsmätning:
(b)
Normal
(b)Sharpness
Skärpa: Normal
(c)
Normal
(c)Effect
Effekt: Normal
(d) White Balance Auto
(d) Vitbalans: Auto
(e) Photo Frame Off
Fotoram: Av
(f(e)
) Shooting(Continuous
Shooting) Single
(f) Flash
Tagning:Fill-in
Single Flash
(g)
(g) Blixt: Blixt på
Fireworks
F
y r v e rMode
k e r( i
DAWN
BACK LIGHT
S
BACK LIGHT
S
FIREWORKS
NIGHT SCENERY
Med
denna
inställning
kommer
följande
varaaslåsta
till följande inställningar.
Under
this
model the
settings
willinställningar
be locked up
below.
(a)
Multi Område
(a)Metering
Avståndsmätning:
(b)
Normal
(b)Sharpness
Skärpa: Normal
(c)
Effect Normal
(c) Effekt: Normal
(d) White Balance Auto
(d) Vitbalans: Auto
(e) Photo Frame Off
Fotoram: Av
(f(e)
) Shooting(Continuous
Shooting) Single
(f) Flash
Tagning:Only
Single(1) Slow Sync (2) Flash Off are available.
(g)
(g) Blixt: Långsam synk eller blixt av
)
MODE SET
DAWN
S
BACK LIGHT
FIREWORKS
NIGHT SCENERY
Med
denna
kommer
följande
inställningar
vara
till följande inställningar.
Under
thisinställning
model the
settings
will be
locked up
aslåsta
below.
(a)
Multi Område
(a)Metering
Avståndsmätning:
(b)
Normal
(b)Sharpness
Skärpa: Normal
(c)(c)Effect
Normal
Effekt: Normal
(d) White Balance Auto
(d) Vitbalans: Auto
(e) Photo Frame Off
Fotoram: Av
(f (e)
) Shooting(Continuous
Shooting) Single
(f)Flash
Tagning:Flash
SingleOff
(g)
(g) Blixt: Blixt av
20
21
DVDV/ /DSC
- Kamera
DSC Mode
Advanced
Introduction
A
v a n c e rSetting
ade in
s tällningar
DVDV/ /DSC
- Kamera
DSC Mode
Välj
rinställning
(Standard:
auto)
MODEfö
SET
( Default: AUTO
)
640X480) 640x480)
VIDEO SIZE ( Default:
Videostorlek
(Standard:
VIDEO SIZE
Tryck
Meny/OK
för att ställaButton
in storleken.
Press
the Menu/OK
to set up your
S
PROGRAM
PORTRAIT
DAWN
320X240
Operation Procedure
This feature is for you to choose the
video size of the video clip. The
bigger the size is the better the video
quality will be. Yet better video quality
occupies more capacity of the memory.
Bildstorlek
(Standard:
2816x2112)
IMAGE SIZE ( Default:
2816x2112)
Du
kanfeature
välja mellan
This
is forföljande
you to
upplösningar:
choose the image resolution.
IMAGE SIZE
S
8M
6M
5M
4M
the scene of the image from the
following options.
AUTO
PROGRAM
PORTRAIT
DAWN
BACKLIGHT
FIREWORKS
NIGHT SCENERY
AUTO
settings for video size.
640X480
S
Du
kanfeature
välja mellan
This
is forföljande
you to choose
inställningar:
MODE SET
3264X2448
(8M)
(6M)
(5M)
(4M)
(3M)
(2M)
2816X2112
2560X1920
2304X1728
3264
2816
2560
2304
2048
1600
x 2448 (by interpolation)
x 2112
x 1920
x 1728
x 1536
x 1200
Operation Procedure
Välj förinställning
QUALITY
( Image Quality )(Standard:
( Default : FINE auto)
)
QUALITY
S
Du
kanfeature
välja mellan
This
is forföljande
you to choose
inställningar:
the image quality from the
S.FINE
following options.
( )S. FINE (Super Fine)
( )FINE
( )NORMAL
FINE
NORMAL
Operation Procedure
Operation Procedure
22
23
DVDV/ /DSC
- Kamera
DSC Mode
EIS
(Elektronisk
bildstabilisering)
EIS (Electrical
Image Stabilizer)
(Default : OFF )
DVDV/ /DSC
- Kamera
DSC Mode
Skärpa
SHARPNESS ( Default : NORMAL )
SHARPNESS
EIS
S
DenThis
här inställningen
digused
att stabilisera
feature canhjälper
only be
with
bilden
i videoläge.
video
recording but not still image.
OFF
ON
Operation Procedure
Bländare
METERING ( Default : MULTI )
METERING
MULTI
SPOT
of the captured image look
smoother, which is suitable
for image editing on PC.
SOFT
SOFT
NORMAL
Using this mode will help to stabilize
the image.
If you prefer the next video not to be
with EIS ,please select "OFF" to
cancel the setting.
Lämpas
bästcan
om make
bilden the
ska edge
This effect
redigeras i efterhand.
Lämpas
bästcan
för utskrift.
This effect
make the
VIVID
edge of the captured image
look sharp, which is suitable
for printing out.
NORMAL
WB
Operation Procedure
VIVID
Ger
skarpaste
bilderna
Thisdeeffect
can make
theman
tenderar
att orsaka
gitter.
edge of också
the captured
image
look much sharper yet may
cause more noises.
Effekter
EFFECT ( Default : NORMAL )
Här
du väljaismellan
följande
effekter.
Thiskan
feature
for you
to choose
the image
NOR
and take a picture with brightness.
Multi Metering:
Exposure will be evaluated according
to the average of the available light
sources in the image area. This is
suitable for general use.
Spot Metering:
If the subject is against the light
source or has little contrast, you can
use this function to have the subject
be brighter.
Operation Procedure
24
effect from the following options.
EFFECT
Bländarinställningarna
hjälperyou
till att
With Metering Setting,
canskärma
get av
ljus
från superior
objektet. Välj
spot omcondition
objektet står
more
exposure
i motljus.
NORMAL
B&W
SEPIA
WB
NEGATIVE
Operation Procedure
NORMAL
effekt
vald.to the picture.
NOR Ingen
No effect
is added
B&W
Svart/vitt
Turn the image into black and white..
SEPIA
Gul/Brun
Turn the image into yellowish
brown effect.
NEGATIVE
Negativ
image into negative
Turn thefilm
film effect.
RGB
25
RG
B
Låter
dig justera
värdena
This setting
allowsRGB
you to
adjust
själv
the value of RGB by yourself.
DVDV/ /DSC
- Kamera
DSC Mode
Vitbalans
WB ( White Balance ) ( Default : AUTO )
Följande
finns
The
WhiteVB-inställningar
Balance options
are tillgängliga
provided as follows:
W.BALANCE
AUTO
WB
DAYLIGHT
CLOUDY
FLUORESCENT
Auto
Daylight
Adjusting
the white balance automatically
Automatiskt
Starktthedagsljus
Under
strong light environment
Molnigt
dagsljus
Cloudy
Under
the cloudy
light environment
Lysrör
Fluorescent Under
the fluorescent light environment
Glödlampor
Tungsten Under
the tungsten light environment
Solnedgång
Sunset
Under
the sunset light environment
Obestämd
omgivning
Custom
Under
uncertain
light environment
Operation Procedure
MedYou
hjälp
av select
“Custom”
kan
du ställa
in vitbacan
the
most
appropriate
lanseringen
för vilkensetting
omgivning
dugiven
vill. Följ
white balance
for a
anvisningarna nedan:
environment by "Custom"
1.shooting
Välj “Custom”
2.setting.
Håll ett vitt papper framför kameran och
tryck ner
avtryckaren
1. Choosehalvvägs.
the CUSTOM setting.
3. 2.
Värdet
vitbalanseringen
kommer
Put för
a sheet
of white paper
in sparas
front
och användas
of
the
camera,
and then press the
för fotografering.
DSC button.(Note that the LCD
shows only white area)
3. The Custom value will be recorded
and this value will be applied for
image shooting.
26
DVDV/ /DSC
- Kamera
DSC Mode
Fotoram
FRAME ( Photo Frame )( Default : OFF )
Välj
ON eller
OFF
Choose
ON
or OFF
OmIf ON
välj den
fotoram
du föredrar.
ONärisvalt,
chosen
then
choose
the photo
FRAME
WB
frame you prefer.
OFF
ON
You can put the selected photo
frame to the image you capture.
If you don't want the next image to
be with photo frame, please go to
he menu and choose OFF to cancel
the setting.
Operation Procedure
1.
2.
3.
4.
5.
6.
7.
8.
9.
27
DVDV/ /DSC
- Kamera
DSC Mode
Fortlöpande
bildtagning
SHOOTING ( Continuous
Shooting ) ( Default : SINGLE )
SHOOTING
WB
SINGLE
CONTINUOUS
Inställningar
SETUP
Inställningar
SETUP
SETUP
Är “CONTINUOUS”
valt tas bilder löpande
Choose "CONTINUOUS"
to have
tillscontinuous
avtryckaren släpps.
“SINGLE” är valt som
shooting.
standard.
FILE
PWRSAVE
If you want to cancel continuous
shooting please choose"SINGLE".
To have the continuous shooting,
please press the Still Image Shooting
Button (
) and on hold. The shutter
will keep releasing when the button is
being pressed. The continuous
shooting will stop when you stop
pressing the button.
Operation Procedure
Operation Procedure
SERIES
3 MIN
LANGUAGE ENGLISH
FORMAT
1.
2.
3.
4.
5.
6.
7.
8.
FILE
PWR SAVE
LANGUAGE
FORMAT
NO
1.MENU
2. or
3.
4. or
5.
6. or
7. OK
13. S. IMAGE
9. VIDEO
DATE
10. Q. VIEW
TIME
11. RESET
IMPRINT
SYS. SOUND 12. S. SOUND
There are 13 options in this feature.
ISO ( Default : AUTO )
ISO
Setting FILE ( default:
Inställning
FILE SERIES )
SETUP
ISO
AUTO
ISO
100
ISO
AUTO
100
200
200
400
400
ISO
ISO
Ju högre
destoisjusare
bild.toAuto
är
This ISO
feature
for you
choose
Standard.
the ISO value of the image.
The higher the ISO value is the
brighter the image will be.
FILE
PWRSAVE
SERIES
RESET
LANGUAGE
If RESET is selected, the next file
name
willdöps
be set
from
SERIES:
Filen
efter
den 0001
senasteven
sparade
filen.
after formatting, deleting all, or
inserting a new memory card.
FORMAT
BACK:
RESET:
Filerna allows
sparas från
oavsett
This setting
you0001
to name
theformafiles.
tering eller borttagning av senaste fil.
If SERIES is selected, the file name
will directly follow the latest stored
file name instead.
SET:OK
Operation Procedure
Operation Procedure
28
29
Inställningar
SETUP
Setting
Saving
P
W RPower
S AV
E ( Default: 3 minutes )
OFF
PWRSAVE
1 MIN
LANGUAGE
2 MIN
FORMAT
3 MIN
1.MENU
2. or
3.
4. or
5. OK
kommer
automatiskt
stängas
TheKameran
camera will
be automatically
switched
off
så fort
den
inte använts
inom
det
onceavhaving
been
operated
for the time
interval
tidsintervall
somhelps
du har
Den här
you
set. This setting
avoidangett.
some unnecessary
inställningen
förhindrar
att
kameran
drar
power consumption when the camera is not in use.
PWRSAVE
LANGUAGE FRANc AIS
DEUTSCH
BACK:
1.MENU
2. or
3.
4. or
5. OK
SET:OK
PWRSAVE
LANGUAGE NO
YES
BACK:
1.Engelska
2.Japanska
1. English
2. Japanese
3. French3.Franska
4. German
4.Tyska 5.Spanska 6.Italienska 7.Turkiska
5. Spanish 6. Italian
7. Turkish
8. Russian
8.Ryska 9.Thailändska
10.Portugisiska
9.
Thai
10.
Portuguese
11.
Simplified
Chinese
11.Enkel kinesiska 12.Traditionell kinesiska
12. Traditional Chinese
13.Holländska
FORMAT
05/02/01
DATE
YY/MM/DD
BACK:
SET:OK
Här kan du ställa in tiden.
1.MENU
2. or
3.
4. or
5. OK
OFF
TIME
DATE
IMPRINT
D&TIME
BACK:
30
1.MENU
2. or
3.
4. or
5. OK
Choose " ON" will show thedate and time
VäljtheON
för att
tid och datum
on
image
taken.Choose
"OFF"ska
will synas
på bilden.
disable this feature.
SET:OK
Operation Procedure
SETUP
1.MENU
2. or
3.
4. or
5. OK
DATE
This function allows you to formatthe
memory
or the built-in
flashmemory
.
Här
kan card
du formatera
minneskortet
eller
kamerans flash-minne.
TIME
IMPRINT
OFF
SYS.SOUND ON
BACK:
1.MENU
2. or
3.
4. or
5.
6. or
7. OK
Operation Procedure
DATE
Välj ON för att aktivera ljud.
SET:OK
Operation Procedure
SETUP
TIME
1. YY/MM/DD
1.
2. MM/DD/YY 2.
3. DD/MM/YY 3.
4. OFF
You can choose tohave the sound when
operating by choosing "ON".
Setting Video System
Video
Operation Procedure
PWRSAVE
This option allows you to setthe date and
the time.
Setting System Sound ( Default: ON )
Sound
Setting
Date ( Default: YY/MM/DD )
D
AT E
SETUP
SET:OK
SETUP
SET:OK
LANGUAGE
BACK:
Operation Procedure
SETUP
FORMAT
TIME
1. MENU
2.
or
3.
4.
or
5.
6.
or
7. OK
FORMAT
Setting
F
O R Format
M AT( Default: NO )
FILE
15 : 45
DATE
Operation Procedure
ENGLISH
FORMAT
FORMAT
Setting Imprint ( Default: OFF )
Imprint
Setting
L
A N Language
GUAGE
SETUP
Operation Procedure
SETUP
LANGUAGE
ström när du inte använder den.
SET:OK
FILE
TIME
Setting Time
Operation Procedure
SETUP
FILE
BACK:
Inställningar
SETUP
ÅÅ/MM/DD
MM/DD/ÅÅ
DD/MM/ÅÅ
4. OFF
IMPRINT
SYS.SOUND NTSC
VIDEO
BACK:
PAL
SET:OK
1.MENU
2. or
3.
4. or
5.
6
or .
7.OK
31
NTSC: U.S.A, Canada, Japan, South Korea,
Taiwan, Mexico.
PAL : Australia, Austria, Belgium, China, Denmark,
Välj U.K.,
PAL.
Finland, Germany,
Holland, Italy, Kuwait,
Malaysia, New Zealand, Singapore, Spain,
Sweden, Switzerland, Thailand, Norway.
Inställningar
SETUP
Setting
Q
. V Quick
I E WView ( Default: 0.5 sec.)
SETUP
IMPRINT
OFF
SYS.SOUND 0.5 SEC
VIDEO
1 SEC
Q.VIEW
3 SEC
BACK:
SET:OK
Operation Procedure
1.MENU
2. or
3.
4. or
5.
6. or
7. OK
Album
Album Mode
Tryck
p å “Mode
M O D EButton
” - k n a pAnd
p e nChoose
och
Press The
välj
Alb
u
m
The Album Mode
If Q. View is on, you can view the image you just
captured on the LCD monitor.
[OFF]: You
viewvill
theatt
picture
you just
in
Ställer
incannot
ifall du
bilden
skatake
visas
direkt
att den är tagen eller ej.
theefter
LCD monitor.
[0.5~3sec] : The captured image is briefly displayed
during the selected time.
BABY PHOTO
RESET
Setting Reset ( Default: NO )
Operation Procedure
SETUP
SYS.SOUND
VIDEO
Q.VIEW
NO
RESET
YES
BACK:
1.MENU
2. or
3.
4. or
5. OK
This option provides the function ofrecalling
all default values except the Date, Time,
Återställer
allaVideo
inställningar
Language, and
system. till fabriksinställningar.
SET:OK
S. SOUND
Setting Start-up Sound ( Default: ON )
Operation Procedure
SETUP
TIME
IMPRINT
RESET
OFF
S.SOUND
ON
BACK:
1.MENU
2. or
3.
4. or
5.OK
1
BABY PHOTO
MY TRIP.AVI
2
You can have start-up soundby choosing
ONHär
or disable
start-up
by
kan duthe
välja
ljud sound
vid uppstart.
choosing OFF.
3
Operation Procedure
SETUP
1.MENU
2. or
3.
4. or
5. OK
IMPRINT
RESET
S.SOUND
S.IMAGE
You can have the defaultstart-up image by
choosing ON or disable the start-upimage
Här kan du
by choosing
OFF.välja bild vid uppstart.
eller of
vald
File name
thefilchosen file
1 Filnamn
föregående
Back totillthe
previoussida
page
2 Tillbaka
Folder
3 Mapp
6
5
4 Filmklipp
Movie Clip
Stillbild
Shooting Image
5 Still
filformat
Error
file
6 Fel
1.Press the Mode Button (
) to Album Mode.
2.You can use the Joystick to choose the file or folder you would like to play.
3.Press the Menu/OK Button to play or go to next page.
4.Select (
) can go back to the previous page.
SET:OK
32
X
4
SET:OK
Setting
S
. I MStart-up
A G EImage ( Default: LOGO )
BACK:
Hur
använder
Album
How du
To Use
Album Mode
33
Album
Album Mode
Album
Album Mode
1.
att Mode
album Button
är valt kommer
skärmen
visasmode.
alla filer
somLCD
liggerwill
påshow
minneskortet.
1.Efter
Press
and select
Album
The
2. Använd
förin
attthe
välja
mellan mapparna.
all the styrspaken
files stored
memory
card.
3. Välj filen som du vill spela och tryck OK
2.Om
Use
Joystick
to select
folder
and its name will also show
4.
duthe
spelar
upp video
kan duthe
använda
play/pause-knappen
on the
5. Tryck
på LCD.
OK för att gå tillbaka till album
3. Select the file you would like to play and then press the Menu/OK
Button to view the file.
4. You could see a photo file on the LCD directly. For a video file,
press the (
) Down key to play and press (
) Down key
again can pause playing.
5. Press the Menu/OK Button can go back album.
REW
PLAY?
PAUSE ?
A
t t convert
k o n v ertera
foto or
och
video
To
the photo
video
files
(a)
Media Converter”
och klicka (b)
filerna
vill konvertera
(b) Välj
Select
thedufiles
that you would
(a)Öppna
Open“ArcSoft
the "ArcSoft
Media converter"
på [Step1 : Select Media]
like to convert.
software and then click on
Step1 Select Media .
FF
OBS! Om filen inte går att spela upp kan den behöva konverteras. Om så är fallet, läs mer på
sid. 35.
1. If the ( X ) icon is shown, please convert that file via "Arcsoft
Media Converter" (please refer to page 35).To view the detail
installation, (please refer to page 61).
2. The "delete" function can be used under this mode. However,
the "DCIM" folder is under protection at the factory default
setting and it cannot be deleted.
34
Att
använda
Converter
Things
You ArcSoft
Can Do Media
With ArcSoft
Media
Installera
programmet
(se
sid.
61)
Converter
(d) Välj
[Step2Step2
: Select Select
Destination]
(d)
Select
och Destination
klicka på “Convert”.
and then click
on "Convert".
(c)
bort filerna
som du
markerat
(c )TaDelete
the files
that
you have
menselected
vill ta bortbut
frånyou'd
listan.like to
remove from the list.
X
35
Album
Album Mode
Album
Album Mode
A
n d r a v i k t i gof
a fother
u n k t iimportant
oner
Introduction
functions
Välj
“Optimize for
the selected
device”
för att for
konvertera
filerna för
uppspelning
för the
Settings
Please
select
"Optimize
the selected
device"
to convert
album-funktionen.
file to play on Album Mode.
1 Foto
Photo
2 Video
36
37
Musikuppspelning
Digital Music Mode
Musikuppspelning
Digital Music Mode
Tryck
och välj
Press på
The“MODE”
Mode Button
And musikuppChoose The
spelning
Digital Music Mode
Hur
man
upp
musik
How To
Play spelar
The Digital
Music
1/1
DCIM
How To
Download
Thener
Digital
Music To
Camera
Hur
man
laddar
musik
tillThe
kameran
USB ?
DISK
W
T
PC CAM
PRINTER
CONFIRM:OK
1.
2.
3.
4.
1.
2.
3.
4.
5.
Välj “Digital Music Player” med “MODE”
Välj den mapp som du la dina musikfiler i
Välj musikspel som du vill lyssna på och tryck OK
Använd
föron
attDigital
spela upp
ochPlayer
pausa Mode (
1. play/pause-knappen
Set the Mode Button
Music
).
Om du2.vill
lyssna med
hörlurar,
sätt iyou
dem
och välj
“EARPHONE”
Choose
the folder
where
posted
the
digital music files on.
3. Choose the music file you would like to play and press the Menu/Ok
Button. You can press the Menu/OK Button again to stop playing.
You can press
Down key to pause playing or press Menu/OK
Button again to stop playing.
4. The music will come out from the built-in speaker if no earphone
is used. If you prefer to play the music through an earphone,
please have the earphone connected to the Earphone Jack (
)
and choose "EARPHONE".
How To
Delete
Digital
Music From
Camera
Hur
man
tarThe
bort
musik
från The
kameran
1. Tryck på Delete/Exposure-knappen för att radera en specifik fil
2. Vill du radera en mapp måste du göra det från datorn
1. You can press the Delete / Exposure Button ( +/- ) to delete the
music file.
2. If you want to delete the folder, you have to connect the camera
with the computer to delete it from the Removal Disk.
Koppla in kameran till datorn med USB-kabeln
Välj DISK och tryck OK
Kopiera musiken till “Flyttbar disk”
1. Connect
the Camera
the computer with the USB cable.
Navigera
genom mapparna
medwith
zoom-spaken
2. Choose DISK and press Menu/OK Button.
3. Copy the digital music files to the "Removal Disk" (when the camera is
connected to the computer the computer will create a new disk called
"Removal Disk").
4. Press Tele / Wide Switch to jump pages if you have many folders inside.
5. Press Tele / Wide Switch to adjust volume during playing.
38
39
Musikuppspelning
Digital Music Mode
Övriga funktioner
Features
Musikuppspelning
Digital Music Mode
How Toupp
Play The
Song(s) Repeatedly
Spela
i slinga
Adjust
H
ö j a oVolume
c h s ä n k a v o l y m en
T
W
00:00:07
00:00:07
00:00:07
Använd zoom-spaken för att höja och sänka
Använd styrpaken (Höger och vänster) för att byta låt
Use the Tele/Wide Switch to adjust the volume.
Skip to next song or back to the previous song
1.(
) Slide the Joystick to the left to skip to the previous song.
2.(
) Slide the Joystick to the right to skip to the next song.
PPause
a u s aThe Playing
Genom att dra styrspaken uppåt kan du välja mellan att sätta den aktuella eller alla låtar på
slinga.
Slide the Joystick up can play the current song repeatedly (
or play all songs repeatedly (
).
)
Gå tillbaka
tillTomeny
How
To Go Back
Menu
Tryck på Meny/OK för att gå tillbaka till menyn
Press the Menu/OK Button can go back to the menu.
00:00:07
How
The
Nameoch
Of The
Song
The Lyrics
Hur To
duShow
visar
namn
text
påOrlåten
Dra styrspaken nedåt för att pausa och spela upp igen.
1.(
2.(
) Slide the Joystick down can pause the playing .
) Slide the Joystick down again can re-active the playing.
40
För att visa texten på låten måste språkinställningarna på kameran vara densamma som
texten på låten.
In order to show the name of the song or the lyrics, the language setting
of the camera should be set at the same language as the song. For
example, if it is an English song you would like to play, the language
of the camera should be set at English.
41
Ljudinspelning
Voice Recording Mode
Spel
Game Mode
Tryck
och välj
Press på
The“MODE”
Mode Button
And ljudinspelnChoose The
ing
Voice Recording Mode
Tryck
och välj
spel
Press på
The“MODE”
Mode Button
And
Choose
Game Mode
Operation Steps
00 : 01 :07
1.MENU
2. or
3.
4. or
5.
6. or
7. OK
START:DV
1. TETRIS
2. SOKO
3. SNAKE
4. JIGSAW PUZZLE
GAME 1
GAME 2
6
GAME 3
GAME 4
Tryck på videoinspleningsknappen för att starta inspelning.
Tryck på samma knapp igen för att stoppa inspelningen
Press the Video Clip Recording Button (
) to start recording.
Press the Video Clip Recording Button again to stop the recording
(the
LED
blinks
while
recording).
Om du vill
höra
det Indicator
du spelat in,
tryck på
uppspelningsknappen.
01
Om du vill pausa, dra styrspaken nedåt, gör samma sak för att fortsätta inspelningen.
If you would like to pause the recording, slide down the Joystick (
).
To slide down the Joystick again can reactivate the recording.
If you would like to hear the audio clip that you just recorded, press
the Playback Button (
) to play the audio clip.
Du kan välja mellan spelen Tetris, SOKO, Snake och Jigsaw puzzle. Använd styrspaken för att
spela.
1.TETRIS
RIGHT/ LEFT - to manipulate the direction of the falling brick
UP Button - to rotating the brick
DOWN Button -- to speeding up brick to fall
DSC Button -- to escape from the game
2.SOKO
TELE - to select the game level
UP, DOWN, RIGHT, LEFT Buttons - to manipulate
DELETE Button -- to undo the last movement
DSC Button -- to escape from the game
3.SNAKE
UP, DOWN, RIGHT, LEFT Buttons - to manipulate
DSC Button -- to escape from the game
4. JIGSAW PUZZLE
UP, DOWN, RIGHT, LEFT Buttons -- to manipulate
DELETE Button -- to show the original picture
DSC Button -- to escape from the game
42
43
AV-in
AV In Mode
Tryck
och välj
AV
IN
Press på
The“MODE”
Mode Button
And
Choose
The
AV In Mode
Bildvisning
Playback Mode
Att väljaThe
bildvisning
Choose
Playback Mode
IThis
d e t mode
h ä r l äenables
g e t k a nyou
d u to
s precord
e l a n i the
n f rvideo
å n T V,from
DVD
TV or
e
l l e r player
a n d r a or
e ndevices
h e t e r mthat
ed v
i d e ovideo
u t g å noutput.
g.
DVD
have
Please
follow the steps below for the recording.
Tr
y c k the
p å bildvisningsknappen
tittathe
påstill
Press
Playback Mode Button (för ) att
to play
bimage,
i l d e r ovideo
c h video
som clips
är inspelat
med
kameran.
and audio
that were
recorded
by this
camera.
Icon Introduction
AV MODE?
EARPHONE
AV OUT
AV IN
CONFIRM:OK
1.
2.
3.
4.
5.
Koppla in kabeln i enheten och i AV in kontakten.
Välj AV IN och tryck OK
Tryck på “Video Clip Recording” för att starta inspelning
mode
plug
the Video Cable in the AV In
Tryck1.At
igenany
för att
stoppa
inspelning.
Om du/ vill
tryck
på uppspelningsknappen.
AVförhandgranska,
Out / Earphone
Jack
(
).
2.Choose AV IN and press Menu/OK Button.
3.Press Video Clip Recording Button (
) to start recording.
4.Press the Video Clip Recording Button to stop the recording.
5.If you would like to see the video you just took, press the
Playback Button (
) to play the video.
Pausa genom att dra styrspaken nedåt.
IIcon
k o n e r Introduction
(
(
videoklipp
) betyder
represents
that the file is a video clip.
) betyder
represents
that the file is an audio clip.
ljudklipp
START : DV
PLAY?
By sliding down the Joystick you can pause the recording.
By sliding down the Joystick again can re-activate the recording.
If the Video Cable is disconnected during the recording,
the recording will be automatically stopped.
44
45
105mm+-2
105mm+-2
Bildvisning
Playback Mode
Bildvisning
Playback Mode
Zooma och
storlek
Viewing
Theändra
Enlarged
Still Image and
Trimming The Image
Översikt
Thumbnails
W
T
W
T
100-0021
1
1
2
4
5
3
T
W
100-0021
2
X 1.6
By sliding the Tele/Wide Switch to the left (
By sliding the Tele/Wide Switch to the right (
single image.
X 1.6
T
) can show the thumbnails.
) can go back to the
When it is set at thumbnails, use the Joystick to pick the file and
press Menu/OK Button to play the file.
När en bild är vald kan du förstora bilden med zoom-spaken. Om du vill spara bilden i det
större formatet, tryck OK och välj TRIM. Orginalbilden kommer då ersättas med den förstorade bilden. Välj CANCEL om du inte vill spara över ursprungsbilden.
When a still image is chosen, you can slide the Tele/Wide
Switch to the right (
) to enlarge the image (maximum 8.0x).
Sliding the Tele/Wide Switch to the left (
) can get the image
back to the original size.
When the image is enlarged, you can use the Joystick to view a
certain part of the image. If you would like to trim the image, press
Menu/OK Button and choose "TRIM"or choose "CANCEL" cancel
the TRIM request.
The original image will be replaced by the trimmed image
if you choose "TRIM".
47
150mm+-2
W
Använd zoom-spaken för att växla mellan översikt och helbild.
46
100-0021
100-0021
Bildvisning
Playback Mode
Avancerade
inställningar
Advanced Setting
Introduction
Bildvisning
Playback Mode
SSet
k y dAdFile
a bilder
With Protection
AHow
t t t aTo
b oDelete
r t b i l dImage(s)
er
DELETE ALL
PROTTECT
Operation Procedure
Operation Procedure
SELECT
ALL
SELECT
ALL
1.
2.
3.
4.
Gå in på “DELETE”
Välj “SELECT” för att visa alla sparade filer, ta fram den du vill ta bort och tryck på OK
Välj 1.
“All”
följt av
“DELETE” och OK för att ta bort alla filer
Enter
"DELETE"
Välj “Cancel” om du inte vill ta bort alla bilder.
2. Choose"SELECT" will show all the stored files. Pick the file you
would like to delete and press Menu/OK Button and select "DELETE"
Menu/OK Button to delete the selected file.
3. Choose"All" "DELETE"
Menu/OK Button to delete all files.
4. Or you can choose CANCEL to cancel the deleting request.
SHow
p e l aTo
up
p b iSlideshow
ldvisning
Play
SLIDE
SHOW
Välj “SELECT” för att visa alla bilder. Välj den som du vill skydda och använd zoom-spaken för
att markera den som skyddad. En ikon kommer visas på skärmen.
1. Choose
"SELECT"
will show
the stored
Pick
the file
Välj “ALL”
och gör samma
som ovan
för att all
skydda
samtligafiles.
bilder.
Bekräfta
medyou
OK.would
like to protect and slide the Tele/Wide Switch to either way can set the
Gör på samma
sätt protection.
för att ta bortThe
skydd
på (bilder.
file with
icon
) will show on the left side of the
screen when the file is locked with protection.
2. Choose "ALL" and slide the Tele/Wide Switch to either way and press
Menu/OK Button can set all the files with protection.
3. To cancel the protection, slide the Tele/Wide Switch again and press
the Menu/OK Button. The icon (
) will no longer show when the
protection is canceled.
RHow
o t e rTo
a b
ilder An Image
Rotate
ROTATE
Operation Procedure
Operation Procedure
RIGHT90O
PLAY
O
LEFT90
INTERVAL REPEAT
180O
HORIZONTAL
1.
2.
3.
4.
Gå in på “SLIDE”
Välj “INTERVAL” för att ställa in tidsintervall mellan bilder
Välj “SHOW”->”PLAY” för att spela upp alla filer
Välj
för att spela upp sparade filer i slinga
1. “SHOW”->”REPEAT”
Enter"SLIDE"
2. Choose"INTERVAL" to set up the interval time between each image.
3. Choose "SHOW"
PLAY will play the stored files once as a slideshow.
4. Choose "SHOW"
REPEAT will play the stored files as a slideshow
repeatedly.
48
1. 1.Enter
Välj “ROTATE”
ROTATE .
2. 2.Choose
Välj bland de
möjliga sätt
att you
vridaprefer.
bilden. There are 5 angels available as below.
the5 rotation
angle
RIGHT
90
180 än 6MPHOR
IZONTAL
OBS! Det
går endast
att LEFT
rotera 90
bilder mindre
(2816x2112)
0
0
0
VERTICAL
The Rotate feature can only be used with resolutions less than 6MP (2816 x 2112).
49
Bildvisning
Playback Mode
Bildvisning
Playback Mode
DPOFStandard
DPOF - STANDARD
Copy To Card
Kopiera
till minneskort
1.
Med DPOF
kanallows
du markera
bilder
(max 30 st.)
1.This
option
you to
put för
theutskrift
print quantity
(MAX. 30 pcs) on your
2. [ONE
PIC] card.
- väljer hur många kopior av den valda bilden som ska skrivas ut.
memory
3. [ALL PICS] - väljer hur många kopior av samtliga bilder ska skrivas ut.
Operation Procedure
COPY TO CARD
2.[ONE PIC] - specifies the number of copies for a selected image and
NO
you
cankan
press
Button
to go toärnext
image.
OBS!
DPOF
inteLEFT/RIGHT
användas om inte
minneskortet
insatt.
3. [ALL PICS] - specifies the number of copies for all pictures apart from
movie clips and voice recording files.
YES
Note: You cannot see the "PRINT" function on the LCD Monitor if a
memory card is not inserted.
Så här kopierar du dina bilder till minneskortet.
This feature allows you to copy the files stored in the internal flash
memory to the memory card.
DPOF
DPOF
DPOF
Operation Procedure
DPOF
STANDARD 00 PIC
STANDARD ONE PIC
INDEX
INDEX
NO
PRINT SIZE DEFAULT
CANCEL
CANCEL
100-0021
Operation Procedure
00 PRINTS
Väljer du “YES” kan du skriva ut en översikt av alla bilder.
This option allows you to put the number of copies for index prints and print
out all images as thumbnail display. [YES] - you can print out the index
prints for all images.
DPOF
- Storlek
DPOF - SIZE
Välj
papperstorlek
(3x5,
4x6,
ochprintout
DEFAULT)
beroende
skrivare. 3X5, 4X6,
This
option allows
you
to5x7,
set 8x10
up the
paper
size på
including
5X7, 8X10 and DEFAULT based on the setting of your printer.
ALL PICS
PRINT SIZE DEFAULT
NO
DPOF
- Index
DPOF - INDEX
NO
Operation Procedure
DPOF - CANCEL
Raderar
alla DPOF
inställningar
du gjort.
This option
allows
you to cancel
all settings above including STANDARD,
INDEX, SIZE.
EXIT: DSC
MOVEPIC. :
SET: OK
50
51
Fjärrkontrollen
IR Remote Controller
PC-kamera
PC Camera
Hur du
PC-kamerafunktionen
How
Toanvänder
Use PC Camera
Function
Du kan
använda
fjärrkontrollen
till To
din
You
Can
Use Remote
Controller
kamera
Operate The Camera
1. Fjärrkontrollen fungerar mellan 3m (inomhus)
och 6m (utomhus).
2. Fjärrkontrollen fungerar på 15 graders vinkel
mellan fjärr och kamera
The
working distance
of the
3. Ta1.bort
batteriskyddet
innan användning.
remote control is 3.0m(outdoor)
or 6.0m(indoor).
2. The effective range of the remote
control is 15 degrees for both
horizontal and vertical angle from
the remote control sensor on the
front of camera.
3. Please remove Battery Protector
before using.
USB ?
Computer
DISK
PC CAM
PRINTER
CONFIRM:OK
1.
2.
3.
4.
Installera “PC Camera Driver” (se. sid 65)
Koppla in kameran till din PC med USB-kabeln
Välj “PC CAM” På kamerans skärm och tryck OK.
1. PC-kameran
To use the genom
camera
as a PC camera, the "PC Camera Driver" is
Starta
MSN.
required to be installed in your computer first (Please refer to page 65).
2. Connect the camera with PC by the USB cable.
3. When the USB Cable is in connected, a menu will show on the TFT LCD
Monitor. Select "PC CAM"and then press Menu/OK Button. The camera
will automatically go to the PC CAM mode (the TFT LCD Monitor will be
switched off).
4. You can start on PC camera function by setting up the MSN messenger.
Changebatteri
The Remote Controller Battery
Byta
1.
2.
3.
4.
Om fjärren fungerar dåligt bör batteriet bytas
Dra ut luckan och ta ut batteriet
Sätt in det nya batteriet
If theluckan
Remote Controller does
Sätt1.
tillbaka
not work, please change a new
battery.
2. Slide out Battery Cover and take
out the battery.
3. Following the + indication and
insert a new battery.
4. Push the Battery Cover back to
close it.
You have to press and push the
battery cover on right side firstly
and then pull it out.
Please insert the Battery Protector
when you are not use the Remote
Controller.
52
53
Koppla
till skrivare
Printer Connection
(PictBridge Mode)
Koppla
till skrivare
Printer Connection
(PictBridge Mode)
Koppla kameran
till en skrivare
som
Connecting
The Camera
To A PictBridgestödjer PictBridge
Supported
Printer
Välj
bilder
att skriva
ut
Select
Pictures
To Print
Om
du har
en skrivare
stödjer
Pictbridge kan
koppla kameran
direkt till skrivaren för
If the
printer
yousom
have
supports
theduinterface
of PictBridge,
att skriva ut bilder.
PB
Lmsges
then you can have your camera connected with the printer
by the supplied USB cable to have the stored images print
out directly.
ONE PIC
ALL PICS
BACK:
Operation Steps
1. MENU
2. or
3.
4.
or
5.OK
00 PRINTS
SET:OK
EXIT:SH1
MOVE PIC:
SET: OK
[SELECT]: Endast de bilder som visas kommer skrivas ut
[ALL PICS]: Alla bilder läggs till för utskrift.
Ställa in antalet kopior för utskrift
1.
2.
3.
4.
5.
1. Sätt på både skrivare och kamera
2. När skrivaren är inkopplad, välj “Printer” på kamerans skärm
[SELECT]: The PictBridge function will be applied only to the picture
Välj [SELECT] Ellercurrently
[ALL PICS].displayed.
En skärm där du kan välja antalet kopior kommer visas.
Bläddra upp eller ner för att öka/minska antalet kopior. Max 30.
Använd
vänster
och
höger
för
att
bläddra
mellanwill
bilder.
[ALL PICS]: The PictBridge
function
be applied to all pictures.
Tryck på OK för att spara.
Tryck på avtryckaren för att återgå utan att spara.
Setting the Number of Copies to Print
1.Select [SELECT] or [ALL PICS]. A screen where you can set the
number of copies to print will appear as shown above.
2. Press the Up/Down Button to select the number of prints.
Maximum 30 prints.
3. Use the Left/Right Button to select another picture and select the
number of prints for another picture.
4. After setting the number of prints, press the OK Button to save.
5. Press the Shutter Button to return to the menu without setting the
number of prints.
1. Have both the camera and the printer powered on.
2. Connect the camera to the PictBridge with supplied USB cable and
select "Printer".
3. Use the supplied USB cable to connect the camera to the PictBridgesupported printer as shown above.
54
55
Koppla
till skrivare
Printer Connection
(PictBridge Mode)
AUTO SET
[YES]: Alla värden från [CUSTOM SET] Ändras automatiskt.
[NO]: Värderna i [CUSTOM SET] behålls
AUTO SET
[YES]: All values in the [CUSTOM
SET] are automatically
changed.
NO
YES
[NO]: [CUSTOM SET] values are
kept.
BACK:
SET:OK
DPOF PRINT
Här väljer du om du ska tillämpa DPOF informationen eller ej.
DPOF Print
[YES]: Skriv ut med DPOF
This allows you to directly print the files
[NO]:with
Avbryt
utskrift
DPOF
information.
NO
[YES]: Directly print the file with the
Beroende på tillverkare kan vissa menyval vara
DPOF information.
otillgängliga
YES
BACK:
Operation Steps
SET:OK
Om skrivaren
stödjer
DPOF
kommer funktionen
[NO] :inte
Cancel
the
printing.
synas men ej vara tillgänglig.
Depending on the manufacturer and
printer model, some menus may not
be available.
Operation Steps
1. MENU
2. or
3.
4.
or
5.OK
1. MENU
2. or
3.
4.
or
5.OK
CUSTOM SET
Här kan du välja pappersstorlek, utskriftformat,
papperstyp, kvalitet, datumutskrift, filnamnsutskrift.
CUSTOM SET
You can select the Paper Size, Print
Format, Paper Type, Print Quality,
Date Print, and File Name Print
menus for printed pictures.
SIZE
LAYOUT
TYPE
QUALITY
BACK:
Operation Steps
1. MENU
2. or
3.
4.
or
5.
or
6.
7. OK
Koppla
till skrivare
Printer Connection
(PictBridge Mode)
SET:OK
SIZE
LAYOUT
TYPE
QUALITY
DATE
FILE NAME
56
Setting the size of
pappersstorlek
theVälj
printing
paper
Setting
number
of
Väljer
hurthe
många
bilder
pictures
be printed
som ska to
skriva
ut per
ark.
on a sheet
of paper
Väljer
av of
Setting
thetyp
type
skrivarpapper
the printing
paper
Setting the quality of
Väljer utskriftkvalitet
the
picture to be printed
Setting whether to
Ställer in datumutskrift
print the date
Setting whether to
Ställer
in filnamnsutskrift
print the
file name
If the camera is connected to a printer
without supporting the DPOF, the
menu is still displayed but the function
is not available.
Printing Pictures
Skriva
ut bilder
[INDEX]: Skriver ut flera bilder på ett papper
PRINT
[STANDARD]: Print the pictures stored
Tryckin
påthe
OK memory
för att avbryta
cardutskrift.
in set numbers.
STANDARD
Each picture will be printed on one
piece of paper.
INDEX
BACK:
Operation Steps
[STANDARD]: Skriver ut bilderna som finns på
minneskortet, varje bild får ett papper.
SET:OK
[INDEX]: Print multiple images on one
sheet of paper.
Please press down OK Button to stop
printing.
1. MENU
2. or
3.
4.
or
5.OK
57
Koppla
till skrivare
Printer Connection
(PictBridge Mode)
Reset
Återställning
Med den här funktionen återställer du alla ändringar
du gjort till fabriksinställningar
[YES]: Alla inställningar går tillbaka till standardinställningar
This function allows you to initialize
RESET
user-changed configurations.
NO
[NO]: Återställer inte inställningarna.
[YES]: All print and image settings
will be reset back to the default.
YES
BACK:
Koppla
till TV
TV Connection
[NO]: Settings will not be reset.
SET:OK
All default printer settings are based
on the those of the printer
manufacturer.
Operation Steps
1. MENU
2. or
3.
4.
or
5.OK
Koppla in den medföljande videokabeln i kamerans usb-port till TVn´s videoingång.
Sätt på TV och välj A/V
Sätt på kameran och välj uppspelning
Connect the USB connector of the camera to video input ports
the TV set
with
themellan
supplied
AV Cable.
Använd of
styrspaken
för att
välja
bilderna
Turn on the TV and switch the TV/Video switch to A/V mode.
Power on the camera and then switch to the Playback Mode.
Press the Joystick to go to the next or last image for TV reviewing.
58
59
Koppla
till PC
PC Connection
Hur
kopplar With
kameran
till en dator
Howman
To Connect
A Computer
D a t o r u p p k/ o
p p l i n g Connection
Computer
Notebook
Koppla
till PC
PC Connection
Installera
drivrutiner
Installingkamerans
Camera Driver
1. Sätt in CD-skivan
1. Insert the CD-ROM in the CD-ROM Drive.
2. Klicka
Select
clickDriver”.
on " Camera Driver ".
2.
påand
“Camera
3. Installation has completed, please click on "OK".
3. När installationen är avslutad, klicka på OK
2
3
D
ator
Computer
Installera
Converter
InstallingArcSoft
ArcSoft
Media Converter
Om
inte kanbe
spelas
av kameran
kanMode,
den konverteras
genomtoArcSoft,
nedan
If a en
filefilcannot
played
on Album
it is required
convert
the följer en
guide
installation.
file toför
the
file format that the camera recognizes by using the ArcSoft Media
Converter (included in the CD-ROM).
1. Sätt in CD-skivan
1. Insert the CD-ROM in the CD-ROM Drive.
När kameran är inkopplad, välj “DISK” och tryck på OK.
I det här läget kan du ladda ner bilderna till din dator.
When the USB c onnector is in connection with the computer while the
camera is on, please select "DISK" and then press Menu/OK Button.
2.2.Klicka
på “ArcSoft
MediaConverter”.
Select
" ArcSoft
Media Converter ".
Choose
theklicka
language
3.3.Välj
språk och
OK and " OK ".
2
3
In this mode, you can download images to your computer .
60
61
Koppla
till PC
PC Connection
Koppla
till PC
PC Connection
10.
DirectX”
och välj
10.Klicka
Clickpå
on“Install
"Install
DirectX"
and“Finish”
choose "Finish".
4. Välj “Next”
4. Select "Next"
5.
på click
“Yes” on
efter
att du
läst Licensavtalet
5. Klicka
Please
" Yes
" after
you read the license agreement.
5
4
10
6.
målmapp
programmetlocation
och klicka
“Next”the software, and then please click
6.Välj
Choose
theför
destination
topå
install
on " Next ".
7. Klicka på “Next”
7. Select or setup the program folder and then click on "Next".
7
6
Installera
Video
Impression
InstallingArcSoft
ArcSoft
Video
Impression
Om du vill redigera video kan du göra det med ArcSoft Video Impression, nedan följer
If you
to edit a movie file, please download ArcSoft VideoImpression.
guide
förwant
installation.
1.Sätt
Insert
the CD-ROM in the CD-ROM Drive.
1.
in CD-skivan
2. Please select" ArcSoft Video Impression ".
3.Choose setup language and then click on " OK ".
2. Välj ArcSfoft Video Impression
3. Välj språk och tryck på OK.
2
8.
8. Installerar...
Installing.
3
9.
Media
Player9”
och9"välj
“Next”
för att
bekräfta
installation,
väljMedia
“Skip”
9. Klicka
Click på
on“Install
"Install
Media
Player
and
choose
"Next"
to confirm
to eller
install
8
Player9 later, or "Cancel" to skip it.
62
9
63
Koppla
till PC
PC Connection
4. Klicka på nästa.
5. Klicka på Ja efter att ha läst licenseavtalet.
.
5
4
6. Välj vart i datorn du vill spara programmet och tryck därefter på nästa.
7
6
8. Installera.
9. Installationen är färdig, tryck på “Finish”.
9
8
64
Koppla
till PC
PC Connection
Installera PC Camera Driver
1. Sätt in CD-skivan i CD-ROM:en
2. Välj “PC Camera Driver”.
2
3. Klicka på “Next”.
4. Tryck på “Continue Anyway”.
.
3
4
5. Tryck på “Continue Anyway”.
6. Installationen är färdig, tryck på “Finish”.
6
5
65
Koppla
till PC
PC Connection
Installera
o Explorer
InstallingUlead
UleadPhot
Photo
Explorer
1.
in enthe
CD-skiva
1.Sätt
Insert
CD-ROM in the CD-ROM Drive.
2.Välj
Select
and
click
on " Ulead Photo Explorer ".
2.
“Ulead
Photo
Explorer”
Koppla
till PC
PC Connection
7.
målmapp
installationen
och klicka
sedan på
“Next”
7. Välj
Choose
theför
destination
location
to install
the
software, and then please click
on " Next ".
8. Välj de genvägar du vill ha och klicka på “Next”
8. Choose the short cut that you need to set up and then click on" Next ".
7
2
3.
Ulead
Photo
Explorer
8.5”. 8.5".
3. Klicka
Clickpå
on“Install
"Install
Ulead
Photo
Explorer
4.Välj
Choose
language,
4.
språk, setup
klicka på
“Next”. and then click on " Next ".
3
4
5.
på “Yes”
efter" Yes
att du
läst Licensavtalet.
5. Klicka
Please
click on
" after
you read the license agreement.
6. Skriv
Inputin user's
nameeller
andföretagets
companynamn
name,
on " Next ".
6.
användarens
ochthen
klickaclick
på “Next”
6
5
66
8
9.
målmapp
och klicka
på “Next”folder and then please click on "Next".
9. Välj
Select
or setup
the program
10.Välj
Please
click
on "Next" after
you select
the "country" and "video standard".
10.
land och
videostandard
och klicka
på “next”
.
10
9
11. Välj det du vill installera och klicka på “Next”
11. Select the option you want to install, and then click on "Next" to continue.
12. Installerar...
12.
Installing.
12
11
67
Koppla
till PC
PC Connection
13.
vad du
installera
ochwant
klickatopåinstall.
“Next” Please click on "Next".
13. Välj
Select
thevill
options
you
14.Installationen
Installationär
has
completed,
please
onkommer
"Finish"
andom.
the system will be
14.
klar,
klicka på “Finish”
ochclick
datorn
starta
restarted automatically.
14
13
Appendix
Error Message Table
Messages
Causes
Solutions
CARD FULL
There is insufficient card
memory capacity for
storing an image.
Delete the stored image(s)
in the memory card or insert
a new memory card.
MEMORY FULL
There is insufficient
internal memory capacity
for storing an image.
Delete the stored image(s)
in the flash memory.
CARD LOCKED
(ICON BLINKING)
The memory card is under
protection.
LOCK
The Image can not be
deleted under protection.
NO IMAGE
There is no image stored
in the memory card or
built-in flash memory.
FILE ERROR
File format error.
Insert a new memory card
or format the built-in flash
memory.
MEMORY ERROR
Memory is damaged
or fails.
Format the memory card or
built-in flash memory.
CARD ERROR
Card is damaged or fails.
Insert a new memory card.
Battery power is drained.
Insert a new battery.
LOW BATTERY !
(ICON BLINKING)
Unlock the protected image.
LOW LIGHT!
The environment is too dark Set the flash mode at Auto
in Flash off or "Night Scene''. Flash or Fill-in Flash.
HAND SHAKE ICON
Avoid shake.
The environment is too dark
Set the flash mode at Auto
in Flash off or "Night Scene''.
Flash or Fill -in Flash.
NO PAPER!
Paper has run out.
Please put more paper in the
paper tray of the Printer.
1. Remove the battery.
2. Reload the battery.
3. Switch on the camera.
Camera Hangs
68
Set the card protection switch
at non-protection position.
69
Appendix
Appendix
Specifications
Image
Sensor
Lens
LCD
Focusing
Shutter
Type
Effective Pixels
Total Pixels
Focal Length
F No.
Digital Zoom
Type
Range
Type
Speed
Exposure Control
Compensation
ISO Equivalent
Flash
Modes
Range
Self-timer
Shooting
Specifications
1/2.5" CCD
Approx. 6.186 mega pixels (2864x2160)
Approx. 6.369 mega pixels
DV Recording /
DSC Shooting
MPEG-4 (MPEG-4 encoded AVI format)
f = 6.09 mm (35mm film equivalent: 36.5mm)
F3.2, F7.0
Capture Mode:5x, Play Mode:2-8x (Base on the different image
size setting)
2.5" TFT LCD: Swivel Screen (290 degree rotation)
Album (PMP)
MP3 Player
MPEG-4 (MPEG-4 encoded AVI / Motion JPEG AVI format)
JPEG (YUV 422)
a file cannot be played back on Album mode, convert it into
the supported file format by using the ArcSoft MediaConverter.
MP3
Voice recording
WAV
Fixed Focus with Digital Zoom
Macro: 20cm/ Normal: 1.2 m~ infinity
Mechanical shutter and Electrical shutter
Mechanical & Electronic shutter
Normal: 2 sec - 1/1000 sec. Night Scene: 8sec - 1/1000 sec
Programmed AE
+
- 2EV (0.5EV / steps)
Auto, 100, 200, 400
5 modes (Auto / Auto Flash with Red-eye Reduction / Fill-in / Slow Sync /Off)
0.2 ~ 1.5 m, Recharging Time: <5 sec.(new battery condition)
10 sec., 2 sec., double with LED indicator
DSC Shooting
DV Recording
JPEG (EXIF2.2, DCF1.0, DPOF1.1)
8M: 3264x2448 (Via interpolation) 6M: 2816x2112
5M: 2560x1920 4M: 2304x1728 3M: 2048x1536
2M: 1600x1200
Single, Continuous Shooting
7 modes (Auto, Program, Portrait, Dawn, Backlight, Fireworks,
Night Scenery)
MPEG-4 (MPEG-4 encoded AVI format)
Metering
640x480 Pixels (VGA) 30 fps
320x240 Pixels (QVGA) 30 fps
Image: Normal, Fine, Super Fine
Video: Normal, Fine, Super Fine
(Compression rate from high to low)
Max. 30 fps with Normal Light Level
Advanced Electronic Image Stabilization technology compensates
for slight movements while video recording
Multi, Spot
Sharpness
Soft, Normal, Vivid
Quality
Live View
EIS
Effect
White Balance
Photo Frame
Editing Function
Playback Function
Storage Memory
* If
MODE
Game
Tetris, Soko, Snake, Puzzle
AV IN
Yes
Web Cam
Yes
Power Source
NP60 Li-lon Rechargeable Battery
Interface
Digital output connector: AV IN/OUT, USB 2.0 High-Speed (Max.
480Mb/s)
Built-in : Microphone, Speaker, IR Remote Controller
IR Remote
Controller
7 modes (Auto / Daylight / Cloudy / Fluorescent / Tungsten / Sunset /
Custom)
70
Indoor: 6m
Outdoor: 3m
Compatible
Language
Software
Mass storage
Camera
Driver
Approx. 115g(Battery and card exclusive)
Approx. 141g (Plus battery)
Approx. 143g(Plus battery and card)
English, Japanese, French, German, Spanish, Italian, Turkish,
Russian, Thai, Portuguese, T Chinese, S Chinese.
Mass Storage Driver for Windows 98SE
(Window 2000/ME/XP, Mac OS 9.2 or later don't require driver)
Web Cam
Web Cam Driver for Windows 98SE/ME/2000/XP
Driver
Application for
ArcSoft MediaConverter(Windows 2000/XPonly)
Windows
ArcSofr VideoImpression 2
Ulead Photo Explorer 8.5SE Basic
Application for
Ulead Photo Explorer 2
MAC
System
Requirements
System
Requirements
For Windows
9 options
Trimming, Rotation
Image / Movie Playback / WAV Audio Playback / Thumbnails /
Slideshow
Internal memory: 32MB flash memory
External memory: Built-in SD/MMC Card Slot (Max. 2 GB)
Working
Distance
105.4 (L)x60.4 H)x28(W) mm
*This function only can be used with Program Mode.
*This function can only be used when the resolution is set at less than 6 mega
pixels (2816x2112)
*This function cannot be used with Continuous shooting.
*This function only can be used with Program Mode.
15 degrees for both horizontal and vertical angle from the remote
control sensor on the front of Digital Camcorder
Dimensions
Weight
*This function only can be used with Program Mode.
*This function only can be used with Program Mode.
Effective
Range
PictBridge
*This function only can be used with Program Mode.
5 modes (Normal / B & W / Sepia / Negative / RGB custom)
JPEG
For Macintosh
Pentium III 800 MHz or equivalent
Windows 98SE/ME/2000/XP
256MB RAM (512MB recommended)
USB port, CD-ROM drive, 800x600 pixels, 16-bit color display
compatible monitor (24-bit color display recommended)
DirectX9.0c or above
Windows Media Player 9 or above
QuickTime 6.5 or above
Power Mac G3 or later Mac OS 9.2-10.3
Minimum 64MB RAM
110MB of available hard-disk space
USB port, CD-ROM drive
QuickTime 6.01 or above
"Specifications and product design are subject to change without any notice" .
71