1
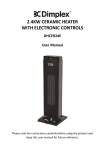
Instruction Manual For model DHCB20 Please read the instructions carefully before using the product and keep this user manual for future reference. 1. Product features PTC heating element Mechanical knob switch Mechanical knob temperature setting Overheat protection Tip-over protection Removable air filter for easy cleaning IP21 Rated. DC Fan Dust proof filter 1 2. Safety warnings Please operate the heater on a dry even surface This appliance is not intended for use by persons (including children) with reduced physical, sensory or mental capabilities, or lack of experience and knowledge, unless they have been given supervision or instructions concerning the use of the appliance by a person responsible for their Disconnect the heater from mains when not in use or when cleaning. Do not operate the appliance with a damaged cord or plug. If the power supply cord is damaged, it must be replaced by the manufacturer or its service agent or a similarly qualified person in order to avoid a hazard. Do not use an extension cord with this heater. Do not immerse cord, plug or any part of the appliance in water or any other liquid. Do not place the heater on or near any other source of heat. Warning: in order to avoid overheating, do not cover the heater. This may cause the unit to overheat Do not operate the heater below a wall socket-outlet. Do not use outdoors. When the heater is turned on for the first time, it may release a slight, harmless odour. This odour is a normal occurrence caused by the initial heating of the internal heating elements and should not occur again. Do not operate heater in areas where flammable liquids are stored. Do not attempt to repair, disassemble or modify the appliance. There are no user-serviceable parts inside. Do not insert or allow foreign objects to enter the ventilation or exhaust openings as this may cause an electric shock , fire or damage to the appliance. Do not use this heater with a programmer, timer or any other device that switches the heater on automaticlally Turn off the heater when not in use When using the heater, keep away from curtains, drapes, clothing, bedding and other such materials to avoid fire. Keep any combustible materials at least 1 metre away from the heater. The power supply, voltage and frequency must comply to the main technical specifications of the heater. If there is a fault, please do not attempt to disassemble the product, or replace the spare parts. Please contact the manufacturer or its service agent. The heater must be installed at least 1,8 m above the floor in accordance to local Electrical wiring regulations and wiring rules. The heater is to be installed so that switches and other controls cannot be touched by person in the bath or shower. 2 3. Parts description 1 2 3 4 5 6 1. On/Off Switch 3. Front Frame 5. Front Grill cover 7. Back cover 9. Air inlet 11. Wall bracket holder 13. Support tabs 7 8 9 10 11 12 13 14 2. Branding 4.Air outlet 6. Control panel 8. Air filter 10. Wall bracket knob 12. Base of wall bracket holder 14. Power cable 4. Installation instruction Heater can be used on the floor, on a desk or wall mounted If required for use in a bathroom the heater must be wall mounted. To mount on the wall A, Take out the wall holder set, unscrew the knob to separate the three Components Base of wall holder wall holder knob B, The minimum height from the unit to the ceiling should be 20cm and the distance from the unit to a wall must be at least 20cm. The heater must be mounted in a position that doors or other moving objects to not obstruct the airflow. 3 C, Select a location for mounting the heater. Secure the base of wall holder to the wall by screw, and then fix the wall holder to the base using the knob. Please see image below. D, Ensure the power button is at the top of the heater facing you, tilt the heater slightly and hook to the top of the wall holder then allow the bottom to rest on the bracket, thus securing your heater Bottom of the bracket E, To take the heater off the wall holder, tilt the unit from the bottom then unhook from the top. F, The wall bracket allows you to adjust the direction slightly, simply take the heater off the wall holder, and loosen the knob, you can then slide the bracket along the slot in the bracket to change to the direction preferred, then screw the knob firmly, placing the heater back on the bracket. 5. Operation instruction 5.1 Connect the power cord with the correct power supply (220-240V~). 5.2 Heat selections are Off, Low 1300W and High 2000W 5.3 Turn the temperature knob to the preferred heat, the room temperature will increase gradually A. When the room reaches the selected temperature the heater will turn off. As the temperature drops below the selected temperature the heater will start again. 4 6. Product maintenance and cleaning. Ensure you check the filter is free from dust as this will affect the operation of your heater. Clean filter frequently. Notice Please do not use harsh chemicals to clean the filter To clean Make sure the heater is turned off and has cooled. Disconnect the power cord or turn off the isolation switch, to reduce the risk of an electrical shock. Use a soft dry cloth to remove any dust from the surface of the heater. Do not use any abrasive or corrosive cleaning products that can damage the surface. If you are facing the heater, slide out the filter from the right rear. Pull out the filter as the direction showed below Filter bracket filter Clean the filter with water and a gentle detergent under the temperature of 30℃. Allow the filter to dry completely before sliding it back into the heater. Please dispose the product responsibly to promote the sustainable reuse of material resources. To return your used device, please use the return and collection systems or contact the retailer where the product was purchased. Glen Dimplex New Zealand Ltd P O Box 58473, Botany, Auckland New Zealand Ph: 09 274 8265 Email: [email protected] 5