1
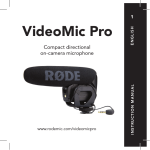
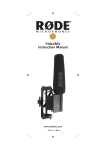
VideoMic Pro Instruction Manual www.rodemic.com Introduction Thank you for investing in the VideoMic Pro. released the original VideoMic in When 2004 it was the only microphone of its kind on the market. Just like many great innovations it was born from a personal need. At the time MiniDV cameras were the latest technology, offering consumers and independent filmmakers unprecedented freedom and creativity for their video, but neglecting audio quality. I went shopping for a solution but found that the only offerings were either cheap inferior quality or high cost shotgun microphones not designed to integrate easily with the cameras. Thus the VideoMic was born. Six years on and its broadcast audio quality, integrated shock mounting and accessible price tag has made it the world’s largest selling microphone for consumer cameras. However in this time there have been numerous innovations in video cameras, from hard drive, solid state and network cameras, through to high definition Digital SLR and onwards to large sensor video cameras. The technology has gotten larger but of course the form factor much smaller, thus the decision to create the high performance, yet conveniently compact VideoMic Pro. Creating a high performance microphone as lightweight and manageable as the VideoMic Pro was quite a technical challenge. Other companies have attempted and failed, simply because a directional microphone depends on the length of the microphone barrel to reject the surrounding ambient noise that you don’t want to pick up. Leveraging the technology developed alongside our award winning NTG-1, NTG-2 and NTG-3 shotgun microphones we’ve finally realised a professional microphone with a much smaller form factor. Please take the time to visit www.rodemic.com and register your microphone for a full ten year warranty. Peter Freedman Microphones Sydney, Australia -2- Specifications Acoustic Principle: Line Gradient Polar Pattern: Super-Cardioid Frequency Range: 40Hz ~ 20 000Hz Frequency Range: (High Pass Filter) Selectable HPF @ 80Hz/12 dB/octave Variable Level: 3 position switch (-10 dB, 0 dB, +20 dB) Output Impedence: 200 Signal to Noise Ratio: 74 dB Equivalent Noise: 20 dBA SPL (A- weighted as per IEC651) Maximum SPL: 134 dB Maximum Output: +6.9 dBu (@ 1% THD into 1K load) Sensitivity: -38 dB re 1V/Pa (12.6mV @ 94 dB SPL) ± 2 dB @ 1kHz Dynamic Range: 114 dB (as per IEC651) Power Requirements: 9V alkaline battery (Current: 7.8mA) Output Connection: 3.5mm stereo mini-jack plug (dual mono) Battery Life: >70 hours Weight (No Battery): 86g (3oz) Dimensions 43mm x 150mm x 95mm (1.69” x 6” x 3.74”) -3- Specifications Frequency Response dB re 1 V./Pa 10 0 -10 -20 -30 -40 20 Hz 100 1000 10 000 20 000 Polar Response 0˚ +5.0 0.0 -2.0 -4.0 -6.0 -8.0 -10.0 -12.0 -14.0 -16.0 -18.0 -20.0 -22.0 -24.0 -2.0 -10.0 -20.0 -25.0 90˚ 270˚ dB rel. 1V/Pa Frequency: 500 Hz: 1000 Hz: 2000 Hz: 8000 Hz: 14000 Hz: 180˚ -4- Features • Compact, lightweight body • Broadcast recording quality • Condenser microphone • 9V battery powered - over 70 hours use (alkaline) • Integrated shock mounting • Integrated foam windshield • 3.5mm stereo mini-jack output (dual mono) • Two step high-pass filter (0, 80Hz) • Three position level control (-10 dB, 0 dB, +20 dB) • Rugged construction • Flexible and lightweight cable to minimise handling noise and ensure isolation • Integrated camera-shoe mount, with 3/8” thread for easy boompole mounting • Australian designed and manufactured • Ten year warranty* *Online product registration required required. -5- Powering the VideoMic Pro • The VideoMic Pro operates on a standard 9V battery (ANSI:1604A or IEC:6LR61). We recommend you use either Alkaline or Lithium batteries for the longest continuous operating time. • The VideoMic Pro will run continuously for over 70 hours with a good quality Alkaline battery. It is however important to understand that battery performance can vary dramatically with ambient temperature and shelf life. Actual operation times will vary, and we suggest you always carry a spare battery. If the application is critical and where there is no opportunity to ‘re-shoot’, we suggest that you use a fresh battery. • Always remember to switch the VideoMic Pro off when it is not being used. -6- Installing the battery • To remove the cover, hold the sides of the cover with your thumb and third finger, and push up on the indentation with your index finger, then pivot the bottom of the cover away. • Insert the battery with the “-” negative terminal on top as shown above. The correct battery orientation is also shown on the inside of the battery cover. • Replace the cover by first hooking the top clips in, then press the bottom clips into place. The cover will push the battery against its spring terminal during installation. If the battery orientation is incorrect the cover will not close fully. -7- Mounting the VideoMic Pro Standard camera-shoe mount • The VideoMic Pro incorporates a standard camerashoe mount on the underside of the suspension shock mount. Designed to reduce motor and handling noise being carried through from the camera to the mic, the camera-shoe mount also has a 3/8” thread at the bottom to allow mounting on tripods and boompoles. • You will find older model and low cost cameras produce more motor noise, which the VideoMic Pro can pick up. If so, switch on the High Pass Filter (HPF) to reduce this (refer to page 10 for more details). The very latest cameras incorporate low noise/ vibration making them relatively silent. • Before sliding the camera-shoe into place, turn the knurled tightening ring anti clockwise to make sliding the camera-shoe into place much easier. Now turn the knurled ring in a clockwise direction, gently tightening it so the VideoMic Pro base is seated firmly in place. -8- The VideoMic Pro has a small cable clip on the underside of the shockmount to secure the cable in place and prevent any unwanted movement noise. Secure your cable on the clip on the underside of the VideoMic Pro shockmount • The VideoMic Pro delivers a mic level signal to the video camera via a stereo mini jack audio lead. The mini jack should be connected to the camera via the camera’s “Audio-In” socket - refer to your video camera user manual for the location of the socket on your camera model. • Now that you have the VideoMic Pro securely fastened to your camera and the audio output lead connected, you can switch the mic on. -9- VideoMic Pro Controls On/Off & High Pass Filter Switch • The power/HPF switch is located on the back of the mic body. Mic OFF Mic ON (FLAT) Mic ON (HPF) Power/High Pass Filter Switch The High Pass Filter (HPF ) is a low frequency cutoff setting, which you can use to remove rumble or other low frequency noise while recording. It will affect the tone slightly but in some situations it may be required. LED Power Indicator • The power indicator LED flashes RED briefly when the mic is first turned on. This changes to GREEN indicating the battery has adequate charge. • When the battery runs low the LED will remain RED and you should replace the battery. The mic will work for approximately one hour once the RED indicator is lit, however with reduced performance. Level Control • The VideoMic Pro features three settings to control the output signal to your recording device. These are set via the bottom selector switch on the back of the microphone. - 10 - Three position level control switch - The left setting (-10) will reduce or attenuate the signal by 10 dB, meaning that loud sound sources will be reduced and be less likely to overload or ‘clip’ the input of the camera. - The right setting (+20) will increase the signal level by 20 dB. This is useful where you have a very quiet sound source, or your camera requires a higher input level for better signal to noise ratio (as in many Digital SLR cameras). Loud sound levels can cause serious hearing damage. Take care when setting the audio levels especially while wearing headphones. Please note that when setting the input level you should always be mindful of your camera’s internal audio level setting. If you have the +20 dB level selected on the VideoMic Pro you may want to reduce the level on your camera. As always it is recommended to test your audio first before recording anything of importance. • The VideoMic Pro has been optimised for high rejection of radio frequency interference, but we suggest you keep all transmitters, cell phones, pagers etc. at least two metres away to reduce the possibility of interference ruining your recordings. - 11 - Shockmount & bands • The VideoMic Pro has been designed with an integrated suspension shockmount, which reduces the chance of transmitting handling noise to the mic when recording your audio. • This shockmount uses four elastomer suspension bands to hold the VideoMic Pro in its shockmount cradle. These bands have been created to be intentionally soft, again to mimimise the transmission of camera and handling noise through this material. • If the VideoMic Pro is shaken or knocked vigorously during use, the mic body may touch the sides of the shockmount cradle. This should be avoided as it may add unwanted noise. • During handling or transport, the bands attaching the VideoMic Pro to its shockmount cradle may become loose. They can easily be put back into place by hand. Please follow the instructions below to readjust the section necessary. Also, if the bands should become damaged or worn over time, the old bands can be fully removed and replacement bands fitted. Start by attaching your shockmount bands to the mic body. The shockmount cradle will then slip easily up under the bands and support the mic. You may wish to first remove the windshield foam, however this is not mandatory. The foam is not present in the following diagrams for ease of illustration purposes only. - 12 - Consult the image below to determine which band to use on the side of the mic that you are starting on. There are four bands in total, two of each shape. BAND TYPE ONE BAND TYPE TWO Top view of the VideoMic Pro. Use the band with the correct alignment for the area you are attaching The ‘arrow head’ end of the band is to be placed into the notch on the side of the mic body which is normally just below the windshield foam. Match the shape of the band to the notch, and press firmly into place. Ensure the lip on the band is caught against lip inside the notch to hold it securely in place. Press the ‘arrow head’ end of the band into the notch on the side of the VideoMic Pro body - 13 - Once the first end is secured, angle the square end of the band into the corresponding notch underneath the front or back of the mic body and press into place. Angle the square end of the band into the corresponding square notch on the bottom of the mic body Repeat the process for all four shockmount bands. Once all four are fitted on the mic body, pull up the shockmount cradle underneath the bands. The correct alignment will have the shoemount on the cradle closer towards the back end of the mic. Press the holes on bands onto the oval ‘hooks’ on the shockmount cradle, so that the mic body hangs above the cradle. Press the bands into the oval ‘hooks’ on the shockmount cradle. - 14 - General Operation • The VideoMic Pro comes pre-fitted with a foam windshield. It is not necessary to remove it, however if it ever is removed please take care not to tear the foam. The windshield should be left on at all times while recording, as even the slightest breeze can cause sound interference. has a full line of accessories such as windshields, boom poles, cable extenders and pistol grips. Please visit our web site www.rodemic.com for further details. • Shotgun microphones such as the VideoMic Pro have a narrow pick-up angle or polar response, and so can be used to great effect with cameras for news gathering, weddings or sporting events. The VideoMic Pro can be used in any situation where you want to listen to what’s in the shot, not what’s at the side or out of view. • Regular use of the VideoMic Pro will provide you with better results as you become more familiar with its sound and pick-up characteristics. • The VideoMic Pro is made from high-strength ABS, ensuring impact resistance and a longer life, however care must be taken not to get the VideoMic Pro wet. Treat the mic with care, the way you treat your camera, and you should have many years of reliable service. - 15 - Support If you experience any problem, or have any questions regarding your microphone, first contact the dealer who sold it to you. We have an extensive dealer network to assist you. If you have difficulty getting the advice or assistance you require, do not hesitate to contact us directly via the details below. International 107 Carnarvon Street Silverwater NSW 2128 Australia Ph: +61 2 9648 5855 Fax: +61 2 9648 2455 USA P.O. Box 4189 Santa Barbara, CA 93140-4189 Ph: 805 566 7777 Fax: 805 566 0071 Technical Support For information and technical support please visit www.rodemic.com/support - 16 -