1
Power Grid Inventory
User's Manual
Intro
Hello and welcome to Power Grid Inventory, or PGI, for short. In this manual you will find
details pertaining to some of the less-than-obvious elements of PGI as well as how to bend it
to your will to suit your needs. If you're looking for a quick n' dirty guide with examples to
get things rolling then have a look at the GettingStarted.pdf guide before reading this. As
well, be sure to check out the documentaion html files for complete details on all of the
classes and variables in PGI.
Even though the release version of PGI was made in Unity 5.1 if should work in versions
as early as 4.6.1. However, the scene files will not be comptaible in such a scenario.
If you're still confused, having trouble getting something to work, or feel there is a
feature lacking that would make PGI more suitable for your project then feel free to contact
me at
[email protected]
You can also find more detailed documentation files at
http://ancientcraftgames.com/pgi/docs/
Good luck and have fun!
Model / View Approach
One thing that bothered me about inventory options on Unity's asset store was that a)
there were very few that offered any grid-based system, and b) none that did not require
complex setup or ripping tons of code out before they could be used for my projects. I feel
that the true power of PGI comes from its ability to mostly stay out of the way of your vision
and design.
To that end the use of a model for storing and managing data and a view for rendering
based on data and allowing users to interact and manipulate the model is a key aspect of
PGI. And while they might be heavily coupled data structures I've tried to design them in a
way that they still allow a high degree of customization and utility. If for some reason the
default view is not to your liking (say for example, you need something that supports multifinger touch gestures or a gamepad) it is entirely possible to write your own. As well the
model is easier to manage when save and load data as well as transfer invetory states over
the network without having to worry about the view state getting in the way. Hopefully
1
between this manual and the documentation files, you will have all the information they
need to realize whatever it is you are looking for in your project using PGI.
It is also important to understand the versatility of the model. It doesn't just have to be a
grid-based inventory. It doesn't even need the grid at all! You could just as easily set up a
series of equipment slots that act as 'recipe' slots for a crafting table with a another slot that
stores the final result. Or use a single equipment slot to provide a location that players must
place a special key to unlock a door. Or provide a shop where players can purchase items by
clicking on them. Or a lootable body or chest. The possibilities are endless!
Major Components
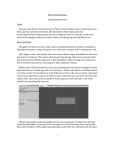
Model - PGIModel
2
⦁
Grid Colummns & Grid Rows values control the dimensions of your inventory grid.
These values can be zero if you wish to use no grid and instead rely on manually created
equipment slots - A useful feature for crafting stations or inventories that should trigger
special events (placing a specific key in a lock, a vender that rewards a player by
customizing the name of an item of their choice, etc..)
⦁
Auto-Detect Items: Setting this flag will activate a reoccurring coroutine that attempts
to syncronize the model's internal state with any PGI inventory items that have been
moved to or from the model's GameObject hierarchy. In otherwords, if a new
PGISlotItem is found as a child it will be registered with the model and show up in the
associated view (assuming there is room - otherwise it will be dropped from the
inventory). As well, previously registered items will be removed if they are suddenly
found to be missing from the model's hierarchy. This functionality is off by default as the
3
recommended (and more efficient) method is to manually call PGIModel.Picku()p and
PGIModel.Drop() in your code to add or remove items.
⦁
Modify Transforms: By default PGI will move your items around in the transform
hierarchy when they enter and leave various inventories. If this behaviour is
inappropriate for your game, simply disable this flag.
⦁
Auto Equip & Auto Equip First: Normally when an item is first entering the inventory
using the PGIModel.Pickup method it will only search for available grid spaces. When the
Auto Equip flag is set equipment slots will also be considered. If the Auto Equip First flag
is set then equipment slots will be considered before using the grid, otherwise they will
only be checked if the grid does not have enough space for the item.
⦁
Auto Stack: This is used to determine if stackable items should be combine when
entering the inventory (see more details about stacking below).
⦁
Allow Socketing: This is used to determine if a socketed item stored in this model can
accept socketable items to enter it (see more details about sockets below).
⦁
Equipment: The Equipment slots array can be assigned PGISlot objects that were
directly placed into the scene and represents specialized slots that items can be
'equipped to'. They are not considered part of the grid and do not take the item's size
into account. They can be used for any number of features including equipment slots,
crafting station material slots, trashcans, and more (see the paragraph above). You will
learn more about this in the 'Equipment Slots' section below.
⦁
Events: A variety of events are triggered on the item, model, view, and slot when items
are moved around during play. The most interesting are OnCanStore, OnCanRemove,
OnCanEquip and OnCanUnequip. By testing various situations and then setting the
incoming model's PGIModel.CanPerformAction flag to false you can disallow items from
being stored, dropped, equipped or unequipped from certain slots. The other events
might be useful for triggered events that occur after an action confirmed like playing
sound effects or applying stat bonuses to a character.
View - PGIView
4
⦁
Slot Prefab: This represents all of the functionality for a single grid cell that is
replicated when the view generates a complete grid. It will used the Slot Prefab
provided with PGI by default. For a customized look you will want to create one
following the guidelines below in the Slot Prefab Spec. These Slot Prefabs can also be
manually placed and linked to the model to create Equipment slots.
⦁
Drag Icon Prefab: *this feature is no longer available*
⦁
Model: The PGIModel that this view will display.
⦁
Disable Dragging & Disable Dropping: These control if this view can allow items to be
dragged away from, or dropped into, this inventory view. These are useful for read-only
5
inventories like vendors and trading screens.
⦁
Disable World Dropping: Normally users can drag items into any part of the screen
that does not have a UI element and it will tell the system to remove this item from the
inventory and return it to the 'world'. Setting this flag disables this behaviour if it is
unwanted.
⦁
Batch Slots: When set, this flag will move the child objects of grid or equipment slots
(i.e. the icon, highlight, and stack UI elements by default) around during runtime in
order to aid uGUI's batching system. It is recomended to leave this on as they can
significantly reduce draw calls and improve rendering performance. However, it can
occasionally cause rendering artifacts as well. Also keep in mind that this happens the
first time OnEnable() is called for this component. If this view starts out as inactive,
there may be a significant delay the first time it becomes active due to this behaviour.
The best workaround is to activate it when it is invisble or during a loading sequence
and then deactivate it until it is needed.
⦁
Horizontal Order & Vertical Order: These two values determine which way the grid is
ordered in the view. If you want you grid to change sizes or items should start at
different corners when they are placed into an inventory then this can be used for those
purposes. This does not affect the internal grid of the model or how any items or stored,
only the visible ordering of the grid's rows and columns.
⦁
Normal, Highlight, Socket Valid, Invalid, & Blocked Color: The five color values
control what tints the view's slots take on when various valid and invalid drag 'n drop
actions are performed.
⦁
Events: A variety of events are triggered on the item, model, view, and slot when items
are moved around during play. The view only handles a few special cases for when a slot
has been clicked, or hovered by a pointer.
Slot Items - PGISlotableItem
6
⦁
Icon Asset Type: PGI now supports sprites and 3D meshes for item icons. Use this to
choose which asset type you would like to use to display your item's icon within a PGI
inventory.
⦁
Icon: If the icon asset type is set to 'Sprite' this will be the sprite asset displayed for
the item within an inventory. If it is set to 'Mesh' this will be the 3D mesh asset
displayed for the item when in an inventory.
⦁
Icon Material: This is only visible for 3D mesh icons. It is the material to apply to
the mesh icon when in an inventory. Note that in many cases world lighting may not
be applied if your PGIView's canvas is not in camera or world space. In these cases it
might be desirable to use a material with a shader that requires no light source.
Another alernative is to set up a special lighting rig local to the PGIView and allow
it's lights only to interact with that view through the use of tags.
7
⦁
Icon Orientation: This is only visible for 3D mesh icons. Use this to provide the
initial orientation of the 3D mesh when viewed as an inventory icon. CoolTip: It is
possible to rotate an item in real-time by accessing the CanvasMesh component of a
slot and changing the rotation every frame. However, this process can be quite
expensive and should only be used with relatively simple meshes and only a few at a
time.
⦁
Inv Width: The number of horizontal cells this item requires in a model grid.
⦁
Inv Height: The number of vertical cells this item requires in a model grid.
⦁
Highlight: When this item is placed into a PGISlot, that slot's highlight will use this
color until the item is removed from that slot.
⦁
Stack ID: The identifying number that is used by the model to determine if two items
are considered stackable. Warning! Stacking is a destructive operation read below for
more details.
⦁
Max Stack: The maximum stack count this particular item can have. Items that do not
stack should have a value of 1. keep in mind the details below about stacking - This max
stack size only takes affect if another item is stacked 'into' this one. If another, otherwise
identical, item were to have a different value here and other items were stacked into it,
then the max size of that item would be honored instead.
⦁
Stack Count: The current stack size of this item.
⦁
References: Often you will need to access other components of your items when calling
your methods that are hooked to PGI events. This array can be used to store references
to those components so that you only have to cast them rather than make a call to
GetComponent<>(). This should help improve performance in some cases.
⦁
Events: A variety of events are triggered on the item, model, view, and slot when items
are moved around during play. The most interesting are OnCanStore, OnCanRemove,
OnCanEquip and OnCanUnequip. By testing various situations and then setting the
incoming model's PGIModel.CanPerformAction flag to false you can disallow items from
being stored, dropped, equipped or unequipped from certain slots. The other events
might be useful for triggered events that occur after an action confirmed like playing
sound effects or applying stat bonuses to a character.
Requirements: There are only two requirements for your items to be compatible with
PGI. Each item must be represented as its own GameObject hierarchy, and a PGISlotItem
component must be attached to the root GameObject of that item. As well, you must be
willing to settle for viewing your item as a Sprite within the default PGIView. Other than
that, you are free to use any kind of data structures and design patterns you wish for your
8
project's items.
Stacking: PGI supports stacking items but some care must be taken. You may use the
StackID, MaxStack, and StackCount values within the PGISlotItem to control stacking
behaviours. If MaxStack is set to a value of 1 or less then stacking will not take place. If
MaxStack is above 1, then it can potentially be stacked with any other item that has a
MaxStack above 1 and has the same StackID.
If StackCount is equal or greater than MaxStack, then no more items will be allowed to
stack with it using the PGIView (however, in code it is possible to exceed the limit by
manually setting the StackSize value).
Important! PGI does not use true stacking! Instead, each PGISlotItem keeps a counter of
how many 'virtual' copies it has. Internally, the model is manipulating this number and
when two stacks are fully combined it actually destroys the item that was placed into the
other! PGI assumes that all stackable items are exactly identical. If you try to use items that
are different with the same StackID you will find your data going missing quite often.
Admittedly, part of the reason for this was the fact that I somewhate shoehorned stacking in
at the last minute. But mostly it was because I figure it is somewhat natural to assume that
stacks of items are identical and in this way PGI can conserve memory by only keeping a
single insance of an object around when stacking.
Splitting Stacks: There is no built-in feature for splitting stacks because it is a realtively
simple process. You simply instantiate a new copy of the GameObject your PGISlotItem is
attached to using GameObject.Instatiate(), set its StackCount to the desired value and then
set the StackCount of the original stack to the difference. Presto!
Slots - PGISlot
9
⦁
Highlight: A reference to an Image component that represents the highlighting portion
of the grid cell. This image will be manipulated by the colors specificed in the PGIView.
⦁
Icon Image: A reference to the image that displays the cells current icon. The sprite that
is used by this Image when the cell is empty is treated as the 'default' icon and will be
restored whenever that cell becomes empty. When an item is stored within the cell, that
item's PGISlotableItem.Icon will be displayed in this image instead.
⦁
Icon Mesh: A reference to the CanvasMesh component that displays the cells current
icon as 3D mesh. Currently you cannot provide a default 3D mesh icon for a slot. It will
be lost the first time an item is equipped to that slot.
⦁
Stack Size: A reference to an Text component that displays the cell's current item's
stack size. When the item's stack size is 1 or less, this Text component will be disabled.
⦁
Events: A variety of events are triggered on the item, model, view, and slot when items
are moved around during play. The most interesting are OnCanStore, OnCanRemove,
OnCanEquip and OnCanUnequip. By testing various situations and then setting the
incoming model's PGIModel.CanPerformAction flag to false you can disallow items from
being stored, dropped, equipped or unequipped from certain slots. The other events
might be useful for triggered events that occur after an action confirmed like playing
sound effects or applying stat bonuses to a character.
Slots are usually composed as a prefab that is then replicated by the PGIView for use in a
grid. These prefabs may also be placed in the scene and directly linked with the PGIModel to
create equipment slots. Either way, you can create custom looking slots using Unity's new UI
10
system. However, PGI has very specific minimum requirements that must be met if you
decide to do this. You can learn more about this below in the Slot Prefab Specs section.
WARNING: When BatchGrid or BatchEquipment is turned on in a PGIView, any child
objects of the root slot GameObject that have a SlotBatch component attached to them will
be moved around in the heirarchy during runtime (as opposed to edit time). Keep this in
mind if you are designing custom slots.
Socketable Items - Socketable
⦁
Socket Id: An identifying number that is compared to any socketed item you wish place
this item in. They must match in order for the socketing to occur.
⦁
Events: A variety of events are triggered on the items involved in socketing. The most
interesting is OnCanSocket. By testing various situations and then setting the incoming
model's PGIModel.CanPerformAction flag to false you can disallow items from being
socketed.
By attaching this component to a PGISlotItem you can make it a socketable item.
Socketable items can be 'inserted' into socketed by dragging and dropping them in the view.
When socketed, this item will become a child of the item it was inserted into.
Be aware that during the socketing operation no OnRemovedFromInventory event will be
triggered on this item so it will effectively disappear from the model's awareness. As well,
once socketed, this item will no longer trigger or receive any PGI events when its parent
interacts with various inventories.
It is entirely possible and valid to make a socketed item a socketable one too. In this way
11
you can nest socketable items within others and provide extra complexity to your game.
Socketed Items - Socketed
⦁
Socket Id: An identifying number that is compared to any socketable item you wish
place into this one. They must match in order for the socketing to occur.
⦁
Propogate Events: Currently not in use! In the future this setting will allow the parent
socketed item to propogate its inventory events to any socketable items inserted into it.
Currently, inventory events simply do no occur for socketable items that have been
inserted into something else.
⦁
Events: A variety of events are triggered on the items involved in socketing. The most
interesting is OnCanSocket. By testing various situations and then setting the incoming
model's PGIModel.CanPerformAction flag to false you can disallow items from being
socketed.
By attaching this component to a PGISlotItem you can make it a socketed item. Socketed
items can have socketable items 'inserted' into them by dragging and dropping them in the
view. When socketed, the socketable will become a child of this item.
Be aware that during the socketing operation no OnRemovedFromInventory event will be
triggered on the socketable item so it will effectively disappear from the model's awareness.
As well, once socketed, such items will no longer trigger or receive any PGI events when its
12
parent interacts with various inventories.
It is entirely possible and valid to make a socketed item a socketable one too. In this way
you can nest socketable items within others and provide extra complexity to your game.
Additional Information
Slot Prefab Specs
The SlotPrefab GameObjects that are fed into the models' equipment slots and the
PGIView are fairly simple and highly customizable to allow you to make your menu look the
way you want. However, there are a few minum requirements in order to ensure that the
view can process and render everything the way it wants to.
The root of the slot should have a RectTransform, Image, and PGISlot components
attached to it and it should be the child of a Canvas at some level (it does not have to be a
direct child). The RectTransform handles sizing of the slot to match the view's rendering
area. The image is needed to display the base image used by the slot, if any. And the PGISlot
is obviously what PGI needs to do its job.
There should be four child GameObject under the root. One represents the area that is
highlighted during drag n' drop operations and uses an Image component. Another is used
to display stack numbers and has a Text component. The final two use an Image and an
Image3D component respectively to represent the icon to display for the slot based on what
item is stored in it. If a 2D image is supplied when the slot is empty, this will be considered
the 'default' icon and will be used whenever the slot is empty. However, this only works for
the Image componet. Currently the Image3D cannot be used for a default icon. All four of
these child objects must also have an IgnoreUIRaycats component to allow the pointer to
work as normal without being blocked by the UI elements that are for displaying the slot's
information.
Performance Issues & Batching: Due to the way uGUI batches its geometry, PGIViews
have an option to aid in the process by allowing any PGISlot's child GameObjects that have a
SlotBatch component attached to be moved around and grouped in the view's heirarchy.
This may cause rendering artifacts, esepcially when transparent menus overlap one another
frequently. However, the performance gains can be quite significant so it is recommened to
keep this feature active. When designing custom slots with additional UI elements, be sure
to attach a SlotBatch component to any GameObject that you wish to take advantage of this
batching behavior.
13
Drag Icon Specs
This feature was recently removed. I've left this section in for now in order to inform
users that may have used it before that it is no longer available as such.
Event Triggers
Event Triggers are the real power of PGI and allow you to make anything from crafting
tables to diabolical puzzles for your players to solve! In fact they are so important that a
large number of features listed in the asset store are implemented entirely using them!
Indeed, most of the really cool stuff isn't built right into the core of PGI but in fact is
implemented as add-ons using event triggers. This was done to follow through with the
belief that PGI should stay out of the way of you project as much as possible and that you
should decide how things work. Check out the example scene that came with PGI for some
common ideas.
'Can...' events: Whenever PGI is about to attempt moving an item around in some
fashion is will usually perform a whole series of checks to ensure that everything is valid
before going through with it. Along the way it will also invoke the 'Can...' events - so called
because they check to see if the action in question can happen (OnCanEquip,
OnCanStoreInInventory, etc...). They get called many times and are used for everything
from action verification in the model to highlighting in the view. These methods are
extremely useful for you to develop your own system. A frequent feature is item filtering where you want to ensure than a particular kind of item can only be equipped to a particular
kind of slot. However, it is worth noting that they can be called quite frequently, sometimes
several times in a single frame, so it is worth making them relatively simple so that they
don't bog down your game when your user is dragging item around.
Many of the other events are useful when certain things need to happen. For example, if
you are making a game that provides players with stats bonuses when a certain weapon is
equipped you will want to make a component that applies and removes these bonuses in
two separate methods and then rig these method to one of the 'OnEquip'/'OnUnequip'
events that are triggered. Events can be rigged using the editor as well as through code.
Triggering Events
14
A very important limitation of PGI to understand is that the model almost never triggers
events (except for the failure events in rare cases). The reason for this is due to the fact that
internally the model may have to invoke some portions of code multiple times and it would
be excessive to invoke these method multiple times. As well, if your code depends on the
events being triggered exactly once - like in the above paragraph's example where we want
to apply stat bonuses only once - then the model must no assume that it can call these
method every time something happens.Instead, the view is responsible for handling many of
the triggered events. When moving items around, equipping, unequipping, and even
switching inventories, the view is mostly responsible for triggering the right event at the
right time.
All events for the model, the view, slot, and the item can be triggered through the
PGISlotItem's various 'Trigger...' methods. You can read more details about them in the
documentation files. As well, you can see an example of a manually triggering events in the
examples folder in the Example->CompleteExample->Scripts->Trashcan.cs file. In this file you
will see that because it is forcing items to be removed from the inventory it must also trigger
the appropriate events to ensure everything stays in sync.
Nesting Inventories
Nested inventories is a snap! Really, it just works. Just attach a PGIModel and a
PGISlotItem and you have one. You could even technically store an item in iself (though I
wouldn't recommend it). To see an example with the proper safegaurds in place check out
the example scene's Storage Bag and then look at the file Examples->CompleteExaple->
Scripts->ContainerItemcs for more info.
Customizing
As stated before, PGI is designed to stay out of your way as much as possible so to that
end I tried to incorperate as little design as I could into the system and rely on using the new
UI system in Unity 4.6 and later. As a result, PGI will not work with earlier version of Unity
but the benefit is that anyone who has worked with the new UI system will feel right at
home and will be able to quickly and easily adapt PGI to any look and feel they desire.
The Future
PGI was originally started because I could not find a decent grid-based inventory system
for Unity and I felt that enough of my heart and sould went into creating this that it
15
warranted making it available to others. I truely hope that it will provide you with what you
need to make your projects better and am looking forward to improving it in the future.
Features I have planned for the future will include: more Views that support GamePads and
a Click 'n Drop mouse interface, more variety of events, a few optimizations, and perhaps
other ideas suggested by users.
If you have any questions, concerns, or feature requests, please contact me at the [email protected] in the top of this manual and let me know. You can read
more in the generated documentation files at http://ancientcraftgames.com/pgi/docs/.
~James 'Sluggy' Clark
16