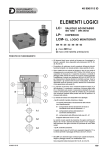
1
HDP serie Installation, Operation and Maintenance Manual INSTALLATION, OPERATION AND MAINTENANCE MANUAL 1 - GENERAL INFORMATION ................................................................................................................ 3 1.1 - PURPOSE OF THIS MANUAL..................................................................................................................3 1.2 - GLOSSARY, TERMS AND SYMBOLS .....................................................................................................3 1.3 - REQUESTING TECHNICAL ASSISTANCE ..............................................................................................4 1.4 - MANUFACTURER’S LIABILITY ...............................................................................................................4 2.1 - SAFETY STANDARDS..............................................................................................................................5 3 - TECHNICAL INFORMATION ............................................................................................................ 8 3.1 - EQUIPMENT IDENTIFICATION ................................................................................................................8 3.2 - DESCRIPTION OF THE EQUIPMENT ......................................................................................................8 3.3 - CONFORMITY ...........................................................................................................................................9 3.4 - OPERATING LIMITS AND CONDITIONS .................................................................................................9 General information 1.5 - SUPPLEMENTARY INFORMATION .........................................................................................................4 2 - SAFETY INFORMATION ................................................................................................................... 5 4 - HANDLING AND TRANSPORT ...................................................................................................... 10 4.1 - PACKAGING SPECIFICATIONS ............................................................................................................10 4.2 - HANDLING INSTRUCTIONS ..................................................................................................................11 4.2.1 - Moving the packages ......................................................................................................................11 4.2.2 - Moving the equipment.....................................................................................................................11 4.3 - STORAGE ...............................................................................................................................................14 5 - INSTALLATION ............................................................................................................................... 15 5.1 - INSTALLING THE GEAR UNIT ...............................................................................................................15 5.1.1 - Gear units with solid output shafts................................................................................................17 5.1.2 - Gear units with hollow output shafts with keyway.......................................................................18 5.1.3 - Gear units with shrink disc .............................................................................................................18 5.2 - INSTALLING A MOTOR WITH AN IEC STANDARD FLANGE (optional variant AD-GL-GR) .............19 5.3 - INSTALLING CONNECTING ELEMENTS ..............................................................................................20 5.4 - ACCESSORIES AND OPTIONAL VARIANTS........................................................................................21 5.4.1 - AUXILIARY COOLING/HEATING SYSTEMS (optional variant FANL, FANR, FANLR, MCRW... , MCRA... , SR, HE) .........................................21 5.4.2 - LUBRICATION SYSTEM (optional variant OP, OP1, OP2, OP... , MOP) .......................................28 5.4.4 - GEAR UNIT WITH FIXING FLANGE (optional variant F...L, F...R) ................................................31 5.4.5 - GEAR UNIT WITH SLEEVE FLANGE (optional variant FM) .........................................................32 5.4.6 - SEALS AND GASKETS (optional variant VS, DS, DVS, TK).........................................................33 5.4.7 - SENSORS (optional variant TG, OLG) ...........................................................................................33 5.4.8 - DRYWELL (optional variant DW) ....................................................................................................35 5.4.9 - ANCHORING OF TORQUE ARM (optional variant TA) ..................................................................35 For the installer 5.4.3 - BACKSTOP DEVICE (optional variant A CW, A CCW) ..................................................................30 5.4.10 - OTHER ACCESSORIES .................................................................................................................37 5.5 - PAINTWORK ...........................................................................................................................................37 5.6 - LUBRICATION ........................................................................................................................................38 5.6.1 - PolyAlkylene Glycol (PAG) synthetic oils......................................................................................39 5.6.2-PolyAlphaOlefin(PAO)syntheticoils ............................................................................................40 5.6.3 - Mineral oil with EP (Extreme Pressure) additives ........................................................................40 5.6.4 - Compatible greases.........................................................................................................................41 5.6.5 - Quantity of lubricant........................................................................................................................41 5.6.6 - Service plugs ...................................................................................................................................42 5.7 - PREPARING CUSTOMER SHAFTS .......................................................................................................47 5.8 - STARTING UP THE GEAR UNIT ............................................................................................................49 5.8.1 - Starting up autonomous control units (MCRW… , MCRA…).......................................................49 IOM Manual HDP_gb - Translation of original instructions in Italian - Rev 0 - 27/07/11 1 / 64 INSTALLATION, OPERATION AND MAINTENANCE MANUAL 6 - MAINTENANCE ............................................................................................................................... 51 6.1 - CHECKING OPERATIONAL EFFICIENCY.............................................................................................52 6.2 - ROUTINE MAINTENANCE .....................................................................................................................52 6.2.1 - MAINTENANCE OF AUTONOMOUS COOLING UNITS (optional variant MCRW... , MCRA...) .............................................................................................54 6.3 - CHECKING THE OIL LEVEL ..................................................................................................................55 For the user 6.4 - OIL CHANGES ........................................................................................................................................55 6.5 - CLEANING ..............................................................................................................................................56 7 - REMOVAL........................................................................................................................................ 57 7.1 - REMOVAL OF MOTOR WITH IEC STANDARD FLANGE (optional variant AD) ..............................................................................................................................57 7.2 - DISASSEMBLING A GEAR UNIT EQUIPPED WITH HOLLOW OUTPUT SHAFT WITH KEYWAY........................................................................................................................................58 7.3 - DISASSEMBLING A GEAR UNIT EQUIPPED WITH HOLLOW OUTPUT SHAFT AND SHRINK DISC COUPLING .............................................................................................................59 8 - TROUBLESHOOTING ..................................................................................................................... 60 8.1 - Gear units ...............................................................................................................................................60 9 - DISPOSING OF THE GEAR UNIT .................................................................................................. 63 For the disposer 8.2 - Autonomous control units ....................................................................................................................61 Revisions The revision list for this manual is given on page 64. The most recent versions of this manual are available at www.bonfiglioli.com. 2 / 64 IOM Manual HDP_gb - Translation of original instructions in Italian - Rev 0 - 27/07/11 1 GENERAL INFORMATION 1.1 PURPOSE OF THIS MANUAL This Manufacturer’s manual provides information regarding the safe transport, handling, installation, maintenance, repair, disassembly and disposal of the gear unit/gearmotor. All purchasing and design information is given in the sales catalogue. As well as adhering to good engineering practices, read the information in this manual carefully and apply it rigorously. Information about the motor used with the gear unit must be obtained directly from the motor’s own installation, operation and maintenance manual. Failure to observe the information provided herein may result in risk to personal health and safety, as well as damage to equipment. This information, provided in the Manufacturer’s original language (Italian), may also be made available in other languages to meet legal and commercial requirements. The documentation must be stored by a person charged to do so, in a suitable location so as to be always available in good condition for consultation. In case of loss or damage, replacement documentation must be requested directly from the Manufacturer, quoting the code of this manual. The manual reflects the state of the art at the time of commercialisation of the gear unit. The Manufacturer reserves the right to modify, supplement and improve the manual, without the present publication being for that reason considered inadequate. 1.2 GLOSSARY, TERMS AND SYMBOLS Some of the frequently occurring terms used in this manual are explained below to unequivocally define their meaning. Routine maintenance: a set of operations required for maintaining the functionality and efficiency of the gear unit. These operations are usually scheduled by the Manufacturer, who defines the qualifications and tasks in question. Non-routine maintenance: a set of operations required for restoring the functionality and efficiency of the gear unit. These operations are not routine maintenance operations. In order to maintain the proper functioning and safety of the gear unit/gearmotor, we recommend that users have non-routine maintenance performed by the manufacturer or an authorised, specialist service centre. Contact the manufacturer’s sales network. Failure to comply with this requirement during the warranty period automatically invalidates the warranty. Expert maintenance technician: an authorised technician selected from those having the qualifications, skills and mechanical and electrical training to do routine maintenance work on the gear unit. SYMBOLS: Particularly significant sections of the manual and important specifications are highlighted by symbols whose meanings are given below. DANGER - WARNING This symbol indicates situations of danger which, if ignored, may result in risks to personal health and safety. CAUTION - ATTENTION Thissymbolindicatestheneedtoadoptspecificprecautionstoavoidpersonalinjuryaswellas damage to equipment. IMPORTANT This symbol indicates important technical information. IOM Manual HDP_gb - Translation of original instructions in Italian - Rev 0 - 27/07/11 3 / 64 1.3 REQUESTING TECHNICAL ASSISTANCE For any technical service needs, contact the Manufacturer’s sales network (www.bonfiglioli.com) quoting the information indicated on the unit’s name plate, the approximate hours of service, the duty cycle and the type of defect. 1.4 MANUFACTURER’S LIABILITY The Manufacturer declines all liability in the event of: • use of the gear unit/gearmotor in contravention of local safety at work legislation • incorrect installation, disregard or incorrect application of the instructions provided in this manual • electrical power supply defects (for gearmotors and/or gear units with electrical devices) • modifications or tampering • work done on the unit by unqualified or unsuitable persons The functionality and safety of the gear unit also depends on scrupulous observance of the instructions given in this manual, in particular: • always operate the unit within its operating limits • diligently observe the routine maintenance schedule • only authorise trained operators to inspect and service the unit •theconfigurationsgiveninthegearunitcataloguearetheonlypermittedones •donotattempttousetheunitinanyotherway •theinstructionsgiveninthismanualdonotsubstitutebutrathersupplementtheprovisionsof established safety legislation. 1.5 SUPPLEMENTARY INFORMATION Additional information about the gear units described in this manual can be obtained from the sales catalogues available on the website www.bonfiglioli.com: • HDP Series parallel shaft gear units: Code 1920 4 / 64 IOM Manual HDP_gb - Translation of original instructions in Italian - Rev 0 - 27/07/11 2 SAFETY INFORMATION 2.1 SAFETY STANDARDS Carefully read the instructions given in this manual and those printed directly on the gear unit, especially those regarding safety. UsethegearunitonlyfortheapplicationsspecifiedbytheManufacturer.Improperusecanresult in risks to personal health and safety and damage to equipment. Persons charged with working on the gear unit at any time during its service life must be trained specifically for the purpose, must possess the necessary specific skills and experience, and must also be equipped with and trained to work with the appropriate tools and individual safety equipment as required by the safety legislation applicable in the place where the gear unit/gearmotor is installed. Failure to meet these requirements constitutes a risk to personal health and safety. ● Keep the gear unit at its maximum efficiency by following the routine maintenance schedule. Good maintenance ensures the unit’s maximum performance, extended service life and continued compliance with safety regulations. ● When working on the unit in areas which are difficult to access or hazardous, ensure that adequate safety precautions have been taken for the operator and others in compliance with established legislation on health and safety at work. ● All maintenance, inspection and repairs must only be carried out by an expert maintenance technician fully familiar with the attendant hazards. It is therefore essential to implement operating procedures which address potential hazards and their prevention for the entire machine. The expert maintenance technician must always work with caution in observance of applicable safety standards. ● During operation wear only the apparel and safety equipment indicated in the User Instructions provided by the Manufacturer or stipulated by the safety legislation applicable in the place where the gear unit is installed. ● Use the lubricants (oil and grease) recommended by the Manufacturer. ● Do not dump polluting materials into the environment. Dispose of all such materials as stipulated by current legislation. ● After replacing lubricants clean the gear unit’s surfaces and the walk-on surfaces around the work area. ● If the unit is to be serviced in a poorly lit area, use additional lamps and ensure that the work is done in compliance with the safety requirements of established legislation. ● During operational testing at the Manufacturer’s premises, the acoustic pressure measured under full load at a distance of 1 m from the unit and 1.6 m above ground level without vibration was less than 85 dB(A). The gear unit is a quasi-machine. The constructor of the plant or machine in which the gear unit is installed must therefore measure the level of noise emitted by the machine as required by the Machinery Directive 200/42/EC. The vibrations produced by the gear unit do not constitute a health risk for personnel. Excessive vibration may be the result of a fault, which should be immediately reported and eliminated. ● Unless they have backstop devices, gear units may reverse direction. If there is any risk of uncontrolled movement occurring in the event of a power failure (for example in load lifting applications) measures must be put in place to prevent such movement occurring (for example by using motors with brakes that engage automatically if the power fails). Ifthegearunitisinstalledinapositionthatcannotbereachedfromthefloor,theconstructorofthe plant or machine in which it is installed must provide, as necessary, suitable means for accessing a position from which the gear unit can be serviced. IOM Manual HDP_gb - Translation of original instructions in Italian - Rev 0 - 27/07/11 5 / 64 The user is responsible for using the products recommended for the installation and maintenance of the gear unit in an appropriate manner and in accordance with the Manufacturer’s instructions. Before putting the gear unit into service, the user must ensure that the plant in which it is installed complies with all applicable directives, especially those regarding health and safety at work. The constructor of the plant or machine in which the gear unit/gearmotor is installed must protect all rotating parts to prevent persons coming into accidental contact and incurring a risk of crushing, cutting or entanglement, especially if the gear unit operates automatically and in an accessible area. Do not use high pressure jets of water to clean the unit. All work must be performed exclusively with the gear unit at a standstill. ● The motor must be protected against accidental startup (e.g. by padlocking the main power switch or removing the power fuses). For this purpose, also affix a notice to the motor indicating that work is in progress on the gear unit. ● Do not perform welding work on the gear unit. The gear unit cannot be used as an earthing post for welding operations because this could damage or destroy parts of the gear teeth and bearings. ● The motor must be disconnected immediately if any alterations in the normal operation of the gear unit are noted when it is running, such as an abnormal increase in operating temperature or abnormal running noise. ● If the gear unit is to be installed in a plant or machine, the manufacturer of said plant or machine is required to include the prescriptions, instructions and descriptions contained in this manual in its own operating manual. ● If the gear unit is installed in situations that are particularly hazardous to personal safety, or that could cause serious damage to equipment, or that involve high inertial loads, vibrations, etc., such as: - suspended installations - motors supported exclusively by the gear unit - low speed shaft with shrink disc oriented downwards install suitable safety devices, such as harnesses, safety chains and restraining systems, etc., ● ● Depending on the operating conditions, the outer surfaces of the gear unit may reach very high temperatures. Serious burns hazard! When draining out spent oil at the time of an oil change, beware of the risk of serious burns caused by hot oil! In the presence of a vent plug with relief valve, wait for the oil in the gear unit to cool before openingtheplugandpayattentiontopossiblejetsofoilduringtransportation,lifting,installation, adjustment,operation,cleaning,maintenance,repair,dismantlingandscrapping. Wait for the gear unit to cool before inspecting it. 6 / 64 IOM Manual HDP_gb - Translation of original instructions in Italian - Rev 0 - 27/07/11 In the presence of accessories (optional variants), it is strictly forbidden to: • use any accessory for any purpose other than that specified in the contract of supply • fill any accessory with lubricants other than those recommended/permitted • use any accessory as a support or mounting surface • use any accessory as an attachment point for the handling or transport of the gear unit/gearmotor • modify any accessory in any way • loosen and/or remove any component (pipe, fitting, flange, control device, etc.) while the system is functioning and/or under pressure • fail to respect the requirements affixed to any accessory and/or to the gear unit/gearmotor, or remove, cover or render illegible any labels • start up any accessory without any relevant guards in place and functional • start up any accessory if damaged All work on any accessory must be performed by qualified personnel who have a thorough knowledgeoftheinstructionsandtechnicalspecificationsfortheproductandwhoareauthorised to perform such work by the safety supervisor. It is the responsibility of the manufacturer or assembler of the machine in which these gear units are incorporated to ensure the safety of that machine as a whole and its conformity to all relevant end product directives. Parts of accessories may be electrically live or in motion. The removal of electrical or mechanical guards,improperuseorinadequatemaintenancemaythereforeleadtoseriousinjuryordamage. IOM Manual HDP_gb - Translation of original instructions in Italian - Rev 0 - 27/07/11 7 / 64 3 TECHNICAL INFORMATION 3.1 EQUIPMENT IDENTIFICATION The gear unit bears the following identifying name plate. The name plate provides all references and indispensable instructions for safe use. The gear unit’s identifying code is explained in the sales catalogue. If the gear unit is supplied fitted with a motor (gearmotor), all information regarding the motor itself is supplied in the motor’s own manual. Name plate information Gear unit type Optional variants Product code Month / Year of manufacture Transmission ratio Rated torque at output shaft Mounting position Rated power at input shaft Approximate quantity of lubricant Weight Notes Name of Manufacturer Readability of the name plate The name plate and the information thereon must be kept readable. The plate should therefore be cleaned from time to time. Should the name plate wear and/or become damaged so as to compromise its readability or that of even one of the items of information thereon, the user must request a new name plate from the Manufacturer, quoting the information given in this manual, to replace the old one. 3.2 DESCRIPTION OF THE EQUIPMENT The gear unit has been designed and constructed for integration, driven by motor, into an assembly of interlocking parts or mechanisms as part of a specific application. Depending on the requirements of the application, the gear unit can be supplied in a variety of executions and configurations. It is designed to satisfy a range of specific requirements in the mechanical, chemical, agricultural and food industries, etc.. The Manufacturer supplies a range of accessories and optional variants to make these gear units as versatile as possible. For further technical information and descriptions, refer to the corresponding sales catalogue and the «OPTIONAL ACCESSORIES AND VARIANTS» section in this manual. The user is responsible for using the products recommended for the installation and maintenance of the gear unit in an appropriate manner and in accordance with the Manufacturer’s instructions. 8 / 64 IOM Manual HDP_gb - Translation of original instructions in Italian - Rev 0 - 27/07/11 3.3 CONFORMITY All gear units or gearmotors (when supplied with motor) are designed as state of the art devices and in compliance with the provisions of applicable Essential Health and Safety Requirements. All gearmotor motors conform to the provisions of the Low Voltage Directive 2006/95/EC and the Electromagnetic Compatibility Directive 2004/108/EC. 3.4 OPERATING LIMITS AND CONDITIONS The applications permitted by the Manufacturer are the industrial applications for which the gear unit has been designed. Ambient conditions ● The permitted ambient temperature range for these gear units is between -20°C and +50°C. In ambient temperatures between -20°C and -10°C, the gear unit must only be operated normally after the machine has been properly and gradually warmed up, or after initial no-load operation. Load may only be applied to the gear unit’s output shaft once the unit’s temperature has risen to -10°C or higher. The gear unit may not be used in areas and environments: ● ● with highly corrosive/abrasive vapours, smoke or dust In direct contact with loose food products. Do not use the gear unit/gearmotor, if not explicitly intended for the purpose, in a potentially explosiveatmosphereorwheretheuseofexplosion-proofequipmentisspecified. The following conditions must be borne in mind if the gear unit is equipped with auxiliary cooling units (MCRW… and MCRA…) or forced lubrication pumps (MOP… and OP…): ● permissible ambient temperature: -10°C to +50°C ● maximum oil pressure: 10 bar ● minimum start-up temperature: whatever temperature guarantees a minimum oil viscosity of 1500 cSt, generally within the range of +5°C to +25°C depending on the type of oil used. For precise temperature values, refer to the relevant sales catalogue and/or product data sheet of the lubricant manufacturer. Irrespectiveofthedegreeofprotectionspecified,outdoorinstallationsmustbeprotectedagainst directsunlight,inclementweather,andinfiltrationbywaterandforeignbodies,without,however, compromising effective gear unit ventilation. IOM Manual HDP_gb - Translation of original instructions in Italian - Rev 0 - 27/07/11 9 / 64 4 HANDLING AND TRANSPORT The person authorised to handle the product must take all necessary precautions to safeguard his own safety and that of all other persons involved. 4.1 PACKAGING SPECIFICATIONS The standard packaging, if supplied, and unless otherwise agreed, is not rainproof and is intended for shipping by ground and not by sea, and for storage in areas which are under cover and not humid. The material must be stored under cover in temperatures between -15°C and +50°C at a relative humidity not in excess of 80%. Storage in all other conditions requires specific packaging. In order to facilitate handling, heavy packages can be loaded on pallets. The most frequent types of packaging are shown in the figures below. Standard carton pallet packaging for single products and kits. Horizontal packaging Vertical packaging Wooden crates for miscellaneous products and shipments by sea. On receipt of the gear unit, make sure the delivery corresponds to the purchase order and that it is not damaged or faulty in any way. Report any problems to the Manufacturer’s sales network. 10 / 64 IOM Manual HDP_gb - Translation of original instructions in Italian - Rev 0 - 27/07/11 Dispose of packaging materials as stipulated by applicable legislation. 4.2 HANDLING INSTRUCTIONS Handle packages as per the Manufacturer’s instructions on the packages themselves, if present. Since the weight and shape of the packages may make manual handling unfeasible, special equipmentmustbeusedtoavoiddamageandinjury.Personsauthorisedforthispurposemustbe trained and experienced in the work in question to avoid risks to themselves and other persons. 4.2.1 Moving the packages Prepare a suitable, delimited area with a level floor or surface for unloading the packages. Prepare the equipment required for handling the package. The lifting and handling equipment (e.g. crane or lift truck) must be of adequate capacity for the weight and size of the load, taking into account its attachment points and centre of gravity. If required, this information is indicated on the package itself. Harness heavy packages with chains, belts and steel ropes after checking that they are suitable for the weight of the load, which is always specified. ● When handling the load keep it level horizontally to avoid tipping and instability. ● ● 4.2.2 Moving the equipment All the following operations must be carried out with care and caution and without sudden movements. When lifting, use accessories such as eyebolts, screw clamps, snap hooks, straps, ropes, hooks, etc.whicharecertifiedandadequatefortheloadinquestion.Theweightoftheunittobehandled isspecifiedonthenameplateand/orintherelativesalescatalogue. Donotuseeyeboltsonthemotortoliftgearmotorsunlessspecificallyinstructedtodoso. During lifting operations the load must not be allowed to swing beyond an arc of ± 15°. If greater swinging movements occur during the procedure, stop and repeat the operations required for the type of lifting system adopted. To rotate the gear unit, use the same attachment points used to lift it and proceed as instructed for lifting. Rotate the gear unit as closely as possible to a supporting surface. Pay special attention to the location of the centre of gravity to prevent the load from becoming unbalanced as it is being rotated. Lifting gear must be attached in such a way that it cannot slip off or move, as this could cause the load to fall. This is especially important if the gear unit is being rotated using slings or ropes, since these are particularly prone to slipping off their attachment points. IOM Manual HDP_gb - Translation of original instructions in Italian - Rev 0 - 27/07/11 11 / 64 Identify the attachment points for lifting the gear unit, as shown in the drawings. Prepare the gear unit for lifting by attaching straps, hooks, etc. to its attachment points, or alternatively use a pallet for moving the load. If using a crane, first lift the gear unit vertically out of its packaging. ● If using a lift truck or pallet truck, remove the packaging and insert the truck’s forks at the positions provided. ● First lift the load very slowly to only a limited height above the ground and check that the load is stable. ● Move the gear unit to the unloading area and lower it gently into position, taking care not to cause sudden oscillations while moving it. ● ● Do not use the shaft end threads or external pipes as lifting points. Take care not to damage any lubrication or cooling system accessories when lifting, moving or positioning the gear unit. x4 x4 x4 x4 x2 B3 B7 B6 x2 V5 Miscellaneousaccessories(e.g.connectingflanges,etc.)and/ormotorscoupledtothegearunit maysignificantlyalterthecentreofgravity,therebyimpairingthestabilityofthegearunit.Insuch cases it may be necessary to use an additional anchor point. 12 / 64 IOM Manual HDP_gb - Translation of original instructions in Italian - Rev 0 - 27/07/11 x4 x4 x1 x1 x4 B3 B7 x1 x4 x1 x2 B6 IOM Manual HDP_gb - Translation of original instructions in Italian - Rev 0 - 27/07/11 x2 V5 13 / 64 4.3 STORAGE Place the gear unit/gearmotor on a stable base and make sure that there is no risk of it moving or falling off. The following recommendations should be followed when storing the gear unit/gearmotor. 1. Do not store the unit in excessively humid conditions or where it is exposed to the weather (i.e. outdoors). 2. Avoid excessive variations in temperature as this can cause condensation inside the gear unit and its accessories. 3. Do not place the gear unit directly on the ground. 4. Store the packaged gear unit (if allowed) in accordance with the instructions on the packaging itself. If the gear unit/gearmotor is stored temporarily outdoors it must be protected to ensure that humidity and foreign matters cannot penetrate to the interior. If gear units and accessories are to be stored for periods under 6 months, if required, fill them with oil to the right level (see the “LUBRICATION” section in this manual) and run them at regular intervals (at least once every 4 weeks) for at least 1 hour, following all the requirements given in this manual. If the unit is to be stored for more than 6 months, the following additional precautions must be taken: 5. Coat all external machined surfaces with a protective anti-corrosion product such as Shell Ensis Fluid SX, Tectyl 506-EH or other product with similar properties and application range. Check the surfaces regularly and re-apply the coating as necessary. 6. Fill the gear unit with lubricating oil and replace the vent plugs with blind plugs. 7. Periodically rotate the gear unit’s input and output shafts through a few turns to avoid damage to bearings and seals. At the end of the storage period, replace the vent plugs before starting up gear units. Tostoregearunits/gearmotorswithadrywellsealingdevice,andforspecificneedsandtypesof storage, consult the Manufacturer’s Technical Service. 14 / 64 IOM Manual HDP_gb - Translation of original instructions in Italian - Rev 0 - 27/07/11 5 INSTALLATION 5.1 INSTALLING THE GEAR UNIT All phases of installation and maintenance must be planned to suit the overall design of the machine. The person authorised to do the work must, if necessary, implement a safety plan to protect the health and safety of all persons directly involved and apply all applicable legislation. It is essential for impact and strain to be avoided during the installation process. Before installing a gearmotor, also refer to the instructions contained in the installation and user manual for the motor. Before installing the gear unit: 1. Drain out the oil used for storage if it is not the same as the oil used for normal functioning, and flush the inside of the gear unit out thoroughly (see the “LUBRICATION” section in this manual). 2. Carefully remove all packaging and protective product residues from the gear unit using suitable solvents. Take special care over the mating surfaces but avoid getting solvents on the shaft seal rings. 3. Check that the data on the name plate correspond to those specified in the order. 4. Ensure that the structure in which the gear unit is to be mounted is sufficiently robust and rigid to support its weight and operating stresses. 5. Check that the machine in which the gear unit is to be installed is switched off and cannot be accidentally started up. 6. Check that all coupling surfaces are flat. 7. Check that the shaft/shaft or shaft/ bore are perfectly aligned for coupling. 8. Fit suitable guards to prevent accidental contact with the gear unit’s external moving parts. 9. If the work environment is corrosive for the gear unit or any of its parts, follow the special precautions required for aggressive environments. Contact the Manufacturer’s sales network for further details. 10. We recommend applying a protective paste to all key type couplings (Klüberpaste 46 MR 401, or a product with similar properties and application range) to ensure optimal coupling and protection against fretting corrosion. Clean all friction couplings thoroughly but do not apply any protective pastes. 11. To ensure effective coupling, the driven shafts should be machined to the tolerances specified in the “PREPARING CUSTOMER SHAFTS” section in this manual. 12. In the case of outdoor installations, protect the gear unit and any motor from direct sunlight and inclement weather by means of guards or a casing. Also make sure that the assembly is properly ventilated. 13. Make sure that the casing of the gear unit is connected to the earth circuit of the machine in which it is installed. 14. Evaluate whether accessible surfaces may exceed the temperature limits established in EN ISO 13732-1 on the basis of the gear unit’s conditions of use and ambient temperatures. If the temperature of accessible surfaces exceeds the limits established by EN ISO 13732-1 (65°C for occasional brief contact with exposed metal), the surfaces in question must be protected to prevent contact (by means of guards and/or lagging). Wherever impossible, signs bearing symbol 5041 of IEC standard 60417 “Warning! Hot surfaces” must be displayed in such a way that they are clearly visible to machine operators (bearing in mind the position and orientation of the gear unit). Symbol 5041 of IEC standard 60417 “Risk of burns! Hot Parts” IOM Manual HDP_gb - Translation of original instructions in Italian - Rev 0 - 27/07/11 15 / 64 Proceed with the installation as follows: 15. Place the gear unit in the vicinity of the installation area. 16. Mount the gear unit and secure it to the structure at the points provided. The gear unit should be secured to the structure using all the fixing points on the mounting provided (feet or flange). 17. Locate the closed oil plug used during shipping and replace it with the vent plug supplied in the shipment (if required). 18. Tighten down the mounting bolts and check that the service plugs are screwed down to the torque values given in the following table. (tab 1) Bolt torque [Nm] +5% /-10% Bolt size 16 / 64 Bolt class 8.8 10.9 M4 3 4.5 M5 5.9 8.9 M6 10.3 15.3 M8 25.5 37 M10 50 73 M12 87.3 127 M14 138.3 201 M16 210.9 314 M18 306 435 M20 432 615 M22 592 843 M24 744 1060 M27 1100 1570 M30 1500 2130 M33 1850 2600 M36 2350 3300 M39 X 3 3200 4500 M42 X 3 4050 5700 Thread Plug/Vent Pitch (threads per inch) Tightening torque [Nm] +5%/-10% 1/8” 28 5 1/4” 19 7 3/8” 19 7 1/2” 14 14 3/4” 14 14 1” 11 25 1” 1/2 11 25 IOM Manual HDP_gb - Translation of original instructions in Italian - Rev 0 - 27/07/11 Afterhavingtightenedthefixingboltscheckthealignmentoftheshaftsagain.Alignmentmustbe checked again and, if necessary, corrected after a few days of operation. In the presence of high external loads, in particularly dangerous mounting positions and in mountingpositionsotherthanB3,useClass10.9fixingbolts. 19. Fill the gear unit with oil or top up as necessary, as instructed in the “LUBRICATION” section in this manual. If the gear unit is equipped with a fan or an auxiliary cooling unit with an oil/air heat exchanger, leave enough room to ensure adequate air circulation. 5.1.1 Gear units with solid output shafts Do not use hammers or other tools which might damage the gear unit’s shafts or bearings to mount external parts. Proceed as shown below, following the recommendations of the “INSTALLING CONNECTING ELEMENTS” section in this manual: Bolt (1) and spacer (2) shown above are not included in the supply. To minimise the loads on the shaft bearings, when mounting transmission mechanisms with asymmetrical hubs use the configuration shown in diagram (A) below: (A) IOM Manual HDP_gb - Translation of original instructions in Italian - Rev 0 - 27/07/11 17 / 64 5.1.2 Gear units with hollow output shafts with keyway To facilitate mounting hollow shaft gear units to the machine’s cylindrical shaft, proceed as indicated in the following diagram: See also the “PREPARING CUSTOMER SHAFTS” section in this manual. The tie bolt (1) and spacer (2) are not included in the consignment. Alternative method: The tie bolt (1), spacer (2) and circlip (3) are not included in the supply. Install suitable devices to secure the hollow shaft to the machine shaft in an axial direction and prevent accidental decoupling. 5.1.3 Gear units with shrink disc Certain gear units may be equipped with a shrink disc for coupling the hollow output shaft to the driven shaft. When installing a gear unit of this type, proceed as follows: 1. Unscrew the locking bolts gradually one at a time and remove the entire shrink disc. 2. Clean and carefully degrease the coupling surface between the gear unit’s output shaft and the machine shaft. Do not use molybdenum disulphide or any other grease which could reduce the friction of the mating surfaces and affect the performance of the shrink disc. Adopt one of the following techniques to facilitate subsequent disassembly at the cylindrical guide section opposite the shrink disc. ● Use a protective paste (Klüberpaste 46 MR 401 or other product with similar properties and application range). ● Design the machine shaft as suggested in the “PREPARING CUSTOMER SHAFTS” section in this manual,toacceptaself-lubricatingcylindricalbushing,orwithaholefortheinjectionofananticorrosion liquid. 18 / 64 IOM Manual HDP_gb - Translation of original instructions in Italian - Rev 0 - 27/07/11 3. Fit the gear unit to the machine and couple its output shaft to the driven shaft. 4. Fit the shrink disc to the gear unit shaft. 5. Fully tighten down the shrink disc bolts gradually one at a time in a clockwise sequence using a torque wrench. This operation usually has to be repeated several times to reach the tightening torque Mt specified in the table below: (tab 2) HDP HDP HDP HDP HDP HDP HDP HDP HDP HDP HDP 60 70 80 90 100 110 120 130 140 150 160 Mt [Nm] 35 35 69 127 127 250 250 250 490 490 490 Torque the shrink disc as prescribed to assure axial fixing of the transmission, in the absence of external loads. The shrink disc coupling must not be disassembled nor lubricated before being reinstalled. Disassemble and clean the shrink plate only when it is fouled. When cleaning and/or during maintenance, lubricate only the sliding surfaces of the shrink disc using a solid lubricant with friction value of µ = 0.04, such as Klüber Molykombin UMFT 1 (or an equivalent product having the same characteristics and durability of performance). Neverrunthegearunitwhentheshrinkdiscprotectiveguardisnotfitted. In the presence of external thrust loads, vibration, safety problems, requirements for enhanced reliability, or unfavourable mounting positions (e.g. output shaft directed downwards), install suitable devices to secure the shaft in an axial direction and prevent accidental decoupling. 5.2 INSTALLING A MOTOR WITH AN IEC STANDARD FLANGE (optional variant AD-GL-GR) Thoroughlycleananddegreasetheflangeofthegearunitandtheareaofthemachinetowhichit is to be coupled. The correct execution of this procedure is essential for safe torque transmission. Do not use solvents or dirty rags to degrease mating surfaces. Donotusemolybdenumdisulphideoranyothertypeofgrease,asthiswouldsignificantlylower thefrictioncoefficientinthecontactareaandthereforeimpairthefunctionalityofthecoupling. Do not force the coupling and do not use inappropriate tools during assembly. Take care not to damage the flat/cylindrical coupling surfaces. ● Do not force the rotary coupling mechanisms with large thrust and/or overhung loads. ● To facilitate assembly, use a synthetic oil lubricating paste such as Klüberpaste 46 MR 401 or other product with similar properties and application range. ● Tighten down all motor/gear unit mounting bolts to their prescribed torques. See the “INSTALLING THE GEAR UNIT” section in this manual for details of tightening torque values. ● IOM Manual HDP_gb - Translation of original instructions in Italian - Rev 0 - 27/07/11 19 / 64 If the gear unit is installed in situations that are particularly hazardous to personal safety, install suitable safety devices, such as harnesses, safety chains and restraining systems, etc., 5.3 INSTALLING CONNECTING ELEMENTS Use the utmost caution when installing the various components, to ensure that no damage is caused to the gear unit and its parts, such as oil seals and mating surfaces, or internal parts such as gears and bearings. Make sure that you have access to suitable lifting equipment to perform the installation operations correctly. When installing external transmission parts do not use hammers or other unsuitable tools, to avoid the risk of damaging the gear unit shafts or supports. When installing connecting elements it is advisable to preheat them slightly. Take the following precautions when doing so: Adopt protection against contact with hot parts: risk of burns! Protect the oil seals from damage and accidental overheating to avoid impairing their functionality (use a heat shield to protect against radiated heat). The connecting or transmission elements must not transmit static or dynamic external loads to the shafts unless said loads have been calculated at the time of gear unit selection. If the element to be coupled to the shaft is not fixed axially by the interference of the coupling, utilise suitable retaining components to prevent axial movement of the element in question on the shaft. 20 / 64 IOM Manual HDP_gb - Translation of original instructions in Italian - Rev 0 - 27/07/11 5.4 5.4.1 5.4.1.1 ACCESSORIES AND OPTIONAL VARIANTS AUXILIARY COOLING/HEATING SYSTEMS Forced ventilation (optional variants FANL, FANR, FANLR) A fan is keyed to the gear unit input shaft and protected against accidental contact by a guard. Neverrunthegearunitwhenthefanguardisnotfitted. Aftereachmaintenanceinterventionrefittheguardsbeforerestartingthegearunit. The fan draws in air through the grille in the protective guard and conveys it to the gear unit casing, thereby dissipating a quantity of heat that depends on the rotation speed. The effectiveness of forced ventilation falls off dramatically: - at rotation speeds below n1=900min-1; if it proves necessary to increase the thermal capacity of the gear unit under such conditions, an auxiliary cooling device should be installed. - if dirt builds up on the blades of the fan or blocks the protective grille over the fan. Clean regularly as instructed in the “MAINTENANCE” section in this manual. FANL FANR FANLR (HDP100 ... HDP160) When installing a gear unit equipped with a forced air cooling fan, it is essential to allow ample spacearoundtheunittoensuresufficientaircirculationforcoolingpurposes. 5.4.1.2 Autonomous control units (optional variants MCRW... , MCRA...) Autonomous cooling units are specially designed to cool gear unit lubricant. They come installed on board the gear units, mounted on special plates and connected to the relevant unions by rigid pipes and/or flexible hoses, also included in the supply. Electrical connections and/or cabling to user points are the responsibility of the Customer and must be completed prior to start-up. IOM Manual HDP_gb - Translation of original instructions in Italian - Rev 0 - 27/07/11 21 / 64 Refer to the sales catalogue for information on the availability of the cooling devices for the different sizes of gear unit and for other technical specifications and dimensions. 5.4.1.2.1 Control units with oil/water heat exchanger (MCRW…). Cooling circuit and components 1) Electric pump with by-pass circuit 2) Filter with blockage indicator and bypass valve 3) Water/oil heat exchanger 4) Minimum pressure switch (only with forced lubrication) 5) Maximum temperature thermostat 6) Control thermostat 7) Solenoid valve Design and functional characteristics (MCRW…) MCRW… control units are available in various sizes, each with a different flow rate and cooling capacity. Oil is sucked directly from the gear unit casing and circulated through an external closed circuit by the electric pump [1], which has a by-pass valve calibrated at 6 bar to avoid overpressure in the system. Before returning to the gear unit, the oil passes through: - the filter with blockage indicator and by-pass valve [2], which eliminates any suspended solid particles and guarantees a more reliable and long lasting transmission (60 micron metal mesh filter element) - the copper tube bundle water/oil heat exchanger [3], which removes the excess heat generated by the gear unit To ensure the proper functioning of the auxiliary cooling system and to save energy and coolant, the following control devices are provided: - minimum pressure switch [4] - maximum temperature thermostat [5] - control thermostat [6] - water shut-off solenoid valve [7] 22 / 64 IOM Manual HDP_gb - Translation of original instructions in Italian - Rev 0 - 27/07/11 Technicalspecifications(MCRW…) Frequency of power supply 50-60 Hz (1) (tab 3) Control unit Electric pump Air/oil heat exchanger + solenoid valve Description V f Pn (D/Y) In Oil flow Water rate flow rate (Y connection) (2) [V] [Hz] [kW] [A] [l/min] MCRW 5 BN 71B 6 IP55 CLF B35 CUS 230/400 50 0.25 0.82 5.3 265/460 60 0.3 0.79 6.4 MCRW 9 BN 71C 4 IP55 CLF B35 CUS 230/400 50 0.55 1.55 9.5 265/460 60 0.65 1.55 11.4 MCRW 21 BN 80C 4 IP55 CLF B35 CUS 230/400 50 1.1 2.66 21.4 265/460 60 1.3 2.7 25.7 MCRW 34 BN 90LA 4 IP55 CLF B35 CUS 230/400 50 1.5 3.6 33.6 265/460 60 1.8 3.8 40.3 MCRW 51 BN 100LA 4 IP55 CLF B35 CUS 230/400 50 2.2 5.2 50.8 265/460 60 2.5 5.1 61 Fittings (GAS) Filter with element in metal mesh 60 μm [l/min] IN OUT Fittings (BSP) 10 3/8” F 3/8” M 3/4” 18 1/2” F 1/2” M 3/4” 31 3/4” F 1” F 3/4” 56 3/4” F 1” F 1 1/4” 81 3/4” F 1” F 1 1/4” (1) For different mains frequencies, contact the Manufacturer’s Technical Service. (2) Nominal flow rate may vary as a function of oil type and functioning temperature. 5.4.1.2.2 Control units with oil/air heat exchanger (MCRA…). Cooling circuit and components 1) Electric pump with by-pass circuit 2) Filter with blockage indicator and bypass valve 3) Air/oil heat exchanger with control thermostat 4) Minimum pressure switch (only with forced lubrication) 5) Maximum temperature thermostat IOM Manual HDP_gb - Translation of original instructions in Italian - Rev 0 - 27/07/11 23 / 64 Design and functional characteristics (MCRA…) MCRA… cooling units are available in various sizes, each with a different flow rate and cooling capacity. Oil is sucked directly from the gear unit casing and circulated through an external closed circuit by the electric pump [1], which has a by-pass valve calibrated at 6 bar to avoid overpressure in the system. Before returning to the gear unit, the oil passes through: - the filter with blockage indicator and by-pass valve [2], which eliminates any suspended solid particles and guarantees a more reliable and long lasting transmission (60 micron metal mesh filter element) - the air/oil heat exchanger unit aluminium radiator, electric fan and control thermostat [3], dimensioned to remove the excess heat generated by the gear unit The following control devices are provided to ensure the correct functioning of the accessory and to save energy: - minimum pressure switch [4] - maximum temperature thermostat [5] - adjustable control thermostat (on the heat exchanger [3]) Technicalspecifications(MCRA…) Frequency of power supply 50-60 Hz (1) (tab 4) Control unit Electric pump Description V f Pn Air/oil heat exchanger In Oil flow rate (Y con.) (2) [A] [l/min] 230/400 50 0.25 0.82 5.3 265/460 60 0.3 0.79 6.4 230/400 50 0.55 1.55 9.5 265/460 60 0.65 1.55 11.4 BN 80C 4 MCRA 21 IP55 CLF B35 CUS 230/400 50 1.1 2.66 21.4 265/460 60 1.3 2.7 25.7 BN 90LA 4 MCRA 34 IP55 CLF B35 CUS 230/400 50 1.5 3.6 33.6 265/460 60 1.8 3.8 40.3 BN 100LA 4 230/400 50 MCRA 51 IP55 CLF 265/460 60 B35 CUS 2.2 5.2 50.8 2.5 5.1 61 (D/Y) [V] MCRA 5 BN 71B 6 IP55 CLF B35 CUS MCRA 9 BN 71C 4 IP55 CLF B35 CUS [Hz] [kW] Degree V a.c. of protection [V] P I Fittings (GAS) 60 μm [W] [A] IN OUT Fittings (BSP) 55 0.25 55 0.25 3/4” F 3/4” F 3/4” 120 0.53 160 0.70 IP 44 1~230 IP 44 1~230 1” F 1” F 3/4” IP 54 3~230 180 0.61/0.35 1” F D/400Y 260 0.74/0.43 1” F 3/4” IP 55 3~280 230 1.12/0.65 1” F D/480Y 300 1.10/0.63 1” F 1 1/4” IP 55 3~280 230 1.12/0.65 1-1/2” 1-1/2” F F D/480Y 300 1.10/0.63 (1) For different mains frequencies, contact the Manufacturer’s Technical Service. (2) Nominal flow rate may vary as a function of oil type and functioning temperature. 24 / 64 Filter with element in metal mesh IOM Manual HDP_gb - Translation of original instructions in Italian - Rev 0 - 27/07/11 1 1/4” 5.4.1.2.3 Installing autonomous control units (MCRW… , MCRA…) Check that the actual mains power, mounting and service conditions correspond to those declared onthenameplatesofthecomponentsand/orspecifiedinthismanual. Electric motors must rotate in the direction shown on the components. Make sure that all electrical power cables are big enough to carry the current draw and suitable for the installation conditions. Inadequate cables can cause overheating and/or voltage drops. Information about the pump’s motor must be obtained directly from the motor’s own sales catalogue or installation, operation and maintenance manual. For all other devices, see the “SENSORS” section in this manual. Wiring and connections must permit a functioning logic suited to the functionalities of the control unit as described in the following section. MCRW…: Connections to the solenoid valve must respect the following specifications: Connection type: three pole, connector type DIN 43650 Contact type: NC (normally closed) Power [V/Hz]: 220-240/50 - 240/60 Consumption: 9 W DC Degree of protection: IP 65 (with connector fitted) To ensure maximum efficiency, provide a water supply system that corresponds to the following specifications: – max. pressure 10 bar – maximum water delivery temperature 20°C – minimum flow rate according to the table in the previous section and make the connections to the water supply circuit so that water enters the heat exchanger via the solenoid valve and the fitting furthest away from the oil circulation pipes, and leaves the heat exchanger through the fitting nearest to them. If the cooling water is very hard the use of a water softener is recommended. In the case of freezing temperatures or long periods of disuse, to avoid possible damage, the cooling water should be drained from the circuit and compressed air blown through the empty circuit to eliminate all residual moisture. MCRA…: Connections to the electric fan of the air/oil heat exchanger must respect the following specifications: MCRA5: Single phase power supply black blue yellow-green THERMOSTAT ELECTRIC FAN single phase CONNECTOR 230 V single phase IOM Manual HDP_gb - Translation of original instructions in Italian - Rev 0 - 27/07/11 25 / 64 MCRA9: Single phase power supply black CAPACITOR brown blue yellow-green THERMOSTAT ELECTRIC FAN single phase CONNECTOR 230 V single phase MCRA21 – MCRA34 – MCRA51: Three phase power supply gray black blue THERMOSTAT brown °C yellow-green ELECTRIC FAN three-phase 123456 TERMINAL BOARD 230/400 V three-phase Toensureanadequateairflowandgoodthermalefficiency,installtheheatexchangerwithatleast 1 m of free space around it. In the case of indoor installations and installations in restricted spaces, make sure that there is sufficientventilationand/orairrecyclingtopreventoverheating. For more general information on installation, refer to the “INSTALLING THE GEAR UNIT” section in this manual. 5.4.1.3 Cooling coil (optional variant SR) The cooling coil, designed for integration in a cooling circuit created by the customer, is installed inside the gear unit sump and is not removable. For optimal efficiency the cooling circuit supply must comply with the following specifications: - max. pressure 8 bar - min. flow rate 5 l/min for HDP 60 … HDP 90 - min. flow rate 10 l/min for HDP 100 … HDP 140 - max. water temperature 20°C Cooling water can circulate through the coil in either direction. If the cooling water is very hard the use of a water softener is recommended. To avoid excessive energy consumption it is good practice to equip the cooling circuit with a thermostatic valve that admits coolant only when the gear unit oil reaches a temperature max. of 70°C. In the case of freezing temperatures or long periods of disuse, to avoid possible damage, the cooling water should be drained from the circuit and compressed air blown through the empty circuit to eliminate all residual moisture. 26 / 64 IOM Manual HDP_gb - Translation of original instructions in Italian - Rev 0 - 27/07/11 Before starting the gear unit ensure that all the connections have been made properly. It is also advisable to check the cross section of water passages periodically to ensure that they arefreefromsedimentand/orobstructionsthatcouldimpairtheefficiencyoftheexternalcooling system.:Ifnecessary,cleanthecircuitbyflushingwithasuitablechemicalagent,checkingwiththe manufacturer of the cleaning agent that it is compatible with the construction material of the coil. The intervals at which to check the condition of the cooling system depend on the characteristics of the cooling water used (see the “ROUTINE MAINTENANCE” section in this manual). Pay the maximum attention when using hazardous chemical detergents and take all the necessary precautions to ensure they are disposed of in compliance with the law. 5.4.1.4 Oil heater (optional variant HE) In significantly low ambient temperatures, increased viscosity can prevent correct oil flow. In such conditions the gear unit can be equipped with one or more electrical heating elements and a minimum temperature thermostat to switch them on and off. Unless otherwise agreed or required this thermostat is set at 25 ± 5°C (see the “SENSORS” section in this manual). Examples of situations requiring oil heating include: ● operation at temperatures below 0°C ● starting of gear units featuring oil bath and splash lubrication if the minimum ambient temperature is not at least 10°C higher than the oil drop point. ● start-up of gear units with forced lubrication if oil viscosity exceeds 1500 cSt. Depending on the lubricant used, kinematic viscosity is generally between 220 and 460 cSt, and maximum permissible viscosity occurs at ambient temperatures between approximately 5°C and 25°C. For precise temperature values, refer to the relevant sales catalogue and/or product data sheet of the lubricant manufacturer. The heating elements are installed directly in the gear unit casing, below the level of the oil. The gear unit must therefore be completely drained before the elements can be removed. The standard power supply voltage is 220 V AC. Consumption varies according to size/configuration. For more detailed information and to ensure correct product selection, contact the Manufacturer’s Technical Service. The electrical circuit connected to the thermostat must be configured so that: - the heating element/s is/are switched on to heat the oil at temperatures below the minimum threshold - the heating element/s is/are switched off when the oil temperature reaches the upper threshold Contact the Manufacturer’s Technical Service to determine the ideal temperature thresholds. These may coincide with other thresholds and in any case need to be determined on the basis of the application and the type of lubricant used. All electrical connections are to be made by the customer prior to the startup of the gear unit. The heater must remain disconnected during periods in which the gear unit is not in use: the heater must be switched on before the gear unit is started, only when it is completely immersed in the oil, andonlyforthetimerequiredfortheoiltoreachitsminimumspecifiedtemperature. The use of the heater for longer periods than specified can result in carbonisation of the oil molecules, impairing lubrication performance and producing residues that are harmful to the gear unit and its components. IOM Manual HDP_gb - Translation of original instructions in Italian - Rev 0 - 27/07/11 27 / 64 Unlessstatedotherwise,therequirementsandspecificationsgivenabovearevalidevenifnonstandard control devices have been supplied with the gear unit instead of the standard ones described in this manual. If the normal heater/s is/are insufficient to heat the oil to the minimum temperature required for startup or operation, or if shorter warm-up times are required, consult the Manufacturer’s Technical Service. In the presence of forced lubrication, if the circuit components, such as the connecting pipelines and pump, etc., are exposed to freezing temperatures, they too must be equipped with a heating system to ensure correct oil circulation following startup. 5.4.2 LUBRICATION SYSTEM The gear unit’s internal parts are usually lubricated with a mixed oil bath and oil splash system. In some configurations certain bearings may be grease lubricated and equipped with Nilos seal rings. A forced lubrication system can be supplied on request. 5.4.2.1 Splash lubrication In gear units with oil splash lubrication the rotation of the gears splashes the lubricant and distributes it to the gear teeth and bearings even in positions above the oil level. To guarantee effective lubrication the oil must be sufficiently fluid, i.e. its viscosity must allow it to flow freely, while simultaneously maintaining suitable characteristics to support high gear meshing loads. In particular, special care must be taken in the following conditions and suitable cooling/heating systems provided as required: applications involving oil temperatures in excess of 95°C. starting in situations in which the minimum ambient temperature is less than 10°C higher than the oil’s drop point gear unit operation in ambient temperatures below 0°C or above 50°C. 5.4.2.2 Forced lubrication The gear unit is equipped with a volumetric pump when forced lubrication of gears and/or bearings is required. The oil pump can be driven mechanically off one of the shafts of the gear unit or connected to a motor fixed to the gear unit casing. If forced lubrication is installed, pay special attention to the maximum permissible viscosity (1500 cSt), especially at the time of plant startup. Depending on the lubricant used, kinematic viscosity is generally between 220 and 460 cSt, and maximum permissible viscosity occurs at ambient temperatures between approximately 5°C and 25°C. For precise temperature values, refer to the relevant sales catalogue and/or product data sheet of the lubricant manufacturer. If this value is not reached under normal conditions, the oil must be preheated. The plant can be equipped with suitable devices to ensure correct operation and to monitor the main functional parameters. For further information, refer to the “SENSORS” section in this manual. 5.4.2.3 28 / 64 Forced lubrication with pump (optional variants OP, OP1, OP2, OP...) This system comprises a reversible pump keyed directly to a gear unit shaft, a coarse mesh filter, a minimum pressure switch and any necessary connecting pipelines. IOM Manual HDP_gb - Translation of original instructions in Italian - Rev 0 - 27/07/11 To ensure an optimum supply of lubricant, a constant rotation speed must be maintained at a value that is as close as possible to the rotation speed for which the pump is designed (see sales catalogue). All electrical connections are to be made by the customer prior to the startup of the gear unit. The electrical contacts of the minimum pressure switch supply an alarm signal when pressure in the lubrication system falls below the minimum permissible value (0.5 bar) (see the “SENSORS” section in this manual). If an alarm occurs, stop the gear unit as soon as possible and locate the cause of the problem. 5.4.2.4 Forced lubrication with electric pump (optional variant MOP) This system comprises an electric pump with a separate power supply, a coarse mesh filter, a minimum pressure switch and any necessary connecting pipelines. To ensure a good lubricant flow rate, make sure that the power supply to the pump motor conforms to the requirements on the motor name plate and to the requirements given in the following tables, unless specified otherwise. (tab 5) HDP… V5… MOP… (without DW) Mains frequency Size Description 50 Hz 60 Hz 230D/400Y 265D/460Y Pn In [400V] Pn In [460 V] [kW] [A] [kW] [A] HDP 60 HDP 70 BN 63B 6 IP55 CLF B34 CUS 0.12 0.64 0.14 0.64 HDP 80 HDP 90 BN 71A 6 IP55 CLF B34 CUS 0.18 0.67 0.21 0.60 HDP 100 HDP 110 HDP 120 BN 71A 6 IP55 CLF B34 CUS 0.18 0.67 0.21 0.60 HDP 130 HDP 140 BN 71A 4 IP55 CLF B34 CUS 0.25 0.78 0.30 0.78 HDP 150 HDP 160 BN 71B 6 IP55 CLF B34 CUS 0.25 0.82 0.30 0.79 (tab 6) HDP… V5… MOP… DW Mains frequency 50 Hz 60 Hz 230D/400Y Size Description 265D/460Y Pn In [400V] Pn In [460 V] [kW] [A] [kW] [A] HDP 60 HDP 70 BN 63A 4 IP55 CLF B34 CUS 0.12 0.47 0.14 0.46 HDP 80 BN 71A 6 IP55 CLF B34 CUS 0.18 0.67 0.21 0.60 HDP 90 BN 71A 4 IP55 CLF B34 CUS 0.25 0.78 0.30 0.78 HDP 100 … HDP 160 Contact the Manufacturer’s Technical Service. IOM Manual HDP_gb - Translation of original instructions in Italian - Rev 0 - 27/07/11 29 / 64 All electrical connections are to be made by the customer prior to the startup of the gear unit. The electrical contacts of the minimum pressure switch supply an alarm signal when pressure in the lubrication system falls below the minimum permissible value (0.5 bar) (see the “SENSORS” section in this manual). If an alarm occurs, stop the gear unit as soon as possible and locate the cause of the problem. The lubrication system must be started up before the gear unit is started. Do not start up the gear unit until the electric pump has been functioning for a few minutes. The electric pump must always run along with the gear unit and must only be switched off after the gear unit has effectively stopped. Check that the actual mains power, mounting and service conditions correspond to those declared onthenameplatesofthecomponentsand/orspecifiedinthismanual. Electric motors must rotate in the direction shown on the components. Make sure that all electrical power cables are big enough to carry the current draw and suitable for the installation conditions. Inadequate cables can cause overheating and/or voltage drops. Information about the pump’s electric motor must be obtained directly from the electric motor’s own sales catalogue or installation, operation and maintenance manual. For all other devices, see the “SENSORS” section in this manual. 5.4.3 BACKSTOP DEVICE (optional variant A CW, A CCW) The backstop device ensures that the gear unit only turns in one direction and prevents reverse movement caused by the load applied to the output shaft. The device consists of a free wheel with centrifugal shoes. In certain cases the torque transmittable by the backstop device can be limiting with respect to the torque transmitted by the gear unit. Consult the sales catalogue for detailed information on this subject. Before commissioning the unit ensure that the output shaft can be freely turned in the required direction of travel without having to apply excessive force. To avoid damaging the backstop device or the gear train it is essential to prevent the motor from rotating in the wrong direction. Under continuous operating conditions, it is advisable to maintain a neutral rotation speed n1min greaterthanthatspecifiedinthecatalogueinordertoensuretheeffectivecentrifugalreleaseofall the shoes and avoid unnecessary wear. For further details, contact the Manufacturer’s Technical Service. 30 / 64 IOM Manual HDP_gb - Translation of original instructions in Italian - Rev 0 - 27/07/11 The backstop device is keyed to the end of the input shaft opposite the drive side in such a way that it is accessible for inspection and maintenance. The device shares the gear unit’s own lubrication system. The direction of the backstop device can be reversed by turning the device’s outer cage around. Contact the Manufacturer’s Technical Service for information on how to proceed if you wish to change the direction of the backstop device. 5.4.4 GEAR UNIT WITH FIXING FLANGE (optional variant F...L, F...R) Thoroughlycleananddegreasetheflangeofthegearunitandtheareaofthemachinetowhich it is to be coupled. Safe torque transmission depends largely on the correct execution of this procedure. Do not use solvents or dirty rags to degrease mating surfaces. Do not apply any type of grease, as this would significantly lower the friction coefficient in the contact area and therefore impair the functionality of the coupling. Tighten the bolts fully down, working in a crosswise sequence and applying the maximum tightening torque shown in the table below using a torque wrench. (tab 7) Thread Screw Nut UNI 5737 UNI 5588 Tightening torque HDP 60 M16 Class 10.9 Class 10 314 Nm HDP 70 M16 Class 10.9 Class 10 314 Nm HDP 80 M16 Class 10.9 Class 10 314 Nm HDP 90 M16 Class 10.9 Class 10 314 Nm HDP 100 M20 Class 10.9 Class 10 615 Nm HDP 110 M20 Class 10.9 Class 10 615 Nm HDP 120 M20 Class 10.9 Class 10 615 Nm HDP 130 M24 Class 10.9 Class 10 1060 Nm HDP 140 M24 Class 10.9 Class 10 1060 Nm HDP 150 HDP 160 Contact the Manufacturer’s Technical Service. IOM Manual HDP_gb - Translation of original instructions in Italian - Rev 0 - 27/07/11 31 / 64 If the gear unit is installed in situations that are particularly hazardous to personal safety, install suitable safety devices, such as harnesses, safety chains and restraining systems, etc., 5.4.5 GEAR UNIT WITH SLEEVE FLANGE (optional variant FM) Thoroughlycleananddegreasetheflangeofthegearunitandtheareaofthemachinetowhich it is to be coupled. Safe torque transmission depends largely on the correct execution of this procedure. Do not use solvents or dirty rags to degrease mating surfaces. Do not apply any type of grease, as this would significantly lower the friction coefficient in the contact area and therefore impair the functionality of the coupling. Tighten the bolts fully down, working in a crosswise sequence and applying the maximum tightening torque shown in the table below using a torque wrench. (tab 8) Thread Screw Nut UNI 5737 UNI 5588 Tightening torque HDP 60 M18 Class 10.9 Class 10 435 Nm HDP 70 M18 Class 10.9 Class 10 435 Nm HDP 80 M20 Class 10.9 Class 10 615 Nm HDP 90 M20 Class 10.9 Class 10 615 Nm HDP 100 M24 Class 10.9 Class 10 1060 Nm HDP 110 M24 Class 10.9 Class 10 1060 Nm HDP 120 M24 Class 10.9 Class 10 1060 Nm HDP 130 M30 Class 10.9 Class 10 2130 Nm HDP 140 M30 Class 10.9 Class 10 2130 Nm HDP 150 HDP 160 Contact the Manufacturer’s Technical Service. If the gear unit is installed in situations that are particularly hazardous to personal safety, install suitable safety devices, such as harnesses, safety chains and restraining systems, etc., 32 / 64 IOM Manual HDP_gb - Translation of original instructions in Italian - Rev 0 - 27/07/11 5.4.6 SEALS AND GASKETS (optional variants VS, DS, DVS, TK) The gear units can be supplied with alternative seal systems on request: Contact seals: single or double (DS) nitrile rubber compound seal rings ● single (VS) or double (DS) Viton® compound seal rings ● Taconite (TK) seals are recommended for environments characterised by the presence of abrasive dust or powders. Taconite seals incorporate a combination of sealing rings, labyrinths and grease chambers. At the intervals specified in the “ROUTINE MAINTENANCE” section in this manual, inject about 30 grams of grease for rolling contact bearings through the grease nipples. ● All work must be performed exclusively with the gear unit at a standstill. The motor must be protected against accidental startup (e.g. by padlocking the main power switch orremovingthepowerfuses).Forthispurpose,alsoaffixanoticetothemotorindicatingthatwork is in progress on the gear unit. 5.4.7 5.4.7.1 SENSORS Bimetal thermostat (optional variant TG) Non-adjustable thermostats are preset to a fixed switching temperature. The actual temperature depends on the thermostat’s function and the accessory with which it is used, as shown below: - 90°C ± 5°C – optional variant TG, in this case the thermostat trips when the lubricant reaches its maximum permissible temperature. If an alarm occurs, stop the gear unit as soon as possible and locate the cause of the problem. - 25°C ± 5°C –setting of optional variant HE, , see the “Oil heater” section in this manual for further details. - 60°C ± 5°C e 90°C ± 5°C – settings of optional variant MCRW…, see the “Autonomous control units” section in this manual for further details. - 90°C ± 5°C – setting of optional variant MCRA…,see the “Autonomous control units” section in this manual for further details. Depending on configuration, thermostats may be installed on board the gear unit or supplied separately. If supplied separately, remove the blind plug fitted for transport purposes and fit the thermostat in its place. Electrical connections and/or cabling to user points are the responsibility of the Customer and must be completed prior to start-up. Contact type: NC (normally closed) Contact current rating: 5 A (resistive) / 240 V AC 5 A (resistive) / 24 V DC Degree of protection: IP 65 (with connector fitted) Threaded fitting: GAS 1/2” M 5.4.7.2 Oil level sensor (optional variant OLG) A sensor for the remote monitoring of lubricant safety level can also be installed on request. If the sensor is supplied separately, remove the clearly identified blind plug fitted for transport purposes and fit the sensor in its place. The device functions when the gear unit is idle. When the gear unit is running the oil level sensor must be bypassed. IOM Manual HDP_gb - Translation of original instructions in Italian - Rev 0 - 27/07/11 33 / 64 Electrical connections and/or cabling to user points are the responsibility of the Customer and must be completed prior to start-up. Contact type: NC (normally closed) in air brown black AC Sensor OUT blue Power supply: 28 V AC Degree of protection: IP 65 Threaded fitting: GAS 1/2” M 5.4.7.3 Minimum pressure switch The minimum pressure switch used with forced lubrication (see optional variants OP…, MOP, MCRW…, MCRA…, and refer to the “AUXILIARY THERMAL DEVICES” and “LUBRICATION SYSTEM” sections in this manual), provides an alarm signal if pressure in the lubrication system falls below the minimum permissible value of 0.5 bar. The output of the pressure switch must be bypassed for a brief period (approx. 30 seconds) immediately after start-up while the oil starts to circulate. Donotmodifythepressureswitchtripsettingwiththeadjusterscrewatthetopofthedevice. Electrical connections and/or cabling to user points are the responsibility of the Customer and must be completed prior to start-up. Contact type: SPDT (changeover contact) NC C Ground Terminal faston 6.3x0.8 NO C = Common NC = Normally closed NO = Normally open The position of the contacts is purely indicative. Contact current rating: 5 A (resistive) / 240 V AC 2 A (resistive) / 24 V DC Degree of protection: IP 65 (with connector fitted) 34 / 64 IOM Manual HDP_gb - Translation of original instructions in Italian - Rev 0 - 27/07/11 5.4.8 DRYWELL (optional variant DW) The drywell device prevents oil leaking from the gear unit’s output shaft seals into the driven machine. It consists of a grease-filled chamber that stops oil leaks and provides the necessary lubrication for the shaft’s bottom bearing. At the intervals specified in the Operating and Maintenance table, inject about 40 grams of grease for rolling contact bearings through the grease nipples. (tab 9) Quantity of grease [kg] - Optional variant DW HDP 60 Initialfilling HDP 70 HDP 80 HDP 90 HDP 100 HDP 110 HDP 120 HDP 130 HDP 140 HDP 150 HDP 160 0.100 0.150 0.250 0.350 Contact the Manufacturer’s Technical Service. Topping up 0.030 0.030 0.040 0.040 The gear unit is supplied with no grease in the output shaft’s bottom bearing. All work must be performed exclusively with the gear unit at a standstill. The motor must be protected against accidental startup (e.g. by padlocking the main power switch or removing the powerfuses).Forthispurpose,alsoaffixanoticetothemotorindicatingthatworkisinprogress on the gear unit. Thegearunitmustalwaysbedrainedofoilbeforeitismoved,toavoidoiloverflowingintothe grease chamber. 5.4.9 ANCHORING OF TORQUE ARM (optional variant TA) For shaft-mounted solutions the gear unit can be equipped with a torque arm on request. Depending on circumstances, this type of device may be equipped either with an anti-vibration bushing or a cup spring damper (included in the supply). Because it is designed and sized specifically for the purpose, this type of device provides the best possible guarantee for the correct operation of the assembly. The machine shaft must be able to support the gear unit radially and axially. The torque arm must fitwithoutstress. Thetorqueboltmustbefittedonthesideofthegearunitnexttothedrivenmachine.Supporting surfaces should be hardened and tempered (minimum hardness 58 HRC, with case hardening to a minimum depth of 0.6 mm), smooth and ground if possible. Nitriding is an alternative treatment that guaranteesasufficientlyresistantbasematerialcapableofresistingthecompressionandscoring of the surface. If safety is at risk and/or maximum reliability is required, install suitable devices to stop the gear unit rotating or breaking free if the torque arm or machine shaft should break. IOM Manual HDP_gb - Translation of original instructions in Italian - Rev 0 - 27/07/11 35 / 64 HDP 60 ... HDP 90 f1 G L1 L0 HDP 100 ... HDP 140 (tab 11) G* [mm] f1 [mm] HDP 100 HDP 110 33.4 33.4 0.8 +0.1 0 0.8 +0.1 0 HDP 120 HDP 130 HDP 140 33.4 0.8 42.7 +0.1 0 0.9 +0.25 0 42.7 0.9 +0.25 0 L0 = Free height L1 = Height under load f1 = Deflection L0-L1 * (nominal value) f1 G L1 L0 HDP 150 - HDP 160 (tab 12) G* [mm] f1 [mm] 36 / 64 HDP 150 HDP 160 204.3 204.3 1.05 +0.5 0 1.05 +0.5 0 L0 = Free height L1 = Height under load f1 = Deflection L0-L1 * (nominal value) IOM Manual HDP_gb - Translation of original instructions in Italian - Rev 0 - 27/07/11 [mm] [mm] [mm] [mm] [mm] [mm] Toensurethenecessarypreload,theusermustadjustthetorquearmbeforethegearunitisstarted up in line with gap G shown in the table. In spring sets, friction and spring height change over time. After the initial running in period, and thenatregularintervals,checkforwearandtheadjustmentsettingG. To improve drive conditions, reduce friction and extend the working life of the cup springs, lubricate the sliding paths with grease, a paste with molybdenum disulphide additives, lubricating paints or other solid lubricants. 5.4.10 OTHER ACCESSORIES For any special accessories installed on the gear unit in accordance with contractual specifications refer to the instructions supplied by the manufacturer of the accessories in question or to any accompanying manuals. Such components may require special maintenance and/or lubrication. 5.5 PAINTWORK HDP gear units in sizes 60 to 90 are externally and internally painted in oven hardened epoxy resin and polyester powder paint that provides an excellent level of protection against corrosion and is suitable for outdoor installations. The colour is RAL 7042 grey. Total thickness on the outside of the gear unit is 60-80 µm. HDP gear unit sizes 100 to 160, on the other hand, are internally and externally spray - painted with an epoxy primer, and then externally finished with a coat of epoxy enamel. The total thickness of the paint is 130-180 µm. If the gear unit is to be painted, protect the nameplate and seal rings against contact with solvent. IOM Manual HDP_gb - Translation of original instructions in Italian - Rev 0 - 27/07/11 37 / 64 5.6 LUBRICATION Before operating the gear unit, check the oil level. As with filling, this operation must be done with the gear unit in the mounting position in which it will be used in the application. If necessary, fill or top up the lubricant to the half way point in the level window, to the reference notch on the dipstick, or until it starts to flow out of the plug hole. The lubricant utilised must be new and uncontaminated and can be poured in through the filler hole or from the inspection cover opening using a filler filter with 25 µm mesh, ensuring that the relative gasket is refitted without damaging it or reapplying the sealant to provide a perfectly oil-tight fit. The oil level must never be below the minimum mark and must be checked periodically with the gear unit at a standstill after allowing it to cool for a short period. Do not mix oils of different makes or specifications and check that the oil is highly resistant to foaming and is EP (Extreme Pressure) rated. If you do not have the same type of oil, completely drain the gear unit and flush it out thoroughly with the new oil to remove all traces of the old oil and any contaminants from inside the casing before filling the unit with the new oil. To facilitate flushing, pre-heat the oil of the viscosity specified for functioning or use an oil of the same type but of lower viscosity (contact the lubricant manufacturer for further information). Adopt protection against contact with hot parts: risk of burns! In the case of gear units equipped with forced lubrication, the oil circuit must also be filled. In this case the unit must be run for a short period and then stopped before rechecking the oil level. Lubricants, solvents and detergents are toxic/harmful to health: - they may cause irritation in direct contact with the skin - they may cause intoxication if inhaled - they may be fatal if swallowed. Handle them with care using suitable personal protection equipment. Do not dump them into the environment and dispose of in accordance with applicable legislation. 38 / 64 IOM Manual HDP_gb - Translation of original instructions in Italian - Rev 0 - 27/07/11 5.6.1 PolyAlkylene Glycol (PAG) synthetic oils HDP 60 … HDP 160 Omala S4 WE 220 Omala S4 WE 320 Omala S4 WE 460 Blasia S 220 Blasia S 320 Klübersynth GH 6 220 Klübersynth GH 6 320 Klübersynth UH1 6-320 F Mobil Glygoyle HE 220-320-460 Alphasyn PG 220 Alphasyn PG 320 Carter SY 220 Carter SY 320 Carter SY 460 Nevastane SY 460 F Degol GS 220 Degol GS 320 Synlube CLP 220 Synlube CLP 320 Renoling PG 220 Renoling PG 320 F = Food grade. Recommended use. Permitted use. The Manufacturer cannot guarantee the quality or suitability of lubricants. Characteristics must be verified directly with the manufacturer of the chosen lubricant. IOM Manual HDP_gb - Translation of original instructions in Italian - Rev 0 - 27/07/11 39 / 64 5.6.2 PolyAlphaOlefin(PAO)syntheticoils HDP 60 … HDP 160 Omala S4 GX 220 Omala S4 GX 320 Klübersynth GEM2 150-220-320-460 Mobilgear SHC XMP 220-320 Mobilgear SHC 630-632 Mobil SHC Cibus 320-460 (USDA H1) F Degol PAS 220 F = Food grade. Recommended use. Permitted use. The Manufacturer cannot guarantee the quality or suitability of lubricants. Characteristics must be verified directly with the manufacturer of the chosen lubricant. 5.6.3 Mineral oil with EP (Extreme Pressure) additives HDP 60 … HDP 160 Omala S2 G 220-320-460 Blasia 220-320-460 Klüberoil GEM1 220-320-460 Mobil XMP 220-320 Mobil 600 XP 220-320 Permitted use. The Manufacturer cannot guarantee the quality or suitability of lubricants. Characteristics must be verified directly with the manufacturer of the chosen lubricant. Refer to the individual sales catalogue for lubricant viscosity. 40 / 64 IOM Manual HDP_gb - Translation of original instructions in Italian - Rev 0 - 27/07/11 5.6.4 Compatible greases Klüber Staburags NBU 8 EP (for bearings) Klüberpaste 46 MR 401 (to facilitate the coupling of cylindrical parts) ● ITP Fluorocarbon gel 880 (to grease contact seals) ● Klüber Petamo GHY 133 N (for Taconite seals) ● ● 5.6.5 Quantity of lubricant The quantity of lubricant specified in the following tables is purely indicative. Gear units must be filled to the mid point of the sight glass, or to the reference notch on the dipstick, or until oil starts to flow out of the plug hole, according to the mounting position specified on order. (tab 10) B3 B6 B7 V5 10 14.8 14.6 16 11 16 15 17 16 24 24 26 23 34 33 37 HDP 100 2 27 61 49 51 HDP 100 3 32 HDP 100 4 34 70 56 58 HDP 110 2 27 61 49 51 32 70 56 58 35 83 64 68 45 96 74 79 57 154 119 128 86 181 140 150 HDP 140 2 76 163 126 115 HDP 140 3 89 HDP 140 4 88 191 147 135 HDP 150 2 109 244 189 173 125 281 217 199 118 264 204 187 135 303 234 214 HDP 60 2 HDP 60 3 HDP 70 2 HDP 70 3 HDP 80 2 HDP 80 3 HDP 90 2 HDP 90 3 HDP 110 3 HDP 110 4 HDP 120 2 HDP 120 3 HDP 120 4 HDP 130 2 HDP 130 3 HDP 130 4 HDP 150 3 HDP 150 4 HDP 160 2 HDP 160 3 HDP 160 4 IOM Manual HDP_gb - Translation of original instructions in Italian - Rev 0 - 27/07/11 41 / 64 5.6.6 Service plugs The following charts identify the position of the various service plugs. HDP 60 - HDP 70 D F D P P B A B A O C G C G O M I A L N HDP 60 2 HDP 60 3 HDP 70 2 HDP 70 3 C = Filler plug with air vent B C 368.5 25 60 70 404 25 D F G I L M 149 147 30 9 25 231 149 147 30 27.5 35 247.5 35 T = Blank plug L = Level plug = No plug present S = Drain plug L* = Overflow level plug B3 T1 T2 L T3 T4 T5 T6 T7 S T C T T B6 T1 T2 C T3 T4 T5 T6 T7 T S L T T B7 T1 T2 S T3 T4 T5 T6 T7 L C T T T V5 T1 C 42 / 64 T2 T3 T4 T5 T6 T7 S T L T T IOM Manual HDP_gb - Translation of original instructions in Italian - Rev 0 - 27/07/11 N O P 25 130.5 60 135 62.5 HDP 80 - HDP 90 D F D P P B A B A O G C G C R O R M I L N A B C D F G I L M N O P R HDP 80 2 HDP 80 3 441 37.5 80 175 173 30 7.5 55 292.5 55 160 80 160 HDP 90 2 HDP 90 3 508.5 42.5 90 197 190 30 14 55 197 90 180 C = Filler plug with air vent 286 55 T = Blank plug L = Level plug = No plug present S = Drain plug L* = Overflow level plug B3 T1 T2 T3 T4 T5 T6 T7 L T S T C T T HDP 80 (i≤75.2) HDP 90 (i≤73.3) T T S L C T T HDP 80 (i≥76.4) HDP 90 (i≥77.9) B6 T1 T2 T3 T4 T5 T6 T7 C T T S L T T B7 T1 T2 T3 T4 T5 T6 T7 S T L C T T T V5 T1 T2 T3 T4 T5 T6 T7 C T S T L T T IOM Manual HDP_gb - Translation of original instructions in Italian - Rev 0 - 27/07/11 43 / 64 HDP 100 ... HDP 120 G G E C D F D B A B A H I C H M T8-V5 L N I 3x 4x T8-B3 A B C D E F G L M N HDP 100 2 175 180 100 236 240 232 50 240 156 35 — — HDP 110 2 225 150 115 236 240 232 50 225 156 35 — — HDP 120 2 245 170 120 260 257 258 50 261 166 35 — — HDP 100 3 HDP 100 4 365 170 100 236 240 232 50 240 100 55 180 55 HDP 110 3 HDP 110 4 380 170 115 236 240 232 50 225 100 55 180 55 HDP 120 3 HDP 120 4 435 190 120 260 261 258 50 261 121 55 251 55 H I L T8 2x C = Filler plug with air vent T = Blank plug L = Level plug = No plug present S = Drain plug L* = Overflow level plug B3 T1 T2 T3L T3R T5R T5L T6 T7 T8 L S T T T T T T C B6 T1 T2 T3L T3R T5R T5L T6 T7 T8 S L/C T T T T T T T B7 T1 T2 T3L T3R T5R T5L T6 T7 T8 T S L L T T C T T V5 (*) T1 T2 T3L T3R T5R T5L T6 T7 T8 T T S C T T T T L (*) Excluding DW 44 / 64 IOM Manual HDP_gb - Translation of original instructions in Italian - Rev 0 - 27/07/11 C G G E D B F D B HDP 130 - HDP 140 C A A H C = Filler plug with air vent A B C D E F G H HDP 130 2 280 340 140 210 340 325 50 310 HDP 140 2 320 340 150 210 340 325 50 335 HDP 130 3 HDP 130 4 530 138 140 340 340 325 50 310 HDP 140 3 HDP 140 4 538 138 150 340 340 325 50 335 T = Blank plug L = Level plug = No plug present S = Drain plug L* = Overflow level plug B3 T1 T2 T3L T3R T5R T5L T6 T7 L/C S T T T T T T T8 B6 T1 T2 T3L T3R T5R T5L T6 T7 S L/C T T T T T T T8 B7 T1 T2 T3L T3R T5R T5L T6 T7 T S L L T T C T T8 V5 (*) T1 T2 T3L T3R T5R T5L T6 T7 T8 T T T T L/C S T T 2x T T S L/C T T T T 3/4x (*) Excluding DW IOM Manual HDP_gb - Translation of original instructions in Italian - Rev 0 - 27/07/11 45 / 64 C H E D D F B B HDP 150 - HDP 160 G A C G A I A B C D E F G H I L HDP 150 2 599 147 145 365 331 350 90 395 20 80 HDP 160 2 640 147 145 385 351 370 90 395 20 80 HDP 150 3 HDP 150 4 609 147 145 365 331 350 90 395 240 80 HDP 160 3 HDP 160 4 650 147 145 385 351 370 90 395 240 80 L T8 C = Filler plug with air vent T = Blank plug L = Level plug = No plug present S = Drain plug L* = Overflow level plug B3 T1 T2 T3L T3R T5R T5L T6 T7 T8 L T S S T T T T C B6 T1 T2 T3L T3R T5R T5L T6 T7 T8 S L/C T T T T T T T B7 T1 T2 T3L T3R T5R T5L T6 T7 T8 T S L L T T C T T V5 (*) T1 T2 T3L T3R T5R T5L T6 T7 T8 T T S C T T T T L (*) Excluding DW 46 / 64 IOM Manual HDP_gb - Translation of original instructions in Italian - Rev 0 - 27/07/11 5.7 PREPARING CUSTOMER SHAFTS Make the driven shaft to be coupled to the gear unit’s output shaft from a good quality steel, respecting the dimensions given in the table. A device such as that illustrated below should also be installed to secure the shaft axially. Take care to verify and dimension the various components to suit the needs of the application. H A1 A2 A3 B B1 B2 C D E F R S UNI 6604 HDP 60 ≥ 78 70 h6 69 283 56 172 220 30 20 h9 74.5 2.5 2 20x12x220A HDP 70 ≥ 89 80 h6 79 283 78 127 220 30 22 h9 85 2.5 2.5 22x14x220A HDP 80 ≥ 104 95 h6 94 338 73 192 280 30 25 h9 100 2.5 2.5 25x14x280A HDP 90 ≥ 121 110 h6 109 378 88 202 320 30 28 h9 116 2.5 2.5 28x16x320A HDP 100 ≥ 133 120 h6 119.5 420 100 250 360 30 32 h9 127 3 2.5 32x18x360A HDP 110 ≥ 143 130 h6 129.5 420 100 250 360 30 32 h9 137 3 2.5 32x18x360A HDP 120 ≥ 153 140 h6 139.5 444 110 260 400 40 36 h9 148 3 2.5 36x20x400A HDP 130 ≥ 183 170 h6 169.5 540 135 310 400 80 40 h9 179 3 2.5 40x22x400A HDP 140 ≥ 193 180 h6 179.5 540 135 310 400 80 45 h9 190 3 2.5 45x25x400A HDP 150 ≥ 223 210 h6 209.5 667 155 400 500 100 50 h9 221 3 3 50x28x450B HDP 160 ≥ 223 210 h6 209.5 667 155 400 500 100 50 h9 221 3 3 50x28x450B Not included in the supply UNI 7437 G G1 G2 G3 G4 H H1 UNI 5739 HDP 60 — 90 70 d9 — 22 — 10 8.5 M20x50 HDP 70 — 100 80 d9 — 22 — 10 8.5 M20x50 HDP 80 — 115 95 d9 — 26 — 15 13.5 M24x60 HDP 90 — 130 110 d9 — 26 — 15 13.5 M24x60 HDP 100 120x4 120 d9 96 64 26 M16 24 12 M24x70 HDP 110 130x4 130 d9 105 69 26 M20 24 12 M24x70 HDP 120 140x4 140 d9 115 79 26 M20 30 15 M24x80 HDP 130 170x4 170 d9 142 102 33 M24 34 17 M30x90 HDP 140 180x4 180 d9 150 110 33 M24 34 17 M30x90 HDP 150 210x5 210 d9 178 140 33 M24 36 18 M30x100 HDP 160 210x5 210 d9 178 140 33 M24 36 18 M30x100 IOM Manual HDP_gb - Translation of original instructions in Italian - Rev 0 - 27/07/11 47 / 64 S 1 2 A1 A2 A3 A4 B B1 B2 R S HDP 60 ≥ 90 72 h7 69 70 g6 328 59 194 2.5 2.5 HDP 70 ≥ 104 82 h7 79 80 g6 332 77 174 2.5 2.5 HDP 80 ≥ 119 97 h7 94 95 g6 398 95 205 2.5 2.5 HDP 90 ≥ 136 112 h7 109 110 g6 440 87 273 2.5 2.5 HDP 100 ≥ 138 125 h6 119.5 120 g6 517 104 328 3 2.5 HDP 110 ≥ 148 135 h6 129.5 130 g6 523 104 334 3 2.5 HDP 120 ≥ 158 145 h6 139.5 140 g6 550 104 354 3 2.5 HDP 130 ≥ 188 175 h6 169.5 170 g6 681 104 462 3 2.5 HDP 140 ≥ 198 185 h6 179.5 180 g6 689 104 470 3 2.5 HDP 150 ≥ 228 215 h6 209.5 210 g6 839 104 593 3 3 HDP 160 ≥ 228 215 h6 209.5 210 g6 839 104 593 3 3 Not included in the supply UNI 7437 L L1 L2 M M1 UNI 5739 HDP 60 — 90 70 d9 22 10 8.5 M20x50 HDP 70 — 100 80 d9 22 10 8.5 M20x50 HDP 80 — 115 95 d9 26 15 13.5 M24x60 HDP 90 — 130 110 d9 26 15 13.5 M24x60 HDP 100 120x4 120 d9 96 26 16 12 M24x65 HDP 110 130x4 130 d9 105 26 16 12 M24x65 HDP 120 140x4 140 d9 115 26 19 15 M24x70 HDP 130 170x4 170 d9 142 33 21 17 M30x80 HDP 140 180x4 180 d9 150 33 21 17 M30x80 HDP 150 210x5 210 d9 178 33 29 18 M30x90 HDP 160 210x5 210 d9 178 33 29 18 M30x90 To facilitate disassembly, provide a machine shaft with a hole through which an anti-corrosion fluid can be injected (2) or a machine shaft with provision for fitting a self-lubricating bush at the cylindrical guide section opposite the shrink disc (1). In the presence of external thrust loads, vibration, safety problems, requirements for enhanced reliability, or unfavourable mounting positions (e.g. V5 mounting positions, output shaft directed downwards), install suitable devices to secure the shaft in an axial direction and prevent accidental decoupling. 48 / 64 IOM Manual HDP_gb - Translation of original instructions in Italian - Rev 0 - 27/07/11 5.8 STARTING UP THE GEAR UNIT The gear unit has been factory tested by the Manufacturer. Before starting the unit, make sure: ● that the machine or part of the machine in which the the gear unit/gearmotor is to be installed has been declared to conform to the requirements of the Machinery Directive 2006/42/EC and to any other relevant and applicable safety standards ● that the gear unit’s mounting position in the installation corresponds to that prescribed and indicated on the name plate ● that the electrical power supply is suitable and operational as prescribed in EN 60204-1, and is grounded as per EN 60079 ● that the rating of the power supply to the motor and any installed electrical devices corresponds to that prescribed and is within +/- 10% of the rated value ● that the oil level in the gear unit/gearmotor and any lubricated installed accessories is as required and that there are no leaks from any plugs, seals or pipes ● that any connections to parts and/or accessories disconnected for transport purposes have been reconnected ● that any of the Manufacturer’s guards that might have been removed have been refitted ● that there are no unusual noises and/or vibrations when the gear unit/gearmotor is started up ● After the first 100 hours of operation, check the tightening torque of all screw couplings: - shrink discs - motor flanges - machine flanges - supports In the presence of optional accessories it is also necessary to check that all the operations required for their correct functioning have been carried out as described in the relative sections and/or manuals. Whenthegearunitisstartedforthefirsttime,allowittorunatslowspeedandatzeroloadfor some time. If no irregular operation is noted during this period, the load and speed can be gradually increased to the rated operating conditions over a reasonable period of time during which the gear unit must be monitored closely. 5.8.1 Starting up autonomous control units (MCRW… , MCRA…) If the gear unit is equipped with an autonomous control unit, also follow the instructions given below during start-up. Unlessstatedotherwise,therequirementsandspecificationsgivenbelowarevalidevenifnonstandard control devices have been supplied with the gear unit instead of the standard ones described in this manual. Perform regular checks during functioning to identify any malfunctions or problems as early as possible. Under operating conditions, take care to avoid all contact, including accidental contact, with the surfaces of the heat exchanger, which can reach high temperatures. Case 1) Functionality: cooling with oil/water heat exchanger (MCRW...) - once the gear unit has started and the oil has reached a temperature of 60°C, the control thermostat must give the signal to start the electric pump and open the water supply solenoid valve - when oil temperature reaches 90°C, the maximum temperature thermostat must activate an alarm and stop the gear unit as soon as possible IOM Manual HDP_gb - Translation of original instructions in Italian - Rev 0 - 27/07/11 49 / 64 Cooling with oil/air heat exchanger (MCRA…) - once the gear unit has started, start the control unit in compliance with the requirements of the “OPERATING LIMITS AND CONDITIONS” section in this manual - to avoid the fan running continuously even when not needed, its motor can be controlled to run over a range of temperatures by a thermostat in the heat exchanger. Unless instructed otherwise, set the said thermostat to switch on the electric fan at a temperature of 60°C whenever possible. - when oil temperature reaches 90°C, the maximum temperature thermostat must activate an alarm and stop the gear unit as soon as possible Case 2) Functionality: cooling and forced lubrication of internal components - start the control unit in compliance with the requirements of the “OPERATING LIMITS AND CONDITIONS” section in this manual - do not start up the gear unit until the control unit has been functioning for a few minutes The control unit’s electric pump must always run along with the gear unit and must only be switched off after the gear unit has effectively stopped. Autonomous control units with oil/water heat exchanger (MCRW…) - once the oil has reached a temperature of 60°C, the control thermostat must give the signal to open the water supply solenoid valve - when oil temperature reaches 90°C, the maximum temperature thermostat must activate an alarm and stop the gear unit as soon as possible - when pressure falls below 0.5 bar, the minimum pressure switch must activate an alarm and stop the gear unit as soon as possible Autonomous control units with oil/air heat exchanger (MCRA…) - to avoid the fan running continuously even when not needed, its motor can be controlled to run over a range of temperatures by a thermostat in the heat exchanger. Unless instructed otherwise, set the said thermostat to switch on the electric fan at a temperature of 60°C whenever possible. - when oil temperature reaches 90°C, the maximum temperature thermostat must activate an alarm and stop the gear unit as soon as possible - when pressure falls below 0.5 bar, the minimum pressure switch must activate an alarm and stop the gear unit as soon as possible 50 / 64 IOM Manual HDP_gb - Translation of original instructions in Italian - Rev 0 - 27/07/11 6 MAINTENANCE Maintenance and replacement work must be carried out by expert maintenance technicians trained in the observance of applicable laws on health and safety at work and the special ambient problems attendant on the installation. In order to maintain the proper functioning and safety of the gear unit/ gearmotor, we recommend that users have non-routine maintenance performed by the Manufacturer or an authorised, specialist service centre. Contact the manufacturer’s sales network. Failure to comply with this requirement during the warranty period automatically invalidates the warranty. Never improvise repairs. Before doing any work on the unit, the operator must first switch off power to the gear unit and ensure that it is out of service, as well as taking all necessary precautions against it being accidentally switched on again or its parts moving without warning (due to suspended loads or similar external factors). Furthermore, all additional environmental safety precautions must be taken (e.g. elimination of residual gas or dust, etc.). Before commencing any maintenance work, power to the machine in which gear units are installed must be disconnected and the switches secured in OFF position. All persons performing maintenance must secure the disconnecting switches for themselves, using personal devices (e.g. padlocks) the keys of which they must keep with them for the duration of the work. ● If the temperature of accessible surfaces exceeds the limits established by EN ISO 13732-1 (65 °C for occasional brief contact with exposed metal), wait for the said surfaces to cool before commencing work. If necessary, wear anti-burn safety gloves when working on gear units. ● Before doing any maintenance work, activate all the safety devices provided and, if necessary, inform persons working in the vicinity. Cordon off the area around the unit and prevent access to any equipment which, if activated, might be the cause of unexpected health and safety hazards. ● Use the lubricants (oil and grease) recommended by the Manufacturer. ● When working on the gear unit always replace gaskets and seals with original spare parts. ● We recommend replacing the lubricating oil after all maintenance work. ● If, during work, there is any risk of coming into contact with oils and greases, respect the safety precautions provided on the manufacturer’s data sheets and use any items of personal protective equipment specified therein. ● If the gear unit is not used for a prolonged period following installation or run-in, it must be run at least once a month. If this is not possible, the gear unit must be protected against corrosion with a suitable rust inhibitor, or completely filled with new oil of the type normally utilised for operating duty. (See the “STORAGE” section in this manual.) The above instructions are aimed at ensuring efficient and safe operation of the gear unit. The Manufacturer declines all liability for injury to persons and damage to components due to the use of nonoriginal spare parts and non-routine work which modify the safety requirements without the manufacturer’s express prior authorisation. Refer to the specific spare parts catalogue when ordering spare parts for the gear unit. IOM Manual HDP_gb - Translation of original instructions in Italian - Rev 0 - 27/07/11 51 / 64 Do not disperse contaminant liquids, worn parts and maintenance residues in the environment. Dispose of all such substances in strict compliance with applicable statutory legislation. 6.1 CHECKING OPERATIONAL EFFICIENCY Periodically remove any dust from the gear unit and motor casings. Check that the noise generated at constant load does not vary. Excessive vibration or noise can indicate wear of the gear train or failure of a bearing. ● Check the power absorption and voltage against the nominal values given on the motor’s nameplate. ● Check the wear of the friction surfaces and braking gasket on the brake motors (if fitted) and, if necessary, adjust the gap. ● Check for lubricant leaks from the gaskets/seals, plugs, casings and pipes. ● Check that temperature does not rise over normal operating levels unless this is not justified by a corresponding increase in the applied load, the rotation speed, ambient temperature or any other factor. If it does, the gear unit must be stopped immediately and the cause of the fault identified. ● Check all bolted couplings for wear, deformation and corrosion and tighten them correctly, without exceeding the values specified in the “INSTALLING THE GEAR UNIT” section in this manual. ● ● 6.2 ROUTINE MAINTENANCE KeepthegearunitatitsmaximumefficiencybyfollowingtheManufacturer’sroutinemaintenance schedule. Good maintenance ensures the unit’s maximum performance, extended service life and continued compliance with safety regulations. List of routine checks We recommend keeping a checklist of inspections so that any changes in individual control parameters can be identified rapidly and easily. Thetimesindicatedinthefollowingtablesvarysignificantlyinrelationtotheconditionsofuseof the gear unit and must be construed as valid in the absence of other types of problems. Depending on the temperature reached by the lubricant, it should be replaced at the intervals indicated in the table below: (tab 13) Oil temperature 52 / 64 Lubrication interval [h] t [°C] Synthetic oil Mineral oil t < 65 25000 8000 65 ≤ t < 80 15000 4000 80 ≤ t ≤ 95 12500 2000 IOM Manual HDP_gb - Translation of original instructions in Italian - Rev 0 - 27/07/11 (tab 14) Frequency 300 h see table Inspection parameter first oil change after commissioning subsequent oil changes 24 h oil temperature 24 h bearing temperature 24 h oil pressure 24 h noise, vibration 170 h ... 720 h gear unit external conditions (fouling, oil deposits) 720 h oil leaks, external seals and gaskets 720 h oil level 720 h oil filter contamination indicator 2200 h vent filter 2000 h ... 4000 h check tightness of the fixing bolts, connecting flanges and drive transmission components 2000 h ... 4000 h check the elastic elements in all joints for wear 2000 h … 4000 h regrease the Drywell device, bearings and seals (where required) 3000 h check cup springs for wear and adjust the torque arm 3000 h condition of torque arm polymer bushes (aging, cracking) 2000 h ... 9000 h condition of gear unit oil (possible presence of contaminants, especially water) 9000 h ... 18000 h internal cleanliness of the cooling coil and water/oil heat exchanger; possible presence of deposits 9000 h ... 18000 h alignment of gear unit shafts with respect to coupled machine shafts at every oil change general internal functioning conditions of gear unit, lubrication devices and/or oil cooling devices, and control devices at every oil change condition of gear tooth flanks at every oil change cleanliness of fan, fan cowl, and gear unit casing IOM Manual HDP_gb - Translation of original instructions in Italian - Rev 0 - 27/07/11 53 / 64 6.2.1 MAINTENANCE OF AUTONOMOUS COOLING UNITS (optional variants MCRW… , MCRA…) If the gear unit is equipped with an autonomous control unit, also follow the instructions given below. Before commencing any cleaning and/or maintenance: - activate all necessary safety devices to prevent the accidental start-up of the gear unit and control unit - wait for the gear unit and all parts of the control unit to cool down - drainthegearunitorlowertheoillevelsothatnooilflowsoutduringworktoreplacecomponents In particular, perform the following periodical checks: - check the blockage indicator, always when the oil is hot, and clean or replace the filter element with another of the same characteristics if the pressure gauge, depending on the type installed: - displays a pressure above 6 bar or 1.5 bar above the value displayed with a new filter element or, - is in the red area. - the cross section of water passages (MCRW…), to check that they are free from sediment and/or blockages that might impair the efficiency of the auxiliary cooling system: If necessary, clean the circuit by flushing with a suitable chemical agent, checking with the manufacturer that the cleaning agent is compatible with the construction material of the heat exchanger. The interval for checking the condition of the heat exchanger and any maintenance work depends on the characteristics of the cooling water used. Any defects in the heat exchanger water supply circuit can be identified by observing the condition of the lubrication oil in the gear unit, which will display a high degree of foaming if it has become contaminated with water. - the condition of the radiator (MCRA…), to verify that it is free from sediment and/or blockages that might impair the efficiency of the heat exchange process: if necessary, blow the fins clean with compressed air (max. pressure 6 bar), taking care to direct the air jet parallel to the fins to avoid damaging them, and protecting any electrical components. Only if absolutely necessary, spray a detergent product compatible with the material from which the heat exchanger is made before blowing clean. The interval for checking the condition of the heat exchanger and any maintenance work depends on the characteristics of the installation environment. Lubricants, solvents and detergents are toxic/harmful to health: - they may cause irritation in direct contact with the skin - they may cause intoxication if inhaled - they may be fatal if swallowed. Handle them with care using suitable personal protection equipment. Do not dump them into the environment and dispose of in accordance with applicable legislation. Pay the maximum attention when using hazardous chemical detergents and take all the necessary precautions to ensure they are disposed of in compliance with the law. Beforere-startingthegearunitorthecontrolunit,fillthegearunitandanyrelevantaccessories with oil to the correct level. Never run the control unit without the necessary guards in place. Always replace the guards before starting the unit. 54 / 64 IOM Manual HDP_gb - Translation of original instructions in Italian - Rev 0 - 27/07/11 6.3 CHECKING THE OIL LEVEL Oil level sight glass: To check the correct level of oil refer to the mid point of the sight glass or to the marks on the dipstick. If the oil level is lower than the lower edge of the sight glass or the dipstick minimum mark, replenish the oil and locate the cause for the fall in level. Overflowlevelplug: Gear units equipped with certain options (e.g. Drywell device), may also be equipped with a yellow plug for use as an overflow level check. To check the oil level, first identify the yellow level cap on the gear unit. Remove the plug and insert a bar of the right size in the hole and of the shape shown in the figure. If the level is more than 3 mm below the spill level, top up and check the reason for the drop in oil level. 1)N.B.Makesurethatthedipstickrestsfirmlyontheedgeofthethreadedhole. 6.4 OIL CHANGES 1. Place a suitable container under the drain plug. 2. Remove the filler and drain plugs and allow the oil to drain out. 3. Wait for a few minutes to ensure all the oil has drained out, and then refit the drain plug after renewing the seal and cleaning the drain plug magnet (if fitted) carefully. 4. With the gear unit installed in its final mounting position, fill it with oil to the mid point of the sight glass, or to the reference notch on the dipstick, or until oil starts to flow out of the plug hole. 5. Tighten down the filler plug after changing its seal. See the “LUBRICATION”sectioninthismanualfordetailsofthequantityofoilrequired.Specified quantitiesareonlyapproximate.Gearunitsmustbefilledtothemidpointofthesightglass,orto thereferencenotchonthedipstick,oruntiloilstartstoflowoutoftheplughole,accordingtothe mountingpositionspecifiedonorder. Lubricants, solvents and detergents are toxic/harmful to health: - they may cause irritation in direct contact with the skin - they may cause intoxication if inhaled - they may be fatal if swallowed. Handle them with care using suitable personal protection equipment. Do not dump them into the environment and dispose of in accordance with applicable legislation. IOM Manual HDP_gb - Translation of original instructions in Italian - Rev 0 - 27/07/11 55 / 64 If a leak is found, identify the cause of the fault and repair it before topping up the lubricant and operating the unit. 6.5 CLEANING To clean dust, dirt and process residues off the gear unit, do not use solvents or other products that might be incompatible with the materials from which it is made, and do not direct high pressure jets of water on to the gear unit. 56 / 64 IOM Manual HDP_gb - Translation of original instructions in Italian - Rev 0 - 27/07/11 7 REMOVAL 7.1 REMOVAL OF MOTOR WITH IEC STANDARD FLANGE (optional variant AD) If during operation the mobile coupling between the motor and gear unit has not rusted significantly, it should be possible to remove the motor without applying excessive force, once the screws coupling it to the gear unit have been removed. If the motor proves particularly difficult to remove, take all necessary precautions and avoid using screwdrivers or levers which might damage the flanges and mating surfaces. If the motor shaft has a threaded hole, proceed as instructed below. Impact extractor 1. Screw the end of an impact extractor into the threaded hole of the motor shaft (fan side). 2. Undo the bolts fixing the motor to the gear unit. 3. Detach the motor by means of the inertial force of the extractor. IOM Manual HDP_gb - Translation of original instructions in Italian - Rev 0 - 27/07/11 57 / 64 7.2 DISASSEMBLING A GEAR UNIT EQUIPPED WITH HOLLOW OUTPUT SHAFT WITH KEYWAY ● Remove the device that secures the gear unit axially. machine’s shaft can be extracted directly in-situ using a hydraulic device, or by using the device shown in the figure below: ● The 4 5 7 6 2 3 1 1. Machine shaft 2. Hollow output shaft 3. Key (not supplied) 4. Threaded rod (not supplied) 5. Bolts (not supplied) 6. Thrust ring (not supplied) 7. Torque plate (not supplied) Duringtheextractionprocessobservethemaximumthrustvaluesspecifiedinthetablebelowand take care to avoid knocks or misalignment. (tab 15) HDP 60 HDP 70 HDP 80 HDP 90 HDP 100 Maximum thrust force 25000 25000 40000 59000 59000 [N] 58 / 64 HDP 110 59000 HDP 120 HDP 130 HDP 140 HDP 150 HDP 160 76000 122000 122000 122000 122000 IOM Manual HDP_gb - Translation of original instructions in Italian - Rev 0 - 27/07/11 Alternatively proceed as shown in the figure below by turning the bolts one at a time: 1 2 3 1. Bolts (not supplied) 2. Thrust ring (not supplied) 3. Circlip (not supplied) 7.3 DISASSEMBLING A GEAR UNIT EQUIPPED WITH HOLLOW OUTPUT SHAFT AND SHRINK DISC COUPLING ● ● Unscrew the fixing bolts gradually one at a time and then remove the shrink disc coupling. Extract the machine shaft as instructed in the section “DISASSEMBLING A GEAR UNIT WITH HOLLOW OUTPUT SHAFT WITH KEYWAY”. IOM Manual HDP_gb - Translation of original instructions in Italian - Rev 0 - 27/07/11 59 / 64 8 TROUBLESHOOTING The following information is intended to serve as an aid in locating and eliminating defects and faults. In some cases, such problems may be caused by the plant or machine to which the gear unit is assembled and hence, the cause and remedy will be described in the Manufacturer’s technical documentation for the machine/plant in question. If any components fail or require replacement as a result of levels of wear likely to compromise the functioning of the gear unit, contact the Manufacturer’s sales network. 8.1 Gear units: FAULT Bearing temperature too high. CAUSE Oil level too low. Top up oil level. Oil spent. Replace oil. Defective bearings. Contact authorised workshop. Oil level too high. Check oil level. Operating temperature too high. Oil spent. Abnormal running noise. Abnormal noise at gear unit mounting. Oil leaks. Gear unit does not run or runs with difficulty. Output shaft does not turn with motor running. 60 / 64 REMEDY Replace oil. Contaminant in oil. Replace oil. Gears damaged. Contact authorised workshop. Bearing axial backlash too high. Contact authorised workshop. Bearings defective or worn. Contact authorised workshop. Excessive load applied. Correct load to rated values given in sales catalogue. Contaminant in oil. Replace oil. Mounting bolts loose. Tighten bolts to specified torque. Mounting bolts worn. Replace bolts. Oil level too high. Check oil level. Casing/coupling seals inadequate. Contact authorised workshop. Gaskets worn. Contact authorised workshop. Oil viscosity too high. Replace oil (see recommended lubricant table). Oil level too high. Check oil level. Excessive load applied. Redesign drive for actual load required. Gears damaged. Contact authorised workshop. IOM Manual HDP_gb - Translation of original instructions in Italian - Rev 0 - 27/07/11 8.2 Autonomous control units (MCRW… , MCRA…): FAULT CAUSE No or insufficient oil circulation. Operating temperature too high. Water/oil heat exchanger not working correctly (MCRW…). Bearing temperature too high. Unusual noise during functioning (in general) caused by no or insufficient pressure in the circuit. Unusual noise during functioning (in general) caused by excess pressure in the circuit. Abnormal running noise (air/oil heat exchanger). Oil leaks or excessive oil consumption. REMEDY Check the speed and direction of rotation of the electric pump. Check that the filter is clean. Check that the control thermostat is functioning correctly. Check that the pressure switch is functioning correctly. Check the water supply circuit. Check that the solenoid valve is functioning correctly. Check that the heat exchanger is clean. Check that the control thermostat is functioning correctly. Air/oil heat exchanger not working correctly (MCRA…). Check the speed and direction of rotation of the electric fan. Check that the heat exchanger is clean. Check that the control thermostat is functioning correctly. No or insufficient oil circulation. Contact authorised workshop. No or insufficient oil circulation. Check oil level. Check the used lubricant. Check that all components are correctly secured and sealed. Check that the electric pump is functioning correctly. Check that the filter is clean. Electric pump damaged or worn. Bypass circuit valve damaged or worn. Pressure switch damaged or incorrectly calibrated. Contact authorised workshop. Suction pipe blocked. Check that the pipe is clean. Operating temperature too high. See relevant section. Oil too viscous. Check the used lubricant. Wait for the gear unit to reach its normal operating temperature. Delivery pipes or components blocked. Check that the pipes are clean. Check that the filter is clean. Check that the heat exchanger is clean. Electric fan damaged or worn. Check that the electric fan is functioning correctly. Check that the heat exchanger is clean. Fittings loose. Check correct tightness. Damaged seals. Check correct tightness. Contact authorised workshop. Filter seals damaged. Check correct tightness. Replace the filter element. Leaks in heat exchanger. Contact authorised workshop. IOM Manual HDP_gb - Translation of original instructions in Italian - Rev 0 - 27/07/11 61 / 64 FAULT Water leaks (MCRW…). Filters frequently become clogged with metal particles. 62 / 64 CAUSE REMEDY Heat exchanger damaged or fittings loose. Check the condition of the water heat exchanger. Check the water supply circuit. Oil too old or high level of impurities. Replace oil. Electric pump damaged or worn. Contact authorised workshop. Pipes or components blocked. Check that the pipes are clean. Check that the heat exchanger is clean. Unusual wear of gear unit components. Check the condition of internal components (gears, bearings, etc.). IOM Manual HDP_gb - Translation of original instructions in Italian - Rev 0 - 27/07/11 9 DISPOSING OF THE GEAR UNIT Make sure that the gear unit cannot function accidentally while it is being taken out of service. The gear unit/gearmotor must be disposed of in compliance with environmental legislation, and the various materials used in its manufacture must be delivered to an authorised disposal/recycling centre. The gear unit must only be taken out of service by operators trained in the observance of applicable laws on health and safety at work. Do not dump non-biodegradable products, lubricants and non-ferrous materials (rubber, PVC, resins, etc.) into the environment. Dispose of all such materials as stipulated by current environment protection laws. Do not re-use parts or components which appear to be in good condition after they have been checkedand/orreplacedbyqualifiedpersonnelanddeclaredunsuitableforuse. IOM Manual HDP_gb - Translation of original instructions in Italian - Rev 0 - 27/07/11 63 / 64 INDEX OF REVISIONS (R) COD. 1661 R0 We reserve the right to modify the information given herein without prior notification. This manual may not be reproduced, even partially, without express authorisation. This edition cancels and replaces all previous editions and revisions. 64 / 64 IOM Manual HDP_gb - Translation of original instructions in Italian - Rev 0 - 27/07/11 Bonfiglioli has been designing and developing innovative and reliable power transmission and control solutions for industry, mobile machinery and renewable energy applications since 1956. Bonfiglioli Riduttori S.p.A. Via Giovanni XXIII, 7/A 40012 Lippo di Calderara di Reno Bologna, Italy tel: +39 051 647 3111 fax: +39 051 647 3126 [email protected] www.bonfiglioli.com