1
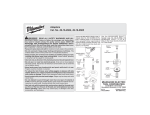
ECE 477 Digital Systems Senior Design Project Rev 9/12 User Manual Year: 2014 Semester: Fall Team: 7 Creation Date: November 17, 2014 Author: <redacted> Project: Digital Knockout Last Modified: October 7, 2015 Email: [email protected] Assignment Evaluation: Item Assignment-Specific Items Product Description Product Illustration Setup Instructions Usage Instructions Troubleshooting Instructions Writing-Specific Items Spelling and Grammar Formatting and Citations Figures and Graphs Technical Writing Style Total Score 5: Excellent 4: Good Comments: Score (0-5) Weight 3: Acceptable 2: Poor Points Notes 1: Very Poor 0: Not attempted ECE 477 Digital Systems Senior Design Project Rev 9/12 1.0 Product Description The Digital Knockout electronic game provides an entertaining, yet safe resort to enjoy your favorite sport of boxing. Think you can throw a punch like a professional? Want to challenge your friend to a one-on-one? Digital Knockout takes the boxing experience to a whole new level by allowing you to be a real professional boxer in your own living room. Intended for both the young and adults alike, this game comes with smart boxing gloves and vests that provide real-time statistics about the power of your punch. Inside your Digital Knockout package, you should find: - two wearable vests - two pairs of boxing gloves, - a console that controls the game flow - one pack of six rechargeable batteries - User Manual - Safety Instructions Packet There are two main modes of gaming supported by Digital Knockout: 1. Multi-player Combat: Up to two players can compete with each other in timed boxing rounds, providing hours of enjoyable and exhilarating game play. Each player must wear one gaming vest and a boxing glove on each hand. The wireless technology in the gloves and vests ensures safety from punch injuries, since you and your opponent can stand at a safe distance away from each other and still deliver impressive, vigorous blows. The game begins with 100 Health Points (HP) allocated to each boxer, and from then, you have exactly 60 seconds to eliminate your opponent or defend yourself long enough before the time runs out! The stronger your punch, the faster you can drain your opponent’s HP. 2. Train Like a Pro: You can experience great action as you develop your boxing skills in this single-player game. Both accuracy and strength are put to test to help shape you into a professional boxer. With no timed conditions in this game mode, you can train until you break a sweat! To play in this mode, you must wear a boxing glove on each hand, and hang the “opponent” vest in front of you. The LCD screens on the main console will then constantly provide feedback on your punches. ECE 477 2.0 Product Illustrations Digital Systems Senior Design Project Rev 9/12 ECE 477 Digital Systems Senior Design Project Rev 9/12 ECE 477 Digital Systems Senior Design Project Rev 9/12 3.0 Setup Instructions To ensure smooth gaming and proper functionality, it is necessary to follow these simple steps below to set up the game: 1. Find the six rechargeable batteries (3.6V) included in the Digital Knockout package. 2. Insert a single battery into a boxing glove in the holder labeled in Figure 2.7 in the previous section. 3. Turn on the power switch on the boxing glove. This is also displayed in Figure 2.7.The red power LED should light up once the power is on. 4. Repeat steps 2-3 for the other boxing glove. Then put on both gloves and tighten wrist straps as necessary. The wrist strap has been labeled in Figure 2.7. 5. Now locate the gaming vest that matches the color of the band on the wrist of the glove, and insert another battery in the holder into the ‘vest board’. The position of the vest board is displayed in Figure 2.4, and the battery holder can be seen in further detail in Figure 2.5. 6. Turn on the power switch for the gaming vest as displayed in Figure 2.5. The red LED should then light up. 7. Put on the vest and tighten the straps on either side as necessary, making sure it fits snugly. 8. If playing with an opponent, repeat steps 2-7 for the other player’s gloves and vest. 9. Plug in the DC adapter of the main console to a wall socket. Refer to Figure 2.2 for clarification. 10. The LCD screens on the console should now be lit up, and contain the next step of instructions, as displayed below in Figure 3.1. 11. Select the game mode by toggling the switch in the center of the main console, and press the red START button whenever ready. Refer to Figure 2.1 for the position of the toggle switch and START button. 12. Face your opponent’s vest, and stand at a distance of about 2m away. 13. Fight like a professional. ECE 477 Digital Systems Senior Design Project Rev 9/12 4.0 Usage Instructions Now that you have set up the game as per the steps in section 3.0, the following general instructions will help you during game play. They are broken down into sections for general usage of the game, single player mode, and multiplayer mode. General Usage: The yellow vest and matching yellow-band glove is assigned to player 1. The orange items are assigned to player 2. The IR emitters are located in the front of the boxing glove. The detectors are located in 5 positions on the front of the vest (four on each corner, one in the center of the waist). These are labeled in Figures 2.6 and 2.3 respectively. To ensure the accuracy of your punch, you must point the glove towards one of these sensors on the opponent’s vest. Once the game has started, you may press the black STOP button on the main console (see Figure 2.1) at any time to end the current game. This works for both game modes (single and multi-player). To “block” a punch, you can hold both elbows close to your ribcage, with your forearm blocking your torso. This will cover up at least three of the five sensors on your vest, and prevent any attacks to your upper body. To “block” punches to the bottom two sensors, you may duck as your opponent punches towards you. This will ensure that the IR transmission from his glove is not able to reach the sensors on your vest. To prevent any injuries, do not physically punch your opponent. Also, do not punch any wall or object with these boxing gloves as it may cause failure of the IR sensors. Refer to the safety and reliability instructions (HW Assignment 11) included in the Digital Knockout package for more information. To change batteries, locate the battery holder in the glove or vest as described in Section 3.0. Use two fingers to push downwards on the battery holder (shown in Figure 2.8). Then pull out the battery from the other side. Finally, follow step 2 or 5 in Section 3.0 to insert the new battery, making sure to take care of the polarities as displayed in Figure 2.9. Finally, when you finish playing, remember to turn off the power for all gloves and vests, and to remove the wall adapter. Multi-player Combat: ECE 477 Digital Systems Senior Design Project Rev 9/12 The first line on the top LCD screen shows the time remaining in the current boxing round (Figure 4.1). The line below it displays the remaining Health Points for each player, denoted by “P1” and “P2” (Figure 4.1). The bottom LCD screen displays real-time information about punch detection on each of the five sensor locations on each vest. An ‘X’ next to a number corresponds to a punch being detected on that position. The top line is for player 1’s vest, and the bottom is for player 2’s vest (Figure 4.1). The loss in HP of your opponent is proportional to the force of your punch; so punch forcefully and triumph quickly! The game ends when either player falls to zero HP, or the timer runs out. A “Game Over” should be displayed on the LCD screen at this point, followed by the winner of the game. The victor is determined by the ranking of both players’ HP. Train Like a Pro: Figure 4.2 – Bottom LCD screen on main console during ‘Train Like a Pro’ mode. Having two pairs of boxing gloves allows you to throw punches with both hands, and train like a professional! You want to make sure you hang up the opponent’s vest in front of you. It should be at a reasonable height: as if your opponent is standing in front of you. The bottom LCD screen will provide feedback regarding the strength and accuracy of your punch. The first line on that screen shows you the force of your punch. This is measured along the x-axis only, so punching in any other direction would not give you a reading that you expected (Figure 4.2). The bottom line on the screen shows the location on the vest that detected your punch (Figure 4.2). ECE 477 Digital Systems Senior Design Project Rev 9/12 5.0 Troubleshooting Instructions Is the console not turning on? Check that the 5V adapter has been inserted properly in a wall outlet. Is HP being deducted from the wrong player? The gaming vests may have been swapped. Make sure you are wearing the right colored vest that matches the color of the band on your glove. Is your punch not registering correctly on the opposing vest? - Make sure you are standing facing the vest, and the distance between you and vest is no more than 2m. - Check that the detectors on the vest or the emitters on the glove aren’t being blocked by anything, e.g. vest might be folding over the sensors if not tightly strapped to your body. Does the punch force appear to be unreasonably small regardless of the strength of your blow? Make sure you are punching in the horizontal direction and facing the vest. Punching sideways or to the roof/floor would result in unreliable readings. Are you unable to see punch statistics on the LCD screen? - Make sure you are not covering any of the antennas on the gloves, vests, or the console. - The power switch might be off for a glove or vest. If you are seeing a flashing ‘low battery’ message, or a flickering power LED, then the battery needs to be replaced for the appropriate component. - Make sure there are no loose or disconnected wires in the glove or vest. Do the punch statistics seem to be updating too slowly? This is not a hardware issue. The software was designed to sample punch force and accuracy every second. Hence, if you throw a punch and retreat your hand too quickly, the game might display incorrect readings. Did none of the above solutions help? Reset the console by removing and reattaching the main power cable from the outlet. Didn’t find your question above? Leave us a message with your name, contact information, and a description of the problem you are encountering at this link: www.digitalknockout.com/contact.html, and we will get back to you as soon as possible.