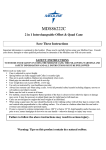
Download battery operated patient lift model : mds400el
Transcript
BATTERY OPERATED PATIENT LIFT
MODEL : MDS400EL
OWNER’S MANUAL
Medline Industries, Inc
One Medline Place
Mundelein, IL 60060-4486
Tel: 1-800-MEDLINE
Web: www.medline.com
Thank you for choosing a Medline Lift!
To better serve you, please record the following information:
Supplier Name:___________________________________
Telephone:_______________________________________
Serial #:_________________________________________
Date of Purchase:_________________________________
INSPECT YOUR MERCHANDISE
Upon receipt of your Medline Lift, verify that all merchandise is complete and free from any shipping
damage. Refuse delivery if the package appears to be badly damaged. If the merchandise is received
damaged or is missing components, contact the shipping company immediately and file a claim.
For further assistance, contact your local dealer or Medline:
Medline Industries, Inc.
One Medline Place
Mundelein, IL 60060-4486
1-800-MEDLINE
1
EXPLOSION CHART OF MEDLINE MDS400EL
A. Spreader Bar
B. Boom
C. Mast
D. Base
E. Actuator
F. Control Box
G. Front Caster
H. Rear Caster with brake
F
E
Each lift has warning labels applied.
G
D
H
DIAGRAM OF CONTROL BOX
a. Emergency Reset/ Stop Button
b. Battery Testing Button
c. Charger (plug into top hole)
d. Handset (plug into second hole from top)
e. Actuator (plug into third hole from top)
2
SAFETY INSTRUCTIONS
The Medline MDS400EL reflects innovative state of the art design to increase user mobility. The
MDS400EL will provide years of service if it is properly maintained, as any piece of electrical/
mechanical equipment requires.
Please pay careful attention to the following important information regarding the care, maintenance,
and operation of the Medline MDS400EL Battery Operated Patient Lift. Carefully read the instructions
before assembling the lifter, or attempting to lift any user with the device.
PLEASE NOTE THE FOLLOWING:
•Special care must be taken with residents who cannot provide assistance themselves while being
lifted. (i.e.residents who are comatose, spastic, agitated, or otherwise severely handicapped.)
•The Medline MDS400EL should be solely for transferring a resident to or from a wheelchair, bed,
commode, shower chair, floor or 90 degree rotation. The lift should not be used for patient
transportations between rooms, etc. in lieu of a wheelchair or gurney.
•During lifting or lowering, whenever possible, always keep the base of the lift in the widest
position with the casters unlocked.
•The base of the lift should be closed before moving the lift.
•Do not roll casters over any object while the resident is in the sling.
•While being lifted in a sling, always keep the resident centered over the base and facing the
caregiver operating the lifter.
•Maximum weight that can be safely lifted is 400 pounds.
NEVER EXCEED SAFE WORKING LOAD CAPACITY.
The Medline MDS400EL allows a resident to be lifted and transferred safely with minimum physical
effort required by the caregiver. Before attempting to lift anyone, please practice operating the lift and
read this manual completely. Also prior to actual lifting, explain the lifting procedure to the resident.
WARNING!
Do not attempt to transfer a resident without prior approval of the resident’s nurse or doctor. Also,
do not transfer without having studied the instructions and practiced operating the lift several times.
Together with the resident’s doctor, nurse, or medical attendant, select a Medline sling that is both
practical and comfortable. The sling selected should be one that serves the needs of the resident,
while providing the resident with optimal safety. Never interfere with the lift, unless instructed by the
attendant who should be experienced in the use of the Medline MDS400EL. Never operate the lift
unless you have been properly trained on all procedures and safe handling methods.
WARNING!
Medline slings are specially designed for use on Medline Lift equipment. For optimum performance
use only genuine Medline 6 point slings on Medline Lift equipment. USE OF NON MEDLINE SLINGS
IS UNSAFE AND MAY RESULT IN INJURY TO THE RESIDENT OR CAREGIVER.
WARNING!
Do not put anything (e.g. cushion, pad, etc) between the resident and the sling. This may cause the
resident to slide out of the sling and cause injury.
3
WARNING!
Avoid personal injury by making sure children or pets are away from the Medline MDS400EL while it
is in use.
WARNING!
Avoid personal injury by making sure all extremities (such as fingers, arms, legs, or feet) are clear of
the lift mechanism while it is in operation.
WARNING!
Avoid personal injury and possible damage to the MDS400EL by making sure the maximum weight
limit of 400 pounds is not exceeded.
WARNING!
Replace any worn parts only with genuine Medline Lift parts. Medline Lift parts are not
interchangeable with parts from other patient lift brands. Using other patient lift parts on Medline
Lift products is unsafe and may result in serious injury to resident and caregiver. Medline is not
responsible for any consequence resulting from the use of non-Medline Lift parts and components.
WARNING!
Avoid personal injury by making sure the electrical connector is disconnected before conducting any
electrical inspection. Contact your dealer if any electrical problem is detected.
WARNING!
Service and repair of Medline Lift equipment should be performed only by Medline or by an
authorized dealer. Medline is not responsible for any consequence resulting from any unauthorized
service or repair.
CAUTION
Avoid damage to the MDS400EL by keeping foreign objects from coming into contact with the lift
mechanism or other lift moving parts.
NOTE
Pre-arrange all necessary items (lifts, slings, commode chair or wheel chair, etc.) for a smooth and
safe lift procedure. The resident being transferred should be positioned in the center of the bed before
being lifted, as well as when he/she is returned to the bed. Keep lifter base widened and brakes
unlocked during lifting.
ALWAYS CHECK THE FOLLOWING BEFORE LIFT OPERATION:
•The base legs are fully engaged from the stowed position
•The mast is fully locked and bolted securely into position
•The base legs open and close properly using foot pedals
•The red emergency stop/reset button is in the up (operating) position
•The hand remote has been tested and the lift up/down functions work smoothly
•The nuts, bolts and fasteners are secure
4
ASSEMBLY INSTRUCTIONS
WARNING!
The lift is heavy. Therefore, avoid injury and DO NOT attempt to remove the lift from the box without
any assistance. Exercise care when unpacking and assembly to avoid injury and pinching fingers
between components. Read the owners manual carefully prior to unpacking and ask for assistance if
you are unsure of proper procedures. A set of special wrenchs is supplied with each lift for assembly;
or standard adjustable wrenchs or socket sets may be used.
Carefully remove all small boxes and parts containers from the shipping
container and check to ensure all parts are present.
Remove the base, set on the floor and engage the caster brakes.
Remove the bolts from the bottom of the mast and the base.
Pull the mast, boom, and spreader bar to an upright position.
Reinsert the bolts into the holes at the bottom of the mast and tighten the nuts.
Attach the control box hanging bracket to the mast and tighten the nuts.
Place the control box inside the bracket.
Attach the bottom of the actuator to the bracket on the mast and insert the pin.
NOTE: The actuator cable should be on the same side as the round openings
of the control box.
Attach the top of the actuator to the bracket on the boom and insert the pin.
Attach the spreader bar to the boom and insert the pin.
Insert the actuator plug into the control box.
Insert the pendant plug into the control box.
NOTE:
Prior to using the Medline MDS400EL for the first time, charge the batteries
for 12 hours.
5
MAINTENANCE & INSPECTION CHECKING
LIST
The operator of the lift is to inspect the Medline MDS400EL before each use. Check all bolts for
tightness. Make sure the base can be easily opened, and that all lift parts are in place. Make sure all
casters turn freely, and that the caster brakes can be engaged. Make certain all necessary items (i.e.
slings, wheel chairs, etc.) are accessible and ready for use. See the instructions below to check the
battery capacity and appropriate re-charge levels.
At least once a month, the lift should be thoroughly inspected by a qualified technician to recognize any
signs of wear, and/or looseness of bolts or parts. Replace any worn parts immediately.
To lubricate, place a drop of general purpose oil on the following points when the Medline
MDS400EL is serviced and every month thereafter:
•Top of mast bolt connection
•Spreader bar hinge
•Caster axles
CHECKING BATTERY
CAPACITY
Check batteries by pressing the Battery Indicator (blue circle with battery sign on top of control box) or by
pressing up or down on the remote. The status of the battery is indicated by colored LED lights and is
listed in the following table:
RED
ON
ON
ON
AMBER
ON
ON
ON/OFF
GREEN
ON
ON
OFF
GREEN
ON
OFF
OFF
GREEN
ON
OFF
OFF
STATUS
FULLY CHARGED
NEEDS CHARGE
CHARGE
IMMEDIATELY. DO
NOT USE THE LIFT.
OFF
OFF
OFF
OFF
OFF
BAD BATTERIES OR
BAD CONNECTION.
CHARGING THE
BATTERIES
•Make sure the battery box red reset/emergency stop button is “ON” (i.e. the red button is up).
•Insert the charger into the charging socket on the battery box (the top slot).
•Plug the charger to the power supply.
•All LED indicator lights should be “ON” while charging.
•When only one green LED indicator light is illuminated, the batteries require approximately 7-9
hours to be fully charged.
•A complete initial charge should take approximately 12 hours. Subsequent recharges should take 4
hours or less. Do not charge the batteries over 12 hours to avoid premature charger wear. Charging
longer than 12 hours will not affect battery life.
•Unplug the charger FIRST before using the lift.
•Replace the two internal batteries when frequent charging is required.
The Medline MDS400EL will not operate while the batteries are being charged.
IMPORTANT NOTES ON CHARGING
Push lift to an appropriate location and charge the batteries with the charger provided. Avoid unplugging
the hand control and motor from the control box. Frequent plugging and unplugging of the hand control
and motor to and from the control box may damage the control box.
6
MAINTENANCE SCHEDULE
Always follow the maintenance and cleaning schedule closely and fully while including any specific
state regulations should they apply. Keep a log book of maintenance times and work performed or
parts replaced.
PERFORM EACH OF THE FOLLOWING IMMEDIATELY AFTER ASSEMBLY AND MONTHLY
THEREAFTER:
Boom & Spreader Bar
•Check that spreader bar is firmly attached to boom.
•Check that boom is firmly attached to mast.
•Check for wear on pin securing spreader bar.
•Make sure spreader bar is free to rotate and swing.
•Check sling hooks on spreader bar for excessive wear.
•Make sure the boom is straight with no bends or deflections.
Mast
•Check mast is secured and bolted tight to the base.
•Make sure mast is straight with no bends or deflections.
Base & Foot Pedals
•Make sure the base legs open freely.
•Make sure the lift rolls easily on its casters and the casters are firmly attached to base. If lift won’t
roll freely check caster surface for wear and replace if required. Lubricate caster axles at each
maintenance session.
Electronic System
•Make sure control box is seated in metal holder on back of mast securely.
•Check that actuator is firmly attached to boom and mast with holding pins.
•Check that actuator cord is firmly inserted into the third hole from the top of the control box.
•Operate hand control or push battery indicator to check battery levels and charge if required.
•Attempt upward and downward lift to ensure actuator working properly.
•Check the operation of the red reset/emergency stop button.
•Listen for any warning beeps during testing and perform troubleshooting as required.
Slings
•Check entire sling inventory for fraying, tearing or excessive wear of any kind and replace any worn
or damaged slings with new Medline slings.
7
DO NOT OPERATE LIFT UNLESS ALL MAINTENANCE POINTS PASS INSPECTION
WARNING:
•ALWAYS plan your lifting operations before commencing.
•ALWAYS carry out the daily check list before using the lift.
•ALWAYS familiarize yourself with the operating control and safety features of a lift before lifting a
patient.
•DO NOT use a sling unless it is recommended for use with the lift.
•ALWAYS check if the sling is suitable for the particular patient and is of the correct size and capacity.
•NEVER use a sling which is frayed or damaged.
•ALWAYS fit the sling according to the instructions provided.
•ALWAYS check the safe working load of the lift to be sure it is suitable for the weight of the patient.
ALWAYS carry out lifting operations according to the instructions in the user manual.
•NEVER disconnect or bypass a control or safety feature because it seems easier to operate the lift.
•DO NOT lift a patent with the caster brakes on. Always let the lift find the correct center of gravity.
•DO NOT attempt to maneuver the lift by pushing on the mast, boom, or patient.
•ALWAYS maneuver the lift with the handle provided.
ALWAYS lower the patient to the lowest comfortable position before transfers.
•DO NOT push a loaded lift at speeds which exceed a slow walking pace (1.9 miles/hour, 2.6 foot/
second).
•DO NOT push the lift over uneven or rough ground. Particularly if loaded.
•DO NOT attempt to push/pull a loaded lift over a floor obstruction, which the casters are unable to
ride over.
•NEVER force an operating/safety control. All controls are easy to use and do not require excessive
force.
•DO NOT park a loaded lift on ANY sloping surface.
•DO NOT use electric lifts in a shower.
•DO NOT charge an electric lift in a bathroom or shower room.
•DO NOT lift a patient unless you are trained and competent to do so.
•YOUR lift is for patient lifting. DO NOT use it, or allow it to be used for any other purpose.
•DO NOT bump the lift down steps, loaded, or unloaded.
•DO NOT attempt to negotiate a loaded lift on a slope.
•ALWAYS check that the hoist is not charging before moving as the electrical connection may be
damaged.
•CAUTION: Keep the batteries fully charged. Place the lift on charge whenever it is not in use. The
charger will not allow the batteries to “overcharge”.
•NEVER lift with the legs in the closed/transport position. The closed position is for storage and
transport only.
•CAUTION: Never run the batteries completely flat. If the audible warning sounds, complete the lifting
operation in hand and place the lift on charge.
•CAUTION: Never store the lift for long periods without regular charging throughout the storage
period.
•CAUTION: Always make sure the main power to the charger is switched off before connecting or
disconnecting the charger to or from the lift.
•CAUTION: Never leave the charger plugged into the lift with the main power off.
•CAUTION: Never disconnect the charger plug by pulling on the cable.
The lift has two braked casters, which can be applied for parking. When lifting, the casters should
be left free and unlocked, so that the lift will then be able to move to the center of gravity of the lift.
•DO NOT apply the brakes because if the brakes are applied, the patient might swing to the center of
gravity and this may prove disconcerting and uncomfortable to the resident.
8
OPERATING INSTRUCTIONS
NOTE: Turn the lift “ON” by turning the red “RESET” button clockwise until it pops up. Turn
the lift “OFF” by pressing down the “RESET” button.
•
•
•
•
•
•
•
•
•
•
•
•
•
•
•
•
•
•
•
•
•
•
Transfer From Bed
Resident should be laying flat in the center of the bed.
Position the resident onto his/her side by gently rolling them towards you with the assistance of
another caregiver.
Roll the sling in half, approximately. The handle on the back section should face outward when
the sling is fitted.
Position the sling under the resident so the commode aperture or “U” shaped cut-out aligns
with the base of the spine and top of the sling close to the neck.
Roll the resident onto the opposite side and position him/her on the flat section of the sling.
This will allow you to unroll the remainder of the sling from the other side of the resident.
Once the sling has been positioned centrally, feed the leg sections under the thighs and draw
c
them up between the thighs.
a
Raise the head of the bed if this function is available.
e
Open the base legs and move the lift slowly towards the
b
f
e a
f
resident and position the spreader bar over the resident’s b
c
d
d
chest.
Attach Loop A of the sling to Hook A on spreader bar; attach Loop B to Hook B; attach Loop C
to Hook C; attach Loop D to Hook D. (Pass loops e and f through each other, crossing them
over each other and the attach to hooks E and F on the spreader bar)
Lift the resident above the bed by using the hand control while watching and reassuring them.
Pull lift away from bed.Close the base and move resident over the wheelchair (chair wheels
locked) or commode opening the base for stability and fit.Then lower the resident onto the
surface by pressing the down button.
NOTE: Reverse the above procedures when returning the user/patient to bed.
Transfer from Wheelchair
Grasp the sling at each corner of the “U” shape of the commode aperture.
The sling should be fitted with the loop handle on the back facing outward.
Help the resident lean forward slightly, then slide the sling down between the chair and the
resident’s back.
Position the commode aperture where the buttocks meet the seat.
Position the sling equally around both sides of the body.
Draw the leg sections to the front along the side of the resident’s thigh.
Check the sling’s central positioning by comparing the lengths of the leg sections when they
are drawn forward.
Reposition the sling if the leg sections are not equal in length.
Feed the leg sections under the thighs.
From between the legs, gently pull the leg sections up the inner thigh.
Cross one leg loop through the other and then position the lift and attach all sling loops as
described in the “from the bed transfer” above.
9
EMERGENCY LOWERING MECHANISM
In case of lift failure while using the Medline MDS400EL, please
follow the procedures below to complete the intended lift and
transfer. The Emergency Lowering Device is located at the top of
the actuator shaft. It is intended for use should the actuator fail to
operate while a patient is suspended. The device consisting of a
plastic collar ring should be turned clock wise continually until the
patient has been lowered. Contact your dealer immediately if
standard troubleshooting techniques do not correct the failure. Do
not attempt to lift until all failure issues have been safely resolved.
NOTE:
The Emergency Lowering Device is intended for lowering only
during lift failure. Should standard troubleshooting techniques fail to
correct the lift and lower functions take the lift out of service and call
your dealer immediately for assistance. Do not attempt further lifts
until the lift is working properly.
10
TROUBLESHOOTING CHART
SYMPTOMS
COMPONENTS
CONCERNED
POSSIBLE CAUSES
ACTION
SOLUTION
The actuator is installed and a
clicking sound is audible.
Actuator
Actuator plug is not sealed propActuator and PCB erly into control box.
Actuator is defective or
completed its life cycle.
Control box is defective.
Test control box
on another
Medline lift.
Firmly plug the actuator plug into
control box.
Replace actuator if control box is
good.
Replace PCB if control box is bad.
The actuator will either go up or
down, but not both.
Hand Control or
PCB
Hand control or control box defective.
Test hand control
on another
Medline lift.
Replace PCB if hand control is
good.
Replace hand control if it is bad.
The actuator makes a grinding
sound while lifting, but works
fine without a load.
Actuator
The internal gear is stripped likely
due to overloading
Stop using the lift.
Repair or replace the actuator.
The actuator stops and starts
during lifting or lowering.
Batteries
Bad batteries
Check battery indicator. Confirm if
lights drop quickly
to red light.
Replace batteries.
The lift will not operate even
though battery indicator shows
charge.
Control Box
Charger still plugged in.
Poor connection between control
box and hand control, or defective
hand control.
Poor connection between actuator
and control box.
Unplug charger.
Plug hand control firmly into control box, or replace hand control.
Plug actuator cord firmly into
control box.
The lift will not operate and
battery indicator has no lights
illuminated.
Control box and
battery
Control box may be in “off” position.
Internal batteries may be loose
from their connections.
Batteries are in need of being
charged.
Batteries are dead and won’t hold
a new charge.
Turn the red emergency stop
button until it pops up to the “on”
position.
Check inside control box to ensure
batteries are connected.
Use the charger to charge the
batteries making sure the red
emergency stop is in “on” or “up”
position.
Replace the two internal batteries.
During charging the battery,
indicator is not illuminated and
won’t charge.
Control Box
Charger
The red emergency stop button is
in “off” or “down” position.
The charger is defective or at end
of it’s life cycle.
Turn the red emergency stop
button until it pops up into the “on”
position.
Inspect the charger for damage
and replace if required.
The battery indicator indicates
need for frequent charging
and/or lift looses power.
Batteries
The internal batteries are at the
end of life cycle.
Replace the two internal batteries.
The lift will not operate and
there is no clicking sound or
light when hand control was
pressed.
Hand Control
The hand control is loose/ defective or at the end of life cycle.
Two beeps per second audible
from control box, and lift runs
slowly/ stops/ starts.
Batteries
Low battery charge level.
Charge the batteries.
Three beeps per second
audible from control box with
only red light illuminated and
lift stops.
Batteries
Low battery charge level.
Charge the batteries
immediately.
Six beeps per second audible
from control box with no lights
illuminated.
Batteries
Extremely low battery charge level.
Charge the batteries
immediately.
Three beeps every other second audible from control box
and lift won’t operate.
Batteries
Battery life cycle.
Replace the batteries.
Three long beeps and lift stops
during lift.
Working Load
Lift is overloaded.
Stop the lift immediately and lower
patient.
11
Check battery
indicator.
Replace the hand control if battery
indicator shows full charge.
LIMITED WARRANTY
The Medline MDS400EL you purchased is guaranteed by Medline to be free from defects in material
and workmanship under normal use and service. The warranty period for this product is three
years for the base and frame assembly and three years for the electronic components including the
actuator. Internal replacement batteries are warranted for twelve months.
This warranty shall be voided upon transfer of ownership of this product. Medline agrees to repair
or replace this product, at our discretion and at no charge, within the warranty period provided the
product is delivered to Medline or its Authorized Service Center in its original packaging or equivalent;
is fully insured with all shipping charges prepaid; and that Medline consents the unit is defective. The
repaired or replacement unit shall be warranted for a period equal to the balance of the defective
unit’s warranty period. A handling charge of $50.00 will be applied to any returned product proven to
be NOT defective. For warranty service, please contact the dealer from whom you purchased your
Medline Lift product. You may also contact Medline at 1-800-MEDLINE should warranty service not
be available from your dealer. NOTE: You must never return the product to your dealer or to Medline
at any time without the verbal consent of either party. To ensure the best service to our customers,
Medline requires the following information to be included with the returned unit:
1. Model Name/Number and Serial Number on the packaging.
2. Proof of purchase, i.e. copy of the original invoice from either Medline or its dealer.
3. A Return Authorization number (RA#) obtained by calling Medline prior to the return of the product.
The RA# must be clearly indicated on the outside of the packaging;
4. A detailed description of the problem and its symptoms on a note.
This warranty shall not apply to any product which has been repaired or altered in any way so as, in
our judgment, to affect its functionality and durability, nor to any product subject to abuse, misuse,
negligence or accident, improper maintenance, improper installation, nor to any product used with
other parts, components and/or accessories with quality and/or specifications not compatible
with this product. This warranty does not cover products that have been impaired by occurrences
considered Acts of God over which Medline has no control. This warranty shall also be voided if any
required periodic maintenance, if applicable, has not been properly performed on this product.
This warranty and the aforementioned remedies presented are exclusive and in lieu of all other
express or implied warranties. No other representatives or claims shall be binding or obligate Medline
in any way. Any warranty applicable to this product is limited to the aforementioned period indicated.
In no event shall Medline be liable for any special, incidental, or consequential damages; loss of
revenue; or cost of replacement goods; resulting from the use or malfunction of this product to the
associated equipment on which and with which it is used. This warranty gives specific legal rights and
you may be entitled to other rights that vary from state to state.
12
MEDLINE PATIENT LIFT MAINTENANCE RECORD
LIFT MODEL:
SERIAL NUMBER:
DATE
SERVICE PERFORMED
PARTS APPLIED/ REPLACED
MAINTENANCE PERFORMED BY
Medline Industries, Inc.
One Medline Place
Mundelein, IL 60060-4486
Tel: 1-800-MEDLINE
Web: www.medline.com
Medline Industries, Inc. reserves the right to change the specifications without prior notice.


