1
Warnings
1.
2.
3.
4.
5.
6.
7.
8.
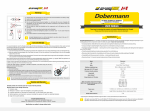
Always follow the instructions from this manual and recommendations on battery usage.
Apply only the recommended power sources.
Do not reverse battery polarity.
Do not use different power sources together, i.e. old ones with new ones, charged with
discharged. Do not use different types of batteries combined as the element with less
capacity can be damaged.
Do not modify or recast the flashlight and its components as it will deprive you of the
warranty.
Do not allow water or any other liquid to leak into the flashlight.
Do not aim a turned-on flashlight at people's or animals' eyes – it can cause temporary
blindness.
Do not allow children to use the flashlight without your assistance.
Predator
THE MOST TECHNICALLY ADVANCED
FLASHLIGHTS IN THE WORLD
USER MANUAL
Thank you for choosing the products of Armytek Optoelectronics Inc., Canada.
Please read this manual carefully before using the flashlight.
Specifications
Armytek Optoelectronics Inc. shall not be liable for any harm done to the user if it
was caused by improper use of the product.
Care and Storage
It is recommended to clean the threads and O-rings off dirt and old grease. Remember that secure protection from water and dust
cannot be provided by worn out sealing. And fouling as well as lack of lubricant cause fast wear-out of threads and sealing rings.
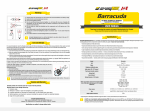
To clean the threads do the following:
1. Unscrew the tailcap and remove the sealing ring carefully with a toothpick (do not use sharp metal things as they can damage the ring).
2. Wipe the sealing ring thoroughly with a soft cloth (or tissue). Do not use solvents. If the sealing ring is worn out or damaged
replace it by a new one.
3. Clean the metal threads with a brush using ethanol. Be careful not to allow applied liquid to get inside the flashlight or tailcap as it
can cause fails in functionality of the flashlight.
After cleaning lubricate the thread and the sealing ring with polyalphaolefin-based silica grease, e.g. Nyogel 760G.The application of
automotive and other improper grease can cause swelling and damage of the sealing rings.
In case of active operation and exploitation in dusty environments, it is recommended to perform cleaning and lubricating of the parts
as often as required, even if it is more than twice a year.
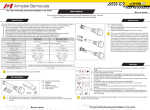
In case the rubber button is damaged, it should be replaced. In the same way you can also
replace the switch with the spring.
1.
Replacement order:
2.
1. Unscrew the tailcap.
2. Unscrew the first washer inside it to take out the switch. To do so you should use needlenose pliers (round-nose pliers or another tool: most suitable will be expansion pliers). Use
the tool as it is shown at the picture. To replace the rubber button unscrew the second
washer under the switch.
3. Replace the rubber button and assemble the parts in inverse sequence.
Do not disassemble the flashlight except for unscrewing the thread ring gage and replacing the rubber button. There are no
other parts in the flashlight that can be replaced by the user.
Service and Warranty
Armytek provides free warranty repair for 10 years from the purchase.
Warranty doesn't cover damage caused by:
1. Improper usage.
2. Attempts to modify or repair the flashlight by nonqualified specialists.
3. Longtime application in chlorinated or polluted water, or other liquids (other than water).
4. High temperatures and chemicals' exposure (including the exposure of liquid from defected batteries).
5. Usage of low-quality batteries.
Armytek Optoelectronics Inc.
Web: www.armytek.com Email: [email protected]
Address: 67 Vandervoort Dr, Richmond Hill, Ontario, L4E 0C7, Canada
Specifications are subject to change without notice.
Armytek Optoelectronics Inc. is a Canadian manufacturer that produces powerful and reliable flashlights designed especially for your
needs applying in them components made in the USA and Japan. 10 years no-hassle warranty.
§ Extreme beam distance up to 381 meters
§ Impressive brightness 700 LED lumens
§ Constant brightness even in -25ºC frost and with almost discharged batteries
§ Distinct hotspot and minimal spill guarantee directed aim illumination
§ Standard 1" body diameter matches up with most weapon mounts
§ Reliable body, red/green/blue filters and original remote switches for comfortable Hunting and secure Military application
§ Guaranteed durability — stands up the recoil of any gun gauge and falling from 30 meters height
§ The flashlight works for more than 5 hours at 50 meters depth
Model
Predator Pro
LED
Cree XB-H
Optics
Smooth Ultra-Throw Reflector
Brightness stabilization type
FULL (in all modes)
Light output, LED / OTF lumens*
700 / 550
Peak beam intensity, candelas
36200
Hotspot/spill
4°/ 40°
Beam distance*
381 meters
Hotspot diameter at 100 meters
7 meters
Modes and runtimes (measured for Armytek 18650
Li-Ion 3100 mAh to the decrease to 10% of initial
brightness)
Firefly1: 0.2lm / 100d
Firefly2: 2lm / 18d
Main1: 30lm / 48h
Main2: 150lm / 8.5h
Main3: 310lm / 3.5h
Max: 550lm / 1h 40min
Strobe: 15 Hz / 3h
Power source
Size
Weight (without batteries)
1x18650 Li-Ion / 2x18350 Li-ion / 2xRCR123 Li-ion / 2xCR123A
Length 154mm, body diameter 25.4mm, head diameter 41mm
135g
* Light outputs for flashlights with Warm light are about 7% less, beam distances are about 3% less.
We highly recommend NOT to use LOW-QUALITY CR123A batteries as a power source for often and continuous flashlight’s
operation. Remember that old or low-quality disposal batteries can be damaged under heavy load and explode.
Set description
Operation
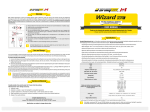
The flashlight has several operational modes:
Maximum — permanently switched light at Maximum mode (activated by click with the head of the flashlight tightened up). It's
an easy and comfortable operational mode for Hunters, especially when the flashlight is used with a remote switch.
5
2
1
3
x2
8
x2
6
Tactical — any mode switched on by half-pressing of the button and active till the button is released. In Maximum mode suitable
for giving signals by short button pressings. In Additional mode quick half-pressings can be used to switch modes.
9
7
4
Additional — permanently switched light at one of the Additional modes at user's choice (activated by click with the head of the
flashlight unscrewed to 1/8). Additional modes: Firefly1, Firefly2, Main1, Main2, Main3, Strobe.
Tighten up
Predator
Maximum
Click x1
1. Tighten the head of the flashlight if it is unscrewed.
OFF
гд
Max
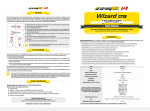
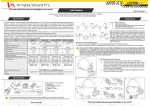
Items included in the package:
1 - Flashlight
6 - Holster
2 - Clip
7 - Spare rubber button
3 - 2 rubber rings
8 - 2 spare O-rings
4 - Rubber grip
9 - User manual
5 - Lanyard
2. First full click of the button turns the light on.
3. Second full click turns it off.
Additional (2 Firefly modes + 3 Main modes + Strobe (if enabled)):
Unscrew to 1/8
Additional
Click x1
OFF
гд
Last
mode
ь Depending on the model, your flashlight can inconsiderably differ from the pictures in the manual.
ь The producer reserves the right to change the package at his own discretion without modifying this manual.
Cycling through Additional modes
Click x2
Strobe *
Initial Service
Firefly2
Main3
Main1
Main2
3.
1. If the head of the flashlight is tightened up, unscrew it for 1/8 of
a circle.
2. First full click of the button turns the light on at the last used
Additional mode.
Cycling through Additional modes:
1. To switch the mode turn the flashlight off and on (either by full
click or half-pressing).
2. The modes switch cyclically: Firefly1 - Firefly2 - Main1 - Main2
- Main3 - Strobe.
Advanced Modes (Firefly1, Strobe):
Firefly1 *
x2
1.
Maximum:
* If enabled
Removing Advanced modes
Additional вTighten up & Unscrew x3
or
Firefly1 and Strobe are advanced modes which you can remove or
add again to the additional modes at your choice. These modes are
enabled by default. To remove (enable) Advanced modes :
1. If the head of the flashlight is tightened up (Maximum),
unscrew and tighten up the head of the flashlight quickly 3 times.
2. If the head of the flashlight is unscrewed (Additional), tighten
up and unscrew the head of the flashlight quickly 3 times.
3. The modes are added to the additional modes’ cycle: Firefly1 Firefly2 - Main1 - Main2 - Main3 - Strobe.
Maximum вUnscrew & Tighten up x3
x3
Tactical:
1. For tactical activation use half-pressing of the button (no click!).
2.
Half Press & Hold (no click)
1/2
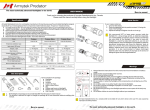
To set/replace batteries:
1. Unscrew the tailcap.
2. Place the batteries with the positive contact (+) facing the head of the flashlight.
3. Adjust the tailcap and tighten it as far as it can go.
ǁ
Release
Tactical
2. To access the Maximum mode the head of the flashlight must
be tightened, to access Additional modes it must be unscrewed to
1/8 of a circle.
3. The light remains on while you half press the button.
We recommend to use Maximum mode for short-time tactical
lighting and giving signals. Frequent half-pressings (<5sec between
them) with the head unscrewed to 1/8 can be used for switching
OFF
ON
Additional modes.
Automemorizing. After switching off the last used Mode is memorized for quick 1-click access at next switching on.
Lock-out function. Unscrew the tailcap to 1/4 for the protection from accidental switching on.
We recommend NOT to leave power sources inside the flashlight for a long storage period, as batteries (especially, non-rechargeable) can leak
for various reasons and damage the inner parts of the flashlight. If you want to keep your flashlight in a stand-by state with batteries in, use new
and quality batteries, store the flashlight in acceptable for batteries operational temperature and revise the batteries' state at least once a
month. If you have noticed any signs of batteries' defects, withdraw them from the flashlight and take out of operation. It is also recommended
to replace discharged batteries with new ones before the storage as the chance of leakage is higher with discharged batteries.
Low Battery Indication. When it is <10%, the LED flashes 2 times ONCE. If you are not sure if it flashed or not switch the
flashlight off and on: in case the battery is low flashes will be repeated. At critical level light output decreases to Firefly mode.