1
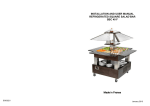
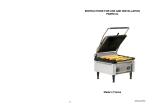
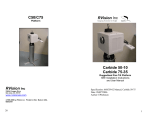
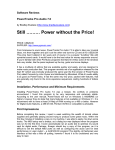
INSTALLATION AND USER MANUAL
WARMING SQUARE SALAD’BAR
SBC 40 C
Made in France
SG03219
12
January 2013
2
WARMING SQUARE SALAD‘BAR
SBC 40 C
Congratulations for the acquisition of this upmarket appliance made in France. You
chose an appliance which alloys the best technical qualities with a big userfriendliness. We wish you the biggest contentment
Picture E
Picture D
4. Slide a second unloading plank (picture D) in front of the first one. VERY IMPORTANT:
Make sure that the second plank is well stacked on the first one (picture E)
5. Repeat the steps 3 and 4 on the other side.
Please respect these instructions scrupulously to avoid any risk of fire, electric shock,
scald or other wounds and damage. During the use of this appliance, fundamental
circumspection of security must always be noticed, such as:
- Take into account the instructions to be systematically kept with the appliance.
- Install the appliance always in instructions respect. A 10 cm distance minimum
with the partition or the wall is necessary.
- Protect the appliance from direct light of the sun, frost and humidity.
- Never leave the appliance within the reach of children or disabled persons without surveillance.
- The machine has to be used only by qualified person.
- Never move the appliance when it is working.
- Check that the appliance is definitely off before connecting it up or disconnecting it.
- Do not touch the hot surfaces of the appliance. The temperature of the hot surfaces can be very important when the appliance is working. Always use handles
and control knobs.
- Do not use the appliance for other functions than determined use.
- Do not leave the electrical cord in contact of hot surfaces.
- The appliance should not be used close to combustible materials.
- During use, look after not to obstruct hearings of aeration of the appliance
- To avoid any electric shock, never plunge the cord or plug in water or quite
other liquid.
- If the cord is harmed, it must be replaced by the producer, its after sale service
or persons of similar skills to avoid any risk.
- Entrust repairs only to a skilled person.
- Use only spare parts of origin.
- Before cleaning the appliance, do not forget to disconnect it.
Picture G
Picture F
1. SECURITY INSTRUCTIONS
6. Make the salad’bar slide on the unloading planks (pictures F and G)
Picture H
7. Your salad’bar is now unloaded. You just have to put it into operation
10
3
2. CONTENTS OF CARDBOARD PACKAGING
The damage due to shocks, bad weather is not flatware by the guarantee. The material travels at the risks of the user; in case of delivery by carrier, the consignee has to
have reservations towards the carrier before any delivery of the device.
Device: a salad’bar
Accessories: - The present note
The guarantee comes to an end in case of intervention, of repair, of modification by
no qualified persons, or of use in inappropriate purposes.
3. CONFORMITY OF USE
Use the salad’bar only to keep warm your hot starters, meat, vegetables, readymade
dishes…at a temperature between +20°C and +90°C during working and service
hours. It enables you keeping warm products already cooked or hot
11. UNLOADING OF THE SALAD’BAR
4. WAY OF FUNCTIONING
1. Unpack the salad’bar with care. Remove all the protective films located around the
pallet
It is necessary to do this operation with at least two persons.
This salad’bar keep the 4 x GN containers warm.
2. Remove the 4 unloading planks placed under the salad’bar (picture A)
To turn on your salad’bar, press on the switch (n°2 on picture): the green pilot light
(n°4 on picture) ignites. Turn on the thermostat control knob (n°3 on picture) on the
desired temperature.
Press on the upper switch (n°1 on picture) to turn on the light (n°5 on picture).
Once water is hot, you can place the GN containers.
4
1
Unloading planks
5
Picture A
Picture B
2
Picture C
3
3. Place one of the four unloading planks under one of the castor. Push it until the
first slat of the pallet (see red circles in pictures B and C)
4
9
9. ELIMINATION OF THE ELECTRIC AND ELECTRONIC WASTE
1
Lighting switch
2
On/off switch
3
Thermostat
4
On/off pilot light
5
Led light
The device respects the directives:
2002/96/CE (DEEE) N°34270064800021
2002/95/CE (ROHS)
2066/95 CE
2004/108 CE
5. FUNCTIONING / MANIPULATION
Reach rule
a) Installation / assembly:
Never put the device among household waste.
The device must be put down in a centre of recycling for the electric equipments.
The materials of the device are indeed reusable. By eliminating correctly the electric
and electronic wastes, the recycling and quite other shape of re-use of worn equipments, you participate in a significant way in the environmental protection.
For any information about the collection of electric and electronic waste, please contact
your distributor.
- Unpack carefully the appliance from its packaging
- Unload the salad’bar (see 11. Unloading of the salad’bar)
- Place the equipment on a stable and heatproof surface.
- Never place the device near a wall or near a partition makes of combustible
materials even if it is very well isolated.
- A distance of 10 cm from the partition or the wall is considered enough.
- Remove the protective film from the appliance.
b) First starting:
10. GUARANTEE
Conditions of guarantee
The guarantee applicable to any device is the commercial guarantee of the distributor
or the retailer. Please contact the store where you bought your device to know the precise conditions.
Fill the container with water (about 5 cm above the heating elements) before switching on the salad’bar.
Do not let it run without water : it could damage the heating elements and irremediably bend the container.
To avoid quick evaporation, cover the whole tank with containers or lids.
First cleaning
The guarantee grants no right for damages.
Clean the device before the first use. (See 6 Cleaning)
The dispositions which follow are not exclusive of the profit of the legal guarantee
planned by articles 1641 and following ones of the Civil code relative to the defects and
the latent defects.
Exclusion clauses of the guarantee
Bad installation and bad maintenance, in particular if they do not respect current
regulations or instructions appearing in this user guide.
Cannot benefit from the guarantee the repairs required as a result of false operations,
of inappropriate use, of carelessness or of excess loads of the device, as well as those
resulting from variations of the power supply, over tension or from defective installations.
8
Connection of the device
- Check that the tension and the frequency of the electricity network suit to the
values indicated on the descriptive plate.
- Check that neither the cord nor the plug are damaged
- Make sure that every control knob is positioned on 0.
- Unwind completely the electric power cable and connect it in a normalised plug
with the earth.
- The device is connected.
NB: in case of connection of the device in a plug without earth protection or directly
on the electricity network, confide its connection to a qualified person .
5
c) Use of device :
6. CLEANING AND MAINTENANCE
Elements of command and display
- Disconnect the device.
- Let cool completely the device before any technical intervention or cleaning.
- Clean regularly the metallic parts after each use by using only use non-abrasive
products, warm water and wash liquid: avoid the abrasive towelling. Rinse your
device with a wet sponge and dry it with a soft cloth.
- Never clean the device under a water jet, the infiltrations would risk to damage it
in a irreparable way.
- Never immerse the cord or the plug in the water or quite other liquid to avoid any
electric shock.
- Regularly change the water to avoid any scale deposit
- Never use abrasive product or vinegar; it could damage the container in irremediable way.
Command/Display
Function
Thermostat (n°3 on picture)
Temperature setting
Switch 0/I (n°1 on picture)
Light on / Light off
Switch 0/I (n°2 on picture)
On/off
Green pilot light
(n°4 on picture)
Machine on (pilot light on)
Machine off (pilot light off)
Starting
7. TECHNICAL SPECIFICATIONS
- Press on the switch (n°2 on picture), the green pilot light (n°4 on picture) ignites.
- Turn on the thermostat (n°3 on picture) on the desired position.
- Press on the switch (n°1 on picture) to turn on light.
Temperature setting
Set the temperature by positioning the thermostat (n°3 on picture) to the desired
temperature.
Stopping the appliance
- Set each switch (n°1 and 2 on picture) on 0: the appliance is no longer functioning.
- Let the device cool
- Disconnect the power cable.
- Clean the appliance. (see 6. Cleaning)
Model
SBC 40 C
Dimensions
1435 x 1435 x 1540 mm
Weight
Temperature
Power
Nb heating element
Current
Voltage
120 Kg
+20° to +90° C
3000 W
1
13 A
220-240 V ~
Colours
Wenge/Light oak/Mahogany
Wires colours correspondence
d) Breakdown / repair:
In case of breakdown or of damaged part, please call your after-sales service and
confide any technical operation to qualified person.
Phase
Neutral
Earth
Brown / Black / Grey
Blue
Yellow-Green
8. NORMS AND LEGALS DISPOSALS
The device is conform to :
When you contact the after-sales service of your distributor or your store, give him the
complete reference of your device (commercial name, type and serial number). This
information appears on the visible descriptive plate behind the device.
6
IEC/EN 60335-1
IEC/EN 60335-2-49
EN 55014-1 + 55014-2
EN 61000-3-2 + 61000-3-3
7