1
PCAN-PCI Express
PCI Express to CAN Interface
User Manual
V3.2.0
PCAN-PCI Express – User Manual
Products taken into account
Product Name
Model
Part Number
PCAN-PCI Express Single
Channel galv. isolated
One CAN channel
IPEH-003026
PCAN-PCI Express Dual
Channel galv. Isolated
Two CAN channels
PCAN-PCI Express Four
Channel galv. isolated
Four CAN channels IPEH-003040
IPEH-003027
Ser. No.
starting at
01000
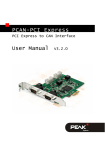
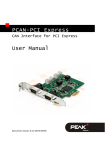
The cover picture shows the product PCAN-PCI Express Four Channel galvanic
isolated. Other product versions have an identical form factor but vary in equipment.
CANopen® and CiA® are registered community trade marks of CAN in Automation
e.v.
All other product names mentioned in this manual may be the trademarks or
registered trademarks of their respective companies. They are not explicitly marked
by “™” and “®”.
© 2012 PEAK-System Technik GmbH
PEAK-System Technik GmbH
Otto-Roehm-Strasse 69
64293 Darmstadt
Germany
Phone: +49 (0)6151 8173-20
Fax:
+49 (0)6151 8173-29
www.peak-system.com
[email protected]
Document version 3.2.0 (2012-10-15)
2
PCAN-PCI Express – User Manual
Contents
1
1.1
1.2
1.3
Introduction
4
Properties at a Glance
System Requirements
Scope of Supply
4
5
5
2
Installing the Software and the Card
6
3
Connecting the CAN Bus
9
3.1
3.2
D-Sub connector
Supplying External Devices via the CAN
Connector
3.3 Cabling
3.3.1
Termination
3.3.2
Example of a Connection
3.3.3
Maximum Bus Length
11
13
13
13
14
4
15
Using the Software
9
4.1 CAN Monitor PCAN-View for Windows
4.1.1
Receive/Transmit Tab
4.1.2
Trace Tab
4.1.3
Status Bar
4.2 Linking Own Programs with PCAN-Basic
4.2.1
Features of PCAN-Basic
4.2.2
Principle Description of the API
4.2.3
Notes about the License
15
17
19
20
21
22
23
24
5
25
Technical Specifications
Appendix A
CE Certificate
27
Appendix B
Dimension Drawing
28
Appendix C
Quick Reference
29
3
PCAN-PCI Express – User Manual
1
Introduction
The PCAN-PCI Express card enables the connection of a PC with
PCI Express slots to CAN networks. The card is available as a single,
dual, or four-channel version. Device drivers and programming
interfaces exist for different operating systems, so programs can
easily access a connected CAN bus.
Tip: At the end of this manual (Appendix C) you can find a
Quick Reference with brief information about the installation
and operation of the PCAN-PCI Express card.
1.1
Properties at a Glance
PC plug-in card (PCIe-x1) for PCI Express slots
1, 2 or 4 High-speed CAN channels (ISO 11898-2)
Bit rates up to 1 Mbit/s
Compliant CAN specifications 2.0A (11-bit ID)
and 2.0B (29-bit ID)
CAN bus connection via D-Sub,
9-pin (in accordance with CiA® 102)
NXP SJA1000-compatible CAN controller
(FPGA implementation)
NXP PCA82C251 CAN transceiver
Galvanic isolation on the CAN connection up to 500 V, separate
for each CAN channel
5-Volts supply to the CAN connection can be connected through
a solder jumper, e.g. for external bus converter
4
PCAN-PCI Express – User Manual
Extended operating temperature range from -40 to 85 °C
(-40 to 185 °F)
Note: This manual describes the use of the PCAN-PCI Express
card with Windows. You can find device drivers for Linux and
the corresponding application information on the provided DVD
in the directory branch Develop and on our website under
www.peak-system.com/linux.
1.2
System Requirements
A vacant PCI Express slot in the computer
Operating system Windows 7/Vista/XP (32/64-bit)
or Linux (32/64-bit)
1.3
Scope of Supply
PCAN-PCI Express card
Slot bracket with D-Sub connectors for the CAN bus (only fourchannel version)
Device drivers for Windows 7/Vista/XP (32/64-bit)
and Linux (32/64-bit)
PCAN-View CAN monitor for Windows
PCAN-Basic programming interface consisting of an interface
DLL, examples, and header files for all common programming
languages
Manual in PDF format
5
PCAN-PCI Express – User Manual
2
Installing the Software and
the Card
This chapter covers the software setup for the PCAN-PCI Express
card (short: PCIe card) under Windows and the installation of the
card in the computer.
Setup the driver before installing the PCIe card.
Do the following to install the driver:
1.
Make sure that you are logged in as user with administrator
privileges (not needed for normal use of the PCIe card later
on).
2.
Insert the supplied DVD into the appropriate drive of the
computer. Usually a navigation program appears a few
moments later. If not, start the file Intro.exe from the root
directory of the DVD.
3.
On the page English > Drivers activate the entry PCAN-PCI.
4.
Click on Install now. The setup program for the driver is
executed.
5.
Follow the instructions of the setup program.
Tip: If you don't want to install the CAN monitor PCAN-View for
Windows onto the hard disk together with the driver, you have
the option to start the program later directly from DVD without
prior installation.
6
PCAN-PCI Express – User Manual
Do the following to install the PCIe card into the computer:
Attention! Electrostatic discharge (ESD) can damage or destroy
components on the PCAN-PCI Express card. Take precautions
to avoid ESD when handling the card.
1.
Four-channel version only: Connect the 10-pin connector of
CAN ports 3 and 4 with a cable from the slot bracket.
Figure 1: Position of the sockets for the CAN connection,
CAN 3 (upper left position), CAN 4 (upper right position)
2.
Shut down the computer and switch it off.
3.
Disconnect the computer from the power supply.
4.
Open the computer's casing.
5.
If applicable, remove a front blind in front of the desired slot
of the PCIe card. The additional slot bracket with connectors
used by the four-channel version needs a further place.
6.
Insert the PCIe card into a vacant PCI Express slot. For
details refer to the documentation of the computer.
7.
Close the computer's casing.
8.
Reconnect the power supply of the computer.
7
PCAN-PCI Express – User Manual
Do the following to complete the initialization:
1.
Turn on the computer and start Windows. Make sure again
that you are logged in as user with administrator privileges.
Windows notifies that new hardware has been detected.
2.
Windows XP only: A Wizard dialog box appears. Follow its
instructions. Deny the search for driver software at
Windows update and select the automatic software
installation during the procedure.
All Windows operating systems: The drivers are found and
installed by Windows.
3.
Afterwards you can work as user with restricted rights
again.
After the initialization process is finished successfully you can find
the entry “PCAN-PCI Express” in the branch “CAN-Hardware” of the
Windows Device Manager.
8
PCAN-PCI Express – User Manual
3
Connecting the CAN Bus
3.1
D-Sub connector
A High-speed CAN bus (ISO 11898-2) is connected to the 9-pin
D-Sub connector. The pin assignment for CAN corresponds to the
specification CiA® 102.
Figure 2: Pin assignment of High-speed CAN connection
(view onto a male connector on the PCAN-PCI Express card)
With pin 1 devices with low power consumption (e.g. bus converters) can be directly supplied via the CAN connector. At delivery this
pin is not assigned. You can find a detailed description in the following section 3.2.
Tip: You can connect a CAN bus with a different transmission
standard via a bus converter. PEAK-System offers different bus
converter modules (e.g. PCAN-TJA1054 for a Low-speed CAN
bus according to ISO 11898-3).
9
PCAN-PCI Express – User Manual
The pin assignment between the D-Sub port and the 10-pin connector on the PCAN-PCI Express Four Channel card for channel 3 and 4
is as follows:
Figure 3: Numbering at the 10-pin connector
Pin
Assignment
Assignment
D-Sub
1
+5 V (optional)
1
2
GND
6
3
CAN_L
2
4
CAN_H
7
5
GND
3
6
not connected
8
7
not connected
4
8
not connected
9
9
not connected
5
10
not connected
10
PCAN-PCI Express – User Manual
3.2
Supplying External Devices via the CAN
Connector
A 5-Volt supply can optionally be routed to pin 1 of a D-Sub connector by setting solder bridges on the PCAN-PCI Express card (independently for each connector on the dual or four-channel version).
Thus external devices with low power consumption (e.g. bus
converters) can be directly supplied via the CAN connector. By
using interconnected DC/DC converter the current output is limited
to 50 mA.
Proceed as follows to activate the 5-Volt supply:
Attention! Electrostatic discharge (ESD) can damage or destroy
components on the PCAN-PCI Express card. Take precautions
to avoid ESD when handling the card.
Set the solder bridge(s) on the PCIe card according to the desired
settings. During this procedure take especially care not to produce
unwanted short circuits on the card.
Figure 4 shows the positions of the solder fields on the PCIe card.
The table below contains the possible settings.
11
PCAN-PCI Express – User Manual
Figure 4: Position of the solder fields on the board’s bottom side for a 5-Volt supply
at the CAN connection
5-Volt supply →
Jumper
CAN 1
JP100
CAN 2
JP200
CAN 3
JP300
CAN 4
JP400
None
Pin 1
Attention! Risk of short circuit! If the option described in this
section is activated, you may only connect or disconnect CAN
cables or peripheral systems (e.g. bus converters) to or from
the PCIe card while the computer is de-energized.
12
PCAN-PCI Express – User Manual
3.3
3.3.1
Cabling
Termination
A High-speed CAN bus (ISO 11898-2) must be terminated on both
ends with 120 Ohms. Otherwise, there are interfering signal
reflections and the transceivers of the connected CAN nodes (CANinterface, control device) will not work.
The PCAN-PCI Express card does not have an internal termination.
Use the card on a terminated CAN bus.
3.3.2
Example of a Connection
Figure 5: Simple CAN connection
In this example, the PCAN-PCI Express card is connected with a
control unit by a cable that is terminated at both ends.
13
PCAN-PCI Express – User Manual
3.3.3
Maximum Bus Length
High-speed CAN networks may have bit rates of up to 1 Mbit/s. The
maximum bus length depends primarily on the bit rate.
The following table shows the maximum possible CAN bus length
at different bit rates:
Bit rate
Bus length
1 Mbit/s
40 m
500 kbit/s
110 m
250 kbit/s
240 m
125 kbit/s
500 m
50 kbit/s
1.3 km
20 kbit/s
3.3 km
10 kbit/s
6.6 km
5 kbit/s
13.0 km
The listed values have been calculated on the basis of an idealized
system and can differ from reality.
14
PCAN-PCI Express – User Manual
4
Using the Software
This chapter covers the provided software PCAN-View and the
programming interface PCAN-Basic.
4.1
CAN Monitor PCAN-View for Windows
PCAN-View for Windows is a simple CAN monitor for viewing,
transmitting, and logging CAN messages.
Figure 6: PCAN-View for Windows
Do the following to start and initialize PCAN-View:
1.
If PCAN-View is already installed on the hard disk, open the
Windows Start menu, go to Programs > PCAN-Hardware,
and select the entry PCAN-View.
15
PCAN-PCI Express – User Manual
If you haven’t installed PCAN-View together with the device
driver, you can start the program directly from the supplied
DVD. In the navigation program (Intro.exe), go to English
> Tools, and under PCAN-View for Windows select the link
Start.
The dialog box for selecting the CAN hardware and for
setting the CAN parameters appears.
Figure 7: Selection of the CAN hardware and parameters
2.
From the list Available CAN hardware select the CAN
channel to be used.
3.
Select the bit rate that is used by all nodes on the CAN bus
from the dropdown list Bit rate.
4.
Under Filter settings you can limit the range of CAN IDs to
be received, either for standard frames (11-bit IDs) or for
extended frames (29-bit IDs).
5.
Finally confirm the settings in the dialog box with OK. The
main window of PCAN-View appears (see Figure 8).
16
PCAN-PCI Express – User Manual
4.1.1
Receive/Transmit Tab
Figure 8: Receive/Transmit Tab
The Receive/Transmit tab is the main element of PCAN-View. It
contains two lists, one for received messages and one for the
transmit messages. Representation of CAN data is in hexadecimal
format.
Do the following to transmit a CAN message with PCAN-View:
1.
Select the menu command Transmit > New Message
(alternatively
or Ins).
The dialog box New Transmit Message is shown.
17
PCAN-PCI Express – User Manual
Figure 9: Dialog box New transmit message
2.
Enter the ID and the data for the new CAN message.
3.
The field Cycle Time indicates if the message shall be
transmitted manually or periodically. If you want to transmit
the message periodically, you must enter a value greater
than 0. For a manual-only transmission enter 0.
4.
Confirm the entries with OK.
The created transmit message appears on the
Receive/Transmit tab.
5.
You trigger selected transmit messages manually with the
menu command Transmit > Send (alternatively Space bar).
The manual transmission for CAN messages being
transmitted periodically is carried out additionally.
Tip: Using the menu command File > Save the current transmit
messages can be saved to a list and loaded for reuse later on.
18
PCAN-PCI Express – User Manual
4.1.2
Trace Tab
Figure 10: Trace Tab
On the Trace tab the data tracer of PCAN-View is used for logging
the communication on a CAN bus. During this process the CAN
messages are cached in the working memory of the PC. Afterwards
they can be saved to a file.
The tracer can be configured to run in linear or in ring buffer mode.
In linear buffer mode the logging is stopped as soon as the buffer is
filled completely. In ring buffer mode the oldest messages are
overwritten by incoming ones.
19
PCAN-PCI Express – User Manual
4.1.3
Status Bar
Figure 11: Display of the Status Bar
The status bar shows information about the current CAN
connection, about error counters (Overruns, QXmtFull) and shows
error messages.
You can find further information about the use of PCAN-View in the
help which you can invoke in the program via the menu Help or the
F1 key.
20
PCAN-PCI Express – User Manual
4.2
Linking Own Programs with PCAN-Basic
Figure 12: PCAN-Basic
On the provided DVD you can find files of the programming
interface PCAN-Basic in the directory branch Develop. This API
provides basic functions for linking own programs to CAN
interfaces by PEAK-System and can be used for the following
operating systems:
Windows 7/Vista/XP (32/64-bit)
Windows CE 6.x (x86/ARMv4)
The API is designed for cross-platform use. Therefore software
projects can easily ported between platforms with low efforts.
PEAK-System has created examples for the following programming
languages: C++, C#, C++/CLR, Visual Basic, Delphi, Python, and
Java.
21
PCAN-PCI Express – User Manual
4.2.1
Features of PCAN-Basic
Supports Windows 7/Vista/XP (32/64-bit) and Windows CE 6.x
operating system
Multiple PEAK-System applications and your own can be
operated on a physical CAN channel at the same time
Use of a single DLL for all supported hardware types
Use of up to 8 channels for each hardware unit (depending on
the PEAK CAN interface used)
Simple switching between channels of a PEAK CAN interface
Driver-internal buffer for 32,768 messages per CAN channel
Precision of time stamps on received messages up to 1 μs
(depending on the PEAK CAN interface used)
Access to specific hardware parameters, such as listen-only
mode
Notification of the application through Windows events when a
message is received
Extended system for debugging operations
Multilingual debugging output
Output language depends on operating system
Debugging information can be defined individually
An overview of the API functions is located in the header files. You
can find detailed information about the PCAN-Basic API on the
provided DVD in the text and help files (file name extensions .txt
and .chm).
22
PCAN-PCI Express – User Manual
4.2.2
Principle Description of the API
The PCAN-Basic API is the interface between the user application
and device driver. In Windows operating systems this is a DLL
(Dynamic Link Library).
The sequence of accessing the CAN interface is divided into three
phases:
1. Initialization
2. Interaction
3. Completion
Initialization
A CAN channel must be initialized before using it. This is done by
the simple call of the function CAN_Initialize. Depending on the
type of the CAN hardware, up to eight CAN channels can be opened
at the same time. After a successful initialization the CAN channel is
ready for communication with the CAN hardware and the CAN bus.
No further configuration steps are required.
Interaction
For receiving and transmitting CAN messages the functions
CAN_Read and CAN_Write are available. Additional settings can be
made, e.g. setting up message filters to confine to specific CAN IDs
or setting the CAN controller to listen-only mode.
When receiving CAN messages, events are used for an automatic
notification of an application (client). This offers the following
advantages:
The application no longer needs to check for received messages
periodically (no polling).
The response time at reception is reduced.
23
PCAN-PCI Express – User Manual
Completion
To end the communication the function CAN_Uninitialize is
called in order to release the reserved resources for the CAN
channel, among others. In addition the CAN channel is marked as
"Free" and is available to other applications.
4.2.3
Notes about the License
Device drivers, the interface DLL, and further files needed for linking
are property of the PEAK-System Technik GmbH and may be used
only in connection with a hardware component purchased from
PEAK-System or one of its partners. If a CAN hardware component
of third-party suppliers should be compatible to one of PEAKSystem, then you are not allowed to use or to pass on the driver
software of PEAK-System.
If a third-party supplier develops software based on the PCAN-Basic
and problems occur during the use of this software, consult the
software provider.
24
PCAN-PCI Express – User Manual
5
Technical Specifications
Connectors
Computer
PCI Express x1 (1 Lane), Specification 1.1
CAN
D-Sub (m), 9 pins
Pin assignment according to specification CiA® 102
CAN
Specification
ISO 11898-2, High-speed CAN
2.0A (standard format) and 2.0B (extended format)
Bit rates
5 kbit/s - 1 Mbit/s
Controller
NXP SJA1000-compatible (FPGA implementation)
Transceiver
NXP PCA82C251
Galvanic isolation
up to 500 V, separate for each CAN channel
Supplying external
devices
D-Sub pin 1; 5 V, max. 50 mA
not assigned at delivery
Termination
none
Measures
Size
PCB: 121 x 114 mm (H x W)
See also dimension drawing in Appendix B on page 28
Weight
PCAN-PCI Express Single Channel:
PCAN-PCI Express Dual Channel:
PCAN-PCI Express Four Channel:
55 g
66 g
73 g
Power supply
Current consumption
at 3.3-V pin
at 12-V pin
265 mA
max. 50 mA
Product version
Single Channel:
Dual Channel:
265 mA
max. 80 mA
Four Channel:
300 mA
max. 150 mA
Continued on the next page
25
PCAN-PCI Express – User Manual
Environment
Operating
temperature
-40 - +85 °C
Temperature for
storage and
transport
-40 - +125 °C
Relative humidity
15 - 90 %, not condensing
EMC
EN 55024:2003-10
EN 55022:2008-05
EC directive 2004/108/EG
26
PCAN-PCI Express – User Manual
Appendix A
CE Certificate
27
PCAN-PCI Express – User Manual
Appendix B
Dimension Drawing
Figure 13: Dimension drawing PCAN-PCI Express
The figure does not show the actual size of the product.
28
PCAN-PCI Express – User Manual
Appendix C
Quick Reference
Software/Hardware Installation under Windows
Before installing the PCAN-PCI Express card into the computer set
up the corresponding software package from the supplied DVD
(with administrator privileges). Afterwards, insert the PCIe card into
a vacant PCI Express slot of the switched off computer. The PCIe
card is recognized by Windows and the driver is initialized. After the
installation process is finished successfully you can find the entry
“PCAN-PCI Express” in the branch “CAN-Hardware” of the
Windows Device Manager.
Getting Started under Windows
Run the CAN monitor PCAN-View from the Windows Start menu as
a sample application for accessing the PCAN-PCI Express card. For
initialization of the PCIe card select the desired CAN channel and the
CAN bit rate.
High-speed CAN connector (D-Sub, 9 pins)
29