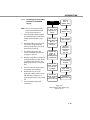
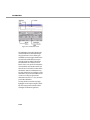
1
Apollo 9000 TOC Combustion Analyzer User Manual Copyright © 2003 Teledyne Tekmar Co. No part of this document may be copied, reproduced, transmitted in any form or by any means, electronic or mechanical, including photocopying, recording, or information storage and retrieval systems, for any purpose other than the purchaser’s personal use, without the express written permission of Tekmar Company. Updates Teledyne Tekmar may update the information contained in this document without notice to the purchaser. The following are registered items: Adobe Acrobat® is a registered trademark of Adobe Systems Incorporated. Intel® Pentium® is a registered trademark of Intel. Microsoft Windows®, Windows NT®, Microsoft® Internet Explorer and Microsoft® Excel are either registered trademarks or trademarks of Microsoft Corporation in the United States and/or other countries. Pyrex® is a registered trademark of Corning Incorporated. Swagelok® is a registered trademark of Swagelok Companies. TEFLON® is a registered trademark of E.I. du Pont de Nemours & Co., Inc. Tygon® is a registered trademark of Norton Company. Whatman® TOC Gas Generator is a registered trademark of Whatman, Inc. Teledyne Tekmar Mason, Ohio USA www .teledynetekmar.com Document Part Number: 14-9000-074_vD Rev. D • Version 08-09-03 (800) 543-4461 Outside the U.S. and Canada: (513) 229-7000 Service (800) 874-2004 Fax (513) 229-7050 USER MANUAL TABLE OF CONTENTS TABLE OF CONTENTS INTRODUCTION CALIBRATION 1.1 Apollo 9000 TOC Analyzer 1-3 4.1 System Calibration 4-3 1.2 Technical Specifications 1-4 4.2 1.3 Safety 1-8 Standard Calibration Without Autosampler Tutorial 4-4 4.3 Standard Calibration With Autosampler Tutorial 1.4 Part Descriptions 1-9 1.5 Apollo 9000 Operating Modes 1-15 1.6 Sample Introduction 1-15 1.7 Prime Replicate 1-16 1.8 Analysis Process 1-16 SYSTEM SETUP 4-11 SAMPLE ANALYSIS 5.1 Sample Analysis 5-3 5.2 Tutorial: TOC Results Made Easy Without Autosampler 5-3 Tutorial: TOC Results Made Easy With Autosampler 5-6 Sample Blanks 5-9 5.3 2.1 Before You Begin 2-3 2.2 Unpack and Inspect 2-6 2.3 Tools and Supplies Needed for Connections 2-7 2.4 Pneumatic Connections 2.5 Electrical Connections 2-11 6.1 2.6 Install the Autosampler (Optional) 2-12 6.2 Applications 6-4 6.3 Modifying Analysis Methods 6-8 2.7 2-7 Add Catalyst to and Install the Combustion Tube 2-18 2.8 Install TOC Talk Software 2-21 2.9 Condition Combustion Tube Catalyst 2-22 Cleaning Procedure for Conditioned Catalyst 2-23 2.10 SPECIAL APPLICATIONS TOC Talk Control Screen 3-3 3.2 Instrument Setup 3-3 3.3 Instrument Diagnostics 3-6 3.4 Archive Data 3-10 3.5 Password Setup 3-11 3.6 Wakeup Schedule 3-12 Sample Preservation for TOC 6-3 MAINTENANCE ANDTROUBLESHOOTING 7.1 TOC TALK 3.1 5.4 Scheduled Maintenance Checks 7-3 7.2 Replacing Parts 7-4 7.3 Troubleshooting Apollo 9000 7-22 7.4 Teledyne Tekmar Customer Support 7-29 CALIBRATION STANDARD 8.1 Calibration Standard Preparation 8-3 8.2 Procedure for Making Standards 8-3 DIAGRAMS APPENDIX A INDEX iii 1 INTRODUCTION INTRODUCTION 1.1 Apollo 9000 TOC Analyzer Figure 1-1 Apollo 9000 Apollo 9000 is comprised of the following: • Syringe - for sample and reagent introduction • Sparger - for inorganic analysis and sample preparation for TOC analysis • Combustion Furnace • Furnace Injection Port • Water Trap - for moisture removal • Permeation Tube - for moisture removal • Corrosives Scrubber - for halogen removal • NDIR Detector - for carbon dioxide detection TOC Analysis Overview Total organic carbon (TOC) analysis grew from the need to analyze waste water and municipal water for organic matter. The need to protect it and establish criteria for screening and measuring contaminant levels was recognized when Congress enacted the Resource Conservation and Recovery Act (RCRA) in 1976. This act requires operators of waste disposal sites to monitor their groundwater on a quarterly basis for organic carbon levels and organic halide levels. TOC analyzers are also widely used in monitoring the quality of process water in the semiconductor and pharmaceutical industries. Because organic material can cause contamination, TOC analysis is also performed to protect process equipment such as boilers, turbines, and purification devices. Furthermore, TOC levels in solids such as soils, clays and sediments are of increasing interest. TOC analyzers can measure total carbon (TC), total organic carbon (TOC), inorganic carbon (IC), purgeable organic carbon (POC), and nonpurgeable organic carbon (NPOC). If the POC is <1% of the TOC, then NPOC is equivalent to TOC. TOC measurement involves: 1. Oxidizing organic carbon in a sample. 2. Detecting and quantifying the oxidized product (CO2). 3. Presenting the result in units of mass of carbon per volume of sample (liquids) or per mass of solid (solids). 1–3 INTRODUCTION Detection and Results 1.2 Technical Specifications Carbon in the sample is first converted to CO2 by the combustion furnace for TOC and TC analysis or by the IC sparger for IC analysis. A carrier gas then sweeps the derived CO2 through a nondispersive infrared (NDIR) detector. Sensitive to the absorbtion frequency of CO2, the NDIR generates a non-linear signal that is proportional to the instantaneous concentration of CO2 in the carrier gas. That signal is then linearized and integrated over the sample analysis time. The resulting area is then compared to stored calibration data and a sample concentration in parts-per-million (ppm) is calculated. Apollo 9000 TOC Analyzer User Interface Analytical: Chemistry: • Oxidation by Combustion (from 680°C to 1000°C) • IC by Acidification and Sparge Detector: • Nondispersive Infrared (NDIR) Measurements: • • TOC (NPOC), TC-IC, TC, IC Range: 4 ppbC to 25,000 ppmC (sample volume, detector, and dilution dependent) using only 4 selectable analytical ranges TOC Talk, the Apollo 9000 software, effortlessly monitors and performs calculations in a Windows 95/98/NT platform. The following are some of the features of Apollo 9000 software, TOC Talk: Precision: • Pre-defined Default Methods • Typical 0.05% of full scale or • Multi-Point Calibration • • Outlier Deletion RSD +/- 3%, whichever is greater, over 3 replicates • Wake-up and Shut-down • Plotted Calibration Curve and Statistics Injection Volume: • Up to 2 ml • Multiple Method Storage • Analog Display of Peaks Analysis Time: • Continuous Scrolling of Results • • Diagnostics 1–4 1 to 3 minutes, typical INTRODUCTION TOC Analysis Time: Other Features and Options: • • Preprogrammed point-and-click method setup • Programmable automatic Wake-up • Automatic shutdown/standby • Selectable IC sparge methods • Automatic file management • Flow rate monitoring • Priority samples via scheduled interrupt • Online help • Solids module • Near line monitoring • Exceeds ISO 8245 particulate requirements with optional kit • Stirring option • Automatic blanking or manual entry of blank value 15 minutes per triplicate, typical Liquid Handling: • Syringe driver, 8-port valve • Auto-dilution method provided from 4000 ppmC to 25,000 ppmC and/or difficult matrices • Auto-rinsing with sample and rinse water Sample Introduction: • Automatic syringe injection • Autosampler • Solids Boat • Manual Syringe Controller: • PC, Interface through Windows (95, 98 or NT), Password Protected Data Handling: • Automatic and customized Spreadsheet reports transferable to Microsoft Excel • Real-time display of NDIR signal • Outlier deletion • Recalculations with different calibration curves • Recalculations with different blank values Calibration: • Typical Methods and Principal Applications: • EPA 415.1 and 9060A • Standard Method 5310B • ASTM D2579 • ISO (Draft) 8245 • AOAC 973.47 • Cleaning Validation • USP 643 • Drinking / Surface water • Industrial Waste Effluent • Waste water • Sea Water Multi-point and automatic blank subtraction 1–5 INTRODUCTION Certification: • UL, CSA, and CE • EMC EN 50081-1 and EN 50082-1 STS 8000 Autosampler Sampler Changer Type: • Utility Requirements: • XYZ robot with stationary rack design Power Entry Module: 2IEC 5 x 20 mm fuses Positioning Performance: • 100v Operation T10A, 250v, fast blow • Accuracy +/-1mm in XYZ dimensions • 115v Operation T10A, 250v, fast blow • Repeatability +\-0.25 mm in XYZ dimensions • 230v Operation T5A, 250v, fast blow • Voltage: 100/120/230 VAC (±10%) • Frequency: 50/60 Hz (excluding NDIR) • Power: 1200 VA Septum Piercing: • Available with septum piercing kit. Has vertical punch strength of 3.8 kg (8.38 lbs.). Rinsing: • Auto-rinsing with sample and/or rinse water via built-in rinse station Dimensions (Approximate): • cm 40 W x 61 D x 53 H Rack Selection: • in 16" W x 23" D x 21" H • • 50 kg ( 110 lb.) shipping weight (2) 77 position trays for 25ml culture tubes (18 x 150 mm) • (2) 35 position trays for 40ml VOA vials (28 X 95 mm) Gas Supply: • Hydrocarbon and CO2-free air • Balston / Whatman TOC Gas Generator Gas Pressure: • 1–6 30 to 35 psi (206.7 to 241.2 kPa) Dimensions: • cm 53.5 W x 43.7 D x 37.1 H • in 21.1 W x 17.2 D x 14.6 H • 17.7 kg (39 lbs) INTRODUCTION Electrical: • Voltage: 100/120/230 VAC (±10%) • Frequency: 50/60 Hz • Power: 200VA Certification: • UL, CSA, and CE • EMC EN50081-1 and EN 50082-1 1–7 INTRODUCTION 1.3 Safety The following warning illustrations describe the symbols and safety references used in this manual. CAUTION Hazardous situation, which, if not avoided, will result in product or property damage and possible injury. WARNING Potentially hazardous situation, which, if not avoided, can result in death or serious injury. DANGER Imminently hazardous situation, which, if not avoided, will result in death or serious injury. 1–8 Explosion Hazardous Voltage Fire Corrosive liquid or substance. High Temperature Risk of eye injury; wear safety glasses. Hazardous or toxic substance. Moving parts can pinch and grab; keep hands and clothing away while power is on. INTRODUCTION 1.4 Part Descriptions Figure 1.4.3 Syringe Driver Figure 1.4.1 Apollo 9000, Front Cooling Fan Carrier Gas Inlet Waste Outlet The syringe driver turns an 8-port Teflon valve. Each port on the valve is fitted with a valve washer before insertion of relevant tubing fitting to ensure an airtight seal. The port assignments for this valve are as follows: Permeation Dryer, IC Sparger Valve, and NDIR Gas Outlet I/O Ports Power Switch Figure 1.4.2 Apollo 9000, Rear Syringe Driver and 8-port Valve The syringe driver is a precision measuring instrument that aspirates and dispenses fluid. The syringe driver contains electronics, a syringe, 8-port Teflon valve, and stepper motors. The electronics control the motors and communication between the syringe driver and microcontroller. Figure 1.4.4 8-Port Valve The syringe driver can dispense up to 2.5 ml (± .1%) of sample or reagent. 1–9 INTRODUCTION IC Sparger The sparger is a glass vessel that holds the sample while Apollo 9000: • acidifies and sparges the sample of inorganic carbon (IC) and purgeable organic carbon (POC), and prepares the sample for TOC analysis. • provides the location for Range 4 sample dilution Figure 1.4.5 IC Sparger Gas flows through the sparger, removing the IC from the sample. The Apollo 9000 can detect IC in IC mode or send it to vent while preparing for TOC mode. 1–10 Combustion Furnace with Injection Port The combustion furnace provides the high temperature necessary to oxidize the carbon in the sample to CO2. It holds the quartz combustion tube between the bottom connector and the injection port at the top. O-rings provide gas-tight seals at each end. The combustion tube contains a bed of proprietary catalyst that promotes oxidation of organics. Figure 1.4.6 Combustion Furnace with Injection Port The injection port provides the interface for the sample line and the furnace carrier gas into the combustion furnace. The sample line enters from the top of the injection port and the carrier gas enters from the right of the injection port. INTRODUCTION Corrosives Scrubber Moisture Control System The detector, which measures carbon dioxide, can be damaged by halogen. To prevent analytical errors, the corrosives scrubber removes halogens from the carbon dioxide before it enters the detector. The corrosives scrubber is a glass tube filled with Pyrex wool and tin and copper granules. Moisture is removed from the gas going to the detector to prevent condensation in the detector. Pyrex Wool Sn Cu The Apollo 9000 moisture control system consists of a condensor coil, cooling fan, water trap, and permeation dryer. The combustion furnace (where carbon in the sample is converted to carbon dioxide) generates high heat. Carrier gas sweeps CO2 and water vapor out of the combustion furnace. The sample then travels through tubing, cooled by a fan to condense water vapor. Pyrex Wool Figure 1.4.7 Corrosives Scrubber Figure 1.4.8 Cooling Fan 1–11 INTRODUCTION Next, the carbon dioxide travels through the water trap, where water is collected. to Permeation Dryer In to 8-port Figure 1.4.9 Water Trap Then the carbon dioxide passes through a semi-permiable Nafion® tube to further remove moisture. This tube is sealed into an impermeable shell, which has openings adjacent to the sample inlet and outlet. When a wet gas stream flows through the tube and a countercurrent dry gas stream purges the shell, water molecules diffuse through the walls of the tubing. Nondispersive Infrared Detector Apollo 9000 converts carbon in the sample to carbon dioxide. The nondispersive (single beam) infrared detector uses electromagnetic radiation or infrared energy to measure this carbon dioxide. This measurement is proportional to the carbon in the sample. Inside the detector, a beam of infrared energy is directed through a sample cell to the detecting apparatus. This apparatus consists of two chambers, which are filled with CO2 and connected by a flow-sensing device. The unobstructed infrared energy absorbed by this CO2 causes the pressure to increase in the forward chamber and equilibrate between the two chambers. When CO2 is then introduced to the sample cell, some of the infrared energy is absorbed. Therefore the pressure in the forward chamber decreases and CO2 flows to equilibrate the pressure. This flow causes a voltage output from the flow-sensor, which is proportional to the concentration of CO2 in the sample cell. Purge Gas Out Sample Gas In Purge Gas In Figure 1.4.10 1–12 Permeation Tube Figure 1.4.11 Nondispersive Infrared Detector (NDIR) INTRODUCTION Flow Restrictors Temperature Controller Five flow restrictors maintain the flow rate of the supply gas as follows: 1. 200 ml/min to the combustion furnace 2. 200 ml/min to the IC sparger 3. 200 ml/min to the autosampler sparge line 4. 200 ml/min to the permeation tube 5. 50 ml/min to purge the NDIR The set point for the combustion furnace is controlled by a temperature controller found on the front face of the Apollo 9000 instrument just below the syringe driver. The temperature controller LED displays the actual temperature of the combustion furnace. The blue button (Set) displays the set point for the combustion furnace when pressed. By holding down the Set button and pressing the appropriate gray Up and Down buttons, the set point for the combustion furnace can be adjusted as needed. Figure 1.4.12 Flow Restrictor When you turn off the gas (valve 1), 50 ml/min of carrier gas continues to purge the NDIR. Figure 1.4.13 Temperature Controller 1–13 INTRODUCTION Optional STS 8000 Autosampler Optional 183 Boat Sampler The optional autosampler is an XYZ robot that automates sample handling procedures. It allows the user to increase throughput and operate the analyzer unattended for many hours. The 183 Boat Sampler is ideal for soils, sediments, sludges and particle-laden liquids. The autosampler tray holds 2 racks; each rack can hold up to 77 (25ml) culture tubes or 35 (40ml) VOA vials. Vials may be fitted with pierceable Teflon-backed septum caps. The autosampler rinses the inside and outside of the needle via a dedicated rinse station. Syringeable samples are injected directly into the platinum sample boat through a septum, minimizing contamination of the combustion stream by ambient air. Solid samples are weighed into the removable boat, which is readily accessible through the hatchcovered port. The boat is manually advanced into the furnace, where the sample is combusted at 800°C. Total Carbon (TC) is measured by direct injection of sample without pretreatment. Total Organic Carbon (TOC) is measured by sparging off the Inorganic Carbon (IC) from the acidified sample before injection, using the sparging station built into the instrument. IC is measured by injecting the water sample into a special vessel containing acidified water: the CO2 produced is swept to the detector and measured. Figure 1.4.14 Optional STS 8000 Autosampler 1–14 INTRODUCTION 1.5 Apollo 9000 Operating Modes Apollo 9000 has four operating modes—Total Organic Carbon (TOC), Total Carbon (TC), Inorganic Carbon (IC), and Total Carbon Minus Inorganic Carbon (TC-IC). 1.5.1 Total Carbon (TC) TC is the measurement of all the carbon in the sample, both organic and inorganic, as a single parameter. 1.5.2 Because air bubbles in the syringe can affect test results, Apollo 9000 automatically discards sample from the top and bottom portion of the sample (regardless of your sample size). 12345 12345 12345 12345 1234567 1234567 1234567 1234567 200 µl to Waste Deliver 1 ml Sample 50 µl to Waste Total Organic Carbon (TOC) TOC analysis consists of addition of acid and sparging with an inert gas to remove IC. The remaining carbon is called TOC (if purgeables are less than 1% of the organic carbon). 1.5.4 Before introducing a sample, Apollo 9000 automatically rinses the syringe to eliminate any contaminants that may interfere with the testing process. This rinsing occurs through a loop sequence where the syringe is filled and discarded with DI water. Inorganic Carbon (IC) Inorganic carbon consists of carbonates and bicarbonates in samples. IC is analyzed in liquid samples by acidifying with an inorganic acid to pH 3 or lower and sparging with an inert gas. 1.5.3 1.6 Sample Introduction Figure 1.5.1 Syringe Drive Sample Delivery TC-IC TC-IC (also called TOC by difference) requires a separate analysis for TC then IC. If present, purgeable organic carbon (POC) will be included in the TC measurement. 1–15 INTRODUCTION 1.7 Prime Replicate All methods use a priming replicate before sample analysis. It is typically half the standard injection volume and it will not be quantified. The amount of sample used for the priming replicate is a method parameter. The peak can be seen on the NDIR strip chart in the Run Screen of TOC Talk software Ready Rinse Syringe with Sample Excess Water in Water Trap Emptied to Waste Deliver Sample to IC Sparger IC Sparger Contents to Waste Deliver Acid to IC Sparger Wait for Endpoint Sparge Sample Sample Gas Swept to NDIR; CO2 Concentration is Measured Rinse Syringe with Sample from IC Sparger Sample Gas Swept Through Corrosives Scrubber Memorize Baseline; Combustion Furnace Gas Off Sample Gas Swept Through Moisture Control System Deliver Sample to Combustion Furnace; Start Integration Combustion Furnace Gas On Wait Time (15 Seconds) 1.8 Analysis Process Please refer to the flow diagrams in section 8 for the following mode descriptions. 1.8.1 Total Organic Carbon (TOC): IC Removal in IC Sparger Note: There are rinsing steps for the syringe and IC sparger and other details that are not described here. 1. Sample and acid are delivered to the IC sparger 2. Sample is sparged and IC is vented (POC, if present also vents). 3. An aliquot of the sparged sample is injected to the furnace as the priming rep. This rep is not quantified. 4. Successive aliquots of the sample are injected and quantified. 5. The IC sparger is emptied of excess sample. 6. The water trap is emptied of condensate. 1–16 Figure 1.8.1 TOC, IC Removal (in IC Sparger) Analysis Process INTRODUCTION 1.8.2 Total Organic Carbon (TOC), Removal of IC with ASM Sparge Note: There are rinsing steps for the syringe and other details that are not represented here. 1. 2. The Autosampler (ASM) needle is rinsed with DI water and then the needle and transfer line is emptied. The ASM needle goes to the acid vial and the syringe draws the amount of acid that is prescribed by the analysis method. 3. The ASM needle goes to the sample vial delivers the acid and sparge gas is started. 4. After the sparge time is completed, and aliquot of the sparged sample is injected to the furnace as the priming rep. This rep is not quantified. 5. Successive aliquots of the sample are injected and quantified. 6. After the final rep of a vial is injected, the ASM needle is rinsed with DI water and then the sequence begins for the next sample vial. 7. Ready Deliver Acid to Sample Vial Excess Water in Water Trap Emptied to Waste Sparge Sample Vial NDIR Signal Linearized and Sent to Computer for Analysis Sample Gas Swept to NDIR; CO2 Concentration is Measured Rinse Syringe with Sample Memorize Baseline; Combustion Furnace Gas Off Deliver Sample to Combustion Furnace Sample Gas Swept Through Corrosives Scrubber Sample Gas Swept Through Moisture Control System Wait Time (15 Seconds) Combustion furnace gas on The water trap is emptied of condensate. Figure 1.8.2 TOC, IC Removal (with ASM Sparge) Analysis Process 1–17 INTRODUCTION 1.8.3 Total Carbon Minus Inorganic Carbon (TC-IC) Note: There are rinsing steps for the syringe and IC sparger and other details that are not represented here. 1. Sample is drawn into the syringe. 2. The priming rep aliquot is injected into the furnace. This rep is not quantified. 3. The analysis rep is injected to the furnace and quantified. 4. Sample, DI water and acid are delivered to the IC sparger. 5. The sparge gas is turned on and the IC is quantified. 6. The IC sparger is emptied of sample. 7. Steps 3 through 6 repeat until all reps are completed. 8. The water trap is emptied of condensate. 1.8.4 Total Carbon (TC) 1. Sample is drawn into the syringe. 2. The priming rep aliquot is injected into the furnace. This rep is not quantified. 3. Successive analysis reps are injected into the furnace and quantified. 4. Condensate is removed from the water trap. Ready Excess Water in Water Trap Emptied to Waste Wait for Endpoint Sample Gas Swept to NDIR; CO2 Concentration is Measured Sample Gas Swept Through Corrosives Scrubber Rinse Syringe with Sample Memorize Baseline; Combustion Furnace Gas Off Deliver Sample to Combustion Furnace; Start Integration Wait Time (15 Seconds) Combustion Furnace Gas On Sample Gas Swept Through Moisture Control System Figure 1.8.4 1–18 TC Analysis Process INTRODUCTION 1.8.5 Inorganic Carbon (IC) Note: There are rinsing steps for the syringe and IC sparger and other details that are not represented here. 1. Sample is delivered to the IC sparger. 2. DI water and acid are delivered to the IC sparger. 3. The sparge gas is turned on but this rep is not quantified. 4. The IC sparger is emptied of the sparged sample. 5. Successive aliquots of the sample, acid and DI water are delivered to the IC sparger as in steps 1 and 2 with quantitation of the IC. 6. The IC sparger is emptied of the last rep. Ready IC Sparger Contents to Waste Rinse Syringe with Sample Memorize Baseline; IC Gas Off Wait for Endpoint Sample Gas Swept to NDIR; CO2 Concentration is Measured Deliver Sample to IC Sparger Rinse Syringe with DI Water Sample Gas Swept Through Corrosives Scrubber Pull DI Water Sample Gas Swept Through Moisture Control System Pull Acid IC Gas On; Start Integration Deliver Acid and DI Water to IC Sparger Figure 1.8.5 IC Analysis Process 1–19 INTRODUCTION Notes: __________________________________________________________________ __________________________________________________________________ __________________________________________________________________ __________________________________________________________________ __________________________________________________________________ __________________________________________________________________ __________________________________________________________________ __________________________________________________________________ __________________________________________________________________ __________________________________________________________________ __________________________________________________________________ __________________________________________________________________ __________________________________________________________________ __________________________________________________________________ __________________________________________________________________ __________________________________________________________________ __________________________________________________________________ __________________________________________________________________ __________________________________________________________________ __________________________________________________________________ __________________________________________________________________ __________________________________________________________________ __________________________________________________________________ __________________________________________________________________ __________________________________________________________________ __________________________________________________________________ __________________________________________________________________ __________________________________________________________________ __________________________________________________________________ __________________________________________________________________ 1–20 2 SYSTEM SETUP SYSTEM SETUP 2.1 Before You Begin This section describes the steps necessary to setup the Apollo 9000 TOC Analyzer. Installation should be performed in the sequence presented in this section. Start-up assistance is available through TeledyneTekmar or its authorized representatives. When all the utilities and facilities required for start-up are in place, contact TeledyneTekmar or its authorized representative to schedule the installation and start-up assistance. Please provide adequate advance notice to avoid undue delay in processing your request. IMPORTANT Please be aware that if Apollo 9000, its components, and/or accessories are used in a manner not specified by Teledyne Tekmar, protection provided by the equipment may be impaired. Utility Requirements for Apollo 9000 Environmental • Typical laboratory environment to operate the unit is 18ºC - 30ºC, 40 70% humidity, free from corrosive, explosive, and volatile vapors. Gas • Hydrocarbon and CO2 free air; can be supplied from either cylinder or gas generator such as a Balston/ Whatman TOC Gas Generator. Gas Consumption • In standby and sleep modes, the unit will use 50 cc per minute to purge the NDIR. • In Ready mode, Apollo will use between 450 cc to 650 cc per minute. 2–3 SYSTEM SETUP Regulators Power • • Apollo 9000 requires one 120 VAC (+/- 10%) 60 Hz, 1200 VA, 15 amp electrical outlet. • STS-8000 autosampler requires one 120 VAC (+/- 10%) 60 Hz, 200 VA, 15 amp electrical outlet. • Computer will require two electrical outlets (CPU and monitor) • Printer will require one electrical outlet. • All power must be free from line spikes or interference. 220 VAC 50 Hz models are available. · Uncontaminated 2-stage regulator for above stated gas. Second-stage operation range should be 0-60 psi equipped with outlet for 1/8" Swagelok (brass) nut and ferrule. When using a gas generator, please check with manufacturer for recommended generator gas pressure requirements. Whatman TOC gas generator, Model 78-40, requires 60 psi of compressed air or better. A Whatman regulator kit will be required (TeledyneTekmar p/n 080-021) to drop the pressure from 60 psig (exiting the generator) to 30 psig (entering the TOC analyzer). Reagents Tubing • 1/8" o.d. x 1/16” i.d. PTFE tubing or 1/8" o.d. refrigerant-grade copper tubing. Lengths greater than 15 ft. should be 1/4" o.d. or larger connected to a short length of 1/8" tubing that connects to the analyzer. Ten feet of 1/8" PTFE tubing is supplied with the instrument. Fittings • 2–4 Nut and ferrule to connect carrier gas tubing to regulator. One 1/8" Swagelok (brass) nut and ferrule to connect carrier gas tubing to the analyzer is supplied. • Distilled and/or deionized (DI) laboratory grade water (TOC less than 0.2 ppm). • 85% phosphoric acid, ACS reagent grade. For a typical one-month supply of 21% phosphoric acid reagent, TeledyneTekmar recommends adding 50ml of 85% phosphoric acid into 150ml of DI water. SYSTEM SETUP Bench Space · Apollo 9000 dimensions are 16"W x 24"D x 21"H. · STS-8000 autosampler dimensions are 21"W x 17"D x 15"H. · Typical computer dimensions are 18"W x 27"D x 22"H (including key board). · Total recommended bench length is 6 1/2 feet with autosampler and computer. Please allow additional space for printer if used. PC Requirements Processor: • Minimum: 486DX/66 MHz or better • Recommended: Intel Pentium or compatible processor Memory: • Minimum: 16 MB • Recommended: 64 MB Standards Hard disk: · One 1000 ppm C potassium acid phthalate (KHP, KC8H5O4) TC/TOC standard is supplied with analyzer. • Minimum: 150 MB free hard disk space • · Sodium bicarbonate, ACS reagent grade, will be necessary if IC calibration is desired. Recommended: 500 MB free hard disk space Tools Needed Display: • Minimum: VGA or higher resolution • Recommended: VGA or higher resolution · 7/16" Open-end wrench · Phillips screwdriver set · Slotted screwdriver set Drive: · Small needle nose pliers • Minimum: 3.5" floppy drive • Recommended: 4X CD-ROM and 3.5" floppy drive Other · · Waste bottle (4 liter) for sample rinse Vials for appropriate autosampler rack (i.e., 40 ml vials) Input/Output Devices: • Minimum: Mouse, Windows 95/98/ NT, compatible speakers and sound card 2–5 SYSTEM SETUP 2.2 Unpack and Inspect Apollo 9000 must only be lifted and positioned from beneath its base.The Apollo 9000 front cover, glassware, or any other external components should never be used for lifting or positioning support. Bodily injury or damage to Apollo 9000 may occur if Apollo 9000 is not lifted and/or positioned properly. The Apollo 9000 TOC analyzer, associated glassware, and accessories should be carefully unpacked and immediately inspected for damage. Claims for loss or shipping damage should be promptly filed with the carrier. Notify the TekmarDohrmann Customer Support Center directly for any shortages or packing errors. 2–6 Remove Packing Material With the exception of the combustion tube and reagent bottles, all glassware is installed at the TeledyneTekmar factory. Open the door of the Apollo 9000 by gently pulling the right front side of the door. It will swing open to the left. Carefully remove the foam packing that protects the installed glassware during shipment. Verify that the 1/16” OD tube at the bottom of the water trap extends into the larger diameter portion of the trap about 1/4” to 1/2”. Bench Placement Arrange Apollo 9000 on the laboratory bench with the computer and optional autosampler. The autosampler should be placed to the left of Apollo 9000 as it needs to be near the syringe. You may also wish to place a local or networked printer near the computer for printing data reports. Allow for generous workspace around and above the analyzer. SYSTEM SETUP 2.3 Tools and Supplies Needed for Connections Before you begin making connections, gather the following tools and supplies: • nuts and ferrules supplied with unit • 1 1/8" open-end wrench • 7/16" open-end wrench • tank of TOC-free carrier gas equipped with a two-stage regulator for steady delivery of gas at 30 to 35 psi (206.7 to 241.2 kPa) • large bottle or beaker to collect waste 2.4 Pneumatic Connections Figure 2.4.1 illustrates the gas and water connections that need to be made at the back before operating Apollo 9000. Specific instructions for each connection are given in the sections that follow. Figure 2.4.1 Pneumatic Connections (Rear) 2–7 SYSTEM SETUP Swage Nuts and Ferrules onto Tubing To connect Apollo 9000 to gas supplies, you must swage nuts and ferrules onto tubing; then connect the tubing to Apollo 9000.This section instructs you how to complete this task correctly. If the nuts and ferrules are the wrong sizes or are not properly swaged, leaks can occur. Tubing connections must be made with either a one-piece plastic ferrule or a two-piece metal ferrule. Plastic Ferrules 1. Slide the nut onto the tubing. 2. For most connections, allow 3mm (1/8") of tubing to extend past the end of the ferrule. For 8-port valve fittings make sure tubing is flush with the end of the ferrule. 3. Insert the tubing into the designated connector on Apollo 9000. 4. Tighten the nut with your fingers being careful not to over-tighten. CAUTION To prevent damaging the metal nuts and ferrules, do not tighten them over 3/4 turn (270°). Once swaged onto tubing, you may need to tighten a nut only slightly to eliminate a leak. If leaking persists, look for other causes of the leak. NOTE To check if a nut and ferrule have been properly swaged, loosen the nut and pull on the ferrule. The ferrule should not slide. Figure 2.4.2 Nuts and Ferrules 2–8 SYSTEM SETUP Swagelok Ferrules 1. Prepare Reagents Slide the nut onto the tubing with the wide opening toward the end of the tubing. 2. Slide the small back ferrule onto the tubing with the flat side toward the nut. 3. Slide the front ferrule onto the tubing with the narrow end toward the end of the tubing. 4. Tighten the nut with your fingers. 5. For metal ferrules (such as to the gas supply), use a wrench to tighten the nut further.Turning the nut 1/4 turn (90°) to 1/2 turn (180°) is usually adequate. However, the amount of force you need to apply can vary, depending on the friction between the nut and threads, as well as the composition and thickness of the tubing or line. WARNING Acid will burn eyes and skin. To prevent injury, wear safety glasses and skin protection when using these chemicals. Refer to Material Safety Data Sheets for detailed information. Put on safety glasses and protective clothing before proceeding to the next step. To prepare reagents, gather the following supplies: • 250 ml bottle for acid (supplied) • 1000 ml bottle for DI H2O • ultra-pure water • phosphoric acid (H3PO4) 85% To prevent organic contamination, wash bottles thoroughly with hot, soapy water and rinse at least three times with ultrapure water before using. To Prepare Acid Reagent: 1. Measure 150 ml of ultra-pure water into a rinsed 250 ml bottle. 2. Add 50 ml of 85% phosphoric acid (H3PO4). For best results, store prepared solutions away from direct sunlight, use the phosphoric acid reagent within one month, and change DI water daily. 2–9 SYSTEM SETUP Connect Reagents Connect Gas Supply Organic-free deionized or distilled (DI) water (50 ppb C or lower is required for trace analysis) is recommended for proper operation of Apollo 9000. 1. Turn the pressure on the two-stage gas regulator to zero psi. (This prevents a sudden burst of pressure from damaging parts.) Note: For best results, change water on a daily basis. 2. Locate the fitting labeled “Gas In” on the back of the unit. Using a nut and ferrule, connect your tubing from the gas supply tank to this fitting. Do not overtighten the nut. 3. Do not turn on the gas supply at this time. Go to the next section to continue making connections before operating Apollo 9000. 1. Locate the DI water bottle and place it to the left of the unit. 2. Place the end of the 1/16” tube connected to Port G of the 8-port valve into the DI water supply. 3. 4. Insert this tubing to the bottom of the water container. Be sure that the tube does not hit the bottom of the bottle and curl back up and out of the water. WARNING To avoid injury to yourself or damage to Apollo 9000: Do not exceed recommended pressure settings. Observe safety regulations when handling pressurized gas. For more information, see Matheson Gases Data Sheets for information on specific chemicals. To prevent explosion and fire: Never use hydrogen or other flammable gas with Apollo 9000. Follow the manufacturers’ directions for safe handling of gas and chemicals. Also refer to Material Safety Data Sheets for information on specific chemicals. Insert the tube from Port A of the 8port valve into: (Automatic Syringe Users) a container of phosphoric acid reagent. (Autosampler Users) a 40 ml VOA vial at Position 11 on the autosampler support bar (see Figure 2.5.7). CAUTION Acid will burn eyes and skin. To prevent injury, wear safety glasses and skin protection when using these chemicals. Refer to Material Safety Data Sheets for detailed information. Connect Drain Line 2–10 1. Place a waste container of your choice (not supplied) to the right of the unit. 2. Route the natural-colored 1/8” Teflon tube that exits the back of the unit into the waste container. SYSTEM SETUP 2.5 Electrical Connections The power requirements for Apollo 9000 are as follows: 120 VAC (+/- 10%) 60 Hz, 1200 VA, 15 amp electrical outlet. It is best to use a power line dedicated to instrument use only. Surge protection is highly recommended. Connect the Interface Cables RS-232 straight-through 9-pin cable connectors allow you to link Apollo 9000 to the computer and its accessories (see Figure 2.5.1). 1. Locate the RS-232 cable. 2. Attach the male end of the cable to the appropriate port on the rear panel of Apollo 9000. WARNING 3. Tighten the retaining screws. Do not plug Apollo 9000 into an extension cord. An extension cord may overheat and cause a fire. 4. Attach the other end of the cable to a serial port (Com 1 or Com 2 only) on the rear panel of the computer. 5. Tighten the retaining screws. Please note that the NDIR detector requires approximately two hours to warm up before operating. Figure 2.5.1 Apollo 9000 System Electrical Connections 2–11 SYSTEM SETUP 2.6 Install the Autosampler (Optional) The following instructions are Apollo 9000-specific. Please refer to the Gilson 223 Sample Changer User’s Guide for further autosampler information. Tools and Supplies Needed Before you begin assembling the autosampler, gather the following tools and supplies: • Slotted screwdriver • Phillips screwdriver • Accessory packages shipped with unit Install Fuses Before operating the autosampler, you must first install fuses. Figure 2.6.3 illustrates the two fuse drawers supplied with the unit (the fuses are located in separately with the autosampler parts). Figure 2.6.1 Optional Apollo 9000 Autosampler Figure 2.6.3 Two Fuse Drawers (Supplied) To install fuses: 1. Locate the accessory package containing the fuse drawer appropriate for your line voltage. 2. Locate the accessory package containing the 2.0 amp fuses. 3. Install the fuse(s) into the fuse drawer. The fuse drawer for 100/120 V accepts one fuse. The fuse drawer for 220/240 V accepts two fuses. 4. Insert the fuse drawer into its receptacle in the back of the unit (see Figure 2.6.2). Figure 2.6.2 Autosampler Rear Panel 2–12 SYSTEM SETUP Connect the RS-232 Interface Cable Remove the Arm Locking Screw The RS-232 interface cable transfers information between the autosampler and Apollo 9000 (see Figure 2.6.2). During shipment, a screw locks the horizontal arm into place. To connect the RS-232 Interface Cable: 1. Locate the RS-232 cable. 2. Attach the 25-pin male end of the cable to the RS-232 parallel port on the rear panel of the autosampler. 3. Tighten the retaining screws. 4. Attach the 9-pin end of the cable to the Com port on the rear panel of Apollo 9000. 5. Tighten the retaining screws. Figure 2.6.4 Autosampler Arm Locking Screw To remove the arm locking screw: 1. The SW2 selector sets the baud rate for the unit. Locate and remove the black plastic plug located on the right side panel of the autosampler. 2. As a default, the baud rate selector is set to 0 for identifying a baud rate of 19200. With your left hand, hold the horizontal arm in place. 3. If the baud rate for your computer is 9600, complete the following steps to change the setting for the SW2 selector to 1 or 3: Using a Phillips screwdriver, remove the arm locking screw located inside the autosampler. 4. Insert the arm locking screw into its storage location on the rear panel. 1. 5. Replace the plastic plug on the side panel. 6. Ensure that the horizontal arm can move by pushing it to the left as far as it will go. Set the Baud Rate 2. Gently insert a small, slotted screwdriver into the SW2 selector (see Figure 2.6.2) on the rear panel of the autosampler and turn gently. Align the white dot with 1 or 3. Before packing the autosampler for shipment, always secure the horizontal arm using the arm locking screw. 2–13 SYSTEM SETUP Install the Vertical Arm Before installing or changing the vertical arm, check that the power is turned off, the power cord is disconnected from the power socket, the arm locking screw has been removed, and that the horizontal arm can move. control rod to move forward slightly. When the white plastic plug is no longer flush with the front of the horizontal arm, remove it and the control rod from the horizontal arm. 4. Pull the needle foot, toward the front of the horizontal arm, as far as it will go. 5. Position the vertical arm onto the horizontal slider. When viewed from the front of the autosampler, the vertical arm’s needle holder bracket is on the right. 6. Use the supplied screws to secure the vertical arm to the horizontal slider.The screws insert into the bottom of the mounting holes in the horizontal slider.You may need to move the vertical arm back and forth slightly to align its mounting holes with those in the horizontal slider. 7. Re-insert the control rod as far as it will go. While inserting the control rod, you may need to rotate it back and forth slightly to get it to pass through the gearing and motor drive socket in the horizontal slider. 8. Apply pressure at the vertical arm’s base and push the vertical arm to the back of the horizontal arm. 9. While slightly moving the needle holder bracket up and down, push the control rod until it clicks into position. Figure 2.6.5 Autosampler Vertical Arm To install the vertical arm: 1. Remove the cover plate from the front of the horizontal arm by removing its three screws. 2. Locate the hexagonal-shaped control rod and horizontal slider by looking down into the horizontal arm. 3. Using your finger, press on the control rod where it passes through the horizontal slider. At the same time, pull the needle foot toward the front of the horizontal arm. This causes the white plastic plug and 2–14 10. Re-insert the white plastic plug. 11. Re-attach the cover plate to the front of the horizontal arm. SYSTEM SETUP Install the Sample Needle To install the needle holder: Locate the accessory packages containing the needle and the needle holder/ guide kit. 1. Figure 2.6.6 Sample Needle Slide the needle holder into place on the needle holder bracket and secure with the supplied screw. Figure 2.6.7 Needle Holder To install the needle guide: To install the needle: 1. Place the metal lock washer onto the needle guide. 1. Connect the transfer tubing to the tubing fitting. 2. Screw the needle guide with lock washer into place on the bottom side of the needle foot. 2. Slide the needle assembly into the needle holder on the vertical arm making sure that the needle is centered over the needle guide. 3. Secure the needle by tightening the needle retaining screw. 4. Connect the 1/16" tubing attached to port D of the 8-port valve to the vertical fitting of the needle. 5. Connect the long, red 1/8" tubing that exits the upper chassis of Apollo to the side port of the needle. 2–15 SYSTEM SETUP Install the Support Bar, Rinse Station, and Acid Vial Bracket To install the support bar, rinse station, and acid vial bracket: The support bar attaches to the front face of the autosampler. Its rear contains mounting holes for rinse stations and its top contains mounting holes for transfer ports and filler ports. 1. Attach the rinse station to the support bar.The default position for the rinse station is the left side of the support bar (with the rinsing well to the left) when the bar is attached to the autosampler. Place the o-rings (supplied with the screws) over the screws on the bar side of the rinsing well. Attach the rinse station behind Positions 4 and 5 of the support bar by tightening the set screws. 2. Attach the acid vial bracket behind Positions 11 and 12 of the support bar by securing with the two screws provided. 3. Attach the tubing to the drain, by first locating the drain tubing. 4. Attach the tubing to the drain fitting. 5. Place the other end of the tubing in a drain receptacle, located lower than the tray. There is sufficient space behind the racks to direct the waste line to the right or left. Maintain a continuous downward slope for proper draining of the tubing. 6. Attach the support bar to the top mounting holes on the front of the autosampler using the knurled screws. Figure 2.6.8 Rinse Station and Support Bar 2–16 SYSTEM SETUP Install the Sample Tray Install the Rack The sample tray positions the racks and any accessories that fit onto the bed of the autosampler. It also contains liquid spills, such as those caused by overflowing vessels. To install the autosampler rack: 1. Place each rack into the tray so that the rack is perpendicular to the front panel of the autosampler. 2. Ensure that the rack handles are positioned to front of the unit. Place the autosampler to the left side of Apollo 9000 Connect the Power Supply To connect the power supply: Figure 2.6.9 Sample Tray To install the tray: 1. Place the tray in the lower position on the bed of the autosampler. 2. Ensure that the tray fits securely and that the drain outlet is located at the left rear of the tray. 3. Attach one end of the drain tubing to the drain outlet and place the other in a drain receptacle, located lower than the tray (part of the drain tubing on the rinse station may be used). 1. Locate the appropriate power cord for your line voltage. 2. Use the power cord to connect the sample changer to an AC power source. Surge protection is recommended. To remove the tray: 1. Lift the tray straight up and then pull it back toward you. 2–17 SYSTEM SETUP 2.7 Add Catalyst to and Install Add Catalyst to the Combustion Tube the Combustion Tube The combustion tube is quartz and is placed in the furnace. The salts from oils present on human skin, if left on the tube, will cause damage to the tube in the hot furnace. Wear gloves while handling the tube and wipe it clean with a damp cloth or paper towel before placing it in the furnace. Figure 2.7.1 Items Required for Combustion Tube and Catalyst Installation 1. 2–18 Verify that the combustion tube is clean, has no cracks and that neither end is chipped. The narrow end is the bottom of the tube. SYSTEM SETUP 2. Place a loosely wadded tuft (approximately 1/2" thick) of quartz wool through the top of the combustion tube to just above the narrow opening.To prevent catalyst from dropping through the quartz wool, gently pack the top of the quartz wool so that there is no space between the perimeter of the quartz wool and the glassware. Figure 2.7.3 Adding Catalyst to Combustion Tube 4. Add 0.5" quartz wool on top of catalyst.The added quartz wool will protect and add life to the catalyst. Figure 2.7.2 Adding Quartz Wool to Combustion Tube 3. The catalyst (20 grams) is in a small vial. Pour the entire 20 grams into the combustion tube. 2–19 SYSTEM SETUP Install the Combustion Tube 1. Remove the right chassis cover from the Apollo 9000. 2. Detach the injection port from the valve mounting plate by removing the two screws and set aside. Remove the blue tube on the right side for easier access to that screw. 3. Swing the locking guard at the bottom of the combustion furnace to the right until it touches the right furnace leg. 4. Gently pull the bottom connector out from under the furnace. b) Contact with the o-ring will be felt. Push down firmly while turning the tube slightly. The movement of the tube through the o-ring should be felt. When properly seated, about 1 1/2 inches of tube should extend above the plate. 6. a) Examine the bottom connector for any debris on the black o-ring that seals to the combustion tube. If necessary, remove the connector at the stainless steel union and rinse it under clean, running water. Shake out the excess water and gently wipe the o-ring with a lint-free cloth. 5. 2–20 Replace the bottom connector and secure it in place by swinging the locking guard to the left until it touches (or nearly touches) the left furnace leg. If it is deemed necessary to remove the o-ring, do not attempt to pick it out with a sharp instrument. Instead, remove the 4 screws that hold the metal plate and spacer block to the injection port. It can now be easily removed. b) A new o-ring must be lubricated with a small amount of silicone vacuum grease. c) Install the Combustion Tube by gently lowering it into the furnace until the bottom end protrudes from the furnace. Hold the combustion tube in place until the bottom connector is resecured. a) The injection port seals to the combustion tube with an o-ring. Examine the o-ring for any debris. If necessary, wipe it gently. With a tiny amount of lubricant on the fingertips, rub it on the o-ring. d) Use a lab wipe and try to wipe all the lubricant away. Enough will be left to make it easy to slide the injection port onto the combustion tube. 7. Slide the injection port onto the combustion tube with gentle pressure and a slight turning movement. Replace the screws. Reconnect the gas line above the right screw. SYSTEM SETUP 2.8 Install TOC Talk Software Configure Apollo 9000 with TOC Talk To install the Apollo 9000 TOC Talk program on Windows 95/98/NT: Before you begin analyzing samples, TOC Talk must be configured to run Apollo 9000 and its accessories. 1. Start Windows. 2. Close any open applications. 3. Place the Apollo 9000 TOC Talk CDROM into the CD-ROM drive. The Apollo 9000 CD Menu will appear. 4. Select the Apollo 9000 install icon. 5. Follow the installation prompts. Note:TeledyneTekmar recommends that you accept the default installation directory on your hard drive for Apollo 9000 TOC Talk. To configure Apollo 9000 with TOC Talk: 1. Start Windows, and then click the Start button. Select TOC Talk from the Apollo 9000 Programs directory. 2. Select Instrument from the Setup menu. 3. Type a name in the Instrument Name box for instrument identification. 4. Type a name (i.e., your name, name of group) in the Operator Name box for analysis identifcation. 5. In System, select Ready mode. 6. Select relevant Options. 7. In Preferences, select the Sample Introduction mode (With/Without Autosampler or Repetitive Sampling). Note: TeledyneTekmarrecommends that you use the Instrument Setup/Status defaults for the remaining options until you become more comfortable with Apollo 9000 operation. 8. Click OK. 2–21 SYSTEM SETUP 2.9 Condition Combustion Tube Catalyst Before initial Apollo 9000 operation and each time you install new catalyst, you must condition the catalyst. To condition the combustion tube catalyst: 1. Disconnect the tube at the side-port of the Water Trap. a) Attach a length of tubing to that tube so that the end can be submerged in a beaker of diluted sodium hydroxide solution. Some noxious gases may be emitted by the catalyst upon conditioning and the water will absorb them. b) Set the carrier gas pressure to 30 psig. 2. Elevate the temperature of the furnace to 900°C by pressing the Set button on the Temperature Controller while pressing the Up arrow button. Wait until the furnace reaches 900°C. 3. Make sure the one liter DI water supply vessel is filled. 4. Start TOC Talk. 5. Click Run in the main screen of the Apollo 9000 software. This will bring you to the Sample Analysis screen. 6. Click Sample Setup to access the Sample Setup screen. 7. Whether in Autosampler or Automatic Syringe Mode, select Sample from the Sample Type list. 8. Select Condition Catalyst from the Method ID list. 2–22 9. Enter 1001 as the vial number in the Pos column if you use an autosampler. Water is taken from the DI water supply rather than from a vial. 10. Click Save/Use. 11. Click Start in the Sample Analysis window. 12. After the system completes the conditioning process (24 reps total), change the temperature setting back to 680°C and wait for the furnace to cool. 13. Reconnect the water trap tube (see Step 1). 14. After the temperature reaches 680°C: a) Autosampler Users: Place 5 vials of freshly-drawn DI water into the autosampler vial tray. In Sample Setup, select Sample as Sample Type,TC 0100 as the Method ID, and 5 reps. Click on Save/Use and Start the run. b) Automatic Syringe Users: Place the sample tube (connected to Port D of the 8-port valve) into a container of freshly-drawn DI water or into the DI water supply of the analyzer. In Sample Setup, select TC 0-100 as the Method ID and 10 reps. After the 10 reps finish, click Start again. After the second run, perform 5 more reps. 15. The raw data count should finally be less than 30,000 counts for the standard Apollo and Less than 375,000 counts for the Apollo HS. If the raw counts are greatly higher, then proceed to section 2.10. SYSTEM SETUP 2.10 Cleaning Procedure for Conditioned Catalyst Fresh catalyst background might be too high for most applications. Before initial Apollo 9000 operation and each time the catalyst is replaced, the catalyst conditioning procedure must be performed. To condition the combustion tube catalyst: 1. Make sure DI water vessel contains a minimum 1-liter supply. 2. Set the combustion furnace temperature to 900°C. Do not use this temperature with old catalyst unless it has been washed. • Press and hold the Set button on the Temperature Controller and then press the Up arrow button until the display reads 900°C. • Release both buttons and wait until the furnace reaches 900°C. 3. Run the TOC Talk Cleaning Procedure Method as a sample for 10 replicates overnight in repetitive sampling mode every 5 minutes (the minimum time allowed). 4. The next day, exit the repetitive sampling procedure, return the combustion furnace temperature to 680°C, and run DI water as a TOC Sample. For applications measuring 1 ppmC samples or less, the raw data for this sample should be: • Less than 30000 area counts for the standard Apollo 9000. • Less than 375000 area counts for the Apollo 9000 HS. If your results do not approximate these values and you are running samples higher than 1ppmC, it may be acceptable to run standards and samples. However, if you are running <1ppmC samples, then repeat the conditioning procedure to lower the raw data for your DI water and background. Note: Some systems may not have DI water clean enough to meet these guidelines. If you are running samples >1 ppmC, your results may be acceptable. If results are not acceptable, then TeledyenTekmar recommends using an improved DI water source. 2–23 SYSTEM SETUP Notes: __________________________________________________________________ __________________________________________________________________ __________________________________________________________________ __________________________________________________________________ __________________________________________________________________ __________________________________________________________________ __________________________________________________________________ __________________________________________________________________ __________________________________________________________________ __________________________________________________________________ __________________________________________________________________ __________________________________________________________________ __________________________________________________________________ __________________________________________________________________ __________________________________________________________________ __________________________________________________________________ __________________________________________________________________ __________________________________________________________________ __________________________________________________________________ __________________________________________________________________ __________________________________________________________________ __________________________________________________________________ __________________________________________________________________ __________________________________________________________________ __________________________________________________________________ __________________________________________________________________ __________________________________________________________________ __________________________________________________________________ __________________________________________________________________ __________________________________________________________________ 2–24 3 TOC TALK TOC TALK 3.1 TOC Talk Control Screen 3.2 Instrument Setup The TOC Talk Control Screen appears when the TOC Talk software is started. Before you begin analyzing samples, TOC Talk must be configured to run Apollo 9000 and its accessories. To access the Instrument Setup/Status Screen, select Instrument from the Setup menu. Figure 3.1 TOC Talk Control Screen The Control screen contains menus with keyboard shortcuts, setup options, the run option, results, and a status bar that depicts event list items in real time along with mode status and current NDIR mV output. Figure 3.2 Instrument Setup/Status Screen The Instrument Setup/Status Screen is the main system configuration interface. In this screen you will configure TOC Talk to recognize your Apollo 9000 system options. Instrument Name Type a name in this text box to identify the Apollo system. Operator Name Enter a name (i.e., your name, name of group) in this text box for analysis identifcation. 3–3 TOC TALK System Preferences Select a system status mode for the Apollo 9000 from the following: Select from the following options to configure the instrument specific to your sample analysis requirements: • • • Ready turns on the permeation dryer gas and the combustion furnace gas, and then routes carrier gas from the IC sparger to vent and from the combustion furnace to the NDIR. In order to execute a sample run, the instrument must be in Ready Mode. Standby turns the gas valves off. The NDIR and furnace remain on. Shutting off the NDIR will incur a minimum two hour stabilization delay upon startup. TekmarDohrmann recommends that Apollo 9000 remain in Standby Mode when not in use. Sample Introduction • Without Autosampler • With Autosampler • Repetitive Sampling Max. Integration Time (min.) • Time (in minutes) allotted for the reaction portion of an analysis to take place. Default is set to 4 minutes. Stabilize Baseline Time (sec.) • Some analysis modes may require added wait between analyses to allow proper return of the baseline to a stable value. 15 seconds is recommended. Sleep sends the instrument to Standby Mode and turns off the combustion furnace, but maintains power to the NDIR. Outlier Deletions Gas Flow Rate (cc/min) • • Select the Outlier Deletion check box if you want to delete a certain number of outliers (maximum is 4) per sample analyzed. To Furnace detects flow of carrier gas to the combustion tube. Options Reps Max. Deletions • 0.8 mm Particulate Kit Installed 3 1 Select this option only if you have the 0.8 mm Particulated Sample Kit installed. 4 1 5 2 Autosampler Sparge Option 6 3 Select this option only if you want the autosampler to sparge the sample (for TOC analysis) before transferring the sample to the Apollo 9000. 7 4 • 3–4 Table 3.2 Maximum Outlier Deletions for Sample Rep Count TOC TALK Print Data Report after Each Sample Set Halt System If Out of Calibration or Over Range • You can select one or both options if you want your analysis sequence halted when TOC Talk detects calibration or range errors. Select this option to send a printout of the last sample set to your default printer. Auto Shutdown • • Check the Auto Shutdown option box to allow the instrument to automatically run a shutdown event list and go into Standby Mode after an autosampler run. This enables the automatic archive utility when “ON” is selected in the archive dialogue. Check the Auto Shutdown With Furnace Off option box if you want the shutdown event list to include turning the combustion furnace off during unit shutdown. This option is only available when Auto Shutdown is also selected. • Check the Out of Calibration option box if you want the scheduled analysis sequence to halt when TOC Talk detects that Apollo 9000 has slipped out of the desired calibration. • Check the Over Range option box if you want the scheduled analysis sequence to halt when TOC Talk detects that Apollo 9000 has detected a sample that has gone out of its analysis range. 3–5 TOC TALK 3.3 Instrument Diagnostics Gas Output Valves CAUTION On the Setup menu, point to Diagnostics, and then click Valves. When Valves 4 and 5 are on to direct the IC Sparger flow to the NDIR, Valve 2 must be off. Failure to turn Valve 2 off when Valves 4 and 5 are on could result in dangerous pressurization of the combustion tube and water trap. Figure 3.3.1 Diagnostics Valve Control Screen WARNING! Do not alter this screen during an analysis. Erroneous or conflicting data can damage the instrument. Select where you want the following combustion furnace and IC sparger output sample gases to go: • Furnace Gas To either Vent or NDIR. [Valve 4] • IC Gas To either NDIR or Vent. [Valve 5] Auxiliary Gas Input Select On or Off for each of the Apollo 9000 components you want gas carried to: • Permeation Dryer turns gas on to the permeation dryer (200cc/ min). [Valve 1] • Furnace turns gas on to the combustion furnace. [Valve 2] • IC Sparger turns gas on to the IC sparger. [Valve 3] • ASM Sparge turns gas on to the autosampler. [Valve 7] 3–6 • Furnace Power controls power to the combustion furnace. The default setting is Off. TOC TALK Syringe Pump and 8-port Valve Diagnostics On the Setup menu, point to Diagnostics, and then click Syringe. • A = Acid E = Not Used B = IC Reactor F = Waste C = Furnace G = DI Water D = Sample H = Water Trap Home Position Button Automatically switches the outer port of the 8-port valve to position A (Acid). Syringe Volume Position (µL) • Current Position Displays current position of the syringe in microliters. • Figure 3.3.2 Diagnostics Syringe Pump & 8-port Valve Control Screen You can move the syringe by entering the absolute position of the syringe in microliters and clicking the Move button. WARNING! Example: If you want to pull 1000 µL from a syringe already located at 200 µL, enter 1200µL in the Move to Volume field and click the Move button. Do not alter this screen during an analysis. Erroneous or conflicting data can damage the instrument. Valve Position • Current Position Displays current position of the outer port of the 8-port valve. The common port is always connected to the syringe. • Move To Position You can choose the outer port position here by clicking on the pull down window or the display box and then clicking on the Move button. Move To Volume • Home Position Button Automatically moves the syringe to 0 µL and the valve to the waste position while discarding syringe contents. Note: Updating the current position during analysis may result in communication and data loss. 3–7 TOC TALK Autosampler Diagnostics Rack Style • On the Setup menu, point to Diagnostics, and then click Autosampler. Select the rack style you are using by clicking the pull down menu or the display box. Manual Movement • Home Click this button to home the autosampler • Click this button to move the autosampler needle to the position selected in the display box to the right of the button. The position number can be changed by clicking the arrow bar or the display box. Figure 3.4 Autosampler Diagnostics Screen WARNING! Move To Vial Note: Do not alter this screen during an analysis. Erroneous or conflicting data can damage the instrument. Special Position Numbers: • 1001 thru 1014 support bar ports • 1015 Rinse Station • Needle Down Moves autosampler needle down • Needle Up Moves autosampler needle up Current Positions (mm) This section displays the current position (in millimeters) of the autosampler in the X, Y, and Z planes when the Update button is activated. 3–8 TOC TALK Communications Diagnostics On the Setup menu, point to Diagnostics, and then click Communications. Flowmeter Calibration Diagnostics On the Setup menu, point to Diagnostics, and then click Flowmeter Calibration. Figure 3.3.4 Communications Diagnostics Screen The Communications Diagnostics Screen allows you to switch the communications port or re-establish communications when necessary. • COM Port Selection Select the correct Communication port from the computer to the Apollo 9000 here from list. TOC Talk automatically configures the COM port (a free COM port is required). • OK Button Select OK to accept the port selection and re-initialize the Apollo 9000. WARNING! Selecting the OK button may compromise the data of the current run. • Figure 3.3.5 Flowmeter Calibration Diagnostic Screen The flow to the furnace can be measured with an independent flowmeter from the 1/8" blue gas line entering the side of the injection port over the combustion furnace (the right side cover must be removed to do this). Once the actual flow for the flowmeter is known, type its value (in units of cc/ min) into the Actual field. When the flowmeter reading is stable, click the Calibrate button. The ratio of Actual flow to raw flow will be displayed in the Cal. Factor field. Cancel Button Select Cancel to exit the communications screen without re-assigning the port and without reinitializing the Apollo 9000. 3–9 TOC TALK 3.4 Archive Data Manual Archive You may prefer to have more control over archival of your data files. On the Setup menu, click Archive. Figure 3.4 Archive Settings Screen Automatic Archive TOCTalk automates the process of data archive with its Archive utility. When enabled, TOCTalk creates a new directory tree, copies all files to the new location, and deletes them from their original location while leaving the original directory structure intact. Archival occurs up to the present day when the interval in days has been reached, the system mode is in Standby, and the TOC Talk software is on. 1. Enter an interval (number of days) value in the first field. 2. Either type in a new file path for the backup files to be created under or accept the default (C:\APOLLO\ARCHIVE) path. 3. Select On in the Automatic Archive Utility Status. 4. Click OK. 3–10 1. Specify a file path for the archive files to be created under or accept the default (C:\APOLLO\ARCHIVE) path. 2. Click Archive Now. A dialogue will appear on your screen indicating that the archive was successful. 3. Click OK. TOC TALK 3.5 Password Setup The Password Setup utility is designed to enforce limited access to controllable features within TOC Talk. This is beneficial if you want to limit access to method setups, calibration setups, and data archival. Each system may have only one password. Figure 3.5 Password Setup Screen Each time you or other users try to access a restricted area, a window will pop up requesting a password. If the user types in the correct password, they will gain full access to that section of the program. To disable password protection: 1. On the Setup menu, click Password. 2. Enter the current password. 4. In Password Restriction Access, click OFF. 4. Click OK. Now all areas may be entered without restriction. After altering configurations, calibration, etc., be sure to go back into the Password Setup, enter a password, and click ON to re-enable password protection. To enable password protection: 1. On the Setup menu, click Password. 2. Check the boxes of the areas you want access restricted to in Restricted Access. 3. Enter a password (maximum 32 characters). Passwords are casesensitive. 4. In Password Restriction Access, click ON. 5. Click OK. 3–11 TOC TALK 3.6 Wakeup Schedule Apollo 9000 can be scheduled to automatically “wakeup” when programmed to do so using the TOC Talk Wakeup utility. Note: The unit wakeup feature is active when the following conditions are met: 1. Wakeup schedule is set 2. Apollo 9000 is in Standby mode 1. On the Setup menu, select Wakeup. 2. Check all the days of the week you want the Apollo 9000 Wakeup Schedule to run. 3. Enter the time of day you want Apollo 9000 to wake up. 4. When satisfied with the schedule, click OK. A small blue clock icon will appear in the TOC Talk title bar when the Wakeup feature is activated and Apollo 9000 is in Standby mode. 3. TOC Talk is running Figure 3.6.2 Wakeup Schedule Enabled Icon Please reference the TOC Talk Online Help for current, comprehensive sample analysis, calibration, data results, tutorials, and advanced operation information. Figure 3.6.1 Wakeup Schedule Screen 3–12 4 CALIBRATION CALIBRATION 4.1 System Calibration Before analyses, Apollo 9000 must be calibrated. A response factor correlates the raw counts of the instrument to a known amount of carbon in a sample, or what is referred to as a standard. Standards are made by adding carbon to ultra-pure water to achieve determined levels of carbon. It is important to use the same source of water for all calibration standards because the carbon in the preparation water is part of the calibration curve. Note: Once Apollo 9000 standard calibration is performed, all you have to do is assign appropriate, active calibration curves prior to sample analyses.You do not need to perform the calibration procedure for each sample run. Standard analyses have, in general, three major sources of carbon content: measured carbon content added to the ultra-pure water, carbon from the preparation water itself, and carbon associated with the reagents used to perform the relevant analysis. When we calibrate the instrument to a y=mx+b linear fit, the constant carbon contribution of the prep water and the reagent are represented by the y-intercept, bcal: y = mx + b cal b cal = b reagent + b rinse water The slope of the curve, m, represents the relationship of the measured carbon in the standard to the response of the instrument since only this source of carbon changes between any set of standards. Note: Running your preparation water as a "zero" standard can be an excellent way to calibrate the low end of the concentration range for lowlevel methods. After calibration, the slope m will be used as our response factor in sample analysis. However, the y-intercept, b cal, will not be used because the carbon associated with a blank may change over time.To address this issue, special blank methods can be run at anytime. The linear equation for samples is simply y=mx + b new. For 0–20, 1–400 ppm TOC and TC methods, the carbon contribution from the preparation water that is present in standards but not samples may be significant.The blank method in this range uses rinse water from the rinse water bottle, continuously recycles it through the furnace for a period of time, and then measures the water derived as the sample blank.To run a check standard against the calibration curve, you must then run the standard as a calibration verification instead of a sample.This calibration verification sample type will apply the correct blank, the y-intercept or b cal, to the analysis. 4–3 Detector Output (Raw Data) CALIBRATION 4.2 Standard Calibration Without Autosampler Tutorial 4 Calibration Points: 25, 50, 75, and 100 ppm IMPORTANT Precisely follow the steps below to achieve successful calibration of your Apollo 9000 instrument. Water Contribution Reagent Contribution 100 Mass (µgC) Slope = calibration factor Intercept = calibration blank Figure 4.1 Calibration Slope 4–4 In this exercise, you will create a standard calibration for low-level TOC sample analysis by setting up three calibration points. You will: 1. Define the Standard Calibration Methods and Concentrations 2. Set the Active Calibration Curve 3. Setup the Standard Calibration Analysis 4. Start the Standard Calibration Analysis Run 5. Review the Analysis Results CALIBRATION #1 Define Standard Calibration Methods and Concentrations 12. Press the arrow down key on your keyboard to insert a new row (Line 3). 1. Start TOC Talk. 13. Type 10 PPM in the Standard ID box. 2. On the TOC Talk Control Screen menu, point to Setup, click Calibration, and then select Standards. 14. Enter 10 in the Concentration (ppm C) box. 15. In the Method ID list, select TOC 020 ppmC. The calculated value in the µgC column should read 5.0000. 16. On the File menu, click Save As. Save this calibration setup as TOC Calibration. 17. Click OK. Note: Figure 4.2.1 TOC Calibration Setup 3. On the File menu, click New. 4. Highlight the first row (Line 1) to select it. 5. Type DI Water in the Standard ID box. 6. Enter zero (0) in the Concentration (ppm C) box. 7. In the Method ID list, select TOC 020 ppmC. The calculated value in the µgC column should read 0.0000. 8. Press the arrow down key on your keyboard to insert a new row (Line 2). 9. Type 5 PPM in the Standard ID box. After you click OK in the Calibration Setup dialog, you will return to the TOC Talk Control Screen, but the Setup menu and Calibration submenu will appear.This is to remind you to Set Active standard calibration methods for the mode(s) of analysis (TC, IC, TOC) and range(s) you intend to run. 10. Enter 5 in the Concentration (ppm C) box. 11. In the Method ID list, select TOC 020 ppmC. The calculated value in the µgC column should read 2.5000. Figure 4.2.2 Set Active Calibration Submenu 4–5 CALIBRATION #2 1. Set Active Calibration Curve From the Set Active submenu, select TOC Curve. Figure 4.2.3 TOC Mode—Active Calibration Curves 2. 4–6 In the 0-20, 1-400 Range list, select the TOC Calibration Calibration Curve ID. "TOC Calibration" is the name you gave the Calibration Setup. TOC Talk will use the Active Calibration Curve (TOC Calibration setup for the 0-20, 1-400 Range) data from the standards to analyze calibration. Note: TOC Talk references the Active Calibration Curves, which are files that store the information associated with a specific Calibration Curve ID or Method ID, during sample runs. If you want to analyze a standard, you must first create a Calibration Setup table and then set the Active Calibrations Curves. Once you save the standard concentrations (Calibration Curve IDs) and set as Active, TOC Talk will automatically refer to the current standard calibration configuration when Standard is selected as the Sample Type for analysis. CALIBRATION #3 Setup Standard Calibration Analysis IMPORTANT Proceed carefully. Most Apollo 9000 TOC Talk standard calibration errors occur during the following steps. If standard analysis setup instructions are not followed unsuccessful calibrations and reduced sample integrity can occur. 1. From the TOC Talk Control Screen, click Run. • Sample Analysis: displays the current Sample ID information (only after a run is started); Start Run button; Sample Setup button. • Strip Chart: displays, in real time, response from the NDIR as Time vs. Millivolts and refreshes at the beginning of each sample run. • Analysis Results: continuously displays current analysis data (up to 30 rows) so that you can easily monitor Apollo 9000 performance. Figure 4.2.4 TOC Talk Run Screens 4–7 CALIBRATION 1 2 Select Sample Type 4 Select Range; Click OK 5 Select Number Reps Per Sample Click Save/Use 3 Click on Standard Calibration Line; click Exit Figure 4.2.5 Standard Calibration Analysis Setup (without Autosampler) 2. Click Sample Setup in the Sample Analysis screen. 3. From the Sample Type list, select TOC Standard. 4. The Choose Range dialog appears. Select the 0-20, 1-400 range. Click OK. 4–8 5. Next the Select Calibrator dialog appears. Select the Standard ID (DI WATER) you want to use by clicking on its row to highlight it. Click Exit. You will return to the Analysis Setup screen.TOC Talk automatically inserts the calibration information in the Sample ID and Method ID fields. 6. Select the Number of Reps Per Sample in the Reps column. 7. Click Save/Use. CALIBRATION #4 Start Standard Calibration Analysis Run Before you begin the analysis run, verify that the: • Sample line runs from Port D of the 8-port valve into the correct standard supply. • • 1. Acid line runs from Port A of the 8port valve into the acid reagent supply. DI Water line runs from Port G of the 8-port valve into a fresh DI Water supply. Click Start in the Sample Analysis screen to begin the standard analysis run. Note: #5 Review Analysis Results The result of each standard analysis rep appears in the Analysis Results screen. Figure 4.2.6 Analysis Results There is no calculation of PPM C during calibration.The results are in area counts for the integrated peak. The Calibration Curve screen appears when the standard run ends (see Figure 4.2.7). You must repeat the Standard Calibration Analysis Setup (#3) and Start the Run (#4) for the two remaining Standard IDs (5 PPM and 10 PPM) in order to create a proper calibration curve (see Figure 4.2.7). 4–9 CALIBRATION Figure 4.2.7 Calibration Curve The Calibration Curve table displays the standard calibration data. At the beginning of each row is a box. Clicking on and off the Use box toggles X. When the X is visible the calibration point represented by that row will be included in the calibration curve when you click Recalc. Some users prefer to analyze the same standard concentration twice and then select one or both to include in the calculations. Various combinations may be setup. Each time you configure a new calibration set, you must click Recalc. The r2 value is one way to evaluate the calibration. The closer r2 is to 1, the more precise the calibration. You may delete unused lines by highlighting the row and pressing the delete key.This may prevent confusion when viewing the calibration again later. 4–10 CALIBRATION 4.3 Standard Calibration With Autosampler Tutorial #1 Note: 1. Start TOC Talk. 2. On the TOC Talk Control Screen menu, point to Setup, click Calibration, and then select Standards. Precisely follow the steps below to achieve successful calibration of your Apollo 9000 instrument. Define Standard Calibration Methods and Concentrations In this exercise, you will create a standard calibration for low-level TOC sample analysis by setting up three calibration points. You will: #1 Define the Standard Calibration Methods and Concentrations #2 Set the Active Calibration Curve Figure 4.3.1 TOC Calibration Setup #3 Setup the Standard Calibration Analysis #4 Start the Standard Calibration Analysis Run 3. On the File menu, click New. 4. Highlight the first row (Line 1) to select it. 5. Type DI Water in the Standard ID box. 6. Enter zero (0) in the Concentration (ppm C) box. 7. In the Method ID list, select TOC 020 ppmC. The calculated value in the µgC column should read 0.0000. 8. Press the arrow down key on your keyboard to insert a new row (Line 2). 9. Type 5 PPM in the Standard ID box. #5 Review the Analysis Results 10. Enter 5 in the Concentration (ppm C) box. 4–11 CALIBRATION 11. In the Method ID list, select TOC 020 ppmC. The calculated value in the µgC column should read 2.5000. 12. Press the arrow down key on your keyboard to insert a new row (Line 3). 13. Type 10 PPM in the Standard ID box. 14. Enter 10 in the Concentration (ppm C) box. Note: After you click OK in the Calibration Setup dialog, you will return to the TOC Talk Control Screen, but the Setup menu and Calibration submenu will appear.This is to remind you to Set Active standard calibration methods for the mode(s) of analysis (TC, IC, TOC) and range(s) you intend to run. 15. In the Method ID list, select TOC 020 ppmC. The calculated value in the µgC column should read 5.0000. 16. On the File menu, click Save As. Save this calibration setup as TOC Calibration. 17. Click OK. Figure 4.3.2 Set Active Calibration Submenu 4–12 CALIBRATION #2 1. Set Active Calibration Curve From the Set Active submenu, select TOC Curve. Note: TOC Talk references the Active Calibration Curves, which are files that store the information associated with a specific Calibration Curve ID or Method ID, during sample runs. If you want to analyze a standard, you must first create a Calibration Setup table and then set the Active Calibrations Curves. Once you save the standard concentrations (Calibration Curve IDs) and set as Active, TOC Talk will automatically refer to the current standard calibration configuration when Standard is selected as the Sample Type for analysis. Figure 4.3.3 TOC Mode—Active Calibration Curves 2. In the 0-20, 1-400 Range list, select the TOC Calibration Curve ID. "TOC Calibration" is the name you gave the Calibration Setup. TOC Talk will use the (TOC Calibration setup for the 0-20, 1-400 Range) data from the standards to analyze calibration. 4–13 CALIBRATION #3 Setup Standard Calibration Analysis Note: 1. Proceed carefully. Most Apollo 9000 TOC Talk standard calibration errors occur during the following steps. If standard analysis setup instructions are not followed unsuccessful calibrations and reduced sample integrity can occur. From the TOC Talk Control Screen, click Run. • Sample Analysis: displays the current Sample ID information (only after a run is started); Start Run button; Sample Setup button. • Strip Chart: displays, in real time, response from the NDIR as Time vs. Millivolts and refreshes at the beginning of each sample run. • Analysis Results: continuously displays current analysis data (up to 30 rows) so that you can easily monitor Apollo 9000 performance. 2. Click Sample Setup in the Sample Analysis screen. 3. Enter the autosampler vial position in the Pos column (see Figure 4.3.5). 4. From the Sample Type list, select TOC Standard. Note: Figure 4.3.4 TOC Talk Run Screens 5. 4–14 You must physically select a Sample Type from the list although the one you want may already be displayed for each line you set up. The Choose Range dialog appears. Select the 0-20, 1-400 range. Click OK. CALIBRATION 1 6 Enter Sample Vial Position 3 4 Select Range; Click OK 2 Select Sample Type 5 Click Save/ Use Select Number Reps Per Sample Select Standard Calibration Line; Click Exit Figure 4.3.5 Standard Calibration Analysis Setup (with Autosampler) 6) Next the Select Calibrator dialog appears. Select the Standard ID (DI Water) you want to use by clicking on its row to highlight it. Click Exit. You will return to the Autosampler Analysis Setup screen.TOC Talk automatically inserts the calibration information in the Sample ID and Method ID fields. 7) Select the Number of Reps Per Sample in the Reps column. 8) Press the arrow down or Insert key on your keyboard or select Insert Row from the File menu to insert another row. 9) Repeat steps 4-8 to enter the two remaining Sample IDs (5 PPM and 10 PPM). 10) Click Save/Use to return to the Run screens. Recalling this autosampler analysis setup will allow immediate recalibration (without going through all the steps again) as long as the calibration standards table is not deleted. 4–15 CALIBRATION #4 Start Standard Calibration Analysis Run Before you begin the analysis run, make sure to do the following: • #5 Review Analysis Results The result of each standard analysis rep appears in the Analysis Results screen. Place vials containing standards in their correct positions on the autosampler rack. Figure 4.3.6 Analysis Results Note: When sparging in the vials, leave about one inch of headspace. • Verify that the acid supply is ample and place the acid vial in position #11 on the autosampler support bar (if you selected the Autosampler Sparge Option in Instrument Setup/ Status). • Verify that the DI Water line runs from Port G of the 8-port valve to a fresh DI Water supply. 1. Click Start in the Sample Analysis screen to begin the standard analysis run. 4–16 There is no calculation of PPM C during calibration.The results are in area counts for the integrated peak. The Calibration Curve screen appears when the standard run ends (see Figure 4.3.7). CALIBRATION Figure 4.3.7 Calibration Curve The Calibration Curve table displays the standard calibration data. At the beginning of each row is a box. Clicking on and off the Use box toggles X. When the X is visible the calibration point represented by that row will be included in the calibration curve when you click Recalc. Some users prefer to analyze the same standard concentration twice and then select one or both to include in the calculations. Various combinations may be setup. Each time you configure a new calibration set, you must click Recalc. The r2 value is one way to evaluate the calibration. The closer r2 is to 1, the more precise the calibration. You may delete unused lines by highlighting the row and pressing the delete key. This may prevent confusion when viewing the calibration again later. 4–17 CALIBRATION Notes: __________________________________________________________________ __________________________________________________________________ __________________________________________________________________ __________________________________________________________________ __________________________________________________________________ __________________________________________________________________ __________________________________________________________________ __________________________________________________________________ __________________________________________________________________ __________________________________________________________________ __________________________________________________________________ __________________________________________________________________ __________________________________________________________________ __________________________________________________________________ __________________________________________________________________ __________________________________________________________________ __________________________________________________________________ __________________________________________________________________ __________________________________________________________________ __________________________________________________________________ __________________________________________________________________ __________________________________________________________________ __________________________________________________________________ __________________________________________________________________ __________________________________________________________________ __________________________________________________________________ __________________________________________________________________ __________________________________________________________________ __________________________________________________________________ __________________________________________________________________ __________________________________________________________________ 4–18 5 SAMPLE ANALYSIS SAMPLE ANALYSIS 5.1 Sample Analysis The following tutorials will guide you through the Apollo 9000 default TOC sample analysis procedure. You will: 5.2 Tutorial: TOC Results Made Easy Without Autosampler #1 1. 1. Configure the Instrument 2. Setup the Sample 3. Start the Analysis Run Configure Instrument Select Instrument from the Setup menu of the TOC Talk Control screen to open the Instrument Setup/Status dialog. Figure 5.2.1 Instrument Setup/Status 2. Select Ready to wake up the instrument. 3. The gas flow will turn on and the detector signal will begin to stabilize. Look for the flow rate display in the To Furnace field. 4. Select the following parameters: a) Select Without Autosampler from the Sample Introduction list. b) Check Print Data Report after Each Sample Set (optional). c) 5. If you wish, you may type in your name and give your instrument a name. All other choices should remain unchecked. Click OK. 5–3 SAMPLE ANALYSIS #2 1. Sample Setup From the menu bar of the Control screen, click Run. Figure 5.2.3 TOC Talk Run Screens Figure 5.2.2 Access to Run Screens 2. 3. The Run screens are actually three separate screens that display realtime data: a) Sample Analysis displays the last Sample ID, Mode, etc. if not running or the current Sample ID, etc. while running. The Sample Setup button accesses the Sample Setup table. b) Strip Chart shows the detector signal and can be changed to magnify small peaks or accommodate larger peaks. c) 5–4 Click the Sample Setup button in the Sample Analysis screen. Analysis Results updates analysis data at the end of each sample analysis rep. Figure 5.2.4 Analysis Setup (without Autosampler) 4. In the Without Autosampler Analysis Setup screen, enter a name for the sample run in the Sample ID field. 5. Select Sample from the Sample Type list. 6. Select TOC 0-20 ppmC from the Method ID list. The analysis Mode displayed should match the Method and the Calibration Curve should display the default unless another curve is set as active and in memory. SAMPLE ANALYSIS 7. Select 3 in the Number of Repeats field. #3 8. Click Save/Use. 1. 9. Before you begin the analysis run, verify that the: Click Start from the Sample Analysis screen. 2. The sample run will begin. You will have your data in approximately 20 minutes. If a printer is connected to the computer, the Detailed Report will print showing reps for each vial as well as the average, standard deviation, and RSD. a) sample line runs from Port D of the 8-port valve into the correct sample vessel b) acid supply line runs from Port A of the 8-port valve into the acid reagent container c) Start Analysis Run DI Water line runs from Port G of the 8-port valve to a fresh DI Water supply Figure 5.2.5 Detailed Report Example Figure 5.2.6 Sample Analysis Data Example 5–5 SAMPLE ANALYSIS 5.3 Tutorial: TOC Results Made Easy With Autosampler #2 Sample Setup 1. From the menu bar of the Control screen, click Run. #1 Configure Instrument 1. Select Instrument from the Setup menu to open the Instrument Setup/Status dialog. Figure 5.3.2 Access to Run Screens 2. The Run screen has three parts, Sample Analysis, Strip Chart and Analysis Result. a) Figure 5.3.1 Instrument Setup/Status Sample Analysis displays the last Sample ID, Mode, etc. if not running or the current Sample ID, etc. while running. The Sample Setup button accesses the Sample Setup table. 2. Select Ready to wake up the instrument. 3. The gas flow will turn on and the detector signal will begin to stabilize. Look for the flow rate display in the To Furnace field. b) Strip Chart shows the detector signal and can be changed to magnify small peaks or accommodate larger peaks. 4. Select the following parameters: c) a) Select With Autosampler from the Sample Introduction List. b) Select Autosampler Sparge Option. c) Check Print Data Report after Each Sample Set (optional). d) If you wish, you may type in your name and give your instrument a name. All other choices should remain unchecked. 5. 5–6 Click OK. Analysis Results updates its analysis data at the end of each sample analysis rep. SAMPLE ANALYSIS 9. Create two more sample analysis lines by pressing the down arrow on your keyboard twice. Each new line will have the same parameters as the first line while incrementing the vial position and the Sample ID to ID2 then ID3. 10. Click Save/Use, answer Yes to the Save Changes inquiry, and enter TOC as the name of the Rack ID. Figure 5.3.3 TOC Talk Run Screens 3. Click the Sample Setup button in the Sample Analysis screen. Figure 5.3.4 Analysis Setup (with Autosampler) 4. In the Autosampler Analysis Setup screen, select New from the File menu to open a new setup table. 5. Vial Position 1 in the table will already be assigned the Sample ID ID1. You may use the default ID or click on the cell and type a new Sample ID. 6. Select Sample from the Sample Type list. 7. Select TOC 0-20 ppmC from the Method ID list. 8. Select 3 sample repetitions from the Reps list. 11. You will return to the Run screen. 12. Be sure to verify the following: a) That there are 3 vials of water placed on the autosampler in positions 1, 2 and 3. Note: Leave about one inch of headspace when sparging in the vials. b) Acid reagent is in the acid bottle located at Position 11 on the autosampler support bar (only if you selected the Autosampler Sparge Option in Instrument Setup/Status). c) The DI water line runs from a fresh DI water supply to Port G of the 8-port valve. 5–7 SAMPLE ANALYSIS #3 Start Analysis Run 1. Click Start from the Sample Analysis screen. 2. The sample run will begin. You will have your data in approximately 45 minutes. If a printer is connected to the computer, the Detailed Report will print showing reps for each vial as well as the average, standard deviation, and RSD. Figure 5.3.5 Example 5–8 Please reference the TOC Talk Online Help for current, comprehensive sample analysis, calibration, data results, tutorials, and advanced operation information. SAMPLE ANALYSIS 5.4 Sample Blanks 5.4.1 Manually Set the Sample Blank Teledyne Tekmar recommends setting the blank value to the raw data value of your DI water run as a sample. To set this up, go to the Sample Blanks Review screen in the Results menu and enter the correct raw data for the desired range of analysis. Enter the values into Blank1, Blank2, or Blank3 or even one value into any of the 3 blank spaces. Sample Type & Range (ppmC) Method ID TOC,TC 0-20 TOC_TC Rng 1 TOC, TC 1-400 TOC_TC Rng 1 TOC, TC 10-750 TOC_TC Rng 2 TOC, TC 100-4000 TOC_TC Rng 3 TOC, TC 1000-25000 TOC_TC Rng 3 IC 0-20 IC Range 1 IC 1-400 IC Range 1 IC 10-750 IC Range 2 IC 100-4000 IC Range 3 Table 5.4.1 Blank Ranges Table 5.4.1 outlines the blank ranges as they correlate to the standard methods. 5–9 SAMPLE ANALYSIS 5.4.2 Run Recirculating TOC and TC Blanks If the DI water contribution to your standards is significant to your analysis, you may want to run a recirculating blank method. The blanking procedure for TC and TOC analysis will recycle DI water through the furnace and then sample from the water trap to determine the sample blank value. Make sure to set the number of replicates to, at least, 6 when running a sample blanking procedure. Note: The raw data value for the sample blank should be less than the raw data for your DI water run as a TOC sample. If it is not,Teledyne Tekmar recommends rerunning the sample blank or manually setting the sample blank. To run a sample blank, select the appropriate sample blank type under the sample setup screen. Table 5.4.2 outlines the correct blank setups for the default TOC and TC methods. The results for blank methods are in raw data counts and the last 3 replicates are averaged as the sample blank. Sample Method ID Blank Sample ID Blank Method ID TOC, TC 0-20ppmC Blank TOC_TC Rng 1 Blank TOC_TC Rng 1 TOC, TC 1-400ppmC Blank TOC_TC Rng 1 Blank TOC_TC 1-400ppmC TOC, TC 10-750ppmC Blank TOC_TC Rng 2 Blank TOC_TC Rng 2 TOC, TC 100-4000ppmC Blank TOC_TC Rng 3 Blank TOC_TC Rng 3 TOC, TC 1000-25000ppmC Blank TOC_TC Rng 3 Blank TOC_TC Rng 3 * * When TOC_TC Blank Range 1 is chosen, TOC_TC 0-20ppmC will automatically be set as the Method ID. Make sure to change this to TOC_TC 1-400 ppmC. Table 5.4.2 TOC, TC Sample Blanks 5–10 SAMPLE ANALYSIS 5.4.3 Run an IC Blank The blanking procedure for IC analysis will measure the background of the DI water and acid used in an IC measurement to determine the sample blank value. Make sure to set the number of replicates to, at least, 6 when running a sample blanking procedure. The results for blank methods are in raw data counts and the last 3 replicates are averaged as the sample blank. Note: The raw data value for the sample blank should be less than the raw data for your DI water run as an IC sample. If it is not, Teledyne Tekmar recommends rerunning the sample blank or manually setting the sample blank. To run a sample blank, simply choose the appropriate sample blank type under the sample setup screen. Table 5.4.3 outlines the correct blank setups for the default IC methods. Sample Method ID Blank Sample ID Blank Method ID IC 0-20ppmC Blank IC Rng 1 Blank IC Rng 1 IC 1-400ppmC Blank IC Rng 1 Blank IC 1-400ppmC IC 10-750ppmC Blank IC Rng 2 Blank IC Rng 2 IC 100-4000ppmC Blank IC Rng 3 Blank IC Rng 3 * * When IC Blank Range 1 is chosen, IC 0-20ppmC will automatically be set as the Method ID. Make sure to change this to IC 1-400 ppmC. Table 5.4.3 IC Sample Blanks 5–11 SAMPLE ANALYSIS Notes: __________________________________________________________________ __________________________________________________________________ __________________________________________________________________ __________________________________________________________________ __________________________________________________________________ __________________________________________________________________ __________________________________________________________________ __________________________________________________________________ __________________________________________________________________ __________________________________________________________________ __________________________________________________________________ __________________________________________________________________ __________________________________________________________________ __________________________________________________________________ __________________________________________________________________ __________________________________________________________________ __________________________________________________________________ __________________________________________________________________ __________________________________________________________________ __________________________________________________________________ __________________________________________________________________ __________________________________________________________________ __________________________________________________________________ __________________________________________________________________ __________________________________________________________________ __________________________________________________________________ __________________________________________________________________ __________________________________________________________________ __________________________________________________________________ __________________________________________________________________ __________________________________________________________________ 5–12 6 SPECIAL APPLICATIONS SPECIAL APPLICATIONS 6.1 Sample Preservation for TOC TOC methodologies vary in their requirements for the preservation of samples. The addition of an inorganic acid to the sample stops the microorganisms present in the sample from metabolizing the organics for food by. The decreased pH of the sample also retards the growth of slime molds that are present as spores in the atmosphere. Sulfuric acid, hydrochloric acid, phosphoric acid and nitric acid can be used. An additional scrubbing device can be used ahead of the corrosives scrubber that will remove the SO3 from the gas going to the detector without removing CO2. Teledyen Tekmar recommends installing the SO3 Mist Scrubber when running sample that contain sulfuric acid. Please contact Teledyen Tekmar Customer Support for additional information or to order the SO3 Mist Scrubber. Since many present day TOC analyzers will automatically add an aliquot of acid to samples before sparging to remove inorganic carbon (IC), problems can arise from adding acid to the already acidified samples collected in the field. In the case of pre-acidified samples, additional acid should not be used. You must consider the possible effects of these acids on the system used to determine the TOC of the samples. Sulfuric acid, H2SO4, in combustion TOC instruments, will form SO3 gas. It has been observed that the SO3 can be absorbed to some extent by the catalyst in the combustion tube. After some amount has been absorbed, the catalyst becomes saturated and then, with each ensuing injection of water, some of the SO3 is released and will cause a response in the NDIR detector. It is also affects the corrosives scrubber used to protect the detector causing additional maintenance. 6–3 SPECIAL APPLICATIONS Hydrochloric Acid, HCl, in combustion TOC instruments, will form HCl gas. Since most commercial analyzers use a NDIR to detect CO2 and they have a gold lined sample cell, the corrosive nature of HCl is a problem. Some of the HCl can be scrubbed from the gas stream using copper and tin but some may break through and cause the detector to be corroded. 6.2 Applications Samples that contain hydrochloric acid (HCl) will form HCl gas in combustion TOC instruments. Since most commercial analyzers that are equipped with a gold-lined sample cell use an NDIR to detect CO2, the corrosive nature of HCl can damage the NDIR. The Apollo 9000 copper and tin scrubber manages to scrub out some HCl, but HCl breakthrough is common and causes NDIR detector corrosion. 1. Clean glassware. It is recommended that all glassware be cleaned with soap and water followed by rinsing with deionized water to eliminate any source of carbon contamination. 2. Check the system blank. Low-level analyses are especially sensitive to effects of system blanks because of the lower amounts of carbon measured. Run the blank method using fresh deionized or ultra pure water. The raw data obtained should be: 6.2.1 The Apollo 9000 HS is a new generation combustion TOC analyzer that has the high sensitivity necessary to measure low levels of carbon. When using this system or the regular Apollo 9000, several conditions must be taken into account when running samples: Phosphoric Acid, H3PO4, is a weaker acid compared to the others mentioned. However, it is not as corrosive and the combustion product is P2O5, which is readily taken up in water and does not stay in a gaseous state to be swept into the detector. Nitric Acid, HNO3, in combustion instruments, will form N2O4, which is a corrosive gas. The copper and tin scrubber will remove some of the gas but not all and there is the potential for corrosion in the detector. 6–4 Low-level Carbon · Less than 30,000 counts for the standard Apollo 9000 · Less than 300,000 counts for the Apollo 9000 HS. If your results do not approximate these values, perform the catalyst maintenance instruction in Section 3. Increase injection volume. Use Method 0-20 ppmC when performing low-level analysis. A new method may also be created to inject volumes of 0.6-2.0 mL to increase the number of counts measured. If the analysis volume has been changed we strongly recommend making a new method for the blank and performing calibrations using the new injection volume. See Section 6.3 on modifying analysis methods. SPECIAL APPLICATIONS 6.2.2 Particulated Samples When analyzing samples containing high levels of particulate matter (like wastewater effluents), TekmarDohrmann recommends pretreating the sample to break up the particulate matter. Reproducibility of the analysis will be dependent upon the degree of sample homogeneity. It is important to use as large a volume of the sample as possible to get a good representative sample. You can pretreat samples in several ways: Homogenization, Filtration, Dilution, and Sample Stirring. Note: Apollo 9000 runs a special method to include the carbon contribution of particulates in the sample. When using this option, the appropriate sample line, furnace line and autosampler/sampling needle should be installed. See the Fall 1999, Volume 9.22 application note entitled "TOC Analysis of Particulated Samples". Homogenization Homogenization can be performed by using blenders, ultrasonic devices or processing the sample in a homogenization device such as the Tissumizer from Teledyne Tekmar. This method is suitable when the carbon contribution of the particulate needs to be measured in addition to the carbon from the liquid component. Filtration If only dissolved organic carbon is to be determined, the sample can be filtered. Use a filter that is free of compounds that contain carbon. You can use the standard autosampler needle and transfer lines for filtered (0.45µm) samples. Dilution Dilute the sample with deionized water by a factor of 10:100. Your results will need to be recalculated by multiplying the dilution factor. Sample Stirring The sample particulates can be suspended during an analysis by using a magnetic stirrer. An application note (Fall 1999 Issue Volume 9.22) entitled "TOC Analysis of Particulated Samples" is available from Teledyne Tekmar. The Apollo 9000 runs a special method to include the carbon contribution of the particulates in the sample. When using this option, the appropriate sample line, furnace line and ASM/Sampling needle should be installed. Refer to Section 7.2.16 for installation instructions. 6–5 SPECIAL APPLICATIONS 6.2.3 Samples with High Salt Content Analysis of samples containing high concentration of salt offers a big challenge for high temperature combustion analyzers. Metal cations such as sodium have the effect of devitrifying the quartz combustion tube (causing it to crystallize and break). Salts can also deposit on the catalyst resulting in a loss of efficiency. An application note (Summer 99, Volume. 9.14) entitled "Measuring Carbon in Salty Water" includes TOC analysis with seawater as samples. Although the Apollo 9000 is well suited for performing analysis of salty waters, the following strategies can be used: 1. Decrease Injection volume. Depending on the level of carbon in the sample, it is best to use as little of the sample as possible to prolong the life of the catalyst. 2. Dilute the sample. This can be done manually or automatically for TOC and TC analyses. Samples can be diluted by using the TOC_TC Method 1,000-25,000 (Method 100-5,000 for Apollo 9000 HS). Refer to Section 6.3 on making new methods. In addition to the directions on Section 6.3, the following should also be modified: 6–6 · Injection volume: aliquot of diluted sample injected in the combustion tube · Sparger volume: Amount of sample transferred into the Sparger for dilution. · Dilution Volume: amount of DI water added to the IC sparger to dilute the sample. Example: A sample containing 1% salt and 20 ppmC can be automatically diluted by a factor of 10. So the method setup should be changed to: · Injection volume: 0.1 mL · Sparger volume: 0.5 mL · Dilution volume: 4.5 mL A total amount of 5 mL for the sparger and dilution volume is recommended to make sure that there is enough liquid for efficient mixing and enough sample for the analysis. If the sample foams a lot, a higher dilution should be used. 3. Clean the combustion tube and catalyst. Refer to Section 7.3.3 and 7.3.4 for maintaining the catalyst and combustion tube. To minimize downtime, prepare a second combustion tube assembly. SPECIAL APPLICATIONS 6.2.4 Samples with High Acid Content Samples containing 50% or more acid present a challenge for a combustion instrument. The introduction of large amount of acid results in decrease in efficiency of the combustion catalyst. If it is necessary to run these types of samples, the following measures must be taken: 1. Decrease Injection volume. Depending on the level of carbon in the sample, it is best to use as little of the sample as possible to prolong the life of the catalyst. 2. Do not add more acid to the sample. Make a new method by following the instructions on Section 6.3. Under acid volume, type 0 mL. 3. Dilute the sample. This can be done manually or automatically for TOC and TC analyses. See the discussion on Section 7.4. 4. Attach a scrubber to the system if necessary. Refer to Section 6.1 for discussion on effects of different acids on the analyzer. 5. Introduce the sample through the automatic syringe mode. Some concentrated acid will damage the stainless steel needle. 6.2.5 Waste Water Wastewater samples vary in their carbon concentrations and chemical composition. For samples containing particulates, refer to Section 6.2.2. For samples containing large amounts of metal ions such as liquor, bauxite and some effluents, follow the directions on Section 6.2.3. 6.2.6 Solids and Sludges Analysis of solids and sludges can be performed using the 183 Boat Sampler with the Apollo 9000. Refer to the manual of the boat sampler for installation instructions. The temperature of the boat may be increased to 900°C to ensure complete oxidation of the solid sample. For most applications, 800°C is adequate. Weighing a larger portion of the sample increases the likelihood of getting a more accurate representative aliquot of the sample. However, the size of the weighing boat and the total µgC (not to exceed 100µgC) would limit the amount of sample analyzed. An extension kit may be used to extend the range of sample analysis. 6–7 SPECIAL APPLICATIONS 6.2.7 High Fraction of Inorganic Carbon For performing TOC analysis, check that enough acid is added to the sample to remove all the inorganic carbon. We do not recommend using TC-IC when the concentration of IC is more than 50% of the total carbon. The precision of the TOC analysis decreases as the amount of IC increases. For example, a sample containing TC of 20.5 ± 0.4 ppmC and IC of 20.0 ± 0.4 would yield a TC-IC value of 0.5 ± 0.56 ppmC. From 2% rsd for TC and IC, a 112% rsd is obtained for the TC-IC. Teledyne Tekmar has also found that the number of counts for carbonate standards (100 ppmC and up) is higher when run as an IC compared to TC. This may be due to incomplete decomposition (depending on concentration) of carbonates at 680°C. Bicarbonates (HCO3-) gave a better recovery. 6.3 Modifying Analysis Methods The operator can modify analysis methods. Pay heed to the warning message before taking up this task. The analysis method contains all the parameters pertinent to an analysis such as, sample volume, sparge time for autosampler, sparge time for IC sparger, priming rep volume, etc. One must be sure that the IC sparger is not overfilled so that water goes to the mist trap. For all of TC or TOC range 2 or 3 methods, the maximum injection volume is 50 µL. The nomenclature for the parameters is the same except for the dilution methods. Table 6.3 describes what each parameter means. When the new method is set up and OK is clicked a message box will instruct you to re-select any samples in the Sample Setup to use the new method. Click OK to return to the Sample Setup Screen. In the case of the Autosampler Setup screen, you must save the setup at this point, which will take you back to the Run screen. Select Sample Setup again and you will find the new method in the drop down list for Methods and can select it for your samples and standards. It is important that you calibrate with the same method before running samples. This means you must make a new calibration setup that will call out the new method. Do not forget to select the new calibration in the Set Active screen for the range and mode you are running and to run new blanks. 6–8 SPECIAL APPLICATIONS Parameter Injection Volume Sparger Volume IC Range 1-3 Volume of sample delivered to IC sparger for analysis N/A TC Range 1-3 Volume of sample delivered to furnace for analysis Volume of sample injected to furnace for priming N/A Dilution Volume N/A Water Volume DI water added to IC sparger Volume of acid added to IC sparger to convert IC to CO2 N/A IC Presparge IC Sparge Internal Parameter, Do Not Change Internal Parameter, Do Not Change N/A N/A ASM Sparge N/A N/A IC Acid Volume ASM Acid Volume TC Range 4 Aliquot of diluted sample injected to furnace for analysis Amount of sample to be diluted N/A Amount of water added to the IC sparger for dilution N/A N/A N/A TOC Range 1-3 Sparged sample injected to furnace for analysis Sparged sample injected to furnace for priming N/A TOC Range 4 Sparged sample injected to furnace for analysis Amount of sample to be diluted N/A Amount of water added to the IC sparger for dilution N/A N/A Volume of acid added to IC sparger to remove IC Volume of acid added to IC sparger to remove IC Volume of sample delivered to furnace for priming Internal Parameter, Do Not Change Volume of acid added to ASM to remove IC Volume of sample delivered to furnace for priming Internal Parameter, Do Not Change Mixing time of diluted sample in the IC sparger N/A Sparging time in IC sparger to remove IC Internal Parameter, Do Not Change Sparging time in ASM to remove IC Sparging/ Mixing time in IC sparger to remove IC N/A Table 6.3 Method Parameter Definitions 6–9 SPECIAL APPLICATIONS Notes: __________________________________________________________________ __________________________________________________________________ __________________________________________________________________ __________________________________________________________________ __________________________________________________________________ __________________________________________________________________ __________________________________________________________________ __________________________________________________________________ __________________________________________________________________ __________________________________________________________________ __________________________________________________________________ __________________________________________________________________ __________________________________________________________________ __________________________________________________________________ __________________________________________________________________ __________________________________________________________________ __________________________________________________________________ __________________________________________________________________ __________________________________________________________________ __________________________________________________________________ __________________________________________________________________ __________________________________________________________________ __________________________________________________________________ __________________________________________________________________ __________________________________________________________________ __________________________________________________________________ __________________________________________________________________ __________________________________________________________________ __________________________________________________________________ __________________________________________________________________ 6–10 7 MAINTENANCE AND TROUBLESHOOTING MAINTENANCE AND TROUBLESHOOTING 7.1 Scheduled Maintenance Checks Daily Maintenance Checks The following components should be checked on a daily basis: CAUTION • Please review the Safety information in Chapters 1 and 2 before performing any maintenance procedures. Carrier gas, 500+ psig from tank to run scheduled load.* • Ample acid supply for load.* • Replaced and ample DI water supply for load.* • Check corrosives scrubber to ensure ample life for load.* Do not operate Apollo 9000 without the cover. Operating Apollo 9000 without the cover properly attached may result in an electrical shock hazard. • Carrier gas flow rate (200 cc/min ± 10%). • Make sure 8-port valve thumbscrews are hand-tightened. To avoid electrical shock, disconnect the power supply to Apollo 9000 and any accessories before servicing interior components. • Inspect and clean syringe (if appropriate). * Load = estimated amount of daily analysis Moving parts can grab and pinch. Keep hands and clothing away from moving parts while power is on. The following components should be maintained on a weekly basis: WARNING Use caution when performing any routine or troubleshooting procedures that may involve contact with hazardous acids. Please see Appendix A for a supply of maintenance worksheets that you can copy and fill out for your records. The Consumables Kit includes most items needed for preventive maintenance. Weekly Maintenance Checks Daily checks, plus: • Clean IC sparger with soap and water if needed. • Change reagents if needed. • Clean syringe. Monthly Maintenance Checks The following components should be maintained on a monthly basis: Daily and weekly checks, plus: • Change corrosives scrubber. • Inspect permeation dryer for damage, water accumulation. • Test fittings on 8-port valve, injection port, carrier gas, and 3way Kloehn valves. • Test catalyst efficiency. 7–3 MAINTENANCE AND TROUBLESHOOTING 7.2 Replacing Parts CAUTION 4. a. Disengage green and yellow tubing both entering and leaving the permeation dryer by unscrewing the appropriate fittings. Make sure that you keep the Tygon tubing overlay on the yellow tubes intact for the new permeation dryer. Attach these four (4) lines on the new permeation dryer by inserting them into the appropriate fittings. Make sure that the sample gas (green lines) flows in the opposite direction of the drying gas (yellow lines). b. Disengage the four (4) fittings holding the green and yellow tubes entering and leaving the permeation dryer. Remove the same fittings from the new permeation dryer. Attach the old permeation dryer’s fittings to the new permeation dryer in the proper order. This will be easier to do but incurs the minimal risk of reusing a cracked fitting. Please review the Safety information in Chapters 1 and 2 before replacing or installing any Apollo 9000 parts. 7.2.1 Permeation Dryer Tool(s) Needed: • Phillips screwdriver 1. Remove right hand, or plumbing side, cover by removing seven (7) screws holding it to the chassis. 2. Locate the old permeation dryer. It should be in front of the combustion furnace when looking at the instrument from the right side. 3. Remove the permeation dryer from 1” black clasps found near each end of the dryer. 7–4 You can now change out the permeation dryer in two ways: 5. Verify that sample and drying gas flows are at 200 cc/min +/- 10 % and are flowing in opposite directions. 6. Reattach permeation dryer to 1” black clasps. 7. Reinstall right cover to instrument. MAINTENANCE AND TROUBLESHOOTING 7.2.2 Copper (Cu) and Tin (Sn) in Corrosives Scrubber 7.2.3 Autosampler Needle Tool(s) Needed: Tool(s) Needed: • Septum puller or pointed tweezer 1. Push open acrylic door and locate the corrosives scrubber on bottom right-center of instrument face. It is a U-tube with Cu on one side and Sn on the other. 2. Noting their position, remove the green lines entering and leaving the corrosives scrubber. 3. With septum puller or pointed tweezer, remove gray septum from the Cu scrubber end. 4. With septum puller or pointed tweezer, remove Pyrex wool from Cu scrubber end. 5. Empty old Cu from scrubber. Use septum puller or pointed tweezer (if necessary). 6. Add new Cu to scrubber. 7. Replace or add new Pyrex wool to Cu scrubber end. 8. Reinsert gray septum. 9. Perform steps 3-8 again for Sn scrubber end (if necessary). • None 1. Home the autosampler by using the autosampler diagnostics screen in TOC Talk software. 2. Locate the autosampler needle on autosampler. 3. Loosen hand screw on upper needle holder and remove autosampler needle from autosampler. 4. Noting their position, unscrew both sparge gas and sample line fittings from the autosampler needle. 5. Verify flow of 200 cc/min ± 10% from 1/8" tubing by turning on the Sparge Gas in the Diagnostics, Valves menu. 6. Attach gas line (1/8" tubing) to side port and sample line to vertical fitting on the new autosampler needle. Verify vigorous flow through second from bottom set of holes in needle. 10. Reattach green lines to corrosives scrubber. 11. Reattach corrosives scrubber to front of instrument and close acrylic door. 7–5 MAINTENANCE AND TROUBLESHOOTING 7. 8. 7–6 Place the needle in small beaker of rinsing water and using the Diagnostics screen in TOC Talk software verify that sample is being effectively pulled into the syringe. Remember that your first pull could have dead volume from the sample line. By dispensing syringe pulls to the waste port (F) and pulling again from the sample port (D), you should be able to verify proper performance. 7.2.4 Reattach the autosampler needle to autosampler. Make sure bottom of needle is level with the bottom needle guide (blue fitting). Handtighten the upper needle fitting to lock the autosampler needle in place. Injection Port Tool(s) Needed: • Phillips screwdriver • Slotted screwdriver 1. Remove right hand, or plumbing side cover by removing seven (7) screws holding it to the chassis. 2. Locate Teflon injection port above the combustion furnace. 3. Remove the 1/16” furnace line from the top of the injection port. 4. Remove Tygon waste line from the right rear of the injection port. 5. Remove injection port from the combustion furnace by removing the flat head screws on either side of the injection port. Be careful when removing the injection port from the combustion tube to avoid breakage. 6. Remove mounting plate and spacer block by removing the four (4) screws attaching them to the injection port. 7. Making sure combustion tube oring is in place, attach mounting plate and spacer block to the new injection port by reattaching the four (4) screws in step 8. 8. Reattach injection port to the combustion furnace with the two (2) screws used in step 7. Be careful when sliding injection port over the combustion tube to avoid breakage. Make sure that 1/8” blue furnace carrier gas fitting is oriented to the right. MAINTENANCE AND TROUBLESHOOTING 9. Reattach the 1/8” blue furnace carrier gas fitting to right of injection port. 10. Reattach the 1/16” furnace line to the injection port. Make sure fitting is hand tight but DO NOT over-tighten. 11. Using TOC Talk software turn on gas flow to the combustion furnace and make sure the furnace gas goes to the NDIR. Verify 200 cc/min +/- 10% through the furnace using the To Furnace or manual flowmeter. If leak is present tighten 1/8” blue line fitting and sample injection line fitting until proper flow is achieved. 12. If there is no leak, replace right cover to instrument. 7–7 MAINTENANCE AND TROUBLESHOOTING 7.2.5 8-port Valve Tool(s) Needed: • Slotted screwdriver • Teflon tape 1. Open acrylic door. 2. Locate 8-port valve on upper left front panel just above the 2.5 ml syringe. 3. Remove two (2) thumbscrews on 8-port valve face. 4. Gently remove the screw just below the syringe with the flat head screwdriver. DO NOT force removing the screw. • If the screw is difficult to remove, use the TOC Talk Syringe Diagnostics to move the plunger 500µl away from the Home position. 5. Pull 8-port valve and syringe assembly away from the syringe driver face and toward you until it is removed. 6. Unscrew syringe from 8-port valve. 7. Noting their position, unscrew the Teflon nuts, 7 total, from around the 8-port valve. 8. Reattach Teflon nuts from previous step to new 8-port valve making sure each port has a white washer (spares come with the 8-port valve) in it beforehand. 9. 7–8 Reattach syringe. Make sure white washer is in place and the threads on the syringe are covered with 12 turns of Teflon tape. 10. Reattach 8-port valve and syringe assembly to syringe driver making sure the pin on the inside of the 8port valve slots into the rod from the syringe driver. This may require you to initially attach the assembly with the syringe out of position. Attach anyway and then turn the assembly until the hole on 8-port valve, behind port A, aligns over the gray circular protrusion on the syringe driver. When properly aligned, reattach assembly using thumbscrews and syringe screw in steps 3 and 4. DO NOT force the syringe screw. 11. Using TOC Talk software, go into the syringe diagnostic and verify the ports on the 8-port valve are properly aligned. There is a chance that the 8-port valve is 180° off its true position. Pull 1000 µl from the furnace port making sure that the DI water line can also pull liquid. Dispense to waste and repeat once more with 2500 µl this time. If you do not get liquid on the second pull go to step 12. If you get liquid then the 8-port valve is misaligned. Perform the following steps: a. Make sure, using the syringe diagnostic screen, that the 8port valve is in the C-Furnace position. b. Remove 8-port thumbscrews and syringe screw and pull assembly out from driver. c. In the syringe diagnostics screen, turn the valve to the DI water, or port G position. d. Reattach 8-port valve and syringe according to step 10. MAINTENANCE AND TROUBLESHOOTING plunger of the syringe is made easier by drawing the syringe down about 0.5 mL by using the Diagnostics, Syringe, valve in DI water position and move syringe to 500 mL. The screw has a very close fit tolerance. It is important to not force the screw. 12. Press the Initialize button on the right face of the syringe driver. The syringe plunger will move to the predetermined position just below the top of the syringe. 13. Using the thumbwheel on the bottom of the syringe, move the syringe plunger to the top of the syringe. Stop when you hit significant resistance. 4. Locate the appropriate furnace injection line for your application. The 0.8 mm I.D. and 0.5 mm I.D. lines will have tubing protruding about 1/4” from one end. That end attaches to the injection port. The 0.1 mm I.D. line will have tubing and a needle protruding from it. 5. Run the furnace injection line to the front of the instrument. You may wish to remove the nut and ferrule while directing the line through the grommet. When the nut and ferrule are reattached, be sure that the tubing end is flush with the face of the ferrule. 6. Attach the furnace injection line to the 8-port valve at port C. Make sure the fitting is finger-tight but do not over tighten the nut. Use the tool provided with your Apollo operating kit. You may wish to remove the 8-port valve from the syringe pump to provide easier access to the ports. If the valve is removed, be sure to engage the nub behind port A into the syringe drive body before replacing the two valve screws. 7. After the valve is reattached, use Diagnostics, Syringe to turn the valve to waste and then home the syringe. 8. Reinstall the right cover to the instrument. 14. Press the Set Home button on the right face of the syringe driver. 15. Close acrylic door. 16. Using TOC Talk software run 1 rep using the Prime System Method ID. This method will insure that the acid and DI water lines are properly primed and ready for analysis. Note: If you accidentally hit either the Set Home or Initialize buttons during this procedure any errors incurred will be corrected when you initialize and home the syringe per the instruction at the end of the procedure. 7.2.6 Furnace Injection Line 1. Remove the right cover of the instrument. 2. Remove the furnace injection line from the top if the injection port. 3. Remove the 1/16” diameter furnace injection line from the 8port valve at port C and remove the line from the instrument. You may wish to remove the 8-port valve from the syringe pump to provide easier access to the ports. Removal of the screw holding the 7–9 MAINTENANCE AND TROUBLESHOOTING 7.2.7 Replace/Clean Syringe Tool(s) Needed: • Slotted screwdriver • Teflon tape 1. Enter Syringe Diagnostics screen in TOC Talk software. 2. Turn valve to IC sparger (Port B). 3. Set syringe pull to 1000 µl. 4. Open acrylic door on instrument 5. Locate syringe on left front of instrument 6. Remove screw directly below the syringe. DO NOT force removing the screw. If removing the screw is difficult, you may also need to loosen the thumbscrews on the 8port valve face to provide more flexibility in removing the syringe screw. • If the screw is difficult to remove, use the TOC Talk Syringe Diagnostics to move the plunger 500µl away from the Home position. 7. Remove the syringe by unscrewing it from the 8-port valve. 8. Pull plunger out of syringe. Clean both plunger face and syringe with DI water until both are free of debris. 9. Reinstall the syringe making sure the Teflon washer is still in the 8port valve. Do not over tighten the syringe. 7–10 10. Hand-tighten 8-port valve thumbscrews if necessary. 11. Using the syringe diagnostics screen in TOC Talk software, set the syringe to 0 µl. 12. Press the Initialize button on the right face of the syringe driver. The syringe plunger will move to the predetermined position just below the top of the syringe. 13. Using the thumbwheel on the bottom of the syringe, move the syringe plunger to the top of the syringe. Stop when you hit significant resistance. 14. Press the Set Home button on the right face of the syringe driver. 15. Close the acrylic door. Note: If you accidentally hit either the Set Home or Initialize buttons during this procedure any errors incurred will be corrected when you initialize and home the syringe per the instruction at the end of the procedure. MAINTENANCE AND TROUBLESHOOTING 7.2.8 Syringe Driver Tool(s) Needed: 10. Remove the syringe driver and replace it with the new one. 11. Using the nut driver, attach the syringe driver to the front face of the instrument using the four (4) nuts from step 9. • Slotted screwdriver • Phillips screwdriver • 5/16” nutdriver 12. Reattach the power and RS-232 cables to the syringe driver. 1. Open acrylic door. 2. Locate 8-port valve on upper left front panel just above the 2.5 ml syringe. 13. Reattach the left-hand, or electrical side cover using the seven (7) screws from step 7. 3. Remove two (2) thumbscrews on 8-port valve face. 4. Gently remove the screw just below the syringe with the slotted screwdriver. DO NOT force removing the screw. • If the screw is difficult to remove, use the TOC Talk Syringe Diagnostics to move the plunger 500µl away from the Home position. 5. Pull 8-port valve and syringe assembly away from the syringe driver face and toward you until it is removed. 6. Turn off power at the back of the instrument. Remove plug from back of the instrument. 7. Remove left-hand, or electrical side cover by removing seven (7) screws holding it to the chassis. 8. Locate Syringe driver. Noting their position on the driver, remove power and RS-232 connections. 9. Using the nutdriver, remove the four (4) nuts at the corners of the syringe driver holding it to the front face of the instrument. 14. Reattach AC power plug to back of instrument and turn the power switch ON. If you hear the syringe pumper’s motors move then you know the power cable to the driver was correctly installed. If not, disconnect AC power, reenter the electrical side of the instrument, and make sure the power cable to the syringe driver is properly installed. 15. Reattach 8-port valve and syringe assembly to syringe driver making sure the pin on the inside of the 8port valve slots into the rod from the syringe driver. This may require you to initially attach the assembly with the syringe out of position. Attach anyway and then turn the assembly until the hole on 8-port valve, behind port A, aligns over the gray circular protrusion on the syringe driver. When properly aligned, reattach assembly using thumbscrews and syringe screw in steps 3 and 4. Do not force the syringe screw. 7–11 MAINTENANCE AND TROUBLESHOOTING 16. Reestablish communications with TOC Talk software by using the Setup, diagnostics, Communications Screen. The Syringe driver should initialize. If not, disconnect AC power, reenter the electrical side of the instrument, and make sure the RS-232 cable to the syringe driver is properly installed. 17. Using TOC Talk software, go into the syringe diagnostic and verify the ports on the 8-port valve are properly aligned. There is a chance that the 8-port valve is 180° off its true position. Pull 1000 µl from the furnace port making sure that the DI water line can also pull liquid. Dispense to waste and repeat once more with 2500 µl this time. If you do not get liquid on the second pull go to step 12. If you get liquid then the 8-port valve is misaligned. Perform the following steps: a. Using the syringe diagnostic screen, make sure that the 8port valve is in the C-Furnace position. b. Remove 8-port thumbscrews and syringe screw and pull assembly out from driver. c. In the syringe diagnostics screen, turn the valve to the DI water, or port G position. d. Reattach 8-port valve and syringe per step 10. 18. Press the Initialize button on the right face of the syringe driver. The syringe plunger will move to the predetermined position just below the top of the syringe. 7–12 19. Using the thumbwheel on the bottom of the syringe, move the syringe plunger to the top of the syringe. Stop when you hit significant resistance. 20. Press the Set Home button on the right face of the syringe driver. 21. Close acrylic door. MAINTENANCE AND TROUBLESHOOTING 7.2.9 Clippard 2-way Valves 7.2.10 Kloehn 3-way Valve Tool(s) Needed: Tool(s) Needed: • Phillips screwdriver • Phillips screwdriver • 3/8”, 5/16” wrenches • Slotted screwdriver 1. Turn off power at the back of the instrument. Remove plug from back of the instrument. 1. 2. Remove both left and right side covers. Turn off power at the back of the instrument. Remove plug from back of the instrument. 2. Locate the Clippard valve to be replaced on the plumbing side of the instrument. Remove both left and right side covers. 3. On the electrical side of the instrument remove the power cable for the Clippard valve from the PCB board. Locate the Kloehn valve to be replaced on the plumbing side of the instrument. 4. On the electrical side of the instrument, remove the power cable for the Kloehn valve from the PCB board. 5. On the electrical side of the instrument, remove the two (2) screws holding the Kloehn valve to the instrument. 6. Noting their position, remove the Teflon lines from the Kloehn valve. 7. Reattach Teflon lines to the replacement Kloehn valve. Do not overtighten. 8. Reattach Kloehn valve to instrument using the screws from step 5. 9. Reattach the power cable for the Kloehn valve to its proper position on the PCB board. 3. 4. 5. Remove the Clippard valve from its mounting clip. 6. With the wrenches and noting the proper line positions, unscrew the lines attached to the Clippard valve. Hold the small fitting stationary while loosening the large fitting. 7. Reattach these lines to the new Clippard valve. Hold the small fitting to avoid loosening or overtightening it to the valve. 8. Reattach the Clippard valve to its mounting clip. 9. Plug the power cable for the Clippard valve into its proper position on the PCB board. 10. Reinstall both left and right covers to the instrument. 10. Reinstall both left and right covers to the instrument. 11. Plug the AC power line back into the back of the instrument and turn the power switch ON. 11. Plug the AC power line back into the back of the instrument and turn the power switch ON. 12. Reestablish communications with TOC Talk software. 12. Reestablish communications with TOC Talk software. 7–13 MAINTENANCE AND TROUBLESHOOTING 7.2.11 PCB Board 7.2.12 Power Supply Tool(s) Needed: Tool(s) Needed: • Phillips screwdriver • Phillips screwdriver • Slotted screwdriver • Slotted screwdriver 1. Turn off power at the back of the instrument. Remove plug from back of the instrument. 1. Turn off power at the back of the instrument. Remove plug from back of the instrument. 2. Remove left-hand, or electrical side cover by removing seven (7) screws holding it to the chassis. 2. Remove left-hand, or electrical side cover by removing seven (7) screws holding it to the chassis. 3. Locate PCB board. It is the 5.5” x 8.5” board on the middle wall to the rear of the instrument. 3. Locate power supply. It is the 4.3” x 7.0” board on the middle wall to the front of the instrument. 4. Noting their location, remove all connections to the PCB board. 4. Noting their location, remove all connections to the power supply. 5. Remove board by removing the four (4) mounting screws found at its corners. 5. Remove board by removing the four (4) mounting screws found at its corners. 6. Replace with new PCB board using screws from previous step.. 6. Install new power supply using screws from step 5. 7. Reconnect electrical cables to the PCB board. 7. Reconnect electrical cables to the power supply. 8. Reinstall left hand cover. 8. Reinstall left-hand cover. 9. Plug the AC power line back into the back of the instrument and turn the power switch ON. 9. Plug the AC power line back into the back of the instrument and turn the power switch ON. 10. Reestablish communications with TOC Talk software. 7–14 10. Reestablish communications with TOC Talk software. MAINTENANCE AND TROUBLESHOOTING 7.2.13 Flow Meter Tool(s) Needed: • Phillips screwdriver • Slotted screwdriver 1. Turn off power at the back of the instrument. Remove plug from back of the instrument. 2. Remove both left and right side covers. 3. Locate flow meter on the plumbing side of the instrument. It will be attached to a mounting bracket that it on the lower back panel of the instrument. 4. On the electrical side of the instrument, remove the power cable for the flow meter from the PCB board. 5. On the plumbing side of the instrument, remove the two (2) screw and nut assemblies holding the flow meter to its mounting bracket. 6. Noting their position, remove the Teflon lines and 1/4”-1/8” fittings from either side of the flow meter. 7. Reattach Teflon lines and fittings to the replacement flow meter. 8. Reattach flow meter to instrument using the screws and nuts from step 5. 9. Reattach the power cable for the flow meter to its proper position on the PCB board. 10. Reinstall both left and right covers to the instrument. 11. Plug the AC power line back into the back of the instrument and turn the power switch ON. 12. Reestablish communications with TOC Talk software. 7.2.14 Power Entry Module Tool(s) Needed: • Phillips screwdriver 1. Turn off power at the back of the instrument. Remove plug from back of the instrument. The component you removed the plug from is the power entry module. 2. Remove right-hand, or electrical side cover by removing seven (7) screws holding it to the chassis. 3. Noting their location, remove all connections to the power entry module. 4. Remove power entry module by removing the two (2) mounting screws from the back of the unit. 5. Install new power entry module using screws from previous step. 6. Reconnect electrical cables to the power entry module. 7. Reinstall right-hand cover. 8. Plug the AC power line back into power entry module and turn the power switch ON. 9. Reestablish communications with TOC Talk software. 7–15 MAINTENANCE AND TROUBLESHOOTING 7.2.15 Add Catalyst to and Replace the Combustion Tube Remove the Old Combustion Tube 1. Remove the right chassis cover from the Apollo 9000. Supplies Needed: 2. Detach the injection port from the valve mounting plate by removing the two screws and set aside. 3. Swing the locking guard at the bottom of the combustion furnace to the right until it touches the right furnace leg. 4. Gently pull the combustion tube up through and out of the top of the combustion furnace and discard accordingly. 5. Gently pull the bottom connector out from under the furnace. • Combustion tube • 20 g catalyst • Quartz wool • Tube packing tool (not provided) • Safety gloves Note: The salts from oils present on human skin, if left on the tube, will cause damage to the tube in the hot furnace. Wear gloves while handling the tube and wipe it clean with a damp cloth or paper towel before placing it in the furnace. a) Examine the bottom connector for any debris on the black o-ring that seals to the combustion tube. If necessary, remove the connector at the stainless steel union and rinse it under clean, running water. Shake out the excess water and gently wipe the o-ring with a lint-free cloth. b) Replace the bottom connector and secure it in place by swinging the locking guard to the left until it touches (or nearly touches) the left furnace leg. 7–16 MAINTENANCE AND TROUBLESHOOTING Add Catalyst to the Combustion Tube 1. 2. 2. Verify that the combustion tube is clean, has no cracks and that neither end is chipped. The narrow end is the bottom of the tube. The injection port seals to the combustion tube with an o-ring. Examine the o-ring for any debris. If necessary, wipe it gently. a) Place a loosely wadded tuft (approximately 1/2" thick) of quartz wool through the top of the combustion tube to just above the narrow opening. To prevent catalyst from dropping through the quartz wool, gently pack the top of the quartz wool so that there is no space between the perimeter of the quartz wool and the glassware. If it is deemed necessary to remove the o-ring, do not attempt to pick it out with a sharp instrument. Instead remove the 4 screws and spacer block that hold the metal plate to the injection port. It will now be easily removed. b) A new o-ring must be lubricated with a small amount of silicone vacuum grease. 3. The catalyst (20 grams) is in a small vial. Pour the entire 20 grams into the combustion tube. c) 4. Before the tube is installed into the furnace, the injection port and old combustion tube must be removed from the furnace and its bottom connector must be examined (see previous section). d) Use a lab wipe and try to wipe all the lubricant away. Enough will be left to make it easy to slide the injection port onto the combustion tube. e) Install the New Combustion Tube 1. Gently insert the combustion tube into the top of the furnace and push down firmly while turning the tube slightly. The movement of the tube through the o-ring should be felt. When properly seated, about 1 1/2 inches of tube should extend above the plate. 3. With a tiny amount of lubricant on the fingertips, rub it on the o-ring. Making sure combustion tube o-ring is in place, attach mounting plate and spacer block to the new injection port by reattaching the four (4) screws in step 2a. Slide the injection port onto the combustion tube with gentle pressure and a slight turning movement. Replace the screws. Reconnect the gas line above the right screw. 7–17 MAINTENANCE AND TROUBLESHOOTING 7.2.16 Temperature Controller Setup 1. Set the temperature set point at or below room temperature. Press and hold (SET) to read the set point. Press (Up) or (Down) appropriately. 2. Begin software adjustments. Press and hold the (Up) and (Down) keys simultaneously for three seconds to enter the software menu. Once in the software menu, the word AUT will appear on the screen. 3. Press the (Up) or (Down) keys until the word CNFG appears on the screen. 4. Press (SET) to display NO. While still holding (SET), press the (Up) or (Down) key until YES appears on the screen. 5. Release both keys to display In (input type). Press (SET) to display J. While still holding (SET), press the (up) or (Down) key until S appears on the screen. Release both keys. In still appears on the screen. 6. Press the (Down) key to display C_F (Celsius/Fahrenheit). Press (SET) to display F. While still holding (SET), press the (Up) or (Down) key until C appears on the screen. 7. Press the (Down) key to display rL (input range low). Press (SET) to display 0. If display does not read 0, press the (Up) or (Down) keys appropriately until the display does read 0. Release both keys, rL still appears on the screen. 8. Press the (Down) key to display rh 7–18 (input range high). Press (SET) to display 1450. While still holding (SET), press the Down) key until 1000 appears on the screen. Release both keys. rh still appears on the screen. 9. Press the (Down) key to display Ot1 (output 1 function). Press (SET) to display heat. If display does not read heat, press the (Up) or (Down) keys appropriately until the display does read heat. Release both keys. Ot1 still appears on the screen. 10. Press the (Down) key to display Ot2 (output 2 function). Press (SET) to display none. If display does not read none, press the (Up) or (Down) keys appropriately until the display does read none. Release both keys. Ot2 still appears on the screen. 11. Press the (Down) key to display disp (display default). Press (SET) to display Ac. If display does not read Ac, press the (Up) or (Down) keys appropriately until the display does read Ac. Release both keys. disp still appears on the screen. 12. Press the (Down) key to display FAIL (failure mode). Press (SET) to display bPLS. If display does not read bPLS, press the (Up) or (down) keys appropriately until the display does read bPLS. Release both keys. FAIL still appears on the screen. MAINTENANCE AND TROUBLESHOOTING 13. Press the (Down) key to display SLOC (set point lock). Press (SET) to display no. If display does not read no, press the (Up) or (Down) keys appropriately until the display does read no. Release both keys. SLOC still appears on the screen. 14. Press the (Down) key to display tag (lockout tag). Press (SET) to display P. Press the (Up) or (Down) keys appropriately until the display is blank. Release both keys. tag still appears on the screen. 15. The configuration menu is now set appropriately. Press and hold the (Up) and (Down) keys simultaneously for three seconds to exit menu. 16. To begin editing PID settings, enter software menu by holding the (Up) and (Down) keys simultaneously for three seconds. Press the (down) key until the screen displays Pid. 17. Press (SET) to display NO. While still holding (SET), press the (Up) or (Down) key until YES appears on the screen. 18. Release both keys to display Pbh (proportional band heat). Press (SET) to display a number. While still holding (SET), press the (Up) or (Down) keys appropriately until 75 appears on the screen. Release both keys. Pbh still appears on the screen. 19. Press the (Down) key to display Cth (cycle time heat). Press (SET) to display a number. Press the (Up) or (Down) keys appropriately until the display read 2.0. Release both keys. Cth still appears on the screen. 20. Press the (Down) key to display It (integral function). Press (SET) to display a number. Press the (Up) or (Down) keys appropriately until the display reads 10.0. Release both keys. It still appears on the screen. 21. Press the (Down) key to display de (derivative function). Press (SET) to display a number. Press the (Up) or (Down) keys appropriately until the display reads 0.25. Release both keys. de still appears on the screen. 22. Press the (Down) key to display CAL (calibration). Press (SET) to display a number. Press the (Up) or (Down) keys appropriately until the display reads 0. Release both keys. CAL still appears on the screen. 23. The PID menu is now set appropriately. Press and hold the (Up) and (Down) keys simultaneously for three seconds to exit menu. 24. Set temperature set point to 680 by holding the (SET) key and pressing the (Up) or (Down) keys appropriately. Release both keys. 7–19 MAINTENANCE AND TROUBLESHOOTING attach transfer line to port D of the 8-port valve (do not over tighten; use the Kloehn tightening device). Make sure the white Teflon washer in still in the port when installing this line. 7.2.17 Instructions for Installation of Apollo 9000 Particulate Options Parts Required For 0.5mm particulates: • Sample transfer line • Injection line • ASM filter needle. Note: The sample transfer line is the regular Apollo 9000 blue transfer line. Installing Injection Line Running From 8-port Valve (Port C) to Injection Port Over Combustion Furnace 1. Remove the right cover of the instrument. 2. Remove the furnace injection line from the top if the injection port. 3. When disconnecting or connecting fittings of the 8-port valve, it may be easier to first remove the valve/syringe from the pumper by removing the two (2) thumbscrews on the valve and the bottom screw holding the syringe plunger. This screw is easier to remove and replace if the syringe if first moved to 100mL or 500 mL via Diagnostics/Syringe. Remove the 1/16” diameter furnace injection line from the 8port valve at port C and remove the line from the instrument. You may wish to remove the 8-port valve from the syringe pump to provide easier access to the ports. Removal of the screw holding the plunger of the syringe is made easier by drawing the syringe down about 0.5 mL by using the Diagnostics, Syringe, turn the valve to the DI water position and move the syringe to 500 mL. The screw has a very close fit tolerance. It is important to not force the screw. 4. For 0.5mm particulates: Use the standard Apollo 9000 sample transfer line. For 0.8mm particulates: Remove the standard Apollo sample transfer line, attached to the 8-port valve at port D, and Locate the appropriate furnace injection line for your application. The 0.8 mm I.D. and 0.5 mm I.D. lines will have tubing protruding about 1/4” from one end. That end attaches to the injection port. The 0.1 mm I.D. line will have tubing and a needle protruding from it. 5. Run the furnace injection line to the front of the instrument. You may wish to remove the nut and ferrule while directing the line For 0.8mm particulates: • Sample transfer line • Injection line • ASM filter needle Tools Required • Medium size Phillips screwdriver • Medium size flat-blade screwdriver Installing Sample Transfer Line 1. 2. 7–20 MAINTENANCE AND TROUBLESHOOTING through the grommet. When the nut and ferrule are reattached, be sure that the tubing end is flush with the face of the ferrule. 6. Attach the furnace injection line to the 8-port valve at port C. Make sure the fitting is finger-tight but do not over tighten the nut. Use the tool provided with your Apollo operating kit. You may wish to remove the 8-port valve from the syringe pump to provide easier access to the ports. When the valve is replaced, be sure to engage the hole behind port A onto the pin extending from the syringe drive body before replacing the two valve screws. Failure to do this may result in breakage of the syringe or damage to the syringe drive. 7. After the valve is reattached, use Diagnostics, Syringe to turn the valve to waste and then home the syringe. 8. Reinstall the right cover to the instrument. Installing the Autosampler (ASM) Filter Needle 1. Attach the sample transfer line to the vertical port at the top of the needle. second stage of the needle (the one with 16 small holes). 5. Using the syringe diagnostic screen in the Setup pull down menu, draw 2.5 mL of DI water from the sample port (port D) to check for a tight seal with the sample line. Discard the water to waste (port F). Do this twice as the first time there will be some headspace in the syringe due to the dead volume of the sample transfer line and ASM needle. Attaching ASM Needle to ASM (ASM users only) When installing, adjust the position of the ASM needle to allow the stir bars in the vials to rotate unimpeded using the needle retaining screw . This is typically 0.5" up from the normal needle position. Make sure that bottom of the needle is within the blue needle guide, but not protruding below the guide. If the needle does not reach the blue needle guide, you may need to attach the guide from the top of the needle foot instead of the bottom. In some cases you may need to replace the blue needle guide with a 10-24 thread, 1/8" nut. Verifying Complete Assembly 2. Attach the red ASM sparge transfer line to the horizontal side port of the needle. 1. Make sure that the particulate option is chosen in the Setup, Instrument window. 3. Immerse the needle in a bottle of DI water. 2. 4. Using the Diagnostic screen in the Instrument setup, select Valves and turn the ASM Sparge gas on. Bubbling should occur from the Check the configuration with 10 ppmC - 100 ppmC standards. An RSD of 1% - 3% should be obtained. 7–21 MAINTENANCE AND TROUBLESHOOTING 7.3 Troubleshooting Apollo 9000 Furnace Carrier Gas Flow Path 1. Make sure combustion furnace carrier gas is on and directed through the NDIR. This can be accomplished by setting the instrument to Standby and then Ready in the instrument setup screen. This can also be done by actuating the appropriate valves in Valve Diagnostics. 2. Make sure the carrier gas going into the instrument is on and the pressure regulator is set to 30-35 psi. If not, adjust the pressure within this range and recalibrate the instrument after the successful completion of this leak checking procedure. 3. Check the flow leaving the NDIR on the 1/8" green line exiting the rear of the instrument with a manual flow meter. Write down NDIR flow result. 4. Using a manual flow meter, measure the flow for the 1/8" white line entering the side of the water trap. Write down water trap flow result. 5. CAUTION Please review the Safety information in Chapters 1 and 2 before performing any troubleshooting procedures. 7.3.1 Leak Checking Leak checking the Apollo 9000 is a simple process of checking the flows at various points in the flow path to identify potential leaks. Please refer to the flow diagram when leak checking. You will compare flows from different points on the flow path so it is important that the flow meter used be the same to achieve accurate results. For this reason, using the flow meter provided on the Apollo 9000 in following these steps is not recommended. • Flow meter, electronic (calibrated) or bubble type • Phillips screwdriver The flow path is leak free if the flows measured in steps 3 and 4 will fall within a 180 to 220 cc/min range (Condition 1) and are within 10 cc/min of each other (Condition 2). Otherwise: • 7/16” wrench a. If condition 1 fails for the water trap go to step 6, Leak Checking before the Water Trap. b. If condition 1 fails for the NDIR but not the water trap and condition 2 passes, try adjusting the system pressure within Tools required: To remove the right cover, first move reagents, DI water, and waste containers away from the unit. Remove the seven screws that hold the cover and lift it off the unit. 7–22 MAINTENANCE AND TROUBLESHOOTING the 30-35 psi range verifying that the pressure gauge is reading correctly. If condition 1 is still not satisfied, you will have to go to step 6 and/or step 14. c. If condition 2 fails and the NDIR flow is lower than the water trap go to step 14, Leak Checking after the Water Trap. d. If condition 2 fails and the NDIR flow is higher than the water trap then it is highly probable that the counter flow of the permeation dryer is bleeding into the sample gas flow. Repair or replace the permeation dryer, reconnect all lines and return to step 3. If this does not fix the leak, call Teledyne Tekmar customer support for further assistance. Leak Checking the IC Sparger 1. 2. with a hand-held flowmeter. If you obtain a reading of 200 cc/min ±10%, continue to step 3. • 3. In the valve diagnostics screen, set the IC Gas to NDIR and set the Furnace Gas to vent. 4. Locate the mist trap. • Check all rubber seals to verify they are intact and securely in place. • Remove the green inlet tube at the side of the trap and measure the flow with a handheld flowmeter. Again, you should obtain the same reading as in step 2. • If you obtain a reading of less than 98% of step 2, remove the glass frit in the IC sparger, soak the frit in basic solution of 1M NaOH, rinse and then reinsert the frit into sparger. • Remeasure the flow entering the water trap. • If you obtain a reading within 98% of step 2 entering the water trap, continue to the next section, Leak Checking the Combustion Furnace. Verify that the gas supply to the IC sparger is on. • In the TOC Talk Control screen, select Setup > Diagnostics > Valves. • Make certain that Gas to IC Sparger is turned on and Gas to the combustion furnace is turned off. Locate the IC sparger. • Check all rubber seals to verify they are intact and securely in place. • Remove the red Teflon tube entering the top and measure the flow through this tube If you obtain a reading of less than 180 cc/min, it is likely that the IC sparger flow restrictor, IC gas valve, or main valve is leaking. 7–23 MAINTENANCE AND TROUBLESHOOTING Leak Checking Before the Water Trap 6. Measure the flow of the 1/8" blue line entering the right side of the injection port. This is the carrier gas line to the combustion furnace. If flow is between 180 to 220 cc/ min, reinstall line and go to step 7. Otherwise go to step 9. 7. Measure the flow leaving the combustion furnace by removing stainless steel to Teflon line union. If flow is good then replace your coiling coil and go back to step 3. If not go to step 8. 8. 9. Inspect and verify the combustion tube for cracks and tube o-rings for wear. Verify fittings leaving the combustion furnace for leaks. If leak is identified and corrected reconnect removed lines and return to step 3. If leak problem is still present, call TekmarDohrmann technical support for further assistance. Your leak is before the injection port. Using the valve diagnostics screen, turn on the flow to the IC sparger and measure the flow of the line entering the top of the sparge tube. If within the 180 to 220 cc/min range then go to step 12. Otherwise, go to step 13. 10. Good IC flow implies a leak specific to the furnace carrier gas line. Inspect the Clippard valve #2, the flow restrictor, flow meter, and connecting lines for leaks. If leak is found, reconnect lines and return to step 3. Otherwise, call TekmarDohrmann technical support for further assistance. 7–24 11. Bad IC flow implies a leak that will affect all carrier gas lines. Look for leaks on the three way tees or other fittings and connecting lines that regulate flow to all Clippard valves and NDIR purge gas from the pressure regulator. If leak is corrected reconnect lines and return to step 3. Otherwise, call Teledyne Tekmar technical support for further assistance. Leak Checking After the Water Trap 12. Reconnect the line to the water trap and measure the flow from the 1/8" green line entering the copper side of the corrosives scrubber. If this number is within 5 cc/min of the water trap go to step 15. Otherwise go to step 11. 13. Open the right side cover and locate the permeation dryer. The permeation dryer is the 1/4" tube with a white plastic tee at either end mounted beside the combustion furnace. Measure the 1/8" green line entering the end of the permeation dryer nearest the front of the instrument. If the number is within 5 cc/min of the water trap then replace the permeation dryer, reconnect removed lines and return to step 3. Otherwise go to step 14. 14. The leak is either at Valve 4 or in the lines connected to Valve 4. Inspect the lines for leaks and replace Valve 4, a 3-way Kloehn valve, if necessary. When leak is corrected reconnect all lines and return to step 3. MAINTENANCE AND TROUBLESHOOTING 15. Open the right side cover and locate the NDIR at the lower back of the instrument. Measure the flow of the sample inlet line going into the detector. If flow is within 5 cc/min of the water trap then go to step 18. Otherwise go to step 17. 16. The leak is either in the NDIR itself, the connections to the NDIR or the sample outlet line. Inspect these parts to find the leak. If the leak is corrected reconnect all lines and return to step 3. Otherwise call Teledyen Tekmar technical support for further assistance. 17. The leak is in the corrosives scrubber or the line from the scrubber to the NDIR. Locate and correct the leak, reconnect all lines and return to step 3. 4. Using a manual flow meter, measure the flow for the 1/8" green line entering the side of the mist trap. Write down mist trap flow result. 5. The flow path is leak free if the flows measured in steps 3 and 4 will fall within a 180 to 220 cc/min range (Condition 1) and are within 10 cc/min of each other (Condition 2). Otherwise: adjusting the system pressure within the 30-35 psi range verifying that the pressure gauge is reading correctly. If condition 1 is still not satisfied you will have to go to step 6 and/or step 11. a. If condition 1 fails for the mist trap go to step 6, Leak Checking before the Mist Trap. b. If condition 1 fails for the NDIR but not the mist trap and condition 2 passes, try c. If condition 2 fails and the NDIR flow is lower than the mist trap go to step 11, Leak Checking after the Mist Trap. d. If condition 2 fails and the NDIR flow is higher than the mist trap then it is highly probable that the counter flow of the permeation dryer is bleeding into the sample gas flow. Repair or replace the permeation dryer, reconnect all lines and return to step 3. If this does not fix the leak, call Teledyne Tekmar technical support for further assistance. IC Sparger Carrier Gas Path 1. Make sure IC sparger carrier gas is on and directed through the NDIR. Note: 2. Make sure that flow to the furnace is turned off. These steps can be done by actuating the appropriate valves in the Valve Diagnostics screen. Make sure the carrier gas going into the instrument is on and the pressure regulator is set to 30-35 psi. If not, adjust the pressure within this range and recalibrate the instrument after the successful completion of this leak checking procedure. 3. Check the flow leaving the NDIR on the 1/8" green line exiting the rear of the instrument with a manual flow meter. Write down NDIR flow result. 7–25 MAINTENANCE AND TROUBLESHOOTING Leak Checking the Moisture Control System 1. Locate the corrosives scrubber. • Check all rubber seals to verify they are intact. • Remove the green tube entering the side of the scrubber with copper granules and measure the flow. • If you obtain a reading of less than 200 cc/min, check the rubber seal on the water trap outlet and the seal in the bottom of the water trap. If you still obtain a reading of less than 200 cc/min, the problem may be a leak in the permeation tube connections. • If you obtain a reading of more than 200 cc/min at the scrubber inlet, the problem is most likely a break inside the permeation tube, which should be replaced. Leak Checking Before the Mist Trap 6. You have a leak before the mist trap. Measure the flow on the 1/8" red line entering the sparge tube at the top of the IC sparger. If flow is between 180 and 220 cc/min, go to step 7. Otherwise go to step 8. 7. Inspect the IC sparger tube, IC sparger and line running between IC sparger and mist trap for leaks. Replace defective parts if necessary. Reconnect all lines and return to step 3. Otherwise, call TekmarDohrmann technical support for further assistance. 8. If your leak is before the IC sparger. Remove the 1/8" white line entering the water trap and using 7–26 the valve diagnostics screen, turn on the flow to the combustion furnace. If the flow exiting the white line is within the 180 to 220 cc/min range then turn off flow to the furnace and go to step 9. Otherwise, turn off the furnace gas and go to step 10. 9. Good furnace flow implies a leak specific to the IC sparger carrier gas line. Open the right side cover and inspect the Clippard Valve 3, the flow restrictor, and connecting lines for leaks. If a leak is found, reconnect lines and return to step 3. Otherwise, call TekmarDohrmann technical support for further assistance. 10. Bad furnace flow implies a leak that will affect all carrier gas lines. Open the right side cover and look for leaks on the white plastic tees or other fittings and connecting lines that regulate flow to all Clippard valves and NDIR purge gas from the pressure regulator. If leak is corrected reconnect lines and return to step 3. Otherwise, call Teledyne Tekmar technical support for further assistance. Leak Checking After the Mist Trap 11. Reconnect the line to the mist trap and measure the flow from the 1/ 8" green line entering the copper side of the corrosives scrubber. If this number is within 5 cc/min of the mist trap go to step 14. Otherwise go to step 12. 12. Open the right side cover and locate the permeation dryer. The permeation dryer is the ¼" tube with a white plastic tee at either end mounted beside the combus- MAINTENANCE AND TROUBLESHOOTING 13. 14. 15. 16. tion furnace. Measure the 1/8" green line entering the end of the permeation dryer nearest the front of the instrument. If the number is within 5 cc/min of the mist trap then replace the permeation dryer, reconnect removed lines and return to step 3. Otherwise go to step 13. The leak is either at valve 5 or in the lines connected to valve 5. Inspect the lines for leaks and make sure the fittings are tight. Using the Diagnostic Valves screen, verify that the IC sparger gas is on and the IC sparger gas output is directed to the NDIR. Measure the flow from the 1/8" red tubing exiting the rear of the instrument. The flow should read 0 mL/min. Otherwise, the valve is defective. Replace Valve 5, a 3-way Kloehn valve. Reconnect all lines and return to step 3. Open the right side cover and locate the NDIR at the lower back of the instrument. Measure the flow of the sample inlet line going into the detector. If flow is within 5 cc/min of the mist trap then go to step 15. Otherwise go to step 16. The leak is either in the NDIR itself, the connections to the NDIR or the sample outlet line. Inspect these parts to find the leak. If the leak is corrected reconnect all lines and return to step 3. Otherwise call Teledyne Tekmar technical support for further assistance. The leak is in the corrosives scrubber or the line from the scrubber to the NDIR. Locate and correct the leak, reconnect all lines and return to step 3. ASM Sparge Gas 1. Make sure the ASM sparge gas is on. This can be done by actuating the ASM sparge valve in the valve diagnostics screen. 2. Make sure the carrier gas source, cylinder or gas generator, is on. 3. Disconnect gas line to ASM needle. This is the fitting entering the side of the needle. Re-attach the gas line to the needle. Submerge the bottom end of the needle to above the second set of holes. Bubbling should be vigorous. If not, your leak is in the connection to the ASM needle or the ASM needle itself. If the needle is leaking, it must be replaced 4. Disconnect gas line to ASM needle. This is the fitting entering the side of the needle. 5. Measure the flow of the gas line. If it between 180 and 220 cc/min then go to step 6. Otherwise, go to step 8. 6. Re-attach the gas line to the needle. Submerge the bottom end of the needle to above the second set of holes. Bubbling should be vigorous. If not, your leak is in the connection to the ASM needle or the ASM needle itself. If the needle is leaking, it must be replaced 7. Your leak is in the line to the ASM needle from the Clippard Valve 7, regulating ASM sparge flow. 8. If the ASM sparge gas line is 1/16" diameter, remove its connection to the ASM sparge flow restrictor. Verify that the tube does not contact the packing of the restrictor. 9. Check the Clippard Valve 7 connections for tightness. 7–27 MAINTENANCE AND TROUBLESHOOTING 7.3.2 Catalyst Efficiency Test 1. Prepare a 20 ppm C standard of KHP. 2. Prepare a 20 ppm C standard of sodium bicarbonate. 3. Confirm that the instrument has been on with gas flowing for at least two hours. 4. Measure the gas flow from the blue tube exiting the instrument. It should be 200 cc/min ± 10%. Do not change the flow at this time. 5. Renew the DI water supply. 6. Confirm that the acid supply is adequate. 7. Run the 'Prime System' method. 8. Using TC range 0 - 20 ppm C, analyze DI water as a sample using 6 reps. 9. Using IC range 0 - 20 ppm C, analyze DI water as a sample using 6 reps. 10. Using TC range 0 - 20 ppm C, analyze the KHP solution using 3 reps. 11. Using IC range 0 - 20 ppm C, analyze the sodium bicarbonate solution. 12. Compare the TC raw data value with the IC raw data value. If the TC value is lower then the IC value by more than 10%, the efficiency of the catalyst is poor and should be replaced or washed and run the Cleaning Procedure run. 7–28 7.3.3 Wash the Catalyst When the Catalyst Efficiency test fails, removing the catalyst from the combustion tube and washing it may restore efficiency. 1. In the Setup Menu, select Instrument and click on the large Sleep button to turn off the gas and the power to the furnace. 2. Wait until the temperature control read out indicates that the temperature is below 50 °C. 3. Remove the combustion tube. 4. Remove the quartz wool that is on top of the catalyst. 5. Pour the catalyst into a 100 or 250 mL beaker. It may require a bit of help if there is very much solid material deposited on the catalyst. Take care to not break the catalyst pieces. 6. Rinse the catalyst with approximately 50 mL of DI water. Swirl the beaker gently. 7. Pour off the water and repeat the rinsing twice more. 8. Place the beaker with catalyst in a 100 °C oven for about 1 hour. Caution: wear protective gloves when removing the hot beaker from the oven. MAINTENANCE AND TROUBLESHOOTING 7.3.4 Clean the Combustion Tube The used combustion tube will have some degree of frosting after some use. The frosting is devitrified quartz and will not be removed by any common solvent. It does no harm unless the devitrification is so severe that the quartz is crystallized completely through the wall. 7.4 TeledyneTekmar Customer Support If you need assistance solving a problem, please follow these steps: 1. Write down the model name, model number, and serial number of the instrument. 2. Prepare some dilute nitric acid, approximately 5%, in a 100 mL graduated cylinder. Note the type of problem you are having: write down the conditions under which the problem occurred, and the display, activity, or result that indicated the existence of a problem. 3. Carefully immerse the tube, top first, into the solution and allow to stand for about 30 minutes. Place the manual near the telephone. The service representative may ask you to look at a diagram. 4. Call Teledyne Tekmar at one of the following numbers: Note: Wear protective gloves and eyewear when handling acid. Quartz chips easily. Take care to not hit the ends of the combustion tube sharply on the graduated cylinder. 1. 2. 3. Lift the tube from the acid solution, rinse and immerse again bottom first for the same amount of time. 4. Remove the tube from the solution, rinse thoroughly with DI water and place it in a 100 °C oven to dry. Caution: wear protective gloves when removing the tube from the oven. 5. Add Catalyst to the Combustion tube. After placing new quartz wool and the catalyst into the cleaned combustion tube, install it in the instrument . 6. Follow the instructions in section 2.10, Cleaning Procedure for Conditioned Catalyst. • (800) 874-2004 toll-free in the US and Canada • (513) 247-7000 outside the US and Canada 7–29 MAINTENANCE AND TROUBLESHOOTING Notes: __________________________________________________________________ __________________________________________________________________ __________________________________________________________________ __________________________________________________________________ __________________________________________________________________ __________________________________________________________________ __________________________________________________________________ __________________________________________________________________ __________________________________________________________________ __________________________________________________________________ __________________________________________________________________ __________________________________________________________________ __________________________________________________________________ __________________________________________________________________ __________________________________________________________________ __________________________________________________________________ __________________________________________________________________ __________________________________________________________________ __________________________________________________________________ __________________________________________________________________ __________________________________________________________________ __________________________________________________________________ __________________________________________________________________ __________________________________________________________________ __________________________________________________________________ __________________________________________________________________ __________________________________________________________________ __________________________________________________________________ __________________________________________________________________ __________________________________________________________________ __________________________________________________________________ 7–30 8 CALIBRATION STANDARD CALIBRATION STANDARD 8.1 Calibration Standard Preparation 8.2 Procedure for Making Standards The objective of this section is to make accurate stock standard solutions of organic and inorganic compounds in reagent water. Working standard solutions are then prepared by accurately diluting these stock solutions with reagent water. 1. One L of 1000 ppmC KHP Stock Calibration Solutions • KHP crystals must be dry and stored in a dessicator. Otherwise, dry by placing in the oven at 105°C for 2 hours prior to preparation of the stock solution. • Accurately weigh 2125 mg of KHP. • Transfer the KHP to a 1.0 L volumetric flask which is a half full of reagent water. • Potassium Hydrogen Phthalate, KHP Swirl the flask to dissolve the KHP. • ACS Acidimetric Standard, 99.95%100.05% Fill the flask to the 1.0 L mark with reagent water. • Invert the flask 5 times to equilibrate the solution. 8.1.1 1. Materials and Reagents Reagent Water The reagent water used must be of the highest quality deionized, distilled or reverse osmosis water available and contain the least amount of carbon in water 2. 1,000 ppmC and 2,000 ppmC KHP certified standards are available from Teledyne Tekmar 3. Preparation of Stock Standard Solution Sodium Bicarbonate (ACS Reagent Grade) For other standards, use the equation below to determine the weight needed to prepare the stock standard solution: Weight of standard (mg) = stock standard concentration (mgC/L) * final volume (L) %C where mgC/L = ppmC %C = decimal fraction of carbon in the reference material ex. KHP NaHCO3 = 0.4705 = 0.1428 8–3 CALIBRATION STANDARD 2. Preparation of Working Standard Solutions 500 mL of 10 ppmC KHP Working Standard Solutions • Fill a 500mL volumetric flask 1/2 full with reagent water. • Transfer 5 mL of the 1,000 ppmC KHP stock solutions into the flask using a pipette. • Swirl the flask for 10 seconds to mix. • Fill the flask to the 500 mL mark with reagent water. • Invert the flask 5 times to equilibrate the solution. For other standards, use the equation below to determine the volume of stock standard solution to use: Transfer volume (mL) = working standard concentration (mgC/L) * final volume of working standard (mL) stock standard concentration (mgC/L) 3. Cap and store the stock and working calibration standards in a 2°C to 8°C refrigerator. However, they need to be brought to room temperature to use them. 4. The typical shelf life for the working standard solutions containing less than 20 ppmC is less than 1 week, while the higher concentration stock solutions have a shelf life of at least 1 month. 8–4 9 DIAGRAMS Figure 9.1 Ready Mode DIAGRAMS 9–3 Figure 9.2 TOC with Autosampler Needle Sparge Mode DIAGRAMS 9– 5 Figure 9.3 TOC with IC Sparger Sparge Mode DIAGRAMS 9– 7 Figure 9.4 TC Analysis Mode DIAGRAMS 9– 9 Figure 9.5 IC Analysis Mode DIAGRAMS 9– 11 Figure 9.6 Apollo 9000 Wiring Diagram 115 VAC 60 HZ CONFIGURATION ALTERNATE VOLTAGE AND FREQUENCY CONFIGURATION * ** JUMPER LOCATED ON THE NDIR BLOCK FOR FREQUENCY OPTIONS. * *REPRESENTS * NOTE 1: REPRESENTS JUMPERS LOCATED ON THE FURNACE TERMINAL BLOCK FOR VOLTAGE OPTIONS. NOTE 2: REPRESENTS JUMPERS LOCATED ON THE NDIR TERMINAL BLOCK FOR VOLTAGE OPTIONS. NOTE 3: 50 HZ (JUMPER 8 TO 9). 60 HZ (NO JUMPER 8 TO 9). NOTE 4: FOR 100 VAC OPERATION INTERNAL MODIFICATIONS TO THE NDIR MUST BE MADE. REMOVE THE WIRE (ORIGINATING FROM THE EXTERIOR TERMINAL BLOCK PIN 7) FROM THE TRANSFORMER PIN 6 AND REATTACH TO PIN 5 OF THE TRANSFORMER AS SHOWN IN THE 100 VAC DIAGRAM. FLOWMETER (14-7628-050) 3 IC SPARGER 14-7629-050 4 FURNACE NDIR/VENT 14-7627-050 5 IC GAS 14-7627-050 7 ASM SPARGE 14-7629-050 REMOVE THE WIRE (ORIGINATING FROM THE EXTERIOR TERMINAL BLOCK PIN 6) FROM THE TRANSFORMER PIN 2 AND REATTACH TO PIN 1 OF THE TRANSFORMER AS SHOWN IN THE 100 VAC DIAGRAM. ORG WHT FUSE 1 (14-7150-034) P15 +24V -12V +12V GROUND +5V NOTE 2: BLK 2 5 1 4 CPU BOARD (14-7009-090) RX1 GROUND DB9/MALE (14-7034-086) 1 AC LINE 14-7621-086 GRN NOTE 2: BLK 230 VAC / 50 HZ 100 VAC TAP TO CHOPPER MOTOR BLK BRN RX1 NOTE: MUST BE CONNECTED (SHORTED) FOR FURNACE TO OPERATE. NOTE: 50 PIN CONNECTOR; ATTACH TO BOTTOM MOST PINS. TX1 +12V RX2 9 5 GROUND DB9/FEMALE PUMPER TX3 NOTE 1: (14-7011-052) RX3 RX2 GROUND P24 P29 RX3 1 RED BLK GROUND 2 WHT TX3 3 P3 WHT 1 BLK 2 (14-7619-086) 1 * BLK 1 1 NEUTRAL 2 2 6 PRIMARY 4 SW LINE 4 5 4 2 1 BLK 3 3 12 11 10 SECONDARY 8 7 BLK 4 PIN GRN 1 2 YEL 3 RED 3 4 SHIELD (14-7105-086) **** MECHANICAL VIEW OF 410240 TRANSFORMER 2 GROUND BRN 3 GROUND 4 2 NOTE 4: HEATER 1 BLK 1 NDIR SIG IN RX3 AC LINE 100 VAC / 50 HZ GROUND WHT 1 2 3 4 5 6 7 8 9 10 TX3 410240 5 4 FURNACE HEATER 2 1 6 2 7 3 8 **** GROUND AC NEUTRAL (14-7640-000) J1 TO HOST PC 6 + 1 2 GRN 3 WHT 4 ** 5 6 ** 7 8 *** 9 BLK P22 BLK GROUND 2 INTERLOCK 1 (14-7617-086) +12V 9 5 CN UV NOTE 3: (14-7617-086) TX1 4 P21 2 SEE NOTE 4 FOR INTERNAL MODIFICATIONS REQUIRED YEL TO AUTOSAMPLER 1 2 3 4 5 6 7 8 9 10 +24V NDIR (14-7674-30H) OR (14-7674-30L) GROUND AC NEUTRAL NOTE 3: P16 1 6 2 7 3 8 1 BRN 2 GRN 3 WHT 4 5 ** 6 7 8 *** 9 RED 1 2 3 4 5 6 BLK 14-7621-086 TOP VIEW P15 6 3 (14-7674-20H) OR (14-7674-20L) + RED 2 WHT 1 YEL VIO ORG BLK RED 100 VAC 50 HZ CONFIGURATION CHANGES NDIR 14-7758-086 GRN GROUND 1 P25 +10 REF 2 FLOW SIG 3 4 1 CN7 2 1 CN6 2 P7 +12V CN5 2 P6 +12V 1 P5 1 CN4 2 +12V P4 +12V 1 CN3 2 P3 +12V 1 CN2 2 P2 +12V 1 CN1 2 +12V P1 MAKE EXTERNAL CONNECTIONS AS SHOWN IN THE 100 VAC DIAGRAM. 230 VAC 50 HZ CONFIGURATION CHANGES 14-7758-086 2 FURNACE 14-7629-050 GRN 1 PERM DRYER 14-7629-050 3 GROUND ORG 2 +10 REF WHT 1 FLOW SIG NOTE: VALVES BELOW ARE RATED 24 VDC WITH 12 VOLTS SUSTAINING VOLTAGE. 230 VAC CONFIGURATION 4 (14-7622-086) (14-7618-086) POWERSUPPLY LINE (14-7624-090) 1 NEUTRAL 2 GROUND 3 NDIR BLK WHT GRN BLK NOTE 2: BLK 1 BRN 2 GRN 3 WHT 4 ** 5 6 ** 7 8 9 (14-7674-10H) OR (14-7674-10L) + GROUND AC NEUTRAL AC LINE BLK AGND DGND CN1 5 LINE 4 WHT 3 NEUTRAL +12V 2 1 GROUND -12V NC +24V GRN JUMPERED ON CABLE FOR TIEPOINT +12V GROUND 115 VAC / 60 HZ 1 2 3 4 5 6 7 8 9 10 11 12 13 BLK GRN WHT BLK 1 2 3 4 5 6 7 8 S2(-) S1(+) OT1(-) OT1(+) TEMP CONTROLLER (14-7626-090) OVER TEMP SENSOR NEUTRAL LINE FURNACE (14-7639-000) (14-7620-086) ORG YEL RED YEL BLK RED (14-7640-000) BLK 1 SW LINE BLK 2 LINE GRN 3 GROUND (SCREW) HEATER 1 VIO YEL YEL CN4 1 RED 2 BLK HEATER 2 WHT S.S. RELAY * (14-7682-051) FAN (14-7717-000) BLK 1 BLK 2 RED 3 GRN 4 AC OUTPUT AC OUTPUT NOTE 1: (14-7620-086) BLK * 1 1 NEUTRAL 2 2 3 3 4 4 SW LINE INPUT CNTRL (+) INPUT CNTRL (-) (14-7621-086) (14-7621-086) 100 VAC & 115 VAC CONFIGURATION DIAGRAMS 9–13 (14-7621-086) RED CN2 +5V RED 2 WHT 1 POWER MODULE (14-4383-028) RED (14-7758-086) DIAGRAMS Figure 9.7 Apollo 9000 CPU Board 9–15 A APPENDIX APPENDIX A A.1 Preventive Maintenance The Apollo 9000 Consumables Kit includes most items needed for preventive maintenance. Daily Maintenance Checks The following components should be checked on a daily basis: • Carrier gas, 500+ psig from tank to run scheduled load.* • Ample acid supply for load.* • Replaced and ample DI water supply for load.* • Check chlorine scrubber to ensure ample life for load.* • Carrier gas flow rate (200 cc/min ± 10%). • Make sure 8-port valve thumbscrews are hand-tightened. • Inspect and clean syringe, if appropriate. * Load = estimated amount of daily analysis Monthly Maintenance Checks The following components should be maintained on a monthly basis: Daily and weekly checks, plus: • Change corrosives scrubber. • Inspect permeation dryer for damage, water accumulation. Copy and use the following Apollo 9000 Maintenance Worksheets as a checklist in your daily analysis plans. Weekly Maintenance Checks The following components should be maintained on a weekly basis: Daily checks, plus: • Clean IC sparger with soap and water, if needed. • Change reagents, if needed. • Clean syringe. A–3 APPENDIX A Apollo 9000 Maintenance Worksheet Month __________ Year ________ D=Daily W=Weekly M=Monthly Sat Sun Mon Tue Wed Thu Fri D W M D W M D W M D W M D W M Notes: ___________________________________________________________________ ___________________________________________________________________ ___________________________________________________________________ ___________________________________________________________________ Signature(s) ________________________________ ________________________________ A–4 APPENDIX A Apollo 9000 Maintenance Worksheet Month __________ Year ________ D=Daily W=Weekly M=Monthly Sat Sun Mon Tue Wed Thu Fri D W M D W M D W M D W M D W M Notes: ___________________________________________________________________ ___________________________________________________________________ ___________________________________________________________________ ___________________________________________________________________ Signature(s) ________________________________ ________________________________ A–5 APPENDIX A Apollo 9000 Maintenance Worksheet Month __________ Year ________ D=Daily W=Weekly M=Monthly Sat Sun Mon Tue Wed Thu Fri D W M D W M D W M D W M D W M Notes: ___________________________________________________________________ ___________________________________________________________________ ___________________________________________________________________ ___________________________________________________________________ Signature(s) ________________________________ ________________________________ A–6 APPENDIX A Apollo 9000 Maintenance Worksheet Month __________ Year ________ D=Daily W=Weekly M=Monthly Sat Sun Mon Tue Wed Thu Fri D W M D W M D W M D W M D W M Notes: ___________________________________________________________________ ___________________________________________________________________ ___________________________________________________________________ ___________________________________________________________________ Signature(s) ________________________________ ________________________________ A–7 APPENDIX A Apollo 9000 Maintenance Worksheet Month __________ Year ________ D=Daily W=Weekly M=Monthly Sat Sun Mon Tue Wed Thu Fri D W M D W M D W M D W M D W M Notes: ___________________________________________________________________ ___________________________________________________________________ ___________________________________________________________________ ___________________________________________________________________ Signature(s) ________________________________ ________________________________ A–8 APPENDIX A Apollo 9000 Maintenance Worksheet Month __________ Year ________ D=Daily W=Weekly M=Monthly Sat Sun Mon Tue Wed Thu Fri D W M D W M D W M D W M D W M Notes: ___________________________________________________________________ ___________________________________________________________________ ___________________________________________________________________ ___________________________________________________________________ Signature(s) ________________________________ ________________________________ A–9 APPENDIX A Apollo 9000 Maintenance Worksheet Month __________ Year ________ D=Daily W=Weekly M=Monthly Sat Sun Mon Tue Wed Thu Fri D W M D W M D W M D W M D W M Notes: ___________________________________________________________________ ___________________________________________________________________ ___________________________________________________________________ ___________________________________________________________________ Signature(s) ________________________________ ________________________________ A–10 APPENDIX A Apollo 9000 Maintenance Worksheet Month __________ Year ________ D=Daily W=Weekly M=Monthly Sat Sun Mon Tue Wed Thu Fri D W M D W M D W M D W M D W M Notes: ___________________________________________________________________ ___________________________________________________________________ ___________________________________________________________________ ___________________________________________________________________ Signature(s) ________________________________ ________________________________ A–11 APPENDIX A Apollo 9000 Maintenance Worksheet Month __________ Year ________ D=Daily W=Weekly M=Monthly Sat Sun Mon Tue Wed Thu Fri D W M D W M D W M D W M D W M Notes: ___________________________________________________________________ ___________________________________________________________________ ___________________________________________________________________ ___________________________________________________________________ Signature(s) ________________________________ ________________________________ A–12 APPENDIX A Apollo 9000 Maintenance Worksheet Month __________ Year ________ D=Daily W=Weekly M=Monthly Sat Sun Mon Tue Wed Thu Fri D W M D W M D W M D W M D W M Notes: ___________________________________________________________________ ___________________________________________________________________ ___________________________________________________________________ ___________________________________________________________________ Signature(s) ________________________________ ________________________________ A–13 APPENDIX A Apollo 9000 Maintenance Worksheet Month __________ Year ________ D=Daily W=Weekly M=Monthly Sat Sun Mon Tue Wed Thu Fri D W M D W M D W M D W M D W M Notes: ___________________________________________________________________ ___________________________________________________________________ ___________________________________________________________________ ___________________________________________________________________ Signature(s) ________________________________ ________________________________ A–14 APPENDIX A Apollo 9000 Maintenance Worksheet Month __________ Year ________ D=Daily W=Weekly M=Monthly Sat Sun Mon Tue Wed Thu Fri D W M D W M D W M D W M D W M Notes: ___________________________________________________________________ ___________________________________________________________________ ___________________________________________________________________ ___________________________________________________________________ Signature(s) ________________________________ ________________________________ A–15 APPENDIX A Apollo 9000 Maintenance Worksheet Month __________ Year ________ D=Daily W=Weekly M=Monthly Sat Sun Mon Tue Wed Thu Fri D W M D W M D W M D W M D W M Notes: ___________________________________________________________________ ___________________________________________________________________ ___________________________________________________________________ ___________________________________________________________________ Signature(s) ________________________________ ________________________________ A–16 INDEX INDEX Symbols µgC 4-5, 4-12 A AC power 7-11, 7-13, 7-14, 7-15 Acid 2-10, 5-7, 7-9 Content, Samples with High 6-7 reagent 5-5 supply 4-16, 5-5, 7-3 vial 4-16 vial bracket 2-16 Active Calibration Curve 4-4, 4-6, 413 air bubbles 1-15 Analysis 5-3 Methods, modifying 6-8 range 3-5 Results 4-7, 4-9, 4-14, 4-16, 54, 5-6 Setup 4-8 Time 1-4 Applications, special 6-3 Anhydrous sodium carbonate 2-5 AOAC 973.47 1-5 Apollo 9000 1-3 dimensions 2-5 software 1-4 TOC Talk 2-21 Archive Data 3-10 Archive Now 3-10 archive utility 3-5 area counts 4-9, 4-16 Arm Locking Screw 2-13 ASM (see Autosampler) ASTM D2579 1-5 Auto Shutdown 3-5 Shutdown With Furnace Off 3-5 Auto-dilution method 1-5 Auto-rinsing 1-5 Automatic Archive 3-5, 3-10 blank subtraction 1-5 shutdown/standby 1-5 syringe injection 1-5 Wake-up 1-5 Autosampler 1-5, 2-12 Analysis Setup 5-7 Diagnostics 3-8 Needle 7-5 rack 2-17 sparge line 1-13 Sparge Option 3-4, 4-16, 5-6, 5-7 vial position 4-14 Auxiliary 3-6 B baseline 3-4 Baud Rate 2-13 blank 4-3 methods 4-3 values 1-5 C Cal. Factor 3-9 calculated value 4-5, 4-12 calculation of PPM C 4-9 Calibration 1-5, 3-5, 3-9, 4-3, 4-4, 410 blank 4-4 Curve 4-3, 4-9, 4-10, 4-13, 416, 5-4 data 1-4 errors 3-5 factor 4-4 points 4-4, 4-10 Setup 4-5, 4-12, 4-13 Slope 4-4 standards 4-3 verification 4-3 Carbon 1-4 content 4-3 dioxide 1-12 iii INDEX Carrier gas 1-4, 1-11, 7-22, 7-25 fitting 7-6 lines 7-26 tubing 2-4 Catalyst 2-18, 2-22, 7-16 catalyst 1-10, 2-19, 7-17 Choose Range 4-8, 4-14 Cleaning Validation 1-5 CO2 1-3, 1-4, 1-10, 1-12 Com 1 2-11 Com 2 2-11 Combustion Furnace 1-3, 1-4, 1-10, 1-13, 220, 3-4, 3-5, 3-6, 3-9, 7-4, 76, 7-16, 7-24 Tube 2-17—20, 2-22, 3-4, 36, 7-6, 7-16, 7-17 Communications 3-9, 7-12, 7-13 Diagnostics 3-9 port 3-9 compressed air 2-4 Concentration (ppm C) 4-5, 4-12, 413 condensor coil 1-11 Condition Catalyst 2-22 Configure Instrument 5-3, 5-6 Connections 2-7, 2-10 Corrosives Scrubber 1-3, 1-11, 7-3, 724, 7-25, 7-26 CPU Board 9-8 Current Positions (mm) 3-8 Curve 4-13 D Data Archive 3-10 files 3-10 Handling 1-5 Detailed Report 5-5, 5-8 Detection and Results 1-4 Detector 1-4, 7-25 Output 4-4 signal 5-3 DI Water 2-4, 2-10, 2-22, 4-16, 55, 7-3, 7-9, 7-12 iv Diagnostics 3-6, 3-8, 3-9, 7-6 distilled water (see DI Water) drain tubing 2-17 Drinking / Surface water 1-5 E Electrical 1-7 Connections 2-11 outlet 2-4 EPA 415.1 and 9060A 1-5 F flammable gas 2-10 flow diagram 7-22 Flow meter 3-9, 7-15 path 7-22, 7-25 rate 7-3 rate monitoring 1-5 restrictors 1-13, 7-24, 7-26 Frequency 1-6 Furnace 2-18, 2-20, 3-4, 3-9, 4-3, 717 carrier gas 7-24 flow 7-26 Gas To either Vent, NDIR 3-6 Gas to vent 7-23 Injection Port 1-3, 7-8 Power 3-6 Fuses 1-6, 2-12 G Gas 2-3 and water connections 2-7 flow 5-3, 7-4 Flow Rate (cc/min) 3-4 generator 2-4 In 2-10 Input 3-6 Output 3-6 permeation tube 1-12 Pressure 1-6 Supply 1-6 to IC Sparger 7-23 INDEX gas/liquid separator 1-11 L H Leak Checking 7-22 after the Mist Trap 7-26 after the Water Trap 7-24 before the Water Trap 7-24 IC Sparger 7-23 LED display 1-13 linear equation 4-3 fit 4-3 Liquid Handling 1-5 low-level Carbon 6-4 methods 4-3 halogen 1-11 removal 1-3 humidity 2-3 Hydrochloric Acid 6-4 hydrogen 2-10 I IC 1-3, 1-4, 1-10, 1-15, 1-19 by Acidification and Sparge 1-4 calibration 2-5 flow 7-24 Gas 7-23 To either NDIR,Vent 3-6 sparge methods 1-5 IC Sparger 1-10, 1-13, 3-4, 3-6, 73, 7-10, 7-23, 7-24, 7-25, 7-26 Carrier Gas 7-25, 7-26 output 3-6 infrared energy 1-12 Initialize 7-9, 7-10, 7-12 injection port 2-20, 7-6, 7-16, 717, 7-24 Injection Volume 1-4 Inorganic Carbon 1-3, 1-10, 1-15, 119 High Fraction of 6-8 Instrument Diagnostics 3-6 Name 2-21, 3-3 Setup 3-3 Setup/Status 2-21, 3-3, 5-3, 5-6 integrated peak 4-9, 4-16 Intercept 4-4 Interface Cable 2-13 ISO 8245 1-5 K KHP, KC8H5O4 2-5 M Maintenance 7-3 Checks 7-3 worksheets 7-3 Manual Archive 3-10 Movement 3-8 Syringe 1-5 Mass (µgC) 4-4 Max. Integration Time (min.) 3-4 measured carbon 4-3 Measurements 1-4 Memory 2-5 Method 1-5, 5-4 ID 2-22, 4-5, 4-6, 4-8, 4-12, 413, 5-4, 5-7, 7-9 Parameters 6-9 Setup 1-5 Mist Trap 1-11, 7-25, 7-26, 7-27 Mode 5-4 Status 3-3 Moisture Control System 1-11 removal 1-3 Move To Vial 3-8 Multi-point 1-5 v INDEX N NDIR 1-4, 1-12, 1-13, 2-3, 2-11, 34, 4-7, 4-14, 7-22, 7-23, 7-25, 727 Detector 1-3, 2-11 flow 7-23 mV output 3-3 purge gas 7-26 Near line monitoring 1-5 Needle 7-5 holder 2-15 Nitric Acid 6-4 non-linear signal 1-4 Nondispersive Infrared (see NDIR) nonpurgeable organic carbon 1-3 NPOC 1-3 O Operating Modes 1-15 Operator Name 2-21, 3-3 Options 2-21, 3-4 organic carbon levels 1-3 halide levels 1-3 Out of Calibration 3-5 Outlier 3-4 deletion 1-5, 3-4 Over Range 3-5 Oxidation by Combustion 1-4 P Particulate Kit 3-4 particulate requirements 1-5 Particulated Samples 6-5 parts-per-million (ppm) 1-4 Password 3-11 Restriction Access 3-11 Setup 3-11 PCB board 7-13, 7-14, 7-15 Permeation Dryer 1-11, 7-3, 7-23, 7-24 Tube 1-3, 1-11, 1-13 Phosphoric Acid 2-4, 2-10, 6-4 Pneumatic Connections 2-7 vi POC 1-3, 1-10 Port A 2-10, 5-5 B 7-10 D 2-22, 5-5 G 2-10, 4-16, 5-5, 7-8 Pos 2-22, 4-14 Position 4 and 5 2-16 11 2-10, 4-16, 5-7 11 and 12 2-16 potassium acid phthalate 2-5 Power 1-6, 2-4 Entry Module 7-15 requirements 2-11 Supply 2-17, 7-14 Preferences 2-21, 3-4 pressure 2-4, 3-6 regulator 7-26 preventive maintenance 7-3 Print Data Report 3-5 Data Report after Each Sample Set 3-5, 5-6 Priority samples 1-5 purge 1-13 purgeable organic carbon 1-3, 1-10 Q quartz 2-18 combustion tube 1-10 wool 7-16 R r2 4-10 rack 2-17, 3-8 Selection 1-6 Style 3-8 Range 1-4, 4-3 errors 3-5 Raw counts 4-3 Data 4-4 Ready 2-21, 5-3, 5-6 Mode 3-4 INDEX Reagent 2-4, 4-3, 7-3 Contribution 4-4 Recalc 1-5, 4-10 Recalculation (see Recalc) Repetitive Sampling 3-4 Reps 4-8, 5-5, 5-7 response factor 4-3 Restricted Access 3-11 result 4-9 Review Analysis Results 4-4, 4-9, 4-16 Rinse 1-6 Station 2-16, 2-17 Water 4-3 RS-232 2-11, 2-13, 7-11 connections 7-11 Interface Cable 2-13, 7-11 RSD 1-4, 5-5, 5-8 Run 4-7, 4-14, 5-4, 5-6 Screens 4-7, 4-14 S Safety 1-8, 7-3 references 1-8 Salt Content, Samples with High 6-6 Sample 1-5, 4-3, 5-4, 5-7 Analysis 2-22, 4-7, 4-8, 4-14, 416, 5-3, 5-4, 5-5, 5-6, 5-7, 5-8 blank 4-3 concentration 1-4 Delivery 1-15 dilution 1-10 ID 4-7, 4-14, 5-4 inlet line 7-25 Introduction 1-5, 1-15, 2-21, 34, 5-6 Needle 2-15 Preservation for TOC 6-3 repetitions 5-7 run 4-3, 5-5, 5-8 set 3-5 Setup 2-22, 4-7, 4-8, 4-14, 54, 5-6, 5-7 Tray 2-17 Type 2-22, 4-3, 4-6, 4-8, 413, 4-14, 5-4, 5-7 Scrubber 1-11 Select Calibrator 4-8 septum 7-5 piercing 1-6 Set Active Calibration Curve 4-4, 46, 4-13 Home 7-9, 7-10, 7-12 point 1-13, 7-18 setup 2-3 Standard Calibration Analysis 47, 4-14 Sample 5-3 Standard Calibration Analysis 4-4 Sleep Mode 2-3, 3-4 Slope 4-3, 4-4 Sludges 6-7 sodium hydroxide solution 2-22 Solids and Sludges 6-7 Sparge Option 3-4 Sparger 1-3 Stabilize Baseline Time (sec.) 3-4 Standard 4-3, 4-6, 4-13 analysis 4-14, 4-16 analysis rep 4-9 Calibration 4-3, 4-4, 4-6, 410, 4-12, 4-14 concentration 4-10 deviation 5-5, 5-8 ID 4-5, 4-8, 4-12 Method 5310B 1-5 run 4-9, 4-16 Standards 2-5 Standby 2-3, 3-4, 3-5, 3-12 Start 5-5, 5-8 Run 4-7, 4-14, 5-3 Standard Calibration Analysis Run 4-4, 4-16 status mode 3-4 Stirring Option 1-5 Strip Chart 4-7, 4-14, 5-4, 5-6 STS-8000 Autosampler 1-6, 2-5, 1-14 vii INDEX Syringe 1-3, 1-15, 7-8, 7-9, 7-10, 711 assembly 7-11 Diagnostics 7-8, 7-10, 7-11 Driver 1-5, 1-9, 7-8, 7-10, 7-11 plunger 7-12 System 2-21, 3-4 Calibration 4-3 status 3-4 V T W TC 1-3, 1-4, 1-15 methods 4-3 TC-IC 1-15 TC/TOC standard 2-5 Temperature Controller 1-13, 2-22 Time vs. Millivolts 4-7, 4-14 tin 1-11 and copper granules 1-11 TOC 1-3, 1-4, 1-15, 3-4 analysis 1-3, 1-10 Analysis Time 1-5 Curve 4-6 Gas Generator 1-6, 2-3 Results 5-6 sample analysis procedure 5-3 Standard 4-8 TOC Talk 1-4, 2-22, 3-3, 3-12, 7-5 TOC-free carrier gas 2-7 Total Carbon 1-3, 1-15 Total Carbon Minus Inorganic Carbon 1-15 Total Organic Carbon (see TOC) Troubleshooting 7-22 Tubing 2-4, 2-8 connections 2-8 tutorial 5-3 two-stage regulator 2-7 Wakeup 3-12 Schedule 3-12 Waste bottle 2-5 water 1-3, 1-5, 6-7 Water accumulation 7-3 Contribution 4-4 Trap 1-3, 1-11, 1-12, 2-22, 36, 7-24 trap flow 7-22 U ultra-pure water 4-3 User Interface 1-4 USP 643 1-5 Utility Requirements 1-6, 2-3, 6-3 viii Valves 3-6, 7-24, 7-27 Control 3-6 mounting plate 7-16 Vial number 2-22 Position 1 5-7 Voltage 1-6 X XYZ robot 1-6, 1-14 Y y-intercept 4-3