1
REFRIGERANT PIPE CONNECTION
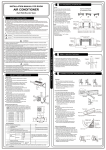
Settlement of outdoor unit
Anchor the outdoor unit with a bolt and
nut
10 or 8 tightly and horizontally
on a concrete or rigid mount.
A
Air inlet
Air inlet
780x540x250
549
280
760x590x275
530
290
670x540x250
484
275
775x545x310
600
320
840x700x320
560
335
895x860x330
590
333
B
Outdoor unit dimension Mounting dimensions
mm(WxHxD)
A(mm)
B(mm)
Air outlet
Fig.14
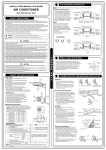
Drain joint installation
NOTE: The drain joint is slightly different
according to the different outdoor unit.
For the drain joint with the seal(Fig.15 (A)), first
fit the seal onto the drain joint, then insert the
drain joint into the base pan hole of outdoor unit,
rotate 90 to securely assemble them. To install
drain joint as shown in Fig.15 (B), insert the drain
joint into the base pan hole of outdoor unit until it
remains fixed with a clicking sound. Connecting
the drain joint with an extension drain hose (Locally
purchased), in case of the water draining off the
outdoor unit during the heating mode.
Refrigerant pipe connection
Drain joint
Seal
Base pan hole of
outdoor unit
(B)
Seal
Drain pipe
(A)
Fig.15
90
Oblique Roughness
1. Flaring work
Main cause for refrigerant leakage
is due to defect in the flaring work.
Carry out correct flaring work
using the following procedure:
A: Cut the pipes and the cable.
1. Use the piping kit accessory or pipes
purchased locally.
2. Measure the distance between the indoor
and the outdoor unit.
3. Cut the pipes a little longer than the
measured distance.
4. Cut the cable 1.5m longer than the pipe
length.
Fig.16
Pipe
Reamer
Point down
B: Burr removal
1. Completely remove all burrs from the cut
cross section of pipe/tube.
2. Put the end of the copper tube/pipe in a
downward direction as you remove burrs in
order to avoid dropping burrs into the tubing.
Fig.17
8
Burr