1
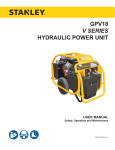
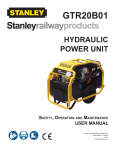
GPV13
V SERIES
HYDRAULIC POWER UNIT
USER MANUAL
Safety, Operation and Maintenance
73417 1/2014 Ver. 1
2 ► GPV13 User Manual
TABLE OF CONTENTS
SAFETY SYMBOLS...................................................................................................................................................4
SAFETY PRECAUTIONS...........................................................................................................................................5
TOOL STICKERS & TAGS.........................................................................................................................................6
HOSE TYPES.............................................................................................................................................................7
HOSE RECOMMENDATIONS...................................................................................................................................8
FIGURE 1. TYPICAL HOSE CONNECTIONS........................................................................................................8
HTMA REQUIREMENTS............................................................................................................................................9
OPERATION.............................................................................................................................................................10
FIGURE 2. PANEL CONTROL VALVE..................................................................................................................10
FIGURE 3. HYDRAULIC CONNECTIONS........................................................................................................... 11
FIGURE 4. THROTTLE CONTROL LEVER......................................................................................................... 11
FIGURE 5. ENGINE COMPONENTS...................................................................................................................12
FIGURE 6. CHOKE LEVER..................................................................................................................................13
FIGURE 7. FUEL LEVER......................................................................................................................................13
FIGURE 8. ON-OFF SWITCH...............................................................................................................................13
MAINTENANCE...............................................................................................................................................14 & 17
TESTING & TROUBLESHOOTING.........................................................................................................................15
TROUBLESHOOTING.............................................................................................................................................16
SPECIFICATIONS....................................................................................................................................................17
IMPORTANT
To fill out a Product Warranty Recording form, and for information on your warranty,
visit Stanleyhydraulic.com and select the Warranty tab.
(NOTE: The warranty recording form must be submitted to validate the warranty).
SERVICING: This manual contains safety, operation, and routine maintenance instructions. Stanley Hydraulic Tools
recommends that servicing of hydraulic tools, other than routine maintenance, must be performed by an authorized
and certified dealer. Please read the following warning.
WARNING
SERIOUS INJURY OR DEATH COULD RESULT FROM THE IMPROPER REPAIR OR SERVICE OF THIS
TOOL.
REPAIRS AND / OR SERVICE TO THIS TOOL MUST ONLY BE DONE BY AN AUTHORIZED AND
CERTIFIED DEALER.
For the nearest authorized and certified dealer, call Stanley Hydraulic Tools at (503-659-5660) and ask for a Customer Service Representative.
GPV13 User Manual ◄ 3
SAFETY SYMBOLS
Safety symbols and signal words, as shown below, are used to emphasize all operator, maintenance and repair actions which, if not strictly followed, could result in a life-threatening situation, bodily injury or damage to equipment.
This is the safety alert symbol. It is used to alert you to potential personal injury
hazards. Obey all safety messages that follow this symbol to avoid possible
injury or death.
DANGER
This safety alert and signal word indicate an imminently hazardous situation
which, if not avoided, will result in death or serious injury.
WARNING
This safety alert and signal word indicate a potentially hazardous situation
which, if not avoided, could result in death or serious injury.
CAUTION
This safety alert and signal word indicate a potentially hazardous situation
which, if not avoided, could result in death or serious injury.
CAUTION
This signal word indicates a potentially hazardous situation which, if not avoided, may result in property damage.
NOTICE
This signal word indicates a situation which, if not avoided, will result in damage
to the equipment.
IMPORTANT
This signal word indicates a situation which, if not avoided, may result in damage to the equipment.
Always observe safety symbols. They are included for your safety and for the protection of the tool.
LOCAL SAFETY REGULATIONS
Enter any local safety regulations here. Keep these instructions in an area accessible to the operator and maintenance personnel.
4 ► GPV13 User Manual
SAFETY PRECAUTIONS
Tool operators and maintenance personnel must always
comply with the safety precautions given in this manual
and on the stickers and tags attached to the equipment.
CLOSED SPACE. Inhalation of engine exhaust can
be fatal.
•
Do not operate a damaged, improperly adjusted
power unit.
•
Supervising personnel should develop additional precautions relating to the specific work area and local
safety regulations. If so, place the added precautions in
the space provided in this manual.
Never wear loose clothing that can get entangled in
the working parts of the power unit.
•
Keep all parts of your body away from the working
parts of the power unit.
•
Keep clear of hot engine exhaust.
In addition to this manual, read and understand safety
and operating instructions in the Engine Operation Manual furnished with the power unit.
•
Do not add fuel to the power unit while the power
unit is running or is still hot.
•
Do not operate the power unit if gasoline odor is
present.
•
Do not use flammable solvents around the power
unit engine.
•
Do not operate the power unit within 3.3 ft/1 m of
buildings, obstructions or flammable objects.
•
Do not reverse tool rotation direction by changing
fluid flow direction.
•
Allow power unit engine to cool before storing in an
enclosed space.
•
Always keep critical tool markings, such as labels
and warning stickers legible.
•
To avoid personal injury or equipment damage, all
tool repair, maintenance and service must only be
performed by authorized and properly trained personnel.
•
Warning: Use of this tool on certain materials during
demolition could generate dust potentially containing a variety of hazardous substances such as asbestos, silica or lead. Inhalation of dust containing
these or other hazardous substances could result
in serious injury, cancer or death. Protect yourself
and those around you. Research and understand
the materials you are cutting. Follow correct safety
procedures and comply with all applicable national,
state or provisional health and safety regulations
relating to them, including, if appropriate arranging
for the safe disposal of the materials by a qualified
person.
These safety precautions are given for your safety. Review them carefully before operating the tool and before
performing general maintenance or repairs.
The GPV13 Hydraulic Power Unit will provide safe and
dependable service if operated in accordance with the
instructions given in this manual. Read and understand
this manual and any stickers and tags attached to the
Power Unit. Failure to do so could result in personal injury or equipment damage.
•
•
Operator must start in a work area without bystanders. The operator must be familiar with all prohibited
work areas such as excessive slopes and dangerous terrain conditions.
Establish a training program for all operators to ensure safe operation.
•
Do not operate the power unit unless thoroughly
trained or under the supervision of an instructor.
•
Always wear safety equipment such as goggles,
ear, head protection, and safety shoes at all times
when operating the power unit and a hydraulic tool.
•
Do not inspect or clean the power unit while it is running. Accidental engagement of the unit can cause
serious injury.
•
Always use hoses and fittings rated at 2500 psi/172
bar with a 4 to 1 safety factor. Be sure all hose connections are tight.
•
Be sure all hoses are connected for correct flow direction to and from the tool being used.
•
Do not inspect hoses and fittings for leaks by using
bare hands. “Pin-hole” leaks can penetrate the skin.
•
NEVER OPERATE THE POWER UNIT IN A
GPV13 User Manual ◄ 5
TOOL STICKERS & TAGS
Hydraulic
GPV13 Power Pack
Safety Tag wire tied to power unit
6 ► GPV13 User Manual
HOSE TYPES
The rated working pressure of the hydraulic hose must be equal to or higher than the relief valve setting on the hydraulic system. There are three types of hydraulic hose that meet this requirement and are authorized for use with
Stanley Hydraulic Tools. They are:
Certified non-conductive — constructed of thermoplastic or synthetic rubber inner tube, synthetic fiber braid
reinforcement, and weather resistant thermoplastic or synthetic rubber cover. Hose labeled certified nonconductive is the only hose authorized for use near electrical conductors.
Wire-braided (conductive) — constructed of synthetic rubber inner tube, single or double wire braid reinforcement, and weather resistant synthetic rubber cover. This hose is conductive and must never be used near
electrical conductors.
Fabric-braided (not certified or labeled non-conductive) — constructed of thermoplastic or synthetic rubber inner tube, synthetic fiber braid reinforcement, and weather resistant thermoplastic or synthetic rubber cover. This
hose is not certified non-conductive and must never be used near electrical conductors.
HOSE SAFETY TAGS
To help ensure your safety, the following DANGER tags are attached to all hose purchased from Stanley Hydraulic
tools. DO NOT REMOVE THESE TAGS.
If the information on a tag is illegible because of wear or damage, replace the tag immediately. A new tag may be
obtained from your Stanley Distributor.
D A N G E R
D A N G E R
1.
FAILURE TO USE HYDRAULIC HOSE LABELED AND CERTIFIED AS NON-CONDUCTIVE
WHEN USING HYDRAULIC TOOLS ON OR NEAR ELECTRIC LINES MAY RESULT IN
DEATH OR SERIOUS INJURY.
FOR PROPER AND SAFE OPERATION MAKE SURE THAT YOU HAVE BEEN PROPERLY TRAINED IN CORRECT PROCEDURES REQUIRED FOR WORK ON OR AROUND
ELECTRIC LINES.
2.
BEFORE USING HYDRAULIC HOSE LABELED AND CERTIFIED AS NON-CONDUCTIVE
ON OR NEAR ELECTRIC LINES. WIPE THE ENTIRE LENGTH OF THE HOSE AND FITTING WITH A CLEAN DRY ABSORBENT CLOTH TO REMOVE DIRT AND MOISTURE AND
TEST HOSE FOR MAXIMUM ALLOWABLE CURRENT LEAKAGE IN ACCORDANCE WITH
SAFETY DEPARTMENT INSTRUCTIONS.
3.
DO NOT EXCEED HOSE WORKING PRESSURE OR ABUSE HOSE. IMPROPER USE
OR HANDLING OF HOSE COULD RESULT IN BURST OR OTHER HOSE FAILURE.
KEEP HOSE AS FAR AWAY AS POSSIBLE FROM BODY AND DO NOT PERMIT DIRECT
CONTACT DURING USE. CONTACT AT THE BURST CAN CAUSE BODILY INJECTION
AND SEVERE PERSONAL INJURY.
4.
HANDLE AND ROUTE HOSE CAREFULLY TO AVOID KINKING, ABRASION, CUTTING, OR
CONTACT WITH HIGH TEMPERATURE SURFACES. DO NOT USE IF KINKED. DO NOT
USE HOSE TO PULL OR LIFT TOOLS, POWER UNITS, ETC.
5.
CHECK ENTIRE HOSE FOR CUTS CRACKS LEAKS ABRASIONS, BULGES, OR DAMAGE TO COUPLINGS IF ANY OF THESE CONDITIONS EXIST, REPLACE THE HOSE
IMMEDIATELY. NEVER USE TAPE OR ANY DEVICE TO ATTEMPT TO MEND THE HOSE.
6.
AFTER EACH USE STORE IN A CLEAN DRY AREA.
SEE OTHER SIDE
SIDE 1
SEE OTHER SIDE
(Shown smaller than actual size)
DO NOT REMOVE THIS TAG
DO NOT REMOVE THIS TAG
THE TAG SHOWN BELOW IS ATTACHED TO “CERTIFIED NON-CONDUCTIVE” HOSE
SIDE 2
D A N G E R
D A N G E R
1.
DO NOT USE THIS HYDRAULIC HOSE ON OR NEAR ELECTRIC LINES. THIS HOSE IS
NOT LABELED OR CERTIFIED AS NON-CONDUCTIVE. USING THIS HOSE ON OR NEAR
ELECTRICAL LINES MAY RESULT IN DEATH OR SERIOUS INJURY.
5.
CHECK ENTIRE HOSE FOR CUTS CRACKS LEAKS ABRASIONS, BULGES, OR DAMAGE TO
COUPLINGS IF ANY OF THESE CONDITIONS EXIST, REPLACE THE HOSE IMMEDIATELY.
NEVER USE TAPE OR ANY DEVICE TO ATTEMPT TO MEND THE HOSE.
2.
FOR PROPER AND SAFE OPERATION MAKE SURE THAT YOU HAVE BEEN PROPERLY
TRAINED IN CORRECT PROCEDURES REQUIRED FOR WORK ON OR AROUND ELECTRIC LINES.
6.
AFTER EACH USE STORE IN A CLEAN DRY AREA.
3.
DO NOT EXCEED HOSE WORKING PRESSURE OR ABUSE HOSE. IMPROPER USE OR
HANDLING OF HOSE COULD RESULT IN BURST OR OTHER HOSE FAILURE. KEEP HOSE
AS FAR AWAY AS POSSIBLE FROM BODY AND DO NOT PERMIT DIRECT CONTACT
DURING USE. CONTACT AT THE BURST CAN CAUSE BODILY INJECTION AND SEVERE
PERSONAL INJURY.
4.
HANDLE AND ROUTE HOSE CAREFULLY TO AVOID KINKING, CUTTING, OR CONTACT
WITH HIGH TEMPERATURE SURFACES. DO NOT USE IF KINKED. DO NOT USE HOSE TO
PULL OR LIFT TOOLS, POWER UNITS, ETC.
DO NOT REMOVE THIS TAG
DO NOT REMOVE THIS TAG
THE TAG SHOWN BELOW IS ATTACHED TO “CONDUCTIVE” HOSE.
SEE OTHER SIDE
SEE OTHER SIDE
SIDE 1
SIDE 2
(Shown smaller than actual size)
GPV13 User Manual ◄ 7
8 ► GPV13 User Manual
All hydraulic hose must meet or exceed
specifications as set forth by SAE J517.
All hydraulic hose must have at least a rated
minimum working pressure equal to the maximum hydraulic system relief valve setting.
This chart is intended to be used for hydraulic
tool applications only based on Stanley Hydraulic Tools tool operating requirements and
should not be used for any other applications.
The chart to the right shows recommended
minimum hose diameters for various hose
lengths based on gallons per minute (gpm)/
liters per minute (lpm). These recommendations are intended to keep return line pressure
(back pressure) to a minimum acceptable level to ensure maximum tool performance.
Tool to Hydraulic Circuit Hose
Recommendations
15-34
MM
Inside Diameter
INCH
USE
(Press/Return)
PSI
up to 10
up to 3
3/8
10
Both
2250
49-60
13-16
FLOW >>>
RETURN
<<< FLOW
PRESSURE
26-100
up to 25
100-200
51-100
up to 50
100-300
51-100
up to 50
26-100
up to 25
8-30
up to 8
30-60
15-30
up to 15
30-90
15-30
up to 15
7.5-30
up to 7.5
Figure 1. Typical Hose Connections
49-60
38-49
10-13
13-16
19-40
5-10.5
38-49
19-40
5-10.5
10-13
19-40
5-10.5
38-49
15-23
10-13
15-23
4-6
19
25.4
16
19
19
25.4
5/8
3/4
3/4
1
19
3/4
1
16
3/4
16
19
3/4
5/8
16
5/8
5/8
16
13
13
10
5/8
1/2
1/2
3/8
Return
Pressure
Return
Pressure
Return
Pressure
Return
Pressure
Both
Return
Pressure
Both
Both
Both
Both
2500
2500
2500
2500
2500
2500
2500
2500
2500
2500
2500
2500
2500
2500
2500
175
175
175
175
175
175
175
175
175
175
175
175
175
175
175
155
BAR
Min. Working Pressure
Certified Non-Conductive Hose - Fiber Braid - for Utility Bucket Trucks
METERS
Hose Lengths
FEET
Conductive Hose - Wire Braid or Fiber Braid -DO NOT USE NEAR ELECTRICAL CONDUCTORS
4-6
4-9
LPM
Oil Flow
GPM
HOSE RECOMMENDATIONS
HTMA / EHTMA REQUIREMENTS
HTMA / EHTMA REQUIREMENTS
HTMA
HYDRAULIC SYSTEM REQUIREMENTS
TYPE I
Nominal Operating Pressure
(at the power supply outlet)
4-6 gpm
(15-23 lpm)
1500 psi
(103 bar)
TOOL TYPE
TYPE II
TYPE RR
7-9 gpm
(26-34 lpm)
1500 psi
(103 bar)
9-10.5 gpm
(34-40 lpm)
1500 psi
(103 bar)
System relief valve setting
(at the power supply outlet)
2100-2250 psi
(145-155 bar)
2100-2250 psi
(145-155 bar)
2200-2300 psi
(152-159 bar)
2100-2250 psi
(145-155 bar)
Maximum back pressure
(at tool end of the return hose)
250 psi
(17 bar)
250 psi
(17 bar)
250 psi
(17 bar)
250 psi
(17 bar)
Measured at a max. fluid viscosity of:
(at min. operating temperature)
400 ssu*
400 ssu*
400 ssu*
400 ssu*
(82 centistokes) (82 centistokes) (82 centistokes) (82 centistokes)
Temperature: Sufficient heat rejection
capacity to limit max. fluid temperature to:
(at max. expected ambient temperature)
140° F
(60° C)
Flow Range
140° F
(60° C)
TYPE III
11-13 gpm
(42-49 lpm)
1500 psi
(103 bar)
140° F
(60° C)
140° F
(60° C)
3 hp
5 hp
6 hp
7 hp
Min. cooling capacity at a temperature
(2.24 kW)
(3.73 kW)
(5.22 kW)
(4.47 kW)
difference of between ambient and fluid
40° F
40° F
40° F
40° F
temps
(22° C)
(22° C)
(22° C)
(22° C)
NOTE:
Do not operate the tool at oil temperatures above 140° F (60° C). Operation at higher temperatures can cause operator
discomfort at the tool.
Filter
Min. full-flow filtration
Sized for flow of at least:
(For cold temp. startup and max.
dirt-holding capacity)
25 microns
30 gpm
(114 lpm)
Hydraulic fluid Petroleum based
(premium grade, anti-wear, non-conductive)
Viscosity (at min. and max. operating temps)
100-400 ssu*
25 microns
30 gpm
(114 lpm)
25 microns
30 gpm
(114 lpm)
25 microns
30 gpm
(114 lpm)
100-400 ssu*
100-400 ssu*
(20-82 centistokes)
100-400 ssu*
NOTE:
When choosing hydraulic fluid, the expected oil temperature extremes that will be experienced in service determine the
most suitable temperature viscosity characteristics. Hydraulic fluids with a viscosity index over 140 will meet the requirements
over a wide range of operating temperatures.
*SSU = Saybolt Seconds Universal
EHTMA
HYDRAULIC SYSTEM
REQUIREMENTS
CLASSIFICATION
B
C
D
Nominal Operating Pressure
(at the power supply outlet)
3.5-4.3 gpm
(13.5-16.5 lpm)
1870 psi
(129 bar)
4.7-5.8 gpm
(18-22 lpm)
1500 psi
(103 bar)
7.1-8.7 gpm
(27-33 lpm)
1500 psi
(103 bar)
9.5-11.6 gpm
(36-44 lpm)
1500 psi
(103 bar)
11.8-14.5 gpm
(45-55 lpm)
1500 psi
(103 bar)
System relief valve setting
(at the power supply outlet)
2495 psi
(172 bar)
2000 psi
(138 bar)
2000 psi
(138 bar)
2000 psi
(138 bar)
2000 psi
(138 bar)
Flow Range
NOTE: These are general hydraulic system requirements. See tool specification page for tool specific requirements
GPV13 User Manual ◄ 9
OPERATION
PREPARATION FOR USE
Do not operate the power unit until you have read the
engine operating and maintenance instructions manual
furnished with the unit.
1. ENGINE CRANKCASE OIL LEVEL
Always check the engine oil level before starting the
engine. Make sure the oil level is at the FULL MARK
on the dipstick. Do not overfill. Use 4-stroke motor oil
that meets or exceeds the requirements for API service
classifications SJ or later as specified in the engine operating and maintenance manual. Refer to the engine
manual for oil viscosity grade.
•
•
•
Texaco “Rando” HD-AZ
Union “Unax” AW-WR-32
Terresolve EnviroLogic 132
4. HYDRAULIC CONNECTIONS
The recommended hose length is 25 ft/8 m with a 1/2
inch/12.7 mm inside diameter. The hoses must have
a working pressure rating of at least 2500 psi/175 bar.
Each hose end must have male thread ends compatible
with HTMA or EHTMA (HYDRAULIC TOOL MANUFACTURERS ASSOCIATION) quick disconnect fittings (NPT
type threads). (See Figure 3.)
2. ENGINE FUEL LEVEL
Check the fuel level. If low, fill with unleaded gasoline
with a minimum of pump octane of 86 or higher. Refer to
the engine manual for details.
3. HYDRAULIC FLUID
Check the sight gauge on the hydraulic fluid reservoir for
the proper fluid level. Use fluids meeting the following
specifications.
Hydraulic
GPV13 Power
Pack
VISCOSITY (FLUID THICKNESS)
U.S.METRIC
50 °F 450 SSU Maximum
10 °C 95 C.S.
100 °F 130-200 SSU
140 °F 85 SSU Minimum
38 °C 27-42 C.S.
60 °C 16.5 C.S. Min
Pour Point: -10°F/-23°C Minimum (for cold startup)
Viscosity Index: (ASTM D-2220) 140 Minimum
Demulsibility: (ASTM D-1401) 30 Minutes Maximum
Flash Point: (ASTM D-92) 340°F/171°C Minimum
Rust Inhibition: (ASTM D-665 A & B) Pass
Oxidation: (ASTM D-943) 1000 Hours Minimum
Pump Wear Test: (ASTM D-2882) 60 mg Maximum
The following fluids work well over a wide temperature
range, allow moisture to settle out and resist biological growth that may occur in cool operating hydraulic
circuits. These fluids are recommended by Stanley Hydraulic Tools. Other fluids that meet or exceed the specifications of these fluids may also be used.
•
•
•
•
•
Chevron AW-MV-32
Exxon “Univis” J-26
Mobil D.T.E. 13
Gulf “Harmony” AW-HVI-150-32
Shell “Tellus” T-32
10 ► GPV13 User Manual
Figure 2. Panel Control Valve
Facing the panel control valve (see Figure 2, the left
male quick disconnect fitting is the PRESSURE FLUID
OUT fitting, marked with “P”. The right female quick disconnect fitting is the RETURN FLUID IN fitting, marked
with “T”.
QUICK DISCONNECT COUPLERS
HTMA approved quick disconnect couplings are installed to hydraulic hoses so that the direction of oil flow
is always from the male to the female quick disconnect
as shown in Figure 3. Quick disconnect couplings and
hose fittings are selected so that additional fittings such
as reducer or adapter fittings are not required.
If adapter fittings are used, they must be approved steel
hydraulic fittings meeting a minimum operating pressure
rating of 2500 psi/172 bar. Do not use galvanized pipe
fittings or black pipe fittings.
DO NOT OVERTIGHTEN THE FITTINGS.
OPERATION
CONTROLS
CONTROL PANEL
PRESSURE
RETURN
HTMA 1/2 INCH FEMALE
QUICK DISCONNECT
COUPLER
HTMA 1/2 INCH MALE
QUICK DISCONNECT
COUPLER
The power unit provides one circuit, with an oil flow of
5 gpm/20 lpm up to 2000 psi/140 bar GPV135H02 or 8
gpm/30 lpm up to 2000 psi/140 bar GPV138B02.
One hydraulic tool can be connected to the tool circuit.
The circuit is activated by moving the control lever on
the power unit to the ON position.
THROTTLE CONTROL
The power unit is equipped with a manual throttle (See
below).
1/2 INCH MALE PIPE HOSE END
1/2 INCH I.D. HOSE, 25 FT
LONG WITH 2500 PSI/
172 BAR RATING AND
4 TO 1 SAFETY FACTOR
RETURN
PRESSURE
Figure 4. Throttle Control Lever Honda
MANUAL THROTTLE CONTROL HONDA
Engine speed is manually held at full throttle to maintain
5 gpm/20 lpm. When a tool is not being used move the
lever to the idle position.
1/2 INCH MALE PIPE HOSE END
HTMA 1/2 INCH FEMALE
QUICK DISCONNECT
COUPLER
HTMA 1/2 INCH MALE
QUICK DISCONNECT
COUPLER
Manual full throttle control on the Honda engine is set
by positioning the control lever (shown in Figure 4) to
the far left.
MANUAL THROTTLE CONTROL BRIGGS
The Briggs engine speed is manually held at full throttle
to maintain 8 gpm/30 lpm (see below). When a tool is
not being used move the lever to the idle position.
ADAPTER, 3/8 INCH MALE PIPE
× -8 SAE O-RING
RETURN
PRESSURE
TOOL
Briggs Throttle Control Lever
Figure 3. Hydraulic Connections
GPV13 User Manual ◄ 11
OPERATION
HONDA ENGINE
GPV135H02
Figure 5.
MUFFLER
AIR CLEANER
FUEL TANK
BRIGGS ENGINE
GPV138B02
CHOKE
FUEL VALVE LEVER
THROTTLE LEVER
ENGINE ON/OFF
SWITCH
RECOIL START
Shown above (Figure 5) are the Honda and Briggs primary engine components referred to in this section. Become familiar with these components and read and understand the engine operation and maintenance manual
before starting the engine and operating the power unit
for the first time.
Explosion and fire hazard.
Checking the engine fuel level or refueling the
engine when it is hot or running can result in an
explosion and/or fire that may result in death or
serious injury.
Do not remove the fuel cap while the engine is
running. Do not add fuel to the tank while the
engine is hot. Do not fill the fuel tank to a point of
overflowing.
12 ► GPV13 User Manual
OPERATION
NOTICE
Before starting the engine, make sure the throttle
control lever is at the far right or idle position.
START-UP
1. Check the engine oil level.
2. Check the hydraulic oil level in power unit.
3. Check that the engine fuel tank is full.
4. Ensure the throttle control lever is at the far right or
idle position.
5. Move the choke lever to the CLOSED position as
shown in Figure 6. Honda pictured below, see figure
5 for Briggs choke location.
Figure 8. ON-OFF Switch Honda
8. Pull the starter grip on the recoil starter until you feel
resistance. Then pull firmly upward. Do not allow the
starter grip to snap back against the engine. Return
it gently.
9. After the engine starts, allow it to warm up. Gradually adjust the choke until it is in the open position.
10. Connect hoses and the tool as described on pages
7 and 8.
11. Move the tool circuit control lever to the ON position.
12. When finished operating the tool, move the tool circuit control lever to the OFF position.
COLD WEATHER STARTUP
Figure 6. Choke Lever Honda
6. Move the fuel valve lever to the ON position as
shown in Figure 7, see figure 5 for Briggs fuel valve
location.
1. Use the procedures described under START-UP
and then follow the procedure below.
2. Hydraulic fluids are thicker in cold weather. Therefore, it is recommended that the engine be run at low
idle long enough to bring the fluid temperature up to
a minimum of 50 °F/10 °C.
3. If the tools and tool hoses are cold, it is recommended to allow hydraulic fluid to circulate through the
tool hoses until warm before using the tool.
SHUTDOWN
1. Ensure the tool circuit control lever is in the OFF
position.
Figure 7. Fuel Lever Honda
2. Allow the engine to idle for approximately one minute and move the engine switch to the OFF position.
7. Position the engine ON-OFF switch to the ON position as shown in Figure 8, see figure 5 for Briggs on/
off switch location.
GPV13 User Manual ◄ 13
MAINTENANCE
ENGINE MAINTENANCE
STORAGE
Follow the maintenance schedule and general maintenance instructions in the engine maintenance and operation manual furnished with the power unit. Also see
maintenance schedule on pages 15 & 16.
•
Clean the unit thoroughly before storage. Do not use
water pressure.
•
Always store the unit in a clean and dry facility.
•
If the unit will be stored for a prolonged period (over
30 days), add a fuel additive to the fuel tank to prevent the fuel from gumming. Run engine for a short
period to circulate the additive.
•
Replace crankcase oil with new oil.
•
Remove the spark plug and pour approximately 1
ounce (30 ml) of engine oil into the cylinder. Replace
the spark plug and crank the engine slowly to distribute the oil.
•
Check hydraulic reservoir for water. If water is found,
change the oil and circulate it through the tool hose
and tool. (See HYDRAULIC SYSTEM MAINTENANCE earlier in this section).
•
Disconnect tool hoses.
HYDRAULIC SYSTEM
MAINTENANCE
•
Check hydraulic fluid level daily. Add fluid per specifications in this manual. (See HYDRAULIC FLUID
under the section titled OPERATION.
•
Remove condensed moisture from the hydraulic
fluid by pumping the hydraulic fluid into a 5 gal/20
l container through the pressure hose. Make sure
the engine is at idle when performing this procedure.
When the hydraulic reservoir is empty turn the engine off immediately.
•
Allow the fluid to sit long enough for the water to
settle to the bottom of the container. Slowly pour the
fluid back into the hydraulic tank, avoiding the water
at the bottom of the container.
•
Each day, check hydraulic lines and fittings for
leaks, kinks, etc. Do not use your hand to perform
this check.
•
Change the hydraulic filter element every 100 hours
of operation or 6 months which ever comes first.
Change more often if cold, moist or dusty conditions
exist.
•
Check oil cooler for debris. Remove debris with air
pressure.
14 ► GPV13 User Manual
MAINTENANCE
HONDA ENGINE MAINTENANCE
MAINTENANCE
Maintenance Schedule
Regular Service Period
Perform at every indicated month or
Each
Use
operating hour interval, whichever comes first.
Engine Oil
Check Level
Change
Air Cleaner
Check
Hydraulics
Engine
Clean
Sediment Cup
Clean
Spark Plugs
Clean-Readjust
Spark Arrester (optional)
Clean
Valve Clearance
Check-Readjust
Fuel Tank and Strainer
Clean
Fuel Line
Check (Replace if
Necessary)
Hydraulic Fluid Level
Check
Hydraulic Fluid
Replace
Remove Condensed Moisture
Check For Leaks, Kinks, etc.
Hydraulic Fluid Filter
Replace
•
•
(2)
Every
3 months
or
50 Hrs
Every
6 months
or
100 Hrs
•
Every
year
or
300 Hrs
•
• (1)
•
•
•
•(2)
•(2)
Every 2 years (2)
•
•
Hyd Fluid Cooler (Inspect & Clean as necessary)
NOTE: (1)
First
month
or
20 Hrs
Every 200 hours
•
Every 50 hours
•
Service more frequently when used in dusty areas.
These items should be serviced by an authorized Honda dealer, unless the owner has the proper
tools and is mechanically proficient. See the Honda Shop Manual.
For additional maintenance information see the Honda engine operator’s manual that was supplied with the power unit.
GPV13 User Manual ◄ 15
MAINTENANCE
BRIGGS & STRATTON ENGINE MAINTENANCE
Maintenance Schedule
Regular Service Period
Perform at every indicated month or
operating hour interval, whichever comes first.
Engine Oil
Check Level
Engine
Change
Air Cleaner
Clean
Pre Cleaner
Clean
Air Cooling System
Clean
Spark Plugs
Clean-Readjust
Finger Guard
Clean
Hydraulics
Muffler & Controls
First 5 Every 8
Hours Hours
or Daily
•
Clean
Hydraulic Fluid Level
Check
Hydraulic Fluid
Replace
Remove Condensed Moisture
Check For Leaks, Kinks, etc.
Hydraulic Fluid Filter
Replace
Hyd Fluid Cooler (Inspect & Clean as necessary)
NOTE: (1)
Every 25
Hours or
Annually
Every 50
Hours or
Annually
•
•
•
• (1)
(1)
•
•
•
Every 100
Hours or
Annually
Annually
Replace
•
•
• (1)
•
Every 200 hours
•
•
Every 50 hours
•
Service more frequently when used in dusty areas.
For additional maintenance information see the Briggs & Stratton engine operator’s manual that was supplied with
the power unit.
16 ► GPV13 User Manual
TESTING & TROUBLESHOOTING
GENERAL
Tests and adjustments should be performed periodically
to ensure the power unit is operating at maximum efficiency. Stanley Circuit Tester (Part Number 04182) is
recommended. This tester can be used to isolate problems in both the engine and hydraulic system prior to
any power unit disassembly.
TESTING THE HYDRAULIC CIRCUIT
The following tests can be performed to ensure that the
hydraulic pump is supplying the correct flow and pressure and that the system relief valve is operating properly.
During these tests, make sure the engine is warm and
operating smoothly. If test results are not as specified,
refer to the troubleshooting table in this section for possible causes.
TESTING THE 5 GPM HTMA TYPE 1 OR 8
GPM HTMA TYPE II CIRCUIT
To test the circuit, proceed as follows:
1. Set the throttle control lever to the far left or full throttle position.
5. With the engine at full operating speed, the test
flow gauge should read 4–6 gpm/15–23 lpm on
GPV135H02 or 7-9 gpm/26-34 lpm on GPV138B02.
6. Slowly turn the restrictor valve clockwise while watching the pressure gauge. The flow rate should stay at
4–6 gpm/15–23 lpm as the pressure gauge reaches
1900–2000 psi/131–138 bar on GPV135H02 or 7–9
gpm/26–34 lpm as the pressure gauge reaches
1900–2000 psi/131–138 bar on GPV138B02.
7. At 1900–2000 psi/131–138 bar, the relief valve
should begin to open. The pressure at which the relief valve just begins to open is commonly referred
to as the “cracking pressure”. At the “cracking pressure,” the flow rate should start to drop because the
relief valve is allowing fluid to bypass to the hydraulic reservoir. The “cracking pressure” is preset at the
factory and if it is not within the above range, the
relief valve must be re-set as follows:
a. The relief valve is located behind the dash panel in the valve manifold assembly. Use an open
end or box end wrench to loosen the nut on the
relief valve.
b. Use an Allen wrench to adjust the relief valve.
Turn clockwise to raise the pressure and counterclockwise to reduce the pressure.
c. Tighten the nut and retest.
2. Connect the Stanley Circuit Tester across the hose
ends (where the tool would normally be connected).
3. Fully open the tester restrictor valve (counterclockwise).
4. Start the engine and allow it to run until warm.
GPV13 User Manual ◄ 17
TROUBLESHOOTING
Problem
Engine will not start.
Cause
Solution
No fuel.
Add fuel.
Defective spark plug.
Remove plug, check gap, clean or replace.
Fluid blowing out of fluid
reservoir vent.
Hydraulic tank overfilled.
Correct the fluid level.
Pump suction leak.
Check suction connections. Tighten if
necessary.
Hydraulic tool won’t operate.
Incorrect hose connection to
tool.
Make sure the tool hose circuit goes from left
(pressure) fitting to tool and back to the right
fitting (return). Fluid always flows from the
male to female fittings.
Quick disconnect fittings
defective.
Detach from hose, connect set together and
check for free flow.
Hydraulic fluid level low.
Check for correct fluid level. Fill using the
recommended fluid.
Pump coupling defective.
With the engine not running, check the
coupling between the pump and engine that
it is engaged and is not damaged. Caution:
Keep hands clear of rotating objects.
Relief valve stuck open.
Adjust or replace valve.
Suction hose kinked.
Make sure suction hose from fluid reservoir
to pump inlet has a smooth curve.
Tool is defective.
Refer to tool manual.
18 ► GPV13 User Manual
SPECIFICATIONS
Engine:............................................................. GPV135H02 Honda 13hp, GPV138B02 Briggs and Stratton 13.5HP
Capacity (GPV135H02) Honda...........................................................................................15-24 lpm/4-6 gpm Circuit
Capacity (GPV138B02) Briggs............................................................................................26-34 lpm/7-9 gpm Circuit
Pressure Range: (GPV135H02 and GPV138B02)............................................................1015~2000 psi/70~140 bar
Length: (GPV135H02 and GPV138B02)............................................................................................ 780 mm/30.7 in.
Width: (GPV135H02 and GPV138B02).............................................................................................. 510 mm/20.1 in.
Height: (GPV135H02 and GPV138B02)............................................................................................ 600 mm/23.6 in.
Weight: (GPV135H02 and GPV138B02) ................................................................................................. 75 kg/166 lb
HTMA/EHTMA
Category (GPV135H02)........................................................................................................ Type 1, EHTMA Class C
Category (GPV138B02)........................................................................................................ Type II, EHTMA Class D
Flow Rate................................................................................................................. 20 lpm/5 gpm or 30 lpm/8 gpm
Nominal Pressure........................................................................................................................... 103 bar/1500 psi
Max Pressure................................................................................................................................. 155 bar/2250 psi
Sound Power Level........................................................................................................................................ 101 Lwa
Vibration Level........................................................................................................................................................ N/A
GPV13 User Manual ◄ 19
Hefei INTACA Science-Technology Development Co.,Ltd.
Add: A-7 Building Gongtou-Liheng Industry Square, Western Section
Fanhua Street(the Cross Wenshan Road),Hefei,Anhui,China
Tel:0551-63498781/2/3
Fax:0551-63498780
P.C.:230601
http: //www.intaca.cn