1
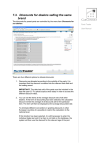
START UP
1. Unpack unit from carrying case & inspect it for an intact (and mostly blue)
desiccator tube on the back. Make sure the hoses going to the tube are not pinched
or restricted. Move the tube left or right as needed.
2. Using a syringe, or attached plastic filler, add about 10 or 15 cc/ml of distilled
water to the water tank. Recap the rubber top when done. Verify that the water line
is visible in sight glass in rear of Vaporpak. Exact level is not critical, but water in
the lower to mid glass range is best.
3. Plug in the charger/adaptor into the rear connector and ensure that the green
"ON AC" lamp is lit on the front panel. You can leave the charger on for lab use, or
just leave it connected overnight for next day's offline use.
4. Turn on the POWER switch & listen inside the test chamber for a whirring sound
from the rear. This is the circulating fan and it MUST be operating.
5. Let the unit run for a few minutes with the front port open. See that the Temp
and RH readings are approximately right for the room conditions... abnormally
high RH means that liquid is in the chamber and it must be blown out with dry air
or wicked with a paper towel very gently, until the RH comes to what “room RH”
should be.
6. Next, put a rubber stopper in the front fitting, and turn on the CONROL switch.
Set the RH command dial for a low reading... like 20% RH. You should hear the
pumps run and the chamber should drop to 20% and hold it within 0.5 % or better.
7. Similarly, test the high range by dialing the Command knob several turns to say...
70 to 75 % RH. The chamber should rise up to near the command and within a few
minutes, be again within about 1/2 % of the command. If the reading is off, simply
adjust the command a little to get the exact RH you want.
8. If all this goes well, then insert a RH/Temp probe to be tested/calibrated and do
the same thing as before. The chamber might take a bit longer to stabilize since the
DUT or probe might have some hygroscopic surface or residual moisture.
9. Don’t expect the Temperature readings to move or converge very quickly,
because the thermal mass of the DUT or test probe will limit how fast the small
circulator fan can equilibrate the probe tip to the actual chamber temp. It might
take 5 or 10 mins to converge, but this is important due to the RH/Temperature
relationship of the water vapor physics. For nominal accuracy, you should have no
more than 0.2 Degree(C) difference or gradient between the DUT and the chamber
Temperature display... (Discounting, of course the static error between the two
thermometers).
10: If all these steps can be reached, then the rest of the calibration process can be
followed from the operation & usage section of the user’s manual.