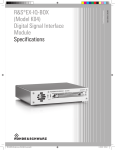
1
The Moving Pixel Company CommView User’s Manual – Doc. Rev. 1.06 -- 4/6/10
com
CommView
User’s Manual
- Page i -
The Moving Pixel Company CommView User’s Manual – Doc. Rev. 1.06 -- 4/6/10
Table of Contents
1
2
3
Overview .................................................................................................................... iv
1.1
Description........................................................................................................ iv
1.2
Terms and Definitions ..................................................................................... iv
1.3
Contacting The Moving Pixel Company ........................................................ iv
Installation ................................................................................................................. 1
2.1
Installation Via CD ROM ................................................................................ 1
2.2
Installation Via Website ................................................................................... 1
2.3
Enabling the VXI-11 Server............................................................................. 2
2.4
Licensing and License Keys ............................................................................. 2
Operation.................................................................................................................... 3
3.1
Overview............................................................................................................ 3
3.2
Data Acquisition................................................................................................ 3
3.2.1
Scope Setup ................................................................................................. 3
3.2.2
Scope Configuration Options...................................................................... 4
3.2.3
Real-Time Acquisition................................................................................ 5
3.2.4
File Acquisition........................................................................................... 6
3.2.5
Data Processing........................................................................................... 6
3.3
Listing Window Functionality ......................................................................... 7
3.3.1
Listing Grid ................................................................................................. 8
3.3.1.1
Records............................................................................................... 8
3.3.1.2
Views ................................................................................................. 8
3.3.1.3
Fields .................................................................................................. 8
3.3.1.4
Setting the Field Radix....................................................................... 9
3.3.1.5
Setting the Time Field Reference....................................................... 9
3.3.1.6
Defining and Using a Symbol File..................................................... 9
3.3.1.7
Common Fields ................................................................................ 10
3.3.1.8
Columns ........................................................................................... 11
3.3.1.9
Row and Column Manipulation....................................................... 11
3.3.1.9.1 Row Selection................................................................................. 11
3.3.1.9.2 Column Selection............................................................................ 11
3.3.1.9.3 Column Widths ............................................................................... 11
3.3.1.9.4 Reordering Columns ....................................................................... 11
3.3.1.9.5 Adding Columns ............................................................................. 12
3.3.1.9.6 Deleting Columns ........................................................................... 12
3.3.1.10
Trigger and Cursors ......................................................................... 12
3.3.1.11
Column Context Menu Summary.................................................... 12
3.3.1.12
Radix Context Menu Summary ....................................................... 14
3.3.2
Cursor Panel.............................................................................................. 14
3.3.3
Tab Control ............................................................................................... 15
- Page ii -
The Moving Pixel Company CommView User’s Manual – Doc. Rev. 1.06 -- 4/6/10
3.3.3.1
3.3.3.2
3.3.3.3
3.3.3.3.1
3.3.3.4
Filter Tab.......................................................................................... 15
Search Tab........................................................................................ 19
Options Tab...................................................................................... 20
Mnem Config Dialog...................................................................... 21
<Minimize> Tab .............................................................................. 22
3.4
Shortcuts .......................................................................................................... 22
3.4.1
Quick Filtering and Searching .................................................................. 24
3.5
4
Menus ............................................................................................................... 29
Standards.................................................................................................................. 31
4.1
XAUI Standard ............................................................................................... 31
4.1.1
Views ........................................................................................................ 31
4.1.2
Mnemonic Types....................................................................................... 31
4.1.3
Fields ......................................................................................................... 32
4.1.4
Options ...................................................................................................... 32
4.2
DigRF Standard .............................................................................................. 33
4.2.1
Views ........................................................................................................ 33
4.2.2
Mnemonic Types....................................................................................... 34
4.2.3
Fields ......................................................................................................... 35
4.2.4
Options ...................................................................................................... 36
5
Software License Agreement ................................................................................... 37
- Page iii -
The Moving Pixel Company CommView User’s Manual – Doc. Rev. 1.06 -- 4/6/10
1 Overview
1.1
Description
CommView is a Windows software application that interprets and disassembles digital
communications data streams acquired by a Tektronix oscilloscope. For those familiar
with Tektronix bus support packages that run on the TLA, CommView provides similar
functionality when used in conjunction with the scope.
When using CommView, first, a specific communications standard to be decoded is
selected. Then, signal(s) acquired on the scope are imported into CommView and
decoded into a time-stream view of data occurring on the bus. Information is displayed
in list form as a series of time-stamped records, with fields within records containing data
directly acquired from the scope or otherwise derived from the data.
CommView allows for flexible viewing of acquired data. Bus activity may be displayed
at different “view” levels, with XAUI, for example, from unaligned lanes of low- level
bits to 8b10b decoded symbols to aligned packet data. Fields within records may be
made visible or not as desired, and numeric fields may be displayed as binary, decimal,
hexadecimal, or even symbolically, if provided with a symbolic translation file that maps
numeric fields into strings (in addition, some fields may have a predefined default
symbolic translatio n table). Finally, extensive searching and filtering options are
provided to facilitate selective viewing for quick debugging and analysis of the data
stream.
1.2
Terms and Definitions
The following terms and definitions are used in this manual:
TMPC
1.3
The Moving Pixel Company
Contacting The Moving Pixel Company
Phone
+1.503.626.9663
US Pacific Time Zone
Fax
+1.503.626.9653
US Pacific Time Zone
Address
The Moving Pixel Company
4905 SW Griffith Drive, Suite 106
Beaverton, Oregon 97005 USA
Email
[email protected]
Web site
http://www.movingpixel.com
Documentation
http://www.movingpixel.com/main.pl?CommView.html
- Page iv -
The Moving Pixel Company CommView User’s Manual – Doc. Rev. 1.06 -- 4/6/10
- Page v -
The Moving Pixel Company CommView User’s Manual – Doc. Rev. 1.06 -- 4/6/10
2 Installation
The CommView application can be installed on a Windows computer running XP or Vista.
In particular, you can install it on your Tektronix scope or a separate desktop/laptop computer
connected to the same network as your scope. The computer on which CommView is
installed and run will be referred to as the host computer (which may or may not be the
scope).
Real-time operation requires communication with the scope and makes use of Tektronix’
TekVisa software, which must be installed on both the host computer and scope. Also,
CommView requires the Microsoft .NET Framework 3.5 to be installed on the host computer.
Installation of each of these components is described below.
Note that CommView can operate in an offline mode that does not require connection to a
scope. In this mode, the application can load saved CommView system files or read in saved
scope data files. Note that operating in offline mode does not require that TekVisa be
installed.
2.1 Installation Via CD ROM
If you received an application CD ROM, all the components you need should be on it.
1. Run the Setup.exe provided on the host computer, which by default installs the
application in the directory: C:\Program Files\TMPC\CommView. In addition, if
.NET 3.5 or its precursors are not present, they will be installed as well.
2. Check if TekVisa 3.3 (or greater) is installed on the host computer:
• Click on Start->Settings->Control Panel
• Click on Add or Remove Programs
• Scroll to see if “OpenChoice TekVISA” is installed
• Click on “Click here for support information” to see the version
• Verify that it is version 3.3 or above
3. If not, run the TekVisa installation program provided on the CD ROM :
TekVISA_3.3.2.7_2009.01.29.17.07.38_14810_EN.exe
4. If TekVisa version 3.3 (or greater) is not already installed on the scope, run the
TekVisa installation program provided on the CD ROM:
TekVISA_3.3.2.7_2009.01.29.17.07.38_14810_EN.exe
2.2 Installation Via Website
If you downloaded the CommView installation program from the Moving Pixel Company
website, you may need to download .NET 3.5 from Microsoft and TekVisa from Tektronix.
1. Check if .NET 3.5 is installed on the host computer:
• Click on Start->Settings->Control Panel
• Click on Add or Remove Programs
• Scroll to see if “Microsoft .NET Framework 3.5” is installed
- Page 1 -
The Moving Pixel Company CommView User’s Manual – Doc. Rev. 1.06 -- 4/6/10
2. If not, download and install .NET 3.5 from the Microsoft website:
http://download.microsoft.com/download/6/0/f/60fc5854-3cb8-4892-b6dbbd4f42510f28/dotnetfx35.exe Please note that it is over 200 MB!
3. Check if TekVisa 3.3 is installed on the host computer:
• Click on Start->Settings->Control Panel
• Click on Add or Remove Programs
• Scroll to see if “OpenChoice TekVISA” is installed
• Click on “Click here for support information” to see the version
• Verify that it is version 3.3 or above
4. If not, download and install TekVisa 3.3 from the Tektronix website:
http://www2.tek.com/cmswpt/swdownload.lotr?ct=SW&cs=sut&ci=15592&lc=EN
5. Check if TekVisa 3.3 is installed on the scope (if different from host computer).
6. If not, install it on the scope
2.3 Enabling the VXI-11 Server
Next, to enable remote computers to access the scope via TekVisa, you must enable the VXI11 server on the scope. When TekVisa is installed, an application called the “TekVisa LAN
Server” is installed and accessed via an icon in the system tray (far right of the task bar).
After installation, the server will be initially disabled and its icon will be overlaid with a red
‘X’. If you right click on the icon, you can enable the VXI-11 server by selecting the
appropriate option in the pop-up menu. Note if the VXI-11 server icon is not present in the
system tray, you can manually start it via “Start->Programs->TekVISA->VXI-11 Server
Control”.
Generally, you will want to start the VSI-11 server automatically at powerup. To do this,
you can right-click on the TekVisa LAN Server icon, select “Server Properties…” and check
“Start server at system powerup”.
2.4 Licensing and License Keys
CommView requires a licensing dongle to be plugged into the USB port of the scope for
general operation. Without the dongle present, CommView will not connect to a scope or
process saved scope data files. However, for the purposes of demonstration, it can load and
view saved system files even without proper licensing.
- Page 2 -
The Moving Pixel Company CommView User’s Manual – Doc. Rev. 1.06 -- 4/6/10
3 Operation
3.1 Overview
Structurally, the CommView application consists of a main window with menu and status
bars, a data cache, and zero of more Listing windows. Most often, the application runs with
only one Listing window, zoomed so that it fills the entire application window and appears
integrated into a single frame. When CommView is first started, a Listing window is created
in zoomed mode. The data cache is naturally empty, so the Listing window appears as a
blank grid, except for its column headers.
Since each Listing window has its own set of controls, each independently supports viewing
the data cache as customized by the user. This allows, for example, one window to display
the records resulting from a filtered search while another could be used to examine the record
context around a particular search record.
To open a new listing window, use the “New Disassembly Listing” menu option in the
Windows menu. Each Listing window has controls to minimize, zoom, or close it and each
can be resized as desired. In addition, you can use the Windows menu to bring any individual
Listing window to the foreground.
Early on in your session, you will want to set the communications standard to be used for
disassembly. This is selected via the Standard menu. Natuarally, each standard has its own
requirements for data acquisition, decoding, and disassembly. Unique details pertaining to
the disassembly of each standard are described in their own section under the Listing Window
section.
3.2 Data Acquisition
Data is acquired for viewing in one of two ways: either by real-time acquisition from a Tek
scope or through saved WFM file(s) from a scope. When real-time acquisition is selected
(through the Acquire New Data From Scope option in the Control menu), the scope must first
have been set up properly to acquire the digital waveform(s).
3.2.1 Scope Setup
Currently, CommView does not modify any of the scope settings during acquisition and
assumes that the user has properly set the sampling frequency, scale, trigger, etc. For digital
signal acquisition, set the horizontal scale to include sufficient data of interest then set the
resolution such that the sampling rate is at least 3x the source signal bit rate. A greater ratio
improves edge position detection and makes bit determination a little easier, but is not
required.
For best signal-to-noise gain, the scale of each scope channel should be set so the acquired
signal occupies at least half of the display. Generally, the waveforms of all relevant channels
- Page 3 -
The Moving Pixel Company CommView User’s Manual – Doc. Rev. 1.06 -- 4/6/10
should be centered vertically in the screen (overlapping each other), but this is not absolutely
required.
3.2.2 Scope Configuration Options
CommView supports a few options specific to scope acquisition accessible via the Control
menu, described below:
Figure 1 – Scope Configuration Dialog
Scope Channel to Comm Lane Mapping – The Scope Configuration dialog (accessible via
“Configure Scope Options…”) allows the user to map each scope channel to lanes in the
communications standard. Figure 1 shows the dialog for DigRF, though the exact text labels
in the dialog may change for different standards. Also, note the number of required scope
channels is specific to the selected standard. For example, the XAUI standard requires four
channels but the number of channels used for DigRF can vary between 1 and 4. . By defa ult,
scope channel 1 maps to comm. lane 0, scope channel 2 maps to comm. lane 1, etc.
Scope Trigger Timeout – This option in the Scope Configuration dialog (“Configure
Scope Options…”) sets the maximum period of time to wait for the scope to trigger before
aborting acquisition. Options range from “1 second” to “Infinite”.
Retrigger Scope On Acquisition – This option in the Control menu requests that
CommView run the scope when a new data acquisition is requested. Otherwise, data will be
retrieved from the scope that has already triggered or CommView will wait for the scope to
trigger (subject to the user timeout limit).
Abort Acquisition – The option is enabled only when acquisition is in progress and the
trigger has not occurred yet. Selecting this option aborts the current acquisition in progress.
- Page 4 -
The Moving Pixel Company CommView User’s Manual – Doc. Rev. 1.06 -- 4/6/10
3.2.3 Real-Time Acquisition
To acquire data from the scope in real-time, CommView must connect to the scope using
TekVisa. Before continuing, make sure of the following:
1. The scope has TekVisa installed and the VXI-11 server is running
2. The host computer, if different from the scope, has TekVisa installed (in this case, no
VXI-11 server needs to be running on the host computer)
3. To verify, bring up the Instrument Manager on the host computer (click on the Visa
icon in the system tray in the bottom right of the taskbar and select Instrument
Manager in the context menu) and click the Update button. If Visa is working
properly, the instrument should appear in the list.
Figure 2 – Scope Connection Dialog
To connect to the scope in CommView, select the “Connect To Scope…” option in the
Control menu. A connection dialog (see Figure 2) will appear with visible instruments in the
drop-down box provided. Select the scope to connect to and click the Connect button (if
necessary, click the Scan button to query TekVisa for new instruments). If connection is
successful, the dialog will close and the scope name will appear in the center pane of the
status bar (when disconnected from a scope, the pane will read as “Offline”).
Note that on startup, CommView will attempt to reconnect to the scope from the previous
session. To disable this functionality, disconnect from the scope before exiting (“Disconnect
From Scope” option in the Control menu).
Next, you may want to set up the scope configuration options described in the previous
section. Specifically, make sure the scope channel to comm. lane mappings are correct, the
trigger timeout is set as desired, and whether you want CommView to re-trigger the scope
every time you request a new acquisition.
Finally, you may need to tell CommView the source bit rate or reference clock frequency to
assume in decoding acquired signals from the scope. If the standard you are using has a
single default bit rate, the bit rate parameter may already be set properly. If not, select the
“Set Bit Rate” option to bring up a data entry dialog to set it. On the other hand, if the
- Page 5 -
The Moving Pixel Company CommView User’s Manual – Doc. Rev. 1.06 -- 4/6/10
standard you are using requires a reference clock frequenc y, select the “Set Ref Clk” option
to bring up a data entry dialog to set it.
Now you are ready to trigger the scope and acquire data. Select “Acquire New Data From
Scope” in the Control menu. Progress messages will be displayed on the status line while the
scope is triggered and data is acquired, processed, and displayed. During this time, most
controls and menus are disabled, with the exception of the Abort Acquisition menu option in
the Control menu. Select this option while waiting for the scope to trigger if you want to
abort acquisition.
3.2.4 File Acquisition
To save WFM files on the scope that can be read in and processed later by CommView, on
the scope , select the Refs menu option, and depending on how many channels you need for
the current standard, click on one of the Save buttons, either “Save Wfm To File” or “Save
All Wfms To Files”. 1 This will bring up a save dialog to enter a base filename. If saving all
waveforms at once, the scope will save each acquired waveform to a file and append
“Ch<x>.wfm” to the filename where <x> is the channel (1-4).
As with real-time acquisition, you may need to tell CommView the source bit rate or
reference clock frequency to use in decoding acquired signals from the scope. If the standard
you are using has a single default bit rate, the bit rate parameter may already be set properly.
If not, select the “Set Bit Rate” option to bring up a data entry dialog to set it. On the other
hand, if the standard you are using requires a reference clock frequency, select the “Set Ref
Clk” option to bring up a data entry dialog to set it.
To process a wfm file (or a set of wfm files), select the “Acquire Data From File…” option
from the Control menu. This will bring up an open file dialog for you to browse and select a
wfm file to process. Select the file and click the Open button. If processing a set of wfm
files, you may select any one of the set.
3.2.5 Data Processing
Once either of the two acquisition commands have been selected, data is acquired and
processed. The first step of processing is to determine how to sample each channel of the
waveform to obtain bits. The basic input parameters to this step are the sample rate of the
scope (obtained either directly from the scope or from the input file) and the source bit rate
set by the user.
Processing begins at the first qualified edge 2 detected in the waveform (not the trigger
position) and from there extracts bits at the given bit frequency. The algorithm is adaptive in
that subsequent edges do resynchronize samp ling phase so an imprecise bit rate setting is
allowed for.
1
2
In the case of XAUI, use “Save All Wfms To Files” to obtain four files.
i.e. an edge not determined to be a glitch
- Page 6 -
The Moving Pixel Company CommView User’s Manual – Doc. Rev. 1.06 -- 4/6/10
Once bits are obtained for each channel, they are parsed and combined into symbols and
packets according to the current standard. Please see the relevant section describing each
standard for mo re details.
3.3 Listing Window Functionality
The Listing window is the heart of the CommView application, disassembling acquired data
based on the current standard and providing functions for viewing, searching, and filtering
records at different protocol levels. This section describes Listing window features,
beginning with sections describing general-purpose functionality and concluding with
sections specific to each supported standard.
Figure 3 – Disassembly Listing
The Listing window (see Figure 3) contains three main controls:
- Page 7 -
The Moving Pixel Company CommView User’s Manual – Doc. Rev. 1.06 -- 4/6/10
•
•
•
Listing Grid – grid control for viewing data records
Cursor Panel – custom control for manipulating cursors and navigating the listing
grid
Tab Control – container control with several tabs and controls for filtering,
searching, setting view options, etc.
The next three sections describe the function and behavior of each control.
3.3.1 Listing Grid
The listing grid displays records according to the current view, arranged in order from earliest
in time at the top to latest in time at the bottom. Generally, only a subset of records can be
viewed at one time. Thus, a vertical scroll bar allows the user to choose the starting record in
the grid, referenced by its Sample number field, which starts at 1 and increments by one for
each record in the data cache.
3.3.1.1 Records
Records represent acquired or derived data from a particular point in time in the waveform
trace and are time-stamped accordingly. For simple standards, the time-stamp spacing
between records is often simply the bit-period of the acquired data. More complicated
standards may have variable bit rates and reported event types other than acquired bits and so
the time-stamps are not uniform.
Records may or may not be visible in the grid as the result of automatic filtering based on
view selection or user filtering based on custom criteria entered and applied in the Filter tab
controls. Thus, frequently, the sample numbers of records displayed in the Listing window
are not contiguous, reflecting hidden records in between them.
3.3.1.2 Views
Depending on the selected standard (Standard menu), different disassembly views are defined
(selected via the view combo box on the Filter tab). Views often correspond to different
layers in the protocol stack (e.g. physical, link, transport, etc.) and define the set of record
types displayed, which in turn define the set of fields that are applicable.
When a view is selected, the listing is updated to display records applicable to the new view.
When moving to higher- level views, the number of visible records generally decreases as
multiple lower- level records are consolidated or hidden. These higher- level records retain the
sample number and time-stamp of the first contributing lower- level record.
For example, a low-level bit-serial view of an acquisition will have records consisting of a
single bit and the sample number of each record will increment by one. A higher- level view
might show records associated with bytes from the acquired data stream. Successive records
in this view will have sample numbers incrementing by 8 and there will be one eighth as
many.
3.3.1.3 Fields
All records have fields. Some fields represent meta- information about the record itself such
as its sample number or timestamp, some fields convey direct information about the data
- Page 8 -
The Moving Pixel Company CommView User’s Manual – Doc. Rev. 1.06 -- 4/6/10
captured, and some fields contain derived information about the record, possibly including
data context and information from other records.
The mnemonic field is a string field describing a record’s type, which is dependent on the
current view selected. For standards with more than one lane, a mnemonic field is generally
defined for each lane, and thus a record may have multiple mnemonics associated with it.
3.3.1.4 Setting the Field Radix
Most fields are numeric and have an underlying value associated with it. Numeric fields can
be displayed as binary, decimal, or hexadecimal by right-clicking the radix context menu of a
particular column sub-header (second row in grid). 3 In addition, numeric fields can be
associated with a user-defined symbol file, in which case this option will also be available in
the radix context menu. Similarly, if a standard defines a default symbolic association with
the field, it too will be available in the menu.
3.3.1.5 Setting the Time Field Reference
The time field is present in all records and all standards, associating the record with a specific
timestamp. CommView supports viewing timestamps relative to a global time reference
selected by the user via the radix context menu associated with the time field. Records
occurring before the global time reference have a negative time field and records occurring
afterwards have a positive time field.
Choices of reference include the first record in the trace (“Relative to Start”), the trigger
record (“Relative to Trigger”), or one of the cursor record positions (“Relative to Cursor1” or
“Relative to Cursor2”). In addition, the option “Relative to Previous” sets the time field
reference for each record to the previous record, causing the time field to display delta time
between successive displayed records.
3.3.1.6 Defining and Using a Symbol File
To associate a radix file to a numeric field, select the “<New Symbolic File>” option in the
radix context menu. This brings up an open file dialog to browse for and select the new
symbol file. Once the symbol file has been selected, the context menu will enable the
“Symbolic (File)” option (and it will be checked).
Symbol files are text files containing numeric-to-string mappings, where each mapping
consists of a boolean predicate equation and a string. During disassembly, the equation from
each mapping is evaluated in order for each field value and the string from the first mapping
whose equation evaluates true is displayed.
Predicate equations can consist of one or more terms, which occupy an equivalent number of
lines in the symbol file. The first N-1 lines of a mapping define the first N-1 predicate terms,
each followed by “AND” or “OR”. The last line of a mapping defines the last predicate term,
followed by a colon, and then the mapping string enclosed in quotes.
Each predicate term consists of a relational operator and a value. Relational operators are
“>”, “<”, “>=”, “<=”, “==”, and “!=”. Values are interpreted as decimal unless an ‘h’ or a ‘b’
3
This menu is called the radix context menu
- Page 9 -
The Moving Pixel Company CommView User’s Manual – Doc. Rev. 1.06 -- 4/6/10
is appended to denote hexadecimal or binary respectively. In addition, for hex or binary
values, the character ‘x’ may be used as a “don’t care” digit (if the first character is an ‘x’ it
represents don’t care digits up to the width of the field)
For example, the following lines define a predicate equation to detect values between 0x10
and 0x40 or if a value is odd:
// predicate equation
> 10h AND
< 40h OR
== x1b : “Range between (10h, 40h) or odd”
For values in the disassembly where this equation evaluates true, the string “Range between
(10h, 40h) or odd” will be displayed.
Some notes about symbol file usage:
• Note that blank lines and lines that begin with “//” (which can be used for comments)
are ignored by the parser.
• Predicate terms are interpreted as a sum-of-products equation and so AND has higher
precedence than OR. Thus, predicates that describe the equation “a AND b OR c
AND d” is parsed “(a AND b) OR (c AND d)”.
• White space is required between the relational operator, the value, the “AND”, “OR”
and “:” delimiters, and the string.
• Mappings are evaluated in order, so subsequent predicate equations do not need to
exclude values that would have already satisfied prior mappings.
• If not mapping qualifies for a value, a string with “?” is displayed. To avoid this, a
default mapping can be appended to the end of the symbol file with the catch-all
predicate “>= 0”.
3.3.1.7 Common Fields
While most fields are defined according to the selected standard, a few important ones are
common to all standards.
Sample – The sample field represents a record’s ordinal number in the listing, starting at one
and incrementing with each record. It is displayed as an immovable, row- header, left- most
column that cannot be deleted. Please note that samples correspond to “events of interest” in
the disassembly trace and may not necessarily have a fixed period between them. Nor do
they necessarily have a one-to-one correspondence to all acquired scope samples. For
example, processing may aggregate multiple scope samples to one record sample number to
represent a bit in a communication packet.
Time – The time field represents a record’s time-stamp, which is often (but not always for
some standards) directly related to the record sample field number (based on the bit rate of
data in the acquired data). By default, it is displayed with a radix of Symbolic (Default),
which displays the time stamp as a string, e.g. “1.300 ns”, but alternatively it may be
displayed as a numeric value (hex or decimal), which converts time to an integer number of
- Page 10 -
The Moving Pixel Company CommView User’s Manual – Doc. Rev. 1.06 -- 4/6/10
picoseconds. This allows the time field to be used in search and filter criteria, for example, in
restricting record display or search to a limited time range.
Mnem<n> – The mnemonic field is a symbolic-only field that conveys record type. Records
with multiple, independent lanes may have multiple mnemonic fields, one for each lane. The
mnemonic string displayed in this field is specific to the selected standard. All standards,
however, support customizing how the mnemonic is displayed, in particular whether the
mnemonic should be displayed with multiple lines which include other fields of the record.
The user can configure this behavior using the “Config Mne m…” button on the View tab of
the tab control. Using this feature is simply another way to view fields in a record, using the
mnemonic to display the field rather than using a separate column in the listing.
3.3.1.8 Columns
Columns in the listing grid have a one-to-one correspondence to fields in records. Columns
may be added (i.e. the field made visible) or deleted (made invisible) by right-clicking the
context menu of any column header. 4 Some fields are only specific to a subset of record
types. Dashes are displayed in a field if it is not applicable to a particular record.
3.3.1.9 Row and Column Manipulation
3.3.1.9.1 Row Selection
Single rows can be selected by right-clicking on the row header (i.e. the Sample field of a
record). A contiguous region of rows can be selected by first selecting a row then selecting a
second (later) row while holding the shift key down. Once selected, rows can by copied to
the clipboard with Ctrl-C or the “Copy Selected Rows” menu option in the Edit menu.
3.3.1.9.2 Column Selection
Similarly, single columns can be selected by right-clicking on the column header (i.e. the
field name of a column). A contiguous region of columns can be selected by first selecting a
column then selecting a second column while holding the shift key down. In addition, a
discontinuous set of columns can be selected by clicking while holding the control key down.
When a set of columns is selected, certain options in the column context menu will apply to
each column, e.g. “Delete Columns”, “Restore Select Column Width(s)”
3.3.1.9.3 Column Widths
Column widths are automatically set to accommodate the widest string or value to be
displayed and are updated whenever the field radix is changed. However, the user may adjust
column width by selecting the right edge of a column header and dragging it. A column’s
width may be restored to its default using the column context menu option “Restore Selected
Column Width(s)” or simply double-clicking on the column header.
3.3.1.9.4 Reordering Columns
To change the display order of a visible column, simply right-click and drag the column
header to a new position.
4
This menu is called the column context menu and also appears when right-clicking in a grid cell. While mostly
similar to when brought up via a column header, certain different menu options are enabled in each case.
- Page 11 -
The Moving Pixel Company CommView User’s Manual – Doc. Rev. 1.06 -- 4/6/10
3.3.1.9.5 Adding Columns
To add one or more columns to the current display (i.e. make new fields visible), right-click
on the column header to bring up the column context menu and select “Add Column(s)…”.
This will bring up a dialog that lists fields that are currently not visible in the listing grid.
A drop-down box is available to select field categories (if any are defined for the current
standard -- the category of “All” is always available). Check boxes to the right allow multilink standards to restrict the field list to those relevant only to the checked links. Click the
“Clear All” or “Set All” buttons to clear or set the checks beside all listed fields respectively.
Click OK to close the dialog and add checked fields to the listing grid or Cancel to close the
dialog without any changes.
3.3.1.9.6 Deleting Columns
To delete columns from the current display (i.e. make fields invisible), first select one or
more columns and then either right-click in one of the selected column header to bring up the
context menu and select “Delete Column(s)” or simply press the delete key. If multiple
columns are to be deleted, the user is asked for confirmation.
3.3.1.10 Trigger and Cursors
A trigger and two cursors can be displayed in the listing grid, changing the background
shading of a particular record. The trigger is only available in some standard
implementations, specifically those that want to indicate where the trigger occurred in the
disassembly. When enabled, it is a static fixed position that cannot be changed, but can be
used as a reference for time measurement and Goto operations.
Cursors are enabled by checking the associated checkbox in the cursor panel to the right of
the listing grid and can also be controlled from the cursor panel control (see Cursor Panel
section for more details). The current cursor positions and the delta time between them are
displayed above the listing grid, using the current global time reference set in the time field
radix context menu.
Cursor related functions are also available in the column context menu available by rightclicking in any grid cell (except the radix sub-header row). In particular, the user can select
“Goto Cursor1” or “Goto Cursor2” to scroll the listing grid to the record location of the
indicated cursor. Also, if the context menu is brought up from a non-header cell, the “Move
Cursor1 Here” and “Move Cursor2 Here” options are available which perform as described.
3.3.1.11 Column Context Menu Summary
The column context menu is brought up by right-clicking in any cell except for the subheader row (second row) of the listing grid. Depending on the cell location clicked to bring
up the menu, certain options will be enabled or disabled. Many of the functions of this menu
have been described in previous sections. Here is a summary of all the functions in the
column context menu:
•
•
•
Add Column(s)… – brings up dialog to add columns (i.e. make fields visible) to the
listing grid.
Delete Column(s) – deletes selected columns.
Goto Cursor1 – scrolls the listing grid to the record location of cursor 1.
- Page 12 -
The Moving Pixel Company CommView User’s Manual – Doc. Rev. 1.06 -- 4/6/10
•
•
•
•
•
•
•
•
Goto Cursor2 – scrolls the listing grid to the record location of cursor 2.
Goto Trigger – scrolls the listing grid to the record location of cursor 2.
Goto… – brings up dialog to enter a sample number to scroll the listing grid to.
Move Cursor1 Here – moves cursor1 to the current record
Move Cursor2 Here – moves cursor2 to the current record
Restore Selected Column Width(s) – restores selected columns to their default width
Modify Filter From Current Cell – contains a sub-menu with options described
below. This option is only enabled when the filter tab is active in the tab control.
o Quick Show – defines a simple filter that shows records that match the field
and value criteria from the selected cell, and applies it. The behavior is
equivalent to entering the filter criteria manually, clicking the “Set All” button
to select all packet types, and clicking the “Show” option button.
o Quick Show (Any Lane) – defines a filter that shows records that match the
field and value criteria from the selected cell in any lane. The behavior is
equivalent to entering the filter criteria manually as an OR equation for each
lane, clicking the “Set All” button to select all packet types, and clicking the
“Show” option button.
o Disable Filter and Scroll – disables the currently applied filter and centers the
current cell row in the display. The behavior is equivalent to clicking the
“Disable” option button and scrolling the grid to center the desired cell to the
center of the display.
o Replace Filter Term – copies the current cell field and value to the active row
of the filter grid. The Comp field is set to “==”.
o Add OR Filter Term – adds a new OR term to the active row of the filter grid
and copies the current cell field and value into the new term. The Comp field
is set to “==”.
o Add AND Filter Term – adds a new AND term to the active row of the filter
grid and copies the current cell field and value into the new term. The Comp
field is set to “==”.
Fill Search From Current Cell – contains a sub- menu with options described below.
This option is only enabled when the search tab is active in the tab control
o Quick Search – defines a simple search equation that shows records that
match the field and value criteria from the selected cell, and applies it. The
behavior is equivalent to entering the search criteria manually, clicking the
“Set All” button to select all packet types, and clicking the “Show” option
button.
o Quick Search (Any Lane) – defines a search equation that shows records that
match the field and value criteria from the selected cell in any lane. The
behavior is equivalent to entering the search criteria manually as an OR
equation for each lane, clicking the “Set All” button to select all packet types,
and clicking the “Show” option button.
o Replace Search Term – copies the current cell field and value to the active
row of the search grid. The Comp field is set to “==”.
o Add OR Search Term – adds a new OR term to the active row of the search
grid and copies the current cell field and value into the new term. The Comp
field is set to “==”.
- Page 13 -
The Moving Pixel Company CommView User’s Manual – Doc. Rev. 1.06 -- 4/6/10
o Add AND Search Term – adds a new AND term to the active row of the
search grid and copies the current cell field and value into the new term. The
Comp field is set to “==”.
3.3.1.12 Radix Context Menu Summary
The radix context menu is brought up by right-clicking in the sub- header row (second row) of
the listing grid and is used to set the display format of the current column. Most of the
functions in the menu have been described in previous sections. Here is a summary of all the
functions in the radix context menu (except for the context menu for the Time field):
•
•
•
•
•
•
Hexadecimal – sets the radix to hexadecimal (enabled for numeric fields)
Decimal – sets the radix to decimal (enabled for numeric fields)
Binary – sets the radix to binary (enabled for numeric fields)
Symbolic (Default) – sets the radix to symbolic using the default translation internal
to the application.
Symbolic (File) – sets the radix to symbolic using the translation defined by the
symbolic file specified by the user using the “<New Symbolic File>” menu option.
<New Symbolic File> – brings up an open file dialog to select a symbol file to
associate with the current column.
In addition, the time field radix context menu has several more options to set the desired time
field reference, which determines how the time field is displayed. One of these options is
always checked:
•
•
•
•
•
Relative to Start – sets the global time field reference to the first acquired record
Relative to Previous – sets the time field reference for each record to the previous
displayed record (i.e. displays delta time between records)
Relative to Trigger – sets the global time field reference to the trigger record
Relative to Cursor1 – sets the global time field reference to the cursor1 record
Relative to Cursor2 – sets the global time field reference to the cursor2 record
3.3.2 Cursor Panel
The cursor panel is a custom control with three narrow columns on the right side of the listing
grid. Each narrow column is similar to a vertical scroll bar, each associated with either a
cursor or the trigger (for the purposes of this description, the trigger can be thought of as a
special immovable cursor). Cursors represent a specific record position in the listing, similar
to a scroll bar, where the top of the panel represents the start of the listing and the bottom of
the panel represents the end of the listing.
The first column in the cursor panel represents the trigger and, if enabled, is drawn as a red
square labeled with a ‘T’. The trigger cursor is automatically enabled if supported by the
current standard. The second and third columns represent cursor1 and cursor2 respectively
and, if enabled, are drawn as a blue square labeled with a ‘1’ or a blue square labeled with a
‘2’. A check box above each cursor column can be used to enable or disable each cursor.
Disable cursors are drawn with a gray background.
- Page 14 -
The Moving Pixel Company CommView User’s Manual – Doc. Rev. 1.06 -- 4/6/10
Like a scroll-bar, the cursor panel is meant to represent the entire vertical span of the listing
windows. Cursor positions within the panel symbolically indicate where each lies within the
listing, i.e. a cursor toward the top of the panel indicates a record position near the start of the
listing and a cursor toward the bottom of the panel indicates a record position near the end of
the listing. The times associated with cursor1 and cursor2 positions and the difference
between them are displayed in readouts above the listing grid.
In addition to the cursor symbols, a horizontal white region is drawn across the cursor panel.
This region represents the currently viewed region of the listing, having a position and
thickness corresponding to the current viewed region relative to the total listing.
The cursor panel supports the following operations for setting cursor positions and scrolling
the listing:
•
•
•
•
•
Left-clicking and dragging a cursor square moves the cursor position. While
dragging, the current cursor position (Sample #) is displayed in a pop-up box.
If the Shift key is pressed and held while dragging, the listing will scroll with the
cursor position, otherwise the listing will not scroll.
If the Control key is pressed and held while dragging, the cursor will scroll more
slowly, allowing for better control.
Double clicking a cursor in the panel scrolls the listing window to the cursor position.
Double-clicking in the cursor panel (not on a cursor) scrolls the listing window to the
position clicked.
3.3.3 Tab Control
The tab control in the lower part of the listing window contains four tabs: Filter, Search,
Options, and <Minimize>. The functions supported in each tab are described in this section.
3.3.3.1 Filter Tab
The filter tab contains controls to filter records displayed in the listing based on user criteria.
In particular, most controls in this tab help to define or apply a filter equation tha t is evaluated
for each record and determines whether or not the record is displayed.
Note that some controls such as the Filter, Show, and Disable radio buttons and the View
combo box update the disassembly listing as soon as they are used. On the other hand,
changes in the Mnemonic Type list box and the Filter Term grid do not take effect until the
Apply button is clicked.
Here is a description of the controls contained in the filter tab:
•
•
View Combo Box – selects the current disassembly view. Disassembly views are
unique to each standard and generally correspond to layers in the protocol stack. See
documentation about each standard for more information about the views it supports.
Mnemonic Type List Box – contains a list of all mnemonic types defined for the
current view. The list box is used to define criteria for the overall filter equation that
- Page 15 -
The Moving Pixel Company CommView User’s Manual – Doc. Rev. 1.06 -- 4/6/10
•
•
•
•
•
•
•
•
consists of the OR of all selected types. See the discussion later in this section for
more details.
Filter Term Grid – allows the user to compose terms of the filter equation. See the
discussion later in this section for more details.
Set All Button – checks all mnemonic types in the list box.
Clear All Button – clears all selected mnemonic types in the list box.
Filter Radio Button – enables record filtering and uses the filter equation to
determine which records should not be displayed (i.e. if the filter equation evaluates
true for a record, it is not displayed).
Show Radio Button – enables record filtering and uses the filter equation to
determine which records should be displayed (i.e. if the filter equation evaluates true
for a record, it is displayed).
Disable Radio Button – disables record filtering.
Default Button – requests confirmation from the user and clears the list box and filter
term grid.
Apply Button – Applies changes to the listbox and/or filter term grid, updating the
disassembly listing.
The Mnemonic Type list box and the Filter Term grid together define the overall filter
equation. The list box defines a set of mnemonic types that qualify records for further
evaluation by the filter terms. That is, records that satisfy the filter equation must have at
least one lane with a mnemonic type than is checked in the list box. So, for example, at the
extremes, if no types are checked, the filter equation will evaluate false for all records. And if
all types are checked, the filter equation for each record will evaluate solely to the result from
the Filter Term grid.
The Filter Term grid defines zero or more boolean terms (one per row) which compare a
record field to a constant value. Terms are logically connected via AND or OR operations to
build a Sum-Of-Products equation used in the overall filter equation. The AND operation
takes precedence over the OR operation so A AND B OR C AND D is evaluated as (A AND
B) OR (C AND D).
The grid defines four columns as follows:
•
•
•
•
Op – defines how the term is logically connected to its predecessor, either via AND or
OR (the first term, which has no predecessor is fixed to show IF). In addition to
showing the logical operation associated with the term, this field is a combo box that
provides options for adding or deleting terms. For AND terms, two options are
available: add another AND term to the product or delete the current AND term. For
IF or OR terms, two additional options are available: add another OR term to the
equation or delete the current OR term (which includes all AND terms of the product).
Field – combo box to select a record field name
Comp – combo box to select a comparison operator (==, !=, <, <=, >, >=)
Value – text box to enter a comparison value
- Page 16 -
The Moving Pixel Company CommView User’s Manual – Doc. Rev. 1.06 -- 4/6/10
To define a filter equation, begin with filling in the Field, Comp, and Value fields of the first
term in the Filter Term grid. Next, select the Op drop-down and select “<Insert OR term>” or
“<Insert AND term>” to add a new term to the equation. Fill in the fields of that term and
continue inserting terms until the equation is fully defined.
Numeric field values are assumed to be in decimal unless appended with an ‘h’ for a
hexadecimal value or a ‘b’ for a binary value. When using hex or binary values, an ‘x’ may
be used as a “don’t care” placeholder. Thus, the value “1xh” will match values from 10h to
1fh.
Symbolic field comparison symbolic is supported, but the user should understand that values
are compared using string-comparison and so results may not be as intended. For example, if
the user constrains the filter equation to select a time range when the Time field is set to
symbolic, he might set up the following equation:
IF Time > 100 us AND Time < 200 us
However, the result of the string comparisons against Time values such as “120.888 ns” and
“190.666666666 ms” will not be as desired. In general, the “==” and “!=” comparison
operations are most predicatble, though be aware that comparisons are case-sensitive. Using
the context menu “Modify Filter From Current Cell” sub-menu is very helpful in copying
exact string values from the grid into search and filter predicates.
- Page 17 -
The Moving Pixel Company CommView User’s Manual – Doc. Rev. 1.06 -- 4/6/10
Figure 4 – Listing with filtered records
Note that changing the radix of a field from numeric to symbolic or symbolic to numeric after
defining filter or search terms can affect the term’s validity. Comparisons are performed on
field values in the radix they are displayed (not the radix at the time the predicates were
built). An error will occur if filtering or searching using a non-numeric predicate value on a
field that is currently being displayed as a numeric value (though hex, decimal, and binary
conversions are automatic).
Figure 4 shows an example XAUI listing with filtered records. The mnemonic types checked
in the listbox are “Sync” and “Pkt Byte”. Given that the “Show” radio button is checked,
only records containing at least one lane with one of these two types will be displayed. In
addition, the Filter Term grid contains one term (Data0 == “xch”). This further filters the
listing to show only records whose Data0 field ends in hexadecimal “c” (‘x’ represents don’t
care). Finally, since the “Disable skipped-lines highlight” option is unchecked (Options tab,
- Page 18 -
The Moving Pixel Company CommView User’s Manual – Doc. Rev. 1.06 -- 4/6/10
not shown), thick horizontal highlights are present to indicate one or more filtered records in
between visible records.
3.3.3.2 Search Tab
The search tab contains controls for searching and possibly highlighting records that satisfy
given criteria. Statistics about filtered and matched search records are also displayed. Here is
a description of the controls contained in the filter tab:
•
•
•
•
•
•
•
•
•
•
Highlight Selected Checkbox – when checked, records satisfying the search criteria
are highlighted in the listing.
Search Cnt Readout – displays the number of records and percentage of all acquired
records that satisfy the search criteria
Visible Cnt Readout – displays the number of records and percentage of all acquired
records) that are currently visible in the listing.
Hidden Cnt Readout – displays the number of records and percentage of all acquired
records that are currently hidden from view in the listing.
Total Cnt Readout– displays the number of acquired records.
Search Term Grid – allows the user to compose terms of the search equation. See
the description about the Filter Term grid in the previous section for more details.
Next Button– scrolls the listing to the next record matching the search criteria
Prev Button – scrolls the listing to the previous record matching the search criteria
Default Button – requests confirmation from the user and clears the list box and filter
term grid.
Apply Button – Applies changes to the search term grid, updating the disassembly
listing and readouts.
Figure 5 shows a listing window for XAUI with search highlights enabled. Basically, search
criteria are entered in to the search term grid identically to the filter term grid. A search
equation is built from terms defined and applied to each record in the listing when the Apply
button is clicked. If the Highlight Selected checkbox is checked, records that satisfy the
search equation are highlighted in the listing (note that the search equation is only evaluated
against unfiltered records). The Next and Prev buttons can be used to scroll the listing to the
next and previous qualifying records respectively.
- Page 19 -
The Moving Pixel Company CommView User’s Manual – Doc. Rev. 1.06 -- 4/6/10
Figure 5 – Listing with search highlights
3.3.3.3 Options Tab
Use the Options tab to set display, disassembly, and configuration options for CommView.
Some of these options are standard specific and are described more in the appropriate section
describing the standard. Common options are described here.
•
•
•
•
Disable skipped-lines highlight checkbox – By default, CommView displays
thicker, darker lines between records in the listing that have one or more filtered
records between them. When this option is checked, these lines are removed.
Append packet byte value to mnemonic – when checked, displays the hexadecimal
value of the packet or payload byte as part of the mnemonic.
Font Size Spin Control – adjusts the listing font size.
Config Mnem… Button – brings up the Mnem Config dialog to configure additional
fields that should be displayed in the mnemonic field.
- Page 20 -
The Moving Pixel Company CommView User’s Manual – Doc. Rev. 1.06 -- 4/6/10
3.3.3.3.1 Mnem Config Dialog
This dialog allows the user to select fields to display in the mnemonic field as additional
lines. This is often useful for viewing critical fields in consolidated views, where there is not
enough horizontal screen space to view all relevant fields at once. Figure 6 shows the
mnemonic configuration dialog for XAUI.
Figure 6 – Mnemonic Configuration Dialog
The dialog has a RecType drop-down box that contains all record types from all views that
have one or more fields associated with them. Selecting a record type from this control, fills
in a list box showing all the fields associated with the selected record type. For each record
type of interest, simply select it in the RecType drop-down and check fields in the list box
that you want displayed with the record’s mnemonic. Click OK to confirm these new settings
and close the dialog or Cancel to abort.
The first RecType entry is special: “All RecTypes”. Selecting this entry brings up all fields
from all record types in the list box. Checking fields for this entry automatically selects them
for all records where the field is applicable. You will see these fields checked and disabled
while selecting fields for specific record types (e.g. the Code field in Figure 6 is automatically
checked and grayed based on settings for “All Rec Types” ).
Clicking the “Clear All Fields” button clears all fields for the current record type. Similarly,
click “Set All Fields” to set all fields for the current record type. Finally, click the “Reset All
Recs” button to clear all fields for all records.
- Page 21 -
The Moving Pixel Company CommView User’s Manual – Doc. Rev. 1.06 -- 4/6/10
Figure 7 shows a resulting XAUI listing wit h mnemonic fields enabled. The Code field has
been enabled for all record types and the Data field has been enabled for the Pkt Byte record
type.
Figure 7 – Listing with mnemonic fields
3.3.3.4 <Minimize> Tab
When clicked, the <Minimize> tab simply collapses the entire tab control to the bottom of the
listing window, expanding the listing grid to its maximum extent within its child window.
The tab labels are still visible and clicking any other tab will expand the tab control back to
its original (fixed) size. Figure 7 shows the listing window with the tab controls collapsed.
3.4 Shortcuts
CommView has many useful shortcuts that enhance searching and viewing the disassembly
listing. For easy reference, the user can view a list of these shortcuts in the application with
the Shortcut Help window (Figure 8), displayed via the Shortcut Help… option in the Help
- Page 22 -
The Moving Pixel Company CommView User’s Manual – Doc. Rev. 1.06 -- 4/6/10
menu. This window always remains on-top when open and can remain open when using the
main window.
Figure 8 – Shortcut Help Window
Many shortcuts relate to scrolling the disassembly window. As expected, the Up, Down,
Left, and Right arrow keys scroll one line or one column up, down, left, or right respectively,
the PageUp and PageDown keys scroll up and down one page, and the Home and End keys
scroll to the beginning and end of the listing. To center the listing on the row with the current
cell (highlighted in yellow), use the CTL-L shortcut.
Because in some standards some fields in the listing only apply to certain packet types, often
you want to scroll up or down to the next valid field, skipping over the records that aren’t
applicable. To do this, you can use the CTL-Up or CTL-Down key combination. For
- Page 23 -
The Moving Pixel Company CommView User’s Manual – Doc. Rev. 1.06 -- 4/6/10
example, in a DigRF listing, pressing CTL-Down when the current cell is in the CRC field of
a packet will scroll the listing to the CRC of the next packet.
There are shortcuts to scroll a particular position, equivalent to the Goto commands available
in the column context menu. You can scroll to the location of the trigger, cursor1, cursor2, or
a particular sample number with CTL-1, CTL-2, CTL-T, or CTL-G respectively. Conversely,
you can instead move a cursor to the current position with ALT-1 or ALT-2.
Some shortcuts deserve special mention because they are so useful, specifically those that
apply to filtering and searching. Several of the filter and search menu options available in the
filter or search submenu of the column context menu are available via shortcuts. Specifically,
these are the Quick Show, Quick Search, and Disable Filter options. The next section
(section 3.4.1) describes their application in more detail.
Once the search equation has been set (either via the Quick Search option or by manually
filling in the predicate fields in the search tab) you can use CTL-N and CTL-P to scroll to the
next or previous search records.
A couple common shortcuts for interacting with the disassembly grid: CTL-C copies selected
rows to the clipboard and DELETE hides selected columns from view.
Finally, a couple miscellaneous but useful shortcuts from the main menu are: ALT-H to bring
up the on-line help (this manual), and ALT-A to acquire new data from the scope.
3.4.1 Quick Filtering and Searching
Quick navigation to specific information in the disassembly listing using shortcuts is a key
feature of CommView. This section is meant to help you understand how to use the
following shortcuts better:
Filter Shortcuts:
CTL-F
Quick Show
ALT-F
Quick Show (Any Lane)
CTL-D
Disable Filter And Scroll
Search Shortcuts:
CTL-S
Quick Search
ALT-S
Quick Search (Any Lane)
CTL-N
Search Next
CTL-P
Search Previous
First, a couple notes.
§ A key distinction between these keyboard shortcuts and their equivalent context menu
options is that the shortcuts are all applicable regardless of whether the appropriate
filter or search tab is currently selected. That is, the Quick Show keyboard shortcuts
can be used when the Search tab is open and the Quick Search shortcuts can be used
when the Filter tab is open.
- Page 24 -
The Moving Pixel Company CommView User’s Manual – Doc. Rev. 1.06 -- 4/6/10
§
Another difference between the shortcut and the menu option is that the shortcut
applies to the current highlighted cell and the menu option applies to the cell the
context menu is brought up in.
The purpose of the filter shortcuts, CTL-F and ALT-F, is to pare down the number of
displayed records better see relevant information. Often, you simply want to see a list of
records of a specific type or having a field with a certain value. To invoke the shortcut,
simply right-click on a cell that has the characteristic you wish to use as the criterion to filter
on, and press the CTL-F or the ALT-F combination. CommView automatically fills in filter
predicate information and restricts the visibility of records to view only qualifying records.
Figure 9 – Quick Show Example
- Page 25 -
The Moving Pixel Company CommView User’s Manual – Doc. Rev. 1.06 -- 4/6/10
Figure 9 illustrates the result of right-clicking in a cell of a DigRF listing that shows a header
byte in lane 2, and then typing CTL-F. CommView fills in fields in the Filter tab and selects
“Show” to display all records that contain a Hdr1 mnemonic in lane 2. Notice since the Time
field is set to display relative to the previous record, the times reflect the delta time between
occurrences of the Hdr1 field in lane 2.
Figure 10 – Quick Show (Any Lane) Example
However, since the Hdr1 field can occur in either lane, the time field does not necessarily
indicate the time interval between packets. To ensure all Hdr1 fields are displayed, use the
ALT-F shortcut. Figure 10 shows the result of this operation, which builds the filter equation
to include records with the Hdr1 field in either lane 1 OR lane 2.
- Page 26 -
The Moving Pixel Company CommView User’s Manual – Doc. Rev. 1.06 -- 4/6/10
Once you have a condensed listing, you often want to select a record of interest and then view
its context in the unfiltered listing. Essentially, you want to disable the filter equation and
scroll to a particular record. This task is performed by the Disable Filter and Scroll
command. Simply right-click on a field in the record of interest and type the CTL-D shortcut.
Figure 11 – Quick Search Example
Using the Quick Search function is very similar to the Quick Show function. Figure 11
shows the result of clicking in the Data1 field and typing CTL-S.5 If the Highlight Selected
option is checked, then all records that have the same Data1 value are highlighted in the
5
Note: for clear viewing, the window has been made narrow, occluding the Next and Prev search buttons in the
Search tab.
- Page 27 -
The Moving Pixel Company CommView User’s Manual – Doc. Rev. 1.06 -- 4/6/10
listing. Note the Search tab has been made active here for you to see the effects of the
operation, though, in practice, the tab does need not be active to apply the shortcut function.
If you want to see records whose Data field is 0xBC in any lane, use the ALT-S shortcut,
resulting in the listing shown in Figure 12.
Figure 12 – Quick Search (Any Lane) Example
Finally, once the search equation has been defined, the Next and Prev search button shortcuts
(CTL-N and CTL-P respectively) are a convenient way to browse records forward and
backward in the listing. Since search definitions and functions operate independently from
filtering, you can constrain the listing to show only records of interest, then you can apply
search criteria to highlight and scroll to view them.
- Page 28 -
The Moving Pixel Company CommView User’s Manual – Doc. Rev. 1.06 -- 4/6/10
3.5 Menus
This section describes options available in the main menus.
File:
Open System… – loads a saved system file (.cmv extension) which contains
all application configuration and acquired data. Any existing data is lost.
Accordingly, the user is notified and asked whether to load the new system
without saving the current system first (or he may cancel).
Save <file> – saves the current configuration and acquired data to the last
system file loaded. If no system file has yet been loaded, this menu option
behaves like the “Save <file> As…” menu option.
Save <file> As… – saves the current configuration to a designated system file.
Default System – resets the current configuration and clears any acquired
data.
<most recently used system files> – loads the selected recent system file
Clear Recent Files – clears the most-recently- used file list in the file menu
Exit – exits CommView. The user is asked whether he wants to save the
current configuration and acquired data to a system file.
Edit:
Copy Selected Rows … – copies selected rows to the clipboard
Control:
Connect To Scope … – brings up the Connect dialog to connect to a scope
Disconnect From Scope – disconnects from the current scope (if connected)
Configure Scope Options – brings up the scope configuration dialog to set
the scope channel to communications lane mapping and the trigger acquisition
timeout.
Acquire New Data From Scope – acquires data from the current scope and
disassembles it. Any existing data is lost. If the “Retrigger Scope On
Acquisition” option is checked, the scope is run before data is acquired.
Acquire New Data From File… – loads data from one or more saved scope
.wfm files. Selecting this option brings up an open file dialog. The number of
files required depends on the standard and the channel-to- lane mapping
defined in the scope configuration dialog. XAUI, for example, requires four
- Page 29 -
The Moving Pixel Company CommView User’s Manual – Doc. Rev. 1.06 -- 4/6/10
files whose file names end in Ch1.wfm, Ch2.wfm, Ch3.wfm, and Ch4.wfm. In
the open file dialog, any of the four files may be selected.
Discard Current Data – Discards any acquired data, clearing the current
display. The user is asked for confirmation. This option can be used before
saving to create a configuration-only system file (no data).
Retrigger Scope On Acquisition – When checked, this option causes
CommView to run the scope first before acquiring new data.
Set Bit Rate… / Set Ref Clk… – Brings up a dialog to set the source data bit
rate of reference clock frequency (depending on the standard selected) used to
interpret acquired waveform data.
Standard:
XAUI – when checked, selects XAUI as the current standard
DigRF – when checked, selects DigRF as the current standard
Window:
New Listing – brings up a new disassembly listing window. If at least one
disassembly window is already present, a message box asking the user whether
the application should copy settings from the current active listing. If the user
selects yes, all settings from the current listing will be copied to the new
listing, including view, mnemonic, filter, search, cursor, and option settings.
Close All Windows – closes all listing windows
Tile Horizontally – tiles listing windows horizontally
Tile Vertically – tiles listing windows vertically
Cascade – cascades listing windows
<Disassembly Window List> – the name of each listing window is appended
to the Window menu. Clicking on a listing name makes the window active
and brings it to the foreground.
Help
Help… – brings up the on-line help (this manual)
Shortcut Help… – brings up the shortcut help window for documentation on
all the shortcuts supported by CommView.
About… – CommView application information
- Page 30 -
The Moving Pixel Company CommView User’s Manual – Doc. Rev. 1.06 -- 4/6/10
4 Standards
4.1 XAUI Standard
Selecting the XAUI standard decodes acquired data according to the Physical Medium
Attachement Sublayer (PMA) and Physical Coding Sublayer (PCS) of the 10 Gb Ethernet
standard 802.3 running on the XAUI physical interface. As this document only provides very
limited information about this protocol, specifically only how it relates to disassembly, please
consult the 802.3 standard for more details.
The XAUI standard transmits data using four serial bit streams running at 3.125 Gb/s. Each
lane is 8b10b encoded and has its own independent clock, which can result in many tens of
bit-times of data skew among them. Symbol alignment is realized through the use of special
a 8b10b code called Align, which occurs periodically in each lane. Thus, a big part of
decoding the XAUI data stream is decoding 8b10b symbols and determining alignment.
The next higher protocol level after PCS is XGMII. XGMII packet data is encapsulated by
special 8b10b codes and a preamble sequence. By parsing these codes and the preamble
sequence, CommView can identify this data.
4.1.1 Views
Four views are provided for XAUI disassembly:
•
•
•
•
Unaligned Bit – displays raw, unaligned, XAUI data as it was acquired. Each bit
time is displayed as a record with the simple mnemonics “Bit0” and “Bit1”. No fields
are applicable to either of these record types.
Unaligned Symbol – displays the raw, unaligned, XAUI data as it was acquired, but
packed as 8b10b symbols. Symbols are decoded into PCS mnemonics with
accompanying fields “Data”, “Ctl”, and “Code” for each lane.
Aligned Symbol – displays aligned XAUI data. This view requires locating suitably
close Align symbols in each lane and time-shifting each lane to match them up. Lane
0 is used as the time and sample reference. Symbols are decoded into PCS
mnemonics with accompanying fields “Data”, “Ctl”, and “Code” for each lane.
Packet Data – within the aligned XAUI data, the view displays only records that
contain one or more XGMII packet bytes
Note that if CommView is unable to identify a legal alignment position for all four lanes, the
Aligned Symbol and Packet Data views are empty.
4.1.2 Mnemonic Types
The following mnemonic types are defined for the XAUI standard:
•
•
Bit 0 – displayed for serial bits with a value of 0
Bit 1 – displayed for serial bits with a value of 1
- Page 31 -
The Moving Pixel Company CommView User’s Manual – Doc. Rev. 1.06 -- 4/6/10
•
•
•
•
•
•
•
•
•
•
•
•
•
Sync – PCS Sync control symbol
Skip – PCS Skip control symbol
Align – PCS Align control symbol
Carrier Extend – PCS Carrier Extend control symbol
Error Propagation – PCS Error Propagation control symbol
Ordered Set – PCS Ordered Set control symbol
Start Frame – PCS Start Frame data symbol (must occur in lane 3 following Start Pkt
and six Preamble symbols)
Pkt Byte – XGMII packet byte, qualified by start of frame and preamble sequence
Preamble – PCS packet-header preamble data symbol (must follow Start Pkt)
Start Pkt – PCS Start Packet control symbol (must occur in lane 0)
End Of Pkt – PCS End Packet control symbol
Data Byte – data byte with control bit not set, not qualified by start of frame and
preamble sequence
Control Byte – unknown control symbol
Note the difference between the Pkt Byte and Data Byte mnemonics. The Pkt Byte
mnemonic is qualified by identification of the proper packet header sequence (Start Pkt,
Preamble (x6), Start Frame). To allow for possible bit errors, this constraint is relaxed to
require identification of only 6 out of 8 symbols in the packet header.
4.1.3 Fields
In addition to the common fields defined for all standards (Sample, Time, and Mnem<x>),
the following fields are defined for the XAUI standard:
•
•
•
•
•
SymErr – this field is a 4-bit mask field indicating whether a disparity or an invalid
8b10b symbol error occurred in a lane (the bit is set to ‘1’). Bits in the mask are littleendian, where lane 0 is associated with bit 0, lane 1 is associated with bit 1, etc.
SeqErr – this field is a single bit field indicating whether the aligned symbols across a
single record appear legal and consistent with the XAUI standard. For example, most
control symbols, when present in lane 0, are expected to be present in all lanes. If this
is not true, SeqErr will be set to ‘1’.
Data – this field contains the 8-bit data value decoded from the lane’s associated
8b10b symbol.
Ctl – this field is a single bit field indicating whether the 8b10b symbol is a control
symbol.
Code – this 10-bit field shows the received 8b10b code. If the radix is set to
“Symbolic (Default)” codes are displayed as Kx.y or Dx.y followed by a ‘+’ or ‘-‘ to
indicate which disparity variant it represents.
4.1.4 Options
No additional options specific only to the XAUI standard are provided in the Options tab of
the tab control.
- Page 32 -
The Moving Pixel Company CommView User’s Manual – Doc. Rev. 1.06 -- 4/6/10
4.2 DigRF Standard
Selecting the DigRF standard decodes acquired data according to the MIPI DigRF version 4
protocol, which uses MPhy as its physical communications layer. Please see the relevant
documentation from MIPI for detailed information about these standards.
However, in short summary, DigRF is a standard intended for point-to-point communications
between a baseband handset IC (BBIC) and a radio transceiver (RFIC). While a full link
includes both transmit and receive sub- links, the CommView implementation solely decodes
a single sub-link. Within a sublink, data traffic can be multiplexed across 1-4 lanes of MPhy
traffic depending on the specific hardware configuration.
Communication frequencies are categorized as high-speed or low-speed. For DigRF, only
certain high-speed (HS) and low-speed (LS) bit rates are used, with HS bit rates ranging from
about 1-3 Gbps and LS bit rates of 52-104. LS communication occurs synchronously with a
reference clock, uses 8b10b encoding, and is assumed in CommView to only use one lane.
HS communication also uses 8b10b encoding and while the HS communication frequency for
each lane uses the same reference clock, some skew is allowed between lanes. Thus
determining alignment is an important aspect of DigRF disassembly.
4.2.1 Views
When parsing DigRF data, CommView divides the bit stream into several segment types:
•
•
•
•
•
•
Sleep – occurs when all lanes are in a quiescent state (DIF-N) for a sufficient period
of time. No differentiation is made between the MPhy Stall and Sleep states.
LS Prepare – occurs after Sleep when one or more lanes transition to a high- voltage
for a period of time to indicate a subsequent LS burst segment is to follow.
HS Prepare – occurs after Sleep when one or more lanes transition to a high- voltage
for a period of time to indicate a subsequent HS burst segment is to follow.
LS Burst – a single lane data transmission at less than 1 Gbps
HS Burst – one or more lanes of data transmission at more than 1 Gbps
Unknown – assigned when none of the above states can be ascertained
These segment types form the basis for all the disassembly views starting from the lowest
level on up. Currently, three views are supported by CommView when disassembling
DigRF. They are:
•
•
Unaligned Bit – displays LS and HS bits as well as the other segment types and thus
spacing between records is not necessarily periodic. Each lane is decoded
independently and time- interleaved in the disassembly listing (samples among lanes
that occur closely enough together are displayed in the same record). Simple
mnemonics identify the segment type and, in bursts, the bit value as well.
Unaligned Symbol – aggregates bits of burst segments from each lane into 8b10b
symbols, with each lane still independently decoded. Marker symbols (SOF, EOF,
and EOT) provide the necessary alignment reference, which then allows CommView
to backtrack in order to assign symbols back to (near) the start of the acquisition trace.
- Page 33 -
The Moving Pixel Company CommView User’s Manual – Doc. Rev. 1.06 -- 4/6/10
•
Special control symbols are identified in the lane and each symbol has the
accompanying fields: “Data”, “Ctl” and “Code”. All segments are shown and all
decoded symbols within burst segments are shown, even those that occur before SOF
(which for HS bursts include possibly user-defined Sync symbols).
Aligned Symbol – displays HS burst segments consisting of multiple lanes as aligned
DigRF data. CommView attempts to correlate SOF markers in each HS lane segment
and declares the segment valid if this is successful in all active lanes. Lane 0 is used
as the alignment time base, shifting HS bits from other lanes in time in a one-to-one
correspondence. Unknown segments are not displayed (though Sleep and the Prepare
segments are still displayed) and neither are symbols in any lane preceding the aligned
SOF markers.
4.2.2 Mnemonic Types
The following mnemonic types are defined for the DigRF standard:
Unaligned Bit View:
Data Bits
o LS Bit 0 – LS bits having a value of 0
o LS Bit 1 – LS bits having a value of 1
o HS Bit 0 – HS bits having a value of 0
o HS Bit 1 – HS bits having a value of 1
Segments
o Sleep – sleep and stall segments
o HS Prepare – prepare segments preceding an HS burst
o LS Prepare – prepare segments preceding an LS burst
o Unknown – unknown segments
Unaligned Symbol View:
Symbol Bytes
o SOF – start-of- frame control symbol (K28.5)
o EOF – end-of-frame control symbol (K28.6)
o EOT – end-of-transfer control symbol (K28.3)
o Idle – filler control symbol (K28.1)
o Control Byte – any other control symbol
Data Bytes
o Data Byte – any occurring data symbol
Segments
o Sleep – sleep and stall segments
o HS Prepare – prepare segments preceding an HS burst
o LS Prepare – prepare segments preceding an LS burst
o Unknown – unknown segments
Aligned Symbol View:
Symbol Bytes
o SOF – start-of- frame control symbol (K28.5)
o EOF – end-of-frame control symbol (K28.6)
- Page 34 -
The Moving Pixel Company CommView User’s Manual – Doc. Rev. 1.06 -- 4/6/10
o EOT – end-of-transfer control symbol (K28.3)
o Idle – filler control symbol (K28.1)
o Control Byte – any other control symbol
Data Bytes
o Hdr1 – first DigRF packet header byte
o Hdr2 – second DigRF packet header byte (for type 2 packets)
o CRC-H – high-byte of packet CRC
o CRC-L – low byte of packet CRC
o Payload Byte – valid data byte occurring SOF/EOF delimiters
o Data Byte – data byte occurring outside of SOF/EOF delimiters
Segments
o Sleep – sleep and stall segments
o HS Prepare – prepare segments preceding an HS burst
o LS Prepare – prepare segments preceding an LS burst
4.2.3 Fields
In addition to the common fields defined for all standards (Sample, Time, and Mnem<x>),
the following fields are defined for the DigRF standard:
Per-lane fields:
• Data – 8-bit data value decoded from the lane’s associated 8b10b symbol.
• Ctl – single bit field indicating whether the 8b10b symbol is control.(1) or data (0).
• Code – this 10-bit field shows the received 8b10b code. If the radix is set to
“Symbolic (Default)” codes are displayed as Kx.y or Dx.y followed by a ‘+’ or ‘-‘ to
indicate which disparity variant the code represents.
• Duration – time field indicating the duration of the associated segment. Applies to
Sleep, LS Prepare, HS Prepare, and Unknown segments.
Per-record, meta-information fields:
• SymErr – bit mask having width equal to the number of MPhy lanes and indicating
whether a disparity or an invalid 8b10b symbol error occurred in a lane (the bit is set
to ‘1’). Bits in the mask are little-endian, where lane 0 is associated with bit 0, lane 1
is associated with bit 1, etc. This field is present in all records that have at least one
control or data byte mnemonic.
• Emb – single bit field indicating whether the current data or control byte is part of an
embedded packet (1) or not (0).
• HS – single bit field indicating whether the current data or control byte is part of a
high-speed burst (1) or a low-speed burst (0)
Per-record, CRC fields:
• ExpCRC – 16-bit field indicating the computed CRC value for the associated packet.
• CRC – 16-bit field extracted from the current packet
• CRCValid – 2-bit mask indicating whether the high and low CRC bytes in the packet
match the expected CRC. Bit zero is set to (1) when the high-byte of the CRC
matches and (0) otherwise. Bit one of the mask is set to (1) when the low-byte of the
CRC matches and (0) otherwise.
- Page 35 -
The Moving Pixel Company CommView User’s Manual – Doc. Rev. 1.06 -- 4/6/10
Per-record, header fields:
• RTI – retransmission indicator in the current packet (Hdr1 records)
• CRI – cyclic running index for the current packet (Hdr1 records)
• xLC_ID – logical channel number for the current packet (Hdr1 records)
• LCI – logical channel indicator for the current packet (Hdr1 records)
• CLC_LEN – payload length field (Hdr2 records)
• SDLC_ID – logic channel extension field (Hdr2 of SDLC records)
• CIL – compression information length field (Hdr2 of SDLC records)
4.2.4 Options
No additional options specific only to the DigRF standard are provided in the Options tab of
the tab control.
- Page 36 -
The Moving Pixel Company CommView User’s Manual – Doc. Rev. 1.06 -- 4/6/10
5 Software License Agreement
PLEASE READ THIS DOCUMENT CAREFULLY BEFORE USING THE SOFTWARE. BY USING THE
SOFTWARE, YOU ARE AGREEING TO BE BOUND BY THE TERMS OF THIS AGREEMENT. IF YOU
DO NOT AGREE TO THE TERMS OF THIS AGREEMENT, DO NOT OPEN, INSTALL, OR USE THE
SOFTWARE. PROMPTLY RETURN WITHIN 15 DAYS THE SOFTWARE, ALL RELATED
DOCUMENTATION, AND ACCOMPANYING ITEMS TO THE PLACE OF ACQUISITION FOR A FULL
REFUND.
This is a legal agreement between you and The Moving Pixel Company (TMPC). This
Agreement states the terms and conditions upon which TMPC offers to license the software
sealed in the disk package, together with all related documentation and accompanying items
including but not limited to, the executable programs, drivers, libraries, and data files
associated with such programs (collectively, the Software).
LICENSE
1. Grant of License
The Software is licensed, not sold, to you for use only under the terms of this Agreement.
You own the disk or other media on which the Software is originally or subsequently
recorded or fixed as permitted by this Agreement. However, as between you and TMPC
(and, to the extent applicable, its licensors), TMPC retains all right, title, and interest to the
Software and all copyrights to the Software, and reserves all rights not expressly granted to
you. This is a non-exclusive license.
2. Limitation on Using, Copying, and Modifying the Software
Except to the extent expressly permitted by this Agreement or by the laws of the jurisdiction
where you acquired the Software, you may not modify the Software. Nor may you sublicense any of your rights under this Agreement.
3. Decompiling, Disassembling, or Reverse Engineering
You acknowledge that the Software contains trade secrets and other proprietary information
of TMPC and its licensors. Except to the extent expressly permitted by this Agreement or by
the laws of the jurisdiction where you are located, you may not decompile, disassemble, or
otherwise reverse engineer the Software, or engage in any other activities to obtain
underlying information that is not visible to the user in connection with normal use of the
Software. In any event, you will notify TMPC of any information derived from reverse
engineering or such other activities, and the results thereof will constitute the confidential
information of TMPC that may be used only in connection with the Software.
TERMINATION
The license granted to you is effective until terminated. The license will terminate
automatically without any notice from TMPC if you fail to comply with any term or condition
of this Agreement. You agree upon such termination to, except in the State of California,
- Page 37 -
The Moving Pixel Company CommView User’s Manual – Doc. Rev. 1.06 -- 4/6/10
return the Software and any physical licensing devices (e.g. USB dongles) to TMPC and
destroy any associated license keys (including any portions or copies thereof). In the State
of California, return any physical licensing devices, destroy the Software and any associated
license keys (including any portions or copies thereof and notify TMPC of such destruction in
writing. Upon termination, TMPC may also enforce any rights provided by law. The
provisions of this Agreement that protect the proprietary rights of TMPC will continue in force
after termination.
LIMITED WARRANTY
TMPC warrants, as the sole and exclusive warranty, that the CD ROM on which the
Software is furnished will be free of defects for a period of ninety (90) days. In the event one
or more of such disks is defective, TMPC will replace the defective CD ROM free of charge
upon receiving the defective CD ROM at the address set forth below.
No distributor, dealer, or any other entity or person is authorized to expand or alter this
warranty or any other provisions of this Agreement. Any representation, other than this
express limited warranty, will not bind TMPC.
EXCEPT AS STATED ABOVE IN THIS AGREEMENT, THE SOFTWARE IS PROVIDED
AS-IS WITHOUT WARRANTY OF ANY KIND, EITHER EXPRESS OR IMPLIED,
INCLUDING BUT NOT LIMITED TO, ANY IMPLIED WARRANTY OF MERCHANTABILITY
OR FITNESS FOR A PARTICULAR PURPOSE.
TMPC does not warrant that the functions contained in the Software will meet your
requirements, or that the operation of the Software will be uninterrupted or error-free. You
assume full responsibility for the selection of the Software to achieve your intended results,
and for the installation, use, and results obtained from the Software. You also assume the
entire risk as it applies to the quality and performance of the Software. Should the Software
prove defective you (and not TMPC, or its distributors or dealers) assume the entire cost of
all necessary servicing, repair, or correction.
This warranty gives you specific legal rights, and you may also have other rights that vary
from country/state to country/state. Some countries/states do not allow the exclusion of
implied warranties, so the above exclusion may not apply to you. TMPC disclaims all
warranties of any kind of the Software was customized, repackaged, or altered in any way by
any third party other than TMPC.
LIMITATION OF REMEDIES AND DAMAGES
THE ONLY REMEDY FOR BREACH OF WARRANTY IS THE EXPRESS LIMITED
WARRANTY SET FORTH ABOVE. IN NO EVENT WILL TMPC OR ITS LICENSORS BE
LIABLE FOR ANY PUNITIVE, INDIRECT, INCIDENTAL, SPECIAL, OR CONSEQUENTIAL
DAMAGES, OR FOR ANY LOST PROFITS, LOST SAVINGS, LOST REVENUES, OR
LOST DATA ARISING FROM OR RELATING TO THE SOFTWARE OR THIS
AGREEMENT, EVEN IF TMPC OR ITS LICENSORS HAVE BEEN ADVISED OF THE
POSSIBILITY OF SUCH DAMAGES. IN NO EVENT WILL TMPCS LIABILITY OR
DAMAGES TO YOU OR ANY OTHER PERSON EVER EXCEED THE AMOUNT PAID BY
YOU TO USE THE SOFTWARE, REGARDLESS OF THE FORM OF THE CLAIM. Some
countries/states do not allow the limitation or exclusion of liability for the incidental or
consequential damages, so the above limitation or exclusion may not apply to you.
- Page 38 -
The Moving Pixel Company CommView User’s Manual – Doc. Rev. 1.06 -- 4/6/10
PRODUCT RETURNS
If you must ship the Software to TMPC or an authorized TMPC distributor or dealer, you
must prepay shipping and either insure the software or assume all risk of loss or damage in
transit.
U.S. GOVERNMENT RESTRICTED RIGHTS
All Software and related documentation are provided with restricted rights. Use, duplication,
or disclosure by the U.S. Government is subject to restrictions as set forth in the Rights in
Technical Data and Computer Software clause at DFARS 252.227-7013 or the Commercial
Computer Software-Restricted Rights at 48 CFR 52.227-19, as applicable. If you are sublicensing or using the Software outside of the United States, you will comply with the
applicable local laws of your country, U.S. export control law, and the English version of this
Agreement.
MANUFACTURER
The Moving Pixel Company
4905 SW Griffith Drive #106
Beaverton OR 97005
+1.503.626.9663 phone
+1.503.626.9653 fax
www.movingpixel.com
GENERAL
This Agreement is binding on you as well as your employees, employers, contractors and
agents, and on any successors and assignees. Neither the Software nor any information
derived therefrom may be exported except in accordance with the laws of the U.S. or other
applicable provisions. This Agreement is governed by the laws of the State of Oregon
(except to the extent federal law governs copyrights and federally registered trademarks).
This Agreement is the entire agreement between us and supersedes any other
understandings or agreements, including but not limited to, advertising of the Software. If
any provision of this Agreement is deemed invalid or unenforceable by any country or
government agency having jurisdiction, that particular provision will be deemed modified to
the extent necessary to make the provision valid and enforceable, and the remaining
provisions will remain in full force and effect. If any legal action is brought by you or TMPC
regarding the Software or this Agreement, the prevailing party shall be entitled to recover, in
addition to any other relief granted, reasonable attorney fees and expenses of litigation.
Neither you nor TMPC will waive any rights under this Agreement, unless such waiver is in
writing. For questions concerning the Software or this Agreement, please contact TMPC at
the address stated above.
- Page 39 -