1
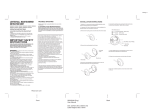
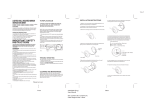
2. Move up the original pillow 10 cm, And then
install a box-shaped and U-shaped fixed
accessories, After adjust the U-shaped parts
3. Open the lock-unlock key then install the
monitor, Then,Close the lock-unlock key.
USER’S MANUAL
box-shaped fixed
accessories
Up and down to
adjust the angle
Bracket
Adjust the angle of
front and rear
U-shaped fixed
accessories
Lock-Unlock Key
5
6
4. Adjust the angle of monitor
Specifications
Since the product features upgrade , Maybe the product specifications are subject to changed
without notice
Model
7"
9"
10.1"
Dimensions
Including the base
178*150.2*91.5(mm)
219.5*188.7*94(mm)
249.5*220*94(mm)
(W* H* D)
Without the base
178*118.7*23(mm)
219.5*143.2*25.5(mm)
249.5*174.5*26(mm)
DC-12V
Operating Voltage
≤8W
Overall power consumption
The minimum size of
viewable image diagona
180mm
227mm
254mm
≥200:1
Contrast
viewing angle
≤8.3W
≤ 0.18W
Passive standby power
Level
Vertical
The inherent resolution
≥ 70°
MODE
TCON
VOL
VOL
MENU
SOURCE
≥60°
≥ 60°
≥55°
800*480□
1024*600□
Attention
·Do not use your fingernails or sharp object to press, rub, or hit the surface, As this may scratch
the screen and cause the image distortion
·Do not use wax, benzene, alcohol, thinners, insecticides, air fresheners, lubricants and any other
chemicals, as these chemicals may damage the glossy screen and cause discoloration
·Do not use liquid spray to the surface, If the TV inside of water, May cause the fire and electric
shock or malfunction
Abandon Process
·Do not discard together with the normal household waste
·Handling the products in accordance with rule of functional department
Before operating this set,please read this instruction completely.
Warn:
Remoter Function
Please do not place the equipment and the remote control in the following conditions.
·Exposure to the position of direct sunlight
·Bathrooms or other position with high humidity
·Nearby any heat source
·The place where is tend to accumulate dust
Do not let the product subject to strongly impact, Or, Allow any objects dropped on the product.
And, Do not let anything fall on the screen, Could result in personal injury or damage to the
product.。
LC D RE MO TE
Power
Menu
V ID E O
S EL E CT
AV/HDMI shift
VOL-
MENU
VOL+
MO DE
S EL E CT
16:/4:3 shift
Appearance and function
9"
7"
Installing
Vertical installation
8
M ODE
T CON
7
6
VOL
5
VO L
M ENU
SOURCE
4
3
2
MODE
TCON
7
6
VOL
VOL
5
4
MENU
SOURCE
3
2
1.Display screen and base installing
Insert the prominent oval metal of base into the
card slot from the metal clip gap of display
screen back
1
1
8
1 0 .1 "
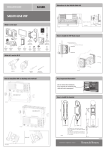
①Power switch
②AV/HDMI switch
③Analog menu
④Volume increases
⑤Volume down
⑥Tcon
⑦16:9/4:3 switch
⑧Remote control receiving window
HDMI
2.Base installing details
①Front&back / left&right to adjust the display
screen to the proper position, And screw the
nut fastening
②Cleaning the dust and grease wipe from
installing countertop surfacewith a clean rag
③Remove the protective paper of sided
adhesive from the base bottom, Pasting base
on the installing countertops and press firmly
tight.
Fixing the screw nut
Up and down to
adjust the angle
DC-12V
Adjust the angle
of front and rear
8
M OD E
TCO N
V OL
VO L
7
6
5
4
M ENU
SOURCE
3
2
1
1
Fixing the screw nut②
Left and right to
adjust the angle
Double-sided adhesive
2
3.Collating the connected relevant cables and fixing them
Remark : Cables can not be pulled too tightly, Otherwise, Easy to make the display screen tilting
or falling
The way of wiring
Hanging installation
Green reverse sig nal
Red wire grounded +12V
1. Unscrew the four screws, remove the back of the parts, and then install the headrest bracket
Black wire grounded
Video1 IN(yellow)
Video2 IN(yellow)
Audio1 IN(red)
Audio2 IN(white)
3
4