1
/MD
/MD
questions:
umer Service
00.667.8623
0.458.8407
eam.com
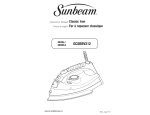
Instruction Manual
Notice d’emploi
usiness as Jarden Consumer Solutions.
reserved.
Sunbeam, Products, Inc.
Solutions, Boca Raton, FL 33431
Sunbeam Corporation (Canada) Limited
n Consumer Solutions,
pton, Ontario L6Y 0M1.
MODELS/
MODÈLES
Professional Iron
Fer professionnel
4267-33 & 4265-33
oncerne ce produit, appelez le
ntèle de Jarden
00 667.8623
800 458.8407
eam.com
s sous le nom de Jarden Consumer Solutions.
s réservés.
ar Sunbeam, Products, Inc.
sumer Solutions, Boca Raton, FL 33431.
nbeam Corporation (Canada) Limited
Jarden Consumer Solutions,
pton (Ontario) L6Y 0M1.
Imprimé en Chine
www.sunbeam.com
P. N. 165517
IMPORTANT SAFEGUARDS
I RonIng
When using electrical appliances, basic safety precautions should always be
followed including the following:
Read all InstRuctIons BefoRe use
faBRIc
suggested
faBRIc selec
steam settIng dIal settIn
• Use iron only for its intended use.
• To protect against risk of electric shock, do not immerse the iron in water
or other liquids.
• The iron should always be set to the off position with the fabric setting button
before plugging and unplugging. Never yank cord to disconnect from outlet;
instead, grasp plug and pull to disconnect.
• Do not allow cord to touch hot surfaces. Let iron cool completely before putting
away. Loop cord loosely around iron when storing.
• Always disconnect iron from electrical outlet when filling with water or emptying
and when not in use.
• Do not operate iron with a damaged cord or if the iron has been dropped
or damaged. To avoid the risk of electric shock, do not disassemble the
iron. Take it to an authorized service center for examination and/or repair.
Incorrect reassembly can cause a risk of electric shock when the iron is used.
• Close supervision is necessary for any appliance being used by or near children.
Do not leave iron unattended while plugged in or turned on or on an ironing board.
• Burns can occur from touching hot metal parts, hot water or steam. Use caution
when you turn a steam iron upside down – there may be hot water in the reservoir.
• If the iron is not operating normally, disconnect from the power supply and
have the iron serviced by an authorized service center. Or call Customer Service at
1 800 667-8623.
• Your SUNBEAM® iron is designed to rest on the heel rest. Do not leave the iron
unattended. Do not set the iron on an unprotected surface, even if it is on its
heel rest.
Acrylic
Off (Dry)
Synthetic
Acetate
Off (Dry)
Synthetic
Polyester
Off (Dry)
Synthetic
Rayon
Off (Dry)
Synthetic
Silk
Off (Dry)
Silk
Viscose
Off (Dry)
Silk
Nylon
Off (Dry)
Silk
s pecIal I nstRuctIons
• This is a 1400-Watt appliance. To avoid a circuit overload, do not operate another
high wattage appliance on the same circuit.
• If an extension cord is absolutely necessary, a 15-ampere cord should be used.
Cords rated for less amperage may overheat. Care should be taken to arrange
the extension cord so that it cannot be pulled or tripped over.
foR pRoducts puRchased
In the
unIted states
and
Wool
(Steam)
Wool
Wool Blends
(Steam)
Wool
Cotton Blends
-
(Steam)
Cotton
Corduroy
-
(Steam)
Cotton
Cotton
-
(Steam)
Cotton
Linen
-
(Steam)
Linen
Denim
-
(Steam)
Linen
canada
To reduce the risk of electrical shock, this appliance has a polarized plug (one blade is
wider than the other). This plug fits a polarized outlet only one way; if the plug does
not fit fully into the outlet, reverse the plug. If it still does not fit, contact a qualified
electrician. Do not attempt to defeat this safety feature.
SAVE THESE INSTRUCTIONS
*An ironing cloth is a cotton, dry-cleaned cl
you are ironing to prevent the fabric from
Note: Some fabrics may require more steam
to adjust steam as needed.
SAFEGUARDS
I RonIng g uIde
c safety precautions should always be
tIons
BefoRe use
faBRIc
suggested
faBRIc select
steam settIng dIal settIng
I RonIng R ecommendatIons
Acrylic
Off (Dry)
Synthetic
Iron garment inside out.
Acetate
Off (Dry)
Synthetic
Iron garment inside out while still damp.
osition with the fabric setting button
nk cord to disconnect from outlet;
Polyester
Off (Dry)
Synthetic
Iron garment inside out while still damp.
Rayon
Off (Dry)
Synthetic
Iron garment inside out.
Let iron cool completely before putting
n storing.
let when filling with water or emptying
Silk
Off (Dry)
Silk
Iron garment inside out. Use an ironing cloth*
to prevent shine marks.
Viscose
Off (Dry)
Silk
Mainly dry iron; steam may be used under
garment manufacturer’s instructions.
Nylon
Off (Dry)
Silk
Iron garment inside out while still damp.
o not immerse the iron in water
or if the iron has been dropped
hock, do not disassemble the
er for examination and/or repair.
ectric shock when the iron is used.
liance being used by or near children.
ed in or turned on or on an ironing board.
parts, hot water or steam. Use caution
there may be hot water in the reservoir.
onnect from the power supply and
rvice center. Or call Customer Service at
on the heel rest. Do not leave the iron
rotected surface, even if it is on its
tRuctIons
circuit overload, do not operate another
t.
y, a 15-ampere cord should be used.
at. Care should be taken to arrange
led or tripped over.
e
unIted states
and
canada
pliance has a polarized plug (one blade is
ed outlet only one way; if the plug does
If it still does not fit, contact a qualified
ty feature.
Wool
(Steam)
Wool
Iron garment inside out or use an
ironing cloth.*
Wool Blends
(Steam)
Wool
Iron garment inside out or use an
ironing cloth.*
Cotton Blends
-
(Steam)
Cotton
Follow garment manufacturer’s instructions.
Use setting for the fiber requiring the
lowest setting.
Corduroy
-
(Steam)
Cotton
Iron garment inside out or use an ironing cloth*
and then brush the garment with your hand
to raise the texture of the fabric.
Cotton
-
(Steam)
Cotton
Iron dark fabrics inside out to prevent
shine marks.
Linen
-
(Steam)
Linen
Iron garment inside out or use an
ironing cloth* to prevent shine marks
(especially on dark fabrics).
Denim
-
(Steam)
Linen
Use the SPRAY MIST® feature and/or
the SHOT OF STEAM® BUTTON for
deeper penetration to remove wrinkles.
*An ironing cloth is a cotton, dry-cleaned cloth that you place over the garment
you are ironing to prevent the fabric from looking shiny.
Note: Some fabrics may require more steam than others. Your iron has the capability
to adjust steam as needed.
CONSIGNES IM
L’utilisation de tout apppareil électrom
précautions fondamentales, y compris
lIsez
les InstRuctIo
• N’utilisez le fer à repasser qu’aux fins aux
• Pour éviter les chocs électriques, n’immer
dans un autre liquide.
• Réglez toujours le fer en position d’arrêt a
de le brancher ou de le débrancher. Ne do
pour le débrancher: tenez la fiche entre le
• Veillez à ce que le cordon ne soit pas en c
fer complètement froid, après avoir enrou
• Débranchez toujours le fer s’il ne sert pas
• N’utilisez pas un fer équipé d’un cordon a
Pour éviter les chocs électriques, ne démo
au besoin par un centre de service agréé. U
source de secousses lors de l’utilisation.
• Soyez vigilant quand le fer est utilisé par d
assidûment le fer s’il est branché, s’il chau
• Pièces chaudes en métal, eau chaude et va
le fer à vapeur très prudemment – il pour
• En cas d’anomalie de fonctionnement, déb
un centre de service agréé. Ou appelez le
Canada ou bien au 1 800 458-8407 aux É
• Le fer SUNBEAMMD est conçu pour être p
un fer à repasser branché sans surveillanc
surface non protégée, même s’il est posé s
I nstRuctIon
• Ce fer a une puissance de 1400 watts. Pou
pas un autre appareil de haute consomma
• S’il est indispensable d’employer un cordo
15 ampères. Une rallonge d’une intensité
Disposez le prolongateur de façon à ce qu
pRoduIts
achetés aux
ét
Pour réduire les risques de choc électrique, c
(ayant une lame plus large que l’autre). La fi
que d’une façon; si elle ne rentre pas complè
n’enfonce toujours pas, entrez en rapport av
surtout pas de neutraliser le dispositif de séc
BLEED SIZE: 22.25”
TRIM SIZE: 22.00”
TYPE SAFETY: 21.75
featuRes
1.
2.
3.
4.
of
YouR pRofessIonal IRon
Spray Mist Release
Covered Water Fill Hole
Backlit Digital Electronic Display
Auto-Off Indicator / Wait/Ready /
Light
5. SPRAY MIST® Button
6. Steam Selection Slide
7. SHOT OF STEAM® Button/
Vertical Steam Button
8. Fabric Select Buttons
1
9. Soft Grip Handle
10. 360° Tangle-Free
Swivel Cord
11. See-Through Water Reservoir
12. Self-Clean Button
13. MicroGlide™ Soleplate
caRactéRIstIques
®
5
6
7
8
9
3
2
11
(Model 4267-33 only)
15
14
Toggle up to
desired fabric and
wait for red light
to turn green.
Faites basculer
au textile voulu
puis attendez que
le voyant rouge
tourne au vert.
12
(Model 4265-33 only)
Stainless Steel Soleplate
14. Maximum Fill Line
1.
2.
3.
4.
10
4
13
15. Storage Strip® Indicator
(Model 4265-33 only)
to fIll the WateR ReseRvoIR
1. Make sure the iron is unplugged. Set the Steam Selection Slide to OFF (Dry).
2. Slide open the Water Fill Hole Cover.
3. Fill water cup with water. Pour water into iron water reservoir. Do not fill water reservoir beyond maximum
fill line.
Warning: To prevent the risk of burns, be careful when filling a hot iron with water. Hot metal parts, hot water and
steam can cause injuries.
selectIng faBRIc settIngs
To select a fabric setting, (Figure A) press the (- +) Fabric Select button until the desired fabric is highlighted. The
Wait light will glow red while the iron heats up.
The light will then change to green (Ready) when the iron is ready to use.
dRY IRonIng
du feR pRofessIonnel
Orifice d’atomisation Spray MistMD
Orifice de remplissage à volet
Afficheur électronique rétroéclairé
Indicateur d’arrêt automatique /
voyant Wait/Ready (attendre/prêt)
5. Bouton d’atomisation SPRAY
MISTMD
6. Curseur de débit de vapeur
7. Bouton jet de vapeur SHOT OF
STEAMMD et vaporisation verticale
8. Touche de sélection des textiles
9. Poignée à prise douce
10. Cordon articulé 360°, non emmêlant
11. Réservoir translucide
12. Bouton d’autonettoyage
13. Semelle MicroGlideMC
(modèle 4265-33 seulement)
Semelle en acier inoxydable
(Modéle 4267-33 seulement)
14. Repère maximal de remplissage
15. Indicateur de rangement Storage StripMD
(modèle 4265-33 seulement)
WARNING: NEVER yank the power cord when unplugging the iron.
This can damage the cord.
WaIt/ReadY lIght
Indicates when your iron reaches the desired temperature. When a fabric setting has been selected the red Wait light
illuminates. Once the iron heats up to the desired fabric selection, the light will change from red (Wait) to green
(Ready). This occurs each time the fabric setting is changed. It will also occur when the iron has been reset after the
Auto-Off is deactivated.
antI-calcIum sYstem
The Anti-Calcium System is a permanent system located inside the water reservoir. This system removes calcium
from the water and reduces calcium build-up on the soleplate.
mIcRoglIde™ soleplate (model 4265-33 onlY)
Provides superior glide over Non-stick and Stainless Steel for quick and easier ironing.
dRIp-fRee
Produces steam without any dripping, spitting, or leaking through the soleplate,
10. 360° Tangle-Free
Swivel Cord
11. See-Through Water Reservoir
12. Self-Clean Button
13. MicroGlide™ Soleplate
11
Faites basculer
au textile voulu
puis attendez que
le voyant rouge
tourne au vert.
12
(Model 4265-33 only)
Stainless Steel Soleplate
(Model 4267-33 only)
14. Maximum Fill Line
Toggle up to
desired fabric and
wait for red light
to turn green.
15
14
13
15. Storage Strip® Indicator
(Model 4265-33 only)
to fIll the WateR ReseRvoIR
1. Make sure the iron is unplugged. Set the Steam Selection Slide to OFF (Dry).
2. Slide open the Water Fill Hole Cover.
3. Fill water cup with water. Pour water into iron water reservoir. Do not fill water reservoir beyond maximum
fill line.
Warning: To prevent the risk of burns, be careful when filling a hot iron with water. Hot metal parts, hot water and
steam can cause injuries.
selectIng faBRIc settIngs
To select a fabric setting, (Figure A) press the (- +) Fabric Select button until the desired fabric is highlighted. The
Wait light will glow red while the iron heats up.
The light will then change to green (Ready) when the iron is ready to use.
dRY IRonIng
WARNING: NEVER yank the power cord when unplu
This can damage the cord.
WaIt/ReadY lIght
Indicates when your iron reaches the desired temperature
illuminates. Once the iron heats up to the desired fabric s
(Ready). This occurs each time the fabric setting is change
Auto-Off is deactivated.
antI-calcIum sYstem
The Anti-Calcium System is a permanent system located
from the water and reduces calcium build-up on the solep
mIcRoglIde™ soleplate (model 4265-33 onlY)
Provides superior glide over Non-stick and Stainless Steel
dRIp-fRee
1. Make sure the Steam Selection Slide is turned to the OFF (Dry) setting.
Produces steam without any dripping, spitting, or leaking
even at low temperatures.
2. Plug the cord into a 120-Volt AC outlet.
stoRage stRIp® IndIcatoR
3. Select Fabric Setting.
The STORAGE STRIP® indicator is an easy way to see when
Note: While the Steam Selection Slide is turned to the OFF (Dry) setting, you may still use the SHOT OF STEAM®
feature or SPRAY MIST® feature. Please make sure the water reservoir is at least 1/4 full of water.
Tip: Refer to the Ironing Guide for the recommended setting for your fabric.
steam IRonIng
1. Follow the instructions for “To Fill the Water Reservoir”.
2. Plug the cord into a 120-Volt AC outlet.
3. Select Fabric Setting.
4. Allow the iron to heat for 2 minutes, and then turn the Steam Selection Slide
to the appropriate setting.
Tip: Refer to the Ironing Guide for the recommended setting for your fabric.
Important: When not ironing, always set the Steam Selection Slide to OFF (Dry).
usIng the IRon’s specIal featuRes
®
spRaY mIst featuRe
The Spray Mist® feature is a powerful water spray mist that dampens the fabric
to aid in removing wrinkles from heavy fabrics and for setting creases.
to use the spRaY mIst® featuRe:
Press the Spray Mist® button firmly. Iron over the fabric to dry.
®
shot of steam featuRe
(model 4265-33 only)
to use the stoRage stRIp® IndIcatoR:
Turn iron on. In approximately 2 minutes, the STORAGE
that the iron is too hot to store. When the iron is turned off,
STORAGE STRIP® indicator to turn from red to black, ind
Caution: The STORAGE STRIP® indicator should only be
stored with care.
caRIng foR You
tuRnIng off YouR IRon
1. Unplug the iron from the power source.
WARNING: NEVER yank the power cord when unplu
stoRIng YouR IRon
1. Allow the iron to cool. (Model 4265-33 only: Wait
original black color, indicating that the iron is cool e
2. If you do not use your iron on a daily basis, empty t
do so, unplug the iron, turn the iron upside down, o
hole. Shake the iron gently to remove trapped water
3. Loosely loop the power cord around the heel rest an
Important: Wrapping the cord around the iron too tightl
The Shot of Steam® feature provides an extra burst of steam for deep penetration of stubborn wrinkles. You can use
this feature while Dry or Steam ironing, but the water reservoir must be at least 1/4 full of water.
Tip: When not ironing, always set the Steam Selection Sli
to use the shot of steam® featuRe:
cleanIng the soleplate
Place the iron on top of the wrinkle and press the Shot of Steam® button each time you would like an extra burst of
maIntaInIng You
Clean the soleplate if starch or other residue accumulate.
1. Unplug the iron from the power source.
to the appropriate setting.
Tip: Refer to the Ironing Guide for the recommended setting for your fabric.
Important: When not ironing, always set the Steam Selection Slide to OFF (Dry).
usIng the IRon’s specIal featuRes
®
spRaY mIst featuRe
The Spray Mist® feature is a powerful water spray mist that dampens the fabric
to aid in removing wrinkles from heavy fabrics and for setting creases.
to use the spRaY mIst® featuRe:
Press the Spray Mist® button firmly. Iron over the fabric to dry.
WARNING: NEVER yank the power cord when unplug
stoRIng YouR IRon
1. Allow the iron to cool. (Model 4265-33 only: Wait
original black color, indicating that the iron is cool en
2. If you do not use your iron on a daily basis, empty th
do so, unplug the iron, turn the iron upside down, o
hole. Shake the iron gently to remove trapped water
3. Loosely loop the power cord around the heel rest an
shot of steam featuRe
Important: Wrapping the cord around the iron too tightly
The Shot of Steam® feature provides an extra burst of steam for deep penetration of stubborn wrinkles. You can use
this feature while Dry or Steam ironing, but the water reservoir must be at least 1/4 full of water.
Tip: When not ironing, always set the Steam Selection Slid
to use the shot of steam® featuRe:
cleanIng the soleplate
®
Place the iron on top of the wrinkle and press the Shot of Steam® button each time you would like an extra burst of
steam. The Shot of Steam® feature may be used continuously with just a short 3 second pause between shots.
veRtIcal steam
The vertical steam feature allows your iron to function as a garment steamer.
Tip: When using the vertical steam on clothing, hang the clothing on a clothes hanger for best results. Hanging
curtains and drapes may also be steamed.
maIntaInIng YouR
Clean the soleplate if starch or other residue accumulate.
to clean the soleplate:
1. Unplug the iron. Allow the iron to cool and then wip
WARNING: DO NOT use abrasive cleansers, scouring pad
2. Run the iron over an all-cotton cloth to remove any
to use veRtIcal steam:
usIng the self-cleanIng featuRe
1. Make sure that the iron has heated up (2 minutes).
You should use the Self-Cleaning feature once a month to
2. Hold the iron in a vertical position, with the iron close to but not touching the fabric you want to steam.
to use the self-cleanIng featuRe:
3. With your other hand, pull the fabric tight.
4. Press the Shot of Steam® button for approximately 3-second intervals as you move the iron across the wrinkled
area.
WARNING: To prevent the risk of burns, keep your hand away from the area being steamed.
WARNING: DO NOT steam garments while wearing them; this may result in injuries.
3-WaY motIon smaRt™ auto-off featuRe
When the iron is plugged in and the Auto-Off is activated, the OFF selection on the digital display and the red Wait
light will blink, indicating that the iron has stopped heating. The Auto-Off is activated if not moved after 30 seconds
in the ironing position and on its side, and after 15 minutes in the upright position. Five (5) minutes after the AutoOff has been activated, in any position, the iron display and all lights will turn totally OFF.
If you leave the iron:
• In a horizontal position without moving it, or accidentally tip the iron over, it will automatically stop heating
after 30 seconds. The OFF selection on the digital display and the red Wait light blink to let you know that the
iron has stopped heating.
1. Unplug the iron. Move the Steam Selection Slide bac
from the Steam Valve. This keeps water flowing into
2. Fill the water reservoir with tap water to the MAX l
3. Plug in the iron and press Fabric Select button to Linen
4. Unplug the iron.
5. Hold the iron over a sink in a horizontal position.
WARNING: Be careful not to touch the iron’s hot surfac
6. Press the Self-Clean button and hold. Water will beg
to side and front to back for 30 seconds. When rock
of the iron to make certain the water circulates comp
7. Turn the iron upside down and allow the remaining
8. Dry the soleplate with a towel.
9. Plug in the iron and press the Fabric Select button to
and dry out the iron completely.
• In a vertical position (on its heel rest) without moving it, the iron will automatically turn off after 15 minutes.
The OFF selection on the digital display and the red Wait light blink to let you know that the iron has stopped
heating.
10. Press the Fabric Select button to OFF. The lights will
Unplug the iron and allow it to cool.
Important: The OFF selection on the digital display and the red Wait light will continue to blink for 5 minutes, then
turn totally OFF.
The professional iron houses an anti-calcium filter in the r
To reset the iron:
• Move the iron back and forth. The OFF selection on the digital display and the red Wait light will stop
blinking and the iron will start heating again (allow it to reheat for 2 minutes); the desired fabric setting will be
highlighted.
• Press the (- +) Fabric Select button, the digital display and red Wait light will illuminate, indicating power has
been restored to the iron (the desired fabric setting will still be selected). Wait for the light to turn GREEN before
ironing.
WARNING: The MOTION SMART™ Auto-Off is a safety feature, not a recommended means for turning your iron
off. See “Caring for Your Iron After Use” for information on turning off your iron and storing it safely between use.
cleanIng the antI-calcIum sYstem
to pRolong the effIcIencY of thIs fIlteR:
1. Unplug the iron and allow it to cool.
2. Locate the water cup that accompanied the iron and
fill the water reservoir with this solution.
3. Leave the solution in the water reservoir for 15 minu
4. Fill the water reservoir a second time with the salt w
5. Fill the tank with fresh water to rinse and empty.
The Anti-Calcium System should be cleaned approximate
Faites basculer
au textile voulu
puis attendez que
le voyant rouge
tourne au vert.
12
15
14
13
13. Semelle MicroGlideMC
(modèle 4265-33 seulement)
Semelle en acier inoxydable
(Modéle 4267-33 seulement)
14. Repère maximal de remplissage
15. Indicateur de rangement Storage StripMD
• To iron zippers, use an ironing cloth or m
the flap. Never iron directly over an unpr
• Use the Ironing Guide to select the best se
you plan to iron.
(modèle 4265-33 seulement)
ion Slide to OFF (Dry).
reservoir. Do not fill water reservoir beyond maximum
ing a hot iron with water. Hot metal parts, hot water and
elect button until the desired fabric is highlighted. The
is ready to use.
OFF (Dry) setting.
RemplIssage du RéseRvoIR
WARNING: NEVER yank the power cord when unplugging the iron.
This can damage the cord.
WaIt/ReadY lIght
Indicates when your iron reaches the desired temperature. When a fabric setting has been selected the red Wait light
illuminates. Once the iron heats up to the desired fabric selection, the light will change from red (Wait) to green
(Ready). This occurs each time the fabric setting is changed. It will also occur when the iron has been reset after the
Auto-Off is deactivated.
antI-calcIum sYstem
The Anti-Calcium System is a permanent system located inside the water reservoir. This system removes calcium
from the water and reduces calcium build-up on the soleplate.
mIcRoglIde™ soleplate (model 4265-33 onlY)
Provides superior glide over Non-stick and Stainless Steel for quick and easier ironing.
dRIp-fRee
Produces steam without any dripping, spitting, or leaking through the soleplate,
even at low temperatures.
stoRage stRIp® IndIcatoR
(model 4265-33 only)
The STORAGE STRIP® indicator is an easy way to see when the iron is cool enough to store.
F (Dry) setting, you may still use the SHOT OF STEAM®
ater reservoir is at least 1/4 full of water.
ng for your fabric.
to use the stoRage stRIp® IndIcatoR:
Turn iron on. In approximately 2 minutes, the STORAGE STRIP® indicator will turn from black to red, indicating
that the iron is too hot to store. When the iron is turned off, it will take the iron approximately 30 - 40 minutes for the
STORAGE STRIP® indicator to turn from red to black, indicating that the iron is cool enough to store.
oir”.
Caution: The STORAGE STRIP® indicator should only be used as a guideline. The iron should always be handled and
stored with care.
he Steam Selection Slide
tuRnIng off YouR IRon
ng for your fabric.
WARNING: NEVER yank the power cord when unplugging the iron. This can damage the cord.
caRIng foR YouR IRon afteR use
on Slide to OFF (Dry).
specIal featuRes
at dampens the fabric
ing creases.
dry.
m for deep penetration of stubborn wrinkles. You can use
rvoir must be at least 1/4 full of water.
team® button each time you would like an extra burst of
sly with just a short 3 second pause between shots.
a garment steamer.
lothing on a clothes hanger for best results. Hanging
1. Unplug the iron from the power source.
1. Assurez-vous que le fer soit débranché. Réglez le curseu
2. Faites glisser le volet de l’orifice de remplissage pour o
3. Remplissez le godet d’eau puis versez l’eau dans le réser
maximal de remplissage.
AVERTISSEMENT: Remplissez prudemment le réservoir
et la vapeur peuvent provoquer des
sélectIon du textIle voulu
Pour choisir un tissu (figure A), appuyez sur la touche de s
évidence. Le voyant Wait (attendre) brillera rouge durant le
fois le fer prêt à l’emploi.
Repassage à sec
1. Assurez-vous que le curseur de débit de vapeur soit rég
2. Branchez le fer sur courant alternatif de 120 volts.
3. Choisissez le textile requis.
RemaRque: Quand le curseur de débit de vapeur à réglé à
OF STEAMMD ou l’atomisation SPRAY MISTMD. Veillez à
tRuc: Le guide de repassage indique les réglages conseillés se
Repassage à la vapeuR
1. Observez les instructions fournies sous «Remplissage d
2. Branchez le fer sur courant alternatif de 120 volts.
3. Choisissez le textile requis.
4. Laissez chauffer le fer 2 minutes puis réglez le curseur d
tRuc: Le guide de repassage indique les réglages conseillés se
ImpoRtant: Entre utilisations du fer, réglez toujours le cu
tIRez paRtI des
MD
atomIsatIon spRaY mIst
MD
stoRIng YouR IRon
®
1. Allow the iron to cool. (Model 4265-33 only: Wait for the Storage Strip indicator to return to its
original black color, indicating that the iron is cool enough to store.)
2. If you do not use your iron on a daily basis, empty the water reservoir after each use for a longer iron life. To
do so, unplug the iron, turn the iron upside down, open the fill hole cover, and allow water to flow from the fill
hole. Shake the iron gently to remove trapped water drops.
3. Loosely loop the power cord around the heel rest and store the iron on its heel rest.
Important: Wrapping the cord around the iron too tightly can damage the cord.
Tip: When not ironing, always set the Steam Selection Slide to OFF (Dry).
maIntaInIng YouR pRofessIonal IRon
cleanIng the soleplate
Clean the soleplate if starch or other residue accumulate.
to clean the soleplate:
1. Unplug the iron. Allow the iron to cool and then wipe it with a soft, damp cloth.
WARNING: DO NOT use abrasive cleansers, scouring pads or vinegar to clean the soleplate. This will damage the finish.
L’atomisation SPRAY MIST produit une puissante pulvé
faux plis tenaces ou à marquer davantage les plissés.
Pour utiliser l’atomisation spRaY mIstMD:
Appuyez fermement sur le bouton d’atomisation SPRAY M
MD
Jet de vapeuR shot of steam
Le jet de vapeur SHOT OF STEAMMD procure un surcroî
peut être utilisée lors du repassage à sec ou à la vapeur, à con
d’eau.
Pour utiliser le jet de vapeur SHOT OF STEAMMD:
Tenez le fer au-dessus des faux plis puis appuyez sur le bouto
vous désirez un supplément de vapeur. Cette fonction peut
s’employer de façon continue, en laissant écouler 3 secondes
défRoIssage paR pRoJectIon veRtIcale de vapeuR
Le défroissage vertical permet de se servir du fer à repasser co
tRuc: Placez les vêtements à défriper sur des cintres pour ob
aussi très pratique pour défroisser les rideaux et tentures.
Pour utiliser le défroissage vertical:
1. Attendez que le fer ait chauffé (2 minutes).
hat dampens the fabric
tting creases.
o dry.
am for deep penetration of stubborn wrinkles. You can use
ervoir must be at least 1/4 full of water.
Steam® button each time you would like an extra burst of
usly with just a short 3 second pause between shots.
a garment steamer.
clothing on a clothes hanger for best results. Hanging
to but not touching the fabric you want to steam.
econd intervals as you move the iron across the wrinkled
nd away from the area being steamed.
hem; this may result in injuries.
, the OFF selection on the digital display and the red Wait
g. The Auto-Off is activated if not moved after 30 seconds
es in the upright position. Five (5) minutes after the Autond all lights will turn totally OFF.
tally tip the iron over, it will automatically stop heating
play and the red Wait light blink to let you know that the
it, the iron will automatically turn off after 15 minutes.
Wait light blink to let you know that the iron has stopped
he red Wait light will continue to blink for 5 minutes, then
the digital display and the red Wait light will stop
to reheat for 2 minutes); the desired fabric setting will be
and red Wait light will illuminate, indicating power has
still be selected). Wait for the light to turn GREEN before
ety feature, not a recommended means for turning your iron
n turning off your iron and storing it safely between use.
2. If you do not use your iron on a daily basis, empty the water reservoir after each use for a longer iron life. To
do so, unplug the iron, turn the iron upside down, open the fill hole cover, and allow water to flow from the fill
hole. Shake the iron gently to remove trapped water drops.
3. Loosely loop the power cord around the heel rest and store the iron on its heel rest.
Important: Wrapping the cord around the iron too tightly can damage the cord.
Tip: When not ironing, always set the Steam Selection Slide to OFF (Dry).
maIntaInIng YouR pRofessIonal IRon
cleanIng the soleplate
Clean the soleplate if starch or other residue accumulate.
Appuyez fermement sur le bouton d’atomisation SPRAY M
MD
Jet de vapeuR shot of steam
Le jet de vapeur SHOT OF STEAMMD procure un surcro
peut être utilisée lors du repassage à sec ou à la vapeur, à co
d’eau.
Pour utiliser le jet de vapeur SHOT OF STEAMMD:
Tenez le fer au-dessus des faux plis puis appuyez sur le bout
vous désirez un supplément de vapeur. Cette fonction peut
s’employer de façon continue, en laissant écouler 3 secondes
défRoIssage paR pRoJectIon veRtIcale de vapeuR
2. Fill the water reservoir with tap water to the MAX line.
Le défroissage vertical permet de se servir du fer à repasser c
tRuc: Placez les vêtements à défriper sur des cintres pour o
aussi très pratique pour défroisser les rideaux et tentures.
Pour utiliser le défroissage vertical:
1. Attendez que le fer ait chauffé (2 minutes).
2. Tenez le fer à la verticale près du tissu à défriper – ma
3. Tendez le tissu de l’autre main.
4. Appuyez sur le bouton du jet de vapeur SHOT OF S
balayez la partie froissée avec le fer.
AVERTISSEMENT: Éloignez votre main de la trajecto
AVERTISSEMENT: NE défroissez PAS de vêtements e
3. Plug in the iron and press Fabric Select button to Linen, and allow the iron to heat until the Wait light turns GREEN.
coupuRe motIon smaRtMC IntellIgente 3 faço
to clean the soleplate:
1. Unplug the iron. Allow the iron to cool and then wipe it with a soft, damp cloth.
WARNING: DO NOT use abrasive cleansers, scouring pads or vinegar to clean the soleplate. This will damage the finish.
2. Run the iron over an all-cotton cloth to remove any residue.
usIng the self-cleanIng featuRe
You should use the Self-Cleaning feature once a month to maintain the optimal performance of your iron.
to use the self-cleanIng featuRe:
1. Unplug the iron. Move the Steam Selection Slide back and forth several times to remove debris and minerals
from the Steam Valve. This keeps water flowing into the steam chamber.
4. Unplug the iron.
5. Hold the iron over a sink in a horizontal position.
WARNING: Be careful not to touch the iron’s hot surfaces.
6. Press the Self-Clean button and hold. Water will begin dripping from the steam vents. Slowly rock the iron side
to side and front to back for 30 seconds. When rocking the iron, dip the nose of the iron slightly below the rear
of the iron to make certain the water circulates completely.
7. Turn the iron upside down and allow the remaining water to flow out of the fill hole.
8. Dry the soleplate with a towel.
9. Plug in the iron and press the Fabric Select button to Linen. Let the iron heat until the Wait light turns GREEN
and dry out the iron completely.
10. Press the Fabric Select button to OFF. The lights will go out, indicating that the iron has turned itself off.
Unplug the iron and allow it to cool.
cleanIng the antI-calcIum sYstem
The professional iron houses an anti-calcium filter in the reservoir, which eliminates impurities from the water.
to pRolong the effIcIencY of thIs fIlteR:
1. Unplug the iron and allow it to cool.
2. Locate the water cup that accompanied the iron and fill it with water. Add 1 teaspoon of salt to the water and
fill the water reservoir with this solution.
3. Leave the solution in the water reservoir for 15 minutes, then empty it.
4. Fill the water reservoir a second time with the salt water solution and empty it again after 15 minutes.
5. Fill the tank with fresh water to rinse and empty.
The Anti-Calcium System should be cleaned approximately once a month.
Quand la fonction d’arrêt automatique est activée, alors
évidence à l’afficheur et le voyant lumineux rouge Wait (
automatique est mis en fonction si le fer reste 30 seconde
reste 15 minutes en position verticale. Cinq (5) minutes a
soit la position du fer – l’afficheur ainsi que les voyants lu
Si vous laissez le fer…
• à l’horizontale (à plat) sans le déplacer, ou bien si vous le
de chauffer après 30 secondes. L’indication OFF (arrêt
pour signaler que le fer a cessé de chauffer;
• à la verticale (sur son talon) sans le déplacer, le fer s’
15 minutes. L’indication OFF (arrêt) à l’afficheur et
le fer a cessé de chauffer.
ImpoRtant: L’indication OFF (arrêt) à l’afficheur et le vo
avant de S’ÉTEINDRE.
Pour relancer le fer…
• Déplacez le fer d’avant en arrière. L’indication OFF (
s’arrêteront de clignoter et le fer recommencera à cha
textile qui avait été sélectionné sera mis en évidence.
• Appuyez sur le bouton de sélection des textiles (- +)
s’allument, indiquant que le fer fonctionne de nouv
Attendez que le voyant passe au VERT pour repass
AVERTISSEMENT: La coupure Motion Smart MC int
de mise hors tension du fer. Voyez «Soins à apporter au fer
mise hors tension et le rangement du fer.
AVERTISSEMENT: NE donnez JAMAIS un coup sec
s du feR pRofessIonnel
1.
2.
3.
4.
Orifice d’atomisation Spray MistMD
Orifice de remplissage à volet
Afficheur électronique rétroéclairé
Indicateur d’arrêt automatique /
voyant Wait/Ready (attendre/prêt)
5. Bouton d’atomisation SPRAY
MISTMD
6. Curseur de débit de vapeur
7. Bouton jet de vapeur SHOT OF
STEAMMD et vaporisation verticale
8. Touche de sélection des textiles
9. Poignée à prise douce
10. Cordon articulé 360°, non emmêlant
11. Réservoir translucide
12. Bouton d’autonettoyage
13. Semelle MicroGlideMC
(modèle 4265-33 seulement)
Semelle en acier inoxydable
(Modéle 4267-33 seulement)
14. Repère maximal de remplissage
15. Indicateur de rangement Storage StripMD
c onseIls
I RonIng t Ips
• Always read garment labels and follow the manufacturer’s ironing instructions.
• Sort the articles to be ironed according to the type of fabric.
• You should first iron garments requiring low temperature (e.g., silks and synthetics)
to avoid damaging them with an iron that is too hot.
• If you are unsure of the fabric content of the garment, test a small area, such as a seam
or facing, before ironing a visible area. Start with a low temperature and gradually
increase the heat to find the best setting.
• When changing the temperature from a high setting to a low setting,
allow approximately 5 minutes for the lower temperature to be reached.
• When steam ironing, use long, slow passes over the fabric. This will allow the steam
to penetrate the fabric while allowing the heat of the soleplate to dry out the moisture.
• To iron linens, turn garment inside out. Be careful not to use an iron that is too hot
because the lining may melt or stick to the soleplate.
• To iron zippers, use an ironing cloth or make sure the zipper is closed and iron over
the flap. Never iron directly over an unprotected zipper.
• Use the Ironing Guide to select the best setting and method for the fabric
you plan to iron.
d
• Lisez toujours les instructions de repa
• Triez le linge à repasser selon la natur
• Repassez en premier les pièces nécessi
et soie, par exemple) pour ne pas les a
• Si vous ne connaissez pas la nature ex
une couture ou une parmenture. Com
que vous augmenterez progressivemen
• Laissez refroidir le fer environ 5 minu
température à un niveau de températu
• Quand vous repassez à la vapeur, don
aura ainsi le temps de pénétrer dans l
• Dans le cas du lin, repassez le vêteme
chaud car la doublure pourrait fondre
• Servez-vous d’une pattemouille pour r
assurez-vous que les glissières soient f
directement le fer sur une glissière no
• Consultez le guide de repassage pour
façon de repasser les divers textiles.
(modèle 4265-33 seulement)
gging the iron.
. When a fabric setting has been selected the red Wait light
election, the light will change from red (Wait) to green
d. It will also occur when the iron has been reset after the
RemplIssage du RéseRvoIR
1. Assurez-vous que le fer soit débranché. Réglez le curseur de débit de vapeur à OFF (sec).
2. Faites glisser le volet de l’orifice de remplissage pour ouvrir l’orifice.
3. Remplissez le godet d’eau puis versez l’eau dans le réservoir du fer. Ne remplissez pas le réservoir au-delà du repère
maximal de remplissage.
AVERTISSEMENT: Remplissez prudemment le réservoir d’un fer chaud. Les pièces métalliques chaudes, l’eau chaude
et la vapeur peuvent provoquer des brûlures.
inside the water reservoir. This system removes calcium
plate.
sélectIon du textIle voulu
for quick and easier ironing.
Repassage à sec
through the soleplate,
Pour choisir un tissu (figure A), appuyez sur la touche de sélection des textiles (- +) jusqu’à ce que le tissu désiré soit en
évidence. Le voyant Wait (attendre) brillera rouge durant le chauffage puis la lumière passera au vert (Ready/prêt) une
fois le fer prêt à l’emploi.
1. Assurez-vous que le curseur de débit de vapeur soit réglé à OFF (sec).
voYant WaIt/ReadY (attendRe/pRêt)
Signale quand le fer a atteint la température sélection
textile. Une fois le fer à la température préconisée pou
vert (Ready/prêt). Ceci se produit à chaque fois que v
après son arrêt automatique.
sYstème antI-taRtRe
Le système anti-tartre est un système permanent, incorp
l’entartrage (l’accumulation de minéraux) de la semelle.
semelle mIcRoglIdemc (modèle 4265-33 seulem
Glissant encore mieux qu’une semelle antiadhésive o
repassage.
antI-gouttes
Le fer produit de la vapeur sans dégoutter, cracher ou
basse température.
md
1 Year Limited Warranty
Garantie limitée de un an
Sunbeam Products, Inc. doing business as Jarden Consumer Solutions or if in Canada, Sunbeam
Corporation (Canada) Limited doing business as Jarden Consumer Solutions (collectively “JCS”)
warrants that for a period of one year from the date of purchase, this product will be free from
defects in material and workmanship. JCS, at its option, will repair or replace this product or
any component of the product found to be defective during the warranty period. Replacement
will be made with a new or remanufactured product or component. If the product is no longer
available, replacement may be made with a similar product of equal or greater value. This is
your exclusive warranty. Do NOT attempt to repair or adjust any electrical or mechanical
functions on this product. Doing so will void this warranty.
This warranty is valid for the original retail purchaser from the date of initial retail purchase
and is not transferable. Keep the original sales receipt. Proof of purchase is required to obtain
warranty performance. JCS dealers, service centers, or retail stores selling JCS products do not
have the right to alter, modify or any way change the terms and conditions of this warranty.
This warranty does not cover normal wear of parts or damage resulting from any of the
following: negligent use or misuse of the product, use on improper voltage or current, use
contrary to the operating instructions, disassembly, repair or alteration by anyone other than
JCS or an authorized JCS service center. Further, the warranty does not cover: Acts of God,
such as fire, flood, hurricanes and tornadoes.
What are the limits on JCS’s Liability?
JCS shall not be liable for any incidental or consequential damages caused by the breach of
any express, implied or statutory warranty or condition.
Except to the extent prohibited by applicable law, any implied warranty or condition of
merchantability or fitness for a particular purpose is limited in duration to the duration of
the above warranty.
JCS disclaims all other warranties, conditions or representations, express, implied, statutory
or otherwise.
JCS shall not be liable for any damages of any kind resulting from the purchase, use or misuse
of, or inability to use the product including incidental, special, consequential or similar damages
or loss of profits, or for any breach of contract, fundamental or otherwise, or for any claim
brought against purchaser by any other party.
Some provinces, states or jurisdictions do not allow the exclusion or limitation of incidental
or consequential damages or limitations on how long an implied warranty lasts, so the above
limitations or exclusion may not apply to you.
This warranty gives you specific legal rights, and you may also have other rights that vary from
province to province, state to state or jurisdiction to jurisdiction.
How to Obtain Warranty Service
In the U.S.A.
If you have any question regarding this warranty or would like to obtain warranty service,
please call 1.800.458.8407 and a convenient service center address will be provided to you.
In Canada
If you have any question regarding this warranty or would like to obtain warranty service,
please call 1.800.667.8623 and a convenient service center address will be provided to you.
In the U.S.A., this warranty is offered by Sunbeam Products, Inc. doing business as Jarden
Consumer Solutions located in Boca Raton, Florida 33431. In Canada, this warranty is offered
by Sunbeam Corporation (Canada) Limited doing business as Jarden Consumer Solutions,
located at 20 B Hereford Street, Brampton, Ontario L6Y 0M1. If you have any other problem
or claim in connection with this product, please write out Consumer Service Department
PLEASE DO NOT RETURN THIS PRODUCT TO ANY OF THESE ADDRESSES
OR TO THE PLACE OF PURCHASE
Sunbeam Products, Inc., faisant affaires sous le
Canada, Sunbeam Corporation (Canada) Limit
Consumer Solutions (collectivement «JCS») ga
courant à partir de la date d’achat, ce produit s
JCS se réserve le droit de choisir entre réparer o
dont la défectuosité a été constatée au cours de
au moyen d’un article neuf ou réusiné ou bien d
plus disponible, il sera remplacé par un article d
votre garantie exclusive. N’essayez en AUCUN
électrique ou mécanique du produit sous peine
Cette garantie n’est valable que pour l’acheteu
au détail initial et elle n’est pas transférable. V
d’achat est requise pour obtenir le service prév
centres de service et détaillants qui vendent de
modifier ou de changer d’une manière quelcon
Cette garantie ne couvre pas l’usure normale d
la négligence, à l’utilisation abusive de l’article
courant inapproprié, au démontage, à la répar
un centre de service JCS agréé. Cette garantie
comme incendies, inondations, ouragans et tor
Quelles sont les limites de la responsabilité de
JCS n’asume aucune responsabilité en cas de d
non-respect de toute garantie ou condition lég
Sauf dans la mesure interdite par la législation
de qualité commerciale ou d’application à un u
garantie ou condition ci-dessus.
JCS dénie toute responsabilité en ce qui concer
représentations expresses, tacites, légales, ou a
JCS n’assume aucune responsabilité pour les d
de l’utilisation abusive ou non du produit, de l
dommages accessoires, particuliers, indirects o
contrat, fondamentale ou autre, ou tout procè
Certaines provinces ou juridictions et certains
dommages accessoires ou indirects, ou ne perm
de la garantie implicite, de sorte que vous pou
énoncées ci-dessus.
Cette garantie vous confère des droits juridiqu
droits variant d’un État ou d’une province ou
Comment obtenir le service prévu par la garan
Aux États-Unis
Pour toute question sur la garantie ou pour obte
800 458.8407 et nous vous fournirons l’adresse
Au Canada
Pour toute question sur la garantie ou pour obte
800 667.8623 et nous vous fournirons l’adresse
Aux États-Unis, cette garantie est offerte par Sun
Jarden Consumer Solutions, de Boca Raton, en F
par Sunbeam Corporation (Canada) Limited, fai
Solutions, du 20B Hereford Street à Brampton (O
réclamation en ce qui concerne ce produit, veuill
NE RETOURNEZ CE PRODUIT NI À L’UNE D
m de Jarden Consumer Solutions, ou au
aisant affaires sous le nom de Jarden
t que pendant une période de un (1) an
exempt de vices de matériaux et de fabrication.
mplacer l’article ou toute pièce de celui-ci
ériode de garantie. Le remplacement se fera
e pièce neuve ou réusinée. Si le produit n’est
aleur égale ou supérieure. La présente constitue
S de réparer ou de modifier une fonction
nulation automatique de la garantie.
détail original, à partir de la date de l’achat
ez garder votre reçu de caisse. Une preuve
ar la garantie. Les concessionnaires JCS,
icles JCS n’ont pas le droit d’altérer, de
les modalités de cette garantie.
ièces ni l’endommagement attribuable à
branchement sur un circuit de tension ou
n ou à l’altération par quiconque, sauf JCS ou
ouvre pas non plus les cas de force majeure
es.
?
mages accessoires ou indirects résultant du
explicite ou implicite.
tinente, toute garantie ou condition implicite
e particulier est limitée à la durée de la
outes autres garanties, conditions ou
s.
mages, quels qu’ils soient, résultant de l’achat,
ptitude à employer le produit, ni pour les
milaires, la perte de bénéfices, la rupture de
enté contre l’acheteur par une tierce partie.
s interdisent d’exclure ou de limiter les
nt pas la limitation de la durée d’application
ne pas être assujetti aux limites ou exclusions
récis et vous pouvez avoir d’autre droits, ces
diction à l’autre.
e service que prévoit la garantie, composez le 1
centre de service agréé commodément situé.
e service que prévoit la garantie, composez le 1
centre de service agréé commodément situé.
m Products, Inc., faisant affaires sous le nom de
de 33431. Au Canada, cette garantie est offerte
affaires sous le nom de Jarden Consumer
rio) L6Y 0M1. En cas de problème ou de
ommuniquer avec le Service à la clientèle.
ADRESSES CI-DESSUS NI AU LIEU D’ACHAT.
/MD
For product questions:
Jarden Consumer Service
Canada : 1.800.667.8623
USA : 1.800.458.8407
www.sunbeam.com
Instruction Manual
Notice d’emploi
©2013 Sunbeam Products, Inc. doing business as Jarden Consumer Solutions.
All rights reserved.
In the U.S., distributed by Sunbeam, Products, Inc.
doing business as Jarden Consumer Solutions, Boca Raton, FL 33431
In Canada, imported and distributed by Sunbeam Corporation (Canada) Limited
doing business as Jarden Consumer Solutions,
20B Hereford Street, Brampton, Ontario L6Y 0M1.
MODELS/
MODÈLES
Profe
Fer p
4267-3
Pour toute question en ce qui concerne ce produit, appelez le
service à la clientèle de Jarden
Canada: 1 800 667.8623
États-Unis: 1 800 458.8407
www.sunbeam.com
©2013 Sunbeam Products, Inc., faisant affaires sous le nom de Jarden Consumer Solutions.
Tous droits réservés.
Aux États-Unis, distribué par Sunbeam, Products, Inc.
faisant affaires sous le nom de Jarden Consumer Solutions, Boca Raton, FL 33431.
Au Canada, importé et distribué par Sunbeam Corporation (Canada) Limited
faisant affaires sous le nom de Jarden Consumer Solutions,
20B Hereford Street, Brampton (Ontario) L6Y 0M1.
GCDS-OST29103-ZZ
Printed in China
Imprimé en Chine
www.sunbeam.com