Transcript
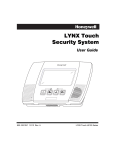
Honeywell Lynx Plus Quick Reference Card the instructions on this card will guide you through the basic functions of your Lynx Plus panel. For additional questions, you can consult the user manual or call technical support at Bypass Sensors 866.290.6769 To bypass a sensor using your Honeywell Lynx Plus panel, complete the following steps: 1. On your alarm panel, type in your master code, followed by 6 (bypass), followed by the zone number you’d like to bypass. 2. For example, if I want to bypass my back door sensor, which is zone 03, I would type in: [1] [2] [3] [4] [6] [0] [3]. 3. After this, your panel should display “bypass” on the screen. 4. Now if your panel is armed, zone 03 back door will be bypassed until you disarm the system once again. Arm & Disarm Your System To arm all of your sensors (including motion detectors) Press Master Code > [AWAY] To arm all of your sensors (excluding any motion detectors) Press Master Code > [STAY] To disarm your system Press Master Code > [OFF] Change Your Master Code & Adding User Codes To change the master code on your Honeywell Lynx Plus panel, complete the following steps: 1. These steps must be done in quick fashion, otherwise it will not work. 2. Type in your Master Code, followed by 802, followed by your new Master Code twice in a row. 3. For example, if my current Master Code were 1234, and I wanted to change it to 9876, I would type in: [1] [2] [3] [4] [8] [0] [2] [9] [8] [7] [6] [9] [8] [7] [6] 4. Panel will give you a confirmation beep afterwards if this is done correctly. To create a secondary code (ex. User 03) for other users, Press Master Code > [8] [0] [3] > New User Code. To delete a secondary code (ex. User 05) Press Master Code [8] [0] [5] > wait three seconds for a beep from the panel. Your system can accommodate up to four additional users: (03), (04), (05) and (06). These four secondary codes can’t create, change or delete any other four-digit user codes. The babysitter code (07) can only disarm the system if it was used to arm the system. Enable & Disable Chime Function To turn on the chime on your Honeywell Lynx Plus Panel, complete the following steps: 1. On your alarm panel, type in # and then chime. [#] [9] this will turn the chime on your alarm panel on and off. My Phone Is Ringing Through My Panel To turn off the ringer through your panel Press [#] [2] [AUX]. Call your home phone to make sure the ringing has stopped. If the ringing continues, repeat the previous step. Check System Status To check the status of your alarm system Press [*] [*]. When disarmed, the system will announce its status and display any open, faulting zones, or system errors. Adjust Panel Volume To turn up the volume on your Honeywell Lynx Plus panel, complete the following steps: 1. On your alarm panel, the 2 key is also the volume key. The 3 key is also the up key. The 6 key is also the down key. 2. To increase the volume on the keypad, press [#]+[2]+[3]. Repeat until desired volume is reached. 3. To decrease the volume on the keypad, press [#]+[2]+[6]. Repeat until the desired volume is reached. Set the Date and Time To set the date and time on your Honeywell Lynx Plus panel, complete the following steps: 1. For this example, we will be setting the date and time to 10-05-2012 and 11:35 am. 2. Type in your master code, followed by [# 6 3]. 3. Your panel will then ask you to type in the two digit hour followed by “away”, which you would type in as [1 1 away] 4. Your panel will then ask you to type in the two digit minutes followed by “away”, which you would type in as [3 5 away]. 5. Your panel will then continue to ask you for the next selections, after which you will always press “away” to confirm your selection. 6. After your panel has finished asking you to select two digit hour, am or pm, two digit minutes, two digit month, two digit day, two digit year, you will be all done. 7. Your panel should display the correct time on the screen once you’re all done.