1
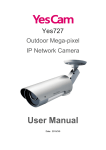
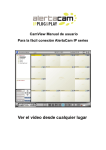
YesCam View & YesCam Play User Manual YesCam View User Manual For Easy Connection YesCam Series Seeing the video from anywhere Version:1.2.4 Date:2015.02.3 1 YesCam View & YesCam Play User Manual Table of Content 1. Introduction…….........................................................................................................................4 2. System Requirement.................................................................................................................4 3. Install YesCam View Program....................................................................................................5 4. Startup and the layout of YesCam View.....................................................................................6 4.1 Startup YesCam View...........................................................................................................6 4.2 Layout of YesCam View........................................................................................................6 4.3 Display Mode……..................................................................................................................6 5. Managing YesCam View Camera IP cameras.............................................................................7 5.1 New Camera........................................................................................................................7 5.2 New Folder..........................................................................................................................8 5.3 Rename...............................................................................................................................8 5.4 Delete..................................................................................................................................8 5.5 Refresh Status......................................................................................................................8 6. Camera Adjustment..................................................................................................................9 6.1 Play on Selected Window....................................................................................................9 6.2 ID / Password Settings.......................................................................................................10 6.3 Video Settings....................................................................................................................10 6.3.1 Quality Function Tab.....................................................................................................11 6.3.2 Video Function Tab.......................................................................................................12 6.3.3 Control Function Tab.....................................................................................................12 6.3.4 Camera info Tab............................................................................................................13 6.4 Mobil Setting.....................................................................................................................13 6.5 SD-Card Playback...............................................................................................................14 6.6 NAS Playback.....................................................................................................................15 6.7 Firmware Upgrade.............................................................................................................16 6.8 Delete................................................................................................................................17 7. DISPLAYED VIDEO CONTROL...................................................................................................18 7.1 Full Window......................................................................................................................19 7.2 Auto Reconnect……...........................................................................................................19 7.3 Stop...................................................................................................................................19 7.4 Pause.................................................................................................................................19 7.5 Motion Recording..............................................................................................................19 7.6 Motion Recording..............................................................................................................19 7.7 DI Count……….....................................................................................................................19 7.8 Properties..........................................................................................................................19 7.9 Snapshot & Continuous Recording....................................................................................20 2 YesCam View & YesCam Play User Manual 7.10 7.11 7.12 Auto Search…...............................................................................................................20 IP Cam online status indicator......................................................................................21 Pan Tilt Panel Function.................................................................................................21 8. YesCam View Software Functions..........................................................................................22 8.1 SETTING.............................................................................................................................22 8.1.1 Directories Settings.......................................................................................................23 8.1.2 Startup Options.............................................................................................................23 8.1.3 Firmware Upgrade........................................................................................................24 8.1.4 Fixed IP access...............................................................................................................24 8.1.5 Login..............................................................................................................................25 8.1.6 Image ratio....................................................................................................................25 8.1.7 SoftWare Update…..…………………………………………………………………..…………………………….26 8.2 YesCam Play...........................................................................................................................26 8.3 Scheduling.............................................................................................................................26 8.3.1 Camera..........................................................................................................................27 8.3.2 Mode.............................................................................................................................27 8.3.3 Continuous Recording...................................................................................................27 8.3.4 Periodic Recording........................................................................................................28 8.3.5 Recording/Playing Conflict............................................................................................28 8.4 Language…............................................................................................................................28 8.5 All Function...........................................................................................................................29 Appendix I: Uninstall YesCam View.................................................................................................29 Appendix II: Performance Information...........................................................................................32 Appendix III: Frequent Ask Question..............................................................................................32 9. YesCam Play User Manual...........................................................................................................33 9.1 YESCAM PLAY - Open Record………….....................................................................................34 9.1.1 Current record folder.....................................................................................................34 9.1.2 Preview video...............................................................................................................34 9.1.3 Name / ID of cameras...................................................................................................34 9.1.4 Video distribution figure...............................................................................................34 9.1.5 Recorded video bar…....................................................................................................34 9.1.6 Recorded video files......................................................................................................34 9.2 YESCAM PLAY - Open Nas......................................................................................................36 9.3 YESCAM PLAY - Open Snapshot.............................................................................................39 9.4 YESCAM PLAY - Functions.....................................................................................................40 9.4.1 Directory.......................................................................................................................40 9.4.2 Language.......................................................................................................................40 9.4.3 Headline Explanation....................................................................................................41 9.4.4 Convert to “.AVI”...........................................................................................................41 9.5 Playback Function Bar...........................................................................................................41 9.5.1 Snapshot.......................................................................................................................42 9.5.2 Zoom in and zoom out..................................................................................................42 3 YesCam View & YesCam Play User Manual 1. Introduction YesCam View is a 36 channel video management software package which is included with this Series IP Cameras. With this YesCam View software, it is just a mouse-click away to see the video of your IP Camera and surprisingly neither technical knowledge nor complex settings are required. Each IP Camera has a unique Camera ID (9 digits long) and a password for logging in to see the video. 2. System Requirement 1. Operation System: Windows XP SP2 and Up 2. Pentium 4 CPU 1.5GHz; 512MB & up DRAM Note: For more than 4 cameras display, more powerful CPU and higher DRAM is needed 4 YesCam View & YesCam Play User Manual 3. Install YesCam View Program Step 1. Insert the installation CD into your CD-ROM drive and double click Management Software to start the installation Step 2. You will see the “Welcome” window and click next. Step 3. Click Finish to exit. YesCam View installation now is completed. 5 YesCam View & YesCam Play User Manual 4. Startup and the layout of YesCam View 4.1 Startup YesCam View You can startup YesCam View from either StartPrograms YesCam View or the shortcut of YesCam View on the windows desktop. Software Version 4.2 Layout of YesCam View Camera List Video Information Disk space information for recording Software Version Bar Close YesCam Minimize Camera Name Snapshot View Recording Display Area 3 Display Area 1 Cam Status Indicator Auto Search List Display Area 2 Display Area 4 Speed dome Control Panel Two ways audio microphone Setting YesCam Play Languag Schedule All Function Display modes Maximize Speaker e Recording 4.3 Display Mode YesCam View supports 10 display modes. By pressing each mode, you can have a different live view display. 6 YesCam View & YesCam Play User Manual 5. Managing YesCam View Camera IP cameras Right click the “Camera List” .You can add a new IP cam, create a new folder, rename the IP cam or the folder, and delete any IP cams or any folder. Right Click “Camera List”, and choose New Camera 5.1 New Camera Users can add a new camera to the list by entering IP cam ID and password. Users can also name the IP cam. The new camera Enter Name & ID &Password and Click ok 5.2 New Folder Users can group IP cams by creating a new folder. Right click on the “Camera List”. Click “New Folder” Name the new folder 7 YesCam View & YesCam Play User Manual 5.3 Rename You can rename the folder. Rename folder 5.4 Delete You can rename the folder. Delete Folder 5.5 Refresh Status Refresh status 8 YesCam View & YesCam Play User Manual 6. Camera Adjustment By right clicking on a green light status IP cam, you can access the video display, do ID and password settings, adjust video settings, upgrade firmware, and delete from the list. Note: Camera status must be green in order to access function list. Right click Green status Camera Function List 6.1 Play on Selected Window Right click Green status Camera Function List 9 YesCam View & YesCam Play User Manual 6.2 ID / Password Settings Edit Camera Name, ID, and Password. Click OK to activate new setting. All the settings are categorized according to its function. 6.3 Video Settings IP cam Status (Name / ID) Click Update for the changes to take effect. 10 YesCam View & YesCam Play User Manual 6.3.1 Quality Function Tab Bandwidth Available selections are from 64K to 1.5M. Appropriate bandwidth setting must match the camera physical site internet uploading bandwidth. Higher bandwidth contributes better picture quality. Video Setting If you check the box of select the best resolution and frame rate automatically, the camera will automatically adjust the most suitable video setting in Resolution and Frame Rate Resolution: higher resolution you set, bigger image you get. Frame rate: Frame per second (1 to 30fps ), higher frame rate you set, smoother motion you get. Preference By selecting Image Quality, the camera automatically adjusts itself for image quality as priority in case of interference with the network environment. Vice versa, by selecting the Video Motion, the camera automatically adjusts itself for video motion. 11 YesCam View & YesCam Play User Manual 6.3.2 Video Function Tab Video Color User can set the video as colored image or black and white image. Brightness Control the brightness of the camera video from 1(dark) ~ 10(Bright) level Sharpness Control the level of sharpness and clearness of the image Low Light Sensitivity The level of the camera senses the low light condition. Place You can choose the camera installation environment in order to make camera automatically adjust for the best image quality. OSD On Screen Display. Enabling this function will make the camera embed the time information into the picture. Microphone Disable or enable the microphone. When you enable the Mic., the user who monitors the image can hear the sounds. Video Flip This function is only available for the Pan Tilt type of camera to flip the image. 6.3.3 Control Function Tab Check the box to allow user remotely controls the motors for Pan and Tilt. (Only available for the Pan/Tilt type of camera) Status of LED Control User can control the behavior of the status LED. Motion Detection Sensitivity The level of how sensitive the camer is in terms of the motion detection. 12 YesCam View & YesCam Play User Manual 6.3.4 Camera info Tab Show the IP camera information and firmware version. 6.4 GPP Setting To allow 3GPP connections from mobile phones, user has to enable it. Bandwidth The bandwidth setting for 3GPP connection from 32k to 256K. Video Setting Check the box to make the camera determine the best combination of the resolution and frame rate according to the given bandwidth. Microphone Allow user to hear sounds on the 3GPP Device 13 YesCam View & YesCam Play User Manual 6.5 SD-Card Playback Window shows recorded files in NAS which selected camera records videos. Click SD-Card playback Select file you want to play back. YesCam View is playing back recorded video 14 YesCam View & YesCam Play User Manual Window shows recorded files in NAS which selected camera records videos. 6.6 NAS Playback Select file you want to play back. YesCam View is playing back recorded video. 15 YesCam View & YesCam Play User Manual 6.7 Firmware Upgrade In case of new firmware is released, enter FTP server address, FTP username, firmware name, and FTP password to upgrade camera firmware. The default password of Authentication is “admin”. Note: Users can change the default Firmware Upgrade Authentication password in the Web Page Configuration. Please refer to page 34. Select firmware Enter FTP information. Click Plain text to unhide/see the password. Click Upgrade Enter Password and click OK 16 YesCam View & YesCam Play User Manual Upgrading status bar appears to indicate the progress of upgrading. 6.8 Delete Delete the IP cam. 17 YesCam View & YesCam Play User Manual Displayed Video Control Use mouse to select displayed window. Right click to see various functions. Double click information bar to make it full window display Snapshot button Press it to snapshot Record Status Light Black: Non recording Red: Continuous recording Green: MD recording Double click displayed video to make it full screen display 18 YesCam View & YesCam Play User Manual 7.1 Full Window: Choose it to display video in full window. Users can also double click the information bar to display in full window. Double click the displayed video to make full screen display. One more double click changes back to normal window display mode. 7.2 Auto Reconnect: Checking “Auto reconnect” option reconnects the video session automatically if the session is closed by the IP Camera, for example, the settings of the IP Cam has been changed or the Internet connection of the IP Cam has lost. 7.3 Stop: Click to stop video displaying. 7.4 Pause: Click to pause video displaying. 7.5 Motion Recording:Click to enable motion detection recording. When motion detection recording is activated, recording status turns to Green. 7.6 Motion Recording: Click to enable motion detection recording. When motion detection recording is activated, recording status turns to Green. 7.7 DI Count:Click to get DI times. Recording status turns into green. 7.8 Properties: Show current IP cam’s frame rate, consuming bandwidth, resolution, and video compression. 19 YesCam View & YesCam Play User Manual 7.9 Snapshot & Continuous Recording Click to do continuous recording. Status light Click to take snapshot. 7.10 becomes red. Auto Search Auto search is a function that searches for all IP Cameras on your LAN (Local Area Network). At the very beginning of YesCam View startups, YesCam View automatically does the auto search. To do auto search manually, double click on the “Auto Search” folder. YesCam View searches all available IP cams in the LAN and lists all IDs under the folder. Right click on the find Cam ID and select “Web Configuration” to access the IP cam’s web page for configuration. Move the mouse cursor over the Cam ID under Auto Search, you can see the IP address of that Camera Auto Search List: List all the found Cam IDs within this LAN. Web configure: Click to open I.E. browser for further configuring this IP Cam. Move your mouse over Cam ID 001006123 to see its IP address. 20 YesCam View & YesCam Play User Manual 7.11 IP Cam online status indicator There is an IP Cam icon in front of the Camera Name which indicates the online status of that IP Camera. RED IP cam is off line, not connecting to internet GREEN IP is on connected to internet. Yellow IP Camera is online but the signal is not good. Note: The green icon indicates the IP Cam is online and responding, but not guarantees that the video session can be established 100%. Unfavorable Firewall setting may block the video. Red icon: means this IP Cam is offline. Green icon: means this IP Cam is online Note: The green icon indicates the IP Cam is online and responding, but not guarantees that the video session can be established 100%. Unfavorable Firewall setting may block the video. 7.12 Pan Tilt Panel Function Connect to Pan Tilt Dome Camera and drag to any channel in the software, the Pan Tilt Panel will be activated as below: █ Pan Scan: make the Pan Tilt Dome move left and right █ Tilt Scan: make the Pan Tilt dome up and down █ Speed: the speed of Pan Tilt Dome has 3 level of speed (3 is the fastest, 1 is the slowest) :Move up :Move Doen :Move Right :Move Left :Move Back to Home █ Patrol: User can have 1 set of Patrol and 5 points for each Patrol. To set each point for the 21 YesCam View & YesCam Play User Manual patrol, User can use the direction arrow in blue to set each point the user want to stop in a patrol. After set each point, click “set” to save each point. Press “Set” after you decide the point you want to stay stop in patrol The time to stay in each point Speed to move Direction arrow for the Patrol point After setting for each point, press saves to save these points for patrol █ Preset: This function will be activated after any PTZ Dome connect with video server █ Zoom in & out: This function will be activated after any analog PTZ Dome Camera connect to IP video server 8. YesCam View Software Functions 8.1 Setting Click Setting and get into the Setting Function menu. 22 YesCam View & YesCam Play User Manual 8.1.1 Directories Settings: to set the directory path for the Recording and Snapshot Recorded video file folder path Click to open the recording folder. Click to change the path Arrange storage HDD recording space and method Available disk space of current selected hard drive Snapshot file folder path After finishing setting, click OK to save the setting 8.1.2 Startup Options: Determine the camera state at startup Automatically start YesCam View when Windows starts: When Microsoft Windows starts, YesCam View will start running automatically. Restore the last time playing/running state: Restore the state of each video window to what it was before YesCam View closed. Click ok to save the setting 23 YesCam View & YesCam Play User Manual 8.1.3 Firmware Upgrade: Here you can assign the default values for firmware upgrade. By doing so, it saves your time to enter the same information every time. The FTP Info for downloading the firmware Click okay to save the settings. 8.1.4 Firmware file name varies according to the type of camera you use. Please contact your supplier for it. Fixed IP access: Here you can assign a fixed IP address when connect to IP Cam. Please check it. Click okay to save the settings. 24 YesCam View & YesCam Play User Manual 8.1.5 Login: Here you can enable login function to protect your YesCam View software opened from other persons. 8.1.6 Image ratio 25 YesCam View & YesCam Play User Manual 8.1.7 SoftWare Update 8.2 YesCam Play Click YamCam Play to start it for playback. 8.3 Scheduling Click Scheduling to configure scheduled recording/playing. 26 YesCam View & YesCam Play User Manual 8.3.1 Camera: The information of the camera to be connected. You can either double click on one of the listed cameras or drag the camera off the Camera field to import the settings. Of course, manually key in the Name, CamID and password is fine as well. 8.3.2 Mode: There are 3 modes available to choose from: Play Only: Live view only, no recording. Continuous recording: Keep recording 24/7 in between the date you set for start and stop Periodic recording: Recording the period of time in a day you set. 8.3.3 Continuous Recording Window number The schedule mode Enter the information of the camera to be connected. The start/end time (for play only/continuous recording mode) 27 Enable/disable the scheduling for current window number. YesCam View & YesCam Play User Manual 8.3.4 Periodic Recording The schedule mode (Periodic recording) The period of time for this schedule to be valid Arrange the days of week for camera to record Determine the priority between “current camera” and “scheduled camera” 8.3.5 Recording/Playing Conflict: When the schedule time is reached, the program needs to determine either to run the scheduled camera or keep the currently used camera for this window. Choosing “Record as scheduled”, YesCam View connects to the scheduled camera. Choosing “Give up the scheduled recording”, YesCam View ignores the scheduled event and keeps the current connected video session. 8.4 Language Click Language button to change the language settings. Right now, YesCam View supports 24 languages as following: English, Chinese, Japanese, French, Italian, Spanish, Hungarian, Turkish, Czech, Hebrew, Thai, Greek, Finnish, Danish, German, Portuguese Portugal, Russian, Dutch, Polish, Lithuanian, and Korean. 28 YesCam View & YesCam Play User Manual 8.5 All Function Any of following functions applies to all the channels in current layout only. ■ Record all: start/enable recording. ■ Snapshot all: Take snapshot. ■ Play all: Start playing. ■ Pause all: Pause. ■ Disconnect all: Stop playing. ■ Clear all connection info: Clear all video information of all cameras. Appendix I: Uninstall YesCam View There are two ways to invoke the YesCam View uninstaller. 1. Uninstall from the start menu .Start YesCam View Uninstall YesCam View 2. Uninstall from the control panel .Start Settings Control Panel Add or Remove Programs .Select YesCam View program and click “Change/Remove”. Step 1: Once the YesCam View uninstaller has been invoked, the uninstall screen shows up. Press “Next” button to move on. 29 YesCam View & YesCam Play User Manual Step 2: Confirm Camera List setting and click Next. Step 3: Confirm whether to keep or remove recording / snapshot folder. Progress Window 30 YesCam View & YesCam Play User Manual Finish Window 31 YesCam View & YesCam Play User Manual Appendix II: Performance Information 1. Video Performance Information The video quality is dependent on the video parameter settings and the network quality. If you want to have a better video quality, you will usually set higher resolution and higher frame rate. This is fine when you are viewing the video locally in the same network. But when you want to see the video remotely through the Internet, you need to know the Internet speed (bandwidth) connected to your home network. If the “Internet speed” setting of your camera is very large, but your real Internet speed (bandwidth) is relatively low, the video quality could be very bad. In some worst case, the video display could be disconnected. In order to have the best video quality, you better have broadband service from your ISP and set the “Internet speed” of the VS316m product a little lower than the real Internet speed provided by your ISP. To notice that when multiple users are displaying the videos from the same camera at the same time, the video bandwidth times number of users will be needed for the Internet speed. Appendix III: Frequent Ask Question Q: The Cam status indicator shows green icon, but I cannot view the video or change the settings. A: The green icon only denotes that the Cam is online and responding, not guarantees that the video session can be established one hundred percent. The reason is due to the firewall or the strict access rules of the router. Q: The video quality is not that good when I view it remotely via the Internet. A: The video quality is greatly affected by your Internet connection speed. Therefore, we recommend you to change the bandwidth settings of the Cam to a value which is smaller than the one that your ISP provides you. Q: Can the password for playing video be null? A: No. For security issue, we do not allow users to make their passwords empty for playing video. Q: Can I change the settings of the Cam through YesCam View? A: Yes, partially. You can change the resolution, frame rate, bandwidth, microphone, auto select, indoor/outdoor mode, light frequency, LED mode, sharpness, and brightness settings of the Cam through YesCam View. The rest of the settings can only be configured via the web page of the Cam. Q. Sometimes I failed to connect to Cam after changing the settings of the IP Cam. A: Cam needs some time, around 5 seconds, to re-initialize the system. Therefore, please wait 5 seconds and try to connect it again for playing the video or getting the settings. If the auto reconnection is enabled, then YesCam View will connect it for you in 5 seconds. 32 YesCam View & YesCam Play User Manual YesCam Play User Manual There are two ways to start YesCam Play for playback the recorded files or view the snapshot files. One way is clicking t Click the YesCam Play button. Another is double click on the YesCam Play shortcut on your Windows desktop. 33 YesCam View & YesCam Play User Manual 9.1 YesCam Play- Open Record Open YesCam Play and left click “Open Record”. 9.1.1 Current record folder Show directory recorded folder, and click Browse to change directory folder. 9.1.2 Preview video The small window on the right top will preview recorded video according to your choice on the recorded bar. 9.1.3 Name / ID of cameras Here will show the ID of cameras which has recorded videos according to your choice on the recorded video files. 9.1.4 Video distribution figure Here will show the recorded time within 24 hours, 12 hours, 6 hours, 1 hours, 15 minutes, and 1 minute. 9.1.5 Recorded video bar Here will show how long Cameras recorded videos. According to three color, each color represents different recording types: blue-always recording, red-motion detection recording, green-schedule recording. 9.1.6 Recorded video files Show recorded files by date: yyyymmdd on the left column. 34 Directory recorded folder/ YesCam View & YesCam Play User ManualClick Browse to change Preview video Date: yyyy/MM/dd Name / ID of cameras Recorded video bar Video distribution bar After selecting camera and duration of the recorded videos, click PLAY, and then video will be played back by YesCam Play. 2. Select duration of recorded video 1. Select camera Click “Play” 35 YesCam View & YesCam Play User Manual Here is the picture which YesCam Play is play back recorded video. 9.2 Open Nas Open YesCam Play and left click “Open NAS”. 36 YesCam View & YesCam Play User Manual Step 1. Click browse and scan neighborhood. Step 2. Select the group your NAS located in. Step 3. Select your NAS in the group and click OK. 37 YesCam View & YesCam Play User Manual Step 4. Type in user name and password of selected NAS. Step 5. Select “IPcamRecordFiles”and click OK, recorded videos will show up on the video distribution figure after scan bar. Step 6. Here will show the recorded videos in selected NAS. 38 YesCam View & YesCam Play User Manual 9.3 Open Snapshot Open YesCam Play and left click“Open Snapshot”. Step 1. Select the snapshot files and the selected picture will preview on the right window. Step 2. After double left click the selected picture, it will be opened by YesCam Play. 39 YesCam View & YesCam Play User Manual 9.4 YesCam Play Functions Directory Language 9.4.1 Directory: Click to get into the directory settins dialog for recording and snapshot. Click“Browse”to change the settings. Note: To correctly find the video files and snapshots which were recorded and taken by YesCam View, we strongly suggest configuring the directories of the recorded files and snapshot files of YesCam Play to what you have configured in YesCam View. 9.4.2 Language: Click to select the language you preferred. 40 YesCam View & YesCam Play User Manual 9.4.3 Headline Explanation: Current date and time YesCam Play Version Minimize YesCam Play Exit YesCam Play Maximize YesCam Play 9.4.4 Convert to “.AVI” : Transcoding to avi format is supported. When playing back recorded video, left click “Start time”. Decide how long the recorded video you want to transcode, and left click “Stop time” and select “Convert ”. Wait for a while and the transcoded file will be saved in the same folder with the original file. Select “Open folder” to browse all the files recorded in the same day from the same camera. 9.5 Playback Function Bar To playback the recorded file, you can either double click on it or drag it to the video window directly. To view the snapshot file, simply double click on it and the snapshot will be opened by the default viewer of your computer. 41 YesCam View & YesCam Play User Manual Drag time bar to select target playback video time Pause / Resume Play Stop Fast Forward Slow Forward Mute / Un-Mute Zoom In / Out 9.5.1 Snapshot The snapshots you taken within YesCam Play are saved in SNAPSHOT_DIRECTORY\YesCam Play\date\. 9.5.2 Zoom in and zoom out The maximum resolution you can zoom in to is 640x480 and the minimum resolution you can zoom out to is the original resolution of the video file. To zoom in, click . Click to zoom out. As mentioned earlier, snapshot is displayed by the default viewer of your computer. This gives you the ability to playback the recorded video file and view the snapshot at the same time. 42