1
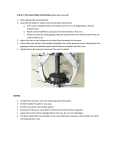
PHS-60-01-02 User's Manual 60 Ton 2-Jaw Hydraulic Puller Safety Precautions WARNING: Using hydraulic pullers can simplify removing or installing high pressure fit components. Users must read these precautions before using in order to safely use the equipment. CAUTION: To prevent personal injury READ and UNDERSTAND ALL of the following safety precautions. General Hydraulic Safety Precautions Before operating, ensure connections are securely tightened and free from leakage. Do not over tighten. Inspect all hoses, cylinders, couplers, and pumps for wear. Do NOT use if ANY component is damaged, altered, or in poor condition. Do NOT allow the hose to kink, curl, twist, crush, bend, or any condition where the flow of fluid within the hose is blocked, restricted, or reduced. Do NOT use the hose to move or pull attached equipment. Hose material and coupler seals must be compatible with the hydraulic fluid used. Release all pressure before breaking any hydraulic connection in the system. Use only approved hydraulic fluid. All components in the hydraulic system must match the maximum pressure rating of the pump. Do NOT extend the cylinder beyond the suggested maximum stroke. Do Not exceed the rated capacity of the cylinder. Do NOT allow any of these components to come in contact with flammable, corrosive (including some paints), or explosive environments. NEVER grasp a leaking hydraulic hose with your hands. Wear approved eye protection, such as safety glasses, goggles, or a face shield. Inspect puller for dents, cracks, or excessive wear before use. Inspect forcing screw for signs of galling or seizing. Replace worn or damaged components. Do NOT exceed puller's rated capacity, spread, or reach. Use correct size of puller for application. Ensure puller is correctly aligned with application and seated on component to be removed. Jaws must be parallel to forcing screw. Do NOT use wrench extensions when applying a load. Cover application with a shield or protective blanket before force is applied to contain flying debris should breakage occur. Apply force gradually. Do not use an impact wrench to apply force unless instructions specify use with an impact wrench is permitted. Do NOT strike or "sledge" puller or component. Do NOT modify puller by grinding, heating, or other means that alter the original design of any component that could weaken puller strength. General Maintenance Assembly Periodic Cleaning Pre-Assembly WARNING: Contamination of hydraulic fluid could cause valve to malfunction. Damage or personal injury could result. Establish a routine to keep hydraulic system as free from dirt as possible. Seal unused couplers with dust covers Keep hose connections free of dirt and grime. Equipment attached to a cylinder must be kept clean. Keep breather-hole in filler cap clean and unobstructed. Use only approved hydraulic fluid. Replace hydraulic fluid as recommended, or sooner if fluid becomes contaminated. Completely retract cylinder before adding or replacing oil. CAUTION: Do NOT use brake fluid, because brake fluid can damage internal seals of pump and cylinder. Lubrication Apply lubricant regularly to all pivot and rubbing points. Use a good grade motor oil or grease. Do not use dry lubricants. Draining and Flushing Reservoir Drain, clean, and replenish reservoir with high-grade approved hydraulic fluid yearly or more often if necessary. Frequency of fluid change will depend upon general working conditions, severity of use, and overall cleanliness and care given the pump. 1. Verify all components on the parts list have been received. a. If any parts are missing, contact your sales representative for replacement. b. DO NOT substitute components. Use ONLY supplied components received in this kit. 2. Inspect and clean: a. Areas around fluid ports b. Hoses, hose ends, couplers, union ends c. Threads and fittings NOTE: Replace any damaged components before using. Assembly IMPORTANT: Read all safety warnings before assembly and use of this tool. 1. Remove threaded protectors from hydraulic fluid outlets. 2. Apply Teflon tape, or suitable thread sealant, to both threaded ends of hose. 3. Connect one end of hose to the outlet of the hydraulic pump. 4. While holding the open end of the hose higher than the hydraulic pump, bleed the air out of the hose by pumping oil until a small amount of oil starts to flow out of the open end of the hose. 5. Connect and tighten the Coupler-Hose Half to the open end of the hose. 6. Build puller arm/hub configuration using the assembly drawing included with this guide. 7. Connect the hose and cylinder together via the quick disconnect couplers. Make sure that the couplers are clean and that the two halves are fully engaged and connected tightly. Storage To prevent exposure to moisture, dust, or other harmful elements: ALWAYS store in a clean, dry environment. Operating Instructions Prior to Operating this tool Bleed Air from System 1. Cycle the hydraulic system until operation is smooth and consistent. 2. Check the pump reservoir level. Add approved hydraulic fluid as needed. a. Place pump in vise with pump head down so you can see the end cap. b. Remove reservoir plug. c. Pump is full if oil is approx. 3-4" below end cap. Non-vented reservoirs require approx. 25% air space d. If oil level is below the normal location, add ISO 15, or compatible hydraulic fluid, until level is correct. Cylinders should be retracted. e. Replace reservoir plug. 3. Remove any air trapped in hydraulic system: a. Place hand pump valve handle in the closed position, and pump the hand pump handle until the cylinder is fully extended. b. Position the cylinder lower than pump and cylinder piston end lower than control valve end. c. Open valve, and retract cylinder by hand completely while keeping it in position stated in step (b). 4. Apply force gradually. Component should give a little at a time. 5. Do not couple puller jaws. Tonnage and capacity of puller is reduced when longer than standard jaws are used or when jaws are compressed, increasing chance of breakage. 6. Keep reach to a minimum. Use shortest jaw positions possible to reach component to be removed. 7. Install puller jaws evenly into component, attachment, or adapter. Uneven jaws result in greater force applied to one side of the puller, which can result in breakage or slippage. 8. Bearing pulling attachments may not withstand the full tonnage of pullers with which they are used. Shape and condition of components being pullerd affects tonnage at which puller blocks and studs may bend or break. Select largest attachments that fit component being pulled. Tool Operation Follow ALL Safety Precautions 1. Slowly use the hydraulic pump to engage puller on component being extracted. 2. Carefully check your set-up to ensure: a. Tool is not binding b. Cylinder, or pushing adapter, remains centered. c. Puller is properly aligned. 3. Stand away from the direction of component being pulled. Tool Set-up 1. Mount puller so its grip is tight. When using a jaw-type puller, tighten adjusting strap bolts. For a better grip and more even pulling power, use a 3-jaw puller when possible. 2. Align puller jaws. Verify setup is rigid and puller is square with the application. 3. Use correct size of puller for the application. If you have applied maximum force and component has not moved, switch to a larger capacity puller. Parts List ITEM 1 2 3 4 5 6 7 8 9 10 11 12 ITEM NUMBER X9451 X9453 X9452 2220585 2350158 RC-60-CH-3-TH 01-001171 X9433 X9436 PUL-20TR-5 PUL-TR-2 PUL-60TR-1 ITEM NAME 60 TON 2-JAW HUB STRAP, 60 TON PULLER ARM, 3-HOLE, 60 TON SCREW, 1"-14 x 4", HHCS, GRADE 8 HEX NUT, 1"-14 60 TON HYDRAULIC CYLINDER SCREW, 1/2"-13 X 1", SHCS FORCING SCREW, 60 TON BALL CRANK HANDLE COUPLER-HOSE HALF HYDRAULIC HOSE, 6'-0" HYDRAULIC PUMP QTY 1 4 2 4 4 1 2 1 1 1 1 1