1
~ Smart Fold , Easy Go ~
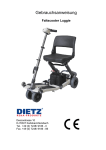
Luggie Classic
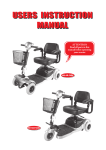
USER'S INSTRUCTION MANUAL
FOREWORD
Note to the User:
For your safety and the safety of everyone around you, we ask that you read and follow the
suggested rules and regulations outlined in this User’s Instruction Manual.
Always think safety first!
CONTENTS
Introduction .............................................................................................................3
Product Description ................................................................................................3
About Your Luggie Scooter ......................................................................................4
Luggie Feature Guide ..........................................................................................5
Guidelines For Safe Use ..........................................................................................6
Getting To Know Your Luggie ...................................................................................8
Operating Your Luggie .............................................................................................9
Freewheeling Your Luggie......................................................................................12
Safety Instructions And Warnings ..........................................................................13
Safety Warnings & Instruction Labels .................................................................18
Learning To Get Around .........................................................................................19
Transporting Your Luggie .......................................................................................22
Battery And Battery Charging .................................................................................24
Frequently Asked Questions........................................................................27
Care And Maintenance ..........................................................................................31
Basic Fault Finding ................................................................................................35
Technical Specification ..........................................................................................38
Luggie Armests Installation Guide ..........................................................................40
Advisory Safety Notices .........................................................................................41
Optional Accessories .............................................................................................42
Warranty Terms .....................................................................................................43
Service Record ...................................................................................................45
INTRODUCTION
Congratulations on the purchase of your Luggie scooter! Please read this User's Instruction
Manual carefully before you attempt to operate your scooter. Your User's Instruction
Manual is your guide to safe operation and maintenance of your Luggie scooter.
Before beginning to use your scooter, make sure you completely read and understand all
instructions thoroughly. Please observe the "Guidelines For Safe Use" and the "Safety
Instructions and warnings" outlined on page 6-7 and 13-17 of this manual. If you have any
questions concerning operation or maintenance, consult your Authorized Luggie Dealer.
Please keep in mind that the operator of the scooter is responsible for accidents or hazards
to other people and/or their properties.
Your Luggie has numerous features not found on other power scooters. With proper care
and maintenance, you will enjoy many years of dependable service from your Luggie
scooter. Your Luggie scooter needs to receive proper maintenance at regular intervals
and should be inspected frequently for proper mechanical operation. Troubleshooting
guidelines, methods of detecting improper operation and how to make minor adjustments
are included in this manual.
Follow all recommendations to obtain trouble free, safe and enjoyable operation of your
Luggie scooter. Please remember that when it comes to service and repairs, consult your
Authorized Luggie Dealer.
PRODUCT DESCRIPTION
Luggie standard features:
Rear-wheel drive via sealed drive axle.
Standard charger adapter.
Seat with folding backrest and adjustable height.
A multi-positional handlebar for greater maneuverability.
A simple "wig-wag" type control lever situated in front of the handlebars when you are
seated which control speed, braking and direction.
Independent braking systems.
"State-of-the-art" micro-controller electronics ensures a smooth, comfortable and safe
drive on most surfaces and gentle slopes no more than 6 degrees.
One piece aluminum alloy chassis for ease of transportation.
Your scooter can be easily folded without the use of tools, making transport a breeze.
Battery pack can be easily removed and replaced.
Note: Your scooter is not designed to transport the user in a moving vehicle i.e. train
or cruise ship. Consult with your Authorized Luggie Dealer or transportation agent for
further details.
The scooter should be serviced by an Authorized Luggie reseller to ensure safe, reliable
operation. For details and a list of options available for Luggie scooter, refer to the
accessories section of this manual.
3
ABOUT YOUR LUGGIE SCOOTER
Warning: The Luggie is a motorized scooter which provides transportation for an
elderly or disabled person. It can be in a variety of indoor and outdoor settings.
The maximum user weight capacity for the Luggie can be found in the rear of this
manual, under "Technical Specification".
Your Luggie is suitable for indoor or outdoor use: in your home, shopping malls,
precincts and on dry, smooth level surfaces. It climbs slopes safely up to 6 degrees and
over obstacles up to one inch (2.5cm).
Your Luggie scooter is a 'Class 2' (B) * vehicle and designed for pavement use only.
The Luggie must only be used on roads with caution if a sidewalk is not available. It is
designed for a single occupant who experiences difficulty or discomfort when walking
for prolonged periods, but has the use of visual and cognitive ability to operate the
scooter safely.
Do not drive your Luggie if you are under the influence of alcohol, drugs or medication
that may affect your physical or cognitive abilities. If in doubt consult your Physician.
As a motorized pedestrian, user should familiarize himself with the current legislation
contained within the Highway Code.
*
Electrically powered scooter is classified in the following categories:
Class 2 as defined in "The use of invalid carriages on the Highways
Regulations 1988": A scooter type invalid carriage designed for the use on
the sidewalk, with maximum speed up to 4 M.P.H.
Class 'B', as defined in the United States Standard CU and The European
Standard EN12184 1999: A scooter sufficiently compact and maneuverable
for some indoor environments and capable of traveling over longer
distances and negotiating outdoor obstacles.
4
LUGGIE SCOOTER LABELED
2
23
1
3
4
5
22
16
21
6
17
14
7
10
19
11
20
15
8
18
13
9
1. Top Console
2. Wig-Wag lever
3. Speed Control Knob
Turtle(slow)
Rabbit(fast)
4. Tiller Adjustment Clamp
5. Tiller
6. Trigger
7. Transport wheel
8. Front Bumper
9. Front Solid Tire
10. Slip Resistant Mat
11. Tiller Locking Clamp
5
12
12. Chassis Locking Release Ring
13. Chassis Hook
14. Charging Socket
15. Battery pack
16. Magnetic Brake Lever
17. Seat Lock Handle
18. Rear Solid Tire
19. Rear Bumper
20. Seat Lock Indicator
(both red when properly locked)
21. Lifting Handle
22. Base of Seat
23. Backrest of Seat
GUIDELINES FOR SAFE USE
These symbols below are used in this owner’s manual to identify warnings and cautions. It
is very important for you to read and understand them.
Warning: Failure to obey and follow the warnings in this User’s Manual may result in
personal injury.
Caution: Failure to observe the cautions in this User’s Manual may result in damage to
your scooter.
Your Luggie is a powerful electronic device, for your safety and the safety of bystanders,
please read instructions outlined in the manual. Always be certain your scooter is in full
working order before starting your journey. Follow notes listed below carefully to ensure
safety at all times.
1. DO NOT ride your Luggie without reading this instruction manual. Also read all of
the safety instructions and Warnings stated on page 13 of this manual.
2. ONLY drive your Luggie if your health condition will allow you to be safe.
3. DO NOT exceed the maximum safe gradient outlined for your vehicle
Warning: For your safety, ALWAYS have the anti-tipping wheels properly fitted
on your Luggie.
4. DO NOT carry passengers or exceed the maximum carrying weight.
5. DO NOT mount or dismount your Luggie unless it is switched off with the magnetic
brake release disengaged - brakes locked.
6. DO NOT switch your Luggie 'on' with the forward/reverse lever (wig-wag) depressed.
Warning: DO NOT hang bags or other belonging over your steering handlebars
as this may interfere with your controls. Failure to observe this warning may result in
injury to yourself, bystanders, your scooter and properties.
7. DO NOT reverse your Luggie onto uneven inclines or surfaces. Be cautious when
traversing slopes. DO NOT attempt to drive on slopes with incline greater than 6
degrees. Not adhering to this warning may result in injuries to yourself and bystanders.
8. DO NOT drive your Luggie in a confined space unless the speed control knob is set to
turtle mode or slow setting.
9. DO NOT turn suddenly at full speed, especially on uneven grounds or slopes. Not
adhering to this warning may result in the scooter overturning.
6
10. DO NOT drive your Luggie where you cannot safely or legally walk. OBEY THE
HIGHWAY CODE.
11. DO NOT drive your Luggie over deep, soft terrain (ie. soft earth, sand, tall grass,
loose gravel or snow).
12. DO NOT drive when under the influence of alcohol or drugs which may impair your
safety.
13. Avoid climbing or descending curbs. You may permanently damage the scooter and
yourself. ALWAYS use ramps where available.
14. ALWAYS approach small obstacles "straight on" and at slow speed.
15. ALWAYS keep your feet on the vehicle when driving.
16. ALWAYS proceed carefully while riding, especially as you approach the downgrade
of a ramp.
17. ALWAYS avoid uneven surfaces.
18. ALWAYS consult your physician if in doubt about your ability to operate the Luggie
scooter safely.
19. When transporting your scooter, DO NOT sit on your Luggie while it is in a moving
vehicle. ALWAYS strap down your Luggie and transfer to the vehicle seat. For
additional details ask the transportation authority of travel for further assistance.
20. DO NOT attempt to remove the seal on the side of the battery. Failure to observe this
warning will invalidate your battery warranty.
21. DO NOT drive your Luggie through deep water or clean the scooter with power
washer or compressor hose.
22. DO NOT drive your Luggie through sand or sea water. This is very corrosive for the
scooter and will cause permanent damage.
Please have a safe journey!
7
GETTING TO KNOW YOUR LUGGIE
Your Luggie scooter is delivered in a strong carton or in the suitcase if you purchased this
option. When unpacking the carton, remove and dispose of all of the sharp metal staples
which are located on the top to avoid injury. Remove all packing materials and follow the
steps outlined in the Quick Start Guide shipped with your Luggie scooter.
We recommend you keep the outer box, packing inserts and battery box for future transport
use. Safely dispose of all other packaging materials. If you need assistances with disposal,
contact your local waste disposal authority for advice on properly disposing methods.
Your Luggie scooter is delivered fully folded. Follow the Quick Start Guide included with
your scooter shipment before operating your scooter. A full technical specification of your
Luggie can be found at the rear of this manual.
A great deal of thought and consideration have gone into the design of your state-of-the-art,
life-changing Luggie scooter. Your Luggie will help increase your mobility; thus, give you
more time to enjoy life. The Luggie scooter is a compact, three wheeled vehicle that will
allow you to navigate obstacles in confined areas. Aside from this, your scooter offers the
following:
COMFORT - The contoured seat helps cushion you from vibrations of your journey,
giving you maximum comfort. The Luggie comes with a speed controller which delivers
you a smooth, jerk-free ride. For added peace of mind, the Luggie comes with an automatic
braking system.
VERSATILITY - The Luggie seat assembly has 3 height adjustments (locked & 2
additional height adjustments) for added comfort and versatility. The steering column (tiller)
has multiple height adjustments controlled by the trigger. Use the trigger.
8
OPERATING YOUR LUGGIE
Before setting out on your Luggie, you need to make sure that your seat is in the
correct riding position. Set the seat to your desired height for your needs.
UNFOLD LUGGIE SCOOTER
1. Make sure your Luggie is on flat ground before adjusting the height of the seat. With
the scooter upright as shown in (FIG 1), pull the chassis locking release ring to
your scooter to separate the front and rear chassis. Once the front and rear chassis are
disengaged, guide the scooter down by holding the base of the seat with both hands.
Refer to the enclosed Quick Start Guide for additional details.
Your scooter should now look like (FIG 2) when unfolded.
FIG 1
FIG 2
2. Pull backward on the seat lock handle to adjust the height of the seat while
simultaneously lifting the seat. (FIG 3)
Note: Please make sure that the seat is properly locked and secured before sitting on the
Luggie. There are two windows on either side of the seat lock handle that will appear
red when the seat is locked and properly secured. Securing the seat adjustment will help
prevent accidents or tilting of the seat.
FIG 3
FIG 4
3. Fasten the chassis hooks or security locks on each side of the joint of front and rear
chassis. (FIG 4)
4. Release the tiller locking clamp. (FIG 5)
5. Pull the trigger outward to raise the tiller to a comfortable position. (FIG 6)
FIG 5
FIG 6
6. Flip the seat back up.
7. Refer to the Quick Start Guide to install your battery. Please refer to the Battery
Installation Guideline, gently put the battery pack in the proper location (Battery
compartment).
9
Warning: If the installed Luggie battery has been idle for a long period, the
battery may be in a low power state.
Warning: The best practice is to remove the battery when transporting the
scooter so as not to accidently power on the scooter which cause injuries and drain
the battery.
Warning: Armrest Installation (optional): If your purchase comes with armrests, refer
to the Luggie Armrest Installation Guide included with your scooter order. Insert and screw
the adjustment knobs on the bottom side of the back of the seat assembly.
Note: The knobs do not need to be screwed on too tightly. These knobs are pull-pin knobs
for you to adjust the width of the armrests.
Caution: The backrest of your seat will not fully fold forwards if the armrests are
positioned too closely towards one another.
Warning: When the scooter is in operation, the armrests should not be in the
raised position.
TILLER ADJUSTMENTS
1. The tiller of your Luggie is designed to allow you to position the handlebars in
a comfortable driving position. It can be locked into numerous positions for your
comfort and ease of transport.
2. To adjust the angle of the tiller (angle the handlebars), locate the trigger as
pictured in (FIG 6). Pull the black lever (trigger), outward to adjust the angle of the
tiller. To lock the tiller in your desired position, simply release the trigger or the
black lever.
The controls of your scooter are located on the top console in front of the handlebars when
seated on the Luggie.
1. Status Light: The power switch on your Luggie doubles as the status light indicator.
When the Luggie is powered 'on', the light on the switch will be illuminated as
a solid for the entire duration of the 'on' state. When your battery run low in power,
the status light will flash slowly at one flash per second. This is the scooter’s way
of telling you that it is low in fuel and a charge is needed. If you notice the
status light flashing at two flashes per second, you are being notified that the
battery voltage is too low to drive. You must stop using your scooter at the earliest
opportunity when this happens. There is a total of nine status light flashing diagnostic
signals for the Luggie, refer to "Basic Fault Finding" section in the rear of this
manual for reference.
2. Battery Indicator: The battery indicator is located on the top console between the
handlebars. When your scooter is switched on, the indicator on the gauge will
move across the scale from the left 'red' sector towards the 'green' sector, indicating
the state of charge of your battery. As the power is used up the indicator will move
towards the red sector indicating the state of charge at that precise time. When the
indicator is fully over to the right (green sector), the battery is fully charged. When
the indicator falls in the red sector your battery is low in charge and need to be recharged. Refer to the battery and battery charging section for further details.
10
Note: When driving up a slope or similar obstacles your Luggie motor will be working
harder than usual, the battery gauge will move into the red sector. The indicator on the
battery meter will regulate to actual charge once the load on your motor is reduced.
In conditions listed above, the battery indicator gauge is not a true indicator of amount
of charge left on the battery.
3. Speed Control Knob: The speed control knob allows you to select the speed of
travel, turtle mode or rabbit mode. Adjustments can be made as you travel.
FIG 7
4. Forward, Reverse Control (Wig-Wag) Lever: The wig wag control lever is located
on the top console in front of the handlebar as seen in (FIG 8). Gripping on the right
lever will move your Luggie in a forward direction. Gripping on the left wig-wag lever
will move the Luggie in a reverse direction. To stop, simply release the wig-wag lever.
FIG 8
FIG 9
Warning: Do not hang bags or other belongings over the steering handlebars,
doing so may interfere with the movement of your control lever. Failure to observe this
warning could put you in a dangerous situation.
Note: Your Authorized Luggie Distributor can modify your vehicle for left-hand
operation use if requested.
Warning: If you are not an accomplished outdoors powered vehicle driver, we
strongly recommend that you first practice in an open, safe area, free from traffic,
preferably with a care provider who can assist you.
5. Sleep Time: When your Luggie scooter has been idle for 15 minutes or more, it will
automatically go into sleep mode to conserve battery charge. There are two ways to
wake the Luggie in sleep mode. One way to wake Luggie is to toggle the wig-wag a
couple of times. The recommended way to wake the Luggie is to power off the scooter
before powering it back on.
You are now ready to go. Always think safety first!
Enjoy your new Luggie scooter!
11
FREEWHEELING YOUR LUGGIE
Your scooter is equipped with a manual freewheel device for your convenience
when you need to push the scooter.
To put your scooter in freewheel mode, locate the magnetic brake release (red
handled lever) located in the rear right hand side of your scooter under your seat as
pictured. (FIG 10).
Make certain the Luggie power switch located under the right handlebar is switched off.
Push forward the magnetic brake release (red handled lever) (FIG10) until a
distinct click is felt to disengage the magnetic brake. You can now push your
Luggie with ease.
FIG 10
N o te: Wh en yo u r s co oter s to p s in th e
freewheel mode while pushing, it is not stuck
or broken. The safety feature on the scooter
will automatically trigger when the scooter is
pushed quicker than a slow walking speed.
To engage the drive system, simply pull the magnetic brake release lever backwards until a
distinct click is felt. If the power switch was left on while in freewheel mode, simply power
off and then on to enable driving mode.
Warning: Do not sit on your Luggie scooter with the freewheel device in the disengage
position. Your Luggie scooter has limited braking while in freewheel mode.
Warning: If your Luggie scooter is in the freewheel mode, you will not be able to drive.
Dismount and re-engage the drive system by pulling back on the magnetic brake release (red
handled lever). Remount your scooter. Switch the power off and on to clear the fault. Your
Luggie will now drive again.
Warning: Do not use your scooter in the freewheel mode without an attendant present.
Personal injury may result.
Warning: Do not attempt to personally disengage your scooter in the freewheel mode
while seated on the scooter. Personal injury may result. Ask an attendant for assistance.
Warning: Do not place your scooter in freewheel mode while on an incline. The
scooter could roll uncontrollably on its own, causing personal injury.
Warning: Always double check that the freewheel device, magnetic bake release lever
is disengaged or in the drive position before attempting to drive your scooter after it has
been left unattended for a period of time. Failure to observe this warning may result in an
accident.
General note: If you are able to push your Luggie while in the drive mode, the drive system
may be disconnected. Do not attempt to drive your scooter.
Warning: Do not leave your scooter unattended when the magnetic brake
release lever is disengaged. In this state your scooter may roll away causing damage
to others and their properties. Always engage the magnetic brake release when left
unattended.
Please take extreme care when using your Luggie.
12
SAFETY INSTRUCTIONS & WARNINGS
Warning: Do not attempt to operate your new Luggie scooter for the first time
without completely reading and understanding all of the facts in this User’s Manual.
Your Luggie scooter is a state-of-the-art device designed to enhance and increase
your mobility. If you have a medical condition, it is recommended for you to practice
driving in the presence of a trained attendant. A trained attendant can be defined as a
family member or care professional specially trained in assisting the scooter operator
in various daily living activities. When you begin to use your Luggie scooter, you will
probably encounter situations in which you will need some practice. Simply take your
time and you will soon become confident and in control as you maneuver through
doorways, on and off elevators, up and down ramps and over moderate terrains.
Below are some tips, precautions and other safety measures that will help you become
accustomed to the safe operation of your Luggie scooter. Your Luggie scooter is fitted
with a number of safety warning & instruction labels. These labels communicate
important warnings. Please familiarize yourself with their locations on your scooter.
SAFETY CHECK
Get to know the feel of your Luggie scooter and its capabilities. We recommend that
you perform a safety check before each use to make certain your scooter operates
smoothly and safely. For details on how to perform these necessary inspections, see the
'Care and Maintenance' section of this manual. Perform the following inspection prior
to using your Luggie.
Check the contact area of the battery. Make certain they are serviceable and
not corroded.
Check that your battery has been fully charged.
Check your scooter brakes. Ensure the scooter is not in freewheel mode.
Warning: Do not carry passengers on your Luggie. Your scooter is designed for a
single occupant. Carrying passengers on your scooter may result in personal injury and/
or property damage.
WEIGHT CAPACITY
Your Luggie scooter is design for a maximum user weight limit of 113.6 kg(250 lbs).
Warning: Do not exceed the weight capacity of your scooter. Doing so will
invalidate your warranty and may result in personal injury and/or damage to your
scooter. Luggie will not be held responsible for injuries and/or property damage resulting
from failure to observe these weight limitations. Please also remember that carrying
heavy objects will increase your total weight and may make your scooter unstable.
13
CORNERING
Excessively high cornering speeds may result in tipping. Factors which affect the
possibility of tipping include, but are not limited to, cornering speed, steering
angle (how sharply you are turning), uneven surfaces, inclined surfaces (such as
heavily cambered pavements), riding from an area of low traction to an area of
high traction (such as passing from grass areas to a paved area - especially at high
speed while turning), and abrupt directional changes.
Caution: Do not corner at high speed! If you feel that you may tip over in a corner,
reduce your speed and steering angle to prevent your scooter from tipping.
Warning: When cornering sharply, reduce your speed. When using your Luggie
at higher speeds, anticipate changes in the road surface. This will greatly reduce the
possibility of a tip or fall. To avoid personal injury or property damage always exercise
common sense when cornering.
BRAKING
Your Luggie scooter is equipped with two powerful brake systems:
1. Regenerative: This uses the electricity generated in your Luggie drive motor to
rapidly slow your scooter when the wig-wag lever is returned to the stop position.
2. Electric/Mechanical Disc Brake: This activates mechanically after the regenerative
brake slows your scooter to a near stop, or when power is removed from the drive
system. Brake engagement is far more abrupt at higher speeds. It is important that
you anticipate when the brakes will engage and that you are braced for the
resulting deceleration.
Warning: Your scooter can decelerate very quickly. Do not decelerate or turn
abruptly when travelling at high speed unless absolutely necessary. Always grip the
steering handlebars tightly and position your feet firmly on the floor board of the scooter.
Operators who cannot grip the handlebars tightly and/or place their feet firmly against
the floorboard should avoid traveling at high speed. Failure to observe this warning could
result in serious personal injury and property damage. Always brace yourself firmly when
decelerating your Luggie scooter.
Caution: Never drive down slopes at full speed. Always adjust your speed to the
driving condition and allow for gradual descents on inclines no more than six degrees.
OUTDOOR DRIVING SURFACES
Your Luggie scooter is designed to provide optimum stability under normal driving
conditions i.e. dry, level surfaces composed of concrete or asphalt. There will be times
when you will encounter other surfaces such as packed soil, grass and gravel.
14
These surfaces may not be sound and fail to give good traction, caution should be
considered before driving on these types of surface to prevent stability problems resulting
in injury or damage to you and your scooter. Always reduce your scooters speed when
driving on uneven terrain or soft surfaces by turning the speed control knob (located on the
left side of the top console) counter clockwise (toward the turtle mode).
Caution: Avoid driving in long and unsafe grass that can become tangles in the gears
of your scooter.
Caution: Avoid snow. This can quickly build up around your wheels.
Caution: Avoid loosely packed sand and gravel. If you feel unsure about a
driving surface, please avoid that surface. Your scooter is a motorized device. Use your
good judgment when traveling to avoid injury and damage to yourself, the scooter and
properties of others.
STREET AND ROADWAY DRIVING
Warning: Your Luggie scooter has not been designed for operation on public
streets and roads.It is designed for operation on pedestrian pavements and traffic free
shopping areas.
Your Luggie scooter must be driven with due care and compliance with the Road
Traffic Acts and conditions of the Highway Code. Always obey all local pedestrian
traffic rules. Wait until your path is clear of traffic, and then proceed with extreme
caution.
Note: Always wear bright or illuminating clothing when driving your scooter. Be aware
that it may be difficult for pedestrians and other motorized vehicles to see you when you
are seated on your scooter. Only drive your scooter on the road when public pavements or
sidewalks are not available (i.e. in the countryside) or when crossing the roadway from one
pavement to another.
INSURANCE
Although it is not a legal requirement for accident insurance coverage (third party), it is
a sensible precaution. Your Dealer will be able to give you details of specialist insurance
companies or your own insurance company will be able to advise you.
WEATHER PRECAUTIONS
Warning: Do not operate your scooter in icy or slippery conditions or on salted
surfaces i.e. roads and pavements. Such use may result in accident, personal injury or
adversely affect the performance and safety of your scooter.
Warning: It is recommended that you do not expose your scooter to any type moisture
at any time i.e. rain, snow or power washer. Such exposure may damage your scooter.
Never drive through deep water or expose your scooter to sea water. Do not operate your
scooter if it has been exposed to heavy moisture until it has been thoroughly dried out.
15
MOTOR VEHICLE TRANSPORTATION
Currently there are no standards approved for "tie down" systems in a moving vehicle of
any type to transport a person while seated in a scooter.
Warning: Do not sit on your scooter while it is in a moving vehicle. Personal injury
may result. Always make certain that your Luggie is properly secured when being
transported. Failure to comply may result in personal injury and/or damage to your scooter.
ACCESSING YOUR SCOOTER
Getting on and off your scooter requires a good sense of balance. Please observe the
following tips when getting on or off your scooter:
Make certain your Luggie scooter is powered off.
Make certain the seat and handlebars are locked firmly into position.
The armrests can be lifted up to allow easier access. If your armrests are installed, make
certain you do not attempt to drive with the armrests raised.
Warning: Position yourself as far back into the scooter seat as possible to
prevent tipping and injury.
Warning: Avoid using the armrests for weight bearing purposes. Such use may cause
the scooter to tip and cause personal injury and/or damage.
Warning: Avoid putting all of your weight onto the floorboard, such use may
cause the scooter to tip and cause personal injury.
Warnin g: Do not ove rloa d y o u r s co o t er at t h e rear wh en cl i m b i n g an
incline. Always lean forward to provide the best stability and prevent rearward
tipping.
Warning: Any attempt to climb or descend an incline steeper than shown in the scooter
specification at the rear of this manual may put your scooter in an unstable position and
cause it to tip, resulting in personal injury. Never remove the anti-tipping wheels of
your scooter. They are an important part of your scooters design. See also Incline.
MODIFICATIONS
Luggie scooter has been designed to provide maximum mobility. A range of accessories are
available from your Authorized Luggie Resellers to further customize your scooter needs.
Under no circumstances should you modify, add, remove or disable any feature, part or
function of your mobility scooter.
Warning: Failure to observe the above warning may result in personal injury and/
or damage to you, your scooter and properties.
16
INCLINES
6 degrees maximum incline
6 degrees maximum incline
FIG 11
More and more modern buildings are designed with disability access in mind.
Ramps have specified percentage of incline designed for easy and safe access. Some ramps
may have turning switchbacks (180 degree turns) that require you to have good cornering
skills on your scooter. Proceed with extreme caution as you approach the downgrade of a
ramp or other incline. Always sit with your back on the back rest of your seat, brace your
hands on the handlebars and position your feet on the floorboard of your scooter.
Take a wide arc with your Luggie around tight corners. Your rear wheels will follow
preventing you from cutting the corner short and bumping or getting hung up on raised
curbs. When descending an incline, keep your speed adjustment set to the slowest speed to
ensure a safely controlled descent. Always drive down an incline facing forward only. If
your scooter descent is quicker than you anticipated, allow the scooter to completely stop,
then progress at a slower speed setting.
Warning: Never drive down an incline at full speed. When climbing an incline, try
to keep your scooter moving. If you must stop, start up again slowly and then accelerate
smoothly with caution. Avoid sudden stops and starts. Lean forward towards your
handlebars to increase stability and prevent rear tipping when moving up the incline.
STAIRS AND ESCALATORS
Warning: Luggie scooter is not designed to travel up or down stairs or escalators.
Always use an elevator. Failure to observe this warning may result in injury to yourself and
others and damage your scooter.
DISPOSAL OF ELECTRO-MOBILE SCOOTER
In time when your scooter becomes unusable it must be disposed of in accordance with
the laws implemented at that time. For further information regarding the recycling
arrangements for this type of vehicle and its batteries, contact your local authority or
government department.
17
SAFETY WARNING & INSTRUCTION LABLES
The following labels are positioned on your Luggie. These labels communicate important
warnings or instructions regarding the safe operation of you scooter. Please familiarize
yourself with their location.
Located on middle of chassis
Located on middle of chassis
Located on front of chassis
Located on side of chassis
Located on tiller
Located on tiller
1
2
3
Read the owner’s manual
before operating scooter
Located on front of chassis
Located on top of pull lever
Data serial plate located on front wheel cross member
Located on
rear cover
Speed control knob
Located on top console
Located on both
sides of rear chassis cover
18
LEARNING TO GET AROUND
Warning: If you are not an accomplished outdoors mobility scooter driver, we strongly
recommend that you first practice in an open area, free from traffic and preferably with an
attendant who can assist you. When ready, proceed to power on the Luggie. The battery
indicator gauge needle will move to the amount of charge left on your battery and the status
light on the power switch will illuminate as a solid. Gently press the right wig wag lever to
move forward. To stop, simply release the wig-wag lever to trigger the brakes.
Warning: When powering on the scooter, do not accidently depress the wig-wag levers
on your Luggie. The above action will result in your scooter going into fault mode. To clear
the fault, power off before powering back on.
Warning: If your Luggie has been adapted for left hand user, forward and reverse
operations will be reversed. For instance, when you press the left wig-wag lever the scooter
will move forward and the right wig-wag lever will drive the scooter in reverse.
LEARNING TO GET AROUND TIGHT SPACES
If you must steer in a tight spot, such as through a doorway or when turning around, stop,
turn the handlebars to where you want to go, and then apply the power gently. This will
make the Luggie turn sharply yet move gently, with complete stability. Practice in an open
area, until you are proficient. Driving in reverse will require more attention.
Remember: When driving in reverse, you have to steer in the opposite direction to the way
you want to go. Practice in open space as required. Please note,reverse speed is set to half
the forward speed for your safety.
Remember: If trying to make a tight turn, turn your steering column or tiller before
applying power. Steer wide of all corners and obstacles. Please move slowly with care.
Warning: Do not power off your scooter while it is in motion. Failure to observe this
warning may irreparably damage the main electronic speed control unit or transmission.
Always power off when your scooter is stationary.
GETTING THROUGH DOORWAYS
When you start using your Luggie, you will meet some obstacles that will require some
practice for smooth driving experience. Here are some common problems, with tips to help
you master them quickly. You will soon be in control through doorways and travel up and
down ramps with surprising ease by following the tips suggested below.
Approach an unfamiliar doorway slowly. Size it up. Does the door have a knob or
push bar? Does it open toward you or away from you? Think in terms of using the
power of the Luggie to do the work for you! You need not strain. Hold the door
knob or bar in one hand and apply power with the other hand. (Remember that you
can drive forwards by using your left finger to move the wig-wag lever towards
you.) If the door is self-closing, you can go though, allowing the door to close
19
behind you, if you go quickly enough. If not, just stop when you have clear of the door
before pushing it close.
If, however, the door opens toward you, hold the knob or bar with one hand and gently let
the reverse power do the work. When the door is open wide enough, move forward quickly,
leaving the hand on the door to keep it free of the scooter and letting go as you pass the
doorway.
If you're not able to move, your rear wheel is probably caught. Reverse and try again. Take
your time. Relax. Enjoy yourself. The techniques described above will take some practice.
Practice makes perfect. Remember, your Luggie can do the work without wearing you out!
MOVING ON AN INCLINE
More and more buildings have ramps for wheelchair access. Some have a change of
direction in the middle. Good cornering skills are required. First, make a wide turn with
your front wheel around tight corners, so that your back wheels follow a wide arc to stay
clear of the corner. If you stop while going uphill, the automatic parking brake will keep
you safe. To start again, slowly depress the forward direction wig-wag lever. The parking
brake will release and you will start to move again.
Remember: When you approach an incline, it is best to lean forward, (FIG 12, FIG
13). This moves the center of gravity of your Luggie towards the front of the scooter for
improved stability. When going down an incline, keep your speed slow. This will keep
you in a safely controlled descent. It is recommended for you to lean backwards as you
descend. If you wish to stop completely, release the wig-wag lever, and you will come to a
gentle stop. For your safety, always avoid sudden stops and starts.
Warning: Do not exceed the incline guidelines or any other specifications presented in
this manual.
CONTROL TRAVEL OVER STATIONARY OBSTACLES
Stationary obstacles (steps, curbs, etc.) must be avoided where possible. Luggie has a
ground clearance of 2.5 inches (6.4 cm). Proceed with extreme caution when driving near
raised surfaces, unprotected ledges and/or drop-offs such as curbs, porches, stairs etc.
should be avoided.
FIG 12
FIG 13
Most new pavements have wheelchair access ramps at intersections. Plan your route where
possible to avoid poor and uneven surfaces. Do not attempt to ride up or down curbs as
you will damage the integrity of your scooter.
20
MOVING OVER GRASS & GRAVEL
Care must be taken when attempting to drive over soft surfaces such as those found in
parks, etc. These surfaces may look level; but, hidden dangers on these surfaces may make
your Luggie become unstable. Avoid unkempt and wet grass, loose deep gravel and/or sand.
Do not exceed the capabilities of your scooter. Always have an attendant to assist you in
circumstances where you are not certain of the safe travel conditions or the terrain. Always
anticipate and think safety first.
Caution: When climbing inclines, the maximum safe gradient limit is 6 degrees. To
ensure your safety and the stability of the scooter, always have the anti-tipping wheels
fitted to your scooter (FIG 14) when climbing inclines or maneuvering obstacles. Always
avoid turning on slopes or climbing curbs.
FIG 14
Caution: Always make certain that your Luggie is in full working order before
attempting to drive.
Caution: Always lean forward when ascending an incline and backwards when
descending an incline to ensure stability as you drive.
Caution: Never attempt to drive beyond the design capability of your Luggie.
Observe weather conditions at all time. Tires can slip on wet or icy surfaces.
Caution: Do not drive through deep water or leave your Luggie exposed to
heavy rain especially during or after wet weather conditions.
Caution: Do not attempt to turn when navigating up an incline. It is advised that
you only turn when all wheels of your scooter are fully on or off the incline. Failure
to observe this caution may result in the scooter toppling over.
Please note: The stability of your scooter is dependent on a number of factors which you
should consider before attempting to climb an incline or other obstacles: (a) your height; (b)
the height of your seat; (c) your weight and (d) the angle of the incline you are attempting
to climb. All of these factors can affect the stability of your Luggie scooter. If you are
unsure of your ability to navigate through an obstacle, incline or a surface, try another
route. Always think 'safety first'.
Please take care and be safe.
21
TRANSPORTING YOUR LUGGIE
Whether it is for a holiday, a day out to visit family and friends, or a trip to go
shopping, your Luggie can be taken along. Depending on the size or model of your car,
you will be able to load your Luggie in one of the following methods.
FIG 15
1. Load your Luggie with the aid of a car hoist. Your dealer
will be able to advise on suitable equipment.
2. With the floor board of the Luggie secured in place, lower
the seat and tug on the front bumper to transport it into the
trunk, bed of your SUV or in the passenger side of your car
with the seat belt securely around the scooter as pictured.
3. With the seat lowered and the scooter completely
folded, lift Luggie into the trunk or bed of your
sport utility vehicle (SUV) for ease of transport.(see
FIG 15 to FIG 19).
FIG 16
FIG 17
FIG 18
FIG 19
Follow these simple instructions for folding your scooter. This procedure can be carried
out quickly and without the use of tools. It is recommended that you transport the battery in
the box that shipped with your Luggie and lay the battery on level surface.
22
Warning: Do not place metal objects over open battery contacts. This may cause the
battery to short circuit.
Caution: Protect clothing when lifting your Luggie. Some components may have
lubricating fluids on their surfaces. Work out the best position to stow the components
of your scooter. Your Luggie will increase the load in your car, please remember this
and adjust your driving to suit this condition.
Note: When using access ramps to load your Luggie into a car, always keep your body
clear of your scooter to prevent injury. Never ride your scooter when loading it into a
vehicle, failure to observe this warning could put you into a dangerous situation. Always
make certain your scooter and any ancillary parts are correctly tied down in the
transport vehicle to prevent movement during acceleration, deceleration and braking.
Most modern cars have anchor points on the bed of your car/trunk/SUV to secure your
scooter and accessories.
Remember: You have increased the load in your car, please take account of this and
modify your driving accordingly.
Warning: Always make certain that your scooter is stored in the transport vehicle with
the magnetic brake release system in the disengaged (brakes locked) position.
23
BATTERY & BATTERY CHARGING
Your Luggie has a lot of power. Keeping Luggie working to its maximum potential means
that its battery must be maintained at full potential. Nightly recharging, after use, will help
giving the battery a longer life and will ensure your Luggie is always ready to go when you
are.
FIG 20
FIG 21
BATTERY PACK
Your Luggie scooter is shipped with two AGM battery (Non-Spillable), designed
specifically for the Luggie. Follow the steps outlined below:
1. Position battery pack into the scooter battery compartment under the seat as
outlined in the Quick Start Guide.
2. Switch on your scooter. The battery meter will now move to show the state of
charge in the battery. If the needle of your battery meter is in the green zone, your
scooter is ready to drive.
Warning: Do not attempt to remove the safety valves situated in the top
of the battery. Failure to observe this warning will invalidate your battery
guarantee.
For air travel, please consult your carrier prior to departure. They will need advance
warning that you wish them to carry the AGM battery. Please note that each carrier reserves
the right not to carry what may be termed Hazardous cargo. FreeRider cannot be held
responsible for their final decision.
BATTERY CHARGER
The battery charger is designed especially for your Luggie (FIG 20). It may not be suitable
for any other powered mobility product. Only use the chargers shipped with your Luggie
scooter. The use of other chargers may permanently damage your battery and would
invalidate the warranty.
SAFE & LASTING BATTERY
1. For longest battery life, your battery should be re-charged when the battery meter
indicator is in the red region or after use whenever possible.
2. If your Luggie battery will not be used for an extended period, fully charge the battery
and disengage from the battery compartment of the Luggie before storage. Battery
charge will gradually deplete with time. Please do a refresh charge every month when
the battery has been stored for an extended period of time. (Remember: Keeping your
battery charged will help extend the life of your battery and ensure that the Luggie is
ready to go when you are.)
24
To charge your batteries follow these simple steps:
1. Switch off your Luggie.
2. Your charger has two leads exiting from it. Plug the 3-prong plug to charging
socket located on the rear chassis of your scooter and the second lead to the
charger unit before plugging it into the wall socket.
Note: If you need to use an extension cord for your main electric supply, make certain
that it is safe and suitable for the charge current.
Note: Your Luggie will not drive if the charger is connected.
LUGGIE CHARGER STATUS LIGHT INDICATOR
Orange: charging
Solid Green: charging complete.
GENERAL
Depending on the depth of discharge, the minimum time to recharge serviceable batteries
fully will vary from 1 hour up to 2 hours. Please note that recharge time will vary between
the minimum and maximum times indicated due to the varying states of battery use. Please
be patient.
TROUBLE SHOOTING
1. If the green indicator is off, check the AC input. If the AC input works normally, the
battery charger may be defective.
2. If the green indicator is working normally but the charging indicator (orange) is off,
the polarity connection may be reversed. The output connection may be short or open.
3. If the charging indicator (orange) is still off when charging, the battery charger may be
defective.
4. If the charging indicator (orange) does not turn green (charged state), the battery is
not being charged normally. Please stop charging and have the battery repaired or
checked by an Authorized Luggie Service Center.
5. If the charging indicator goes from orange to green (fully charged state)
immediately, the battery may be fully charged.
6. If the battery does not charge, the battery may be defective. Have it checked by an
Authorized Luggie Service Center.
ADVISORY NOTES
1. Disconnect your plug from the wall socket before removing the 3-pin charge plug
from the charge socket of your Luggie.
2. The Luggie charger is for indoor use only. Do not expose it to rain or moisture.
25
3. DO NOT smoke or expose your Luggie near open flame while the battery is being
charged.
4. DO NOT use an extension cord to connect the charger onto the charging unit of your
Luggie unless absolutely necessary. Use of an improper extension lead could result in
fire and/or electric shock.
5. DO NOT use the charger if it has received a sharp blow, been dropped or otherwise
misused in anyway.
6. DO NOT dismantle the charger, poke or drop objects through the slots in the charger
case.
7. DO NOT unplug or interrupt the recharge cycle until the charging cycle has been
completed. Failure to observe this instruction can damage the integrity of the battery.
8. There is a drive inhibit function on your scooter. The scooter cannot be driven when the
charger is plugged into your Luggie.
9. Avoid exposure to heat when charging your battery.
YOUR GUIDE TO SAFE AND LASTING BATTERY
1. For longest life of your battery, your battery should be recharged after use, preferably
overnight.
2. When storing your Luggie and battery for an extended period, fully charge your battery
and disconnect the battery from power socket. The battery should never be stored fully
discharged.
3. If your Luggie has been stored for some time, always recharge your battery before use.
4. Every six months, check the connection on the battery pack. Make sure the
connection area is clean.
5. Your battery carries a limited manufacturer warranty which is subject to a stringent wear
and tear clause. Any gradual deterioration in performance is normally associated with
fair wear and tear. Misuse or accidental damage is not covered by the manufacturer's
warranty.
26
FREQUENTLY ASKED QUESTIONS
Q: How do I turn on Luggie scooter?
A: Locate the on/off switch below the handlebar on the right side. If you do not see a solid
red on the switch, check to make sure the battery has been properly installed. Refer to the
owner’s manual for diagnosis.
Q: What does the magnetic brake release do?
A: In time of emergency or when your battery is out of power, disengaging the magnetic
brake release will inhibit you from driving the scooter; but, it will allow your scooter to be
pushed freely by an attendant.
Q: Are there safety modes in place even when the magnetic brake release has
been disengaged?
A: Yes. If the attendant pushes the scooter too quickly while the magnetic brake release
is disengaged, the scooter will brake or stop. If this happens, come to a complete stop to
allow the safety mechanism to reset before starting again. If the attendant pushes slowly,
the scooter will move easily without braking.
Q: What if my Luggie doesn’t start?
A: (a) Check to see that the battery is installed properly in the battery compartment before
turning on the power switch.
(b) If the battery is installed properly, check the battery indicator to see if the battery is
fully charged. If the indicator is in the red zone or if the power switch flashes once
per second your battery is low in power. Please charge your battery.
(c) If the power switch flashes 5 times per second and your battery indicator is in
the green zone (charged state) make sure the magnetic brake release hasn’t been
disengaged. If the magnetic brake release is disengaged, turn off the power switch,
engage the magnetic brake release then turn on the power switch before driving.
Q: How do I move forward, reverse and stop on the Luggie scooter?
A: Gripping the right wig-wag lever let you move forward on Luggie scooter. Gripping on
the left wig-wag lever allows you to move in reverse. To stop, simply let go of the wig-wag
lever.
Q: Am I able to adjust the speed of my Luggie scooter?
A: You can adjust the speed of your Luggie by adjusting the speed control knob located on
the left of the top console. When the knob is adjusted to the turtle mode, the scooter is at its
slowest. As you adjust the knob toward the rabbit icon on the speed control knob, the speed
of the Luggie will increase to the top speed of 4 MPH.
Q: When should I charge my battery?
A: Charge your battery when the battery indicator is in the red region on the battery
indicator on the top console of your scooter.
27
Q: How long will it take to fully charge the battery?
A: The time required to fully charge your battery will depend on the depth of discharge on
the battery. The minimum time taken to recharge the battery fully will vary between 4 to 6
hours.
Q: What do I do if I want to store my Luggie and battery for an extended
period of time?
A: When storing your Luggie and battery for an extended period of time, fully charge your
battery and remove the battery from the connector of the scooter. The battery should never
be stored fully discharged.
Q: How should I fold the Luggie to check it for air travel?
A: The best way to fold the Luggie and check it for air travel is to retract the tiller and fold
both the tiller down to the base of the scooter along with the seat. By making the scooter
flat (folding down both the tiller & the seat ) like FIG 2, page 9, it is easier for airline crew
to handle and transport the scooter without damaging the scooter. And, unplug the battery
wiring harness to prevent from short circuit.
Q: How do I remove the battery from the battery compartment?
A: To remove the battery from its compartment. Unplug the battery connectors before
removing the battery pack.
Q: How long will my AGM battery last?
A: The life of your AGM battery will depend on use and care. Like any consumable
product, the battery will deteriorate in performance and reduce in range with time and use.
Battery tend to deteriorate in performance and reduce in range when left in a discharged
state, left in cold conditions for extended periods or worn due to heavy use.
Q: Where can I drive Luggie?
A: The Luggie was designed to provide optimum stability under normal driving conditions
for indoor use on dry, level surfaces. We realize that there will be times when you will
encounter other surfaces. Please take caution when driving in any conditions. Luggie is not
recommended for uneven terrain, rain, snow, steep inclines, sand gravel or uneven surfaces.
Q: How do I unfold my Luggie scooter?
A: Refer to the Quick Start Guide provided in your packaging or the owner’s manual on
unfolding your new scooter.
Q: How do I adjust the angle of my tiller?
A: Lift the trigger handle out to bring the tiller toward or away.
28
Q: What should I do if my battery doesn’t charge?
A: Call the customer service department to trouble shoot. Do not attempt to remove the
safety valves situated in the top of the battery. Failure to observe this warning will
invalidate your battery guarantee. If the battery is faulty and still under warranty, request
a RMA (Return Merchandise Authorization) number from your Authorized Luggie Dealer
before shipping back the battery for replacement. If the battery is no longer under warranty,
properly dispose of the old faulty battery and purchase a new Luggie battery from an
authorized reseller.
Q: Who do I contact if I need replacement parts for my Luggie scooter?
A: Contact your authorized Luggie reseller for replacement parts on your Luggie scooter.
Q: How do I ensure my seat is locked in position?
A: Check to see that the seat lock indicator is red on both the right and left side to ensure
your seat is locked in place. Refer to the Quick Start Guide to locate the seat lock indicator.
Q: Do I need to remove the battery when I travel via air?
A: If you would like to travel with additional batteries, please ask your travel
companion to carry it for you or check with your airline of travel for additional
details.
Note: It is recommended that you check with your airline of travel prior to traveling in
regard to checking your Luggie scooter. Please be advised that different airlines may
handle the situation differently.
How can I ensure maximum battery life?
Simply put, a fully charged battery is a happy battery! A fully charged battery will
provide reliable performance and extended battery life, so keep your battery fully
charged whenever possible. Extra care must be taken when handling batteries, if you
decide to fold your vehicle for transportation etc. Dropped battery, even from a very
small height, can lead to damage of the internal components, causing premature battery
failure. Do not open the battery casing, doing so will void the warranty.
Disposal
Caution: Used batteries must be disposed of properly. Please contact your local
electronic waste facility to dispose of used batteries properly.
BATTERY WARRANTY
The battery shipped with your Luggie has a limited warranty to be free of material defect or
workmanship for a period for 6 months. Any battery faults due to a defect in manufacture
or materials will be obvious within a few weeks of use. The condition of your battery
will be dependent on the actual use of the scooter and how often the battery is cycled ie
discharged and charged.
29
Gradual deterioration in performance and reduction in range is normal and associated with
fair wear and tear, misuse or accidental damage. Under these circumstances, the warranty
will not apply. Some users due to their hectic lifestyle, weight or operating conditions, may
wear their battery out during the original battery manufacturer's guarantee period due to
extensive use of their scooter. The battery has a defined number of discharge cycles it can
make. The more times you use your scooter the more cycles your battery will make; the
shorter their life span.
Remember: The longevity of your battery will be dependent on your care in breaking in
the battery.
Best practice for new battery:
1. Fully charge new battery prior to your initial use. This will bring your battery up to
about 88% performance.
2. Ride your vehicle around the house or garden. Do not venture too far away until you
become accustomed to the controls and feel of the scooter. This will gently break in your
battery.
3. Give your battery another full charge and run the scooter again. The battery will now
perform to over 90% of their full potential.
4. After ten to fifteen charging cycles, the battery will top off at 100% charge and
last for an extended period. It is important that you follow the steps outlined
above for the longevity of your battery.
How can I get the maximum operating time per charge?
Rarely do we have the ideal driving situation (smooth, flat, hard terrain with no wind
or curves and warm temperatures). More often, we are presented with hills, uneven and
loosely packed surfaces, curves, wind, cold and heavy loads. Conditions described above
will affect the distance or running time of your battery charge.
Here are a few suggestions for obtaining the maximum range per charge:
1. Always charge your battery fully prior to your trip.
2. Plan your trip in advance to avoid inclines, curbs and soft surfaces.
3. Limit your baggage weight to essential items.
4. Try to maintain an even speed to avoid stop and start driving.
5. Ensure recommended routine servicing of the vehicle's components.
Warning : When working on or disposing of your batteries:
1. DO NOT allow metal objects to short out the terminals of your battery. This could
cause the battery to explode and cause injuries..
2. DO NOT allow your battery to freeze. If frozen allow it to naturally thaw out before
charging, failure to observe this warning may damage the battery.
3. If you need to replace your battery, contact your Authorized Luggie Reseller.
Original Luggie parts will give you the best performance.
4. Always handle battery with care.
5. Dispose of worn out battery by contacting your local waste/electronic waste
disposal authority.
30
CARE & MAINTENANCE
Your Luggie, like any other electro-mechanical scooter, will benefit from regular
servicing by your Authorized Luggie Dealer. You too, can help keep your Luggie in
tip top condition by following the simple guidelines outlined below.
Note: Only competent people should carry out service work.
SEAT UPHOLSTERY
A damp cloth and a little soapy water will keep your seat, backrest and armrests
looking new. Do not use abrasive cleaners as this will damage the coating on the
upholstery. The coating on the upholstery will degrade over time with use due to
natural oils in your hair and skin, UV light, general use and handling of your scooter.
BODY WORK
The painted body work on your Luggie scooter can be lightly washed with clean
soapy water. Do not use abrasive cleaners or strong detergents. The use of abrasive
or strong detergents may fade the color. Use cleaning solutions safe for automobiles.
Salt contact (ocean air) is very corrosive to metal parts on your Luggie scooter.
Caution: Do not hose down your Luggie with a power washer. Water could be forced
into the electronics and cause permanent damage to your scooter.
Always use a soft cloth to clean your Luggie. Auto polish may also be used to keep the
paint work and bright chrome parts in pristine condition. The metal frame work of your
Luggie should be cleaned once a year and any paint work damaged should be treated to
prevent further attack from the elements. Do not store your Luggie in damp conditions.
This may affect the electronics if left for extended period of time. Moisture, if left
unattended can cause deterioration to the metal frame.
ELECTRONICS
Servicing of the drive electronics and charger should only be carried out by your
Authorized Luggie Service Dealer. These units are sealed and should not be opened.
BROKEN SEALS WILL INVALIDATE YOUR WARRANTY. Below are some pointers
to keep in mind.
1. DO NOT operate your Luggie in exceptional weather conditions i.e. very heavy
rain.
2. Cover your scooter if it is left unattended and outside for a long period of time.
3. DO NOT drive your Luggie through deep water. This could damage the electronic
speed controller. Sea and road salts are very corrosive and should be avoided if
possible.
DRIVE TRANSMISSION LUBRICATION
The Luggie is fully lubricated on delivery. You will not need to fill transmission fluid on
your scooter.
Note: Your Luggie transmission is filled with a special lubricant. Do not attempt to force
grease into the transmission as this will contaminate the original lubrication and will
invalidate your warranty.
31
Caution: When lifting the transmission, keep well away from clothing. It is normal to
find a light film of lubrication around this part.
MOTOR BRAKES
Safety Note: For your own safety, we recommend that you check the function of your
Luggie brakes prior to any journey. If the motor brake is functioning correctly and the
drive is engaged, you will not be able to push your scooter when the scooter is powered on
or off without the use of the wig wag levers.Refer to the Freewheeling Your Luggie on page
12 for additional details.
Warning: Letting go of the wig wag lever while driving will reduce the speed of your
Luggie very quickly. If you notice a change in the normal slowing/braking condition of
your scooter, or if your Luggie does not slow down quickly, please do not use your scooter.
Contact your Authorized Luggie Dealer.
TIRES
Check the condition of your tires regularly. Look for signs of wear, cuts and foreign objects
lodged in the tread of your Luggie tires (FIG 22).
FIG 22
TIRE SERVICING REAR WHEELS
To remove a rear wheel from your Luggie follow the instructions below (ONLY
COMPETENT PEOPLE SHOULD CARRY OUT THESE PROCEDURES).
Power off your Luggie.
Using a suitable body stand, lift the side of the vehicle you wish to service off the
ground. Place the stand under the chassis. Care must be taken when lifting heavy loads.
You may need a friend to help you. Please be safe. Do not lift the scooter by the plastic
body work.
With the aid of a 13mm spanner (not supplied), remove the center hub nut and washer.
Slide the wheel from the mounting axle. Rear wheels are fitted to the drive axle via a
hub which is located onto a key. These wheels fit tight onto the axle and may need some
pressure on the wheel hub to release them from the axles. Look for spacing washers and
take care not to misplace the drive key which fits between the wheel hub and the axle
shaft.
To reassemble the wheel simply follow the above procedure in reverse order noting the
following points:
Make certain that you replace any spacing washers and keys in the order that they were
moved.
32
Locking Screws: The special 'locking' center hub screws may lose its effectiveness when
it has been removed over a number of times. New screws should be used each time the
wheel is removed. Contact your Authorized Luggie Reseller to purchase parts or have the
tires replaced.
TIRE SERVICING FRONT WHEELS
Your Luggie is fitted with solid tires which require minimum maintenance. Tires should
be changed out when the tread have been worn out or cracked due to weather. Remove
the wheel from the fork or turning axle shaft with the aid of 19mm and 21mm spanners
(tools are not included). The front wheel has two bearings which may have various spacing
washers between the forks. Please note the order of these washers. Remove the tire from
the wheel by following steps above for rear wheels, using a 10mm spanner and 4mm hex
key. Reassembly in the reverse procedure making certain that all washers supplied are
replaced in the correct order removed.
BATTERY
Keep your battery well charged (see Battery Charging section of this manual). Keep battery
clean and store in dry frost-proof location. Your Luggie Dealer will be able to test your
battery for its condition.
Note : Service charge may apply for this service.
IMPORTANT: It is not possible to predict the life expectancy of your battery. This is
mainly due to the different workloads a battery can be subjected to during your day to
day use. The life of your battery will be dependent on the following: motor loads, general
service factors, care and maintenance working conditions, periods of nonuse and abuse etc.
When you are ready to replace your Luggie battery, always order the battery made for your
specific scooter.
Warning: Contact your electronic waste disposal facility to properly dispose your
Luggie battery.
Note: The charger supplied with your Luggie scooter is specifically designed for
Luggie battery and may not work correctly with other brand of battery. (Refer
to Batteries and Battery Charging section of this manual for additional details.)
LUBRICATION
The Luggie is designed with low maintenance in mind. Wheel and steering bearings are
sealed for life. The following are suggested service intervals for your Luggie scooter.
Caution: Only drive your Luggie scooter if it is in full working order.
RECOMMENDED SERVICE INTERVALS DAILY CHECKS
Operation of motor brakes
Operation of driving brake
Operation of seat lock
Tire condition
Battery capacity
33
WEEKLY CHECK
Chassis locking mechanism.
Armrest adjustment knobs.
Allow battery charger to go through a full recharge cycle. Wait until the green
light illuminates.
Clean paintwork with auto shampoo. DO NOT use harsh abrasives or power
washer.
SIX MONTHS CHECK
Tire wear, replace as necessary.
All fasteners and fittings for sound function.
Tension of handle bar lock and hinge bolt.
Battery connections.
Inspect all electrical plugs and sockets for damage, good contact and fit.
ANNUALLY CHECK
Front wheel bearings for wear.
Handlebar bearings
Chassis for sound welds
Rear drive wheel hub keys
All wheel bolts
Drive axle securing bolts
Motor mounting bolts
Magnetic motor brake disc and function
Main wiring loom for damage
All steering components
Clean chassis and repaint any exposed parts.
Replace any damaged axle seals.
Cycle charge for full operation function.
Cycle test batteries for operating capacity. (Ask your Authorized Luggie Dealer for
details.)
Note: Annual inspection will include weekly, semi-annual and annual checks listed above.
LUBRICATION
Use a general purpose noncorrosive lubricating fluid (i.e. WD-40) on moving parts. All
wheel bearings are factory sealed and should not normally need lubricating. Handlebar
bearings should be lubricated with a general purpose bearing grease. Your drive axle is
factory filled with a special lubricant and will not normally need replacing.
Caution: Do not mix other lubricants with this factory fitted drive axle lubricant.
Failure to observe this caution will invalidate your warranty.
Note: Service interval recommendations are guidelines for proper care and maintenance of
your scooter. More frequent use of your scooter may require more frequent adjustments to
these suggested intervals listed above.
34
BASIC FAULT FINDING
Q: What if my Luggie will not start?
A: Check to see whether the power switch has been switched ‘on’. If it is, the battery
indicator meter will be operating. If the status light on your top console is flashing once per
second, your battery is low in charge. Charge your battery.
Q: What if the status light on the power switch fail to operate when the switch is in
the 'on' position?
A: Make sure the charger is not plugged into the charge socket of your scooter. When your
scooter being charged, you will not be able to drive.
Q: What if my Luggie stops for no apparent reason?
A: Your battery may not be working properly. Contact your Authorized Luggie Reseller.
Q: What if the battery indicator is operational but the status light flashes and the
Luggie is inoperable?
A1: Check the status fault codes (page 37-38) indicated by the LED on your power switch
flashing.
A2: Check to make sure that the magnetic brake release is not disengaged. If the magnetic
break release is disengaged, the status light on the power switch will flash five times.
Q: What if my Luggie does not slow down or behave erratically?
A: Switch off the power and contact your Authorized Luggie Dealer.
Warning: If you find for any reason your Luggie does not reduce speed when you let go
of the wig-wag lever, power off your Luggie. The parking brake will activate immediately
and stop your scooter. Be aware that the scooter will stop very suddenly. Hold onto your
handlebars and sit back in your seat.
Warning: The above operation should only be carried out in an emergency; continual
use of this facility will damage the drive transmission and motor brake. Inform your
Authorized Dealer before using your scooter again.
Warning: If you feel for any reason that your scooter is not driving correctly or making
unusual noise, stop using the scooter and contact your Authorized Dealer.
SPEED CONTROL
The speed controller system incorporates a sophisticated microprocessor which continually
monitors the Luggie scooter's systems to ensure safe and reliable operation. Safety
conditions monitored by the speed control are listed below:
Speed control system integrity
Internal voltages and circuits
Motor voltages and circuits
Freewheel speed limiting downhill
Battery voltage
35
When the battery voltage is low, the 'status' indicator light situated on power switch will
flash slowly as a warning for you to recharge your batteries. If the 'speed controller' detects
a fault, the light will flash more rapidly, with the number of flashes indicating the nature of
the fault. If your scooter is switch 'on' but not operated for a set period of time (15 minutes
approximately) the speed controller system will automatically turn itself 'off' to conserve
valuable battery energy. This fault can be cleared when you power off then power back on.
FAULT DIAGNOSIS
Faults with the main speed controller are rare. Most faults on powered scooter are
associated with wiring or bad connections due to poor maintenance or incorrect installation
of connectors when assembling the scooter after transporting the scooter. If your Luggie
scooter fails to operate refer to the status fault codes on the following page for reference. If
in doubt, consult the dealer from whom you purchased your Luggie scooter.
DO NOT ATTEMPT TO REMOVE THE SAFETY VALVES SITUATED IN THE TOP
OF THE BATTERY. FAILURE TO OBSERVE THIS WARNING WILL INVALIDATE
YOUR BATTERY GUARANTEE.
SPEED CONTROLLER SETTINGS
Warning: Performance adjustments should not be made to the wig wag levers which
could compromise the integrity of the speed controls and put the operator in a serious
danger. Performance adjustments should only be made by an Authorized Luggie technician
fully trained and conversant with the programming and capabilities of the Luggie scooter.
Warning: Incorrect settings could cause injury to the scooter operator and/or to
bystanders or damage to the scooter and/or surrounding property. If in doubt, consult your
Authorized Dealer.
36
STATUS FAULT CODES
FLASH
1
2
3
4
5
6
7
8
9
37
Description
Meaning
The batteries are running low.
Recharge the batteries.
The batteries have run out of charge.
Recharge the batteries.
Low Battery Fault
Check the battery and associated connections
and wiring.
Battery voltage is too high. This may occur if
overcharged &/or travelling down a long slope.
If travelling down a slope, reduce your speed
High Battery Fault
to minimize the amount of regenerative
charging.
The motor has been exceeding its maximum
current rating for too long.
The scooter may have stalled. Turn the
controller off, leave for a few minutes and turn
Current Limit Time-out
back on again.
The motor may be faulty. Check the motor and
associated connections and wiring.
Either a park brake release switch is active or
the park brake is faulty.
Check the park brake and associated
Park Brake Fault
connections and wiring.
Ensure any associated switches are in their
correct positions.
Either a Stop function is active or a Charger
Inhibit or OONAPU condition has occurred.
Release the Stop condition (seat raised etc.)
Disconnect the Battery Charger
Throttle OONAPU
Ensure the throttle is in neutral when turning
the controller on.
The Throttle may require re-calibration.
The throttle, speed limit pot, SRW or their
associated wiring may be faulty.
Speed Pot Fault
Check the throttle and speed pot and
associated connections and wiring.
The motor or its associated wiring is faulty.
Check the motor and associated connections
Motor Voltage Fault
and wiring.
The controller may have an internal fault.
Other error
Check all connections and wiring.
Battery Low
Model Number
Overall Length(Unfold)
Overall length(Fold)
Overall width
Ground clearance
Maximum load
Range up to
Luggie Classic
98.2 cm / 38.66 inches
66 cm / 25.98 inches
45.5 cm / 17.91 inches
6.4 cm / 2.52 inches
113.6 kg / 250 lbs
15.3 km / 9.6 miles(90 kg / 198 lbs)
Total Weight(excl. battery)
23.6 kg / 52 lbs
Battery pack weight
10 kg / 22 lbs
Turning radius
Maximum speed
103.8 cm / 40.87 inches
6 km / 4 mph
AGM Battery
12V / 12Ah * 2
Seat Width
36.8 cm / 14.49 inches
CLASSIFICATION
Type 'B' indoor / with some outdoor capabilities (EN12184:1999) Class 2 (Highway
Regulations 1988).
Maximum safe climbing angle: 6 degrees with 250 lbs (113.6 kg) weight capacity.
Warning: The safe climbing angle is measured with the seat in the highest position, and
a weight capacity of 250 lbs (113.6 kg). The motor on your scooter is powerful and may be
able to climb a steeper incline than the maximum safe climbing angle. Exceeding the safe
climbing angle may put you at risk of injury. On no account must you attempt to climb an
incline of more than 6 degrees. This will exceed the rear stability of your scooter.
Maximum speed: up to 4 mph (6 km/h) [+/-10%] dependent on weight and manufacturing
tolerances.
Range: range up to 9.6 miles (15.3 km) when loaded 198 lbs (90 kg) between charges
under ideal conditions.
Note: Range varies with weight, terrain, temperature, battery condition etc. and is subject
to manufacturing tolerances. Your battery will require a period of "breaking in" before
they will reach their optimum capacity (up to 20 charge, discharge cycles can be expected)
before full range is experienced. Refer to the battery charging section of this manual.
Tire Size: Front 6 inches(15.2 cm), Rear 7 inches(17.8 cm). PU solid
AGM Battery: 12 Volt, deep cycle, Non-Spillable battery, 12 Ah x 2
Charger: 24V / 5 Amp charger
38
Conforms to: EN60335-2-29 and EN12184
EN12184:1999 (Clause 9.8)
EN55022:2010, Class B
EN60601-1-2:2007/ CISPR 11: 2009+A1: 2010
IEC61000-4-2/ IEC61000-4-3
FCC Part 15:2010, Subpart B, Class B
Electrical System: 24 volt DC
Drive system: Rear wheel, direct drive via sealed drive axle
Motor: 24 Volt DC. Permanent magnet totally enclosed for outdoor use. Internal brushes.
3.0 Amp (no load), 70W/3600RPM
Brake: Automatic dynamic regenerating braking system with spring activated magnetic
solenoid parking brake and freewheel facility.
Tiller: Adjustable locking for driving comfort.
Speed Control: Proportional state-of-the-art design for safety and smooth operation
incorporated with 'Fault' diagnosis.
Seat: Contoured adjustable seat with height adjustment. Armrest are optional with multiple
width adjustments.
Charger socket: Located on the rear chassis cover. (Complies with EMC Directive 89/336/
EEC and with Medical Devices Directives 93/42/EEC.)
TURNING RADIUS
103.8cm [40.87”]
30.5cm [12.01”]
MAX-78.5cm [30.91”]
MIN-44.7cm [17.60”]
6.4cm [2.52”]
84cm [33.07”]
15.5cm [6.10”]
45.5cm [17.91”]
Luggie Classic
39
MAX-53.5cm [21.06”]
MIN-48.5cm [19.09”]
73.8cm [29.06”]
98.2cm [38.66”]
LUGGIE ARMRESTS INSTALLATION GUIDE
40
ADVISORY SAFETY NOTICE
Warning: Radio wave sources may affect scooter control. Your powered scooter is
designed to operate in appropriate environments; however, radio wave sources such as
radio or TV broadcasting stations, amateur (ham) radio transmitters, two-way radios and
cellular portable telephones can affect powered motorized scooters. The following warnings
listed below should reduce the chance of unintended brake release or uncontrolled powered
scooter movement.
Refrain from using your cell phone, two way radio while driving your Luggie.
Be aware of nearby transmitters such as radio or TV stations, and try to
avoid coming into close contact with them.
If unintended movement or brake release should occur, power off your
Luggie as quickly as it is safe to do so.
Be aware that adding accessories or components or modifying your Luggie
scooter may make it more susceptible to interference from radio waves
sources.
Note: There is no easy way to evaluate overall effect of the above to your scooter.
Report all incidents of unintended movement or brake release to your Authorized
Luggie Dealer, noting if there is a radio wave source nearby. Your Authorized
Service Technician will then be able to diagnose your scooter to eliminate any
possible scooter component failure.
Your scooter has been tested to the following standards with reference to EN12184.
Emissions EN55022(B), Immunity IEC61000-4-2, IEC61000-4-3, ESD IEC801-2.
Note: All figures, speeds, measurements and capacities shown in this manual are
approximate and do not constitute specifications. Our policy is one of continual
improvement. We reserve the right to alter, without notice, any weights, measurements or
other technical data shown in this manual. If you require specific accurate data, please
contact your Authorized Dealer.
Enjoy your Luggie!
41
OPTIONAL ACCESSORIES
Storage bag
Sling bag
Adjustable armrest
Luggie is a one piece foldable mobility scooter with optional accessories for your
convenience. For information regarding these optional accessories listed above, please
contact your Authorized Luggie Dealer.
Warning: Do not over load accessories as this will affect the weight capacity of your
scooter and decrease stability.
42
WARRANTY TERMS
Please keep a note of your serial No................................
(This is located on the front frame tube, under the front chassis cover).
The frame of your scooter is warranted for 36 months, 12 months from the date of purchase
against faults arising due to defects in manufacture or materials on electronic components.
This warranty does not detract from, but is in addition to your legal rights. Parts replaced or
repaired under the terms of this warranty will be covered for the balance of the period. This
warranty applies only to parts supplied or approved by your Authorized Luggie Dealer.
Refer to your warranty sheet for additional details. Due to the individual prescription nature
of this product, this warranty is not transferable.
Note: Optional extended warranty insurance may be available from your Authorized
Dealer.
Exclusions: This warranty does not extend to consumable items which may need replacing
due to normal wear and tear, namely tires, punctures, lubrication, mats, oil seals, gaskets,
screws, upholstery, motor brushes ,fuses, batteries, handgrips etc. or to damage to the
product caused by misuse, neglect or accident. This warranty does not apply if your Luggie
shows signs of excessive wear and abuse, or has been modified without the authority of
your Authorized Dealer.
The following items are not covered by your warranty:
1. Any noise or vibration, which does not affect the quality and function of the scooter.
2. Damage due to lack of maintenance or improper use or operation or storage.
3. Fees for the regular service inspection and maintenance.
4. Any fees incurred as a result of warranty repair, losses or compensation because
of the inability to use the scooter (telephone use, shipping, car rental, travel fees
etc.).
METAL WORK:
Components, such as the frame work and bright metal parts require special attention
and may deteriorate in certain conditions. Moisture and salt may corrode parts if left
unattended. Auto cleaner polishes should be used to prevent long term damage. Failure to
clean and protect these components may void your warranty.
43
PAINT WORK:
This warranty does not cover deterioration of paint resulting from the lapse of time i.e.
natural fading. It is the user’s responsibility to clean and protect the painted surfaces.
SPEED CONTROLLER:
Servicing of the speed controller or battery charger must only be carried out by your
local Authorized Luggie Dealer. Any attempt to open or dismantle these items render the
warranty void on that item immediately.
BATTERY:
Batteries carry a limited 6 month warranty from the original manufacturer which is subject
to a stringent wear and tear clause. Any battery faults due to a defect in the original
manufacture will normally become obvious within the first two months of use. (See battery
charging section of this manual for additional details.) Any gradual deterioration in the
performance after this period is normal and associated with fair wear and tear, misuse or
accidental damage and as such is not covered by the manufacturer’s warranty. (Battery is
warranted as a single part, only the failed part is replaceable.)
Warning: Do not attempt to open the battery. Breaking the battery seal will void the
warranty on the battery.
SERVICE CHECKS:
In line with all mobility vehicles, your Luggie will benefit from regular service inspections
to keep it in pristine condition. The frequency of these service inspections will depend
on the amount of use of your vehicle. We strongly recommend you contact your local
Authorized Luggie Dealer to arrange for a service visit. (See Care & Maintenance Section
of this manual). It is recommended that you fully service your Luggie at least every 12
months or more frequently depending on use. The warranty on your Luggie may not apply
if routine maintenance is not carried out as defined in the Care and Maintenance section of
the manual.
SERVICE CHECKS AND WARRANTY SERVICE:
If your Luggie should need attention due to failure as defined under the warranty terms,
please contact the dealer from whom you purchased your scooter. The Luggie shown and
described in this manual may not be exactly identical in every detail as your own Luggie.
However, all instructions are still entirely relevant, irrespective of detail differences. If you
are unsure of any details mentioned in this manual, please consult your Authorized dealer
before driving your scooter. Warranty service checks must be performed by an Authorized
dealer and will generally be valid at the location where purchased. All transportation costs
and shipping damage incurred while submitting parts for repair or replacement are the
responsibility of the purchaser.
44
SERVI C E REC ORD
This section is designed to assist you in keeping records of any service and repairs done
to your Luggie scooter. Should you decide to sell or exchange your scooter in the future,
this will prove most helpful to you. Your service agent will also benefit from a documented
record. This manual should accompany the scooter when service or repair work is carried
out. The service agent will complete this section and return the manual to you.
DEALER STAMP
DETAILS OF WORK CARRIED OUT
DATE
DEALER STAMP
DETAILS OF WORK CARRIED OUT
DATE
INITIALS
DEALER STAMP
DETAILS OF WORK CARRIED OUT
DATE
45
INITIALS
INITIALS
S ERVI C E REC ORD
This section is designed to assist you in keeping records of any service and repairs done
to your Luggie scooter. Should you decide to sell or exchange your scooter in the future,
this will prove most helpful to you. Your service agent will also benefit from a documented
record. This manual should accompany the scooter when service or repair work is carried
out. The service agent will complete this section and return the manual to you.
DEALER STAMP
DETAILS OF WORK CARRIED OUT
DATE
INITIALS
DEALER STAMP
DETAILS OF WORK CARRIED OUT
DATE
INITIALS
DEALER STAMP
DETAILS OF WORK CARRIED OUT
DATE
INITIALS
46
YOUR LOCAL DEALER
(TO BE FILLED IN BY LOCAL DEALER)
FREERIDER USA
8696 Utica Avenue
Rancho Cucamonga, CA 91730
Tel:(909) 466-7996 Fax:(909) 466-7990
Email: [email protected]
http://www.FreeRiderUSA.com
FREERIDER CORP.
Head Quarter and Kaohsiung Facility:
No.22, Bengong 5th Rd., Gangshan Dist.,
Kaohsiung City 820, Taiwan(R.O.C)
Tel:886-7-6223093 Fax:886-7-6230373
Email: [email protected]
http://www.freerider.com.tw
http://www.luggie.com.tw
2014.09.19 V1