1
Digital Sound Projector
Owner’s Manual
Read the supplied booklet “Quick Reference Guide” before using the unit.
English
CONTENTS
Supplied accessories . . . . . . . . . . . . . . . . . . . . . . . . . . . . . . . . . . . . . . . . . . . . . 4
Preparing remote control . . . . . . . . . . . . . . . . . . . . . . . . . . . . . . . . . . . . . . . . . . . . . . . . . . . . . . . . . . . . . . . . . . . . . . . . . . 4
FEATURES
5
PLAYBACK
22
Basic operation for playback . . . . . . . . . . . . . . . . . . . . . . . . . . . . . . . . . . . . 22
Enjoying sound based on your preference . . . . . . . . . . . . . . . . . . . . . . . . 23
Selecting a surround sound effect . . . . . . . . . . . . . . . . . . . . . . . . . . . . . . . . . . . . . . . . . . . . . . . . . . . . . . . . . . . . . . . . . 23
What you can do with this unit . . . . . . . . . . . . . . . . . . . . . . . . . . . . . . . . . . . . 5
2-channel playback (stereo playback mode) . . . . . . . . . . . . . . . . . . . . . . . . . . . . . . . . . . . . . . . . . . . . . . . . . . . . . . . . 23
Mastering useful apps . . . . . . . . . . . . . . . . . . . . . . . . . . . . . . . . . . . . . . . . . . . . . . . . . . . . . . . . . . . . . . . . . . . . . . . . . . . . . . 6
Adjusting volume for each channel . . . . . . . . . . . . . . . . . . . . . . . . . . . . . . . . . . . . . . . . . . . . . . . . . . . . . . . . . . . . . . . . 24
Controls and functions . . . . . . . . . . . . . . . . . . . . . . . . . . . . . . . . . . . . . . . . . . . 7
Viewing audio information . . . . . . . . . . . . . . . . . . . . . . . . . . . . . . . . . . . . . . . . . . . . . . . . . . . . . . . . . . . . . . . . . . . . . . . . 24
Clear playback of human voices (CLEAR VOICE) . . . . . . . . . . . . . . . . . . . . . . . . . . . . . . . . . . . . . . . . . . . . . . . . . . . . . 25
11
Wireless playback of audio via Bluetooth connection . . . . . . . . . . . . . . 26
PREPARATIONS
General setup procedure . . . . . . . . . . . . . . . . . . . . . . . . . . . . . . . . . . . . . . . . 11
a Installation . . . . . . . . . . . . . . . . . . . . . . . . . . . . . . . . . . . . . . . . . . . . . . . . . . 12
Listening to audio through Bluetooth speakers or headphones (transmitting) . . . . . . . . . . . . . . . . . . . . . . . 29
Listening to music from a Bluetooth device . . . . . . . . . . . . . . . . . . . . . . . . . . . . . . . . . . . . . . . . . . . . . . . . . . . . . . . . . 27
Terminating Bluetooth connection . . . . . . . . . . . . . . . . . . . . . . . . . . . . . . . . . . . . . . . . . . . . . . . . . . . . . . . . . . . . . . . . . 30
Raising the antenna . . . . . . . . . . . . . . . . . . . . . . . . . . . . . . . . . . . . . . . . . . . . . . . . . . . . . . . . . . . . . . . . . . . . . . . . . . . . . . . 13
Mounting the unit on a wall . . . . . . . . . . . . . . . . . . . . . . . . . . . . . . . . . . . . . . . . . . . . . . . . . . . . . . . . . . . . . . . . . . . . . . . 14
b Connecting a TV . . . . . . . . . . . . . . . . . . . . . . . . . . . . . . . . . . . . . . . . . . . . . . 15
c Connecting playback devices . . . . . . . . . . . . . . . . . . . . . . . . . . . . . . . . . 16
d Other connections . . . . . . . . . . . . . . . . . . . . . . . . . . . . . . . . . . . . . . . . . . . . 17
Connecting an external subwoofer . . . . . . . . . . . . . . . . . . . . . . . . . . . . . . . . . . . . . . . . . . . . . . . . . . . . . . . . . . . . . . . . 17
Wired network connections . . . . . . . . . . . . . . . . . . . . . . . . . . . . . . . . . . . . . . . . . . . . . . . . . . . . . . . . . . . . . . . . . . . . . . . 17
e Connecting the power cable . . . . . . . . . . . . . . . . . . . . . . . . . . . . . . . . . . 17
f Initial settings . . . . . . . . . . . . . . . . . . . . . . . . . . . . . . . . . . . . . . . . . . . . . . . 18
NETWORKS
31
Connecting to a network . . . . . . . . . . . . . . . . . . . . . . . . . . . . . . . . . . . . . . . . 31
Wired network connections . . . . . . . . . . . . . . . . . . . . . . . . . . . . . . . . . . . . . . . . . . . . . . . . . . . . . . . . . . . . . . . . . . . . . . . 31
Wireless network . . . . . . . . . . . . . . . . . . . . . . . . . . . . . . . . . . . . . . . . . . . . . . . . . . . . . . . . . . . . . . . . . . . . . . . . . . . . . . . . . . 32
Connecting the unit to a wireless network . . . . . . . . . . . . . . . . . . . . . . . . . . . . . . . . . . . . . . . . . . . . . . . . . . . . . . . . . 32
Connecting a mobile device to the unit directly (Wireless Direct) . . . . . . . . . . . . . . . . . . . . . . . . . . . . . . . . . . . . 40
Playing back music stored on media servers (PCs/NAS) . . . . . . . . . . . . 42
Media sharing setup . . . . . . . . . . . . . . . . . . . . . . . . . . . . . . . . . . . . . . . . . . . . . . . . . . . . . . . . . . . . . . . . . . . . . . . . . . . . . . . 42
Displaying the menu screen on the TV . . . . . . . . . . . . . . . . . . . . . . . . . . . . . . . . . . . . . . . . . . . . . . . . . . . . . . . . . . . . . 18
Playing music files . . . . . . . . . . . . . . . . . . . . . . . . . . . . . . . . . . . . . . . . . . . . . . . . . . . . . . . . . . . . . . . . . . . . . . . . . . . . . . . . . 42
Selecting the language for menu display . . . . . . . . . . . . . . . . . . . . . . . . . . . . . . . . . . . . . . . . . . . . . . . . . . . . . . . . . . . 19
Listening to Internet radio . . . . . . . . . . . . . . . . . . . . . . . . . . . . . . . . . . . . . . 43
Setting a surround sound effect for the installation position . . . . . . . . . . . . . . . . . . . . . . . . . . . . . . . . . . . . . . . . 19
Operating the unit by TV’s remote control (HDMI control) . . . . . . . . . . . . . . . . . . . . . . . . . . . . . . . . . . . . . . . . . . 20
Playback of Internet radio . . . . . . . . . . . . . . . . . . . . . . . . . . . . . . . . . . . . . . . . . . . . . . . . . . . . . . . . . . . . . . . . . . . . . . . . . 43
Registering favorite Internet radio stations . . . . . . . . . . . . . . . . . . . . . . . . . . . . . . . . . . . . . . . . . . . . . . . . . . . . . . . . . 43
Playing back music with AirPlay . . . . . . . . . . . . . . . . . . . . . . . . . . . . . . . . . 45
Playback of iTunes/iPod music contents . . . . . . . . . . . . . . . . . . . . . . . . . . . . . . . . . . . . . . . . . . . . . . . . . . . . . . . . . . . . 45
Playing back music stored on mobile devices . . . . . . . . . . . . . . . . . . . . . 47
Using a mobile device to play songs . . . . . . . . . . . . . . . . . . . . . . . . . . . . . . . . . . . . . . . . . . . . . . . . . . . . . . . . . . . . . . . 47
En
2
SETTINGS
48
APPENDIX
62
Setup menu . . . . . . . . . . . . . . . . . . . . . . . . . . . . . . . . . . . . . . . . . . . . . . . . . . . . 48
Troubleshooting . . . . . . . . . . . . . . . . . . . . . . . . . . . . . . . . . . . . . . . . . . . . . . . . 62
Setting the setup menu . . . . . . . . . . . . . . . . . . . . . . . . . . . . . . . . . . . . . . . . . . . . . . . . . . . . . . . . . . . . . . . . . . . . . . . . . . . 48
General . . . . . . . . . . . . . . . . . . . . . . . . . . . . . . . . . . . . . . . . . . . . . . . . . . . . . . . . . . . . . . . . . . . . . . . . . . . . . . . . . . . . . . . . . . . 62
Setup menu list . . . . . . . . . . . . . . . . . . . . . . . . . . . . . . . . . . . . . . . . . . . . . . . . . . . . . . . . . . . . . . . . . . . . . . . . . . . . . . . . . . . 49
Bluetooth . . . . . . . . . . . . . . . . . . . . . . . . . . . . . . . . . . . . . . . . . . . . . . . . . . . . . . . . . . . . . . . . . . . . . . . . . . . . . . . . . . . . . . . . . 64
Sound . . . . . . . . . . . . . . . . . . . . . . . . . . . . . . . . . . . . . . . . . . . . . . . . . . . . . . . . . . . . . . . . . . . . . . . . . . . . . . . . . . . . . . . . . . . . 50
Remote control . . . . . . . . . . . . . . . . . . . . . . . . . . . . . . . . . . . . . . . . . . . . . . . . . . . . . . . . . . . . . . . . . . . . . . . . . . . . . . . . . . . 65
HDMI . . . . . . . . . . . . . . . . . . . . . . . . . . . . . . . . . . . . . . . . . . . . . . . . . . . . . . . . . . . . . . . . . . . . . . . . . . . . . . . . . . . . . . . . . . . . . 51
Network . . . . . . . . . . . . . . . . . . . . . . . . . . . . . . . . . . . . . . . . . . . . . . . . . . . . . . . . . . . . . . . . . . . . . . . . . . . . . . . . . . . . . . . . . . 66
Function . . . . . . . . . . . . . . . . . . . . . . . . . . . . . . . . . . . . . . . . . . . . . . . . . . . . . . . . . . . . . . . . . . . . . . . . . . . . . . . . . . . . . . . . . . 52
When surround effect is not enough . . . . . . . . . . . . . . . . . . . . . . . . . . . . . 68
Information . . . . . . . . . . . . . . . . . . . . . . . . . . . . . . . . . . . . . . . . . . . . . . . . . . . . . . . . . . . . . . . . . . . . . . . . . . . . . . . . . . . . . . . 53
How to install YRB-100 . . . . . . . . . . . . . . . . . . . . . . . . . . . . . . . . . . . . . . . . . . . . . . . . . . . . . . . . . . . . . . . . . . . . . . . . . . . . 68
Network . . . . . . . . . . . . . . . . . . . . . . . . . . . . . . . . . . . . . . . . . . . . . . . . . . . . . . . . . . . . . . . . . . . . . . . . . . . . . . . . . . . . . . . . . . 54
Basic Knowledge of Surround Sound . . . . . . . . . . . . . . . . . . . . . . . . . . . . . 69
Bluetooth . . . . . . . . . . . . . . . . . . . . . . . . . . . . . . . . . . . . . . . . . . . . . . . . . . . . . . . . . . . . . . . . . . . . . . . . . . . . . . . . . . . . . . . . . 57
What is Surround Sound? . . . . . . . . . . . . . . . . . . . . . . . . . . . . . . . . . . . . . . . . . . . . . . . . . . . . . . . . . . . . . . . . . . . . . . . . . . 69
Operating a TV via the TV Remote Repeater function of the unit . . . 58
Updating the unit’s firmware . . . . . . . . . . . . . . . . . . . . . . . . . . . . . . . . . . . . 59
What is a Digital Sound Projector? . . . . . . . . . . . . . . . . . . . . . . . . . . . . . . . . . . . . . . . . . . . . . . . . . . . . . . . . . . . . . . . . . 69
Using “Network Update” in the setup menu to update firmware . . . . . . . . . . . . . . . . . . . . . . . . . . . . . . . . . . . . 59
Glossary . . . . . . . . . . . . . . . . . . . . . . . . . . . . . . . . . . . . . . . . . . . . . . . . . . . . . . . 70
Updating firmware with connection of a USB flash drive . . . . . . . . . . . . . . . . . . . . . . . . . . . . . . . . . . . . . . . . . . . . 60
Audio/video information . . . . . . . . . . . . . . . . . . . . . . . . . . . . . . . . . . . . . . . . . . . . . . . . . . . . . . . . . . . . . . . . . . . . . . . . . . 70
Yamaha’s Audio Technologies . . . . . . . . . . . . . . . . . . . . . . . . . . . . . . . . . . . . . . . . . . . . . . . . . . . . . . . . . . . . . . . . . . . . . 69
Initializing the unit’s settings . . . . . . . . . . . . . . . . . . . . . . . . . . . . . . . . . . . . 61
Network information . . . . . . . . . . . . . . . . . . . . . . . . . . . . . . . . . . . . . . . . . . . . . . . . . . . . . . . . . . . . . . . . . . . . . . . . . . . . . . 70
Initializing basic unit settings . . . . . . . . . . . . . . . . . . . . . . . . . . . . . . . . . . . . . . . . . . . . . . . . . . . . . . . . . . . . . . . . . . . . . . 61
Specifications . . . . . . . . . . . . . . . . . . . . . . . . . . . . . . . . . . . . . . . . . . . . . . . . . . 71
Initializing network settings . . . . . . . . . . . . . . . . . . . . . . . . . . . . . . . . . . . . . . . . . . . . . . . . . . . . . . . . . . . . . . . . . . . . . . . 61
Available signal information . . . . . . . . . . . . . . . . . . . . . . . . . . . . . . . . . . . . . . . . . . . . . . . . . . . . . . . . . . . . . . . . . . . . . . . 72
Index . . . . . . . . . . . . . . . . . . . . . . . . . . . . . . . . . . . . . . . . . . . . . . . . . . . . . . . . . . 74
En
3
About this manual
• In this manual, operations that can be performed using either the front panel keys or the remote control
are explained using the remote control.
•
indicates supplementary explanations for better use.
•
indicates precautions for use of the unit and its feature limitations.
Preparing remote control
Supplied accessories
Before connecting, make sure you have received all of the following items.
Before installing batteries or using the remote control, be sure to read battery and
remote control precautions in “Quick Reference Guide” (separate booklet).
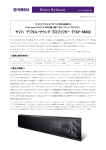
YSP-1600
The unit
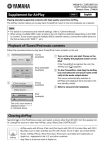
Installing the batteries
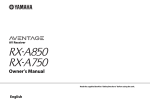
Supplied accessories
Remote control
Batteries
(AAA, R03, UM-4; x2)
Optical cable
(1.5 m (4.9 ft))
Peel off the protection sheet
before use.
Battery × 2
(AAA, R03, UM-4)
Accessories for mounting the unit on a wall
Template
Brackets (x2)
Screws (M4 x 12mm; x4)
ANTENNA / ANTENNE
MOUNTING TEMPLATE/GABARIT DE FIXATION
DRILL HERE / PERCER CIC
DRILL HERE / PERCER CIC
457mm (18” )
457mm (18 po)
ZR85910-1
Operation range
Owner’s Manual CD-ROM
Quick Reference Guide
MusicCast Setup Guide
Within 6 m (20 ft)
• The supplied optical cable may not be needed depending upon connections.
➤ Supplied accessories
En
4
FEATURES
What you can do with this unit
Sound beams are reflected off walls using unique
real surround sound formats and techniques,
allowing listeners to enjoy their preferred
acoustic environment.
• Enjoy realistic surround sound
with five surround modes: MOVIE,
MUSIC, SPORTS, GAME, TV
PROGRAM (CINEMA DSP)
• Clear playback of speech (dialog,
narration, etc.; CLEAR VOICE)
Wide variety of supported content
TV
•
•
•
•
. p. 23
. p. 25
Media server (PC/NAS)
Internet radio
AirPlay
Music stored on mobile
devices
.
.
.
.
p. 42
p. 43
p. 45
p. 47
Mastering
dedicated
apps
. p. 6
Sequential operation of a TV,
this unit, and BD/DVD player
(HDMI Control)
TV remote
control
. p. 20
HDMI
Control
Audio
Audio/
Video
Audio
Mobile
devices
Network contents
Control
Control
Plays back audio content
from Bluetooth® devices
The unit
Audio
HDMI Control
Audio/
Video
. p. 27
Mobile
devices
Listen to audio input to
the unit with Bluetooth
headphones or speakers
Audio
BD/DVD player
This unit’s
remote control
Bluetooth
headphones
FEATURES ➤
. p. 29
What you can do with this unit
En
5
Mastering useful apps
You can operate and program the unit, or play streaming services via the unit, by installing the free dedicated apps, MusicCast CONTROLLER and HOME THEATER CONTROLLER
(WLAN) on a mobile device such as a smartphone. For details, search for MusicCast CONTROLLER and HOME THEATER CONTROLLER (WLAN) on the App Store or Google Play.
MusicCast CONTROLLER
This app allows you to play distributed content and streaming services via the unit.
• In this manual, iOS and Android mobile devices are collectively referred to as “mobile devices”. The specific
type of mobile device is noted in explanations as needed.
MusicCast CONTROLLER capabilities
• Play songs stored on computers (servers)
• Select an Internet radio station
• Play music stored on mobile devices
• Distribute and receive audio between the unit and other Yamaha network A/V devices
See MusicCast Setup Guide for details.
HOME THEATER CONTROLLER (WLAN)
This app allows you to configure specific settings such as sound beams.
FEATURES ➤
What you can do with this unit
En
6
Controls and functions
Front panel
1
2
3
4
1 Indicators
Indicate the status of the unit (p. 8). The indicators will dim
automatically if no operations are performed for 5 seconds.
6
7
5 INPUT key
Select an audio input source (p. 22).
6 VOLUME (+/–) keys
Adjust the volume of the unit (p. 22).
• “Dimmer” can adjust the brightness of the front panel display
in the setup menu (p. 52).
5
• When the unit is turned off, this unit consumes a small amount of
power in order to search for HDMI signals or to receive infrared
signals from the remote control.
7 z key
Turn on/off the unit.
2 Dual built-in subwoofers
The built-in subwoofers are located in the top part of the unit.
3 Remote control sensor
Receive infrared signals from the remote control (p. 10).
Receive infrared signals from the TV remote control when the
TV Remote Repeater function is enabled (p. 58).
4 CONNECT key
Use to control the unit using the dedicated MusicCast
CONTROLLER app for mobile devices. See the MusicCast
Setup Guide for details.
FEATURES ➤ Controls and functions
En
7
Indicators
STATUS
TV
HDMI
ANALOG BLUETOOTH
1
1 STATUS indicator
Glows when surround playback is selected and turns off
when stereo playback is selected.
Glows red: The unit is off (with HDMI control or
network standby activated)
STATUS
Off: The unit is off
2 Audio input indicator
The corresponding indicator glows to show the input source
to which audio is selected.
4
Glows
HDMI
ANALOG
BLUETOOTH
NET
SURROUND
Glows when the MOVIE, MUSIC, SPORTS,
GAME, or TV PROGRAM key on the remote
control is pressed (surround playback).
SURROUND
Turns off when the STEREO key on the remote
control is pressed (stereo playback).
indicator
Glows when connected to a wireless network; turns off when
the connection is terminated (p. 32).
Example: when TV is selected
TV
3
3 SURROUND indicator
Glows green: The unit is on
STATUS
SURROUND
2
The STATUS indicator shows the unit’s power status.
STATUS
NET
5
4
5
❑ Other indications
In addition to indications explained 1–5, other indicators
on the front panel may glow or flash to indicate operation and
setting status.
In this manual, illustrations of the nine in-line indicators
are used for explanation.
: Off
: Glows
: Flashes
indicator
Glows blue when connected to a Bluetooth device; turns off
when the Bluetooth connection is terminated (p. 26).
Example: When the STATUS indicator flashes and the TV
indicator glows
Input source to be played back
TV
TV audio
HDMI
Audio from a device connected to the
HDMI IN jack
ANALOG
Audio from a device connected to the
ANALOG input jack
BLUETOOTH
Audio from a Bluetooth device
NET
Audio input via a network
FEATURES ➤ Controls and functions
En
8
Rear panel
4
5
6
7
8
9
0
HDMI
IN
OUT(ARC)
NETWORK
TV
ANALOG SUBWOOFER OUT UPDATE ONLY
HDMI
IN
1
1 Power cable
For connecting to an AC wall outlet (p. 17).
2 TV Remote Repeater
Transmit signals from the TV’s remote control received by the
remote control sensor on the unit’s front panel to the TV
(p. 58).
3 Antenna
Raise the antenna after the unit is installed (p. 13).
4 HDMI IN jack
For connecting an HDMI-compatible playback device such
as a BD/DVD player, a satellite and cable TV tuner, and a
game console (p. 16).
2
OUT(ARC)
NETWORK
TV
ANALOG SUBWOOFER OUT UPDATE ONLY
3
5 HDMI OUT (ARC) jack
For connecting to an HDMI-compatible TV and outputting
video/audio signals (p. 15).
0 UPDATE ONLY jack
Use to update this unit’s firmware (p. 60).
6 NETWORK jack
For connecting to a network with a network cable (p. 17).
7 TV (digital optical) jack
For connecting to a playback device equipped with a digital
optical audio output jack (p. 15).
8 ANALOG jack
For connecting an external device with a 3.5 mm RCA stereo
cable (p. 16).
9 SUBWOOFER OUT jack
For connecting an external subwoofer (p. 17).
FEATURES ➤ Controls and functions
En
9
Remote control
1 Input selector keys
Select an audio input source to be played back (p. 22).
Infrared signal transmitter
8
1
9
2
3
TV
HDMI
Device connected via the HDMI IN jack
ANALOG
Device connected via the ANALOG input
jack
0 CH LEVEL key
BLUETOOTH
Bluetooth device
a STEREO key
NET
Audio last input via a network
2 Surround mode key
Choose a surround playback mode from MOVIE, MUSIC,
SPORTS, GAME, TV PROGRAM (p. 23).
Turns the CLEAR VOICE function on or off (p. 25).
4 S/T/W/X keys, ENTER key
Change the setting (p. 48).
5 SETUP key
4
Displays the setup menu (p. 48).
5
c
d
6
e
Turn on/off the unit (p. 22).
9 NET RADIO (1–3) keys
TV
3 CLEAR VOICE key
0
a
b
8 z key
Register and play streaming services such as Internet radio
stations via the unit (p. 43).
Adjust the volume balance during playback (p. 24).
Switch to stereo playback mode (p. 23).
b INFO key
Use the indicator on the front panel to show information for
audio currently playing (p. 24).
c RETURN key
Return to the previous menu screen.
d MUTE key
Mute the sound (p. 22).
e VOLUME (+/–) key
Adjust the volume of the unit (p. 22).
6 SUBWOOFER (+/–) key
Adjust the volume of the subwoofer (p. 22).
7 POSITION (L/C/R) keys
For optimum surround sound effect, select a preset position
mode according to where the unit is installed (p. 19).
7
FEATURES ➤ Controls and functions
En
10
PREPARATIONS
General setup procedure
Position the unit to achieve the optimal surround sound effects. The unit can also be mounted
on a wall.
1
Installation (p. 12)
2
Connecting a TV (p. 15)
Connect a TV to the unit.
3
Connecting playback devices (p. 16)
Connect video devices (such as BD/DVD players) to the unit.
4
Other connections (p. 17)
5
Connecting the power cable (p. 17)
After all the connections are complete, plug in the power cable.
6
Initial settings (p. 18)
Specify unit settings before use to adjust surround sound effects based on position and
conditions.
Raise the wireless antenna in preparation for network connection using a wireless router
(access point).
Connect an external subwoofer.
Use a network cable to connect the unit to a router in preparation for wired network connection.
This completes all the preparations. Enjoy playing movies, music and other content with the unit!
• See “NETWORKS” (p. 31) for information regarding network connection and audio playback via a network.
PREPARATIONS
➤ General setup procedure
En
11
1 2 3 4 5 6
a Installation
Place the unit on a flat surface. When installing this unit on a rack behind which there is limited space, for example, it may be easier to connect external devices to this unit first. See
pages 15 to 17 for information regarding the connection of external devices.
Notes
• Be sure to install this unit on a large, stable stand where it does not fall subject to vibrations, such as from an earthquake, and where it is out of the reach of children.
• The unit’s speakers are not magnetically shielded. Do not install hard disk drives or similar devices near the unit.
• Do not stack the unit directly on top of other playback devices, or vice versa. Heat and vibrations may result in damage or malfunction.
Recommended place for installation
• Do not install the unit near a corner of the
room.
• The unit can be mounted on a wall (p. 14)
• When raising the antenna (p. 13), position
the unit so that the antenna does not
obstruct the TV screen.
• The listening position (such as sofa, etc.)
should be located at the front of the unit.
Position the unit and TV so that they are separated
by at least 5 cm (2").
Use the TV Remote Repeater function if the unit
obstructs the remote control sensor on the TV
(p. 58).
To achieve the optimal surround sound
effects, be sure that obstacles such as
furniture may not obstruct the path of
sound beams (p. 13).
• The distance between the listening position
and the unit should be more than 2 m (6.6 ft).
PREPARATIONS
➤ a Installation
En
12
1 2 3 4 5 6
❑ Unit installation position and surround sound effects
Raising the antenna
The unit achieves surround sound by reflecting sound beams off walls.
Raise the antenna on the rear panel of the unit when connecting a wireless router
(access point) to use a network.
Hold the base of the
antenna while raising it
to its upright position.
Effective surround effect may not be achieved in the following environment.
• Sound beams are blocked by obstacles such as furniture.
• The room size is not within the following dimensions;
Width: 3 meters to 7 meters (9.8 ft to 23 ft)
Depth: 3 meters to 7 meters (9.8 ft to 23 ft)
Height: 2 meters to 3.5 meters (6.6 ft to 11.5 ft)
• Listening position is too close to the unit.
• Do not apply excessive force on the antenna. Doing so may damage it.
• Be sure to check the direction in which the antenna moves, and angle it in the proper direction.
• The unit is installed too close to the left or right wall.
• Do not remove the antenna.
• The unit is installed in the corner of the room.
• There is no wall for reflecting sound beam on the path of the sound beams.
• For details on the wireless connection, refer to p. 32.
• The optimum surround sound effect is achieved by setting a position according to the installation position of
the unit. For details, refer to “Setting a surround sound effect for the installation position” (p. 19).
PREPARATIONS
➤ a Installation
En
13
1 2 3 4 5 6
Mounting the unit on a wall
The unit can be mounted on a wall.
If the antenna will be used (p. 13), raise it before
mounting the unit on a wall.
1
Attach the mounting template on a wall
and mark for the screw holes.
3
Tapes or
thumbtacks
Position the
bracket so that
the protrusions
on the side of the
bracket fit into
the grooves on
the unit.
Mounting template (supplied)
ANTENNA / ANTENNE
DRILL HERE / PERCER CIC
MOUNTING TEMPLATE/GABARIT DE FIXATION
DRILL HERE / PERCER CIC
457mm (18” )
457mm (18 po)
Use the screws to attach the brackets
(both supplied).
ZR85910-1
Screw
holes
2
Remove the mounting template from the
wall and install the commercially available
screws at the marks on the wall.
4
ANTENNA / ANTENNE
• When installing the unit on a wall, all installation work must be
performed by a qualified contractor or dealer. The customer must
never attempt to perform this installation work. Improper or
inadequate installation could cause the unit to fall, resulting in
personal injury.
• To prevent the unit from falling, attach it to a wall constructed of
drywall (plasterboard).
• Make sure you use commercially available screws that can support
the weight of the installation (in step 2). Using clamps other than
specified screws, such as short screws, nails, and two-sided tape,
may cause the unit to fall.
DRILL HERE / PERCER CIC
MOUNTING TEMPLATE/GABARIT DE FIXATION
DRILL HERE / PERCER CIC
457mm (18” )
457mm (18 po)
Screws
(supplied)
Brackets
(supplied)
Hang the unit on the screws.
ZR85910-1
ANTENNA / ANTENNE
MOUNTING TEMPLATE/GABARIT DE FIXATION
7 to 9 mm
(1/4" to 3/8")
DRILL HERE / PERCER CIC
DRILL HERE / PERCER CIC
457mm (18” )
457mm (18 po)
4 mm (#8)
20 mm (3/4") or more
ZR85910-1
Bracket
mounting
holes
2 to 4 mm
(1/16" to 3/16")
• Fix the cables in place where they will not become loose. If your foot
or hand accidentally gets caught on a loose cable, the unit may fall.
• Check that the unit is fixed securely after the installation. Yamaha
will bear no responsibility for any accidents caused by improper
installations.
• Do not lean on the unit or apply excessive force to the top of the
unit. Doing so may cause the unit to fall.
PREPARATIONS
➤ a Installation
En
14
1 2 3 4 5 6
b Connecting a TV
Connect a TV to the unit so that video input to the unit can be output to the TV. You can also enjoy playback of TV audio on the unit.
• Use a 19-pin HDMI cable with the HDMI logo printed on it. A cable with a maximum length of 5 m is recommended to prevent degradation of signal quality.
• For playback of 3D and 4K video content, use a high-speed HDMI cable.
TVs that support Audio Return Channel (ARC)
Connect the TV to the unit with an HDMI cable (not supplied).
TVs that do not support Audio Return Channel (ARC)
Connect the TV to the unit with an HDMI cable (not supplied) and an optical cable.
HDMI OUT (ARC) jack
• This unit supports HDCP version 2.2, a copy protection technology. To enjoy playback of 4K video, connect
the unit to the HDMI IN jack (one compatible with HDCP 2.2) on an HDCP 2.2-compliant TV.
HDMI input
HDMI
HDMI
HDMI
HDMI
OUT(ARC)
HDMI OUT (ARC) jack
ARC-compatible HDMI input
HDMI
(ARC)
HDMI
HDMI
IN
HDMI
OUT(ARC)
NETWORK
TV
ANALOG SUBWOOFER OUT UPDATE ONLY
HDMI
OUT(ARC)
The unit
(rear)
OPTICAL
O
TV
HDMI
IN
TV
O
OUT(ARC)
NETWORK
TV
ANALOG SUBWOOFER OUT UPDATE ONLY
The unit (rear)
Audio output
(digital optical)
TV jack
TV
1. Remove the cap
When connecting a TV that supports Audio Return Channel (ARC), enable the HDMI
control function (p. 51).
2. Check the direction of
the plug
Audio Return Channel (ARC)
ARC enables input and output of audio signals via a single HDMI cable. If the TV supports ARC, audio
signals from the TV can be input to this unit via the same HDMI cable used to output video signals from
this unit to the TV.
• Use an ARC-compatible HDMI cable.
• If the TV has no optical jack
Use a 3.5 mm stereo mini plug cable to connect the unit to the TV via the ANALOG input jack on the unit
and the audio output jack on the TV. TV audio can be played through this unit by switching input to
ANALOG using the ANALOG key on the remote control.
PREPARATIONS
➤ b Connecting a TV
En
15
1 2 3 4 5 6
c Connecting playback devices
Connect video devices such as BD/DVD players, set-top boxes (STBs) and game consoles to the unit. Depending on the video/audio output jacks available on your video device,
choose one of the following connections. We recommend using an HDMI connection if the video device has an HDMI output jack.
HDMI connection
Analog connection
Connect a video device to the unit with an HDMI cable (not supplied).
HDMI IN jack
Connect a video device to this unit via a 3.5 mm stereo mini plug cable (not supplied).
Next, connect the video device’s video output to the TV’s video input.
HDMI output
HDMI
ANALOG jack
3.5 mm stereo mini
plug cable
HDMI
HDMI
IN
Audio output
(analog)
ANALOG
HDMI
IN
Video device
HDMI
To video
output jack
HDMI
OUT(ARC)
NETWORK
TV
ANALOG SUBWOOFER OUT UPDATE ONLY
Video device
The unit (rear)
IN
OUT(ARC)
NETWORK
TV
ANALOG SUBWOOFER OUT UPDATE ONLY
To video
input jack
The unit (rear)
TV audio can be played through this unit by switching input to HDMI using the HDMI
key on the remote control.
TV
• Once the HDMI control function has been activated (p. 20), video and audio content from playback devices
can be output from the TV even when this unit is off (HDMI signal pass-through).
• Use a 19-pin HDMI cable with the HDMI logo printed on it. A cable with a maximum length of 5 m is
recommended to prevent degradation of signal quality.
• For playback of 3D and 4K video content, use a high-speed HDMI cable.
TV audio can be played through this unit by switching input to ANALOG using the
ANALOG key on the remote control.
• If the video device has an HDCP 2.2-compliant HDMI output jack, connect the unit to that jack.
• Audio from the video device can be input via the TV (digital optical) jack, not via the HDMI IN jack. Use an
optical cable to connect the video device to the unit via the digital optical output jack on the video device
and the TV jack on the unit. If the video device is connected to the unit in this way, change the “HDMI”
setting in the setup menu from “Audio Assign” to “Optical”.
PREPARATIONS
➤ c Connecting playback devices
En
16
1 2 3 4 5 6
d Other connections
e Connecting the power cable
After all the connections are complete, plug in the power cable.
Connecting an external subwoofer
The unit has built-in subwoofers. However, you can connect an external subwoofer to
enhance low-frequency sounds. Connect a subwoofer via the SUBWOOFER OUT jack
on this unit.
The unit (rear)
SUBWOOFER OUT jack
SUBWOOFER OUT
Subwoofer pin cable
(not supplied)
INPUT
To an AC wall outlet
HDMI
IN
OUT(ARC)
NETWORK
TV
ANALOG SUBWOOFER OUT UPDATE ONLY
The unit (rear)
Subwoofer
• Use an external subwoofer with a built-in amplifier.
Wired network connections
For a wired connection, connect one end of the network cable to the NETWORK jack on
the rear panel of the unit and the other end to a router. For details, refer to
“NETWORKS” (p. 31).
PREPARATIONS
➤ d Other connections
En
17
1 2 3 4 5 6
f Initial settings
Displaying the menu screen on the TV
Visual operation of this unit is
possible by displaying its menu
screen on the TV.
TV remote control (example)
Initial screen display
Turn on the unit and the TV, and
then use the input button on the
TV’s remote control to switch input
so that video input from this unit is
displayed.
Switch
input
sources
When the unit is turned on for the first time after purchase, the
screen below will be displayed and the
indicator on the front
panel will flash slowly.
Share
Y
(
n
u
l
When this unit and the TV are
connected as shown below,
select “HDMI 1”.
o
W
e
s
a
u
i
t
i
t
w
n
e
c
F
o
g
r
an
i)
rk
a
.
s
s
w
d
Wi-Fi
h
e
i
e
a
t
t
v
Settings
re the wireless
tings of the
h Sound Projector
ice with iOS7 or
[ENTER]:Start
[RETURN]:Cancel
[
]:OSD Language
HDMI
HDMI
RETURN
HDMI
SETUP
Flashes slowly
1
OUT(ARC)
2
3
HDMI INPUT
While this screen is displayed, an iOS device (such as an
iPhone) can be used to easily connect the unit to a wireless
network. See the Quick Reference Guide.
If you will not use an iOS device to connect to a wireless
network, press the RETURN key.
HDMI
IN
OUT(ARC)
NETWORK
TV
ANALOG SUBWOOFER OUT UPDATE ONLY
The unit (rear)
TV
• You can use this function to connect to a wireless network at any time by
selecting “Share Wi-Fi Settings (iOS)” from the setup menu. However, be
aware that if a different wireless network, or a Bluetooth device, has already
been configured, doing so will erase any previous settings.
The menu display
The menu is displayed on the TV screen when the SETUP key is
pressed. When the TV is receiving HDMI signals, the menu is
superimposed over video content. Press the SETUP key twice to
cancel menu display.
• This screen will not be displayed and the
indicator will not flash if the unit
is connected to a router via its NETWORK jack (wired connection).
Setup Menu
Channel Level
Sound
Dynamic Range
HDMI
Audio Delay
Function
Information
PREPARATIONS
➤ f Initial settings
En
18
1 2 3 4 5 6
Selecting the language for menu display
1
2
3
Turn the unit and TV on.
Switch the TV’s input to display video input from this unit (p. 18).
Press and hold the SETUP key until the “OSD Language” menu
appears on the TV.
Setting a surround sound effect for the installation
position
The surround sound is achieved by reflecting the sound beams off walls as shown in
the illustration below. For optimum surround effect, turn on the unit and select the
POSITION key according to the installation position of the unit.
1
Hold down the POSITION key that corresponds to the installation
position of the unit for more than 3 seconds.
The indicators on the front panel flash according to the set position.
OSD Language
Left
ENGLISH
DEUTSCH
FRANÇAIS
ESPAÑOL
ITALIANO
NEDERLANDS
РУССКИЙ
SVENSKA
TÜRK
Center
Right
L (Left)
When the menu is not displayed
• Confirm the following cases.
Left side of room
– The HDMI input jack of your TV and the HDMI OUT (ARC) jack of the unit are connected.
– The input of your TV is set to “HDMI 1” (example).
4
Use the S/T key to select the desired language and press the
ENTER key.
Settings
C (Center)
(default setting)
, ENGLISH (default), DEUTSCH, FRANÇAIS, ESPAÑOL, ITALIANO, NEDERLANDS,
РУССКИЙ, SVENSKA, TÜRK
5
Center of room
Press the SETUP key to exit the setup menu.
R (Right)
Right side of room
PREPARATIONS
➤ f Initial settings
En
19
1 2 3 4 5 6
Operating the unit by TV’s remote control (HDMI control)
With some TVs, navigating this unit’s menus displayed on the TV can be controlled.
What is the HDMI control function?
HDMI Control allows you to operate external devices via HDMI. If you connect a TV that
supports HDMI Control to the unit with an HDMI cable, you can control the unit (such as
power and volume) with TV remote control operations. You can also control playback
devices (such as HDMI Control-compatible BD/DVD players) connected to the unit with
an HDMI cable.
• Even if your TV supports the HDMI control function, some functions may not be available. For details, refer
to the manual supplied with your TV.
• We suggest using devices (TV, BD/DVD player, etc.) from the same manufacturer.
Coordinated functions via the TV remote control
Remote control of TV (Example)
1. Turn on/off
Both the TV and this unit turn on/off at the same time.
2. Switch input sources
• The input source for this unit switches accordingly when the TV’s
input source is switched. The input source for this unit also switches
when a BD/DVD player is selected as the input source from the TV’s
menu display.
• The input source can be switched while this unit is turned off.
3. Control volume
This unit’s volume can be adjusted when the TV’s audio
output is set to the external device.
4. Switch the audio output device (TV or this unit)
First, try the operations described above with your TV’s remote control. If you are able
to perform these operations, you may continue operating this unit with your TV’s remote
control. The HDMI control function can be used with some HDMI devices by simply
activating the function. If you are not able to perform these operations, configure HDMI
control settings (p. 21).
PREPARATIONS
➤ f Initial settings
En
20
1 2 3 4 5 6
Setting the HDMI control function
1
2
Turn on the unit, TV, and playback devices.
If devices are not coordinated
Be sure that all devices are correctly connected to this unit, and
that settings are properly configured as described below.
– “HDMI Control” (p. 51) is set to “On” in the setup menu.
Activate the HDMI control function on the unit, TV,
and playback devices such as BD/DVD players that
support this function.
– The HDMI control function is enabled on the TV.
The example of TV settings
• From the setup menu on your TV, select “Link setting” “HDMI control setting”, then set a setting such as “HDMI
control function” to “ON”.
For this unit, be sure that “HDMI Control” is set to “On”
(default; p. 51).
For playback devices, refer to the instructions supplied with
each device.
HDMI
• Set audio output to any option other than TV.
3
Turn off the main power of the TV and then turn off
the unit and playback devices.
4
Turn on the unit and playback devices and then turn
on the TV.
5
– Disconnect the power cable of the unit and external devices
connected to the unit via HDMI cable. Plug them in again after
about 30 seconds.
Switch the TV input to display the video from the
unit.
– If devices fail to coordinate after ANALOG is input, repeat
steps 5 and 6 under “Setting the HDMI control function”.
6
Press the HDMI key to select HDMI input, and check
that video from the playback device is properly
displayed.
– Turn off this unit and the TV, and then turn them back on again.
HDMI
Glows (green)
7
If devices fail to coordinate even after the settings described
above have been applied correctly:
Check that the unit is properly coordinated with the
TV by turning off the TV or adjusting the TV volume
with the TV remote control.
Changing the connection method and
connected devices
When the connected devices and jacks are changed, configure the
settings again with the following procedure.
1
Disable the HDMI control function of the TV and BD/
DVD player, turn off all connected devices, and
change the connections.
2
Follow steps 1 to 7 of “Setting the HDMI control
function”.
PREPARATIONS
➤ f Initial settings
En
21
PLAYBACK
Basic operation for playback
1
2
Input
selector
keys
3
Subwoofer volume display
Press the z key to turn on this unit.
The lighted indicator moves to the right when the volume is turned up,
and to the left when the volume is turned down.
Turn on devices (TV, BD/DVD player, game console,
etc.) connected to this unit.
Volume down (–)
Select a device by pressing the input selector key
corresponding to the connection of external
devices.
Volume up (+)
• When audio is output from both TV speaker and this unit,
mute the TV sound.
Press the HDMI key to play audio/video content from a BD/
DVD player connected via the HDMI IN jack.
• When sound input to HDMI IN jack is output from the TV,
the volume level does not change even if you press the
VOLUME (+/–) key or the MUTE key.
Indicator on the front panel
To mute the audio output
HDMI
To mute the sound, press the MUTE key.
Glows
SUBWOOFER
(+/-)
VOLUME
(+/-)
For playback from a Bluetooth device, refer to p. 26. For
audio playback via a network, refer to p. 42 to 47.
4
To resume the volume, press the MUTE key again or press
the VOLUME (+/–) key.
Play back a device selected in step 3.
• The subwoofer volume can be adjusted separately from the whole volume.
MUTE
• When listening to audio or watching video from a playback device
connected to the TV, select the device as the TV's input source.
5
Press the VOLUME (+/–) key to adjust the volume.
Press the SUBWOOFER (+/–) key to adjust the
volume of the subwoofer.
When the volume is adjusted, indicators on the front panel
indicate volume level.
• Lowering the subwoofer volume is recommended at night.
6
Select from surround playback or stereo playback
mode, and configure sound setting according to
your preferences (p. 23).
Press the z key to turn off this unit after use.
Volume display
The number of lighted indicators increases when the volume is turned
up, and decreases when the volume is turned down.
Volume down (–)
Volume up (+)
PLAYBACK
➤ Basic operation for playback
En
22
Enjoying sound based on your preference
Selecting a surround sound effect
2-channel playback (stereo playback mode)
Select the surround mode to enjoy realistic surround effects that
closely resemble a movie theater, the middle of a music concert, or
a sports field event, by Yamaha’s sound field program, “CINEMA
DSP.” You can select a surround mode that best suits the source
from MOVIE, MUSIC, SPORTS, GAME, or TV PROGRAM.
The front channels are the primary channel sources for output of
stereo sound.
1
Surround
mode keys
Press one of the surround mode keys (MOVIE,
MUSIC, SPORTS, GAME, or TV PROGRAM).
1
Press the STEREO key to switch to stereo playback
mode.
Indicator on the front panel
SURROUND
Off
Indicator on the front panel
SURROUND
Glows
STEREO
INFO
Surround mode
The features of surround modes are described below.
Select the surround mode that best suits the playback source and
your personal taste.
Sound field
program
Features
MOVIE
Creates a broad and expansive cinematic space. With
Dolby or DTS surround effects, this program enriches
your cinematic experience.
MUSIC
Creates the palpable excitement, as if you were standing
at the front center of a live concert hall event.
SPORTS
Creates the realistic atmosphere of a live sports event or
talk show.
GAME
Enjoy three-dimensional sound effects with computer or
video games.
TV PROGRAM Creates optimum surround sound for TV programs.
• When the source is a 2-channel stereo signal, the sound is played back as
surround sound.
PLAYBACK ➤ Enjoying sound based on your preference
En
23
Adjusting volume for each channel
3
Adjust the volume of playback for each channel (audio in each
direction) so that sounds are evenly distributed in their respective
directions.
Press the S/T key to adjust the volume.
Display while volume is adjusted
The lighted indicator moves to the right when the volume is turned up,
and to the left when the volume is turned down.
Volume down (T)
• Refer to “Channel Level” (p. 50) when adjusting the volume of each channel with
the test sound.
1
Hold down the CH LEVEL key for more than 3
seconds.
Volume up (S)
Example of volume balance
• If you have problems hearing words: Select C (center) to increase the level.
2
CH LEVEL
INFO
Press the CH LEVEL key to select adjustable
channel from the followings.
The output channel changes as follows each time the CH
LEVEL key is pressed.
When the sound is not like surround sound: Select SL (surround left) and SR
(surround right) to increase the level.
• The volume of the subwoofer also can be adjusted by using the SUBWOOFER (+/
–) key.
• When the position setting is changed (p. 19), the channel level setting will be
overwritten.
Indicators on the front panel
Viewing audio information
Front (left)
/
Information regarding audio currently playing can be viewed.
Center
SUBWOOFER
(+/-)
1
Press the INFO key.
The following information regarding audio currently playing
is displayed via indicators on the front panel while the INFO
key is held down.
Front (right)
Surround (right)
1
2
3
4
5
a Audio from a TV that supports ARC is currently being
input to the unit via the HDMI cable
Surround (left)
b Input signal: DTS
c Input signal: Dolby Digital
Subwoofer
d Dolby Pro Logic II is currently in use (2-channel audio
signal is input)
Returns to Front (left)
e CLEAR VOICE is enabled (p. 25)
• Subwoofer volume can only be adjusted in stereo playback mode (p. 23).
PLAYBACK ➤ Enjoying sound based on your preference
En
24
Clear playback of human voices
(CLEAR VOICE)
Human voices, such as lines in movies and TV shows, or news and
sports commentary, are played back very clearly.
1
Press the CLEAR VOICE key to turn on the CLEAR
VOICE function.
Indicators on the front panel
Flashes three times and then turns off
Press the key again to turn off the function.
CLEAR
VOICE
Flashes once and then turns off
PLAYBACK ➤ Enjoying sound based on your preference
En
25
Wireless playback of audio via Bluetooth connection
You can receive and play audio from a Bluetooth device, such as a mobile device or digital music player, over a wireless connection. Yamaha’s exclusive Compressed Music
Enhancer technology improves sound quality characteristics for the richness and depth of original audio before it is compressed.
You can also transmit audio input to the unit to Bluetooth speakers or headphones.
See documentation supplied with your Bluetooth device for more information.
Receive and play audio with the unit
Perform the following steps on the Bluetooth device to be connected.
For the first Bluetooth connection
For subsequent Bluetooth connection
Bluetooth device
(such as a mobile
device)
Pair the unit and Bluetooth device
Transmit and play audio from the unit
When connecting to a Bluetooth
device for the first time, “pairing”
between the device and unit is
required. Pairing is required for
connecting a Bluetooth device for the
first time.
Bluetooth speakers/
headphones
Connect Bluetooth device and play back
• Audio cannot be received by the unit from mobile devices and the like, and transmitted to speakers or
headphones at the same time.
• “Bluetooth” in the setup menu must be set to “On” (default; p. 57) to use Bluetooth functions.
PLAYBACK
➤ Wireless playback of audio via Bluetooth connection
En
26
Listening to music from a Bluetooth device
Pairing a Bluetooth device with the unit
1
4
Play back a song on the Bluetooth device.
Press the BLUETOOTH key on the remote control.
Bluetooth is selected as the input.
BLUETOOTH
Glows
BLUETOOTH
• If you are unable to select Bluetooth as an input source, be sure that the
following settings have been applied.
• The unit can be paired with up to 20 Bluetooth devices for receiving and
transmitting audio. If a new device is successfully paired with the unit after 20
other devices have already been paired, the device with the earliest connecting
date will have been unpaired to make room for the new device.
– “Bluetooth” in the setup menu is set to “On” (p. 57)
– “Transmission” in the setup menu is set to “Off” (p. 57)
2
3
• Perform pairing with the Bluetooth device and unit within 10 m (33 ft) of each
other.
Turn on the Bluetooth device to be paired, and
perform pairing.
• If a Bluetooth device has been connected before, the unit will connect to the last
connected device when the BLUETOOTH key is pressed with step 1. Terminate
this connection to pair a new device.
The operation varies depending on the device. Refer to the
instruction manual supplied with the device.
• Refer to “Bluetooth” (p. 64) in “Troubleshooting” if paring is not possible.
Select “YSP-1600” in the Bluetooth device list on
the device.
If a passkey (PIN) is required, enter the number “0000”.
PIN 0 0 0 0
YSP-1600
1
4
7
2
5
8
0
3
6
9
When pairing is completed,
or a completion message
appears on the Bluetooth device.
The
indicator on the unit’s front panel flashes while the
unit and Bluetooth device are being paired, and glows
steadily when pairing is complete.
PLAYBACK
➤ Wireless playback of audio via Bluetooth connection
En
27
Playing back audio from a Bluetooth device
on the unit
1
• Perform Bluetooth connection with the device and unit within 10 m (33 ft) of each
other.
• Adjust the volume level of the Bluetooth device as required.
Press the BLUETOOTH key on the remote control
when the unit is turned on.
• If a Bluetooth device has been connected before, the unit will connect to the last
connected device when the BLUETOOTH key is pressed with step 1. Terminate
this connection to connect to a different Bluetooth device.
Bluetooth is selected as the input.
• Setting “Network Standby” in the setup menu to “On” allows the unit to be turned
on and off with Bluetooth device operations.
BLUETOOTH
Terminating Bluetooth connection
Glows
Bluetooth connection is terminated in the following cases.
BLUETOOTH
• If you are unable to select Bluetooth as an input source, be sure that the
following settings have been applied.
– “Bluetooth” in the setup menu is set to “On” (p. 57)
The
indicator on the unit’s front panel turns off when the
connection is terminated.
• The Bluetooth device is turned off.
• The BLUETOOTH key is pressed for more than 3 seconds.
– “Transmission” in the setup menu is set to “Off” (p. 57)
• The unit is turned off.
2
Turn on the Bluetooth device.
Flashes
Connecting
Glows steadily
Connection established
3
Select “YSP-1600” in the Bluetooth device list on
the device.
4
Play back a song on the Bluetooth device.
PLAYBACK
➤ Wireless playback of audio via Bluetooth connection
En
28
Listening to audio through Bluetooth speakers or headphones (transmitting)
Pairing a Bluetooth device with the unit
Input
selector
keys
/
ENTER
1
2
Turn on the Bluetooth device.
3
Press the SETUP key twice.
Use the S/T keys to select a Bluetooth device, and
then press the ENTER key.
Device
Select the input source (other than BLUETOOTH)
with the input selector keys.
The setup menu is displayed on the TV screen.
▲
A
F
a
f
▼
B
G
b
g
C
H
c
h
D
I
d
i
E
J
e
j
Search
1
2
3
4
[ENTER]:Confirm
[RETURN]:Cancel
4
Use the S/T keys to select “Bluetooth”, and then
press the ENTER key.
5
Use the S/T keys to select “Transmission”, and
then press the ENTER key.
6
Use the S/T keys to select “On”, and then press
the ENTER key.
7
Use the S/T keys to select “Device Search”, and
then press the ENTER key.
SETUP
8
When a connection has been established (the device has
been paired with the unit), “Completed” will be displayed on
the TV screen.
The
indicator on the unit’s front panel flashes while the
unit and Bluetooth device are being paired, and glows
steadily when pairing is complete.
• A Bluetooth device that has been assigned a passkey (PIN) other than “0000”
cannot be connected to the unit.
• The unit cannot connect to a Bluetooth device if “Bluetooth” in the setup menu is
not set to “On” (p. 57).
• Perform pairing with the Bluetooth device and unit within 10 m (33 ft) of each
other.
• The unit can be paired with up to 20 Bluetooth devices for receiving and
transmitting audio. If a new device is successfully paired with the unit after 20
other devices have already been paired, the device with the earliest connecting
date will have been unpaired to make room for the new device.
• If a Bluetooth device has been connected before, the unit will connect to the last
connected device when the input source is selected in step 2. Terminate this
connection to pair a new device.
• “Not found” is displayed on the screen with step 8 when the unit cannot recognize
the name of the device.
• Refer to “Bluetooth” (p. 64) in “Troubleshooting” if paring is not possible.
PLAYBACK
➤ Wireless playback of audio via Bluetooth connection
En
29
Terminating Bluetooth connection
Playing back audio input from the unit
through Bluetooth speakers or
headphones
Bluetooth connection is terminated in the following cases.
The
indicator on the unit’s front panel turns off when the
connection is terminated.
• The connection is terminated from the Bluetooth device, or
the Bluetooth device is turned off.
• Be sure that “Transmission” in the setup menu is set to “On” (p. 57).
• Connection to a Bluetooth device is not possible during playback using AirPlay
(p. 45).
• “Transmission” in the setup menu is set to “Off”.
• The unit is turned off.
Input
selector
keys
1
2
Turn on the Bluetooth device.
Select the input source (other than BLUETOOTH)
with the input selector keys.
If a Bluetooth device has been connected before, the unit
will connect to the last connected device. Proceed to step
4.
To connect to a different device, proceed to step 3.
3
Follow steps 3 through 8 under “Pairing a Bluetooth
device with the unit” to pair the device with the unit.
When a connection has been established (the device has
been paired with the unit), “Completed” will be displayed on
the TV screen.
The
indicator on the unit’s front panel flashes while the
unit and Bluetooth device are being paired, and glows
steadily when pairing is complete.
4
Audio from the input source will play.
• Perform Bluetooth connection with the device and unit within 10 m (33 ft) of each
other.
• Adjust Bluetooth device volume as needed.
• Audio will also be output from the unit.
PLAYBACK
➤ Wireless playback of audio via Bluetooth connection
En
30
NETWORKS
Connecting to a network
You can choose between wired network connection and wireless network connection (p. 32) depending upon your network environment.
Network connection allows you to listen to Internet radio stations and play music files with AirPlay or your computer (media service) via this unit. You can operate the unit with a mobile
device to which the MusicCast CONTROLLER app has been installed, allowing you to enjoy listening to a variety of audio sources via this unit.
Wired network connections
• Some security software installed on your computer, or network device settings (such as a firewall), may
block the unit’s access to your computer or Internet radio stations. Should this occur, change security
software and/or network device settings.
To use a wired network connection, connect the unit to a router via an STP network
cable (category 5 or higher straight cable; not supplied).
• A network connection cannot be established if the MAC address filter on your router is enabled. Check your
router’s settings.
Network Attached Storage
(NAS)
• To configure your router’s subnet mask manually, apply the same subnet used by this unit to all devices.
• Use of a broadband connection is recommended when using Internet services.
Internet
• If your router supports DHCP, network settings for the unit need not be configured. Network parameters
(such as the IP address) will be assigned automatically. If your router does not support DHCP, or if you
prefer to configure network parameters manually, you must configure network settings yourself (p. 54).
• You can verify that network parameters (such as the IP address) have been properly assigned to the unit by
selecting “Information” (p. 54) from the setup menu.
WAN
LAN
Modem
• See our website for more information on the MusicCast CONTROLLER app.
PC
Network cable
Router
Mobile device
NETWORK
HDMI
IN
OUT(ARC)
NETWORK
TV
ANALOG SUBWOOFER OUT UPDATE ONLY
The unit (rear)
• If the unit is already connected to a wireless network and you would like to switch to a wired connection,
change “Network” in the setup menu to “Wired”.
NETWORKS ➤ Connecting to a network
En
31
Wireless network
Connecting the unit to a wireless network
Connect the unit to a wireless router (access point).
Select the connection method appropriate for your network environment from “Wireless
(Wi-Fi)” in the setup menu.
Internet
Wireless(Wi-Fi)
Wireless router
(access point)
S
·
·
·
·
·
e
W
S
A
M
P
l
P
h
c
a
I
e
S
a
c
n
N
ct
B
re
es
ua
C
a
ut
W
s
l
od
t
i
P
S
e
s
o
o
e
e
n
F
i
t
tup
method.
i Settings
nt Scan
ting
(iOS)
Modem
[ENTER]:OK
[RETURN]:Cancel
Connection method
Operation
WPS Button
Use the WPS button on your wireless router
(access point) to establish a wireless
connection.
Share Wi-Fi Settings (iOS)
Apply network settings from an iOS device
(such as an iPhone).
Access Point Scan
Select an access point from a list displayed
after a search of available access points.
Manual Setting
Establish a wireless network connection by
entering required information, such as the SSID,
manually.
PIN Code
Establish a wireless connection by registering
the unit’s PIN with your wireless router (access
point). This method can be used if the wireless
router (access point) supports the WPS PIN
feature.
The unit
Mobile device
For details on connection, see “Connecting the unit to a wireless network”.
The
indicator on the front panel glows when the unit is connected to a wireless
network.
Glows (green)
• You cannot use the wireless network connection simultaneously with the wired network connection (p. 31)
or Wireless Direct (p. 40).
• If the unit and the wireless router (access point) are too far apart, the unit may not connect to a wireless
router (access point). In such case, place them close to each other.
• If the unit will not be connected to a wireless router (access point), Wireless Direct (p. 40) can be used to
play music files stored on your mobile device via the unit.
Choosing a connection method
If you want to:
Use this connection method
Use an iOS device to easily connect to a
network
Share Wi-Fi Settings (iOS) (p. 33)
Connect to a wireless router (access point)
that supports the WPS (push button) feature
WPS Button (p. 34)
Connect to a wireless router (access point)
that supports the WPS PIN feature
PIN Code (p. 39)
Connect to a network by search for a nearby
access point
Access Point Scan (p. 35)
Connect directly to an access point that
cannot be located
Manual Setting (p. 37)
NETWORKS ➤ Connecting to a network
En
32
Sharing the iOS device setting
7
You can easily setup a wireless connection by applying the
connection settings on iOS devices (such as an iPhone).
Use the S/T keys to select “Share Wi-Fi Settings
(iOS)”, and then press the ENTER key.
Wireless(Wi-Fi)
Before proceeding, confirm that your iOS device is connected to a
wireless router (access point).
S
·
·
·
·
·
• You need iOS device with iOS 7.1 or later.
e
W
S
A
M
P
l
P
h
c
a
I
e
S
a
c
n
N
ct
B
re
es
ua
C
• The connection settings on iOS devices cannot be applied to the unit to establish
a wireless connection if your wireless router (access point) uses WEP encryption.
See “Searching for a wireless router (access point)” (p. 35) to establish a
connection.
1
2
/
ENTER
RETURN
3
Press the z key to turn on this unit.
8
I
f
i
·
·
·
f
o
n
N
N
A
i
·B
The setup menu is displayed on the TV screen.
5
Use the S/T keys to select “Network Connection”,
and then press the ENTER key.
6
Use the S/T keys to select “Wireless (Wi-Fi)”, and
then press the ENTER key.
s
o
o
e
e
n
F
i
t
tup
method.
i Settings
nt Scan
ting
(iOS)
When the following screen is displayed, press the
ENTER key.
Press the SETUP key twice.
Use the S/T keys to select “Network”, and then
press the ENTER key.
t
i
P
S
e
[ENTER]:OK
[RETURN]:Cancel
Turn on the TV and switch the TV input to display
video from the unit (HDMI OUT jack; p. 18).
4
a
ut
W
s
l
od
l
i
e
E
l
n
l
S
S
l
t
t
T
l
f
u
h
h
o
i
w
a
a
w
a
o
p
m
or
et
r
r
i
l
r
r
u
m
o
e
i
n
i
k
e
s
a
o
[
[R
Wing i
g se
zed.
set
sets
ic s
tion
th s
ENTE
ETUR
Fi Settings
s begun, the
ttings will be
tings
ervice
account
ettings
R]:Start
N]:Cancel
SETUP
• The settings to be deleted (initialized) will be displayed. If you do not want to
delete these settings, press the RETURN key to terminate the connection.
9
When the following screen is displayed, press the
ENTER key.
Share
Network Connection
Wired
Wireless(Wi-Fi)
Wireless Direct
M
c
n
W
y
a
o
e
i
o
k
n
t
u
Wi-Fi
e sure your i
nected to you
work, and the
Fi settings s
r iOS device.
Settings
OS device is
r Wi-Fi
n open the
creen of
[ENTER]:Confirm
[RETURN]:Cancel
NETWORKS ➤ Connecting to a network
En
33
10 Display the Wi-Fi setup screen on the iOS device
and select the unit from “SETUP A NEW AIRPLAY
SPEAKER...”.
7
Use the S/T keys to select “WPS Button”, and then
press the ENTER key.
Wireless(Wi-Fi)
Follow the on-screen instructions displayed on the iOS
device.
S
·
·
·
·
·
Using the WPS push button configuration
You can easily set up a wireless connection with one push of the
WPS button.
1
2
3
/
ENTER
SETUP
Press the z key to turn on this unit.
Turn on the TV and switch the TV input to display
video from the unit (HDMI OUT jack; p. 18).
Press the SETUP key twice.
The setup menu is displayed on the TV screen.
4
Use the S/T keys to select “Network”, and then
press the ENTER key.
5
Use the S/T keys to select “Network Connection”,
and then press the ENTER key.
6
Use the S/T keys to select “Wireless (Wi-Fi)”, and
then press the ENTER key.
Network Connection
Wired
Wireless(Wi-Fi)
Wireless Direct
e
W
S
A
M
P
l
P
h
c
a
I
e
S
a
c
n
N
ct
B
re
es
ua
C
a
ut
W
s
l
od
t
i
P
S
e
s
o
o
e
e
n
F
i
t
tup
method.
i Settings
nt Scan
ting
(iOS)
[ENTER]:OK
[RETURN]:Cancel
8
Push the WPS button on the wireless router (access
point).
9
Press the ENTER key.
When a connection has been established (the device has
been paired with the unit), “Completed” will be displayed on
the TV screen.
If “Not connected” is displayed, press the ENTER key to
repeat the process beginning with step 6, or see the
information below to try another connection method.
• The WPS button cannot be used to establish a wireless connection if your
wireless router (access point) uses WEP encryption, or if the router’s MAC
address filter is enabled. See “Searching for a wireless router (access point)”
(p. 35) to establish a connection.
• The WPS button cannot be used to establish a wireless connection if your
wireless router (access point) is configured so that it does not broadcast its SSID.
See “Setting up the wireless connection manually” (p. 37) to establish a
connection.
About WPS
WPS (Wi-Fi Protected Setup) is a standard established by the
Wi-Fi Alliance, which allows easy establishment of a wireless
home network.
NETWORKS ➤ Connecting to a network
En
34
Searching for a wireless router (access
point)
Find and connect to a nearby wireless router (access point).
1
2
Press the z key to turn on this unit.
3
Press the SETUP key twice.
The wireless connection setting screen appears on the TV.
Access
Turn on the TV and switch the TV input to display
video from the unit (HDMI OUT jack; p. 18).
4
Use the S/T keys to select “Network”, and then
press the ENTER key.
5
Use the S/T keys to select “Network Connection”,
and then press the ENTER key.
6
Use the S/T keys to select “Wireless (Wi-Fi)”, and
then press the ENTER key.
Network Connection
SETUP
Wired
Wireless(Wi-Fi)
Wireless Direct
7
Use the S/T keys to select the desired access point
and press the ENTER key.
▲
SSID
The setup menu is displayed on the TV screen.
/
/
ENTER
8
Use the S/T keys to select “Access Point Scan”,
and then press the ENTER key.
:
Security:
Security K
:
Connect
▼
[ENT
[RETU
Point
Access
Scan
Point
1
WPA2-PSK(AES)
ey
ER]:Confirm
RN]:Cancel
9 Press the ENTER key.
10 Use the W/X/S/T and ENTER keys to enter the
security key.
*
(
.
0
A
N
a
n
S
O
C
****_
) [
, :
1 2
B C
O P
b c
o p
pace
K
ANCEL
]
;
3
D
Q
d
q
{
_
4
E
R
e
r
BK
}
|
5
F
S
f
s
SP
<
/
6
G
T
g
t
>
\
7
H
U
h
u
DE
*
$
8
I
V
i
v
LE
!
~
9
J
W
j
w
TE
?
^
@
K
X
k
x
#
'
+
L
Y
l
y
CL
%
"
M
Z
m
z
EA
&
`
=
←
→
R
[]/[]: Move the cursor left and right.
[Space]: Enter a space.
[BKSP]: Delete the character to the left of the selected one.
[DELETE]: Delete the selected character.
[CLEAR]: Delete all characters entered.
[CANCEL]: Cancel character entry, and return to the previous screen.
Wireless(Wi-Fi)
S
·
·
·
·
·
e
W
S
A
M
P
l
P
h
c
a
I
e
S
a
c
n
N
ct
B
re
es
ua
C
a
ut
W
s
l
od
t
i
P
S
e
s
o
o
e
e
n
F
i
t
tup
method.
i Settings
nt Scan
ting
(iOS)
Once the security key been entered, select “OK”, and then
press the ENTER key. The screen will return to that
displayed in step 8.
[ENTER]:OK
[RETURN]:Cancel
The list of available access points appears on the TV
screen.
NETWORKS ➤ Connecting to a network
En
35
11 Use the S/T keys to select “Connect” and press the
ENTER key to start the connection process.
When a connection has been established (the device has
been paired with the unit), “Completed” will be displayed on
the TV screen.
If “Not connected” is displayed press the ENTER key to
repeat the process beginning with step 6, or see the
information below to try another connection method.
• “Access Point Scan” cannot be used to establish a wireless connection if
your wireless router (access point) is configured so that it does not
broadcast its SSID. See “Setting up the wireless connection manually”
(p. 37) to establish a connection.
12 Press the SETUP key to exit the setup menu.
/
ENTER
SETUP
NETWORKS ➤ Connecting to a network
En
36
Setting up the wireless connection
manually
Use the S/T keys to select “SSID”.
Manual
Setup the SSID (network name), encryption method and security
key for your network manually.
▲
SSID
1
2
Press the z key to turn on this unit.
Security:
Security K
:
Connect
▼
[ENT
[RETU
3
Press the SETUP key twice.
Turn on the TV and switch the TV input to display
video from the unit (HDMI OUT jack; p. 18).
The setup menu is displayed on the TV screen.
/
/
ENTER
8
4
Use the S/T keys to select “Network”, and then
press the ENTER key.
5
Use the S/T keys to select “Network Connection”,
and then press the ENTER key.
6
Use the S/T keys to select “Wireless (Wi-Fi)”, and
then press the ENTER key.
SETUP
Network Connection
Wired
Wireless(Wi-Fi)
Wireless Direct
7
Use the S/T keys to select “Manual Setting”, and
then press the ENTER key.
e
W
S
A
M
P
l
P
h
c
a
I
e
S
a
c
n
N
ct
B
re
es
ua
C
a
ut
W
s
l
od
t
i
P
S
e
s
o
o
e
e
n
F
i
t
tup
method.
i Settings
nt Scan
ting
[ENTER]:OK
[RETURN]:Cancel
:
None
ey
ER]:Confirm
RN]:Cancel
Use the W/X/S/T keys and the ENTER key to enter
the SSID of the access point.
a
(
.
0
A
N
a
n
S
O
C
bc_
) [
, :
1 2
B C
O P
b c
o p
pace
K
ANCEL
]
;
3
D
Q
d
q
{
_
4
E
R
e
r
BK
}
|
5
F
S
f
s
SP
<
/
6
G
T
g
t
>
\
7
H
U
h
u
DE
*
$
8
I
V
i
v
LE
!
~
9
J
W
j
w
TE
?
^
@
K
X
k
x
#
'
+
L
Y
l
y
CL
%
"
M
Z
m
z
EA
&
`
=
←
→
R
[]/[]: Move the cursor left and right.
[Space]: Enter a space.
[BKSP]: Delete the character to the left of the selected one.
[DELETE]: Delete the selected character.
[CLEAR]: Delete all characters entered.
[CANCEL]: Cancel character entry, and return to the previous screen.
Once the security key been entered, select “OK”, and then
press the ENTER key. The screen will return to that
displayed in step 8.
10 Use the S/T keys to select “Security” and the W/X
keys to select the encryption method.
Wireless(Wi-Fi)
S
·
·
·
·
·
9
Setting
(iOS)
Settings
None, WEP, WPA2-PSK (AES), Mixed Mode
• As communications are not encrypted when “None” is selected, selecting
this option poses the risk that third parties may access the unit without your
permission.
NETWORKS ➤ Connecting to a network
En
37
11 Use the S/T keys to select “Security Key” and
press the ENTER key.
13 Use the S/T keys to select “Connect” and press the
ENTER key to start the connection process.
When a connection has been established (the device has
been paired with the unit), “Completed” will be displayed on
the TV screen.
• If you select “None” in step 10, this item is not available.
12 Use the W/X/S/T and ENTER keys to enter the
security key.
If you select “WEP” in step 10, enter either 5 or 13
character string, or 10 or 26 hexadecimal (base 16) keys.
If “Not connected” is displayed press the ENTER key to
repeat the process beginning with step 6.
14 Press the SETUP key to exit the setup menu.
If you select the method other than “WEP”, enter either 8 to
63 character string, or 64 hexadecimal (base 16) keys.
• Hexadecimal (base 16) keys use combinations of the numbers 0 through 9
and the letters a through f. Letters are not case sensitive.
/
/
ENTER
SETUP
*
(
.
0
A
N
a
n
S
O
C
****_
) [
, :
1 2
B C
O P
b c
o p
pace
K
ANCEL
]
;
3
D
Q
d
q
{
_
4
E
R
e
r
BK
}
|
5
F
S
f
s
SP
<
/
6
G
T
g
t
>
\
7
H
U
h
u
DE
*
$
8
I
V
i
v
LE
!
~
9
J
W
j
w
TE
?
^
@
K
X
k
x
#
'
+
L
Y
l
y
CL
%
"
M
Z
m
z
EA
&
`
=
←
→
R
[]/[]: Move the cursor left and right.
[Space]: Enter a space.
[BKSP]: Delete the character to the left of the selected one.
[DELETE]: Delete the selected character.
[CLEAR]: Delete all characters entered.
[CLEAR]: Cancel character entry, and return to the previous screen.
Once the security key been entered, select “OK”, and then
press the ENTER key. The screen will return to that
displayed in step 8.
NETWORKS ➤ Connecting to a network
En
38
8
Using the WPS PIN code
Register the unit’s PIN code with your wireless router (access point)
to establish a connection.
1
2
Press the z key to turn on this unit.
3
Press the SETUP key twice.
Use the S/T keys to select the desired access point
and press the ENTER key.
The PIN code of the unit appears on the TV screen.
PIN
PIN
Turn on the TV and switch the TV input to display
video from the unit (HDMI OUT jack; p. 18).
E
i
P
t
/
ENTER
Use the S/T keys to select “Network”, and then
press the ENTER key.
5
Use the S/T keys to select “Network Connection”,
and then press the ENTER key.
6
Use the S/T keys to select “Wireless (Wi-Fi)”, and
then press the ENTER key.
Network Connection
SETUP
Wired
Wireless(Wi-Fi)
Wireless Direct
7
Wireless(Wi-Fi)
e
W
S
A
M
P
l
P
h
c
a
I
e
S
a
c
n
N
ct
B
re
es
ua
C
a
ut
W
s
l
od
t
i
P
S
e
s
o
o
e
e
n
F
i
t
tup
method.
i Settings
nt Scan
ting
t
h
E
n
he PI
e acc
NTER
necti
N cod
ess p
to st
on pr
e
oint.
art
ocess.
9
Enter the unit’s PIN code into the wireless router
(access point).
For details on settings, refer to the instruction manual of the
wireless router (access point).
10 Press the ENTER key to start the connection
process.
When a connection has been established (the device has
been paired with the unit), “Completed” will be displayed on
the TV screen.
If “Not connected” is displayed press the ENTER key to
repeat the process beginning with step 6, or see the
information below to try another connection method.
Use the S/T keys to select “PIN Code”, and then
press the ENTER key.
S
·
·
·
·
·
ter
to t
ess
e co
[ENTER]:Start
[RETURN]:Cancel
The setup menu is displayed on the TV screen.
4
n
n
r
h
Code
Code:00000000
(iOS)
• The PIN code cannot be used to establish a wireless connection if your
wireless router (access point) uses WEP encryption, or if the router’s MAC
address filter is enabled. See “Searching for a wireless router (access
point)” (p. 35) to establish a connection.
11 Press the SETUP key to exit the setup menu.
[ENTER]:OK
[RETURN]:Cancel
The list of available access points appears on the TV
screen.
NETWORKS ➤ Connecting to a network
En
39
Connecting a mobile device to the unit directly (Wireless Direct)
Connect a mobile device directly to the unit without using a wireless
router (access point).
4
Use the S/T keys to select “Network”, and then
press the ENTER key.
5
Use the S/T keys to select “Network Connection”,
and then press the ENTER key.
6
Use the S/T keys to select “Wireless Direct”, and
then press the ENTER key.
Wireless Direct supports the following.
– Operation of the unit using a mobile device to which the
dedicated HOME THEATER CONTROLLER (WLAN) app has
been installed.
– Use of AirPlay to play music files stored on an iOS device.
Network Connection
Wired
Wireless(Wi-Fi)
Wireless Direct
Mobile device
/
/
ENTER
SETUP
The unit
7
• You cannot use Wireless Direct simultaneously with the wired network connection
(p. 31) or the wireless network connection (p. 32).
Settings
None, WPA2-PSK (AES)
• When Wireless Direct is enabled, the unit cannot connect to the Internet.
Therefore, you cannot use any kind of Internet service such as Internet radio.
1
2
3
Use the S/T keys to select “Security” and the W/X
keys to select the encryption method.
In most cases, “WPA2-PSK (AES)” should be selected. If
your mobile device does not support “WPA2-PSK (AES)”,
select “None”.
Press the z key to turn on this unit.
Turn on the TV and switch the TV input to display
video from the unit (HDMI OUT jack; p. 18).
• As communications are not encrypted when “None” is selected, selecting
this option poses the risk that third parties may access the unit without your
permission.
Press the SETUP key twice.
The setup menu is displayed on the TV screen.
8
Use the S/T keys to select “Security Key” and
press the ENTER key.
• If you select “None” in step 7, this item is not available.
NETWORKS ➤ Connecting to a network
En
40
9
Use the W/X/S/T and ENTER keys to enter the
security key.
Enter either 8 to 63 character string, or 64 hexadecimal
(base 16) keys.
• Hexadecimal (base 16) keys use combinations of the numbers 0 through 9
and the letters a through f. Letters are not case sensitive.
*
(
.
0
A
N
a
n
S
O
C
/
/
ENTER
SETUP
****_
) [
, :
1 2
B C
O P
b c
o p
pace
K
ANCEL
]
;
3
D
Q
d
q
{
_
4
E
R
e
r
BK
}
|
5
F
S
f
s
SP
<
/
6
G
T
g
t
>
\
7
H
U
h
u
DE
*
$
8
I
V
i
v
LE
!
~
9
J
W
j
w
TE
?
^
@
K
X
k
x
#
'
+
L
Y
l
y
CL
%
"
M
Z
m
z
EA
&
`
=
←
→
R
10 Use the S/T keys to select “Save” and press the
ENTER key to save the setting.
This completes the settings and “Set the mobile device.”
will be displayed on the TV screen. The unit functions as an
access point.
Next, configure the Wi-Fi settings of a mobile device.
11 Configure the Wi-Fi settings of a mobile device.
For details on settings of your mobile device, refer to the
instruction manual of the mobile device.
a Enable the Wi-Fi function on the mobile device.
b Select the SSID displayed in step 9 from the list of available
access points.
c When you are prompted for a password, enter the security key
displayed in step 9.
[]/[]: Moves the cursor left and right.
[Space]: Enter a space.
[BKSP]: Delete the character to the left of the selected one.
[DELETE]: Delete the selected character.
[CLEAR]: Delete all characters entered.
[CANCEL]: Cancel character entry, and return to the previous screen.
12 Press the SETUP key to exit the setup menu.
Once the security key been entered, select “OK”, and then
press the ENTER key. The screen below will be displayed.
Wireless
▲
SSID
:
Security:
Security K
:
Save
▼
[ENT
[RETU
Direct
YSP-1600
XXXXXX
WPA2-PSK(AES)
ey
*************
ER]:Confirm
RN]:Cancel
• Before proceeding to the next step, record the following information. These
information will be needed to configure the Wi-Fi setting of a mobile device.
– SSID displayed on the TV screen
– Security key you have just entered
NETWORKS ➤ Connecting to a network
En
41
Playing back music stored on media servers (PCs/NAS)
You can play back music files stored on your PC or DLNA-compatible NAS on the unit.
Media sharing setup
To play back music files stored on your PC or DLNA-compatible NAS, first you need to
• To use this function, the unit and your PC must be connected to the same router (p. 31). You can check
whether the network parameters (such as the IP address) are properly assigned to the unit in “Information”
(p. 54) in the setup menu.
configure the media sharing setting on each music server.
• The audio may be interrupted while using the wireless network connection. In this case, use the wired
network connection.
• The following file formats are supported.
– The unit supports playback of WAV (PCM format only), MP3, WMA, MPEG-4 AAC, FLAC and ALAC
(Apple Lossless Audio Codec) files (1- or 2-channel audio only).
– The unit is compatible with sampling rates of up to 192 kHz for WAV and FLAC files, 96 kHz for ALAC
files, and 48 kHz for other files.
– The unit supports gapless playback of WAV, FLAC and ALAC files.
– To play back FLAC files, you need to install server software that supports sharing of FLAC files via DLNA
on your PC or use a NAS that supports FLAC files.
– Digital Rights Management (DRM) contents cannot be played back.
For a PC with Windows Media Player installed
This unit supports Windows Media Player 11 or later. This section explains Windows
Media Player 12 setup as an example.
1
2
3
4
Start Windows Media Player 12 on your PC.
5
Click “OK” to exit.
Select “Stream”, then “Turn on media streaming”.
Click “Turn on media streaming”.
Select “Allowed” from the drop-down list next to the unit’s model
name.
For a PC or a NAS with other DLNA server software
installed
Refer to the instruction manual for the device or software and configure the media
sharing settings.
Playing music files
Use the MusicCast CONTROLLER app installed on your mobile device to play music
files.
• Configure basic settings for the MusicCast CONTROLLER app before playing music files.
• Refer to the supplied "MusicCast Setup Guide" for details.
NETWORKS
➤ Playing back music stored on media servers (PCs/NAS)
En
42
Listening to Internet radio
You can listen to Internet radio stations from all over the world.
• To use this function, the unit must be connected to the Internet (p. 31). You can check whether the network parameters (such as the IP address) are properly assigned to the
unit in “Information” (p. 54) in the setup menu.
• You may not be able to receive some Internet radio stations.
• The unit uses the vTuner Internet radio station database service.
• This service may be discontinued without notice.
NET RADIO
1-3
Playback of Internet radio
Registering favorite Internet radio stations
Use the MusicCast CONTROLLER app installed on your mobile
device to select an Internet radio station.
Assign Internet radio stations to the NET RADIO keys on the remote
control, or save them in the vTuner Bookmarks folder.
Assigning a station to a NET RADIO key
• Configure basic settings for the MusicCast CONTROLLER app before selecting
an Internet radio station.
• Refer to the supplied "MusicCast Setup Guide" for details.
1
2
Select the desired Internet radio station.
Press and hold one of the NET RADIO keys (1–3) for
at least 3 seconds.
❑ Tuning into assigned Internet radio stations
1
Press the NET RADIO key (1–3) to which the desired
Internet radio station has been assigned.
The input source switches to NET, and streaming begins.
STATUS
TV
HDMI
ANALOG
BLUETOOTH
NET
SURROUND
Glows
NETWORKS ➤
Listening to Internet radio
En
43
Registering the station on the vTuner website
You can also register your favorite Internet radio stations on the vTuner website.
1
Select any of Internet radio stations on the unit.
This operation is necessary to register the radio station for the first time.
2
Check the vTuner ID of the unit.
You can find the vTuner ID in “Information” (p. 54) in the setup menu.
3
Access the vTuner website (http://yradio.vtuner.com/) with the web
browser on your PC and enter the vTuner ID.
You can switch the language.
Enter the vTuner ID in this area.
• To use this feature, you need to create your personal account. Create your account using your e-mail
address.
4
Register your favorite radio stations.
Click the “Add” icon (
) next to the station name.
• To remove the station from the “Bookmarks” folder, select “Bookmarks” in the Home screen, and then
click the “Remove” icon (
) next to the station name.
NETWORKS ➤
Listening to Internet radio
En
44
Playing back music with AirPlay
The AirPlay function allows you to play back iTunes or iPod music on the unit via
network.
Playback of iTunes/iPod music contents
Follow the procedure below to play back iTunes/iPod music contents on the unit.
• This section describes “iPod touch”, “iPhone” and “iPad” as the “iPod”. “iPod” refers to “iPod touch”,
“iPhone” and “iPad”, unless otherwise specified.
1
Turn on the unit, and start iTunes on the PC or display the playback
screen on the iPod.
If the iTunes/iPod recognizes the unit, the AirPlay icon (
) appears.
iTunes
iTunes (example)
iPod iOS7/iOS8 (example)
iPod iOS6 (example)
(wired or
wireless)
(wired or
wireless)
Router
The unit
• If the icon does not appear, check whether the unit and PC/iPod are connected to the router properly.
2
On the iTunes/iPod, click (tap) the AirPlay icon and select the unit
(network name of the unit) as the audio output device.
iPod
iTunes (example)
• To use this function, the unit and your PC or iPod must be connected to the same router (p. 31). You can
check whether the network parameters (such as the IP address) are properly assigned to the unit in
“Information” (p. 54) in the setup menu.
• When using a multiple SSID router, access to the unit might be restricted depending on the SSID to
connect. Connect the unit and iPod to the same SSID.
iPod (example)
YSP-1600 XXXX
YSP-1600 XXXX
Network name of the unit
• The AirPlay function can be used with an iPhone, iPad, or iPod touch running iOS 4.3.3 or later, a Mac
running OS X version 10.8 “Mountain Lion” or later, or a Mac or Windows computer with iTunes 10.2.2 or
later installed.
NETWORKS ➤
Playing back music with AirPlay
En
45
3
Select a song and start playback.
To operate playback, use the Music app on the iPod or iTunes on the PC.
The input source switches to NET, and playback begins.
NET
Glows
• You can turn on the unit automatically when starting playback on iTunes or iPod by setting “Network
Standby” (p. 56) in the setup menu to “On”.
• You can edit the network name (the unit’s name on the network) displayed on iTunes/iPod in “Network
Name” (p. 56) in the setup menu.
• You can adjust the unit’s volume from the iTunes/iPod during playback.
Caution
• When you use iTunes/iPod controls to adjust volume, the volume may be unexpectedly loud. This could
result in damage to the unit or speakers. If the volume suddenly increases during playback, stop
playback on the iTunes/iPod immediately.
NETWORKS ➤
Playing back music with AirPlay
En
46
Playing back music stored on mobile devices
Use this function to play music stored on your mobile device over a network.
Using a mobile device to play songs
Use the MusicCast CONTROLLER app installed on your mobile device to operate
playback.
Router
(wired or
wireless)
• Configure basic settings for the MusicCast CONTROLLER app before playing music.
The unit
• Refer to the supplied "MusicCast Setup Guide" for details.
Caution
• When you use mobile device controls to adjust volume, the volume may be unexpectedly loud. This
could result in damage to the unit or speakers. If the volume suddenly increases during playback, stop
playback on the mobile device immediately.
Mobile device
• To use this function, the unit and your PC or mobile device must be connected to the same router (p. 31).
You can check whether the network parameters (such as the IP address) are properly assigned to the unit
in “Information” (p. 54) in the setup menu.
• When using a multiple SSID router, access to the unit might be restricted depending on the SSID to
connect. Connect the unit and mobile device to the same SSID.
NETWORKS
➤ Playing back music stored on mobile devices
En
47
SETTINGS
Setup menu
A variety of settings for this unit can be specified and adjusted from the setup menu. Among the options available are channel volume control,
HDMI settings, and network settings.
The setup menu is displayed on, and operated from, the TV screen. See “Displaying the menu screen on the TV” (p. 18) for instructions on
displaying the setup menu on the TV.
Setting the setup menu
1
/
/
ENTER
2
Press the SETUP key.
To display the Network or Bluetooth menu, press the
SETUP key again.
Repeat these steps to display the desired menu.
Setup menu
Setup Menu
Setup Menu
RETURN
SETUP
Use the S/T key to select a menu and then press
the ENTER key.
Channel Level
Sound
Dynamic Range
HDMI
Audio Delay
Function
Information
Channel Level
Sound
Dynamic Range
HDMI
Audio Delay
Function
Information
The X key can be used in place of the ENTER key.
• Hold down the SETUP key for more than 3 seconds to display “OSD
Language” directly on the screen (p. 19, 52).
• If an update for the unit’s firmware is available, an envelope icon (
displayed in the setup menu (p. 59).
) will be
Press the W key or RETURN key to return to the previous
menu.
3
Use the S/T key to change the setting value of each
menu.
4
Press the SETUP key again to exit the setup menu.
SETTINGS ➤ Setup menu
En
48
Setup menu list
Menu
Item
HDMI
Function
Page
Adjust the volume of each channel.
50
Dynamic Range
Specify dynamic range.
50
Audio Delay
Adjust the delay between video and audio output.
50
HDMI Control
Turn HDMI control on or off.
51
HDMI Audio Out
Choose whether HDMI audio input is played via this unit or the TV.
51
Audio Assign
Specify the audio input from the TV jack or HDMI IN jack when HDMI is selected as
the input source.
51
Dimmer
Adjust the brightness of indicators on the front panel.
52
OSD Language
Change the language used for menus displayed on the TV screen.
52
Auto Power Standby
Turn Auto Power Standby on or off.
52
TV Remote Repeater
Enable/disable the TV Remote Repeater function.
58
Audio
Display audio input signal information.
53
Video
Display video input signal information.
53
System
Display this unit’s firmware version.
53
Information
Display the unit’s network information.
54
Network Connection
Select the network connection method.
54
Channel Level
Sound
Front L, Front R, Center, Surround L, Surround R,
Subwoofer
Function
Information
Network
IP Address
DHCP, IP Address, Subnet Mask, Default
Gateway, DNS Server (P), DNS Server (S)
Configure the network parameters (such as IP address).
55
MAC Address Filter
Filter, MAC Address 1–10
Set the MAC address filter to limit access to the unit from other network devices.
55
Network Standby
Enable/disable the function that turns on the unit from other network devices.
56
Network Name
Edit the network name (the unit’s name on the network) displayed on other network
devices.
56
Update the firmware via the network.
56
Bluetooth
Enable/disable the Bluetooth functions.
57
Transmission
Turn the function that transmits audio to a Bluetooth device, such as Bluetooth
speakers, on or off.
57
Device Search
Search for the Bluetooth device, such as Bluetooth speakers, to which audio will be
transmitted.
57
MAC Address
Display the MAC address for the Bluetooth connection.
57
Network Update
Perform Update
Bluetooth
SETTINGS ➤ Setup menu
En
49
Sound
Channel Level
Setup Menu
Audio Delay
➜
Sound
➜
Channel Level
Setup Menu
➜
Sound
➜
Audio Delay
Adjust the volume of each channel to balance output levels. Use test sounds output
from each channel to adjust volume for optimal balance.
TV images sometimes lag behind the sound. You can use this function to delay the
sound output to synchronize it with the video image.
Item
Front L, Front R, Center, Surround L, Surround R, Subwoofer
Settings
Adjustable range
-10 to +10
0 ms–500 ms
Specify audio output timing in increments of 5 ms.
Auto (default)
Adjust the delay between video and audio output automatically when a TV that
supports an automatic lipsync function is connected to the unit via HDMI.
Dynamic Range
Setup Menu
➜
Sound
➜
Dynamic Range
Adjust this unit’s dynamic range (difference between maximum and minimum volumes).
Settings
Auto (default)
Set dynamic range at a level that supports comfortable listening at low volumes.
Standard
The dynamic range recommended for regular home use.
Max
Output sound without adjusting the dynamic range of the input signals.
SETTINGS ➤ Setup menu
En
50
HDMI
Use to configure the settings related to HDMI signals and the HDMI control function.
HDMI Control
Setup Menu
Audio Assign
➜
HDMI
➜
HDMI Control
Turn HDMI control (p. 20) on or off.
Setup Menu
➜
HDMI
➜
Audio Assign
Specify whether audio is input via the HDMI IN jack or the TV (digital optical) jack of the
unit when HDMI is selected as the input source.
Settings
Off (default)
Disable the HDMI control function. The standby power consumption of this unit
decreases.
On
Enable the HDMI control function.
Settings
HDMI (default), Optical
HDMI Audio Out
This setting can be configured only when “HDMI Control” is set to “Off”.
Setup Menu
➜
HDMI
➜
HDMI Audio Out
Use to select a device to play back HDMI audio signals.
Settings
AMP (default)
Play back the input sound signal.
TV
Plays audio content from the TV connected to the HDMI OUT (ARC) jack.
Volume cannot be adjusted from the unit. Use the TV to adjust volume.
• When “HDMI Control” is set to “On”, select the audio output device based on the settings configured for the
TV connected to this unit.
• HDMI video signals input to the HDMI IN jack of this unit are always output from the HDMI OUT (ARC) jack
of this unit.
SETTINGS ➤ Setup menu
En
51
Function
Dimmer
Auto Power Standby
➜
Setup Menu
Function
➜
Dimmer
Setup Menu
➜
Function
➜
Auto Power Standby
Adjust the brightness of indicators on the front panel.
Turn Auto Power Standby on or off.
Settings
-2 (off), -1 (normal; default), 0 (bright)
When this function is activated, the unit turns off when it is not in use.
• If this function is set to “-2” or “-1”, the display brightens only when operations are performed with this unit.
OSD Language
Setup Menu
Settings
Off (default setting other than U.K., Europe and Russia models), On (default setting for U.K., Europe
and Russia models)
When “Auto Power Standby” is set to “On”, the unit automatically turns off as indicated
below
➜
Function
➜
OSD Language
Use to select the language used for menus displayed on the TV screen.
Settings
Menus are displayed in Japanese.
ENGLISH
(default)
Menus are displayed in English.
DEUTSCH
Menus are displayed in German.
FRANÇAIS
Menus are displayed in French.
ESPAÑOL
Menus are displayed in Spanish.
ITALIANO
Menus are displayed in Italian.
NEDERLANDS
Menus are displayed in Dutch.
РУССКИЙ
Menus are displayed in Russian.
SVENSKA
Menus are displayed in Swedish.
TÜRK
Menus are displayed in Turkish.
• Audio is input to the unit, but no operations have been performed with the unit for
more than 8 hours.
• HDMI, BLUETOOTH or NET is selected as the input source, but no audio has been
input to the unit or no operations have been performed with the unit for more than 20
minutes.
• HDMI is selected as the input source, but no playback device has been connected to
the unit’s HDMI IN jack for more than 20 minutes.
5 minutes before the auto power standby function automatically turns the unit off, the
indicators on the front panel indicate a countdown until the unit is turned off.
5 minutes before
One indicator turns off for every minute that passes.
10 seconds before
The blinking indicator moves to the left for every second that passes.
... 9 seconds before 10 seconds before
• Hold down the SETUP key for more than 3 seconds to display “OSD Language” directly on the TV screen.
• The settings may be changed automatically when using the TV which supports the HDMI control function.
• Auto Power Standby can also be turned on or off using the keys on the front panel (p. 62).
SETTINGS ➤ Setup menu
En
52
Information
TV Remote Repeater
Setup Menu
➜
Function
➜
Display information for the audio and video signal input to this unit.
TV Remote Repeater
Audio
Turn the TV Remote Repeater function on or off.
Setup Menu
Settings
Off (default)
Disable the TV Remote Repeater function.
On
Enable the TV Remote Repeater function.
➜
Information
➜
Audio
The following information on the current audio input signal is displayed.
Format
Digital audio format
Number of channels
The number of channels contained within the input signal—front/
surround/low frequency effects (LFE). Example: “3/2/0.1” means signal
contains 3 front channels, 2 surround channels, and LFE.
If the signal contains channels other than front, surround, and LFE, the
total number of channels may be displayed. Example: “5.1ch”.
Sampling frequency
The sampling frequency of the digital input signal
Bit rate
The per-second bit rate of the input signal
For details, see “Operating a TV via the TV Remote Repeater function of the unit”
(p. 58).
• The audio bit rate or sampling frequency may not be displayed for some input signals.
Video
Setup Menu
➜
Information
➜
Video
The following information on the current video input signal is displayed.
Type
HDMI or DVI
Resolution
Video signal resolution
System
Setup Menu
➜
Information
➜
System
Display the version of firmware currently installed on this unit.
SETTINGS ➤ Setup menu
En
53
Network
Configures the network settings.
• Some menus are not superimposed over video content on the TV screen.
Information
Setup Menu
Network Connection
➜
Network
➜
Information
Display the network information on the unit.
Setup Menu
➜
Network
➜
Network Connection
Select the network connection method.
Settings
• The options displayed vary according to the type of network connection (Wired/Wireless (Wi-Fi)/Wireless
Direct).
Status
The connection status of the NETWORK jack
Connection
Connection method
MC Network
The connection status of MusicCast Network
SSID
The access point to which the unit is connected
Security
The encryption method for your network
MAC Address
MAC address (Ethernet/Wi-Fi)
IP Address
IP address
Subnet Mask
Subnet mask
Default Gateway
The IP address of the default gateway
DNS Server (P)
The IP address of the primary DNS server
DNS Server (S)
The IP address of the secondary DNS server
vTuner ID
The ID of the Internet radio (vTuner)
Wired
Select this option when connecting the unit to a network with a network
cable (not supplied).
Wireless (Wi-Fi)
Select this option when connecting the unit to a network via the wireless
router (access point).
Wireless Direct
Select this option when connecting a mobile device to the unit directly.
SETTINGS ➤ Setup menu
En
54
IP Address
MAC Address Filter
➜
Setup Menu
Network
➜
IP Address
Configure the network parameters (such as IP address).
❑ DHCP
➜
Setup Menu
Network
➜
MAC Address Filter
The MAC address filter limits network devices that can be used to operate the unit.
When operating the unit via an app on a mobile device, specify the MAC address of the
device.
Select whether to use a DHCP server.
Settings
• Operation of the AirPlay function (p. 45) or DLNA-compatible device (p. 42) is not limited by this setting.
Off
The DHCP server is not used. Configure the network parameters
manually. For details, see “Manual network settings”.
❑ Filter
The DHCP server is used to automatically obtain the unit’s network
parameters (such as IP address).
Enable/disable the MAC address filter.
On (default)
Manual network settings
1
2
Set “DHCP” to “Off”.
Settings
Off (default)
Disable the MAC address filter.
On
Enable the MAC address filter. In “MAC Address 1–10”, specify the MAC
addresses of the network devices that will operate the unit.
Use the S/T keys to select a parameter type.
❑ MAC Address 1–10
IP Address
Specify an IP address.
Subnet Mask
Specify a subnet mask.
Specify the MAC addresses (up to 10) of the network devices that will operate the unit
when “Filter” is set to “On”.
Default Gateway
Specify the IP address of the default gateway.
DNS Server (P)
Specify the IP address of the primary DNS server.
DNS Server (S)
Specify the IP address of the secondary DNS server.
3
Use the W/X keys to move the edit position and the S/T keys to
select a value.
4
Press the ENTER key.
1
2
Use the S/T keys to select an MAC address number (1 to 10).
3
Press the ENTER key.
Use the W/X keys to move the edit position and the S/T keys to
select a value.
SETTINGS ➤ Setup menu
En
55
Network Standby
Setup Menu
➜
Network Name
Network
➜
Network Standby
Setup Menu
➜
➜
Network
Network Name
Turn the function that controls the unit’s power (Network Standby) when a network
device or Bluetooth device is operated on or off.
Edit the name displayed for this device (the unit’s name on the network) on other
network devices. A name up to 15 characters in length may be specified.
Settings
1
Off
Disable the network standby function.
Use the W/X keys to move the edit position and the S/T keys to
select a character.
The unit will turn on when the MusicCast CONTROLLER or
HOME THEATER CONTROLLER (WLAN) app installed on
your mobile device is used to initiate playback while the
unit is off.
On (default)
Enable the network
standby function.
The unit will turn on and off in accordance with the
following Bluetooth device operations.
Coordinated power on
When a Bluetooth device is connected to this unit while it is
off, this unit turns on and the input source switches to
BLUETOOTH.
Coordinated power off
When a Bluetooth device is disconnected from this unit
while it is on, this unit turns off.
(Only when BLUETOOTH is selected as the input source.)
• The unit consumes more power when “Network Standby” is set to “On” than when it is set to “Off”.
Network Name
YSP-1600 1B08FA
[RETURN]:Back
• The following alphanumeric characters and symbols may be used.
( ) [ ] { } < > * ! ? # % & . , : ; _ | / \ $ ~ ^ ' " ` 0–9 @ + - = A–Z a–z
2
Press the RETURN key.
Network Update
Setup Menu
➜
Network
➜
Network Update
Update the firmware via the network.
Perform Update
This option is available after firmware has been updated. For details, see “Updating the
unit’s firmware” (p. 59).
SETTINGS ➤ Setup menu
En
56
Bluetooth
Configures the Bluetooth settings.
• Some menus are not superimposed over video content on the TV screen.
Bluetooth
Device Search
➜
Setup Menu
Bluetooth
➜
Bluetooth
Enables/disables the Bluetooth function.
Disable the Bluetooth function.
On (default)
Enable the Bluetooth function.
Setup Menu
➜
Bluetooth
➜
Bluetooth
Device Search
MAC Address
Transmission
Setup Menu
➜
Select the Bluetooth speakers or headphones to which audio will be transmitted, and
the pair the speakers or headphones with the unit to establish a connection.
Settings
Off
Setup Menu
➜
➜
➜
Bluetooth
MAC Address
Display the MAC address for the Bluetooth connection.
Transmission
Transmit audio from the unit to Bluetooth speakers or headphones.
Settings
Off (default)
Audio can not be transmitted.
On
Audio input to the unit can be transmitted to Bluetooth speakers or
headphones.
SETTINGS ➤ Setup menu
En
57
Operating a TV via the TV Remote Repeater function of the unit
When the TV Remote Repeater function is enabled, the unit receives TV remote control signals at the remote control sensor (on front) and
transmits the signals from the TV Remote Repeater (on rear). This function is useful when you cannot operate your TV from the remote control
because the remote control sensor of the TV is blocked by the unit.
• This function can be used while the TV remote control is using infrared signals.
• Position the unit and TV so that they are separated by at least 5 cm (2").
Follow the steps below to enable the TV Remote Repeater function.
1
Press the SETUP key.
The setup menu is displayed.
TV remote control sensor
2
Use S/T key to select “Function”, and then press
the ENTER key.
3
Use S/T key to select “TV Remote Repeater”, and
then press the ENTER key.
4
Use S/T key to select “On”, and then press the
ENTER key.
5
Press the SETUP key to exit the setup menu.
TV remote control
/
ENTER
SETUP
HDMI
IN
OUT(ARC)
NETWORK
TV
ANALOG SUBWOOFER OUT UPDATE ONLY
TV Remote Repeater
SETTINGS
➤ Operating a TV via the TV Remote Repeater function of the unit
En
58
Updating the unit’s firmware
New firmware that provides additional features or product
improvements will be released as needed. If the unit is connected
to the Internet, you can download the firmware via the network and
update it.
When the unit is turned on for the first time after a new version of the
unit’s firmware has been released, a message indicating that a
firmware update is available will be displayed on the TV screen,
and an envelope icon ( ) will be displayed in the setup menu
(p. 48)
2
Use the S/T keys to select “Network”, and then
press the ENTER key.
3
Use the S/T keys to select “Network Update”, and
then press the ENTER key.
The following screen is displayed when firmware updates
are available.
Network Update
The unit’s firmware can be updated as follows.
Perform Update
• Update firmware from “Network Update” in the setup menu.
• Update firmware by connecting a USB flash drive to which the
unit’s firmware update has been saved (p. 60).
/
ENTER
• Update firmware using the dedicated MusicCast CONTROLLER
app installed on a mobile device. Follow MusicCast
CONTROLLER guides to operate the app and update the
firmware.
SETUP
Notes
• To cancel the operation without updating the firmware, press the SETUP
key.
4
Press the ENTER key.
The TV screen goes black and firmware update begins.
The indicators on the front panel glow to indicate progress
during the update.
• Do not operate the unit or disconnect the power cable or network cable during
firmware update. Firmware update takes about 20 minutes or more (depending
on your Internet connection speed).
• If the Internet connection speed is slow, or the unit is connected to the wireless
network, network update may not be possible depending on the condition of
the network connection. In this case, update the firmware using the USB flash
drive (p. 60).
• To perform the following procedure, your TV must be connected to the unit via
HDMI.
Update progress
• If there are multiple firmware updates, the indicators will start glowing as
each firmware update begins.
• For details on update, visit the Yamaha website.
Using “Network Update” in the setup menu
to update firmware
1
Press the SETUP key twice.
The setup menu is displayed on the TV screen.
SETTINGS ➤ Updating the unit’s firmware
En
59
5
When the indicators on the front panel glow alternately as shown
below, press the z (power) key on the unit's front panel.
4
Press the z key on the front panel while pressing the VOLUME – key
on the unit.
The firmware update will begin.
All indicators glow
The indicators on the front panel glow to indicate progress during the update.
Alternates
Update progress
• If there are multiple firmware updates, the indicators will start glowing as each firmware update
begins.
One indicator glows
The firmware update is complete.
5
When the indicators on the front panel glow alternately as shown
below, press the z (power) key on the unit's front panel.
• If the firmware update fails, the indicator at far right will flash blue. Use the z (power) key to turn the unit off
and then on again, and repeat the procedure from step 1 again. If the firmware update fails again, confirm
that the unit is properly connected to a network.
All indicators glow
Updating firmware with connection of a USB flash drive
Alternates
Download the latest firmware version from the Yamaha website to a USB flash drive,
which can then be used to update the unit’s firmware.
See information provided when updating firmware for details.
1
2
3
Save this unit’s firmware to a USB flash drive.
Turn off the unit.
Connect the USB flash drive to the UPDATE ONLY jack on the unit’s
rear panel.
One indicator glows
The firmware update is complete.
• If the firmware update fails, the indicator at far right will flash blue. Use the z (power) key to turn the unit off
and then on again, and repeat the procedure from step 1 again. If the firmware update fails again, confirm
the following.
– The USB flash drive is correctly connected to the UPDATE ONLY jack.
– See information provided as firmware updates are performed, and be sure that the USB flash drive
contains the firmware update for this unit.
– The unit is properly connected to a network.
SETTINGS ➤ Updating the unit’s firmware
En
60
Initializing the unit’s settings
Various settings for the unit can be initialized. You can choose to initialize basic unit settings (does not initialize network settings), or to initialize only network settings.
Initializing basic unit settings
Initializing network settings
The basic unit settings other than network settings will be initialized.
The following settings will be initialized.
1
2
• Settings for “Network” and “Bluetooth” in the setup menu
Turn off the unit.
• Internet radio stations assigned to the NET RADIO 1–3 keys
Hold down the z (power) key for more than 3 seconds on the front
panel of the unit.
Once settings have been initialized, the unit turns on, all indicators on the front
panel flash for a moment, and then the unit can be operated.
• Bluetooth pairing information
1
2
Turn off the unit.
Press the z (power) key while pressing the CONNECT key on the
front panel of the unit.
Once settings have been initialized, the unit turns on, all indicators on the front
panel flash for a moment, and then the unit can be operated.
• In addition to basic unit settings, the following settings will also be initialized.
– Network Standby (p. 56)
– Bluetooth function (p. 57)
• When network settings are initialized, the “Share Wi-Fi Settings (iOS)” screen will be displayed the next
time the unit is turned on (p. 18).
SETTINGS ➤ Initializing the unit’s settings
En
61
APPENDIX
Troubleshooting
Refer to the chart below when this unit does not function properly. If the problem you are experiencing is not listed below or if the instruction below does not help, turn off the unit,
disconnect the AC power supply cable, and contact the nearest authorized Yamaha dealer or service center.
General
Cause
Remedy
See page
This unit does not operate
properly.
Problem
The internal microcomputer has been frozen by an external electric shock
(such as lightning or excessive static electricity) or by a power supply with
low voltage.
Disconnect the AC power supply cable from the outlet and plug it again in
after 30 seconds.
–
This unit fails to turn on when z
key is pressed (the STATUS
indicator flashes red), or the unit
is turned off soon after the power
has been turned on.
The AC power supply cable is not firmly connected to the AC wall outlet.
Connect the AC power supply cable firmly to the AC wall outlet.
The internal microcomputer has been frozen by an external electric shock
(such as lightning or excessive static electricity) or by a power supply with
low voltage.
Disconnect the AC power supply cable from the outlet and plug it again in
after 30 seconds.
This unit is suddenly turned off.
The internal temperature becomes too high and the overheat protection
circuitry has been activated.
Wait for about 1 hour for this unit to cool down, turn it back on after
confirming an adequate amount of ventilation space and not to cover this
unit with a cloth.
When the Auto Power Standby function is enabled, this unit turns off
automatically in any of the following situations:
– Audio is coming from the selected input source. However, no operations
have been performed for 8 hours or more.
– HDMI, BLUETOOTH or NET is selected as the input source, but no audio
has been input to the unit or no operations have been performed with the
unit for more than 20 minutes.
– HDMI is selected as the input source, but no playback device has been
connected to the unit’s HDMI IN jack for more than 20 minutes.
Turn on the power of the unit and play back the source again. If the Auto
Power Standby function is not used, set “Auto Power Standby” to “Off” from
the setup menu. Auto Power Standby can also be turned on or off using the
keys on the front panel. With the unit turned off, hold down the INPUT key
and press the z key, both on the front panel. The Auto Power Standby
setting will be reversed and the unit will turn on. The
indicator on the
front panel will glow for a few seconds when Auto Power Standby is
switched off, and will not glow when Auto Power Standby is switched on.
The network standby function is enabled, and the Bluetooth connection is
terminated.
Resume the Bluetooth connection using the Bluetooth device, or turn on
this unit and set “Network Standby” to “Off”.
56
Firmware update has failed.
Turn the unit off and then on again, and try updating the firmware again. If
the firmware update fails again, confirm that the unit is properly connected
to a network.
If firmware update using a USB flash drive fails, be sure that the USB flash
drive is properly connected to the UPDATE ONLY jack, and that it contains
the firmware update for this unit.
59
The indicator at far right flashes
blue.
17
–
12
52
APPENDIX ➤ Troubleshooting
En
62
Problem
No sound.
No sound or too small sound from
a specific channel.
Surround sound effects are
insubstantial.
Cause
Remedy
See page
Incorrect input or output cable connections.
Connect the cable properly.
No appropriate input source has been selected.
Select an appropriate input source with the input selector keys.
16
22
The volume is turned down.
Turn up the volume.
22
The sound is muted.
Press the MUTE or VOLUME (+/–) key to resume audio output and adjust
the volume level.
22
There is input signal cannot be played back by this unit.
Play a source whose signals can be reproduced by this unit. Change the
system settings of the source device.
72
“HDMI Audio Out” is set to “TV”.
Set to “AMP”.
51
“HDMI Control” is set to “Off”.
When connecting ARC (Audio Return Channel) supported TV and this unit
using an HDMI cable only, set “HDMI Control” to “On”.
51
To use this unit with “HDMI Control” set to “Off”, connect the TV’s audio
output jack to this unit’s TV (digital optical) jack via the optical cable.
15
Sound from an HDMI control-enabled TV is set for output from the TV’s
built-in speakers.
Use the TV’s HDMI settings to set audio output to any option other than the
TV’s built-in speakers.
The output level of the channel is muted.
Raise the output level of the channel.
Position is not properly specified.
Specify position in accordance with the unit’s installation position.
19
The source is played in stereo playback mode.
Switch to surround playback mode.
23
When connecting this unit with playback device and TV digitally, the output
setting of the playback device and TV is not valid.
Refer to the manual supplied with your device and check the setting.
–
24, 50
The playback device is set for constant output from 2 channels (PCM, etc.). Change the playback device’s audio output setting.
–
–
Position is not properly specified.
Specify position in accordance with the unit’s installation position.
19
There is no wall in the path of the sound beam.
Place the sound reflection board in the path of the sound beam.
68
No sound is coming from the
subwoofer.
The volume of the subwoofer is low.
Increase the volume of the subwoofer with the SUBWOOFER + key.
The volume of low (bass) tones
from the subwoofer is low.
The volume of the subwoofer is low.
Increase the volume of the subwoofer with the SUBWOOFER + key.
Content from an input source with a limited support for low tones is playing. Play content from an input source with broader support for low tones to see
if volume is still low.
22
22
–
APPENDIX ➤ Troubleshooting
En
63
Problem
Cause
Remedy
See page
The image is not displayed on TV
screen.
The HDMI cable is not securely connected.
Connect the HDMI cable properly.
The “This content can not be
viewed on your TV. Please
connect the TV which
corresponds to HDCP2.2 with
HDMI OUT of this unit.” message
is displayed on the TV screen and
the input source does not play.
The HDMI IN jack on the TV, which is connected to the HDMI OUT (ARC)
jack on the unit, is not compatible with HDCP 2.2.
Connect the unit to the HDMI IN jack that is compatible with HDCP 2.2 on a
TV.
Menu screen of this unit is not
displayed.
The input switch of TV is not set correctly.
Set the TV’s input source to this unit.
A digital or high-frequency
equipment produces noises.
The unit may be placed close to digital equipment or high-frequency
equipment.
Move the equipment away from the unit.
The HDMI control function does
not work properly.
“HDMI Control” is set to “Off”.
Set “HDMI Control” to “On”.
The HDMI control function is disabled on your TV.
Refer to the manual supplied with your TV and check the setting.
–
The number of the connected HDMI devices exceeds the limit.
Disconnect some of the HDMI devices.
–
The TV does not support the audio delay auto adjustment feature.
Adjust timing of sound output manually from “Audio Delay”.
Audio delay control function is
not effective even “Audio Delay”
is set to “Auto”.
15, 16
15
18
–
51
50
Bluetooth
Problem
Cause
Remedy
See page
Cannot make the unit paired with the Bluetooth device.
Receiving/transmitting
Receiving
Transmitting
“Bluetooth” is set to “Off”.
Set it to “On”.
57
The device does not support A2DP.
Perform paring operations with a device which supports A2DP.
71
The unit and device are too far apart.
Position the Bluetooth device so that it is less than 10 m (33 ft) from this unit
and pair the device with this unit.
There is a device (microwave oven, wireless LAN, etc.) outputs signals in
the 2.4 GHz frequency band nearby.
Move this unit away from the device that is emitting radio frequency signals.
Another Bluetooth device is connected.
Terminate current Bluetooth connection, and perform pairing with the new
device.
28
Bluetooth is not selected as the input source.
Select Bluetooth as the input source.
22
A Bluetooth adaptor, etc. that you want to pair with the unit has a password
other than “0000”.
Use a Bluetooth adaptor, etc. whose password is “0000”.
“Transmission” is set to “Off”.
Set it to “On”.
27, 29
–
27
57
APPENDIX ➤ Troubleshooting
En
64
Problem
Cause
Remedy
See page
Cannot make a Bluetooth connection.
Receiving/transmitting
Transmitting
“Bluetooth” is set to “Off”.
Set it to “On”.
57
Another Bluetooth device is connected.
The unit cannot make multiple Bluetooth connections. Terminate current
Bluetooth connection, and make connection for the desired device.
28
More than 20 devices are paired and the oldest pairing information is
deleted.
Perform pairing again. The unit can be paired with up to 20 Bluetooth
devices for receiving and transmitting audio. If a new device is successfully
paired with the unit after 20 other devices have already been paired, the
device with the earliest connecting date will have been unpaired to make
room for the new device.
27
Terminate AirPlay playback and try again to establish a connection.
30
Attempted to establish a connection during playback with AirPlay.
No sound is produced or the sound is intermittent during playback.
Receiving/transmitting
Receiving
Transmitting
The Bluetooth connection of the unit with the device is disconnected.
Perform Bluetooth connection operations again.
The unit and device are too far apart.
Move the Bluetooth device so that it is less than 10 m (33 ft) from this unit.
28
There is a device (microwave oven, wireless LAN, etc.) outputs signals in
the 2.4 GHz frequency band nearby.
Move this unit away from the device that is emitting radio frequency signals.
The device’s Bluetooth function is off.
Enable the Bluetooth function of the device.
The device’s volume is set to minimum.
Turn up the volume level on the device.
–
The device is not set to send Bluetooth audio signals to the unit.
Check that the Bluetooth function of the device is set properly.
–
Playback on the device has not been performed.
Perform playback on the device.
Transmitted audio does not play.
Play audio from the device selected with the input selector key.
27, 29
–
–
–
30
Remote control
Problem
The remote control does not work
and/or function properly.
The TV cannot be operated
using the TV Remote
Repeater function.
Remedy
See page
The wrong distance or angle.
Cause
The remote control functions within a maximum range of 6 m (20 ft) and no
more than 30 degrees off-axis from the front panel.
4
Direct sunlight or lighting (from an inverter type of fluorescent lamp, etc.) is
striking the remote control sensor of this unit.
Reposition this unit.
–
The batteries are weak.
Replace all batteries.
4
The TV Remote Repeater function is disabled.
Enable the TV Remote Repeater function.
58
A remote control using technology other than infrared is used (this unit may
not support some infrared remote controls).
The TV Remote Repeater function cannot be used. Move the unit so that it
does not block the remote control sensor on the TV, and use the TV’s remote
control to operate the TV.
–
The unit and TV are too close together or too far apart.
Move the unit away from the TV more than 5 cm (2").
12
The unit’s power cable is unplugged.
Plug in the power cable.
17
There is an object, such as a power cable, between the unit and TV.
Remove the obstacle.
–
APPENDIX ➤ Troubleshooting
En
65
Network
Problem
Cause
Remedy
See page
The network feature does not
function.
The network parameters (IP address) have not been obtained properly.
“Not connected” is displayed with
“Wireless (Wi-Fi)” configuration;
unable to connect to wireless
router (access point).
The wireless router’s MAC address filter is enabled.
“Not connected” is displayed with
“Wireless (Wi-Fi)” configuration
using the WPS function (“WPS
Button” and “PIN Code”) and
“Access Point Scan”; unable to
connect to wireless router
(access point).
The wireless router (access point) does not broadcast its SSID.
“Not connected” is displayed with
“Wireless (Wi-Fi)” configuration
using the WPS function (“WPS
Button” and “PIN Code”); unable
to connect to wireless router
(access point).
The wireless router (access point) uses WEP encryption.
Playback stops unexpectedly and
files cannot be played
continuously.
The folder contains some files that cannot be played via the unit.
The unit does not detect the PC.
The media sharing setting is not correct.
Configure the sharing setting and select the unit as a device to which music
contents are shared.
Some security software installed on your PC is blocking the access of the
unit to your PC.
Check the settings of security software installed on your PC.
The unit and PC are not in the same network.
Check the network connections and your router settings, and then connect
the unit and the PC to the same network.
–
The MAC address filter is enabled on the unit.
In “MAC Address Filter” in the setup menu, disable the MAC address filter
or specify the MAC address of your PC to allow it to access to the unit.
55
The files are not supported by the unit or the media server.
Use the file format supported by both the unit and the media server.
The files in the PC cannot be
viewed or played back.
Enable the DHCP server function on your router and set “DHCP” in the
setup menu to “On” on the unit. If you want to configure the network
parameters manually, check that you are using an IP address which is not
used by other network devices in your network.
A connection cannot be established if the wireless router’s MAC address
filter is enabled. Check wireless router (access point) settings and try a
different connection method.
55
31, 32
A connection cannot be established if the wireless router (access point) is
configured so that it does not broadcast its SSID. Check wireless router
(access point) settings and try a different connection method.
34, 35, 39
A connection cannot be established using the WPS function. Try a different
connection method.
34, 39
Delete or move files (including video or hidden files) that cannot be played
via the unit from the folder.
–
42
–
42
APPENDIX ➤ Troubleshooting
En
66
Problem
Cause
Remedy
See page
The selected Internet radio station is currently not available.
There may be a network problem at the radio station, or the service may
have been stopped. Try the station later or select another station.
–
The selected Internet radio station is currently broadcasting silence.
Some Internet radio stations broadcast silence at certain of times of the day.
Try the station later or select another station.
–
Access to the network is restricted by the firewall settings of your network
devices (such as the router).
Check the firewall settings of your network devices. The Internet radio can
be played only when it passes through the port designated by each radio
station. The port number varies depending on the radio station.
–
In “MAC Address Filter” in the setup menu, disable the MAC address filter
or specify the MAC address of your mobile device to allow it to access to
the unit.
55
The unit and mobile device are not in the same network.
Check the network connections and your router settings, and then connect
the unit and mobile device to the same network.
–
Firmware update via the
network (Network Update)
fails.
It may not be possible depending on the condition of the network.
Update the firmware via the network (Network Update) again or use a USB
flash drive.
The iPod does not recognize
the unit when using AirPlay.
The unit and iPod/mobile device are connected to different SSIDs on the
same access point.
The Internet radio cannot be
played.
The MAC address filter is enabled on the unit.
The dedicated apps for
mobile device does not detect
the unit.
Connect them to the same SSID.
–
The app installed on a mobile
device does not recognize the
unit.
The unit cannot connect to
the Internet via a wireless
router (access point).
Wireless network is not
found.
59
The wireless router (access point) is turned off.
Turn on the wireless router (access point).
–
The unit and the wireless router (access point) are too far apart.
Place the unit and the wireless router (access point) closer to each other.
–
There is an obstacle between the unit and the wireless router (access
point).
Move the unit and the wireless router (access point) in a location where
there are no obstacles between them.
–
There is a device (microwave oven, wireless LAN, etc.) outputs signals in
the 2.4 GHz frequency band nearby.
Move this unit away from the device that is emitting radio frequency signals.
Access to the network is restricted by the firewall settings of the wireless
router (access point).
Check the firewall setting of the wireless router (access point).
–
–
APPENDIX ➤ Troubleshooting
En
67
When surround effect is not enough
The unit achieves its surround sound effects by projecting sound beams which reflect
off walls. The sound beams are not reflected toward to the listening position caused by
furniture, etc., in the path of sound beams, or the room shape. In this case, the sound
may become unbalanced.
How to install YRB-100
The unit outputs sound beams according to the “Position” settings (p. 19) as shown in
the following illustrations.
Install the YRB-100 in the path of the sound beam.
shows the recommended install position.
FL: Front left
FR: Front right
SL: Surround left
SR: Surround right
Figure 1. Ideal condition
Figure 2. Surround right beam is not
being reflected because there
is no wall.
Surround right is quieter than surround
(left), or surround right is in front of its
proper location.
Position: Center
If the sound beams are not reflected toward to the listening position (figure 2), you can
adjust for this by installing the optional sound reflection board YRB-100.
Figure 3. With a sound reflection board
installed
The sound beam for surround right is
reflected correctly, and correct surround
sound effect is achieved.
Position: Left
Position: Right
• After installing the sound reflection board, refer to the YRB-100 owner’s manual to
adjust the height and angle. Playing test-tones from “Channel Level” in the setup
menu is recommended when adjusting the board (p. 50).
• By installing the board close to your listening position, you can achieve clear surround
sound positioning.
Note
• YRB-100 may not be available in some countries or regions.
• This unit does not have the function to automatically adjust sound beam angles. It is not necessary to
adjust the sound beam angles, although the procedure is described in the owner’s manual.
APPENDIX ➤ When surround effect is not enough
En
68
Basic Knowledge of Surround Sound
What is Surround Sound?
What is a Digital Sound Projector?
Yamaha’s Audio Technologies
Surround sound offers the sense of being surrounded by sounds, an
experience common in concert halls and movie theaters. This can be
achieved by surrounding the audience with numerous speakers from
which sound is output uniformly in all directions. This “surround
sound” technology immerses the listener in sound with speakers
positioned not only in front of the listener, but also behind and to the
sides of the listener, making him or her feel as if they are actually in
the situation.
For precise directional control and quality of sound reproduction,
sounds must be split into separate audio channels for output to each
speaker. Surround sound systems for regular home use (5.1-channel
speaker systems) produce surround sound using five speakers and
a subwoofer, as shown below:
A digital sound projector separately controls compact speakers
installed in orderly rows, so that optimized audio signals are output
from each speaker and synthesized as highly focused sounds
(sound beams).
This unit features many more functions based on Yamaha’s superior
audio technologies.
Typical 5.1 channel speaker system
Digital amplifier
Speaker
CINEMA DSP
Sound beams are emitted
in the target direction
Front speakers
Subwoofer
Center
speaker
Compressed Music Enhancer
This technology enhances and extends bass and treble, which tend
to be weak in digitally compressed formats such as MP3 used with
portable digital audio players and computers. This makes
compressed audio sound more musically dynamic.
With this unit, Compressed Music Enhancer is automatically
activated when audio is input from a Bluetooth device.
When these focused sounds hit a hard wall, they are reflected off of
the wall. A digital sound projector outputs sound beams from five
channels, including front (left/right), center, and surround (left/right)
channels, by reflecting these beams off of walls so that sounds reach
the listener from the appropriate direction. It features a technology
that enables true surround sound without requiring the installation of
speakers in front of, or behind, the listener.
This technology enables precise digital recreation of actual acoustic
environments found in well-known concert halls and movie theaters.
This is achieved using Yamaha’s exclusive sound field programs,
which are based on data measured in various sound fields, and with
which the amplitude, depth, and volume of sounds have been
adjusted.
Clear Voice
This technology enables clear playback of speech (dialog,
narrations, etc.) while maintaining the quality of background sound
(music, sound effects, etc.). It enhances the acoustic characteristics
of speech sounds and increases the perceived volume level.
Surround speakers
As explained above, sounds can be reproduced for a great sense of
presence by installing multiple speakers. However, this can be
difficult to do in a living room. This unit utilizes “digital sound
projector” technology to provide a realistic and engaging surround
sound experience using only a slim center unit and subwoofer.
APPENDIX ➤ Basic Knowledge of Surround Sound
En
69
Glossary
Audio/video information
Sampling Frequency and Bit Depth
These are values that represent the amount of information used to convert analog signals to digital signals.
They may be expressed as 48kHz/24bit, for example.
• Sampling Frequency
This defines the number of samples per second (sampling a finite set of discrete values in an analog
signal). The higher the sampling rate, the broader the range of frequencies that can be played back.
• Bit Depth
This defines the amplitude value of sounds when quantifying analog signals as finite values. The higher
the bit depth, the deeper sounds are reproduced.
Deep Color
This is a video technology supported by the HDMI standard. It processes RGB or YCbCr signals at bit
depths of 10, 12, or 16 bits per color, whereas conventional formats utilize only 8-bit processing, enabling
reproduction of more colors. Its gamut is comprised of a billion or more colors, while the gamuts of
conventional formats are comprised of only millions of colors or less. This broader gamut results in more
precise reproduction of colors and greater detail in darker portions.
Dolby Digital
This is a compressed audio format for 5.1 channels. It was developed by Dolby Laboratories, and is widely
used with DVD discs.
MPEG-4 AAC
An MPEG-4 audio standard. It is used for mobile telephones, portable audio players, and audio streaming
services on Internet because it allows a high compression rate of data while maintaining better audio quality
than MP3.
Pulse Code Modulation (PCM)
This technology records analog audio signals in digital form, converts analog audio signals to digital audio
signals, and transmits analog audio signals in digital form. It is the underlying technology for all digital audio
signal systems, and is widely used with CDs, Blu-ray Discs, and many other types of media as a
uncompressed audio format known as Linear PCM.
WAV
Windows standard audio file format, which defines the method of recording the digital data obtained by
converting audio signals. By default, the PCM method (no compression) is used, but you can also use other
compression methods.
WMA (Windows Media Audio)
One of the compressed digital audio formats developed by Microsoft Corporation. With psychoacoustic
technologies, this compression method achieves a high compression rate. Reportedly, it is capable of
compressing data quantity by about 1/20 maintaining a certain level of audio quality.
x.v.Color
This is a color space supported by HDMI. It has become an international standard for video and offers a
broader gamut than does the sRGB standard for expression of colors never before possible. It expands the
color space while ensuring compatibility with the sRGB standard for more natural and vivid images.
Dolby Pro Logic II
This technology converts audio signal recorded in 2 channels to 5-channel signal.
DTS Digital Surround
Network information
This is a compressed audio format for 5.1 channels developed by DTS. It is widely used with DVD discs.
SSID
FLAC
SSID (Service Set Identifier) is a name that identifies a particular wireless LAN access point.
FLAC is a file format for lossless audio data compression. FLAC is inferior to lossy compressed audio
formats in compression rate but provides higher audio quality.
Wi-Fi
HDMI
High-Definition Multimedia Interface (HDMI) is a digital audio/video interface that has become an industry
standard around the world. It is capable of transmitting both digital video and audio signals intact via a
single cable. It is also compliant with the High-bandwidth Digital Content Protection (HDCP) standard. See
http://www.hdmi.org for more information.
MP3
Wi-Fi is a technology that allows an electronic device to exchange data or connect to the Internet wirelessly
using radio waves. Wi-Fi offers the advantage of eliminating the complexity of making connections with
network cables by using wireless connection. Only products that complete Wi-Fi Alliance interoperability
tests can carry the “Wi-Fi Certified” trademark.
WPS
WPS (Wi-Fi Protected Setup) is a standard established by the Wi-Fi Alliance, which allows easy
establishment of a wireless home network.
One of the compressed digital audio format used by MPEG. With psychoacoustic technologies, this
compression method achieves a high compression rate. Reportedly, it is capable of compressing data
quantity by about 1/10 maintaining a certain level of audio quality.
APPENDIX ➤ Glossary
En
70
Specifications
Item
Amplifier
Maximum Rated
Output Power
Type
Array
speakers
Driver
Frequency
Response
Impedance
Type
Driver
Subwoofer
Decoder
Acoustic suspension type
Full range
2.8 cm (1-1/8") cone magnetic shielding type x 8
500 Hz to 22 kHz
Bluetooth version
Ver. 2.1 +EDR
Supported
protocols
A2DP, AVRCP
Supported codecs
Bluetooth
4Ω
Bass reflex type
Receiving: SBC, MPEG-4 AAC
Transmitting: SBC
Wireless output
Bluetooth Class 2
Maximum
communication
distance
10 m ([33 ft] without obstructions)
Supported content
protection method
8.5 cm (3-1/4") cone non-magnetic shielding type x 2
SCMS-T (receiving)
Impedance
6Ω
Power Supply
PCM (5.1ch), Dolby Digital, DTS Digital Surround
Power
Consumption
25 W
Supported audio
signal (TV, BD/
DVD)
Digital (Optical)
Analog
(RCA/monaural)
1 (HDMI IN)
1 (TV)
1 (ANALOG)
1 (SUBWOOFER OUT)
1
UPDATE ONLY
1
Compatible with DLNA ver. 1.5
AirPlay supported
Internet Radio
Wireless LAN
Standards
Dimensions
(W x H x D)
With antenna: 1000 x 134 x 152 mm (39-3/8" x 5-1/4" x 6")
Without antenna: 1000 x 65 x 130 mm (39-3/8" x 2-1/2" x 5-1/8")
4.7 kg (10.4 lbs)
Weight
Specifications are subject to change without notice.
IEEE802.11b/g/n
Radio Frequency
Band
2.4 GHz
WPS (Wi-Fi
Protected Setup)
Push-Button-Method, PIN Method
Security Type
Standby Power
Consumption
• HDMI Control Off, Network Standby Off............... 0.4 W
• HDMI Control On, Network Standby Off .............. 1.5 W
• HDMI Control Off, Network Standby On
(Wired/Wi-Fi/Wireless direct/Bluetooth)
........................................................... 1.9/1.8/2.0/1.9 W
• HDMI Control On, Network Standby On .............. 3.0 W
General
1 (HDMI OUT (ARC))
NETWORK
Network
Wireless LAN
(Wi-Fi)
Subwoofer 30 W x 2
Wireless Direct
U.S.A. and Canada models: AC 120 V, 60 Hz
China model: AC 220 V, 50 Hz
Taiwan model: AC 110-120 V, 50/60 Hz
Other models: AC 220-240 V, 50/60 Hz
HDMI
Other Jacks
Array speakers 2 W x 8
50 Hz to 500 Hz
Analog
(RCA/stereo)
Output Jacks
Direct connection with mobile
devices
Frequency
Response
HDMI
Input Jacks
Specifications
WEP, WPA2-PSK (AES), Mixed Mode
APPENDIX ➤ Specifications
En
71
Available signal information
❑ Repeatable video signals
HDMI signal compatibility
This unit is compatible with the following video signals.
❑ Receivable audio signals
Audio signal types
Audio signal formats
• Deep Color
Compatible media
• x.v.Color
2ch Linear PCM
2ch, 32–192 kHz, 16/20/24 bit
CD, DVD-Video, DVD-Audio, etc.
• 3D video signal
Multi-ch Linear PCM
6ch, 32–192 kHz, 16/20/24 bit
DVD-Audio, Blu-ray disc, HD DVD,
etc.
This unit is compatible with the following resolutions.
Bitstream
Dolby Digital, DTS
DVD-Video, etc.
• VGA
• 720p/60 Hz, 50 Hz
• 480i/60 Hz
• 1080i/60 Hz, 50 Hz
• Refer to the supplied instruction manuals of the input source device, and set the device appropriately.
• 480p/60 Hz
• 1080p/60 Hz, 50 Hz, 30 Hz, 25 Hz, 24 Hz
• When CPPM copy-protected DVD-Audio is played back, video and audio signals may not be output
depending on the type of the DVD player.
• 576i/50 Hz
• 4K/60 Hz, 50 Hz, 30 Hz, 25 Hz, 24 Hz
• This unit is not compatible with HDCP-incompatible HDMI or DVI devices. Refer to the supplied instruction
manuals of HDMI or DVI devices for HDCP compatibility.
• 576p/50 Hz
• To decode audio bitstream signals on this unit, set the input source device appropriately so that the device
outputs the bitstream audio signals directly (does not decode the bitstream signals on the device). Refer to
the supplied instruction manuals for details.
• The resolution of transmitted video signal varies according to specifications of the TV connected to this
unit.
Digital audio signal (optical)
Audio signal types
Audio signal formats
Compatible media
2ch Linear PCM
2ch, 32–96 kHz, 16/20/24 bit
CD, DVD-Video, DVD-Audio,
etc.
Bitstream
Dolby Digital, DTS
DVD-Video, etc.
APPENDIX ➤ Specifications
En
72
Windows™
The “
” logo and “Cinema DSP” are registered
trademarks of Yamaha Corporation.
®
The Bluetooth word mark and logos are registered trademarks
owned by Bluetooth SIG, Inc. and any use of such marks by Yamaha
Corporation is under license.
Bluetooth
Manufactured under license from Dolby Laboratories.
Dolby, Pro Logic, and the double-D symbol are trademarks of Dolby
Laboratories.
For DTS patents, see http://patents.dts.com. Manufactured under
license from DTS Licensing Limited.
DTS, the Symbol, & DTS and the Symbol together are registered
trademarks, and DTS Digital Surround is a trademark of DTS, Inc.
© DTS, Inc. All Rights Reserved.
“HDMI,” the “HDMI” logo and “High-Definition Multimedia Interface”
are trademarks, or registered trademarks of HDMI Licensing LLC.
Bluetooth is a technology for wireless communication employing the
2.4 GHz frequency band, which can be used without a license.
Windows is a registered trademark of Microsoft Corporation in the
United States and other countries.
Internet Explorer, Windows Media Audio and Windows Media Player
are either registered trademarks or trademarks of Microsoft
Corporation in the United States and/or other countries.
Android™
Android is a trademark of Google Inc.
Handling Bluetooth communications
• The 2.4 GHz band used by Bluetooth compatible devices is a radio
band shared by many types of equipment. While Bluetooth
compatible devices use a technology minimizing the influence of
other components using the same radio band, such influence may
reduce the speed or distance of communications and in some
cases interrupt communications.
• The speed of signal transfer and the distance at which
communications is possible differs according to the distance
between the communicating devices, the presence of obstacles,
radio wave conditions and type of equipment.
• Yamaha does not guarantee all wireless connections between this
unit and devices compatible with Bluetooth function.
iTunes, AirPlay, iPad, iPhone, iPod, and iPod touch are trademarks of
Apple Inc., registered in the U.S. and other countries.
“x.v.Color” is a trademark of Sony Corporation.
MusicCast is a trademark or registered trademark of Yamaha
Corporation.
The Wi-Fi CERTIFIED Logo is a certification mark of Wi-Fi Alliance.
The Wi-Fi Protected Setup Identifier Mark is a certification mark of
Wi-Fi Alliance.
Wi-Fi, Wi-Fi Alliance, Wi-Fi CERTIFIED, Wi-Fi Protected Setup, WPA
and WPA2 are trademark or registered trademark of Wi-Fi Alliance.
“Blu-ray Disc™”, “Blu-ray™”, and the logos are trademarks of the
Blue-ray Disc Association
Explanations regarding GPL
This product utilizes GPL/LGPL open-source software in some
sections. You have the right to obtain, duplicate, modify, and
redistribute this open-source code only. For information on GPL/
LGPL open source software, how to obtain it, and the GPL/LGPL
license, refer to the Yamaha Corporation website
(http://download.yamaha.com/sourcecodes/musiccast/).
Bluetooth protocol stack (Blue SDK)
DLNA™ and DLNA CERTIFIED™ are trademarks or registered
trademarks of Digital Living Network Alliance. All rights reserved.
Unauthorized use is strictly prohibited.
Copyright 1999-2014 OpenSynergy GmbH
All rights reserved. All unpublished rights reserved.
APPENDIX ➤ Specifications
En
73
Index
Numerics
2-channel playback
3D video 15
4K video 15
5.1-channel 69
23
A
Access point scan 35
AirPlay 45
Antenna 9, 13
App HOME THEATER CONTROLLER (WLAN) 6
App MusicCAST CONTROLLER 6
Audio assign 51
Audio information 24
Audio input signal information 53
Audio Return Channel (ARC) 15
Auto power standby 52
Delay between video and audio output 50
DHCP 31, 55
DLNA 42
DNS server (P) 54, 55
DNS server (S) 54, 55
Dolby Digital 70
Dolby Pro Logic II 70
DTS Digital Surround 70
Dynamic range 50
E
Encryption method 34, 37, 39, 40
F
File format (computers/NAS) 42
Firmware update 56, 59
Firmware version 53
B
H
Bit depth 70
Bluetooth 26
Bluetooth (receiving audio) 27
Bluetooth (transmitting audio) 29
Bluetooth function (on/off) 57
Brightness of indicators 52
HDCP version 2.2 15
HDMI 70
HDMI audio out 51
HDMI cable 15, 16
HDMI control 20, 51
I
C
Channel level 50
CINEMA DSP 23
Compressed Music Enhancer 69
D
Deep Color 70
Default gateway 54, 55
Indicators 7, 8
Information (audio/video/firmware) 53
Initialization 61
Installation (Mounting the unit on a wall) 14
Installation position of the unit 19
Internet radio 43
IP address 54, 55
iPod music (AirPlay) 45
iTunes music (AirPlay) 45
L
Language (OSD)
19
M
MAC address 54
MAC address filter 31, 55
Manual setting (wireless connection)
Media sharing setup 42
Menu display 18
Mobile device music 47
MP3 70
MPEG-4 AAC 70
37
N
Network information 54
Network name 56
Network standby 56
O
OSD language
52
P
Pairing 27, 29
Power cable 9, 17
Pulse Code Modulation (PCM)
70
R
Reflection board 68
Remote control 4, 10
Remote control sensor 7
S
Sampling frequency
70
APPENDIX
➤ Index
En
74
Security 54
Security key 38, 40
Security software 31
Setup menu 48
Sharing Wi-Fi settings (iOS device) 18, 33
SSID 34, 36, 54, 70
Stereo playback 23
Subnet mask 31, 54
Subwoofer volume 22, 24
Surround mode 23
Surround sound effect 19
T
Test sounds 50
TV 18, 20, 22
TV Remote Repeater 58
V
Video input signal information 53
Volume 22
Volume for each channel 24, 50
vTuner 43
vTuner ID 54
W
Wi-Fi 70
Wired network connections 17, 31
Wireless Direct 40
Wireless network 32
WPS 70
WPS PIN code 39
X
x.v.Color 70
APPENDIX
➤ Index
En
75
© 2015 Yamaha Corporation YH260A0/EN