1
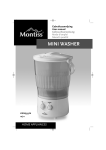
User manual
ANTIBACTERIAL HAND VAC WITH UV LIGHT
CVH5743M
02/12
HOME APPLIANCES
1) Press the lever down. 2) Insert the vacuum cleaner while holding the lever down. 3) Once the vacuum cleaner is inserted release the lever and press the vacuum cleaner down until you hear a “CLICK”. Step 1 Step 2 Step 3 1. Do not drop, throw or smash the product. 2. Do not project UV rays to human eyes or skin directly. In addition, do not project UV light into the eyes of animals. 2
TABLE OF CONTENTS SAFETY REGULATIONS 4 THE PRODUCT 5 DESCRIPTION OF THE PARTS 5 PRODUCT FEATURES 5 USE OF THE DEVICE 6 CARE AND MAINTENANCE 8 TROUBLE SHOOTING 12 13 DISPOSAL OF YOUR APPLIANCE TECHNICAL DETAILS 13 GUARANTEE 14 SERVICE FORM 15 3
SAFETY REGULATIONS 1. 2. 3. 4. 5. 6. 7. 8. 9. 10. 11. 12. 13. 14. 15. 16. 17. 18. 19. 20. 21. 22. 23. 24. 25. 26. 27. 28. 29. 30. 4
Before using the device, please read this user manual carefully. Do not use the appliance if the plug, the mains cord or other components are damaged. Check the device regularly for damage. Do not use the device if the power cord or plug is damaged, or when any component of the device has been dropped or damaged. If the power cord is damaged, you must have it replaced by Home‐tek Europe Limited, a service centre authorized by Home‐tek Europe Limited or a similarly qualified person in order to avoid safety hazards. Repairs should be carried out by a qualified technician only. Improper repairs may damage the unit and endanger the user. Before use, check whether the mains voltage corresponds with rating label of the device. This appliance is not intended for use by persons (including children) with reduced physical, sensory or mental capabilities, or lack of experience and knowledge, unless they have been given supervision or instruction regarding the use of the appliance by a person responsible for their safety. Keep the device out of reach of children. Careful supervision is required if the device is used near children. Never allow children to use the device. Only use the device for its intended purpose as described in this user manual. Do NOT use the unit outside or on wet surfaces. Do NOT touch the unit or the plug with wet hands. Never immerse the product into water or any other liquid. Keep the vacuum cleaner and the accessories indoors and in a dry place. Do not use the appliance if any of the openings are blocked. Keep the device free of dust, lint, hair and anything that may reduce the air flow. Apart from replacing the UV‐C bulb this appliance contains no user serviceable parts. There are a number of safety switches on the bottom of the unit. These switches prevent the UV lamp activating when the product is removed from the cleaning surface. The UV lamp will reactivate when placed back on the cleaning surface. For your safety, do not try to manually override the safety switch. Do not touch the UV‐C bulb directly after use as it will be hot and may burn. Do not pull the plug from the wall socket by its power cord. To pull the plug from the wall socket, take the plug and carefully pull it from the wall socket. Do not leave the device unattended when the plug is in the wall socket. Remove the plug from the wall socket when you are not using the device or when carrying out maintenance. Turn the power switch to "off'” before you pull the plug from the wall socket or before placing the plug in the wall socket. Do not pull or carry the unit by its power cord and do not use the power cord as a handle. Do not close the door on the power cord or pull it around sharp edges or corners. Do not use any accessories that are not recommended by the supplier, especially not accessories that have not been supplied with the device. Always switch the product off before you attach or remove the accessories. This unit is designed for vacuuming dry material. Do NOT try to suck up liquids or moist materials of any sort as there will be a high risk of electric shocks. Do NOT vacuum anything burning or smoking, like cigarettes, matches or hot ashes. Do not vacuum hot liquids, acids and solvents. Do not vacuum any sharp objects. Do not use any harsh cleaning chemicals to clean the unit as this may lead to discolouring of the unit. Keep the unit away from heat sources such as radiators, to prevent deformation of the plastic parts. THE PRODUCT DESCRIPTION OF THE PARTS 1. 2. 3. 4. 5. 6. 7. 8. Handheld vacuum cleaner On/off switch Lever (to lock handheld unit) Base unit Verification windows UV lamp Lamp protection grill UV safety switches PRODUCT FEATURES •
•
•
•
•
Sterilising function of the UV‐light kills 99.9% of all bacteria. An ideal device to remove bacteria from your mattress and eliminate mites from your home. Perfect for cleaning and treatment of the fabric of your sofa’s, curtains and carpets. Can be used to thoroughly clean cat and dog baskets. Ideal for allergy sufferers. 5
USE OF THE DEVICE UV‐C and vacuum function combined Press the lever down. Insert the vacuum cleaner while holding the lever down. Once the vacuum cleaner is inserted release the lever and press the vacuum cleaner down until you hear a “CLICK”, see pictures below. Step 1 Step 2 Step 3 6
•
•
•
•
Switch on the unit using the on/off switch (Fig. 1). The UV lamp will come on when the UV safety switch is in contact with the surface. This can be checked through the verification windows on top of the unit. Caution: prolonged exposure to UV light can be harmful! Do not override the safety switches manually. Caution: do not attempt to pick up large or sharp objects as these may cause damage to the vacuum cleaner (Fig. 2). Fine dust such as plaster and cement must not be picked up as they will block the filter. Using the hand vacuum only •
To remove the cleaner from the base press the lever at the rear and lift the handle. •
Certain tasks may require the use of the nozzle or brush attachments. These tools are stored in the base unit (Fig. 3, 4 and 5). Guidelines for cleaning your mattress and/or bed •
In order for the UV‐C light to be fully effective against dust mite and bacteria, it is important that the area is exposed to UV‐C light for adequate time. Please adhere to the following guidelines. 1. It is best to start in one corner of the bed. 2. Press the unit flat against the mattress. 3. In order for the UV‐C light to activate, all sensors must be placed on the mattress. 4. Ensure the unit is moved in a smooth and steady motion. 5. To ensure every part of the mattress is covered follow a set plan such as detailed in diagrams A and B. 7
1. 2. 3. 4. 5. 6. With double beds it is advised to clean one side at a time. Move the UV‐C vacuum at a speed less than 20 seconds per meter and repeat 3 times. It is advisable, to clean both sides of the mattress, if possible. We suggest a similar method for bedding such as duvets and pillows. Used Mattresses – It is best to clean on a daily basis for the first 7 days and than once a month thereafter. New Mattresses – it will be sufficient to clean once a month only. If cleaning carpets follow a similar method. CARE AND MAINTENANCE Dust container and filter •
Allergy sufferers – When emptying any vacuum cleaner it is difficult to avoid exposure to dust. To minimize this risk of exposure please ensure that you encase the dust container in a large bag to empty it and close the bag as tightly as possible round the container. Remove the container and close the bag as tightly and quickly as possible and dispose of this immediately. It is advisable to wear disposable clothes and a face mask while emptying the cleaner. If at all possible, ask a non allergy sufferer to empty the dust container when required. •
It is important to ensure that the dust container is emptied and the filter cleaned regularly. If it is not done the cleaner will lose its effectiveness. It is best to empty and clean after each use. •
Disconnect the cleaner from the supply and separate it from the base section by pressing the lever. •
Press the dust container lock button to release the dust container from the vacuum (See Fig. 6). 8
•
•
•
•
Pull the filter assembly outwards and empty the dust from the container into a waste bin (See Fig. 7) Unlock the outer microfiber filter by twisting to the right. The HEPA filter should pull away freely from the main casing. The filter should be cleaned every time the dust container is emptied by tapping them on the side of the dust bin to release any trapped dust. Reassemble in reverse order. •
Cleaning the UV‐C lamp •
During use dust will settle on the protection cover which may reduce the effectiveness of the UV‐C light. It is therefore important to clean this periodically. •
Detach the protection grill on the bottom of the base unit by pulling the 2 clips up with your thumbs (see picture below). •
•
Use a soft lint free cloth to wipe any dust or dirt away from the protective tube surrounding the UV‐C bulb. Replace the protection grill by inserting the 3 pins into the openings on the front side of the device. 2) After inserting these pins push the grill down at the side of the 2 clips until it locks in its place, you will hear a click (see picture below). 9
Step 1 Step 2 Step 3 Replacing the UV‐C lamp •
Before replacing the lamp ensure sure the vacuum cleaner is switched off and unplugged at the mains. •
The standard life span of the bulb under normal use will be 2 to 3 years. Replacement can be obtained at www.muppa.nl. •
Detach the protection grill on the bottom of the base unit (see detailed instruction in “Cleaning the UV‐C lamp”). •
Unscrew the screws surrounding the protective housing, using a screw driver. 10
•
Using a small pair of pliers at one end of the bulb (the silver part) rotate the bulb through 90° and remove the protective tube from the bulb. 11
•
•
•
Insert the new bulb into the protective tube and insert the tube back into the device and rotate by 90° to secure. Replace the protective housing and tighten all screws. Replace the protection grill and clip back into place (see detailed instruction in “Cleaning the UV‐C lamp”). Safety switches •
The UV‐C light will only be activated when the vacuum cleaner is in full contact with the surface being cleaned. •
On the bottom of the base unit there is a pressure sensitive wheel (Fig.9) that is activated when placed in contact with a surface that needs to be cleaned. •
There are also another 3 sensors that must also be activated for the UV‐C lamp to work (Fig. 9). •
Do not manually override the pressure sensitive wheel or cover the sensors. TROUBLE SHOOTING Symptom Poor suction UV light not activated No function 12
Possible cause Blocked filter Full dust container Vacuum cleaner not fitted to base unit correctly Safety switch not depressed or sensors not activated Plug fuse failed Solution Remove and clean the filter Empty dust container Ensure the cleaner is securely locked in position Sensor switches only operate when the base is level and in contact with the surface being cleaned Check fuse by replacement with one of the same value DISPOSAL OF YOUR APPLIANCE 1. 2. 3. 4. When this crossed‐out wheeled bin symbol is attached to a product it means the product is covered by the European Directive 2002/96/EC. All electrical and electronic products should be disposed of separately from the municipal waste stream via designated collection facilities appointed by the government or the local authorities. The correct disposal of your old appliance will help prevent potential negative consequences for the environment and human health. For more detailed information about disposal of your appliance, please contact your city office, waste disposal service or the shop where you purchased the product. TECHNICAL DETAILS Model number CVH5743M Power 400W Nominal voltage 230V~ Nominal frequency 50Hz UV‐C lamp power 8W UV‐C wavelength 253.7nm Montiss is a registered brand name of: Van den Berg Products BV IJzerwerf 10‐12 6641 TK Beuningen The Netherlands www.vdbergproducts.com 13
GUARANTEE This guarantee covers your unit for a period of 24 months from the date of purchase for service and replacement of parts, on the condition that you have used the machine correctly as described in the user manual. This guarantee does not exclude national legislation that may exist in the country of purchase in regards to warranty regulations. When you make a claim under this guarantee, you must submit the original invoice or receipt with clear mention of the date of purchase, name of retailer and the description and model number of the appliance. You are advised to keep these documents in a safe place. This device is intended for domestic use only. Damage and / or malfunctions as the result of industrial or commercial use are excluded from the warranty. The guarantee for this appliances expires if: •
The original invoice or receipt has in one way or another been changed or made illegible; •
The model or serial number on the product has been changed, removed, deleted or made illegible; •
Repairs have been executed by unauthorized repair workshops or persons who are not authorized to do so; •
The damage is the result of an external cause, such as fire damage, water damage, transport damage, atmospheric discharges, insufficient or improper maintenance; •
The appliance has been operated in another country than for which originally designed, approved, released and produced, as well as defects occurred as the result of such modifications; •
The appliance has not been used according to the guidelines and directions in the user manual supplied with the product. In the unlikely event your appliance is not functioning well or shows any defect, please contact your retailer. To avoid any inconvenience, we advise you to read the user manual carefully before contacting them. 14
SERVICE FORM Please note we only accept warranties that have been filled out clearly and completely. Kindly check and ensure all details are filled out in the form below in order for us to attend to your complaint as soon as possible. THE PRODUCT: Article number: CVH5743M Article description: Montiss Antibacterial Hand Vac with UV Light Place of purchase:............................................................................................................................. Date of purchase (as per proof of purchase):.................................................................................. YOUR CONTACT DETAILS: Name:................................................................................................................................................. Address:.............................................................................................................................................. Postal code:........................................................................................................................................ City:.................................................................................................................................................... Telephone:.......................................................................................................................................... E‐mail:................................................................................................................................................. DESCRIPTION OF THE PROBLEM: ............................................................................................................................................................ ............................................................................................................................................................ ............................................................................................................................................................ ............................................................................................................................................................ ............................................................................................................................................................ ............................................................................................................................................................ Please note we only accept warranties that have been filled out clearly and completely. Kindly check and ensure all details are filled out in the form below in order for us to attend to your complaint as soon as possible. You can send this form, together with the proof of purchase, to: Home‐tek Europe Limited Roe Head House, Far Common Road Mirfield, West Yorkshire England WF14 0DQ. Tel: 08452 100888 Email: [email protected] 15