1
Lock ‘n Go
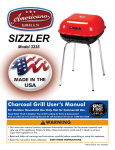
Model 2010
Charcoal Grill User’s Manual
For Outdoor Household Use Only. Not for Commercial Use.
Need Help? Need to Register Your Grill? Looking for Parts & Accessories?
Visit us online at www.onefiregrills.com Or call Customer Service at 1-800-251-7558
!
WARNING
• This instruction manual contains important information necessary for the proper assembly and
safe use of this appliance. Failure to follow these instructions could result in death or serious
injury from explosion or fire.
• Read and follow all warnings and instructions carefully before assembling or using this appliance.
• Keep this manual for future reference. SAVE THESE INSTRUCTIONS.
P/N 03.5175.0X Rev. 20140521
2
!
DANGER
CARBON MONOXIDE HAZARD
This appliance can produce carbon monoxide, an odorless toxic gas.
Using it in an enclosed space can kill you. Never use this appliance in
an enclosed space, such as a camper, tent, car, or home. This appliance
is not intended for and should never be used as a heater.
Meco Corporation strives to be a quality supplier of consumer products. If we omitted any parts
needed for assembly, or you need troubleshooting information, please contact us using our toll
free number or visit our website.
It is important to register your grill and retain your receipt.
1-800-251-7558
8 am - 4:30 pm E.S.T. Monday - Friday
1-423-639-1171 (Telephone)
1-423-639-2570 (Fax)
www.onefiregrills.com
!
Consumer Service Department
MECO CORPORATION
1500 Industrial Road
Greeneville, TN 37745 USA
WARNING
To reduce the risk of serious bodily injury or death:
· Never use a barbecue grill unless all parts of the unit are firmly in place and the grill is stable.
· Never use gasoline, kerosene, alcohol or other volatile fluids as a starter. They can explode.
· Do not use charcoal grill as a space heater.
· Do not use aerosols or store flammable liquids or materials near this charcoal grill. Cap lighter fluid
immediately and place a safe distance from the grill.
· Instant light briquettes already have the starter blended in. Do not use lighter fluid, an electric starter,
solid, or metal chimney starters.
· Do not add more instant light briquettes once the fire has been lit. To avoid flame-ups, unpleasant
fumes and odors, add regular charcoal briquettes if needed.
· Once the barbecue grill has been lit, do not touch the charcoal briquettes/wood chunks to see if they
are hot.
· Never add lighter fluid to already hot or warm coals.
· Do not close Hood on flaming charcoal. If closed and re-opened, the flames could leap out and burn.
· Do not wear loose clothing (example: hanging shirt tails, clothing with frills, etc.) around a charcoal
grill while in use or hot.
· Do not lean your body over the charcoal grill when lighting it, while it is hot or is in use.
· Do not touch hot surfaces. Use heat resistant gloves, long-handled tongs, or barbecue mitts at all
times since the grill will become very hot.
· Do not move a charcoal grill when in use or hot.
· Do not allow children to operate or play near a charcoal grill. Keep animals and bystanders out of the
grill area. Do not leave grill unattended.
· Allow grill to cool before handling parts or cleaning.
· To avoid a fire, allow coals to burn out completely and let the ashes cool for 48 hours before disposing of them.
· Do not attempt to extinguish a grease fire with water or other liquids. Have an ABC fire extinguisher
nearby.
· Always have an ABC fire extinguisher, baking soda, a bucket of sand or a garden hose ready in case
of an uncontrolled fire.
WARNING: Combustion by-products produced when using this product contain chemicals known to
the State of California to cause cancer, birth defects, or other reproductive harm.
This product contains chemicals known to the State of California to cause cancer and/or birth defects
or other reproductive harm.
3
USING CHARCOAL
To reduce the risk of serious injury or death from explosion or fire:
• Be careful when burning charcoal to avoid getting burned from flame, heat or hot coals.
• Be aware of the wind blown sparks.
• The use of alcohol, prescription or non-prescription drugs could impair the consumer’s ability to properly assemble
or safely operate this appliance.
SELECTING A LOCATION
To reduce the risk of serious injury or death from explosion or fire:
• Locate your grill an open area away from buildings, dry leaves, or brush, and at least 10 feet away from your
house or building.
• Always make sure the grill is on a level, stable surface and not tilted toward the front or back.
• Do not use the grill in a garage, breezeway, carport, porch, high traffic area, on or under any surface that can
catch fire.
• Do not use a charcoal grill indoors, on recreational vehicles, or on boats.
STARTING A FIRE
To reduce the risk of serious injury or death from explosion or fire:
• Make certain you leave the Hood off until the flames have died down.
• Should electrically operated starters be used, be sure they are properly grounded according to local codes.
Electrical cords should be placed away from walkways or traffic areas.
• Do not use lighter fluid, an electric fire starter solid, or chimney starters with instant light charcoal. This could
cause flame-ups, unpleasant fumes and odors.
• Use barbecue mitts and long handled tongs to spread out the hot charcoal.
• If there is any type of fire that threatens either personal safety or property, call the fire department.
COOKING ON YOUR GRILL
• To reduce risk of burns from the hot air and steam trapped inside, open the Hood carefully when grill roasting.
• Do not grasp the Cooking Grid with your hands while it is hot. Use barbecue mitts for handling.
• If flare-ups occur, close the Vents for at least one minute to stop flare-up. Do not use water.
END OF COOKING SESSION
To reduce the risk of serious injury or death:
• Allow the grill to cool completely before cleaning, transporting or storing.
• Empty and clean the Fire Bowl after each cooking session so excessive grease and ashes do not accumulate. See
Cleaning instructions on next page.
• Store your charcoal grill in a cool dry place.
• Do not store charcoal and lighter fluid indoors.
• Store out of the reach of children.
• Do not store additional charcoal and lighter fluid under or near the grill while it is hot.
• To avoid a fire or explosion, do not store charcoal or lighter fluid near a heat source.
• Always cap the lighter fluid when not in use.
4
Preparation for Assembly
TOOLS NEEDED: Phillips head Screwdriver and a 3/8” open end wrench or a pair of pliers.
LAY OUT AND IDENTIFY ALL PARTS. DO NOT DISCARD CARTON OR PACKING UNTIL YOUR GRILL IS COMPLETELY
ASSEMBLED. READ ALL ASSEMBLY AND SAFETY INSTRUCTIONS IN THE OWNER’S MANUAL BEFORE YOU START.
If you need replacement parts, refer to the Parts Illustrations to find the exact parts you need. If you have any questions
or need help, contact Customer Service at 1-800-251-7558 or go to www.onefiregrills.com. Be sure to have the grill
model number. If you need a replacement part under warranty, a proof of purchase will be necessary. You will
be asked to forward your proof of purchase via e-mail or to fax your proof of purchase to 423-639-2570 and reference
your model number. It is important to register your grill and retain your receipt.
15
Part# Description Quantity
1 Leg
3
2 10-24 x 5/8” Bolt
8
3 Lock Bracket
3
4 10-24 Lock Nut
8
5 Bowl
1
6 Cover Plate
1
7 Acorn Nut
3
8 Reflector Pan
1
9 Cooking Grid
1
10 10-24 x 1” Bolt
3
11 Hood
1
12 Vent Damper
2
13 Handle Bracket
1
14 #8 x 5/8” Screw
2
15 Wood Handle
1
2
14
13
12
4
11
7
4
10
9
2
1
8
3
4
7
6
6
7
4
2
5
3
10
12
2
13
15
14
1
5
Step 1
Bowl Assembly
Attach Leg (1) to Bowl (5) by hooking the tabs on the Leg into the two slots under the oval hole in the side of the Bowl.
Rotate the Leg up until the top hole in the Leg aligns with top hole in the side of the Bowl. Place a Lock Bracket (3)
against inside of Bowl with the lip at the bottom of the Bracket fitting into the wide Bowl slot between the round and
oval holes. Insert 10-24 x 5/8” Bolt (2) through the hole in the Leg, Bowl and Lock Bracket. Fasten in place with 10-24
Lock Nut (4) and tighten. Repeat for other two Legs. Place Bowl/Leg assembly on a flat work surface.
Step 2
Insert Bolt 10-24 x 5/8” (2) through the hole next to the rectangular opening in the side of the Bowl then through oval
hole in Cover plate (6). Fasten with Acorn Nut (7) but do not tighten. Slide to left and hook lip inside Bowl. Tighten
Acorn Nut.
Step 3
Install Charcoal Pan (8) into Bowl by sliding it under the Lock Bracket bolts and dropping to the bottom of the Bowl.
The straight edge of the Charcoal Pan should be on the opposite side from the cover plate. Install cooking Grid (9) by
placing it on the Leg/Lock Bracket bolts that extend inside the Bowl.
Step 4
Hood Assembly
Insert 10-24 x 1” Bolt (10), from the outside, through a hole in the rim of the Hood (11). Hold bolt head firmly against
the outside of the Hood rim and fasten in place witha 10-24 Lock Nut (4). Tighten securely. (Note: Smooth bolt head
does not need screwdriver. This Bolt acts as the lock when engaged in the Lock Bracket on the Bowl.) Repeat for other
two Bolts and Nuts around Hood lip.
Step 5
Insert a 10-24 x 5/8” Bolt (2) through hole in Vent Damper (12) then through the small hole nearest the 2” vent hole in
the top of the Hood. Fasten with an Acorn Nut from inside hood. Tighten the Acorn Nut so that the Vent Damper fits
snug against the Hood but can still rotate over large the 2” vent hole. Repeat for other Vent Damper.
Step 6
Insert a 10-24 x 5/8” Bolt (2) through one bottom hole in the Handle Bracket (13) then through the remaining small
holes in the top of the Hood. Fasten with a Lock Nut from inside hood. Repeat for other side of handle bracket.
Tighten both sides securely.
Step 7
Place the Wood Handle (15) between the upright legs of the Handle Bracket so the holes in the wood handle line up
with the holes in the Handle Bracket. Fasten in place with one #8 x 5/8” Screw (14) in each side. Your Lock ‘n Go grill
is now ready for use but FIRST READ IMPORTANT SAFEGUARDS and Cooking Instructions on the following pages.
LOCK
NOTE ABOUT THE LOCK N’ GO FEATURE
To lock the hood to the bowl for transportation or storage,
place the Hood on the Bowl and rotate it clockwise until
the Bolts in the rim of the Hood engage completely in the
Lock Brackets attached to the Bowl. To unlock the Hood,
simple rotate it counterclockwise.
ALWAYS BE SURE THAT THE HOOD IS SECURELY LOCKED
AT ALL BRACKETS BEFORE LIFTING THE GRILL.
UNLOCK
6
STARTING A CHARCOAL FIRE IN YOUR OneFire LOCK ‘N GO GRILL
STEP 1. Use a high quality hardwood charcoal to make sure you get a good fire. Charcoal briquettes made from
maple, oak, birch or elm woods will burn clean with very little smoke and without unpleasant odors.
STEP 2. Remove the hood.
STEP 3. Remove the Cooking Grid. Line the bottom of the Bowl with heavy duty aluminum foil.
STEP 4. Place about two pounds of charcoal (25-30 briquettes) in the bottom of the grill.
STEP 5. Make a pyramid shaped stack in the center of the Bowl and pour on charcoal lighter fluid following the instructions on the container.
Warning: Do not use lighter fluid if you are using instant light briquettes or an electric fire starter.
STEP 6. Let the lighter fluid soak in for approximately one minute.
STEP 7. Carefully light the charcoal and let it burn for 20 to 30 minutes or until it is covered with a light gray ash.
NOTE: For a hot fire in a hurry, use a fan or a bellows to create extra air movement over the charcoal. Be careful not
to blow the ashes out of the grill.
STEP 8. Use long-handled tongs to arrange the charcoal in a checkerboard pattern. Leave about one-half inch of
space between each piece of charcoal. This will help you to avoid flare-up from the meat drippings and will give you
more even heat for grilling.
COOKING ON YOUR OneFire LOCK ‘N GO GRILL
1. ADJUSTABLE DRAFT...Leave the hood vents open for the most heat, close them to lower the heat. It takes a few
minutes for the charcoal to react to the vent adjustment.
2. SMOKING...For true smoke flavor, use chips or chunks of wood from nut or fruit trees such as hickory, walnut,
cherry or apple. Soak the chips in water overnight (or at least 2 hours before cooking) so they will not burn so quickly
when you put them on the charcoal.
After you get the fire started and charcoal spread out, scatter the soaked chips on top of the hot charcoal using tongs.
Spray the Cooking Grid with cooking spray so food does not stick. Place the meat on the grid, close the hood, and
adjust the vents for the desired heat.
5. FLARE-UPS...Close the vents for at least one minute to stop flare-ups. You do not have to use water.
6. PUTTING OUT THE CHARCOAL...Save your charcoal to use again by closing the hood vents. The charcoal will go
out in a little while and the next time you cook, you will need to add less new charcoal.
CARE OF YOUR OneFire LOCK ‘N GO GRILL
For easier cleaning and before each time you cook... line the bottom of the fire bowl with heavy duty or a double layer
of aluminum foil.
Ashes...Remove the ashes as soon as possible after each time you cook but wait until the charcoal has cooled. Pour out
the ashes or wrap them in the aluminum foil from the bottom of the Bowl. Never put hot ashes in a garbage container.
You can save any leftover charcoal for use next time you cook. Use a garden hose to wash out accumulated grease and
ashes. Let the grill dry before closing and storing.
Cooking grid...Use a detergent and hot water solution just as you would for any cooking equipment. A stiff brush may
be helpful in removing heavy grease deposits.
Hood and Bowl...Dampen a cloth in hot water and a detergent solution. Then, wipe both the inside and outside of the
hood and bowl. CAUTION: Be careful around sharp edges of the grill. Wipe all areas dry before storing. Note: Do not
use oven cleaner or abrasive cleaner on your grill. This may cause damage to the paint finish.
Storage...After you have cleaned your grill, store it in a clean, dry area. Leave all the vents open so moisture does not
collect inside causing rust. If you store your grill outside, close the top vent to keep the rain out.
If rust appears on your grill, clean and buff the affected area with steel wool. Touch up bare metal with a high heat
paint specified for barbeque grills. Follow paint manufacturer’s instructions for use.
7
8