1
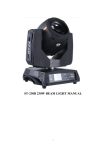
ENGLISH OPERATION MANUAL OPERATION MANUAL ® Thank you for buying this Briteq product. To take full advantage of all possibilities and for your own safety, please read these operating instructions very carefully before you start using this unit. FEATURES This unit is radio-interference suppressed. This product meets the requirements of the current European and national guidelines. Conformity has been established and the relevant statements and documents have been deposited by the manufacturer. This device was designed to produce decorative effect lighting and is used in light show systems. An incredible powerful moving beam projector based on the legendary Philips MSD Platinum 5R lamp! The advanced optics guarantee an incredibly bright beam with excellent specs: Brightness : 200.000lux @ 10m and 60.000lux @ 20m! Zoom: 1° ~ 3.8° DMX-controlled electronic focus Frost filter 17 sharp gobos + open 14 carefully selected diachronic colors + open Very fast mechanical dimmer/shutter Different strobe functions Remote lamp on/off control The very fast pan/tilt movements (540°/270°) assure very dynamic show programming. 8 or 16bit resolution pan/tilt resolution with position correction. The matrix LCD-display assures easy navigation in the different setup menus Battery backup makes it possible to configure the machine while the machine is not connected to the mains. Different DMX channel modes for maximum flexibility Easy firmware updates keep your machine up-to-date at all times (optional firmware updater needed) Remote DMX-addressing Neutrik 3pin & 5pin in/outputs for maximum flexibility in a professional environment Neutrik Powercon in/outputs: up to 15 units can be daisy chained for easy installation BEFORE USE Before you start using this unit, please check if there’s no transportation damage. Should there be any, do not use the device and consult your dealer first. Important: This device left our factory in perfect condition and well packaged. It is absolutely necessary for the user to strictly follow the safety instructions and warnings in this user manual. Any damage caused by mishandling is not subject to warranty. The dealer will not accept responsibility for any resulting defects or problems caused by disregarding this user manual. Keep this booklet in a safe place for future consultation. If you sell the fixture, be sure to add this user manual. Check the contents: Check that the carton contains the following items: Operating instructions BTX-BEAM 5R 2x omega Brackets Powercon cable BRITEQ® 1/18 BTX-BEAM 5R ENGLISH OPERATION MANUAL SAFETY INSTRUCTIONS: CAUTION: To reduce the risk of electric shock, do not remove the top cover. No user-serviceable parts inside. Refer servicing to qualified service personnel only. The lightning flash with arrowhead symbol within the equilateral triangle is intended to alert the use or the presence of un-insulated “dangerous voltage” within the product’s enclosure that may be of sufficient magnitude to constitute a risk of electric shock. The exclamation point within the equilateral triangle is intended to alert the user to the presence of important operation and maintenance (servicing) instructions in the literature accompanying this appliance. This symbol means: indoor use only This symbol means: Read instructions This symbol means: Safety Class I appliance This symbol determines: the minimum distance from lighted objects. The minimum distance between light-output and the illuminated surface must be more than 12 meters The device is not suitable for direct mounting on normally flammable surfaces. (suitable only for mounting on non-combustible surfaces) To protect the environment, please try to recycle the packing material as much as possible. A new light effect sometimes causes some unwanted smoke and/or smell. This is normal and disappears after some minutes. To prevent fire or shock hazard, do not expose this appliance to rain or moisture. To avoid condensation to be formed inside, allow the unit to adapt to the surrounding temperatures when bringing it into a warm room after transport. Condense sometimes prevents the unit from working at full performance or may even cause damages. This unit is for indoor use only. Don’t place metal objects or spill liquid inside the unit. Electric shock or malfunction may result. If a foreign object enters the unit, immediately disconnect the mains power. Locate the fixture in a well ventilated spot, away from any flammable materials and/or liquids. The fixture must be fixed at least 50cm from surrounding walls. Don’t cover any ventilation openings as this may result in overheating. Prevent use in dusty environments and clean the unit regularly. Keep the unit away from children. Inexperienced persons should not operate this device. Maximum save ambient temperature is 40°C. Don’t use this unit at higher ambient temperatures. The units’ surface temperature may reach up to 85°C. Don’t touch the housing with bare hands during its operation. Make sure the area below the installation place is free from unwanted persons during rigging, de-rigging and servicing. Allow the device about 10 minutes to cool down before replacing the bulb or start servicing. Always unplug the unit when it is not used for a longer time or before replacing the bulb or start servicing. The electrical installation should be carried out by qualified personal only, according to the regulations for electrical and mechanical safety in your country. Check that the available voltage is not higher than the one stated on the rear panel of the unit. The power cord should always be in perfect condition. Switch the unit immediately off when the power cord is squashed or damaged. It must be replaced by the manufacturer, its service agent or similarly qualified persons in order to avoid a hazard. Never let the power-cord come into contact with other cables! This fixture must be earthed in order to comply with safety regulations. Don’t connect the unit to any dimmer pack. Always use an appropriate and certified safety cable when installing the unit. In order to prevent electric shock, do not open the cover. Apart from the lamp and mains fuse there are no user serviceable parts inside. Never repair a fuse or bypass the fuse holder. Always replace a damaged fuse with a fuse of the same type and electrical specifications! In the event of serious operating problems, stop using the fixture and contact your dealer immediately. BRITEQ® 2/18 BTX-BEAM 5R ENGLISH OPERATION MANUAL The housing and the lenses must be replaced if they are visibly damaged. Please use the original packing when the device is to be transported. Due to safety reasons it is prohibited to make unauthorized modifications to the unit. Important: Never look directly into the light source! Don’t use the effect in the presence of persons suffering from epilepsy. DESCRIPTION: 1. Control panel 2. Head 3. Arm 4. Tilt arm self-locking handle 5. pan self-locking handle 6. Handle 7. Base Caution: The head and arm must be unlocked before operation! Tilt mechanism locks and releases every 45° Pan mechanism locks and releases every 90° Control Panel Front view (control panel) Rear view (connections) LEDs (left side of the LCD display): POWER On Power on BATTERY On Battery status DMX On DMX signal Buttons (right side of the LCD display): MENU To enter, move back or leave the menu UP Move up in the menu DOWN Move down in the menu ENTER Confirm the desired function Button Shortcuts: There are 4 different shortcuts to access specific functions without the need for using the setup menu. While the screen displays the standard window (see right), the user can press the following button combinations: Lamp on: Press MENU and UP together during 3s. Lamp off: Press MENU and DOWN together during 3s. Reset Unit: Press MENU and ENTER together during 3s. Reverse display: Press UP and DOWN together. Connections DMX input/output: For DMX 512 operation, use good DMX cable with 3 or 5-pin XLR-connectors to link the units together PowerCon out/input: The Powercon in/out connectors allow the user to daisy chain up to 15 units on the same 20A power line. While connected to a 16A power line, only 12 units can be connected. Power Switch: The BTX-BEAM 5R uses a circuit 6A-breaker instead of a usual fuse, if the circuit breaker shuts down for any reason, the user can simply put the switch back on. BRITEQ® 3/18 BTX-BEAM 5R ENGLISH OPERATION MANUAL LAMP (RE)PLACEMENT In case of replacement of the lamp or maintenance, do not open the fixture within 10 minutes until the unit cools down after switching off. Always unplug the unit before servicing! Always use the same type of spare parts (bulbs, fuses, etc.) When replacing parts, please only genuine spare parts. Switch off the unit and unplug the mains cable. Wait for about 10 minutes until the unit has been cooled down. Use a screwdriver to unscrew the screws to open the cover of the fixture.(Fig. 1) Remove the fan (Fig. 2) Inside you will see the lamp socket. Remove the lamp socket gently out of the lamp compartment. Pull out the cable (Fig.3) Replace the cable to the new lamp, insert the lamp gently (Fig. 4) Adjust the hotspot using a screw (Fig. 4) Attention! Check the label on the backside of the device or see the technical specifications in this manual to know which lamp should be used. Never install lamps with a higher wattage! Lamps with higher wattage generate temperatures the device was not designed for. If the device uses a lamp transformer, it will burn due to current overload. Don’t touch the bulb with bare hands! This drastically shortens the lifespan of the lamp. If you touched the lamp, clean it with a cloth and a little denatured alcohol. Wipe the lamp off before installing. Be sure that the wires don’t touch the lamp. Reinstall the fan Close the cover Done Fig.1 Use 1/4 Turn to loosen the four screws and open the cover. Fig.3 Take away the old lamp. BRITEQ® Fig.2 Use 1/4 Turn to loosen the screws and take out the fan. Fig.4 Unplug all the connect wires over the lamp and (wear anti-static gloves) take on the lamp. Put the new lamp in place. 4/18 BTX-BEAM 5R ENGLISH OPERATION MANUAL OVERHEAD RIGGING Important: The installation must be carried out by qualified service personal only. Improper installation can result in serious injuries and/or damage to property. Overhead rigging requires extensive experience! Working load limits should be respected, certified installation materials should be used, the installed device should be inspected regularly for safety. Make sure the area below the installation place is free from unwanted persons during rigging, de-rigging and servicing. Locate the fixture in a well ventilated spot, far away from any flammable materials and/or liquids. The fixture must be fixed at least 50cm from surrounding walls. The device should be installed out of reach of people and outside areas where persons may walk by or be seated. Before rigging make sure that the installation area can hold a minimum point load of 10times the device’s weight. Always use a certified safety cable that can hold 12times the weight of the device when installing the unit. This secondary safety attachment should be installed in a way that no part of the installation can drop more than 20cm if the main attachment fails. The device should be well fixed; a free-swinging mounting is dangerous and may not be considered! Don’t cover any ventilation openings as this may result in overheating. The operator has to make sure that the safety-relating and machine-technical installations are approved by an expert before using them for the first time. The installations should be inspected every year by a skilled person to be sure that safety is still optimal. Installation: 1. Fix the Truss hooks (1) to the Omega clamps with screw and locking nut. 2. Fasten the omega clamps (2) on the bottom of the base by inserting quick-lock fasteners (3) into the holes of the base and tighten fully clockwise. 3. Hang the fixture on the truss (4) using the hooks and fasten the screws (5). Fasten the safety cable (6) through the bottom of the base and over the support. ELECTRICAL INSTALLATION + ADDRESSING Important: The electrical installation should be carried out by qualified personal only, according to the regulations for electrical and mechanical safety in your country. Electrical installation for two or more units in DMX-mode: The DMX-protocol is a widely used high speed signal to control intelligent light equipment. You need to “daisy chain” your DMX controller and all the connected units with a good quality balanced cable. Both XLR-3pin and XLR-5pin connectors are used, however XLR-3pin is more popular because these cables are compatible with balanced audio cables. Pin layout XLR-3pin: Pin1 = GND ~ Pin2 = Negative signal (-) ~ Pin3 = Positive signal (+) Pin layout XLR-5pin: Pin1 = GND ~ Pin2 = Negative signal (-) ~ Pin3 = Positive signal (+) ~ Pins4+5 not used. To prevent strange behavior on the dmx units, due to interferences, you must use a 90Ω to 120Ω terminator at the end of the chain. Never use Y-splitter cables, this simply won’t work! Make sure that all units are connected to the mains. Each unit in the chain needs to have its proper starting address so it knows which BRITEQ® 5/18 BTX-BEAM 5R ENGLISH OPERATION MANUAL commands from the controller it has to decode. In the next section you will learn how to set the DMX addresses. OPERATING INSTRUCTIONS Do not switch the unit on and off in short time intervals as this reduces the lamp life. Always unplug the unit when it is not used for a longer time or before replacing the bulb and or making the service. In the event of serious operating problems, stop using the fixture and contact your dealer immediately. Important: Never look directly into the light source! Don’t use the effect in the presence of persons suffering from epilepsy. Every time you turn on the unit, it will run built-in program to reset all motors to their home position, the display will show the Briteq logo during the startup, you may hear some noises for about 20 seconds. It will show warning sign if one of the checks fails during the reset and you can press the MENU button to view the error information. After that, the unit will be ready to receive DMX signal and the standard display will show as below on the right. Standard display explained: Base 30°C Shows the temperature of the CPU in the base 001 Shows the DMX start address of the unit Md.1 19Ch. Shows the currently selected channel mode (19ch mode on the display) SETUP MENU - Main functions Turn on the unit, press MENU button to enter into menu mode, press UP and DOWN buttons until the required function is shown on the display. Select the function by pressing the ENTER button. Use UP and DOWN buttons to choose the submenu, press the ENTER button to store/confirm and automatically return to the last menu. Press MENU button or leave the unit unused for one minute to exit menu mode. BATTERY BACKUP FUNCTION: While the unit is disconnected from mains power, press UP button for one minute to enter into menu mode. Press MENU button or let the unit unused during one minute to exit. BRITEQ® 6/18 BTX-BEAM 5R ENGLISH OPERATION MANUAL The main functions are shown in the menu structure below, the grayed boxes are the default settings: BRITEQ® 7/18 BTX-BEAM 5R ENGLISH OPERATION MANUAL DMX Functions Enter menu mode, select DMX Functions, press ENTER button to confirm, use UP and DOWN buttons to select DMX Address, DMX Channel Mode or View DMX Value DMX Address (DMX512 address setting) Select DMX Address, press ENTER button to confirm, the current address will blink on the display, use UP and DOWN button to adjust the address from 1 to 512, press ENTER button to store. Press the MENU button to go back to the last menu, if you leave the unit unused for one minute it will automatically exit from menu mode. Example: Unit 1 Unit 2 Unit 3 Unit 4 Channel mode Address Address Address Address 19 channels 1 20 39 58 DMX Channel Mode To select DMX Channel Mode, press ENTER button to confirm, the current channel mode will blink on the display, use UP and DOWN button to select Mode1 (19 channels mode),… Press ENTER button to confirm. Press the MENU button to go back to the last menu, if you leave the unit unused for one minute it will automatically exit from menu mode. View DMX Value Select View DMX Value, press ENTER button to confirm. Channel function and its value will show on the display, use UP and DOWN button to view other DMX values. Press the MENU button to go back to the last menu, if you leave the unit unused for one minute it will automatically exit from menu mode. BRITEQ® 8/18 BTX-BEAM 5R ENGLISH OPERATION MANUAL Fixture Setting Enter menu mode, select Fixture Setting, press ENTER button to confirm, use UP and DOWN buttons to select Pan Inverse, Tile Inverse, BL.O. P/T Moving, BL.O. Color Change or BL.O. Gobo Change. Pan Inverse Select Pan Inverse, press ENTER button to confirm, current mode will blink on the display, use UP and DOWN buttons to select No (normal) or Yes (pan inverse), press ENTER button to store. Press the MENU button to go back to the last menu, if you leave the unit unused for one minute it will automatically exit from menu mode. Tilt Inverse Select Tilt Inverse, press ENTER button to confirm, current mode will blink on the display, use UP and DOWN buttons to select No (normal) or Yes (tilt inverse), press ENTER button to store. Press the MENU button to go back to the last menu, if you leave the unit unused for one minute it will automatically exit from menu mode. P/T Feedback (pan/tilt Feedback) Select P/T Feedback, press ENTER button to confirm, current mode will blink on the display, press UP/DOWN buttons to select No (Pan or tilt’s position will not feedback while they are out of step.) or Yes (pan/tilt will feedback if they are out of step.), press ENTER button to store. Press the MENU button to go back to the last menu, if you leave the unit unused for one minute it will automatically exit from menu mode. BL.O. P/T Moving (Blackout while pan/tilt moving) Select BL.O. P/T Moving, Press ENTER button to confirm, current mode will blink on the display, use UP and DOWN buttons to select No (normal while pan/tilt are moving) or Yes (blackout while pan/tilt are moving), press ENTER button to store. Press the MENU button to go back to the last menu, if you leave the unit unused for one minute it will automatically exit from menu mode. BL.O. Color Change (Blackout while change color) Select BL.O. Color Change, press ENTER button to confirm, current mode will blink on the display, use UP and DOWN buttons to select No (normal while the color is changing) or Yes (blackout while the color is changing), press ENTER button to store. Press the MENU button to go back to the last menu, if you leave the unit unused for one minute it will automatically exit from menu mode. BL.O. Gobo Change (Blackout while change gobo) Select BL.O. Gobo Change, press ENTER button to confirm, current mode will blink on the display, use UP and DOWN buttons to select No (normal while gobo is changing) or Yes (blackout while gobo is changing), press ENTER button to store. Press the MENU button to go back to the last menu, if you leave the unit unused for one minute it will automatically exit from menu mode. Lamp Setting Enter menu mode, select Fixture Setting, press ENTER button to confirm, use UP and DOWN buttons to select On/Off, State/Power on, Off Via DMX, On if DMX on, Off if DMX off, Cooling Mode, Ignition Delay or Low Power Delay On/Off (Turn on/off the lamp) Select On/Off, press ENTER button to confirm, current mode will blink on the display, use UP and DOWN buttons to select On (lamp on) or Off (lamp off), press ENTER button to store. Press the MENU button to go back to the last menu, if you leave the unit unused for one minute it will automatically exit from menu mode. State/Power On (Lamp state while power on) Select State/Power On, press ENTER button to confirm, current mode will blink on the display, use UP and DOWN buttons to select On (Lamp strike during the startup reset) or Off (Lamp is off at the startup), press ENTER button to store. Press MENU button back to the last menu or let the unit idle one minute to exit menu mode. Off Via DMX (Turn off the unit via DMX controller) Select Off Via DMX, press ENTER button to confirm, current mode will blink on the display, use UP and DOWN buttons to select Yes (enable turn off lamp via DMX) or No (disable turn off lamp via DMX), press BRITEQ® 9/18 BTX-BEAM 5R ENGLISH OPERATION MANUAL ENTER button to store. Press the MENU button to go back to the last menu, if you leave the unit unused for one minute it will automatically exit from menu mode. PS: When you operate the unit via DMX controller, set the value of channel “special function” to “lamp off”, after 5 seconds the lamp will be switched off. On If DMX On (Lamp turns on when DMX signal is detected) Select On If DMX On, press ENTER button to confirm, current mode will blink on the display, use UP and DOWN buttons to select Yes (Lamp turns on when DMX signal is detected) or No (keep the default setting), press ENTER button to store. Press the MENU button to go back to the last menu, if you leave the unit unused for one minute it will automatically exit from menu mode (If the lamp is off via DMX signal, you can reconnect the DMX controller to switch the lamp on). Off If DMX Off (Lamp turns off when DMX signal is off) Select Off If DMX Off, press ENTER button to confirm, current mode will blink on the display, use UP and DOWN buttons to select Yes (Lamp turns off when DMX signal is cut off), press ENTER button to store. Press the MENU button to go back to the last menu, if you leave the unit unused for one minute it will automatically exit from menu mode. Ignition Delay (Delay time between power on and lamp on) Select Ignition Delay, press ENTER button to confirm, current mode will blink on the display, use UP and DOWN buttons to adjust the delay time from 0S to 255S, press ENTER button to store. Press the MENU button to go back to the last menu, if you leave the unit unused for one minute it will automatically exit from menu mode. Low Power Delay (Delay time between reduce lamp power and shutting off the unit) Select Low Power Delay, press ENTER button to confirm, current mode will blink on the display, use UP and DOWN buttons to adjust the delay time from 0s to 255s, press ENTER button to store. Press the MENU button to go back to the last menu, if you leave the unit unused for one minute it will automatically exit from menu mode. (If you set the low power delay time to 3s, the lamp will run in half power 3 seconds after the shutter is totally closed) Display Setting Enter menu mode, select Display Setting, press ENTER button to confirm, use UP and DOWN buttons to select Display Inverse, Backlight Auto Off, Backlight Intensity or Temperature unit and Display Warning. Display Inverse Select Display Inverse, press ENTER button to confirm, current mode will blink on the display, use UP and DOWN buttons to select No (normal display) or Yes (inverse display), press ENTER button to store. Press the MENU button to go back to the last menu, if you leave the unit unused for one minute it will automatically exit from menu mode. Backlight Auto Off Select Backlight Auto Off, press ENTER button to confirm, current mode will blink on the display, use UP and DOWN buttons to select No (display always on) or Yes (display goes off one minute after exiting menu mode), press ENTER button to store. Press the MENU button to go back to the last menu, if you leave the unit unused for one minute it will automatically exit from menu mode. Backlight Intensity Select Backlight Intensity, press ENTER button to confirm, current mode will blink on the display, use UP and DOWN buttons to adjust backlight intensity from 1 (dark) to 10 (bright), press ENTER button to store. Press the MENU button to go back to the last menu, if you leave the unit unused for one minute it will automatically exit from menu mode. Temperature Unit Select Temperature Unit, press ENTER button to confirm, current mode will blink on the display, use UP and DOWN buttons to select C° or F°, press ENTER button to store. Press the MENU button to go back to the last menu, if you leave the unit unused for one minute it will automatically exit from menu mode. BRITEQ® 10/18 BTX-BEAM 5R ENGLISH OPERATION MANUAL Display Warning Select Display Warning, press ENTER button to confirm, current mode will blink on the display, use UP and DOWN buttons to select No (display does not show the warning when the unit goes wrong) or Yes (display will show the warning when unit goes wrong), press ENTER button to store. Press the MENU button to go back to the last menu, if you leave the unit unused for one minute it will automatically exit from menu mode. Fixture Test Enter menu mode, select Fixture Test, press ENTER button to confirm, use UP and DOWN buttons to select Auto Test or Manual Test Auto Test Select Auto Test, press ENTER button to confirm, the unit will run built-in programs to automatically test pan, tilt, color, gobo, gobo rotation, shutter, dimmer, prism, prism rotation, frost, focus, and lamp on/off. Press MENU button back to the last menu or exit menu mode after auto test. Manual Test Select Manual Test, press ENTER button to confirm, the current channel will show on the display, use Up and DOWN buttons to select channel, press ENTER button to confirm, then use UP and DOWN buttons to adjust the value, press ENTER button to store, the fixture will run as the channel value indicates. Press the MENU button to go back to the last menu, if you leave the unit unused for one minute it will automatically exit from menu mode. (All channel values will become 0 after exiting Manual Test menu) Fixture Information Enter menu mode, select Fixture Information, press ENTER button to confirm, use UP and DOWN buttons to select Fixture Use Time, Lamp On Time or Firmware Version. Fixture Use Time Select Fixture Use Time, press ENTER button to confirm, fixture use time will show on the display, press MENU button to exit. Lamp On Time Select Lamp On Time, press ENTER button to confirm, lamp on time will show on the display, press ENTER button to confirm, use UP and DOWN buttons to select Exit or Reset Time, press ENTER button to confirm. Press the MENU button to go back to the last menu, if you leave the unit unused for one minute it will automatically exit from menu mode. Firmware Version Select Firmware Version, press ENTER button to confirm, firmware version will show on the display, press MENU button back to exit. Reset Functions Enter menu mode, select Reset Function, press ENTER button to confirm, use UP and DOWN buttons to select Pan/Tilt, Shutter/Prism, Color, Gobo, Zoom/ Focus/ Frost or All. Pan/Tilt (Reset Pan/Tilt) Select Pan/Tilt, press ENTER button to confirm, use UP and DOWN buttons to select Yes (the unit will run built-in program to reset pan and tilt to their home positions) or No, press ENTER button to store. Press the MENU button to go back to the last menu, if you leave the unit unused for one minute it will automatically exit from menu mode. Shutter/Prism (Reset Shutter/ Prism) Select Shutter//Prism, press ENTER button to confirm, use UP and DOWN buttons to select Yes (the unit will run built-in program to reset shutter and Prism to their home positions) or No, press ENTER button to store. Press MENU button to exit. Color (Reset Color) Select Color, press ENTER button to confirm, use UP and DOWN buttons to select Yes (the unit will run built-in program to reset color to their home positions) or No, press ENTER button to store. Press MENU button to exit. BRITEQ® 11/18 BTX-BEAM 5R ENGLISH OPERATION MANUAL Gobo (Reset GOBO) Select Gobo, press ENTER button to confirm, use UP and DOWN buttons to select Yes (the unit will run built-in program to reset GOBO wheel to their home positions) or No, press ENTER button to store. Press MENU button to exit. Zoom /Frost/Focus (Reset Zoom /Frost/Focus) Select Zoom /Frost/Focus, press ENTER button to confirm, use UP and DOWN buttons to select Yes (the unit will run built-in program to reset zoom, frost and frost to their home positions) or No, and press ENTER button to store. Press MENU button to exit. All (Reset All) Select All, press ENTER button to confirm, use UP and DOWN buttons to select Yes (the unit will run built-in program to reset all motors to their home positions) or No, press ENTER button to store. Press MENU button to exit. Special Functions Enter menu mode, select Special Functions, press ENTER button to confirm, use UP and DOWN buttons to select Fixture Maintenance or Factory Setting. Fixture Maintenance Select Fixture Maintenance, press ENTER button to confirm, use UP and DOWN buttons to select Interval or Remain Time. Interval Select Interval, press ENTER button to confirm, the interval time will show on the display. Press MENU button to exit. Remain Time Select Remain Time, press ENTER button to confirm, the remaining time will show on the display, press ENTER button to confirm, use UP and DOWN buttons to select Exit or Reset time, press MENU button to exit. Factory Setting Select Factory Setting, press ENTER button to confirm, the fixture will reset to factory settings and exit menu mode. Home Position Adjustment Press MENU button into menu mode, then press ENTER button for about 3 seconds into offset mode to adjust the home position. Select the function by ENTER button. Use UP and DOWN button to choose the submenu, press the ENTER button to store and automatically return to the last menu. Press MENU button to exit. BRITEQ® 12/18 BTX-BEAM 5R ENGLISH OPERATION MANUAL Pan Enter offset mode, Select Pan, press ENTER button to confirm, the current position will blink on the display, use UP and DOWN buttons to offset the value from -128 to 127, press ENTER button to store. Press MENU button to exit. Tilt Enter offset mode, Select Tilt, press ENTER button to confirm, the current position will blink on the display, use UP and DOWN buttons to offset the value from -128 to 127, press ENTER button to store. Press MENU button to exit. Shutter Enter offset mode, Select Shutter, press ENTER button to confirm, the current position will blink on the display, use UP and DOWN buttons to offset the value from 0 to 255, press ENTER button to store. Press MENU button to exit. Color Enter offset mode, Select Color, press ENTER button to confirm, the current position will blink on the display, use UP and DOWN buttons to offset the value from -128 to 127, press ENTER button to store. Press MENU button to exit. Gobo Enter offset mode, Select Gobo, press ENTER button to confirm, the current position will blink on the display, use UP and DOWN buttons to offset the value from -128 to 127, press ENTER button to store. Press MENU button to exit. Prism Enter offset mode, Select Prism, press ENTER button to confirm, the current position will blink on the display, use UP and DOWN buttons to offset the value from 0 to 255, press ENTER button to store. Press MENU button to exit. R-Prism Enter offset mode, Select R-Prism, press ENTER button to confirm, the current position will blink on the display, use UP and DOWN buttons to offset the value from -128 to 127, press ENTER button to store. Press MENU button to exit. Zoom Enter offset mode, Select Zoom, press ENTER button to confirm, the current position will blink on the display, use UP and DOWN buttons to offset the value from 0 to 255, press ENTER button to store. Press MENU button to exit. Focus Enter offset mode, Select Focus, press ENTER button to confirm, the current position will blink on the display, use UP and DOWN buttons to offset the value from 0 to 255, press ENTER button to store. Press MENU button to exit. Frost Enter offset mode, Select Frost, press ENTER button to confirm, the current position will blink on the display, use UP and DOWN buttons to offset the value from 0 to 255, press ENTER button to store. Press MENU button to exit. BRITEQ® 13/18 BTX-BEAM 5R ENGLISH OPERATION MANUAL 19 CHANNEL MODE: BTX-BEAM5R currently has 1 DMX-mode: 19CH mode. Other, additional DMX-modes can be uploaded if needed. BRITEQ® 14/18 BTX-BEAM 5R ENGLISH BRITEQ® OPERATION MANUAL 15/18 BTX-BEAM 5R ENGLISH OPERATION MANUAL MAINTENANCE Make sure the area below the installation place is free from unwanted persons during servicing. Switch off the unit, unplug the mains cable and wait until the unit has been cooled down. During inspection the following points should be checked: All screws used for installing the device and any of its parts should be tightly fastened and may not be corroded. Housings, fixations and installations spots (ceiling, truss, suspensions) should be totally free from any deformation. When an optical lens is visibly damaged due to cracks or deep scratches, it must be replaced. The mains cables must be in impeccable condition and should be replaced immediately when even a small problem is detected. In order to protect the device from overheat the cooling fans (if any) and ventilation openings should be cleaned monthly. The interior of the device should be cleaned annually using a vacuum cleaner or air-jet. The cleaning of internal and external optical lenses and/or mirrors must be carried out periodically to optimize light output. Cleaning frequency depends on the environment in which the fixture operates: damp, smoky or particularly dirty surroundings can cause greater accumulation of dirt on the unit’s optics. Clean with a soft cloth using normal glass cleaning products. Always dry the parts carefully. Clean the external optics at least once every 30 days. Clean the internal optics at least every 90 days. Attention: We strongly recommend internal cleaning to be carried out by qualified personnel! TROUBLESHOOTING The following points are a few common problems that may occur during operation. Here are some suggestions for easy troubleshooting: A. The unit does not work, no light, the fan does not work 1. Check the power cable and the circuit breaker 2. Measure the mains voltage on the main connector. 3. Check the power on LED B. Not responding to DMX controller 1. DMX LED should be on. If not, check DMX connectors, cables to see if they are linked properly. 2. If the DMX LED is on and no response to the DMX controller, check the DMX address and the channel mode. 3. If you have intermittent DMX signal problems, check the pins on connectors or on the PCB of the unit or the previous one. 4. Try to use another DMX controller. 5. Check to see if the DMX cables run near or alongside high voltage cables, this may cause damages or interferences to DMX interface circuit. C. One of the channels is not working well 1. The cable between the motor and the PCB should be defect. 2. The motor’s drive IC on the PCB might be defect. D. The lamp is cutting out intermittently 1. The lamp is not working well. Check if the mains voltage is either too high or too low. 2. Internal temperature may be too high. Check if the replacement of fan is needed on the head. E. If The pan belt is broken 1. Turn off the mains power. 2. Loosen the screws (A),open the cover (B). 3. Loosen the screws (C). 4. Unplug all the connect wires over the belt. 5. Change a new belt (D), put the belt around the 6. axis gear and motor gear. BRITEQ® 16/18 BTX-BEAM 5R ENGLISH OPERATION MANUAL 7. Plug all the connect wires back upon the belt. 8. Tighten all the screws. F. If The tilt belt is broken 1. Turn off the mains power. 2. Loosen all the screws (A) and open the right arm cover (B). 3. Loosen the screws (C) that fix the bridge. 4. Change a new belt (E). Please adjust the tension of the belt properly. Note: do not fix the belt too tight as it is can easily break. 5. Reverse the procedures from step 3 to 2. ERROR LIST Lamp Startup Fail It appears when there is no lamp or some wires are damaged. Temperature Sense Error The temperature sensor is defect. Lamp Too Hot, Power Off The lamp temperature is higher than 110°c. Check if the unit is properly ventilated, fans or temperature sensor may be damaged. Lamp Too Hot, Low Power The temperature is higher than 105°c. the unit will run on a low power level. Maintenance Fixture The maintenance remaining time has passed, please carry out maintenance and reset the timer in the menu. Lamp On Over 700 Hour The lamp life is over 700 hours, please replace the lamp. Memory Initial Fail The memory IC is defect. CPU-B Error, CPU-C Error, CPU-D Error One of the CPU boards or some wires are defect. Pan Reset Error, Pan Encode Error, Tilt Reset Error, Tilt Encode Error, Shutter Reset Fail, Dimmer Reset Fail, Color Reset Fail, , Gobo Reset Fail, and Frost Reset Fail They may appear when turning on or resetting the unit or some parts such as board P.C are damaged. Please contact a qualified person for maintenance. BRITEQ® 17/18 BTX-BEAM 5R ENGLISH OPERATION MANUAL SPECIFICATIONS Mains Input: Power consumption: Fuse: Sound Control: DMX connections: Movement: Dimmer/Shutter: Color wheel Gobo wheel Effect: Zoom: Focus: DMX channels used: Lamp: Size: Weight: AC 100~240V, 50Hz 290 Watt 250V 6A circuit breaker none 3pin & 5pin XLR male / female Pan: 540° Tilt: 270° Pan/Tilt position lock for transporting protection. Mechanical dimmer 14 fixed colors 17 fixed gobos 8 facet rotating prism & Frost From 1°~ 3.8° Electronic 19 channels Philips MSD Platinium 5R (8000K) 415 x 344 x 497.5 mm 19 kg Every information is subject to change without prior notice You can download the latest version of this user manual on our website: www.beglec.com BRITEQ® 18/18 BTX-BEAM 5R