Download Hobby King Apache OSD User Manual
Transcript
Hobby King Apache OSD User Manual
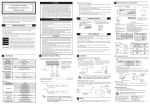
1 Hardware Connection:
A Port Group A:
1.1 Audio/Video Port:
It’s for connecting the camera.
1.2 GPS/USB Module Port:
It’s for connecting GPS module or USB data module, but they cannot connect
the main board meantime.
to
1. 4 Other Sensor Module Ports:
We supply four couples of ports for connecting the
other OSD modules, they have the same function: Any port
can connect to our other supplied modules.. OSD main
board can automatically detect the module type.
1. 5 OSD Power Module Port:
It’s a must part for AEO OSD, it must be connected to supply power to all the OSD parts, and meantime it
can sensor the real current Amps and Volt. of the power battery.
B Port Group B:
1.6 Aux. Voltage Detection Port:
There’re two modes for this port.
When it’s set auxiliary voltage detection mode, pls use the cables in Figure
1.12 to connect and measure the power. For example, video transmitter and
camera usually use the male JST to supply power.
When it’s set RSSI mode, connect receiver RSSI output to this port, pls notice the red is positive and black is negative.
Other Ports
TF Card Slot
Slot the TF can record the flight data. The TF card supports max.8GB.
The card has to be pre-formatted with FAT32 before using..
2.OSD In-flight Interface Screen & Setting Menu:
Entire Contents © Copyright 2011
1
V1.03
3. How to Use:
Before Powering-Up the System
All connection must be made before powering up the system. Ensure the GPS antenna is facing up and not
blocked from the sky. Make sure all components are securely fixed in the plane. The GPS must be kept away
from all electronic components, especially the electrical speed controller, video transmitter and wireless mo dem transceiver.
Before Taking-Off
Connect battery for the on-board video system if there is any, turn on the ground video receiver and display
system. Turn the RC transmitter on, make sure the throttle stick is pulled at the low position. and then connect
the power battery to power up the OSD system. If there is any separated battery pack for RC receiver, power
the RC receiver up before the power battery is connected. Place the plane at the taking off position, and keep
it to be stationary until the position is locked by the GPS, and the HDOP reading is not more than 3. It may
take some time for the position to be locked, and the HDOP reading is dropped to 3 in the poor weather condition. It is not recommended to take off if the HDOP reading is more than 3.
After Taking-Off
You may take off the plane after a standard range check for the radio system and the plane condition before
the flight. Do please prepare to return to the take off position and land the plane when:
- The power battery is low
- The video battery is low
- The video link is not stable
- The RSSI reading is low
- The HDOP reading is close to 3
- The GPS signal quality indication is low
And the plane must be landed as soon as possible when:
- The video link is not stable
- The RSSI warning is indicated
- Any GPS failure is indicated
- The HDOP reading is suddenly increased for more than 3
After Landing
After landing, you may press the red reset button on the infrared remote controller while the OSD system is in
the in-flight interface screen to reset the Relative Altitude, Maximum Altitude Reached, Distance to Home,
Home Direction and also the Timer (if it is set to the “Take-Off Start” mode) back to zero. In the same time,
the home position recorded in the system will be replaced by the current location coordinate.
Thanks for using our products!
Entire Contents © Copyright 2011
2
V1.03


