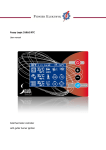
1
testo 350 · Combustion & Emission Analyzer Instruction manual 2 1 Contents 1 Contents ...................................................................................................3 2 Safety and the environment....................................................................7 3 2.1. About this document ........................................................................7 2.2. Ensure safety...................................................................................8 2.3. Protecting the environment..............................................................9 Specifications ........................................................................................10 3.1. Use ................................................................................................10 3.2. Technical data ...............................................................................10 3.2.1. 3.2.2. 3.2.3. 3.2.4. 3.2.5. 3.2.6. 3.2.7. 3.2.8. 4 Examinations and licenses.............................................................................10 Bluetooth module (option)..............................................................................10 Declaration of Conformity ..............................................................................12 Measurement ranges and resolution..............................................................13 Accuracy and response time..........................................................................14 Measurement range extension for individual slot (option) ..............................16 Fresh air valve (option) ..................................................................................16 Other instrument data ....................................................................................17 Product description...............................................................................20 4.1. Control unit ....................................................................................20 4.1.1. 4.1.2. 4.1.3. 4.1.4. 4.1.5. 4.2. Overview........................................................................................................20 Keyboard .......................................................................................................21 Display...........................................................................................................22 Connections/interfaces ..................................................................................23 Menu guidance for control unit.......................................................................24 Analyzer box..................................................................................25 4.2.1. 4.2.2. 4.2.3. 4.2.4. 4.2.5. 4.2.6. Overview........................................................................................................25 Status display ................................................................................................26 Connections/interfaces ..................................................................................27 Functions/instrument options .........................................................................28 Menu guidance analyzer box .........................................................................28 Modular flue gas probe ..................................................................................30 3 5 First steps.............................................................................................. 31 5.1. Commissioning ............................................................................. 31 5.2. Getting to know the analyzer......................................................... 31 5.2.1. Power supply, batteries/rechargeable batteries ............................................. 31 5.2.1.1. Recharging the rech. batt. of the Control unit .................................. 31 5.2.1.2. Charging the rech. batt. of the analyzer box .................................... 32 5.2.1.3. Battery care..................................................................................... 32 5.2.1.4. AC Power supply............................................................................. 32 5.2.2. Connecting probes / sensors ......................................................................... 33 5.2.3. Occupying the trigger input ............................................................................ 34 5.2.4. Connecting system components .................................................................... 34 5.2.4.1. Connection using contact strip......................................................... 34 5.2.4.2. Connection using a Data bus cable (accessory part to a bus system)35 5.2.4.3. Connection via Bluetooth (option).................................................... 38 5.2.5. Switching on .................................................................................................. 39 5.2.6. Calling up a function ...................................................................................... 40 5.2.7. Entering values.............................................................................................. 40 5.2.8. Printing / saving data ..................................................................................... 42 5.2.9. Search for meras. boxes................................................................................ 42 5.2.10. Confirming an error message ........................................................................ 42 5.2.11. Switching off .................................................................................................. 43 5.3. Folders / Measurement sites......................................................... 43 5.4. Saved Measurements ................................................................... 46 5.5. Instrument diagnosis ..................................................................... 47 5.5.1. 5.5.2. 5.5.3. 5.5.4. 6 Using the analyzer ................................................................................ 49 6.1. Settings ......................................................................................... 49 6.1.1. 6.1.2. 4 Error diagnosis .............................................................................................. 48 Gas path check.............................................................................................. 48 Sensor diagnosis ........................................................................................... 48 Instrument information ................................................................................... 48 Assigning the right hand function key ............................................................ 49 Instrument settings ........................................................................................ 49 6.1.2.1. Dilution ............................................................................................ 49 6.1.2.2. Measurement view .......................................................................... 51 6.1.2.3. Units................................................................................................ 53 6.1.2.4. Date / time....................................................................................... 54 6.1.2.5. Power options.................................................................................. 54 6.1.2.6. Display brightness ........................................................................... 54 6.1.2.7. Printer ............................................................................................. 55 6.1.2.8. Bluetooth ......................................................................................... 55 6.1.2.9. Language ........................................................................................ 56 6.1.2.10. Country version ............................................................................... 56 6.1.2.11. Password protection ........................................................................ 57 6.1.2.12. Analog input .................................................................................... 58 6.1.2.13. Data bus.......................................................................................... 58 6.1.3. 6.1.4. 6.1.5. 6.2. Measuring......................................................................................68 6.2.1. 6.2.2. 6.2.3. 6.3. 7 Fuels & Test option ........................................................................................59 Sensor settings ..............................................................................................59 6.1.4.1. NO2 addition ....................................................................................60 6.1.4.2. CxHy-Sensor ...................................................................................60 6.1.4.3. Sensor protection ............................................................................61 6.1.4.4. Calibration / adjustment ...................................................................61 6.1.4.5. ppmh counter ..................................................................................64 6.1.4.6. Calibration data ...............................................................................65 6.1.4.7. Negative value.................................................................................65 Programs .......................................................................................................66 Preparing for measurement ...........................................................................68 Using the flue gas probe ................................................................................70 Applications ...................................................................................................70 6.2.3.1. Flue Gas, Flue Gas + m/s, Flue Gas + ∆p, Program for all analyzer boxes, Exhaust Gas before + after catalyst .....................................72 6.2.3.2. Draft-Measurement..........................................................................74 6.2.3.3. Smoke number ................................................................................75 6.2.3.4. Gas flow calc. ..................................................................................75 6.2.3.5. Oil flow calc. ....................................................................................76 Analog outputs...............................................................................77 Maintenance ...........................................................................................79 7.1. Changing the rechargeable battery ...............................................79 7.2. Cleaning the flue gas analyzer ......................................................80 7.3. Replacing/retrofitting sensors ........................................................80 7.4. Replacing the filter for NO sensors................................................83 7.5. Recalibrating sensors ....................................................................83 7.6. Cleaning the modular flue gas probe.............................................84 7.7. Replacing probe pre-filter ..............................................................84 7.8. Changing the thermocouple...........................................................84 7.9. Condensate trap/condensate container.........................................85 7.10. Checking/replacing the dirt filter ....................................................86 7.11. Cleaning/replacing the pump .........................................................87 7.11.1. 7.11.2. 7.11.3. 7.11.4. Cleaning the main gas pump .........................................................................88 Changing the main gas pump ........................................................................89 Changing the condensate pump ....................................................................90 Replacing the motor of the condensate pump................................................91 7.12. Replacing the filtration non-woven in the gas cooler .....................93 7.13. Recommended maintenance cycles..............................................94 7.14. Condensate watchdog (option)......................................................94 5 8 9 6 Tips and assistance .............................................................................. 96 8.1. Questions and answers ................................................................ 96 8.2. Accessories and spare parts......................................................... 98 8.3. Updating the instrument software ............................................... 101 Appendix.............................................................................................. 104 2 Safety and the environment 2.1. About this document This document describes the product testo 350 with the device setting Country version | USA Use > Please read this documentation carefully and familiarize yourself with the analyzer before putting it to use. Pay particular attention to the safety instructions and warning advice in order to prevent injuries and damage to the products. > Keep this document on hand so that you can refer to it when necessary. > Hand this documentation on to any subsequent users of the analyzer. Warnings Always pay attention to information that is marked by the following warnings with warning pictograms. Implement the specified precautionary measures. Representation Explanation WARNING Indicates potential serious injuries CAUTION indicates potential minor injuries CAUTION indicates circumstances that may lead to damage to the products Symbols and writing standards Representation Explanation Note: Basic or further information. 2. ... Action: more steps, the sequence must be followed. > ... Action: a step or an optional step. - Result of an action. 1. ... ... Menu Elements of the instrument, the instrument displays or the program interface. 7 Representation Explanation 2.2. [OK] Control keys of the instrument or buttons of the program interface. ... | ... Functions/paths within a menu. “...” Example entries. Ensure safety > Only operate the analyzer properly, for its intended purpose and within the parameters specified in the technical data. Do not apply force to the analyzer. > Do not operate the analyzer if there are signs of damage on the housing, power supply, or sample lines. > Do not perform contact measurements on non-insulated, live electrified parts. > Do not store the analyzer with solvents. Do not use any desiccants for storage. > Carry out only the maintenance and repair work on this instrument that is described in the documentation. Follow the prescribed steps exactly. Use only original spare parts from testo. > Any additional service must only be carried out by authorized personnel. Testo will otherwise refuse to accept responsibility for the proper functioning of the analyzer after repair and for the validity of certifications. > Use the device in closed, dry rooms. Protect analyzer from rain and moisture. 8 > Temperatures given on probes/sensors relate only to the measuring range of the sensors. Do not expose handles and sample lines to any temperatures in excess of 158 °F unless they are expressly permitted for higher temperatures. The objects to be measured or the measurement environment may also pose risks: Note the safety regulations valid in your area when performing the measurements. Safety related symbols on the instrument Representation Explanation If the product is not used in strict compliance with this documentation, the intended protection may be impaired. > Operate the product only as described in this documentation. > Please consult your testo dealer or the manufacturer when in doubt. For products with Bluetooth (optional) Changes or modifications that have been made without the explicit consent of the responsible approval authority, may cause the retraction of the type approval. Data transfer may be disturbed by equipment that uses the same ISM-band, i.e. WLAN, microwave ovens. The use of radio communication links is not permitted in airplanes and hospitals, among other locations. For this reason the following points must be ensured before entering: > Turn off Bluetooth function (control unit and analyzer box). > Disconnect control unit and analyzer box from all external power sources (power supply, external rech. batts., etc.). 2.3. Protecting the environment > Dispose of faulty rechargeable batteries/spent batteries in accordance with valid legal specifications. 9 > At the end of its life cycle, send the product to the separate collection for electric and electronic devices (observe local regulations), or return the product to testo for disposal. 3 Specifications 3.1. Use The testo 350 is a portable combustion & emission analyzer. The instrument consists of the control unit (control unit for displaying readings and controlling the analyzer box) and the analyzer box (measuring instrument). Plug-type contacts, databus cable or Bluetooth (option) are used to connect the control unit to the analyzer box. The testo 350 has been designed for the following tasks/applications: • Service/adjustment of industrial boilers and systems (processing plants, power plants) • Emission control troubleshooting of compliance measurements with emission guidelines • Service/commissioning of burners/boilers • Measurements on gas turbines/stationary industrial engines • testo 350 must not be used as a safety (alarm) device The Bluetooth option may only be operated in countries in which it is type approved. 3.2. Technical data 3.2.1. Examinations and licenses As declared in the certificate of conformity, this product complies with Directive 2004/108/EC. This product is TÜV approved. 3.2.2. 10 Bluetooth module (option) • Bluetooth type: BlueGiga WT 11 • Bluetooth product note: WT 11 • Bluetooth identification: B01867 • Bluetooth company: 10274 Certification EU countries Belgium (BE), Bulgaria (BG), Denmark (DK), Germany (DE), Estonia (EE), Finland (FI), France (FR), Greece (GR), Ireland (IE), Italy (IT), Latvia (LV), Lithuania (LT), Luxembourg (LU), Malta (MT), Netherlands (NL), Austria (AT), Poland (PL), Portugal (PT), Romania (RO), Sweden (SE), Slovakia (SK), Slovenia (SI), Spain (ES), Czech Republic (CZ), Hungary (HU), United Kingdom (GB), Republic of Cyprus (CY). EFTA countries Iceland, Liechtenstein, Norway, Switzerland Other countries USA, Canada, Turkey, Colombia, El Salvador, Ukraine, Venezuela, Ecuador, Japan Information of the FCC (Federal Communications Commission) Contains FCC ID: QOQWT11 • Section 15.19 Labelling requirements • This device fulfils part 15 of the FCC-directives • Commissioning is subject to the two following conditions: 1 this instrument must not cause any dangerous interferences and 2 this instrument must be able to cope with interferences, even if these have undesired effects on operation. Changes The FCC demands that the user is to be informed that with any changes and modifications to the device, which have not been explicitly approved by testo AG, the right of the user to use this device will become null and void. 11 3.2.3. 12 Declaration of Conformity 3.2.4. Measurement ranges and resolution Analysis box Measurement parameter 1 2 Measurement range Resolution O2 0…25vol.% 0.01vol.% CO, H2-comp. 0…10000ppm 1ppm COlow, H2-comp. 0...500ppm 0.1ppm NO 0...4000ppm 1ppm NOlow 0...300ppm 0.1ppm NO2 0...500ppm 0.1ppm SO2 0...5000ppm 1ppm H2S 0...300ppm 0.1ppm CO2-(IR) 0...50vol.% 0.01Vol.% (0…25Vol.%) 0.1Vol.% (> 25Vol.%) HC 1, 2 Natural gas: 100…40000ppm 10ppm Propane: 100…21000ppm 10ppm Butane: 100…18000ppm 10ppm Differential pressure 1 -16 to +16 "H2O 0.004 "H2O Differential pressure 2 -80 to +80 "H2O 0.004 "H2O NTC (permanently installed) -4° to 122 °F 32.18 °F Detection limit: 50ppm Strict compliance with the lower explosion limit is mandatory. 13 Measurement parameter Measurement range Resolution Abs. Press., optionally when IR sensor is installed -240 to 461 "H2O 0.4 "H2O Flow velocity 0 to 131 ft/sec 0.1 ft/sec to 131 ft/sec Type K (NiCr-Ni) -328° to 2498 °F 32.18 °F Type S (Pt10Rh-Pt) 0° to 3200 °F 3.2.5. 33.8 °F Accuracy and response time Analysis box Measurement parameter Accuracy Response time O2 ±0.2Vol.% < 20s (t95) CO, H2-comp. ±10ppm (0…199ppm) < 40s (t90) ±5% of reading (200…2000ppm) ±10% of reading (rest of range) COlow, H2-comp. ±2ppm (0…39.9ppm CO) NO ±5ppm (0…99ppm) < 40s (t90) ±5% of reading (rest of range) < 30s (t90) ±5% of reading (100…1999ppm) ±10% of reading (rest of range) NOlow ±2ppm (0…39.9ppm) NO2 ±5ppm (0…99.9ppm) < 30s (t90) ±5% of reading (rest of range) < 40s (t90) ±5% of reading (rest of range) SO2 ±5ppm (0…99ppm) < 30s (t90) ±5% of reading (100…1999ppm) ±10% of reading (rest of range) H2S ±2ppm (0…39.9ppm) ±5% of reading (rest of range) 14 < 35s (t90) Measurement parameter Accuracy Response time CO2-(IR) ±0.3Vol.% ±1% of reading (0…25Vol.%) < 10s (t90) heat-up time: < 15min ±0.5Vol.% ±1.5% of reading (rest of range) HC ±400ppm (100…4000ppm) < 40s (t90) ±10% of reading (rest of range) Differential pressure 1 ±1.5% of fmv (-16 to -1 "H2O) - ±1.5% of reading (rest of range) Differential pressure 2 ±1.5% of fmv (-80 to +20 "H2O) Absolute pressure ±4 "H2O - ±1.5% of reading (rest of range) - Stack Gas Temp. ±39.2°F (-148° to 392 °F) Thermocouple ±33.8 °F (rest of range) Type K (NiCr-Ni) - Thermocouple Type S (Pt10Rh-Pt) ±33.8 °F (0° to 3200 °F) - Combustion air via permanently installed NTC ±32.36 °F (14 to 122 °F) ±37.4 °F Offset - 15 3.2.6. Measurement range extension for individual slot (option) 3 Measurement Max. measuring Accuracy parameter range with highest dilution factor CO, H2-comp. 0…400000ppm ±2% of reading 1 ppm COlow, H2-comp. 0…20000ppm ±2% of reading 0.1ppm SO2 0…200000ppm ±2% of reading 1 ppm NOlow 0…12000ppm ±2% of reading 0.1ppm NO 0…160000ppm ±2% of reading 1 ppm Natural gas: 100…40000ppm ±2% of reading HC 3.2.7. Resolution 4, 5 10 ppm Propane: 100…21000ppm 10 ppm Butane: 100…18000ppm 10 ppm Fresh air valve (option) Dilution of all sensors, dilution factor 5 3 6, 7 Measurement parameter Measurement range Accuracy O2 0 to +25 Vol. % O2 0.01 Vol. % O2 (0 to 25 Vol. % O2) CO, H2-comp. 2500…50000ppm ±5% "H2O (-40 to 0 "H2O at probe tip) COlow, H2-comp. 500…2500ppm ±5% "H2O (-40 to 0 "H2O at probe tip) Add to the standard accuracy statement (without dilution). Detection limit: 50ppm 5 Strict compliance with the lower explosion limit is mandatory. 6 Add to the standard accuracy statement (without dilution). 7 Accuracy data are valid within the specified pressure range (pressure on probe tip). 4 16 NO2 500…2500ppm ±5% "H2O (-40 to 0 "H2O at probe tip) SO2 500…25000ppm ±5% "H2O (-40 to 0 "H2O at probe tip) NOlow 300…1500ppm ±5% "H2O (-40 to 0 "H2O at probe tip) NO 1500…20000ppm ±5% "H2O (-40 to 0 "H2O at probe tip) H2S 200…1500ppm ±5% "H2O (-40 to 0 "H2O at probe tip) HC 8, 9 Natural gas: 500…40000ppm ±5% "H2O (-40 to 0 "H2O at probe tip) Propane: 500…21000ppm Butane: 500…18000ppm CO2-(IR) 3.2.8. 0 to 50 Vol. % CO2 0.3 Vol. % O2 +1% mv (0 to 25 Vol. % O2) 0.5 Vol. % O2 +1.5% mv (>25 to 50 Vol. % O2) Other instrument data Flue gas analyzer 8 9 Feature Values Ambient temperature 23° to 113 °F short-term (max. 5min.): up to 176 °F by radiated heat (i.e. heat radiation from a hot exhaust channel) Ambient pressure 240.87 to 441.60 "H2O Ambient humidity 5…95%rF Storage and transport temperature -4° to 122 °F Detection limit: 50ppm Strict compliance with the lower explosion limit is mandatory. 17 Feature Values Degree of protection IP40 Warranty Analyzer: 24 months (excluding wear parts) CO-, COlow- ,NOlow-, NO, SO2, H2S-, HCsensor: 12 months O2 sensor 18 months CO2-(IR) sensor: 24 months Flue gas probe: 24 months Thermocouple: 12 months Rech. battery: 12 months Terms of warranty Terms of warranty: see website www.testo.com/warranty Control unit Feature Values Power supply • Li-ion rech. batt. • Analyzer box • Power supply Battery charge time 7h (via mains adapter) 14h (via CAN interface) Rech. batt. service life approx. 5h (display switched on, Bluetooth deactivated) Memory 250,000 readings Housing material PC, TPE Weight .097 lbs. Display Graphic color display, 240 x 320 pixels Dimensions 10 x 4.5 x 2.3 in. Analysis box Feature Values Power supply via rech. batt. Li-ion rech. batt. via internal power supply: 100V AC/0.45A 240V AC/ 0.2A (50-60Hz) via DC-input (option) 11V…40V DC/ 1 - 4A 18 Feature Values Battery charge time <6hr Battery operation time 2.5hr (with gas cooler and IR module) / 4.5hr (without gas cooler and IR module) Dimensions 12.99 x 5.03 x 17.24 in. Housing ABS URL 94V0 Weight 10.58 lbs. (completely assembled) Memory 250000 readings Flue gas overpressure 20.07 "H2O Underpressure max. 120.43 "H2O Pump volumetric flow rate 1 l/min (controlled), standard litre ±0.1l/min Hose length max. 53 ft. (corresponds to five probe hose extensions) Diluting gas Fresh air or nitrogen Flue gas dust load max. 20g/m³ Humidity load max. 158 °F td at measuring input USB interface USB 2.0 Trigger input Voltage: 5...12V (falling or rising flank) Pulse width: >1 s Load: 5V/max. 5mA, 12V/max. 40mA Bluetooth option Class1 module (reach <100m in open field) 19 4 Product description 4.1. Control unit 4.1.1. Overview 1 IrDA interface 2 Switch On / Off 20 3 Magnetic holder (on rear) CAUTION Strong magnets Damage to other devices! > Keep a safe distance from products which could be damaged by magnets (i.e. monitors, computers, pacemakers, credit cards). 4 Display 5 Keyboard 6 Electrical contact bar for analyzer box (on rear) 7 4.1.2. Interfaces: USB 2.0, charger, testo data bus Keyboard Key Functions [ Switch measuring instrument on/off ] [OK] Function key (orange, 3x), relevant function is shown on Example the display [▲] Scroll up, increase value [▼] Scroll down, reduce value [esc] Back, cancel function [ Open main menu ] [i] Open menu Instrument diagnosis 21 4.1.3. Display 1 Status bar (dark grey background): • Display of date and time (valid for control unit and analyzer box). • Display of Bluetooth status, power supply and remaining rech. batt. capacity (valid for control unit): Icon Feature - Blue background/white symbol = Bluetooth on, Bluetooth connection to measuring box set up - Grey background/white symbol = Bluetooth off - Blue background/green symbol = Bluetooth connection to analyzer box up and running Battery operation Indication of remaining capacity of the rech. batt. by color and filling degree of the battery symbol (green = 20-100%, red = < 20%) Power supply operation Indication of remaining capacity of rech. batt: see above 22 2 Tabs and tab info field: • Tabs: Display of measuring system components (CU = control unit, 2, 3, ... = analyzer boxes, analog output box) connected to the control unit. The tabs provide access to the individual components. Warning symbol: - Red frame, red symbol/white background: Display of instrument errors in the instrument diagnosis menu, otherwise: Instrument designation. - Black frame, black symbol/yellow background: Information message (symbol is displayed alternately with the instrument designation). - Yellow frame, yellow symbol/red background: Warning (symbol is displayed alternately with the instrument designation). • Information field on tab (only in the tabs of analyzer boxes): Indication of selected folder/measurement site, selected fuel, chosen application, status of power supply and remaining rech. batt. capacity (valid for analyzer box, symbols like for display of control unit, see above), set dilution factor. 3 Selection field for functions (chosen function appears against a white background, unavailable functions are identified by grey characters) or display of measuring values. 4 4.1.4. Function display for function keys. Connections / interfaces 1 USB 2.0 2 Testo data bus 3 Connecting socket for power supply 0554 1096 4 Guide groove for locking with analyzer box 23 4.1.5. Menu guidance for control unit Main menu Menu Description Saved measurements - Display of saved measurements Device settings Date/Time Set date, time, time format: Power Options Automatic instrument shut-down on/off Display backlight in battery operation on/off Instrument diagnosis Search for boxes 24 Display brightness Set display brightness Printer Select printer, enter print text Bluetooth (option) Bluetooth on/off Language Set instrument language Country version Set country version Password protection Change password Data bus Display of bus address, enter bus rate Error diagnosis Display of present errors Device information Display of device information - Set up connection to analyzer boxes 4.2. Analyzer box 4.2.1. Overview 25 1 Condensate trap and condensate container, 2 Locking/unlocking button for control unit 3 Particle filter 4 Filter fresh air inlet (option: fresh air valve/measurement range extension overall (5x)) 5 Contact bar for connection to control unit 6 Guide pins for locking with control unit 7 Diluting gas filter 8 Status display 9 Full-view slider for marking/identification 10 Gas outlet 1 11 Fresh air inlet 12 Gas outlet 2 4.2.2. Status display The status display shows the operating status of the analyzer box: Display Status green/permanent (analyzer box switched on) Power supply operation or rech. batt operation/rech. batt. fully charged red/flashing (analyzer box switched on) • Rech. batt. operation/residual rech. batt. capacity < 20% • other device error green/flashing (analyzer box switched Charge rech. batt. off) 26 green/permanent (analyzer box switched off) Rech. batt. fully charged, trickle charge green, red/alternately flashing Flash mode active 4.2.3. Connections / interfaces 1 Data bus termination slide switch 2 Sensor for combustion air temperature 3 Flue gas probe 4 Sensor input 5 USB 2.0 6 Trigger input 7 Dilution gas inlet for measurement range extension 8 Mains connection 100...240V AC, 50-60Hz 9 DC-voltage input 11…40V DC (option) 10 Covering cap gas channel access (only for servicing purposes) Plugged in covering cap: Position ( not be changed! ) must 11 Pressure ports p+ and p12 Testo Data bus 27 4.2.4. Functions/instrument options Some functions are available as optional extras. The functions your analyzer box is equipped with (condition as delivered) is shown on the identification plate on the bottom side of the analyzer box. Imprint Description CO, NO, NO2, SO2, The sensor of the specified type is check marked NOlow, COlow, CxHy/HC, H2S, O2, CO2-(IR) SG Special main gas pump for long-term measurement 1/x Measurement range extension (individual dilution with selectable dilution factors) DC DC-voltage input (11…40V DC) ∆p-0 Automatic pressure zeroing for flow measurement GP Gas preparation thermoelectric chiller for higher measuring accuracy Fresh air valve for overall dilution (x5) to measure high concentrations. Contains Bluetooth Bluetooth module FCC ID:QOQWT11 IC ID:4620-A 4.2.5. Menu guidance analyzer box Main menu Menu Description Applications - Select an application in accordance with the measuring task to be performed Folders - Create and manage folders and measurement sites Fuels & Test option - Select and configure fuels Saved measurements - 28 Display and manage measurements Main menu Menu Description Device settings Dilution Set the dilution factor Measurement view Configure the display, set measurement parameters and units for selected application and measurement type Units Set units for display variables Date / time Set date, time, time format: Power Options Set automatic instrument shut-down and switch off display backlight in rech. batt. operation Display brightness Set display brightness Printer Select printer, enter print text Bluetooth Bluetooth on/off Language Set instrument language Country version Set country version (fuels, display variables, calculation formulas) Password protection Change password Analog input Configure analog input Databus Display of bus address, enter bus rate Sensor settings - Make sensor settings, perform calibration / adjustment Programs - Configure and activate measuring programs Instrument diagnosis Error diagnosis Display of present errors Gas path check Perform tightness test Sensor diagnosis Perform sensor diagnosis Device information Display of device information 29 4.2.6. Modular flue gas probe 1 Removable filter chamber with window and particle filter 2 Probe handle 3 Connecting cable 4 Connector plug for measuring instrument 5 Probe module lock release 6 Probe module 30 5 First steps 5.1. Commissioning Control unit The control unit has a permanently installed rechargeable battery. > Remove the protective film from the display. > Charge the rech. batt. fully before using the control unit. Analyzer box The analyzer box is supplied with a rech. batt. already fitted. > Charge the rech. batt. fully before using the analyzer box. 5.2. Getting to know the analyzer 5.2.1. Power supply, batteries/rechargeable batteries In case of longer interruption of the power supply to the control unit (i.e. rech. batt. empty) the settings for date / time will be lost. 5.2.1.1. Recharging the rech. batt. of the Control unit The rech. batt. can only be charged at an ambient temperature of 32 to 122 °F. If the rech. batt. had been completely discharged, the charging time at room temperature will take about 7hr (charging with power supply adapter) or approx. 14hr (charging via testo Data bus). Charging via power supply (Art.-No. 0554 1096) ✓ The control unit is switched off. 1. Connect the plug of the power supply to the power supply socket on the control unit. 2. Connect the power supply to a power socket. - The charging process starts. The charge condition will be shown on the display. - Once the rech. batt. has been charged the instrument will automatically change to trickle charge. 31 Charging via analyzer box ✓ Control unit is locked to analyzer box or is connected via the testo data bus cable. ✓ The analyzer box is supplied via the power supply. During operation with low charge power or in switched off state. 5.2.1.2. Charging the rech. batt. of the analyzer box The rech. batt. pack can only be charged at an ambient temperature of 32 to 122 °F. If the rech. batt. has been discharged completely, the charging time at room temperature is approx. 6 hr ✓ The analyzer box is switched off. > Connect the power cable to analyzer box and power socket. 5.2.1.3. - Charging will start, the fan may come on automatically. The status LEDs lights green while the rech. batt. is being charged. - Once the rech. batt. has been charged the instrument will automatically change to trickle charge. The status LEDs permanently light green. Battery care > Do not fully exhaust rechargeable batteries. > Store rech. batts. only in charged condition and at low temperatures, but not below 32 °F. > For longer breaks you should discharge and recharge the batteries every 3 months. Trickle charging should not exceed 2 days. 5.2.1.4. AC Power supply In case of danger the instrument must be disconnected from the electric power supply by simply pulling out the power cord. > Always position the instrument so that the power supply plug can be easily reached. 32 Control unit 1. Connect the plug of the power supply to the power supply socket on the control unit. 2. Connect the plug of the power supply to an electiric socket. - The control unit is powered by the power supply. - If the control unit is switched off the rech. batt. charging process will start automatically. Switching the control unit on has the effect of stopping battery charging and the control unit being powered via the power supply. Analyzer box via internal power supply > Connect the power cord to analyzer box. - The analyzer box is powered via the internal power supply. - If the analyzer box is switched off the rech. batt. charging process will start automatically. Battery charging stops when the flue gas analyzer is switched on by the control unit. Analyzer box via DC-voltage input DC ✓ Cable with battery terminals and adapter for connection to analyzer box required (0554 1337, accessory). - 5.2.2. If the analyzer box is switched off the rech. batt. charging process will start automatically. Battery charging stops when the flue gas analyzer is switched on by the control unit. Connecting probes Probe detection takes place during the activation process: Probes that are required must always be connected before the analyzer is switched on, or the analyzer must be switched off and then on again after a probe change, so that the correct sensor data can be shown. > Connect the required probes to the corresponding ports. 33 5.2.3. Occupying the trigger input The trigger input can be used as a criterion to either start or stop (ascending or descending flank) measuring programs. > Activating the trigger input, with external voltage supply (5...12 V): > Activating the trigger input, with supply via instrument voltage (12 V): When using the instrument voltage the analyzer can only be started via the trigger input from the switched off state when the AC power cord is plugged in. 5.2.4. Connecting system components 5.2.4.1. Connection using contact strip The control unit can be plugged onto the analyzer box. 1. Place the guide groove in the bottom side of the control unit over the guide pins of the analyzer box. 34 2. Press the Control unit against the analyzer box until the locking/ unlocking buttons noticeably clicks into place two times. To protect the display (i.e. during transport) the control unit can also be inserted with the back facing up, however, in this case there is no connection to the analyzer box. 5.2.4.2. Connection using a data bus cable (accessory part to a bus system) or If testo easyEmission software is connected via a control unit to measuring boxes, the number of measuring boxes must not be changed. To add new measuring boxes, end the testo easyEmission software, connect the new measuring box and restart the testo easyEmission software. or or 35 The individual components (i.e. control unit with analyzer box or analyzer box with analyzer box) can be connected to a bus system using the testo data bus cable. Before starting up a bus system, the bus address and bus rate of the connected components must be changed. For this, before the components are connected to a bus system, each component must be configured separately either with the control unit or the notebook/PC. Calling up the function: [ ] → Device settings → [OK] → Data bus → [OK]. Bus address The bus address of each component connected to the testo data bus must be unambiguous. The bus address of the connected component can be changed, if necessary. 1. Bus Address → [Change] 2. Setting a new bus address: [ ], [ ], [◄], [►]. 3. Confirm the entry: [OK]. Bus rate The relevant data rate must be selected depending on the number of connected components in a system. • Control unit with one measuring box: 500 kbit/s • All other systems: 50 kbit/s > Select bus rate 500 kbit/s or 50 kbit/s: [ → [ ] or [ESC]. 36 ], [ ], → [Change] If several analyzer boxes are connected with the Control unit, only the measurement data from one analyzer box can be displayed at a time, or only one analyzer box can be activated respectively. This is accomplished by selecting the analyzer box, see Measure values of diluted sensors (with enabled measurement range extension) underlined on the print Search for analyzer boxes, page 42. If several analyzer boxes are connected to a notebook/PC, the analyzer boxers can be activated and opened parallel to each other, i.e. to display measuring channels of different analyzer boxes parallel to one another. If a notebook/PC or data bus controller (0554 0087) has several connected and enabled measuring boxes, the minimum measuring rate changes, depending on the number of measuring boxes, as follows: Measuring boxes Minimum measuring rate 1 to 2 1 sec 3 to 4 2 sec 5 to 8 3 sec 9 to 16 5 sec > Connect the data bus cable to the data bus interfaces. Please observe the following points when setting up a connection via data bus cable: • Use only testo data bus cables • Do not route data bus cables in the vicinity of electric power cables. • Ensure sufficient power supply by supplying each analyzer box with AC voltage. • The cables should ideally be plugged in before the system is switched on. Connecting during operation (hot plugging) is possible, however, depending on the combination the system may need to be switched off and on again. • The connection cannot be separated under load. • Data bus subscribers: max. 16 analyzer boxes in one data bus system. 37 • Cable length: max. 164 ft. between control unit and analyzer box, max. 2,624 ft. between all analyzer boxes in the data bus system. • The bus system must have a defined electrical termination, see below. Electrical termination of the bus system The data bus system is linear in structure. The control unit or the testo data bus controller with USB connection represents the beginning of the line. The end is represented by the last components connected in the system (analyzer box or analog output box). This component must have a defined electrical termination. An analog output box is the furthest subscriber. > Plug the data bus termination plug into the data bus socket on the analog output box. An analyzer box is the furthest subscriber. > Set the data bus terminating slide switch on the analyzer box (see Connections / interfaces page 27, point 1) to switch position right ( ). 5.2.4.3. Connection via Bluetooth (option) or or 38 Via Bluetooth the control unit can be connected to a analyzer box or a PC/Notebook, as long as both components are equipped with this function, see Bluetooth, page 55. 5.2.5. Switching on Before switching on > Connect all system components. > Connect all required probes/sensors. > Connect all system components to the electric power supply. When switching on the control unit - should be plugged on the contact strip of the analyzer box or - connected with a data bus cable or - plugged to the power cable of the analyzer box, so that starting via Bluetooth is enabled. Switching on > press [ ]. - The Welcome Screen is displayed (approx. 5 sec.) - The control unit display screen appears. - The control unit searches for connected analyzer boxes and shows these as independent tabs in the display. Control unit and analyzer box are not connected: If the control unit has already been switched on, you must press [ ] once again for a short moment to set up a connection to the analyzer box. 39 5.2.6. Calling up a function 1. Select function: [▲], [▼]. - The chosen function appears in a frame. 2. Confirm selection: [OK]. - 5.2.7. The chosen function is opened. Entering values Some functions require values (numbers, units, characters) to be entered. Depending on the function that is chosen, the values are entered via either a list field or an input editor. List field 1. Select the value to be changed (numerical value, unit): [▲], [▼], [◄], [►] (depending on the selected function). 2. Press [Change]. 3. Set value: [▲], [▼], [◄], [►] (depending on the selected function). 4. Confirm the entry: [OK]. 5. Repeat steps 1 and 4 as required. 6. Save the entry: [Finished]. 40 Input editor 1. Select the value to be changed (character): [▲], [▼], [◄], [►]. 2. Accept value: [OK]. Options: > Toggle between characters and special characters: Select Ι← ABC→&$/ →Ι: [▲], [▼] → [ABC→&$/]. > Position the cursor in the text: Select Ι← ABC→&$/ →Ι: [▲], [▼] → [Ι←] or [→Ι]. > Delete character after the cursor: Select Ι← [Del]. ABC→&$/ →Ι: [←] or [→]→[▼] → > Delete character in front of cursor: Select Ι← ABC→&$/ →Ι: [←] or [→]→[▼] → [←]. 3. Repeat steps 1 and 2 as required. 4. Save the entry: Select ← Finished [Finished]. →: [▲], [▼] → 41 5.2.8. Printing / saving data Printing and saving is accomplished via the menu Options, which is accessed via the left function key and is available in many different menus. Assignment of the right function key with the function Save or Print, see Assigning the right hand function key page 49. Only readings, which have a display field in the measurement view assigned, will be saved/printed out. The measurement data can be printed out parallel to the saving process, while a measurement program is running. Measure values of diluted sensors (with enabled measurement range extension) underlined on the printout. 5.2.9. Search for analyzer boxes (only available via Control unit tab) > [ ] → Search for boxes → [OK]. - Analyzer boxes connected via testo data bus: are displayed (tabs) - Analyzer boxes connected via Bluetooth: • Analyzer box found: Analyzer box and control unit are connected automatically • several analyzer boxes found: The available analyzer boxes are displayed for selection An existing Bluetooth connection is disconnected by selecting a new analyzer box from the selection field. 5.2.10. Confirming an error message If an error occurs, an error message is shown in the display. > Confirming an error message: [OK]. Errors which have occurred and have not yet been rectified are indicated by a warning symbol in the status bar. Not yet rectified error messages can be displayed in the menu Error diagnosis, see Sensor diagnosis, page 48. 42 5.2.11. Switching off Unsaved readings will be lost when the analyzer is switched off. Rinse phase When switched off, the analyzer box checks whether flue gases are still in the sensors. The sensors are rinsed with fresh air, if this should be necessary. The duration of the rinse phase depends on the gas concentration in the sensors. > press [ 5.3. ]. - The rinse phase starts. - The flue gas analyzer switches off. It is normal for the fan of the analyzer box to run on for a while. Folders / Measurement sites (only available via Measuring/Analyzer Box tab) All readings can be saved under the currently active measurement site. Readings not yet saved are lost when the measuring instrument is switched off. Folders and measurement sites can be created, edited, copied and activated. Folders and measurement sites (incl. protocols) can be deleted. Calling up the function: > [ ] → Folders → [OK]. Changing the display: > Toggle between overview (display of number of measurement sites per folder) and detailed view (display of all measurement sites per folder): [Overview] or [Details]. Activating a measurement site: > Select the measurement site → [OK]. - The measurement site is activated and the menu Measurement Options is opened. 43 Creating a new measurement site: A measurement site is always created in a folder. 1. Select the folder in which the measurement site is to be created. 2. [Options] → New measurement site→ [OK]. 3. Enter values or make settings. The following inputs/settings are possible: Parameter Description Measurement site Enter name Application Select application Fuel Select fuel Profile Enter diameter, length, width, height and area. For correct measurement of the volume flow you must set the profile and area. A volumetric flow rate is calculated from the geometries entered here together with the measured velocity. Pitot Tube Factor The parameter "Pitot tube factor" influences the measurement of flow speed, volume flow rate and mass flow. The Pitot factor depends on the type of Pitot tube used: Straight Pitot tubes: Factor = 0.67 Prandt’l Pitot tubes (bent): Factor = 1 Humidity The parameter "Humidity" (combustion air humidity) influences the calculation of qA (flue gas loss) and flue gas dew point. The factory setting is 80.0% humidity. To achieve a higher accuracy, the values can be adjusted to the actual ambient conditions. Pressure absolute The absolute pressure influences the calculation of flow speed, volume flow, mass flow and flue gas dew point. The factory setting is 980mbar (14.2 psi). To achieve a higher accuracy, the values can be adjusted to the actual ambient conditions. If a CO2-(IR) module is installed, the absolute pressure value measured there will automatically be used. 44 Parameter Description Barometric pressure The input of the barometric pressure and the height above sea level is only required when no absolute pressure is available (no CO2 IR module present). The barometric pressure influences the calculation of flow speed, volume flow, mass flow and flue gas dew point. To achieve a higher accuracy, the values can be adjusted to the actual ambient conditions. This is 1013mbar (14.6 psi) as an annual average, regardless of the altitude. Depending on the current weather, this pressure can fluctuate by ±20mbar (8 "H2O) around the annual average. Altitude The height above sea level influences the calculation of flow speed, volume flow, mass flow and flue gas dew point. To achieve a higher accuracy, the value can be adjusted to the actual ambient conditions. Dewpoint The parameter "Dewpoint" (combustion air dewpoint) influences the calculation of qA (flue gas loss) and flue gas dew point. The factory setting for the dewpoint is 34.7 °F. To achieve a higher accuracy, the values can be adjusted to the actual ambient conditions. 4. Finalize the entry: [Finished]. Other measurement site options: > [Options] → Edit measurement site: Make changes to an existing measurement site. > [Options] → Copy measurement site: Make a copy of an existing measurement site in the same folder. > [Options] → Delete measurement site: Delete an existing measurement site. Create a new folder: 1. [Options] → New Folder → [OK]. 2. Enter values or make settings. 3. Finalise the entry: [Finished]. 45 Other folder options: • 5.4. Edit Folder: Make changes to an existing folder. • Copy Folder: Make a copy of an existing folder. • Delete Folder: Delete an existing folder, including the measurement sites created therein. • Delete All Folders: Delete all existing folders, including the measurement sites created therein. Saved Measurements Analyzer box Measurement data are always saved in a measurement record in the analyzer box with which the measurement data were measured. An overview with all created folders and measurement sites is displayed. The measurements saved for the corresponding measurement sites are displayed. Measurements can be displayed, printed, deleted and copied to the control unit. Control unit Measurement sites cannot be saved in the control unit. Measurements saved in the analyzer box can be copied to the control unit, i.e. to be able to transport these for evaluation by PC software, while the analyzer box remains at the measurement site. For easy assignment the measurements are saved under the serial number of the analyzer box. The data (folders, measurement sites, readings) contained in these measurements are displayed like in the analyzer box. Activating the function: > [ ] → Saved measurements → [OK]. > only with control unit tab: Choose the serial number of the analyzer box → [OK]. Changing the display: > Toggle between overview (display of number of measurement sites per folder) and detailed view (display of all measurement sites per folder): [Overview] or [Details]. 46 Display record: 1. Choose the desired record from the detailed view. 2. [Data]. Options > [Options] → [Delete All Measurements]: The readings of all measurement sites will be deleted. > [Options] → [Copy All Measurements]: The readings of all measurement sites will be copied. Analyzer box options > [Options] → Print Data: Transmit data of the chosen record to a record printer. > [Options] → Copy Record: Copy record into the record log of the Control unit. > [Options] → Delete Record: Delete the chosen record. > [Options] → Show Graphic: Display saved record data as graphic. > [Options] → Number of lines: Change the number of measuring values per display page. > [Options] → Delete All Measurements: Delete all saved measurements for a measurement site. > [Options] → Copy All Measurements: Copy all measurements of a measurement site into the record log of the Control unit. Control unit options > [Options] → Delete All Measurements: Delete all saved measurements for a measurement site. 5.5. Instrument diagnosis Important operating values and instrument data are displayed. A gas path check can be carried out. The status of the sensors and any device errors not yet rectified are displayed. Activating the function: > [ ] → Instrument diagnosis → [OK]. or > [ i ]. 47 5.5.1. Error diagnosis > Error diagnosis → [OK]. - Unrectified errors, warnings and notes are displayed. > View next / previous error: [▲], [▼]. 5.5.2. Gas path check (only available via Analyzer Box tab) Check the analyzer regularly for leaks, to ensure accurate measurements. The leak test requires a plastic cap 0193 0039, comes with the flue gas probe). 1. Gas path check → [OK] 2. Place the plastic cap on the tip of the flue gas probe so that the openings are completely covered. 5.5.3. - The pump flow is displayed. - Volumetric flow rate less than or equal to 0.04l/min: The gas paths are leak tight (traffic light in display lights green). - Volumetric flow rate higher than 0.04l/min: The gas paths are leaking (traffic light in display lights red). Probe and analyzer box must be checked for leaks. Sensor diagnosis (only available via Analyzer Box tab) 1. Sensor diagnosis → [OK]. 2. Select sensor. [▲], [▼]. - The status of the sensor is indicated by a lamp. A sensor is able to recover. It is therefore possible that the sensor status indication changes from yellow to green or from red to yellow. 5.5.4. Instrument information > Device information → [OK]. - 48 Information is displayed. 6 Using the analyzer 6.1. Settings 6.1.1. Assigning the right hand function key The right function key can have a function from the Options menu assigned to it. The menu Options is accessed via the left function key and is available in many different menus. This assignment is only valid for the currently opened menu / the opened function. ✓ A menu / function is opened in which the Options menu is displayed on the left function key. 1. Press [Options]. 2. Select option: [ ], [ ]. Depending on the menu / function from which the Options menu was opened, various functions are available. 3. Assign the selected function to the right function key: Press the [Config. Key]. 6.1.2. Instrument settings 6.1.2.1. Dilution (only available via tab Analyzer Box and with the measurement range extension option) Option dilution (for single slot with selectable dilution factors With active dilution the measuring gas for the sensor in slot 6 is diluted with ambient air (other possibility: nitrogen gas) in a controlled manner. For this purpose, the diluting gas is drawn through a separate gas inlet by a pump and a valve operating on the principle of pulse width modulation. A filter is installed to protect the gas path against dust. If the dilution system is active this is indicated by a clearly noticeable clicking of the valve. In addition the symbol 1/x appears at the right hand top of the display (in the header) and the selected dilution factor appears at the corresponding parameter (the complete line of the diluted parameter appears against a blue background). The following dilution factors can be manually set: 49 Factor Ratio of diluting gas: Measuring gas x1 no dilution x2 1:1 x5 4:1 x 10 9:1 x 20 19 : 1 x 40 39 : 1 Auto dilution 4:1 If the dilution stage auto-dilution is selected, dilution (5x) is activated automatically when the set switch-off threshold of the sensor in slot 6 is reached. • If the surrounding air contains interfering gases, push the hose onto the dilution inlet and place in a clean atmosphere. • If gas from a gas cylinder is used, observe a max. pressure of 12 "H2O (30hPa) • Diluting also changes the resolution of the reading display, i.e.: Undiluted resolution 1ppm, with factor 10 resolution 10ppm. Activate the function: > [ ] → Device settings → [OK] → Dilution → [OK] 1. Single slot → [Change] 2. Set the dilution factor: [ ], [ ]. 3. Confirm the entry: [OK]. Option: > Without dilution: Press [Without]. Dilution system with fixed dilution factor (x5) for all sensors (fresh air valve option) The selection of to dilute all (x5) results in the dilution of all sensors (x5). The measuring channels O2, CO2-(IR), CO2, qA, Lambda, Eta and all measuring channels for flow measurements are faded out in case of dilution to dilute all. 1x deactivates the dilution (extension of measuring range). 50 It is possible to calibrate/adjust with test gas when dilution is switched on to eliminate any measuring errors caused by dilution (see Calibration/adjustment page 61). Calling up the function: > [ ] → Device settings → [OK] → Dilution → [OK] 1. Select to dilute all (x5): [ ] → [Change]. 2. Select setting: [On] / [Off]. 3. Confirm the entry: [OK]. 6.1.2.2. Measurement view (only available via Analyzer Box tab) The parameters/units and the display representation (number of readings displayed per display page) can be set. The settings are only valid for the currently chosen combination of application and measurement type, which is indicated by the symbol (application) and the text (measurement type) in the info field. Total overview of selectable parameters and units (available selection depends on the chosen application / measurement type): Display Measurement parameter Tstack Flue gas temperature Tamb Combustion air temperature ∆p Differential pressure ∆p1 Differential pressure 1 (flue gas + m/s) ∆p2 Differential pressure 2 (flue gas + ∆P) Draft Flue draft Pabs Absolute pressure Pump Pumping capacity O2 Oxygen O2ref Oxygen reference CO2 Carbon dioxide CO2max maximal carbon dioxide content qAnet Abgasverlust CO Carbon monoxide COundil Carbon monoxide undiluted 51 Display Measurement parameter COamb Ambient carbon monoxide NO Nitrogen monoxide NO2 Nitrogen dioxide NOx Nitrogen oxide SO2 Sulphur dioxide H2S Hydrogen sulphide CxHy Hydrocarbon H2 Hydrogen ExAir Air ratio cCO Corrected carbon monoxide value CSO2 Corrected sulphur dioxide value CO2IR Carbon dioxide IR active Vel Flow velocity Volume flow Volume flow DewPt Flue gas dew point temperature MCO Mass flow CO MNOx Mass flow NOx MSO2 Mass flow SO2 MH2S Mass flow H2S effn Efficiency cNO Efficiency under due consideration of the heat value range cNOx Corrected Nitrogen oxide value MCO2IR Mass flow CO2-IR ambCO2 Ambient carbon dioxide %rF ambient Humidity measuring value external sensor UI ext external voltage Tsensor Instrument temperature Calling up the function: > [ ] → Device settings → [OK] → Measurement view → [OK] 52 Change parameter / unit in a line: 1. Select the line: [▲], [▼] → [Change] 2. Select the parameter: [▲], [▼] → [OK] 3. Select the unit: [▲], [▼] → [OK] 4. Save changes: [OK] Options: > [Options] → Number of lines: Change the number of measuring values per display page. > [Options] → Blank line: Insert the empty line before the selected line. > [Options] → Delete line: Delete the selected line. > [Options] → Factory setting: Reset the readings display to factory setting. 6.1.2.3. Units (only available via Analyzer Box tab) The units used for parameters in configuration menus can be set. Activating the function: > [ ] → Device settings → [OK] → Units → [OK] Adjustable units Parameter Unit Altitude m, ft Length cm, inch, mm Pressure mbar, psi, inHG, inW, hPa Area mm², in² Volume m³, l Volume flow m³/h, l/min Time sec, min Setting the unit 1. Select the line: [▲], [▼] → [Change]. 2. Select the unit: [▲], [▼] → [OK]. 3. Confirm the entry: [Finished] 53 6.1.2.4. Date/time This function is available in both the analyzer box and the control unit. Changes are accepted for the control unit and for the analyzer box. Date, time mode and time can be set. Activating the function: > [ ] → Device Settings → [OK] → Date/Time → [OK] Set date/time 1. Select parameter: [◄], [▲], [▼] → [Edit]. 2. Set parameter: [▲], [▼] and partly [◄], [►]→ [OK]. 3. Save changes: [Save]. 6.1.2.5. Power options This function is available in both the analyzer box and the control unit. Changes are accepted by the control unit and the analyzer box. Automatic instrument shut-down (Auto-Off) and switching off of the display light in battery operation can be set. Activating the function: > [ ] → Device settings → [OK] → Power Options → [OK] Making settings: 1. Select function or parameter: [▲], [▼] → [Change] 2. Set parameter: [▲], [▼] and partly [◄], [►] → [OK]. 3. Save changes: [Finished] 6.1.2.6. Display brightness This function is available in both the analyzer box and the control unit. Changes are accepted for the control unit and for the analyzer box. The intensity of the display illumination can be set. Calling up the function: > [ ] → Device Settings → [OK] → Display Brightness → [OK] Performing settings > Set parameter: [◄], [►]→ [OK]. 54 6.1.2.7. Printer This function is available in both the analyzer box and the control unit. This function is available for both the control unit and the analyzer box. The headers (lines 1-3) and the footer for the printout can be set. The printer that is used can be activated. Activating the function: > [ ] → Device Settings → [OK] → Printer → [OK] Activating the printer: The printer 0554 0543 can only be selected after the Bluetooth-interface has been activated, see Bluetooth, page 55. 1. Select Printer → [OK]. 2. Select the printer: [▲], [▼] → [OK]. - The printer is activated and the menu Printer is opened. Setting the print text: 1. Print text → [OK]. 2. Select function: [▲], [▼] → [Edit]. 3. Enter values → [Next]. 4. Save the entry: [Finished]. 6.1.2.8. Bluetooth This menu is only available if the instrument is equipped with Bluetooth option. The Bluetooth module can be switched on / off. This function is available in both the analyzer box and the control unit. Settings only apply for the device activated at the time. To set up a connection between Control unit and analyzer box, see Connection via Bluetooth (option), page 38. To set up a connection between control unit and Notebook/PC: Follow the operating instructions for the software and Notebook/PC used. Calling up the function: > [ ] → Device settings → [OK] → Bluetooth → [OK]. 55 Switching Bluetooth on / off 1. [Change]. 2. Select setting: [ ], [ ] → [OK]. 3. Confirm the entry: [Finished]. 6.1.2.9. Language This function is available in both the analyzer box and the control unit. Changes are accepted for the control unit and for the analyzer box. The menu language can be set. The number of available languages depends on the activated country version, see Country version, page 56. Activating the function: > [ ] → Device settings → [OK] → Language → [OK] Activate the language: > Select the language → [OK]. 6.1.2.10. Country version This function is available in both the analyzer box and the control unit. Changes are accepted for the control unit and for the analyzer box. The country version can be set. The selection of the country version influences the menu languages that can be activated. Please make sure that the correct country version has been set. By changing the country version the bases of calculation and thus the displayed measurement parameters, fuels, fuel parameters and calculation formulas may change. Information concerning assignment table, basis of calculation and country version see www.testo.com/download-center (registration required). If several components with different country versions are connected, the components will automatically change to the country version of the control unit when the control unit is connected. 56 Activating the function: > [ ] → Device settings → [OK] → Country Version → [OK] This action can be password protected. A password is specified in the menu Password protection, see Password protection, page 57. Possibly: > Enter the password: [Enter] → Enter password → [Next] → [OK]. Setting the country version: 1. Select the country version: [▲], [▼] → [OK]. 2. Confirm confirmation request: Yes → [OK] - The system is restarted. If the control unit is connected via Bluetooth to the measuring box, when the measuring box is restarted, the control unit should be used to search again for the measuring box (see Measure values of diluted sensors (with enabled measurement range extension) underlined on the prin Search for analyzer boxes, page 42.) 6.1.2.11. Password protection This function is available in both the analyzer box and the control unit. Changes are accepted for the control unit and for the analyzer box. The password protection is only valid for functions identified by the following symbol: or . Password protection can be activated / deactivated, the password can be changed. To deactivate the password protection change the password to 0000 (factory setting). Calling up the function: > [ ] → Instrument Settings → [OK] → Password Protection → [OK] 57 Possibly: > Enter the currently valid password: [Enter] → Enter password → [Next] → [OK]. Changing the password: 1. [Edit]. 2. Enter the new password → [Next]. 3. [Edit]. 4. Enter the new password again to confirm → [Next]. 5. Save changes: [Finished]. 6.1.2.12. Analog input (Only available via Analyzer Box tab) Power cable 0554 0007 (accessory) is required. An analog signal is read in by an external instrument. The signal is scaled and assigned to a physical parameter. The calculated value is displayed. Before the analyzer is started, insert power cable 0554 0007 at the measuring box probe input port. 1. Select analog signal (±1 V, ±10 V, 0…20 mA) at power cable 0554 0007. Activating the function: > [ ] → Device settings → [OK] → Analog input → [OK]. Configuring the analog input: 1. Measurement vs → [Change]. 2. Enter or set values: [▲], [▼], [◄], [►] → [OK]. 3. Save the entry: [Finished]. 4. Entry of min. and max. measure value limit (Min0V or Min0mA) → [Change]. 5. Enter or set values: [▲], [▼], [◄], [►] → [OK]. 6. [Finished]. 6.1.2.13. Data bus Bus address See Connection using a data bus cable, page 35. 58 6.1.3. Fuels & Test option The fuel can be selected. Fuel-specific coefficients can be set. Besides the already pre-configured fuels, up to 5 more fuels can be configured in a customized way (i.e. with the testo easyEmission software). Fuel parameter, see www.testo.com/download-center (registration required). In order to maintain the measuring accuracy of the instrument one must choose or configure the correct fuel. Activating the function: > [ ] → Fuels & Test option → [OK]. Activating fuels: > Select the fuel → [OK]. - The fuel is activated and the main menu is opened. Setting coefficients: 1. Select the fuel → [Coeff.]. 2. Select the coefficients: [Change]. Possibly: > Enter the password: [Enter] → [Next] → [OK]. 3. Set values → [OK]. 4. Save changes: [Finished]. 6.1.4. Sensor settings An NO2 addition and shut-down thresholds to protect the sensors can be set. Activating the function: > [ ] → Sensor settings → [OK] 59 6.1.4.1. NO2 addition The NO2 addition value can be calculated when the NO2 sensor is not installed. The setting of the NO2 addition value can be password protected, see Password protection, page 57. Activating the function: > [ ] → Sensor settings → [OK] → NO2 addition → [Change]. Possibly: > Enter the password: [Enter] → Enter password → [Next] → [OK]. Setting the NO2 addition: > Set parameter → [OK]. 6.1.4.2. CxHy-Sensor The CxHy-Sensor can be activated/deactivated. The HC-Sensor menu under Sensor settings is only displayed if an HC sensor is connected. This sensor is a Pellistor which always requires a certain amount of O2 to operate (approx. 2% O2). This sensor would be destroyed at lower values. The sensor therefore switches off at inadequate O2 values. If it is known from the beginning that values below 2% do exist, the sensor can also be switched off manually. CxHy-Sensor On starts the flue gas analyzer with a zeroing phase (30s). For proper functioning the sensor is heated up to approx. 500°C, duration: approx. 10min. This means that the sensor needs to be zeroed again 10min after the device has been switched on, in order to prevent drifting (into the "minus" range). Activating the function: > [ ] → Sensor settings → [OK] → HC-Sensor Switching the CxHy sensor on/off 1. [Change]. 2. Select setting: [▲], [▼] 3. Confirm the entry: [OK] 60 6.1.4.3. Sensor protection Protection limits can be set to protect the sensors against overload. The sensor protection switch-off is available for the following sensors: H2S, NO, NO2, CO2-(IR), CxHy, CO, SO2. The sensor protection is activated if the threshold is exceeded, the measuring gas is diluted. If the threshold is exceeded again, the system will be shut down. To deactivate sensor protection the thresholds must be set to 0ppm. Activating the function: > [ ] → Sensor settings → [OK] → Sensor protection → [Change]. Setting sensor protection thresholds: 1. Select parameter: [Change] 2. Set parameter → [OK] 3. Save changes: [Finished] 6.1.4.4. Calibration/adjustment CO-, SO2-, NO2-, NO-, O2- and CO2-(IR)-sensors can be tested (calibrated) and adjusted. The calibration of the O2- sensor (O2 reference) generally takes place in the same way as the calibration of the toxic sensors. The entered nominal O2-value is only temporary, i.e. the nominal value will be overwritten the device is switched off and on again the next time or in case of zeroing. The same applies when a measuring program passes through a zeroing phase. The O2 test gas must also be applied to the measuring gas input (as with the toxic sensors). If obviously unrealistic readings are displayed, the sensors should be checked (calibrated) and, if required, adjusted. Have the calibration/adjustment carried out by qualified personnel. To ensure that specific accuracies are retained, testo recommends testing every six months and recalibration when required, except when required by local or state regulations. 61 Adjustments made with low gas concentrations can lead to accuracy deviations in the upper measuring ranges. The sensor protection (shut-down function) is not deactivated. The test gas concentration should therefore be lower than the set thresholds for the sensor protection. The function of to dilute all (x5) is automatically deactivated. If the instrument is fitted with an CxHy sensor, it should be switched off before test gas is applied. If a CxHy-Sensor is fitted, switch this off before measuring test gases with O2 contents <2%. If you forget to do this, the sensor will switch off automatically during the measuring process, but will still be strained unnecessarily. The following boundary conditions must be met when calibrating / adjusting: • Use absorption-free hose material. • Select Test Gas as fuel • Switch on the flue gas analyzer at least 20 minutes before calibration/adjustment (to warm up) • Use clean air for gas zeroing • Maximum overpressure of the test gas 12.04 "H2O (recommended: pressureless via bypass) • Apply the test gas for at least 3 minutes Recommended test gas concentrations and compositions can be found in the Test Gas Manual (Order-No. 0981 2313) or in the Download Center. Activating the function: Make sure that the ambient air us free of interfering gases (i.e. CO, NO, etc.) during zeroing! > [ ] → Sensor settings → [OK] → Recalibration → [OK]. Possibly: > Enter the password: [Enter] → Enter password → [Next] → [OK]. - 62 Gas zeroing (30s). Perform calibration/adjustment of CO-, SO2-, NO2-, NO-, O2sensors: WARNING Dangerous gases Danger of poisoning! > Observe safety regulations/accident prevention regulations when handling test gas. > Use test gases in well ventilated rooms only. Application of test gas via service adapter (0554 1205) is recommended, or apply test gas directly to the probe tip to avoid possible absorptions in the gas path. 1. Select the parameter: [▲], [▼] → [OK] 2. [Change] → Enter the test gas concentration (nominal value). 3. Apply test gas to the sensor. 4. Start calibration: [Start] 5. Accept the nominal value once the actual value is stable (adjustment): [Adjust] -orCancel (no adjustment): [esc] 6. Save changes: [Finished] Perform calibration / adjustment of the CO2-(IR) sensor Check the CO2-(IR)-sensor with the absorption filter to obtain accurate readings. The displayed CO2-value should be <0.3%CO2. If the value is higher, perform calibration and gradient adjustment. WARNING Dangerous gases Danger of poisoning! > Observe safety regulations/accident prevention regulations when handling test gas. > Use test gases in well ventilated rooms only. Application of test gas via service adapter (0554 1205) is recommended, or apply test gas directly to the probe tip to avoid possible absorptions in the gas path. 63 1. Select the CO2IR-sensor: [▲], [▼] → [OK] 2. Connect Absorptionsfilter or apply Testgas CO2 with 0%. 3. [◄], [►], [Yes] → [OK] - Stability time (300s) 4. Start analyzer val. admis. manually: [Start] or wait for stability time: Analyzer val. admis. is automatically started. - Analyzer val. admis. ends automatically. 5. [Next] 6. Enter the nominal gradient value: [Change] → [▲], [▼], [◄], [►] → [OK]. 7. Start stability time: [Start] - Stability time (300s) 8. Start analyzer val. admis. manually: [Start] or wait for stability time: Analyzer val. admis. is automatically started. - Analyzer val. admis. ends automatically. 9. Perform adjustment: [Finished] -orCancel (no adjustment): [esc] 6.1.4.5. ppmh counter For sensors, which use a changeable chemical filter for neutralizing cross-gases, a ppm hour counter is available. This concerns: NO sensor Activating the function: > [ ] → Sensor settings → [OK] → ppm hour counter → [OK]. - The display shows maximum, current and remaining filter lifetime. Resetting a sensor hour meter 1. [Reset]. 2. Confirm confirmation request: Yes → [OK] 64 6.1.4.6. Calibration data With this function the current calibration data and the sensor status of the individual sensors can be displayed. The condition of the sensor is checked with each sensor calibration / adjustment. The graphic representation shows the last 25 calibrations. Activating the function: > [ ] → Sensor settings → [OK] → Calibration data → [OK]. Options > [Options] → [Print]: The current calibration data of all sensors are printed out. > [Options] → [Graphic]: The status of the selected sensor is graphically displayed. 6.1.4.7. Threshold Explanation 100% Full capacity 70% Reduced sensor sensitivity. Recommendation: Acquire a replacement sensor 50% Replace sensor Negative value The display for negative values can be activated/deactivated. Activating the function: > [ ] → Sensor settings → [OK] → Negative values Switching negative values on/off 1. [Change] 2. Select setting: [▲], [▼] 3. Confirm the entry: [OK] 65 6.1.5. Programs Five flue gas measuring programs can be set, saved and executed. The Trigger function (trigger signal as start/stop criterion) is only available for devices with the trigger input option. Instrument settings cannot be changed if a program is active or running. The program Exhaust Gas (before + after cat) checks whether the analyzer box is equipped with a fresh air valve. If not, a measuring program with normal flue gas measurement will be added, instead of the program Exhaust Gas (before + after cat). A program Exhaust Gas (before + after cat) without fresh air valve does not show any sensible measuring results. Activating the function: >[ ] → Programs → [OK]. Activating/deactivating a program: > Select the program: [▲], [▼] → [Enable] or [Disable]. - When activating a program: The program is activated and the measurement type matching the program is opened. Editing the measuring program: Adjustable parameters: Parameter Function Measurement program Edit program name Measurement type Select flue gas menu: Reading per mean value 66 • Flue gas • Flue gas + m/s • Flue gas ∆P • Flue gas (before and after catalyst) • Solid fuel With mean value Yes only mean values will be saved. Parameter Function Start Determine the start criterion • The measuring program is started at any time (the function key automatically changes to the stop function). Stop • Time Start of measurement at a pre-programmed time. • External signal Trigger signal to control the start of measuring programs. Determining the stop criterion • The measuring program is stopped at any time (the function key automatically changes to the start function) • Time The recoding of readings stops at a desired time. • External signal Trigger signal to control the stop of measuring programs. • Duration Setting cycles to save readings. • Memory full Saving readings ends when the memory is full. Gas time Selection of gas time cycle Rinse time Enter the rinse time. The measurement program begins with a rinse phase (duration: 6min). Measuring phases (gas time) and rinsing phases (rinsing time) alternate according to the programmed values. 67 Parameter Function Analyzer rate The analyzer rate is the saving cycle for mean values. It is programmed in units of seconds, minutes, whereby the smallest possible analyzer rate depends on the number and type of connected probes. 1. Select the program: [ ], [ ] → [OK]. ], [ ], [◄], [►]. 2. Press [Change]. 3. Press [Change]. 4. Edit program name: [ 5. Confirm the entry: [OK]. 6. Repeat steps 4 and 5 as required. 7. Press [Next]. 8. Perform steps 4 and 7 for further criteria accordingly. 9. Press [Finished]. 6.2. Measuring 6.2.1. Preparing for measurement The combustion air temperature is continuously measured by the temperature sensor installed in the analyzer box. The fresh air required for the zeroing phase is drawn in through the exhaust if no fresh air valve (option) is installed and through the valve inlet if a fresh air valve is installed. The flue gas probe can thus already be inside the flue gas channel before or during the zeroing phase. The testo 350 can be operated as follows: • lying down • hanging horizontally down by its handle • plugged vertically to the wall bracket by the handle To prevent measuring errors the position of the testo 350 must not be changed during a measurement. Under ambient temperatures of 50° F the CO2-(IR) sensor requires a shorter heat-up time to reach full measuring accuracy. At 23 °F this typically is 15 min. 68 Before switching on > Check whether: • All system components are properly connected. • All required probes / sensors are connected. • The power supply of all system components is guaranteed. During then zeroing phase During the zeroing phase the sensors of the analyzer are zeroed. Zero point and drift of the sensors are checked. The O2 value is set to 21% O2. > Make sure that the ambient air is free of interfering gases (i.e. CO, NO) during the zeroing phase! Before the measurement > Set the fuel for the combustion system to be measured. > Assign the required measurement parameters and units to a display field in the measurement view. > Activate the measurement site to which the readings are to be assigned. > Make sure that the gas outlets are free, so that the gas can escape without obstruction. Otherwise the measurement results may be corrupted. Measurements with the CxHy sensor WARNING Dangerous mixture of gases Danger of explosions. > Perform measurements only in flue gas ducts. > Only measure gases which do not form a combustible mixture in the ambient air. There must always be sufficient oxygen in the flue gas to prevent the CxHy sensor from being destroyed. With an O2 content of less than 2% the CxHy sensor switches off automatically (protective function). Higher concentrations of silicones, H2S and sulphurous hydrocarbons can also lead to the destruction of the CxHy sensor. Zeroing takes place automatically when the CxHy sensor is activated. To ensure that accurate CxHy readings are obtained, 69 you should then wait about 10 min. (with the analyzer switched on) before starting another zeroing process manually. To prevent the CxHy sensor from drifting during lengthy measurement operations, zeroing should be carried out from time to time. 6.2.2. Using the flue gas probe Checking the thermocouple > Make sure that the thermocouple of the flue gas probe does not touch the probe basket. Bend the thermocouple back if necessary. Aligning the flue gas probe > Turn the probe to align the thermocouple so that it is freely exposed to the flue gas flow. > Align the flue gas probe in the flue gas duct so that the tip is in the hot spot (area of the highest flue gas temperature). 6.2.3. Applications You can choose from fixed saved and a user defined application (application defined on the basis of the measuring object). The memory contains suitable device settings for the analyzer box and typical fuels and calculations for these applications. These quickly provides you with optimized device configurations for the respective measuring task and the device will automatically inform you about important application specific peculiarities (information in the display). Burner • Fuels: Natural gas, Butane, Propane, Diesel, Fueloil #5, Fueloil #6, Kerosene, Anthracite, Bituminous, Distillate #1, Wood 10%M., Wood 20%M., Wood 30%M., Wood 40%M., Bark 15%M., Bark 30%M., Bark 45%M., Bark 45%M., Bioheat 5, Bioheat 12, Bioheat 20, Test gas • Available measuring programs: Flue Gas, Flue Gas + m/s, Flue Gas + ∆P, Program for all analyzer boxes Turbine • 70 Fuels: Natural gas, Butane, Propane, Diesel, Fueloil #5, Fueloil #6, Kerosene, Anthracite • Available measuring programs: Flue Gas, Flue Gas + m/s, Flue Gas + ∆p, Flue gas before + after catalyst, Program for all analyzer boxes Engine >1 and engine <1 • Fuels Natural gas, Butane, Propane, Diesel, Fueloil #5, Fueloil #6, Kerosene, Anthracite, Bioheat 5, Bioheat 12, Bioheat 20, Test gas • Available measuring programs: Flue Gas, Flue Gas + m/s, Flue Gas + ∆p, Program for all analyzer boxes, Flue Gas before + after catalyst • Measuring program Exhaust Gas before + after catalyst: Two analyzer boxes are required. If one of the two analyzer boxes is equipped with a measurement range extension (individual dilution), the testo 350 will automatically recommend this analyzer box to be used for Before cat. If the analyzer box used for measurement Before cat is not equipped with the option measurement range extension, the device will recommend to install this option. If the analyzer box used for the measurement Before cat is equipped with the dilution option and the CO sensor is plugged into the dilution slot, 5x will automatically be used for dilution. I a higher dilution factor has already been activated, this setting will be maintained. If the analyzer box used for the measurement Before cat is equipped with the dilution option and the CO sensor is not plugged into the dilution slot, the device will recommend to replug the sensor accordingly. User-defined • Fuels: Natural gas, Butane, Propane, Diesel, Fueloil #5, Fueloil #6, Kerosene, Anthracite, Bituminous, Distillate #1, Wood 10%M., Wood 20%M., Wood 30%M., Wood 40%M., Bark 15%M., Bark 30%M., Bark 45%M., Bark 45%M., Bioheat 5, Bioheat 12, Bioheat 20, Test gas Activating the function: 1. [ ] → Applications → [OK]. Press the function key Options to open configuration menus. 2. Selecting an application: [ 3. Selecting fuel: [ ], [ ], [ ] → [OK]. ] → [OK]. 71 6.2.3.1. Flue Gas, Flue Gas + m/s, Flue Gas + Δp, Program for all analyzer boxes, Exhaust Gas before + after catalyst The flue gas menus (Measurement Type) are the central measuring menus, which – in addition to the readings measured with this function – contain the readings of all measurements performed (if selected in the menu Measurement view). All readings can also be saved in or printed out from these menus. The flue gas menus can always be selected, irrespective of the plugged in sensors. Measuring functions of the flue gas menu: • The measurement type Flue Gas can be used to perform a flue gas measurement. • The measurement type Program for all analyzer boxes can be used for i.e. a bus system, in which several flue gas analyzers are interconnected. A measuring program can thereby be defined and transferred to all analyzer boxes. • The measurement type Exhaust Gas before + after cat enables synchronous measuring of exhaust gas concentration before and after the catalyst. For this flue gas menu two measuring boxes are required, which are linked via the testo data bus. The readings of both analyzer boxes are displayed parallel in the display of the control unit to provide a quick overview over the condition of the catalyst. • With measurement type Flue Gas + m/s a flue gas measurement can be performed in parallel to a flow measurement (+ volume / mass flow calculation) via a Pitot tube (the connecting cable for the thermocouple of the straight Pitot tube must thereby not be connected to the sensor socket of the instrument). • The measurement type Flue Gas + ∆P can be used to perform a flue gas measurement with parallel differential pressure measurement. After measurements with high concentrations and after longer measurements the instrument should be rinsed with fresh air, so that the sensors can be regenerated again. 72 Flow measurement: Before the measurement beings, make the measurement site settings (Pitot tube factor and correction factor), see Folders / Measurement sites, page 43. Do not measure for longer than 5 min., as the drift of the pressure sensor could have the effect that the readings are outside the tolerance limits. Activating the function: ✓ Application selected. > Choose the measurement type: [ ], [ ] → [OK]. Options > [Options] → Save: The readings are saved in a record. > [Options] → Print: The readings from a record are printed. > [Options] → Fuels & Test option: Select fuel. > [Options] → Dilution: Select the dilution factor. > [Options] → Measurement view: (This function is not available during a measurement): The configure measurement view menu is opened. > [Options] → Folders: (This function is not available during a measurement): - The folder Folders/Measurement sites is opened. > [Options] → Programs: The programs menu is opened. > [Options] → Recalibrate: (This function is not available during a measurement): The gas sensors are zeroed. > [Options] → Number of lines: Change the number of measuring values per display page. > [Options] → Show Graphic: The readings are displayed in form of a line graph. > [Options] → Configure Graphic: The measurement parameters to be represented (max. 4) can be displayed ( hidden ( ). - ) or Possibly: Gas zeroing (30s). > Depressurize the pressure sensor and perform pressure zeroing. Performing the measurement: 1. Start measurement: [ ]. 73 Undiluted CO reading If a separate measurement of CO undiluted has not yet been carried out, this value is calculated using the readings of the flue gas probe and is updated continuously. If CO undiluted has already been measured separately, the value obtained is adopted. - The readings are displayed. 2. End the measurement, record readings: [ ]. 3. 6.2.3.2. Draft-Measurement ✓ A flue gas probe must be connected. ✓ The pressure socket of the instrument must be free (depressurized, not closed). Do not measure for longer than 5 min., as the drift of the pressure sensor could have the effect that the readings are outside the tolerance limits. > [Options] → Save: The readings are saved in a record. > [Options] → Print: The readings from a record are printed. > [Options] → Measurement view: (This function is not available during a measurement): The configure measurement view menu is opened. > [Options] → Folders: The folder Folders is opened. > [Options] → Show Graphic: The readings are displayed in form of a line graph. > [Options] → Configure Graphic: The measurement parameters to be represented (max. 4) can be displayed ( hidden ( ). ) or Activating the function: > Measurement type → Draft-Measurement → [OK]. Performing the measurement: 1. Start measurement: [ - Draft zeroing (7s). - Rinse (approx. 10s). ] 2. Position the flue gas probe in the hot spot (area of the highest flue gas temperature). The display showing the maximum 74 measured flue gas temperature (FT) helps when positioning the probe. - The reading is displayed. 3. Quit measurement [ - ]. The reading is maintained. Options: > [Options] → Save: The readings are saved in a record. > [Options] → Print: The readings from a record are printed. > [Options] → Show Graphic: The readings are displayed in form of a line graph. > [Options] → Configure Graphic: The measurement parameters to be represented (max. 4) can be displayed ( hidden ( ). 6.2.3.3. ) or Smoke number Activating the function: > Measurement Type → Smoke number → [OK]. Determine smoke pump no./smoke nos./oil deposits with the smoke pump and enter manually: The function is only available if the chosen fuel is an oil. 1. Select parameter → [Change]. 2. Enter data or values → [Next] or [OK]. Enter the boiler H2O temperature: > Boiler H2O Temp → [Change] → Enter value → [OK]. Options > [Options] → Reset values: The entered values are deleted. > [Options] → Save: The readings are saved in a record. > [Options] → Print: The readings from a record are printed. 6.2.3.4. Gas flow calc. The function Gas flow calc. is only available if the activated fuel is a gas. 75 Activating the function: > Measurement Type → Gas flow calc. → [OK]. Performing the measurement: 1. Start measurement: [ - ]. The measuring duration is displayed. 2. When the adjusted gas flow is reached: [ - ]. The calculated gas flow and the gas burner capacity (in kW) are displayed. Options: > [Options] → Print: The readings from a record are printed. > [Options] → Save: The readings are saved in a record. > [Options] → Change Gas amount: Set the gas amount value. > [Options] → Change unit: The unit for the gas flow can be changed (m3 > l or l > m3). 6.2.3.5. Oil flow calculation The function is only available if the chosen fuel is an oil. Activating the function: > [ ] → Measurement Options → [OK] → Oil Flow calc. → [OK]. Performing the measurement: 1. Select the parameters Oil Clocking (of the oil nozzle) and Oil pressure (no effect on calculation): [▲], [▼] → [Change]. 2. Enter values. [▲], [▼] and partly [◄], [►] → [OK]. - The calculated oil burner capacity (in kW) is displayed. Options: > [Options] → Print: The readings from a record are printed. > [Options] → Save: The readings are saved in a record. > [Options] → Change unit: The unit for the oil flow can be changed (kg/h > gal/h or gal/h > kg/h). 76 6.3. Analog outputs (only available via tab Analog output box) The analog output box is displayed like the analyzer box. The tab contains the databus number. The analog output box 0554 0845 (accessory) is suitable for the output of up to 6 measuring channels in form of analog signals (4 to 20 mA). The analog output box is connected to the instrument via databus, the configuration can be made via control unit or the PC software easyEmission (with testo databus controller). Power supply Power is supplied to the analog output box via the measuring box. The LED of the analog output unit lights green when the power supply is correct. Each individual output channel is thereby assigned to a measuring channel, the range of the respective measurement channel is entered and then corresponds to the 4 t 20 mA output of the output box connected to this channel. If the measurement range is 77 exceeded 21-22 mA is still output, depending on load. If the measurement range is fallen short of, the output will be up to 3.5 mA. The current value is set to 3.5 mA as start value for a non-adjusted analog output box and for cases of faults. Connections The channels are electrically isolated towards the testo databus. However, the individual channels are not electrically isolated among each other. When connecting you must make sure that there are no undesired ground loops! In both channels the positive output is connected to the ground connection of the recorder. The interfaces work correctly. Activating the function: > [ ] → Analog outputs → [OK]. Configuration of analog outputs: 1. Press [Edit]. ], [ 2. Assign channel to box: [ ] → [OK]. 3. Press [►]. 4. Press [Edit]. 5. Select parameter: [ ], [ ] → [OK]. 6. Press [Edit]. 7. Set min. measurement limit: [ ], [ ], [◄], [►]→ [OK]. 8. Set max. measurement limit: [ ], [ ], [◄], [►]→ [OK]. 9. Select next channel: [ ]. > Repeat steps 1 to 9. 10.Confirm the entry: [Finished]. 78 7 Maintainence 7.1. Changing the rechargeable battery Control unit The rech. batt. pack can only be changed by the testo service. Analyzer box ✓ The analyzer box must not be connected to a power socket. ✓ The analyzer box must be switched off. 1. Open the cover of the service compartment (locking clip) on the back of the analyzer box. 2. Take the rech. batt. pack out of the battery compartment and loosen the plug connection from the slot. Use only testo rech. batt. pack 0515 0039. When inserting the rech. batt. pack, make sure that the leads do not get kinked or squeezed. 3. Connect the connector of the new rech. batt. pack to the slot and lay the rech. batt. pack into the battery compartment. 4. Close the service compartment cover. Do not use silicone cleaners. 79 7.2. Cleaning the analyzer > In case of contamination clean the housings of Control unit and analyzer box with a damp cloth. Do not use any aggressive cleaning agents or solvents! Mild household cleaning agents and soap may be used. Do not use silicone cleaners. > Clean ventilation slots, gas outlets, fresh air inlets, pressure connections and dilution air inlet with a vacuum cleaner. Do not blow out with compressed air. 7.3. Changing / retrofitting sensors A slot bridge (0192 1552) must be inserted in slots which are not equipped with a sensor. Used sensors must be disposed of as hazardous waste! The CO2-(IR) sensor can only be changed / retrofitted by the testo service. When the sensor is changed, the switch-off threshold values are only retained if the measuring box is isolated from the mains supply and rechargeable battery during the change, and is restarted afterwards. ✓ The analyzer box must be switched off and isolated from the power supply and rechargeable battery. 1. Place the analyzer box on its front. 2. Open the cover of the sensor compartment (locking clip) and take it off. 3. Loosen the bow from the sensor. 80 4. Take the sensor out of the bracket. 5. Pull the hose connections off the connecting nipples of the defective sensor/the bridge. 6. Remove the defective sensor/bridge from the slot. > NO- / NOlow sensors: Remove the auxiliary circuit board. Remove the additional circuit boards of the new sensors just before the installation. Do not allow sensors to lay around without additional circuit board for longer than 15min. 81 Sensors must be connected to the dedicated and correspondingly marked slots: Slot Sensors 1 NO2, H2S, CO, COlow, NO, NOlow, SO2 2 NO2, H2S, CO, COllow, NO, NOlow, SO2 3 CO2-(IR), NO2, H2S, CO, COlow, NO, NOlow, SO2 4 O2 5 CO, COlow, NO, NOlow, SO2, CxHy 6 CO, COlow, NO, NOlow, SO2, CxHy 7. Install new sensor/new bridge in the slot. 8. Plug the hose connectors on the sensor/bridge. 9. Insert the bow into the bracket. 82 10.Attach the sensor compartment cover and close it (the clip must click into place). After replacing an O2-sensor, plug in and change for 60 min. before you use the device. 7.4. Replacing the filter for NO sensors ✓ The measuring instrument must be switched off and isolated from the power supply. 1. Place the measuring instrument on its front. 2. Open the cover of the sensor compartment (locking clip) and take it off. 3. Loosen the bow from the sensor and take it out of the bracket, see Changing / retrofitting sensors, page 80. 4. Pull the hose connectors off the sensor. 5. Remove the sensor from the slot. 6. Remove the used filter from the sensor. 7. Plug the new filter on the sensor. Avoid touching the sensor. Follow the marking on filter and sensor. 8. Insert the sensor in the slot. 9. Press the hose connectors on the sensor. 10.Insert the bow into the bracket, see Changing / retrofitting sensors, page 80. 11.Attach the service cover and close it (the clip must click into place). 12.Reset the ppm-hour meter, see ppmh counter, page 64. 7.5. Recalibrating sensors See Calibration data, page 65. 83 7.6. Cleaning the modular flue gas probe ✓ Disconnect the flue gas probe from the measuring instrument prior to cleaning. 1. Release the probe catch by pressing the key on the probe handle and remove the probe module. 2. Blow compressed air through the flue gas ducts in probe module and probe handle (see illustration). Do not use a brush! 3. Fit a new probe module on the probe handle and engage it in place. 7.7. Replacing probe pre-filter On probe modules with pre-filter the pre-filter can be replaced. > Unscrew the pre-filter from the probe shaft and screw on a new filter. 7.8. Changing the thermocouple 1. Release the probe catch by pressing the key on the probe handle and remove the probe module. 2. Remove the thermocouple plug-in head from the socket using a screwdriver and pull the thermocouple out of the probe shaft. 3. Keep inserting the new thermocouple into the probe shaft until the connection head clicks into place. 4. Fit a new probe module on the handle and engage in place. 84 7.9. Condensate trap/condensate container With the gas preparation option fitted, the condensate is separated from the measuring gas and is led into a condensate container that is isolated from the gas path. In the case of longer measurements with moist flue gas, the condensate can be led off using a tube without any external air being carried along. The filling level of the condensate trap can be read from the markings. Emptying the condensate trap/condensate container The condensate consists of a weak mix of acids. Avoid skin contact. Make sure that the condensate does not run over the housing. CAUTION Condensate entering the gas path. Damage to sensors and flue gas pump! > Do not empty the condensate trap/condensate container while the flue gas pump is in operation. 1. Unlock the condensate trap/condensate container by the orange handle on the underside. 85 2. Unlock the condensate trap/condensate container and pull it vertically off the analyzer box. 3. Open the drain plug (1) and let the condensate run out into a sink. 4. Wipe off any drops still on the condensate outlet with a cloth and close the condensate outlet. 5. Plug the condensate trap/condensate container on the analyzer box. 7.10. Checking / replacing the dirt filter Checking the dirt filter: > Check the dirt filter of the analyzer box periodically for contamination. Check visually by looking through the window of the filter chambers. In case of visible contamination, change the dirt filter. Replacing the dirt filter: The filter chamber may contain condensate. 86 1. Open the filter chamber: Turn the filter cover counter-clockwise and remove. 2. Remove the dirt filter and replace it with a new one (0554 3381). 3. Attach the filter cover and lock by turning it clockwise. The rib on the filter cover must be parallel to the handle. 7.11. Cleaning/replacing the pump ✓ The analyzer box must be switched off and isolated from the power supply. 1. Empty the condensate container. 2. Place the analyzer box on its front. 87 3. Open the cover of the service compartment (locking clip) on the back of the analyzer box. 1 Condensate pump 2 Main gas pump 3 Rinsing/feed pump for diluting gas 7.11.1. Cleaning the main gas pump 1. Pull the gas pump upwards out of the gas measuring block. 2. Pull the inlet and outlet hoses off the sockets on the pump head 3. Loosen the plug connectors and remove the main gas pump. 4. Loosen the 4 fastening screws (Torx spanner T 9) on the pump head of the main gas pump. 5. Pull off the pump head. 6. Remove the two circlips from the depressions of the pump head (front and rear). 88 7. Remove and clan the pump diaphragm (i.e. white spirit). > If necessary, blow the inlet and outlet sockets out with compressed air. 8. Reattach the pump diaphragms with the circlips. 9. Place the pump head on the main gas pump and fasten with the screws (Torx spanner T 9). 10.Push the inlet and outlet hoses over the sockets on the pump head. 11.Connect the plug connectors and insert the main gas pump into the gas measurement block. 7.11.2. Changing the main gas pump When the main gas pump is changed by the user, the operating hour meter is not reset. The difference between the current operating hour reading and the operating hours from the last pump change serve as an indicator for the next pump change. 1. Pull the gas pump upwards out of the gas measuring block. 2. Pull the inlet and outlet hoses off the sockets on the pump head 3. Loosen the plug connector and remove the main gas pump. 4. Push the inlet and outlet hoses over the sockets on the pump head of the new main gas pump. 5. Connect the plug connectors and insert the main gas pump into the gas measurement block. 89 7.11.3. Changing the condensate pump The condensate pump is only available in instruments with the gas preparation (GP) option. 1. Unlock an remove the cover. 2. Unlock the two lateral clip locks of the condensate pump and pull off the pump head. 3. Pull the inlet and outlet hoses off the sockets on the analyzer box. 4. Plug the inlet hose (length 0.98") and outlet hose (length 1.2") of the new pump onto the connecting sockets of the analyzer box. 5. Push the pump onto the motor shaft until the clip locks engage. Make sure that the tubes are not pinched or constrained. 6. Attach cover. 90 7.11.4. Replacing the motor of the condensate pump The condensate pump is only available in instruments with the gas preparation (GP) option. 1. Unlock and remove the cover. 2. Unlock the two lateral clip locks of the condensate pump and pull off the pump head. 3. Pull the inlet and outlet hoses off the sockets on the analyzer box. 91 4. Loosen the motor on the condensate pump (short anticlockwise turn). 5. Take the motor of the condensate pump out of the bracket. 6. Loosen the plug connector, remove the motor. 7. Push on the plug connector of the new motor. 8. Place the motor of the condensate pump into the bracket. 9. Fasten the motor on the condensate pump (short clockwise turn). 10.Plug the inlet hose (length 0.98") and outlet hose (length 1.2") of the pump onto the connecting sockets of the analyzer box. 11.Push the pump onto the motor shaft until the clip locks engage. Make sure that the hoses are not pinched or constrained. 12.Attach cover. 92 7.12. Replacing the filtration non-woven in the gas cooler The filtration non-woven is included in the filter set 0554 3381. ✓ The analyzer box must be switched off and isolated from the mains supply. 1. Unlock the condensate trap and pull it vertically off the measuring box. 2. Pull off the hose. 3. Open the cover of the filtration non-woven in anti-clockwise direction. 4. Replace the exhausted filter with a new filtration non-woven. 5. Close the cover. 6. Plug on the hose. 7. Plug the condensate container on the measuring box. 93 7.13. 7.14. Recommended maintenance cycles Component Service life Remedy Main gas pump 2500 hr Renew the pump Special main gas pump for long-term measurement 10000 hr Renew the pump Rinsing/delivery pump 2500 hr Renew the pump Condensate pump 2500 hr Renew pump head with hose (gas cooler option) 5000 hr Renew the pump Fleece in gas cooler (gas cooler option) 1200 hr Clean housing, renew fleece Condensate trap/ condensate container 25ml condensate Empty the condensate trap/condensate container at regular intervals Condensate watchdog (option) The condensate watchdog serves the purpose of protecting the infrared CO2 sensor. It prevents the penetration of condensate into the infrared sensor. If the message Condensate watchdog appears in the display of the control unit, the condensate watchdog needs to be dried. If the message appears repetitively, the flue gas analyzer must be returned to the testo service. Drying the condensate watchdog ✓ The analyzer box must be switched off and isolated from the mains supply. 1. Unlock the condensate trap and pull it vertically off the measuring box. 94 2. Unscrew the 4 screws from the cover and open the cover. 3. Remove the measuring electrodes and clean them with a dry cloth. The housing may still contain condensate residues. 4. Clean out all condensate and wipe the housing with a dry cloth. 5. Reinsert the cleaned measuring electrodes. 6. Attach the cover and fasten it with the screws. 7. Plug the condensate trap/condensate container on the analyzer box. 95 8 Tips and assistance 8.1. Questions and answers Question Possible causes/solution Rechargeable battery low > Switch to AC power supply. Analyzer box switches automatically off or analyzer box cannot be switch on Batteries/rechargeable batteries empty. NO value drifts Auxiliary voltage for NO sensor was interrupted, i.e. by a sensor change. > Charge rechargeable batteries or switch to AC power supply. > Wait until sensor has regenerated. Stable NO measurement only possible after approx. 2 hr. Double module A sensor of the same type has already been plugged in. Dilution Gas flow rate in dilution path too high / too low > Please contact your local dealer or the Testo Customer Service. O2 sensor exhausted ... Signal too high > Replace the O2 sensor Signal of indicated sensor is too high. > Wait until regenerated (additional zeroing starts automatically). > Ensure fresh air supply ... Signal not stable Signal of indicated sensor is drifts excessively (defect). > Change sensor. > Wait until regenerated (additional zeroing starts automatically). > Ensure fresh air supply 96 ... Switch-off Reading of indicated sensor is higher than the set switch-off threshold. Instrument temperature Instrument temperature is beyond the operating temperature. Question Possible causes/solution Pump volumetric flow rate Too low gas flow (filter clogged) or too high gas flow (overpressure). > Check gas path / filter. Gas cooling system Gas cooler not working (faulty). > Please contact your local dealer or the Testo Customer Service. Sensor temperature too high O2 sensor temperature beyond the specification. Gas cooler fault Condensate in gas cooler was not pumped off. > Check peristaltic pump Inlet and outlet hoses mixed up by mistake. > Push the inlet and outlet hoses correctly over the sockets on the pump head. Low pump power Inlet and outlet hoses mixed up by mistake. > Push the inlet and outlet hoses correctly over the sockets on the pump head. Slow to establish a connection or slow data transfer between PC/notebook and testo 350 via Bluetooth Control unit is plugged into measuring box or is connected via data bus cable. > To achieve a high data speed, we recommend setting up a Bluetooth connection directly via the measuring box. If we could not answer your question, please contact your dealer or testo Customer Service. Contact data see back of this document or website www.testo.com/service-contact. 97 8.2. Accessories and spare parts Printer Description Article no. Infrared high-speed printer 0554 0549 Bluetooth printer, incl. rechargeable battery and charging adapter 0554 0543 Filter Description Article no. Particle filter for flue gas probe 0554 3385 Filter set for measuring box and gas cooler 20 pcs. dirt filters for measuring box and 10 pcs. filtration non-woven for gas cooler 0554 3381 Spare filter for probe pre-filter 0554 3372 Spare filter for NO-sensor 0554 4150 Flue gas probes, probe shafts and thermocouples Description Article no. Flue gas probe, 11.81" incl. probe stop, thermocouple NiCr-Ni (TI), Tmax 932 °F, 7 ft. tube 0600 9766 Flue gas probe, 27.5" incl. probe stop, thermocouple 0600 9767 NiCr-Ni (TI), Tmax 932 °F, 7 ft. tube Flue gas probe, 11.81" incl. probe stop, thermocouple NiCr-Ni (TI), Tmax 1832 °F, 7 ft. tube 0600 8764 Flue gas probe, 27.5" incl. probe stop, thermocouple 0600 8765 NiCr-Ni (TI), Tmax 1832 °F, 7 ft. tube Flue gas probe, 11.81" with pre-filter, incl. probe stop, thermocouple NiCr-Ni (TI), Tmax 1832 °F 7 ft. tube 0600 8766 Flue gas probe, 27.5" with pre-filter, incl. probe stop, 0600 8767 thermocouple NiCr-Ni (TI), Tmax 1832 °F, 7 ft. tube 98 Engine probe with pre-filter 0600 7561 Engine probe without pre-filter 0600 7560 Tube extension 9 ft. 0554 1202 Description Article no. Probe shaft with pre-filter, 11.81", Tmax 1832 °F 0554 8766 Probe shaft with pre-filter, 27.5", Tmax 1832 °F 0554 8767 Probe shaft, 11.81", Tmax 932 °F TI 0554 9766 Probe shaft, 27.5", Tmax 932 °F TI 0554 9767 Probe shaft, 11.81", Tmax 1832 °F TI 0554 8764 Probe shaft, 27.5", Tmax 932 °F TI 0554 8765 Thermocouple, 11.81" NiCr-Ni (TI), Tmax 932 °F 0430 8764 Thermocouple, 27.5" NiCr-Ni (TI), Tmax 932 °F 0430 8765 Pitot tubes Description Article no. Pitot tube 19.6" 0635 2140 Pitot tube 39.3" 0635 2240 Pitot tube 13.77" 0635 2041 Pitot tube 29.52" 0635 2042 Sensors (spare) Description Article no. O2 0393 0000 CO, H2-comp., filter not replaceable 0393 0104 NO, incl. replacement filter 0393 0150 NO2 0393 0200 SO2 0393 0250 SO2low 0393 0251 NOlow 0393 0152 COlow-H2-comp 0393 0102 CO2-(IR) Testo-Sevice H2S 0393 0350 CxHy 0393 0300 99 Retrofits CO, H2-comp. sensor 0554 2104 NO sensor 0554 2150 NO2 sensor 0554 2200 SO2 sensor 0554 2250 NOlow sensor 0554 2152 COlow-H2-comp. sensor 0554 2102 CO2-(IR) sensor Testo-Sevice H2S sensor 0554 2350 Bluetooth module for control unit and analyzer box Testo-Sevice Gas cooler / gas preparation Testo-Sevice Fresh air valve Testo-Sevice Measurement range extension for individual slot Testo-Sevice DC voltage input Testo-Sevice Automatic pressure zeroing Testo-Sevice Spare parts Description Article no. Tube cartridge (condensate pump) 0440 0013 Motor for condensate pump 0238 0001 Rinsing/feed pump for diluting gas 0239 0014 Main pump (standard) 0239 0031 Special analyzer box gas pump for long-term measurement 0239 0032 Rech. batt. pack for analyzer box 0515 0039 Rech. batt. pack for control unit Testo-Sevice Other accessories 100 Description Article no. Service adapter 0554 1205 AC power supply for control unit 0554 1096 easy Emission (PC configuration software) 0554 3335 Transport case 0554 3510 Description Article no. Service adapter 0554 1205 Carrying strap 0554 3147 Analog output box 0554 0845 Cable with adapter for cigarette lighter and adapter for connection to analyzer box 0554 1336 Cable with battery terminals and adapter for connection to analyzer box 0554 1337 Hose set for flue gas discharge 0554 3149 Wall bracket for analyzer 0554 0203 USB cable to connect the PC to the analyzer 0449 0073 Data bus connecting plug 0554 0119 Data bus line 5 ft. 0449 0075 Data bus line 6 ft. 0449 0076 Data bus line 65 ft. 0449 0077 Connecting cable analog output box 0449 0086 Connecting cable data bus adapter 0449 0087 ISO calibration certificate 0520 0003 For a complete list of all accessories and spare parts, please refer to the product catalogues and brochures or look up our website www.testo.com 8.3. Updating the instrument software Under www.testo.com/download-center you can download the current instrument software (Firmware) for testo 350 (registration required). Control unit and analyzer box must be separated for updating the instrument software. Before the firmware update is started, the control unit's rechargeable battery must be fully charged. If the battery is not fully charged, this will affect the firmware update. The analyzer must then be sent in to testo service. Once the instrument software has been updated, the descriptions in the operating instructions will no longer match the instrument functions. For the latest version of the operating instructions, visit www.testo.com\download-center. 101 Control unit > Unplug the power supply and switch off the control unit. 1. Hold [▲] depressed. 2. Plug in the power supply, keep [▲] depressed. - The display shows Firmware update along the bottom edge. 3. Release [▲] . 4. Plug the connecting cable (Art.-No. 0449 0073) into the USBport on the Control unit, then connect it to the PC. - Your PC recognises the control unit as a removable medium. 5. Copy the new file (appcurel.bin) to the detected removable medium. - In the display the status bar progresses from left to right. This process may take a few minutes. 6. Disconnect the connecting cable from the device. - After updating of the instrument software (Firmware) has been completed the control unit will automatically reboot and is ready for use. Analyzer box > Disconnect power supply. 1. Place the analyzer box on its front. 2. Open the cover of the sensor compartment (locking clip) and take it off. 3. Hold the button at slot 3 carefully depressed with a pointed tool. 4. Plug in the mains plug, keep the button depressed. - The status display flashes alternately green and red. 5. Release the button. 6. Plug the connecting cable (Art.-No. 0449 0073) into the USBport on the analyzer box, then connect it to the PC. - 102 Your PC recognizes the analyzer box as a removable medium. 7. Copy the new file (appboxdbg.bin) to the detected removable medium. - The status display flashes alternately green and red. This process may take a few minutes. 8. Remove the connecting cable from the analyzer box 350. - After updating of the instrument software (Firmware) has been completed the analyzer box will automatically reboot and is ready for use. 103 9 Appendix Recommendation for emission measurements over an extended period of time The following table shows recommendations for rinse times for measurements with high concentrations and recommendations for calibration cycles for emission measurements over an extended period (via a measuring program): > Rinse the instrument: Expose the probe to fresh air and start flue gas measurement. Measurement parameter RecomConcen- Recommended mended tration measure- rinse time [ppm] ment [min] period [min] Recommended calibration cycle in months Filter service life 50 100 200 500 1000 2000 4000 8000 10000 90 60 30 15 10 10 5 5 5 5 5 10 10 10 15 30 45 60 3 3 3 3 3 3 1 1 1 approx. 300.000ppmh COH2low 10 20 50 100 200 500 90 60 30 15 10 10 5 5 10 10 15 20 3 3 3 3 3 3 approx. 80.000ppmh NO 50 100 200 500 1000 2000 3000 90 60 30 20 10 10 5 5 5 5 10 10 20 30 3 3 3 3 3 1 1 approx. 120.000ppmh (filter exchangeable) COH2 104 Measurement parameter RecomConcen- Recommended tration mended [ppm] measure- rinse time [min] ment period [min] Recommended calibration cycle in months Filter service life NOlow 10 20 50 100 200 300 90 60 30 20 10 10 5 5 5 10 10 20 3 3 3 3 3 3 approx. 40.000ppmh NO2 10 20 50 100 200 500 90 60 30 20 10 10 5 5 5 10 10 20 3 3 3 3 3 1 - SO2 50 100 200 500 1000 2000 5000 90 60 30 15 10 10 5 5 5 10 10 10 20 40 3 3 3 3 3 1 1 approx. 200.000ppmh H2S 10 20 50 100 200 300 40 30 20 10 5 5 5 5 10 10 10 20 2 2 2 2 2 2 - CxHy Pellistor no rinsing cycles required, as long as the flue gas contains a sufficient amount of O2 (O2 shut-down...) 2 CO2-(IR) no rinse cycles required 1 approx. 70.000ppmh - If the testo 350 is not used for measurements over an extended period, but rather, for example, for random measurements during start-up, servicing and adjustment of industrial combustion systems, process systems, power plants, gas turbines or stationary industrial motors, an annual check of the testo 350 by testo service is recommended. 105 Cross-sensitivities This table is valid for new sensors with unused filters, and for cross-gas concentrations in the ppm-range (down to less than 1000ppm). The value "0" means: <1% cross-sensitivity. Target gas Cross-gas CO NO NO2 SO2 13 O2 0 0 0 0 CO(H2) --- 0 10 0 10 010 0 CO(H2)low --- 0 10 0 10 010 0 NO 0 0 H2S --- 0 10 11 (w) 10 0 0 --- NO2 0 0 <-2% --- -20% 12 SO2 <5%12 0 --- -110%12 010 SO low <5%12 0 --- -110%12 010 CxHy 10 H2S 10 12 <2% 10 10 0 <15% <5% 12 NO low 35% 0 6% 12 10 0 12 <20% 0 12 -20% 0 0 12 --- With non-saturated filter. w = changeable filter 12 Is compensated, if the cross-gas in the instrument is also measured (i.e. if the instrument is equipped with the corresponding sensors). 11 106 Target gas Cross-gas Cl2 H2 O2 HCI 13 CO2 0 see 14 0 0 CO(H2) 0 15 0 0 0 0 CO(H2)low 0 15 0 0 0 0 NO 0 0 0 0 0 NO low 0 0 0 0 0 NO2 0 100% 0 0 0 SO2 <3% -80% 010 30% 0 -80% 10 30% 0 SO low CxHy H2S <3% 130% 0 16 0 HCN 0 no data no data no data 0 <10% 0 0 0 13 No influence up to a few 1000ppm; for cross-concentrations in the %-range 0.3% O2 per 1% SO2 / HCl. 14 0.3% O2 per 1% CO2; is compensated 15 after H2-compensation 16 Is compensated with indication CO/H2 from the CO(H2)-sensor. 107 0970 3519 en 02 V01.00 en_US