1
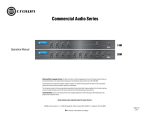
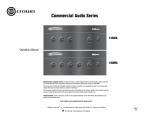
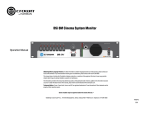
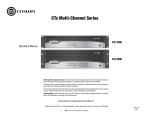
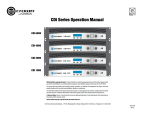
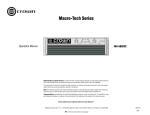
Commercial Audio Series 140MAx Pack Crown 140MAx Operation Manual Two JBL Control 1S loudspeakers (part of 140MAx Pack) Obtaining Other Language Versions: To obtain information in another language about the use of this product, please contact your local Crown Distributor. If you need assistance locating your local distributor, please contact Crown at 574-294-8000. This manual does not include all of the details of design, production, or variations of the equipment. Nor does it cover every possible situation which may arise during installation, operation or maintenance. The information provided in this manual was deemed accurate as of the publication date. However, updates to this information may have occurred. To obtain the latest version of this manual, please visit the Crown website at www.crownaudio.com. Trademark Notice: Crown, Crown Audio and Amcron are registered trademarks of Crown International. Other trademarks are the property of their respective owners. Some models may be exported under the name Amcron.® ©2007 by Crown Audio® Inc., 1718 W. Mishawaka Rd., Elkhart, Indiana 46517-9439 U.S.A. Telephone: 574-294-8200 139118-1A 9/07 Commercial Audio Series Tuner-Mixer-Amplifiers Important Safety Instructions 1) 2) 3) 4) 5) 6) 7) 8) 9) 10) 11) 12) 13) 14) page 2 Read these instructions. Keep these instructions. Heed all warnings. Follow all instructions. Do not use this apparatus near water. Clean only with a dry cloth. Do not block any ventilation openings. Install in accordance with the manufacturer’s instructions. Do not install near any heat sources such as radiators, heat registers, stoves, or other apparatus (including amplifiers) that produce heat. Do not defeat the safety purpose of the polarized or grounding-type plug. A polarized plug has two blades with one wider than the other. A grounding-type plug has two blades and a third grounding prong. The wide blade or the third prong is provided for your safety. If the provided plug does not fit into your outlet, consult an electrician for replacement of the obsolete outlet. Protect the power cord from being walked on or pinched, particularly at plugs, convenience receptacles, and the point where they exit from the apparatus. Only use attachments/accessories specified by the manufacturer. Use only with a cart, stand, tripod, bracket, or table specified by the manufacturer, or sold with the apparatus. When a cart is used, use caution when moving the cart/apparatus combination to avoid injury from tip-over. Unplug this apparatus during lightning storms or when unused for long periods of time. Refer all servicing to qualified service personnel. Servicing is required when the apparatus has been damaged in any way, such as powersupply cord or plug is damaged, liquid has been spilled or objects have fallen into the apparatus, the apparatus has been exposed to rain or moisture, does not operate normally, or has been dropped. 15) WARNING: TO REDUCE THE RISK OF FIRE OR ELECTRIC SHOCK, DO NOT EXPOSE THIS APPARATUS TO RAIN OR MOISTURE. 16) DO NOT EXPOSE TO DRIPPING OR SPLASHING. DO NOT PLACE OBJECTS FILLED WITH LIQUID, SUCH AS VASES,ON THIS APPARATUS. TO COMPLETELY DISCONNECT THIS EQUIPMENT FROM THE AC MAINS, DISCONNECT THE POWER SUPPLY CORD PLUG FROM THE AC RECEPTACLE. THE MAINS PLUG OF THE POWER SUPPLY CORD SHALL REMAIN READILY OPERABLE. TO PREVENT ELECTRIC SHOCK DO NOT REMOVE TOP OR BOTTOM COVERS. NO USER SERVICEABLE PARTS INSIDE. REFER SERVICING TO QUALIFIED SERVICE PERSONNEL. À PRÉVENIR LE CHOC ÉLECTRIQUE N’ENLEVEZ PAS LES COUVERCLES. IL N’Y A PAS DES PARTIES SERVICEABLE À L’INTÉRIEUR. TOUS REPARATIONS DOIT ETRE FAIRE PAR PERSONNEL QUALIFIÉ SEULMENT. WATCH FOR THESE SYMBOLS: The lightning bolt triangle is used to alert the user to the risk of electric shock. The exclamation point triangle is used to alert the user to important operating or maintenance instructions. IMPORTANT Commercial Audio Series tuner-mixer-amplifiers require Class 2 output wiring. MAGNETIC FIELD CAUTION! Do not locate sensitive high-gain equipment such as preamplifiers or tape decks directly above or below the unit. Because this tuner-mixeramplifier has a high power density, it has a strong magnetic field which can induce hum into unshielded devices that are located nearby. The field is strongest just above and below the unit. If an equipment rack is used, we recommend locating the tuner-mixer-amplifier(s) in the bottom of the rack and other sensitive equipment at the top. FCC COMPLIANCE NOTICE This device complies with part 15 of the FCC rules. Operation is subject to the following two conditions: (1) This device may not cause harmful interference, and (2) this device must accept any interference received, including interference that may cause undesired operation. CAUTION: Changes or modifications not expressly approved by the party responsible for compliance could void the user’s authority to operate the equipment. NOTE: This equipment has been tested and found to comply with the limits for a Class B digital device, pursuant to part 15 of the FCC Rules. These limits are designed to provide reasonable protection against harmful interference in a residential installation. This equipment generates, uses, and can radiate radio frequency energy and, if not installed and used in accordance with the instruction manual, may cause harmful interference to radio communications. However, there is no guarantee that interference will not occur in a particular installation. If this equipment does cause harmful interference to radio or television reception, which can be determined by turning the equipment off and on, the user is encouraged to try to correct the interference by one or more of the following measures: • Reorient or relocate the receiving antenna. • Increase the separation between the equipment and receiver. • Connect the equipment into an outlet on a circuit different from that to which the receiver is connected. • Consult the dealer or an experienced radio/TV technician for help. Operation Manual Commercial Audio Series Tuner-Mixer-Amplifiers DECLARATION of CONFORMITY Crown International, Inc. Issued By: Crown International, Inc. 1718 W. Mishawaka Road Elkhart, Indiana 46517 U.S.A. FOR COMPLIANCE QUESTIONS ONLY: Sue Whitfield 574-294-8289 [email protected] European Representative’s Name and Address: Nick Owen 35, Bassets Field Thornhill Cardiff. South Glamorgen CF14 9UG United Kingdom Equipment Type: Commercial Audio Series Family Name: Tuner-Mixer-Amplifiers Model Names: 140MAx EMC Standards: EN 55103-1:1997 Electromagnetic Compatibility - Product Family Standard for Audio, Video, Audio-Visual and Entertainment Lighting Control Apparatus for Professional Use, Part 1: Emissions EN 55103-1:1997 Magnetic Field Emissions-Annex A @ 10 cm and 1 M EN 61000-3-2:2001 Limits for Harmonic Current Emissions (equipment input current 16A per phase) EN 61000-3-3:2002 Limitation of Voltage Fluctuations and Flicker in Low-Voltage Supply Systems Rated Current 16A EN 55022:2003 Limits and Methods of Measurement of Radio Disturbance Characteristics of ITE: Radiated, Class B Limits; Conducted, Class B EN 55103-2:1997 Electromagnetic Compatibility - Product Family Standard for Audio, Video, Audio-Visual and Entertainment Lighting Control Apparatus for Professional Use, Part 2: Immunity EN 61000-4-2:2001 Electrostatic Discharge Immunity (Environment E2-Criteria B, 4k V Contact, 8k V Air Discharge) EN 61000-4-3:2001 Radiated, Radio-Frequency, Electromagnetic Immunity (Environment E2, Criteria A) EN 61000-4-4:2001 Electrical Fast Transient/Burst Immunity (Criteria B) EN 61000-4-5:2001 Surge Immunity (Criteria B) EN 61000-4-6:2003 Immunity to Conducted Disturbances Induced by Radio-Frequency Fields (Criteria A) EN 61000-4-11:2001 Voltage Dips, Short Interruptions and Voltage Variation Safety Standard: IEC 60065: 2002 7th Ed. Safety Requirements - Audio Video and Similar Electronic Apparatus CAN/CSA-E60065-03 7th Ed. Audio, Video and Similar Electronic Apparatus-Safety Requirements UL 60065 7th Ed. Audio /Video and Musical Instrument Apparatus for Household, Commercial and Similar General Use. I certify that the product identified above conforms to the requirements of the EMC Council Directive 89/336/EEC as amended by 92/31/EEC, and the Low Voltage Directive 73/23/EES as amended by 93/68/EEC. Signed Date of Issue: Jan. 1, 2006 Larry Coburn Operation Manual Title: Senior Vice President of Manufacturing Due to line current harmonics, we recommend that you contact your supply authority before connection. page 3 Commercial Audio Series Tuner-Mixer-Amplifiers Table of Contents page 4 Important Safety Instructions .......................................................2 3.4.2 Overview of XM Satellite Radio .................................13 Declaration of Conformity ............................................................3 3.4.3 Installing the Antenna................................................14 1 Welcome ................................................................................5 3.4.4 Operating the XM Tuner.............................................14 1.1 Features ...........................................................................5 3.4.5 Operation by the Front-Panel Controls ......................15 1.2 Front Panel Controls and Indicators ................................ 6 3.4.6 Operation by Remote Control ....................................17 1.3 Back Panel Controls and Connectors................................7 4 Troubleshooting ...................................................................18 2 Setup ......................................................................................8 5 Specifications ......................................................................19 2.1 Installation........................................................................8 6 Service ... ...............................................................................20 2.2 Choose Input Wire and Connectors .................................9 6.1 US and Canada Service ...................................................20 2.3 Choose Output Wire and Connectors ...............................10 6.1.1 Service at a US or Canada Service Center ................20 2.4 Wire Your System ............................................................11 6.1.2 Factory Service .........................................................20 2.5 Phantom Power ................................................................11 6.1.3 Factory Service Shipping Instructions ......................20 3 Operation .................................................... 12 6.1.4 Packing Instructions..................................................20 3.1 Powering Up.....................................................................12 6.1.5 Estimate Approval......................................................20 3.2 Priority Ducking................................................................12 6.1.6 Payment of Non-Warranty Repairs.............................20 3.3 Music-On-Hold ................................................................12 7 Warranty ...............................................................................21 3.4 XM Satellite Radio Operation............................................13 Product Registration.....................................................................23 3.4.1 Copyright Notice........................................................13 Crown Factory Service Information Form .....................................25 Operation Manual Commercial Audio Series Tuner-Mixer-Amplifiers 140MAx Minimum guaranteed power into 4 ohms *1 kHz Power 40W *1 kHz Power: refers to maximum power in watts at 1 kHz with 0.5% THD. 1 Welcome The Crown® 140MAx Pack is the first tunermixer-amplifier and loudspeaker system designed for commercial use. It is designed for easy installation by the user. Applications include restaurants, retail stores, coffee shops and other commercial establishments. The system includes the Crown 140MAx tunermixer-amplifier, two JBL® Control® 1S 2-way loudspeakers, and two 25-ft. speaker cables. Built into the 140MAx is an XM Radio tuner that receives satellite radio stations with digital sound quality. A front-panel LCD screen displays XM Radio channel data (channel number, channel name, artist name, song title), 16 station presets and signal strength. Operation Manual 1.1 Features The unit also accepts signals from line, telephone, or microphone (phantom power included). Bass and treble controls allow the user to tailor the tone quality of the sound system. The priority ducking feature drops the volume of the background music when a microphone is used. A VOX threshold setting controls how loud the voice must be before ducking occurs. The built-in power amplifier provides 40 watts into a 4-ohm output (for use with the supplied JBL Control 1S loudspeakers). Current and thermal limiting protect the amplifier and loudspeakers from accidental overload. • • • • • • • • Ideal for commercial use; can be installed by the user 4 inputs, one input volume control, and one 40W amplifier output channel Balanced Phoenix-type mic/line input, XLR-type mic input, dual RCA stereo music inputs, screw-terminal speaker outputs Programmable XM Radio tuner with XM channel data display Priority ducking XM Radio Music-On-Hold output Two JBL Control 1S 8-ohm 2-way loudspeakers with cables included One-Year, No-Fault, Fully Transferable Warranty completely protects your investment and guarantees its specifications page 5 Commercial Audio Series Tuner-Mixer-Amplifiers 1 Welcome (continued) 1.2 Front Panel Controls and Indicators A. Input Volume Control (Levels): One detented encoder with knob. Microphone/line (switchable). B. XM Tuner Display: LCD screen displays XM channel data (channel number, channel name, artist name, song title) 16 station presets and signal strength. C. XM Tuner Scroll Knob: Lets you scroll through channels and select them. D. Power Indicator: Blue LED indicates power on. E. XM Tuner Menu Button: Selects Direct, Preset or Category mode. F., G: XM Tuner Category Buttons: Scrolls through categories (rock, classical, news, country, etc.) H. Power Switch: Pushbutton on-off switch. Figure 1.1 Front Panel Controls and Indicators page 6 Operation Manual Commercial Audio Series Tuner-Mixer-Amplifiers 1 Welcome (continued) 1.3 Back Panel Controls and Connectors I. Amplifier Output Connectors: 2-position terminal strip with COM (Common) and 4-ohm terminals. Accepts up to 10 AWG crimp-on terminal forks. Speaker wire included. J. XM Radio Section XM Radio Stereo Line Out Connector: Dual RCA jacks for stereo music out from XM Radio tuner. RS-232 Port: Not currently active. For future diagnostics use. XM Radio Antenna Connector: Connects to XM antenna cable. K. Priority Section Active Indicator: LED illuminates when VOX ducking is active. VOX Threshold: Trim pot adjusts how loud the voice must be before ducking occurs. Can be set for no ducking. I Priority Release Control: Trim pot adjusts release time of VOX ducking. M. Input Section Mic/Line Input Connector: 3-pin Phoenix-type, balanced. Priority Connector: 3-pin Phoenix-type connector for pushto-talk mic switch. Contact closure activates ducking. Ducking does not affect Music-On-Hold outputs or XM stereo line out. Mic Input Connector: XLR-type, balanced. L. Music-On-Hold Section MOH Signal Presence Indicator: Flashes when MOH signal is present. Mic/line Switch: Selects mic-level or line-level signal for Phoenix-type input. Dual RCA Input Connector: For stereo music signals, unbalanced, summed together, two connectors per input. MOH 1V Level Control: Trim pot adjusts level for MusicOn-Hold 1V output. N. AC Power Cable: Permanently attached. MOH 1V Line Output Phoenix Connector: 3-pin Phoenix connector, 600-ohm transformer-isolated output, provides Music-On-Hold signal of approximately 1 volt. O. TEL Input Connector: Transformer-isolated 600-ohm input, summed into input for paging from a telephone system. MOH 1V Line Output RCA Connectors: Two RCA connectors (mono) for 1-volt output (in parallel with 600-ohm connectors, so they are isolated). J K N Operation Manual Phantom Power Switch: Turns phantom power on or off for Phoenix-type input connector and XLR input connector. L M O Figure 1.2 Back Panel Controls and Connectors page 7 Commercial Audio Series Tuner-Mixer-Amplifiers 2 Setup 2.1 Installation CAUTION: Before you begin, make sure your tuner-mixer-amplifier is disconnected from the power source, with the power switch in the “off” position and the Levels control turned completely down (counterclockwise). You may place a single mixer-amp on a surface with 12 inches of air space around the unit for convection cooling. Do not mount units directly on top of each other. Allow 2 rack units (3.5 inches) between units for convection cooling. When using a rack, the side walls of the rack should be a minimum of two inches (5.1 cm) away from the tuner-mixer-amplifier sides, and the back of the rack should be open. . page 8 3.5 In. 8.9 cm 4.1 In. 10.5 cm 17.3 In. 43.8 cm 12.2 In. 31.0 cm 13.9 In. 35.2 cm Figure 2.1 Dimensions Operation Manual Commercial Audio Series Tuner-Mixer-Amplifiers 2 Setup (continued) 2.2 Choose Input Wire and Connectors Crown recommends using pre-built or professionally wired balanced line (two-conductor plus shield), 22-24 gauge cables and connectors. Unbalanced line (one-conductor plus shield) may also be used but may result in noise over long cable runs. Female XLR input on 140MAx The 140MAx has three types of input connectors: Phoenix-type, XLR, and RCA. + – + • Mic/Line Connector: 3-pin Phoenix-type, balanced (Figure 2.2). – Male XLR cable connector • Mic Connector: XLR, balanced (Figure 2.3). • Dual RCA Input Connector: For stereo music signals, unbalanced, summed together, two connectors per input (Figure 2.4). • Tel Input Connector: 3-pin Phoenix-type, transformer isolated, 600 ohms. Summed into input for paging from a telephone system. See Figure 2.5. To stereo line-level source The 140MAx also has an XM Radio antenna connector for use with the supplied XM Radio antenna. Figure 2.4 Dual RCA Input Connectors To microphone To mic or line-level source Figure 2.2 3-pin Phoenix-type Connectors - Figure 2.3 XLR Mic Input Connectors Figure 2.5 Tel (Isolated) Connector Wiring to Telephone System Interface or PBX To telephone system interface/PBX output Operation Manual page 9 Commercial Audio Series Tuner-Mixer-Amplifiers 2 Setup (continued) 2.3 Choose Output Wire and Connectors Amplifier Output Connectors: Find the enclosed speaker cables, which have spade lugs. Slip the spade lugs under the output screw terminals and tighten (Figure 2.6). XM Radio Stereo Line Out Connector: Get a cable with two RCA plugs on each end. Connect one end of that cable to the XM Radio Stereo Line Out Connector. Connect the other end of that cable to the line-level input of an external device. See Figure 2.7. Music-On-Hold Connections You can play music from the XM radio over your phone line while the caller is on hold. Use one of the connectors below to connect the 140MAx to the Music-On-Hold input on your telephone system interface/PBX. - • MOH Line Output Phoenix Connector: 3-pin Phoenix connector, 600-ohm transformer-isolated output, provides Music-On-Hold signal of approximately 1 volt. See Figure 2.8. • MOH Line Output RCA Connectors: Two RCA connectors (mono) for 1-volt Music-On-Hold output (in parallel with 600ohm connectors, so they are isolated). See Figure 2.9. Figure 2.6 Amplifier Output Connections To line-level input of external device Figure 2.7 Connections to the XM Radio Stereo Line Out RCA Connectors To telephone system interface/PBX input Figure 2.8 Connections to the MOH Line Output Phoenix Connector Figure 2.9 Connections to the MOH Line Output RCA Connectors To line-level input of external device page 10 Operation Manual Commercial Audio Series Tuner-Mixer-Amplifiers 2 Setup (continued) 2.4 Wire Your System Typical input and output wiring is shown in Figure 2.10. INPUTS: Connect either a microphone or a balanced linelevel signal to the Phoenix-type input connector. Set the MIC/LINE switch accordingly. You can also connect a microphone to the XLR input. Connect unbalanced line-level signals to the RCA input connectors. OUTPUTS: Find the amplifier output connectors (screw terminals). Using a speaker cable, connect the COM terminal to the speaker negative (–) lead; connect the 4-ohm terminal to the speaker positive (+) lead. 8-ohm speakers Using the other speaker cable, connect one speaker’s (+) terminal to the other speaker’s (+) terminal. Connect one speaker’s (–) terminal to the other speaker’s (–) terminal. 2.5. Phantom Power Condenser mics require phantom power to operate. If you are using a condenser microphone with the 140MAx, turn on the Phantom Power Switch on the back of the mixeramplifier. The microphone must be able to work on 15V phantom power, which the 140MAx mic input connector provides. CD/DVD player XM antenna Figure 2.10 Input and Output Wiring Operation Manual page 11 Commercial Audio Series Tuner-Mixer-Amplifiers 3 Operation 3.1 Powering Up 1. Turn off any equipment connected to the Line Out connectors. 2. Plug the amplifier’s power cord into a 3-wire grounded AC outlet. 3. Turn down the input volume controls. 4. Turn down the master volume control. 5. Turn on the Power switch. The Power indicator should glow. 6. Turn the input volume controls in use about 3/4 up. 7. Turn up the master volume control(s) until the desired loudness or power level is achieved. 8. Touch up the input levels as needed for equal loudness from each microphone. 9. Turn on any equipment connected to the Line Out connectors. If you ever need to make any wiring or installation changes, disconnect the power cord. 3.2 Priority Ducking If you want a microphone to duck (turn down) the background music, follow this procedure. On the back of the 140MAx, 1. Connect a push-to-talk mic switch to the Priority Connector (Figure 3.1). 2. While talking into a microphone, adjust the VOX Threshold control on the back of the unit. It controls how loud the voice must be before ducking occurs. The control can be set for no ducking. The Active Indicator will illuminate when ducking is active. 3. Adjust the Priority Release control on the back of the unit. It adjusts the release time of the VOX ducking. 3.3 Music-On-Hold On the back of the unit, adjust the MOH Level Control to obtain the desired level of Music-On-Hold on your phone system. page 12 Figure 3.1 Priority Ducking Controls and Connectors Operation Manual Commercial Audio Series Tuner-Mixer-Amplifiers 3 Operation (continued) 3.4 XM Satellite Radio Operation 3.4.1 Copyright Notice It is prohibited to copy, decompile, disassemble, reverse engineer, or manipulate any technology incorporated in receivers compatible with the XM Satellite Radio system. Furthermore, the AMBE (R) voice compression software included in this product is protected by intellectual property rights including patent rights, copyrights, and trade secrets of Digital Voice Systems, Inc. The user of this or any other software contained in an XM Radio is explicitly prohibited from attempting to copy, decompile, reverse engineer, or disassemble the object code, or in any other way convert the object code into human-readable form. The software is licensed solely for use within this product. 3.4.2 Overview of XM Satellite Radio Your 140MAx tuner-mixer-amplifier includes a high-fidelity, commercial XM satellite radio receiver. 170 channels of music, news, sports, comedy, talk, and entertainment are available with digital quality sound. XM offers 100% commercial-free music channels and over 2 million titles. For an up-to-date channel lineup, please visit www.XMradio.com. The required basic monthly subscription is sold separately. Premium Channel is available at additional monthly cost. Installation costs and other fees and taxes, including a one-time activation fee may apply. The subscription fee is commercial only. All fees and programming subject to change. Channels with frequent explicit language are indicated by "XL." Channel blocking is available for XM radio receivers by calling 1-800XMRADIO. Subscriptions subject to Customer Agreement available at XMradio.com. XM is available only in the 48 contiguous United States and Canada. XM® is a registered trademark of XM Satellite Radio Inc. ©2006 XM Satellite Radio Inc. All rights reserved. Using XM radio requires a monthly subscription from XM Satellite Radio. To subscribe, contact XM on the Web at www.XMradio.com or by phone at 1-800-XM-RADIO (or 1-800-967-2346). Operation Manual page 13 Commercial Audio Series Tuner-Mixer-Amplifiers 3 Operation (continued) 3.4.3 Installing the Antenna 1. Connect the antenna Connect the included XM antenna to the XM antenna input on the back of the 140MAx. 4. Optimize the signal strength Have someone hold the antenna as you optimize the signal strength (described next). 3.4.4 Operating the XM Tuner You can control the XM tuner by the 140MAx front-panel buttons or by the included remote control. If the power fails, the tuner will automatically return to its state before power loss. A display will appear similar to the one below: The XM tuner display and controls are shown below. You will be mounting the antenna near a south-facing wall. The antenna comes with 20 feet of cable. If that is not sufficient to reach the 140MAx, purchase a 50-foot cable extension kit. Up to two extensions can be used together for up to 120 total feet of cable. Alternatively, you can use custom lengths of 50 ohm RG58U, or obtain extension kits from third-party sources. For outdoor antenna installation options, go to www.xmradio.com XM Direct Signal-strength indicator 2.Turn on the 140MAx Verify the power indicator is illuminated and the display backlight is on. At the bottom right of the screen is a small box that indicates signal strength. Orient the antenna to achieve maximum signal strength (fill the box as much as possible). If the message “CHECK ANTENNA” appears, check that the antenna connector is tightly connected and that the antenna cable is not shorted. If the antenna does not have a clear path to the satellites, the display will read “NO SIGNAL”. 3. Align the antenna For indoor installation on a flat surface: Set the antenna on its base on a flat horizontal surface, ideally near a south-facing wall, and near a window if possible. 5. Set the listening volume Turn up the XM input volume control until you hear the XM radio signal at a low volume. If the system is working, you will hear XM programming on channel 1 and you can proceed to activate the 140MAx. Turn the base of the antenna so that the XM logo is facing to the south if you are in the eastern half of the U.S. and to the south/southeast if you are in the western half of the U.S. 6. Activate your XM account After verifying channel 1 audio, you must activate your XM account to access all XM channels. Commercial accounts must sign up for and activate under the terms of XM’s Commercial Service. For outdoor installation: See www.xmradio.com for third-party outdoor installation options. For indoor wall mounting: You will mount the antenna near a south-facing wall, and near a window if possible. 1. Insert four screws (not supplied) in the wall so they align with the holes in the base of the antenna. 2. Tilt the antenna fully back on the base. 3. Place the antenna base on the four screw heads with the antenna pivot at the top. 4. Pull down the base approximately 1/4 inch until the base is firmly secured. The XM logo will be upside down when the antenna is properly installed. page 14 First obtain the XM Radio ID number of your unit. Turn the Scroll knob until you see channel 0 on the LCD display and press the Scroll knob to select this channel, or press Direct Entry then 0 and OK on the remote control. The 8-digit XM Radio ID will appear in the top section of the display. Record the 8-character ID in the space below, noting that letters I, O, S and F are not used and that the number zero has a line running diagonally through it. XM Radio ID: _________________________ Activate your XM radio service by calling XM at 1-800-XM-RADIO (1-800-967-2346). Commercial accounts cannot be activated via the Internet. A listener care representative will help you activate your unit. Customers should have their Radio ID ready; the Radio ID can be found by selecting channel 0 on the tuner with the Scroll Knob to the right of the LCD Display. • The LCD display shows channel information. • The Menu button selects Direct, Preset, or Category mode (explained later). • The Category < > buttons select Categories (rock, country, jazz, news, etc.) • The Scroll knob lets you scroll through the XM channels and select them (explained later). Infrared remote sensor LCD display Scroll knob Default Display The default display shows the current channel number, channel name, Category name, artist name and song title. The word "Direct" appears at the bottom left of the screen. That means the tuner is in Direct mode: you can select channels directly from the remote control if you wish. You can also select channels using the front-panel controls. Artist XM124 Direct Song title Channel Name Category name Operation Manual Commercial Audio Series Tuner-Mixer-Amplifiers 3 Operation (continued) 3. Press a Category < or > button. The tuner will scroll through the Categories. When you see a Category that you want, press the Scroll knob. 3.4.5 Operation by the Front-Panel Controls To listen to a channel 2. Push the Scroll knob to listen to that channel. 4. Turn the Scroll knob until you see a channel that you want to listen to. All the scrolling channels are in that same Category. Press the Scroll knob to listen to the channel. To listen to a Preset channel To set volume, bass, and treble 1. Push the Menu button until you see "Preset" in the bottom left of the display. 1. Turn the Levels encoder. The Main Level screen appears.Turn the encoder up or down to adjust the volume level. (If you don’t do anything, the XM screen will re-appear after a delay.) 1. Turn the Scroll knob until you see the channel you want. Artist XM124 Preset Song title Channel Name Category name 3. Push the Levels encoder. The Treble screen appears. Turn the encoder up or down to adjust the amount of treble. Treble –12dB . . . . . . . . . . . . . +12dB Push for XM Level 4. Push the Levels encoder. The XM Level screen appears. Turn the encoder up or down to adjust the XM Radio level. XM Level Levels encoder Main Level –50dB 0dB Push for Input 1 Level Push for Bass 2. Using the Scroll knob, scroll through presets 1-16. Press the Scroll Knob to select the desired preset. 5. Push the Levels encoder. The Input 1 Level screen appears. Turn the encoder up or down to adjust the Input 1 level. To select channels by categories (musical genres) "Category" means the type of programming offered on a channel, such as rock, country, jazz, news, etc. 1. Press the Menu button until you see "Category" in the bottom left of the display. 2. In the bottom-right corner of the screen is the name of the current Category. Artist XM124 Category Operation Manual Song title Channel Name Category name 2. Push the Levels encoder. The Bass screen appears. Turn the encoder up or down to adjust the amount of bass. Bass Input 1 Level –30dB Push for Main Level –12dB . . . . . . . . . . . . . +12dB Push for Treble 6. Push the Levels encoder and you are back to the Main Level screen. Main Level 0dB Push for Bass page 15 Commercial Audio Series Tuner-Mixer-Amplifiers 3 Operation (continued) XM front panel lock-out 1. To activate front panel lock-out, press Category < and > buttons at the same time and release. 2. "Lockout Enabled" will appear to confirm that the XM feature is locked on the front panel. You still can operate the remote control. 3. To deactivate front panel lock-out, press Category < and > buttons at the same time and release. 4. "Lockout Disabled" will appear to confirm that the XM feature is unlocked on the front panel. XM Diagnostics mode The diagnostic mode is useful for antenna installation and optimization of signal strength. 1. Press Menu and Category < buttons at the same time and release. 2. Scroll through the diagnostic mode using the Category < and > buttons. page 16 Operation Manual Commercial Audio Series Tuner-Mixer-Amplifiers 3 Operation (continued) 3.4.6 Operation by Remote Control To listen to a Preset channel by direct entry To adjust XM radio volume To listen to a channel by direct entry 1. For presets 0-9, press the desired preset digit you would like to recall. 1. Press the Direct Entry button on the remote control. 2. Using the Digits 0-9, select the 1-, 2-, or 3- digit channel number you would like to access. 3. Press OK. 2. For presets 10-16, press 1, then the desired preset digit you would like to recall. Press volume up or volume down to achieve the desired XM volume level. Note: MOH level, XM Stereo outputs, and XM input volume controls are affected by this volume control. The overall amplifier volume is not affected by this volume control. Artist XM124 To listen to a channel by scrolling through channels 1.Press CH + to go to higher channels. 2.Press CH – to go to lower channels. 3.Press OK to confirm your channel selection. Preset Song title Channel Name Category name To mute the XM signal Press Mute. "Mute" will flash in the display to notify you that audio is muted. 3. Press OK to listen to the desired preset. To listen to a Preset channel by pressing Preset +/– To set up Preset channels 1. Press PSET + or PSET– to go through presets 1 through 16. 1. Using direct entry or CH +/–, find the channel you would like to set as a preset, and press OK. 2. Press OK to listen to preset desired 2. For presets 0-9, hold the desired preset digit for 2 seconds. For presets 10-16, press 1, then hold the second digit (0 through 6) of the preset for 2 seconds. To select channels by categories (musical genres) 3. Repeat Steps 1-2 for the remaining Presets. "Category" means the type of programming offered on a channel, such as rock, country, jazz, news, etc. 1. Press Category < or > on the remote to select the next or prior category. You will see "Category" in the bottom left of the display. Artist XM124 Category Song title Channel Name Category name 2. Press CH+ or CH– to cycle through the channels. 3. Press OK to select the desired channel. Operation Manual page 17 Commercial Audio Series Tuner-Mixer-Amplifiers 4 Troubleshooting CONDITION: No power. POSSIBLE REASON: • The mixer-amplifier’s Power switch is off. • The mixer-amplifier is not plugged into the power receptacle. • The mixer-amplifier’s high-voltage power supply circuit breaker has tripped. Verify that the AC mains voltage is correct, then press the Reset button on the back panel. CONDITION: No sound. POSSIBLE REASON: • The amplifier is in “fault” mode. A Fault status can be triggered when one of the amplifier’s protection circuits is activated. First disconnect your speakers from the affected channel(s) one by one to determine if one of the loads is shorted. If an amplifier channel has a thermal fault, there will be no indication on the front panel, but the amp will recover after cooling. If operation does not return to normal after restarting your amp, return mixer-amp to Crown or an authorized Crown Service Center for servicing. • No input signal. • Input signal level is very low. CONDITION: Distorted sound. POSSIBLE REASON: • Input signal level is too high. Turn down your Levels control. NOTEL Your tuner-mixeramplifier should never be operated at a level which cause the Clip LED to illuminate constantly. Key: LED OFF LED ON page 18 Operation Manual Commercial Audio Series Tuner-Mixer-Amplifiers 5 Specifications Minimum Guaranteed Power 140MAx 1 kHz with 0.5% THD Minimum guaranteed power per channel into 4 ohms or 70V/100V output 40W Performance Number of input channels 2 Number of power amplifier channels 1 Input Sensitivity (volts RMS) for full output at maximum gain 3 mV 800 mV 400 mV 75 mV Balanced mic inputs Balanced line inputs RCA connectors Telephone connector Frequency Response (at 1 watt from 4-ohm tap, 80 Hz - 15 kHz) Frequency Range 70 Hz - 20 kHz (–10 dB). Power Capacity 150 watts (test signal of IEC filtered random noise with a peak-to-average ratio of 6 dB, 2 hrs duration). Sensitivity 87dB/1W/1m. < 0.5% Nominal Impedance 8 ohms. < ± 5 mV Crossover Frequency 6 kHz. Components: 135 mm (5-1/4 in) low frequency loudspeaker 19 mm (3/4 in) polycarbonate dome tweeter. Enclosure Material Structural foam. Finish Black, grey or white. Termination Spring terminal (adapted to accept dual banana plugs). Dimensions (HxWxD) 235 x 159 x 143 mm (9.25 x 6.25 x 5.625 in). Net Weight (each) 1.8 kg (4 lb). ± 1 dB Power Bandwidth (at 8-ohm tap, 2 dB below maximum 1 kHz power) 80 Hz to 20 kHz with < 0.5% THD Signal to Noise Ratio (ref. to rated power, master volume at minimum) 85 dB Total Harmonic Distortion (THD) at rated power at 1 kHz DC Output Offset Input Impedance (nominal) Crosstalk XM Line Output Level (nominal) Phantom Power AC Line Voltages Available Operating Temperature/Humidity Storage Temperature JBL Control 1S Loudspeaker Specifications Mic: 400 ohms, Line: 100 kilohms, RCA: 50 kilohms, Telephone: 600 ohms –70 dB at 1 kHz 1V into 10 kilohms 15 VDC 120V, 60 Hz. Line voltage tolerance +15%, –20% 0o C to 40o C at 95% relative humidity (non-condensing) o o –20 C to 85 C Construction Cooling Dimensions: Width, Height, Depth (behind mounting surface) Net Weight (140MAx), Shipping Weight (complete system) Operation Manual Convection cooled Width (without rack ears): 17.3" (43.8 cm). Width (with rack ears): EIA Standard 19" W (EIA RS-310B).Height (front panel): 3.5" (8.9 cm).Height (including feet): 4.1" (10.5 cm).Depth (front panel to back panel): 12.2" (31.0 cm).Depth (front of knobs to back of non-touch cover): 13.9" (35.2 cm). 20 lb (9.07 kg), 43 lb (19.5 kg) page 19 Commercial Audio Series Tuner-Mixer-Amplifiers 6 Service Crown amplifiers are quality units that rarely require servicing. Before returning your unit for servicing, please contact Crown Technical Support to verify the need for servicing. viceable prior to sending it to the factory. Serviceable product list is available at http://crownweb.crownintl.com/crownrma/. For more information, please contact us direct. This unit has very sophisticated circuitry which should only be serviced by a fully trained technician. This is one reason why each unit bears the following label: A Service Return Authorization (SRA) is required for product being sent to the factory for repair. An SRA can be completed online at www.crownaudio.com/support/ factserv.htm. If you do not have access to the web, please call Crown’s Customer Service at 574.294.8200 or 800.342.6939 extension 8205 in North America only. CAUTION: To prevent electric shock, do not remove covers. No user serviceable parts inside. Refer servicing to a qualified technician. Complete the Crown Audio Factory Service Information form, in the back of this manual, when returning a Crown product to the factory or authorized service center. The form must be included with your product inside the box or in a packing slip envelope securely attached to the outside of the shipping carton. Do not send this form separately. Warranty is only valid within the country in which the product is purchased. 6.1 US and Canada Service Service may be obtained in one of two ways: from an authorized service center or from the factory. You may choose either. It is important that you have your copy of the bill of sale as your proof of purchase. 6.1.1 Service at a US or Canada Service Center This method usually saves the most time and effort. Simply present your bill of sale along with the defective unit to an authorized service center to obtain service. They will handle the necessary paperwork and repair. Remember to transport the unit in the original factory pack. A list of authorized service centers in your area can be obtained from Crown Factory Service, or online from http://www.crownaudio.com/support/servcent.htm. 6.1.2 Factory Service Crown accepts no responsibility for non-serviceable product that is sent to us for factory repair. It is the owner’s responsibility to ensure that their product is ser- page 20 For warranty service, we will pay for ground shipping both ways in the United States. Contact Crown Customer Service to obtain prepaid shipping labels prior to sending the unit. Or, if you prefer, you may prepay the cost of shipping, and Crown will reimburse you. Send copies of the shipping receipts to Crown to receive reimbursement. Your repaired unit will be returned via UPS ground. Please contact us if other arrangements are required. 6.1.3 Factory Service Shipping Instructions: 1. Service Return Authorization (SRA) is required for product being sent to the factory for service. Please complete the SRA by going to www.crownaudio.com/support/factserv.htm. If you do not have access to our website, call 1.800.342.6939, extension 8205 and we'll create the SRA for you. 2. See packing instructions that follow. 3. Ship product to: CROWN AUDIO FACTORY SERVICE 1718 W MISHAWKA RD. ELKHART, IN 46517-9439 4. Use a bold black marker and write the SRA number on three sides of the box. 5. Record the SRA number for future reference. The SRA number can be used to check the repair status. 6.1.4 Packing Instructions Important: These instructions must be followed. If they are not followed, Crown Audio, Inc. assumes no respon- sibility for damaged goods and/or accessories that are sent with your unit. Cardboard support 1. Fill out and include the Crown Audio Factory Service Information sheet in the back of this manual. 2. Do not ship any accessories (manuals, cords, hardware, etc.) with your unit. These items are not needed to service your product. We will not be responsible for these items. 3. When shipping your Crown product, it is important that it has adequate protection. We recommend you use the original pack material when returning the product for repair (Figure 9.1). If you do not have the original box, please call Crown at 800.342.6939 or 574.294.8210 and order new pack material. (Do not ship your unit in a wood or metal cabinet.) 4. If you provide your own shipping pack, the minimum recommended requirements for materials are as follows: a. 275 P.S.I. burst test, Double-Wall carton that allows for 2-inch solid Styrofoam on all six sides of unit or 3 inches of plastic bubble wrap on all six sides of unit. b. Securely seal the package with an adequate carton sealing tape. c. Do not use light boxes or “peanuts”. Damage caused by poor packaging will not be covered under warranty. Enclose the completed Crown Audio Factory Service Information form (or securely attach it to the outside of carton) and re-seal the shipping pack with a sturdy carton sealing tape. 6.1.5 Estimate Approval Approval of estimate must be given within 30 days after being notified by Crown Audio Inc. Units still in the possession of Crown after 30 days of the estimate will become the property of Crown Audio Inc. Tuner-mixer-amp Bag Cardboard support Figure 9.1 Packing. Put this assembly in carton. 6.1.6 Payment of Non-Warranty Repairs Payment on out-of-warranty repairs must be received within 30 days of the repair date. Units unclaimed after 30 days become the property of Crown Audio Inc. If you have any questions, please contact Crown Factory Service. Crown Factory Service 1718 W. Mishawaka Rd., Elkhart, Indiana 46517-9439 U.S.A. Telephone: 574.294.8200 800.342.6939 (North America only) Facsimile: 574.294.8301 (Technical Support) 574.294.8124 (Factory Service) Internet: http://www.crownaudio.com Operation Manual Commercial Audio Series Tuner-Mixer-Amplifiers 7 Warranty 1 YEAR LIMITED WARRANTY US AND CANADA SUMMARY OF WARRANTY Crown International, 1718 West Mishawaka Road, Elkhart, Indiana 46517-4095 U.S.A. warrants to you, the ORIGINAL PURCHASER of each NEW Crown product, for a period of one (1) year from the date of purchase by the original purchaser (the “warranty period”) that the new Crown product is free of defects in materials and workmanship. Warranty is only valid within the country in which the product was purchased. ITEMS EXCLUDED FROM THIS CROWN WARRANTY This Crown Warranty is in effect only for failure of a new Crown product which occurred within the Warranty Period. It does not cover any product which has been damaged because of any intentional misuse, accident, negligence, or loss which is covered under any of your insurance contracts. This Crown Warranty also does not extend to the new Crown product if the serial number has been defaced, altered, or removed. Operation Manual our factory within a reasonable time after receipt of the defective product at our authorized service center or our factory. All expenses in remedying the defect, including surface shipping costs in the United States, will be borne by us. (You must bear the expense of shipping the product between any foreign country and the port of entry in the United States including the return shipment, and all taxes, duties, and other customs fees for such foreign shipments.) HOW TO OBTAIN WARRANTY SERVICE You must notify us of your need for warranty service within the warranty period. All components must be shipped in a factory pack, which, if needed, may be obtained from us free of charge. Corrective action will be taken within a reasonable time of the date of receipt of the defective product by us or our authorized service center. If the repairs made by us or our authorized service center are not satisfactory, notify us or our authorized service center immediately. WHAT THE WARRANTOR WILL DO DISCLAIMER OF CONSEQUENTIAL AND INCIDENTAL DAMAGES We will remedy failures due to defects in the materials and workmanship by repair or replacement. Warranty work can only be performed at our authorized service centers or at the factory. Warranty work for some products can only be performed at our factory. We will remedy the defect and ship the product from the service center or YOU ARE NOT ENTITLED TO RECOVER FROM US ANY INCIDENTAL DAMAGES RESULTING FROM ANY DEFECT IN THE NEW CROWN PRODUCT. THIS INCLUDES ANY DAMAGE TO ANOTHER PRODUCT OR PRODUCTS RESULTING FROM SUCH A DEFECT. SOME STATES DO NOT ALLOW THE EXCLUSION OR LIMITATIONS OF INCIDENTAL OR CONSEQUENTIAL DAMAGES, SO THE ABOVE LIMITATION OR EXCLUSION MAY NOT APPLY TO YOU. WARRANTY ALTERATIONS No person has the authority to enlarge, amend, or modify this Crown Warranty. This Crown Warranty is not extended by the length of time which you are deprived of the use of the new Crown product. Repairs and replacement parts provided under the terms of this Crown Warranty shall carry only the unexpired portion of this Crown Warranty. DESIGN CHANGES We reserve the right to change the design of any product from time to time without notice and with no obligation to make corresponding changes in products previously manufactured. LEGAL REMEDIES OF PURCHASER THIS CROWN WARRANTY GIVES YOU SPECIFIC LEGAL RIGHTS, YOU MAY ALSO HAVE OTHER RIGHTS WHICH VARY FROM STATE TO STATE. No action to enforce this Crown Warranty shall be commenced after expiration of the warranty period. THIS STATEMENT OF WARRANTY SUPERSEDES ANY OTHERS CONTAINED IN THIS MANUAL FOR CROWN PRODUCTS. 9/07 page 21 Commercial Audio Series Tuner-Mixer-Amplifiers THIS PAGE INTENTIONALLY LEFT BLANK page 22 Operation Manual Commercial Audio Series Tuner-Mixer-Amplifiers PRODUCT REGISTRATION Crown International 1718 W. Mishawaka Rd. Elkhart, IN 46517-9439 Phone: 574-294-8000 Fax: 574-294-8329 www.crownaudio.com Online registration is also available at http://crownweb.crownintl.com/webregistration. Warranty is only valid within the country in which the product is purchased. When this form is used to register your product, it may be mailed or faxed. Crown International 1718 W Mishawaka Rd Elkhart IN 46517 Fax: 574-294-8329 CUT ON THIS LINE Please note that some information is required. Incomplete registrations will not be processed. * Indicates required information. OWNER'S INFORMATION - PLEASE PRINT * First name: ______________________ Middle initial: _____ * Last name: ________________________________ Company: _________________________________________________________________________________ * Mailing address: ____________________________________________________________________________ * City: ____________________________* State: ___________________________* Zip Code: ________________ * Country: __________________________ E-mail address: ___________________________________________ * Phone # (include area code): ___________________________ Fax #: __________________________________ PRODUCT INFORMATION * MODEL e.g. IT8000, CDi1000, PCC160 ________________________________ ________________________________ ________________________________ ________________________________ * SERIAL # e.g. 8000000000 ____________________ ____________________ ____________________ ____________________ * PURCHASE DATE mo/day/yr ______ /_____ /_____ ______ /_____ /_____ ______ /_____ /_____ ______ /_____ /_____ Product purchased from: *(Business/Individual) ___________________________ Country: ________________________ Comments: ____________________________________________________________________________________ _____________________________________________________________________________________________ _____________________________________________________________________________________________ Operation Manual page 23 Commercial Audio Series Tuner-Mixer-Amplifiers THIS PAGE INTENTIONALLY LEFT BLANK page 24 Operation Manual Commercial Audio Series Tuner-Mixer-Amplifiers Crown Audio Factory Service Information Shipping Address: Crown Audio Factory Service, 1718 W. Mishawaka Rd., Elkhart, IN 46517 PLEASE PRINT CLEARLY SRA #: __________________(If sending product to Crown factory service.) Model: _________________________________ Serial Number: _____________________ Purchase Date: ________________ PRODUCT RETURN INFORMATION Individual or Business Name: ___________________________________________________________________________________________________________________________________________________________________________ Phone #: __________________________________________________ _________________________________________________________ Fax #: ________________________________________ E-Mail: Street Address (please, no P.O. Boxes): ___________________________________________________________________________________________________________________________________________________________________________ City: __________________________________________ State/Prov: ________________________________ Postal Code: _________________ Country: _____________________ Nature of problem: ___________________________________________________________________________________________________________________________________________________________________________ ___________________________________________________________________________________________________________________________________________________________________________ ___________________________________________________________________________________________________________________________________________________________________________ Other equipment in your system: ___________________________________________________________________________________________________________________________________________________________________________ If warranty is expired, please provide method of payment. Proof of purchase may be required to validate warranty. PAYMENT OPTIONS I have open account payment terms. Purchase order required. PO#____________________________________________________ COD Credit Card (Information below is required; however if you do not want to provide this information at this time, we will contact you for the information when your unit is repaired). Credit card information: Type of credit card: Master Card Type of credit card account: Visa Personal/Consumer American Express Discover Business/Corporate Card # ______________________________________________ Exp. date: _____________ * Card ID #: __________________________ * Card ID # is located on the back of the card following the credit card #, in the signature area. On American Express, it may be located on the front of the card. This number is required to process the charge to your account. If you do not want to provide it at this time, we will call you to obtain this number when the repair of your unit is complete. Name on credit card: ____________________________________________________________________________ Billing address of credit card: __________________________________________________________________________ __________________________________________________________________________ __________________________________________________________________________ Operation Manual page 25 Commercial Audio Series Tuner-Mixer-Amplifiers THIS PAGE INTENTIONALLY LEFT BLANK page 26 Operation Manual Commercial Audio Series Tuner-Mixer-Amplifiers THIS PAGE INTENTIONALLY LEFT BLANK Operation Manual page 27