1
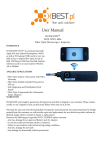
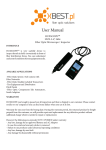
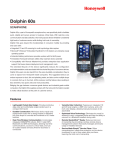
TheFibers
C R E AT I V E F I B E R S
User Manual
HUXSCOPE-WiFiTM
Fiber Optic Microscope / Inspector
STANDARD PACKAGE
HARDWARE SPECIFICATIONS
a. Handset (included WiFi)
Brand Name
HUXScope-WiFi
b. AC Battery Charger incl. USB to mini 5-pin cable
Magnification
260X - 400X
b. Software (Pass/Fail Analysis)
Field of Vision
c. Tip for female SC/PC and FC/PC
Focus
d. Tip for female LC/PC
WiFi
e. Manual
Power
[Female Tip is to inspect ferrule inside of adaptor and Male Tip is to
Battery
inspect patchcord ferrule.]
Software
HUXSCOPE you bought is passed our all inspection and then is
shipped to our customer. TheFibers give you a warranty for one year
2.4GHz WiFi IEEE 802.11b/g/n
110/220V@50/60Hz Charger or USB Cable with PC
3.7V 1300mA Rechargeable Lithium Polymer Battery
Battery Running Time
USB Cable
WARRANTY
400um x 300um
Manual, Maximum 2mm in and out
Dimension
Approx. 4 hours (continuous usage)
mini 5-pin to USB 2.0 for Windows XP, WIN7/8
For PC
Pass/Fail Analysis to IEC 61300-3-35
For Smartphone
Android App and iOS (Apple) App
Handset (without Tip)
Weight
185mm (L) x 24mm (T)
170g
from the buying date. During the warranty period, for the returned
product by freight prepaid from the customer, TheFibers will provide
repair and replacement for any defective product without additional
PRODUCT EXTERIOR OVERVIEW
charge which is needed to repair or replacement.
However the followings are NOT COVERED under warranty:
Focus
▪ In case the serial and warranty sticker is removed
▪ Failure to use products under abnormal operating conditions
▪ Any loss, damage by user fault
▪ Any damage by disassembly without permission
INTRODUCE
TM
HUXSCOPE-WiFi
Charging LED
WiFi LED
is communicated with Apple iOS and Android
Smartphone (WiFi) as well as PC/Laptop (USB) and it is very usefully
device to inspect fiber optic ferrule in field. HUXScope-WiFi has
Pass/Fail Analysis Software and it is no need exterior Wireless AP or
Module.
KEY FEATURES
• WiFi and USB connection to Smartphone and PC
• Android App and iOS (Apple) App both
S/W WiFi/USB
S/W ON/OFF
• Pass/Fail Analysis to IEC 61300-3-35
• Available several connector & adaptor types Tips
(Both Female / Male Tip)
AVAIABLE APPLICATIONS
▪ Fiber Optic System / Sub-system with Fiber Networks
• External Interface : mini 5-pin type
• Save inspected images and reports
▪ Fiber Optic Module included Transceivers, SFP, etc.
• Real-time report in field through smartphone
▪ Test Equipment and Distribution Patch Panels
• Built-in rechargeable battery
▪ Fiber Optic Components like Attenuators, Inside Adaptors
• No need exterior Wireless AP or Module
Mini 5-pin
WiFi OPERATION
Handset includes rechargeable battery and the running time of this
battery (if full) is approx. 4 hours (continuous usage). Therefore
please S/W OFF always when you don't inspect. The Charging LED
show RED when the battery is charging and this RED LED will be
OFF when the battery is full charged or un-charged. You can see the
below how to charge more detail.
f. Open Android Smartphone App and camera properly like below.
- click Camera Control
Imaging Device.]
- click Setting Icon
d. Check button: To analysis Pass/Fail and Resume to return.
- click IP Camera
e. Select Single Mode or Multi Mode button.
- set Camera Name
f. Set Acceptance Criteria
- set Camera Model to
g. Parameter Setting button: To control Video Process and Camera
"Unknown IP-06"
- set IP to 10.10.1.1 and
a. Download and install the recommended App (IP Cam Viewer) in
App Store (iPhone) and Google Play Store (Android Smartphone).
b. Handset S/W OFF
HTTP Port to 8196
- click Save
d. Smartphone Wi-Fi ON and connect to TheFibers AP.
Control (Setting 1, Setting 2)
h. Change Core/Clad Threshold (recommend 70~90) according to
your PC condition.
i. Save & Print button: After click Check button, you can save (or
print) the analysis report by bmp or jpg file. After click Resume button,
c. Handset S/W WiFi and then S/W ON. Waits for a seconds and
then the WiFi LED is blinking with GREEN color.
[If your software don't work yet, you have to change the name of
g. Insert the tip into adaptor or female side of fiber optic devices. You
you can capture (or print) the inspected image only automatically like
can feel reaching edge of the adaptor. To get clear images, you have
Capture_0001, Capture_0002....
to rotate 360° FOCUS.
h. Change Tip : The handset basically was assembled by SC/FC/PC
Charging Battery
Female Tip. If you want to change Tip to others, it could be changed
we recommend you should be careful.
a. Connect AC Battery Charger to Handset and the required electric
power is 110/220V@50/60Hz. The full charging time takes about 3
hours. When charging, the S/W position is no problem at ON or OFF
but OFF is more faster.
USB OPERATION
b. Connect Handset to PC by USB to mini 5-pin cable and then the
by screw easily. Please keep clean lens in Handset when removing
and changing the Tip. The lens is important to get clean images. So
e. Open iOS iPhone and set like below.
- click Menu
- click Manage Cameras
- click Add Camera
a. Download and install the supplied software to your PC.
- click IP Camera
b. Connect Handset to PC by USB to mini 5-pin cable and move
- set Name
- set Type to "Unknown IP-06"
- set IP/Host to 10.10.1.1
and HTTP to 8196
- click Save
battery will be recharged but slowly. During use it with USB operation,
if the Battery is full, the charging process is stopped automatically.
S/W USB and then S/W ON.
c. Run the software (click icon).
c. The Battery Life Time is about 500 cycles. Unless you use full
battery every day or unless it is charged by un-recommended
Charger, no need battery replacement for long time. To replace the
Battery, the Handset should be sent to TheFibers A/S Center only
and the replacement takes just 1 day.
TheFibers A/S Center
A-1109 Keumkang Penterium IT Tower
282 Hagui-ro, Anyang-City, Korea
Tel: +82-31-381-6108
www.thefibers.com