Transcript
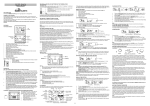
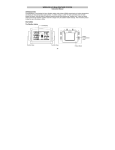
WINDOW THERMOMETER
Instruction manual
INTRODUCTION:
Congratulations on purchasing this elegant window thermometer which displays the
minimum, maximum and the current outdoor temperature. To enjoy the full benefits of
this innovative product, please read this operating manual.
+ (Plus) key
•
Press and hold to reset both the minimum and maximum temperature value
to the current temperature at the same time.
•
Press to adjust hour or minute in time setting mode
SET key
•
Press and hold to advance to time setting mode
TIME SETTING
User shall set the current time before use so that the thermometer will automatically
reset the minimum and maximum temperature every day at 8:00 pm and 8:00 am
respectively:
1.
With an appropriate tool, press and hold the SET key for about one second, the
hour digits will start flashing.
CARE AND MAINTENANCE:
•
Extreme temperatures, vibration and shock should be avoided as these may
cause damage to the units and give inaccurate forecasts and readings.
•
When cleaning the display and casings, use a soft damp cloth only. Do not use
solvents or scouring agents as they may mark the LCD and casings.
•
Do not submerge the units in water.
•
Immediately remove all low powered batteries to avoid leakage and damage.
Replace only with new batteries of the recommended type.
•
Do not make any repair attempts to the units. Return it to their original point of
purchase for repair by a qualified engineer. Opening and tampering with the
units may invalidate their guarantee.
•
Do not expose the units to extreme and sudden temperature changes, this may
lead to rapid changes in forecasts and readings and thereby reduce their
accuracy.
SPECIFICATIONS:
Outdoor temp. measuring range
flashing
FEATURES
•
•
•
•
•
Transparent LCD display
Displays minimum, maximum and current outdoor temperature
Automatically reset the minimum temperature every day at 8:00 pm
Automatically reset the maximum temperature every day at 8:00 am
Low battery indicator
2.
3.
4.
TO INSTALL AND REPLACE BATTERIES INTO THE THERMOMETER
The thermometer uses 1 x AAA, IEC LR3, 1.5V batteries. To install and replace the
batteries, please follow the steps below:
1.
Lift up to remove the cover at the back.
2.
Insert batteries observing the correct
polarity (see marking).
3.
Replace compartment cover.
BATTERY CHANGE:
It is recommended to replace the batteries in all units on an annual basis to ensure
optimum accuracy of these units.
Please participate in the preservation of the environment. Return
used batteries to an authorized depot.
Use the + key to set the hour.
Press the SET key again to advance to the minute setting. The minute digits
will start flashing.
Use the + key to set the minute. Press the SET key again to confirm and return
the normal display.
Every 10 seconds
Power consumption
:
1 x AAA, IEC LR3, 1.5V
(alkaline batteries recommended)
Dimensions (L x W x H)
:
66 x 19.2 x 84.2 mm
LIABILITY DISCLAIMER
•
•
Manual Reset
User may press and hold the + key (with an appropriate tool) for about one second to
reset both the minimum and maximum temperature to the current temperature at the
same time
•
Automatic Reset
•
The thermometer will automatically reset the minimum temperature every day
at 8:00 pm and reset the maximum temperature every day at 8:00 am.
•
If the thermometer experience a temperature which is out the measuring range,
i.e. lower than -29.9 or higher than 70.0 °C, then the max and min will be reset
to the current temperature once it is back to a temperature in the measuring
range.
•
POSITIONING
•
•
•
•
tape on this surface
-29.9ºC to +70C with 0.1°C Resolution
(“OF.L” displayed if working at temp. lower
than -30 or higher than 70 °C)
Outdoor temp. checking intervals :
RESETTING THE MINIMUM AND MAXIMUM TEMPERATURE
This fancy temperature station is ideal to be placed onto windows (outer glass
surface) with a double side tape. Therefore you will observe the temperature outside
conveniently.
Place the Double sided
:
•
•
•
The electrical and electronic wastes contain hazardous substances. Disposal of
electronic waste in wild country and/or in unauthorized grounds strongly
damages the environment.
Please contact your local or/and regional authorities to retrieve the addresses
of legal dumping grounds with selective collection.
All electronic instruments must from now on be recycled. User shall take an
active part in the reuse, recycling and recovery of the electrical and electronic
waste.
The unrestricted disposal of electronic waste may do harm on public health and
the quality of environment.
As stated on the gift box and labeled on the product, reading the “User manual”
is highly recommended for the benefit of the user. This product must however
not be thrown in general rubbish collection points.
The manufacturer and supplier cannot accept any responsibility for any
incorrect readings and any consequences that occur should an inaccurate
reading take place.
This product is designed for use in the home only as indication of the
temperature.
This product is not to be used for medical purposes or for public information.
The specifications of this product may change without prior notice.
This product is not a toy. Keep out of the reach of children.
No part of this manual may be reproduced without written authorization of the
manufacturer.
SETTING UP
1.
2.
3.
4.
After the batteries have been installed a full LCD segment will be shown.
In about five second, the current outdoor temperature will be shown. The
thermometer will capture the maximum and minimum temperature
measured and display them immediately.
Once the thermometer experience a new highest or lowest temperature, it
will renew and display the corresponding minimum or maximum
temperature.
User shall then advance to the time setting mode to enter the current time in
the time (see time setting). The thermometer will automatically reset the
minimum temperature every day at 8:00 pm; and reset the maximum
temperature every day at 8:00 am.
Double sided tape
Caution:
This thermometer contains glass part.
User shall handle it with care during usage.
FUNCTION KEYS
There are two function buttons located at the back under the battery cover. They are
the + (Plus) key and SET key
+ key
SET key
1