Download S800_Landing_Gear_v1.2_en
Transcript
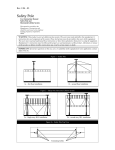
Retractable Landing Gear for Spreading Wings S800 V 1.2 Assembly & Connection The part with the control board attached is defined as left, the other part is right. Make sure to make a 2013.01.24 Revised distinction between the left and the right servos. STEP1 Introduction Servo Installation (If the servos have already been installed, please skip this step.) 1. Define and mark two HS-7954SH servos from Hitec as left servo and right servo. 2. Connect the left servo to the [L] port on the control board, and the right servo to the [R] port. The retractable landing gear is designed for the S800 frame in order to provide a better perspective in 3. Keep pressing the SET button with the aid of a small tool, and then power on. You will see the yellow aerial-filming / photography work. By using a 2-position switch channel of the R/C transmitter, you can LED flashes quickly, and then wait until the servos have finished their position initialization. control the landing gear to retract remotely. The retractable landing gear will not block the view of the 4. Make sure the servo arm is parallel to the servo’s center line (shown in the following Fig). camera lens, making smooth shooting in all directions possible. 5. Power off, and assemble the left and right servos to the left and the right parts of the landing gear. Tips: If you use your own servos, it is recommended to use dedicated programmer from Hitec to enlarge the servo travel from 120° to 150°, and then install servos by the above steps. Servos from DJI have been enlarged servo travel. STEP2 Mechanical Assembly 1. Assemble the left and the right parts respectively, and then fix the screws at the joints with appropriate screw thread lock. 2. Connect the left and right parts with the connecting rod. 3. For safety reasons, make sure to connect the springs to both parts. 4. Assemble the battery Bracket, referring to the “S800 User Manual”. STEP3 Electrical Connections 1. Plug the cables from the servos into the correct ports on the control board. Make sure the right servo is connected to the [R] port, and the left servo to the [L] port. Disclaimer & Warning 2. Connect the required 2-position switch channel of the R/C receiver to the [IN] port. Thank you for purchasing this DJI product. Please regularly visit the S800 web page at Ser voAssembly Ser voArmInstallation www.dji-innovations.com. This page is updated regularly. Any technical updates and manual corrections will CenterL ine be available on this web page. Due to unforeseen changes or product upgrades, the information contained in this manual is subject to change without notice. Servo Arm RightS er vo Please strictly follow the manual to assemble and use the retractable landing gear. As DJI Innovations has Ser vo no control over use, setup, final assembly, modification or misuse, no liability shall be assumed nor accepted for any resulting damage or injury. By the act of use, setup or assembly, the user accepts all resulting LeftS ervo ControlBoard Finished liability. DJI Innovations accepts no liability for damage(s) or injuries incurred directly or indirectly from the RL use of this product. IN DANGER!!! DO NOT TOUCH! DJI and S800 are registered trademarks of DJI Innovations. Names of product, brand, etc., appearing in this RightSer vo manual are trademarks or registered trademarks of their respective owner companies. This product and RightP artoftheL andingG ear manual are copyrighted by DJI Innovations with all rights reserved. No part of this product or manual shall LeftP artoftheL andingG ear LeftSer vo LED SETButton ReceiverChannel be reproduced in any form without the prior written consent or authorization of DJI Innovations. No patent liability is assumed with respect to the use of the product or information contained herein. GimbalF rontD irection ©2012 DJI Innovations. All Rights Reserved. 1 ©2012 DJI Innovations. All Rights Reserved. 2 Travel Calibration Usage If the Landing Gear you got has been installed with the servos, please skip this step. Otherwise, calibrate the The landing gear can be used by following the steps below after assembly & connection. system using the following procedure. 1. Make sure the transmitter & receiver batteries are fully charged. 1. For safety reasons, please keep your hands away from any link mechanism to avoid injury. 2. Toggle the switch to the [Lower] position, and then turn on the transmitter. 2. Make sure the [R], [L] and [IN] connections are correct and firmly connected. 3. Make sure the [R], [L] and [IN] connections are correct and firmly connected. 3. Hand the Landing Gear in the air during calibration, as the landing gear will move. 4. Make sure the Landing Gear is at the [Lower] position, and then power on the system. If the green 4. Keep pressing the SET button using a small tool and power on. You can see the LED flashes YELLOW LED is on solid, then this is a normal start. If the LED will flash GREEN slowly, please re-calibrate the quickly, and then press the SET button once again. The system begins auto calibration with the system according to the procedure of Travel Calibration. indication of the LED flashing YELLOW slowly. DO NOT obstruct any moving part during auto 5. Make sure to toggle the switch to the [Retracted] position only AFTER you takeoff the aircraft. calibration. 6. When the aircraft is landing, please toggle the switch to the [Lower] position for a safe landing. 5. First the left-part is calibrated, the left link mechanism first moves up then moves down automatically. Tips Then the right-part is calibrated, the right link mechanism first moves up then moves down automatically. The system will turn off the servo power temporarily within 3 seconds after the landing gear has 6. After calibration, both left and right parts are in the [Lower] position, and the LED is on solid GREEN. reached the target position. Then the landing gear will work normally. When powering on the system, if the TX switch is in the [Retracted] position, which is the unsafe signal Notes: for the landing gear, the LED will quickly flash RED. Please toggle the switch to the [Lower] position. If the LED is on solid YELLOW when calibrating, then it means that there is something wrong with the If there is an abnormal signal or no signal input into the [IN] port the LED will slowly flash RED. Please calibration, please re-do the Servo Installation of the Assembly & Connection section, since the servo check the receiver and the connections. arm might be installed with a wrong angle. If the power consumption of the servos is too large when in use, the LED will be on solid RED. If this Please avoid any obstruction when calibrating. If the landing gear is blocked from moving, please status lasts more than 4 seconds, the landing gear will lower and the LED will flash GREEN slowly. recalibrate the landing gear by the above steps. Please re-calibrate the system. If the [R] and [L] servo cables are reversed, the travel will not be measured correctly. Please connect LED Indicator correctly and recalibrate the landing gear using the above steps. If the LED flashes slowly GREEN after power on, please re-calibrate the system using the above steps. System works normally Hasn’t been calibrated R/C Transmitter (TX) Setting Need re-calibration Select a 2-position switch channel (default setting is OK) on the Wrong calibration TX as the control input of the landing gear, and then make sure Enter the calibration mode the corresponding port of the receiver is connected to the [IN] System is calibrating port on the control board. Retracted:Toggle the switch Fig. 1 Motor stall to this position to retract the Input signal is unsafe when power on the TX landing gear (Fig.1) Input signal is abnormal Lower:Toggle the switch to Specifications this position to lower the Landing Gear (Fig. 2) Fig. 2 Parameter Range Parameter Range Tips: Working Voltage 3S~6S (LiPo) Input Signal PWM (High-Pulse Width 800us~2200us) If the switch channel on the TX has fail-safe function, set the fail-safe value to [Lower] position, so that Working Current Max 1A@6S Output Signal PWM(Neutral Position is 1520us) in 90Hz the landing gear will be in [Lower] status when the receiver enters fail-safe, to land the aircraft safely. To avoid false switch triggering, you can use the slide lever or other trim as the landing gear’s control o Working Temperature -20~70 C Output Voltage 6V Total Weight 875g Servo Travel 150 o (Minimum120 o) switch. ©2012 DJI Innovations. All Rights Reserved. 3 ©2012 DJI Innovations. All Rights Reserved. 4 Spare Parts List M2 . 5x5x1 . 3x1 M3 . 0x6 . 7x1 . 3x1 S8031501 S8031507 S8035201 S8031506 S8033501 S8034601 S8031505 S8035301 S8031507 S8032201 S8032202 HC _ M3 . 0x8 S8032203 S8032204 S8031502 S803 15 05 S803 15 03 S8034801 S803 15 04 S803 15 06 M2 . 5x5x1 . 3x1 S8033401 S8034901 HC _ M2 . 5x10 S8035001 S8035002 S8031604 S8033801 53 HITEC Servo(Right) S8035301、HC_M2.5X10 56 Spring S8033701、S8033801、S8034501、M3.0X6.7X1.3X1 57 Control Board Module S8034801、S8034901、S8035201、M2.5X5X1.3X1 58 H Frame S8034601、S8035001、M3.0X6.7X1.3X1 16 T-Frame(Right) S8031601、S8031602、S8031603 17 T-Frame(Left) S8031601、S8031602、S8031604 18 T-Frame Nonslip Damper (4pcs) S8031801 T-Frame Silicone Rubber Damper 19 S8031901 (4pcs) 20 Bi-pod Carbon Tube 22 Battery Tray S8032001 S8032201、S8032202、S8032203、S8032204、 S8033701 M3 . 0x6 . 7x1 . 3x1 S8034501 M2.5X5X1.3X1 S8035101 S8031501、S8031502、S8031503、S8031504、 23 (1) Carbon Tube Bracket(Left Set) S8031505、HC_M3X8 S8031501、S8031502、S8031503、S8031504、 24 S8031601 Carbon Tube Bracket(Middle Set) S8031506、HC_M3X8 S8031603 S8031603 S8031604 S8031501、S8031502、S8031503、S8031504、 25 Carbon Tube Bracket(Right Set) S8031507、HC_M3X8 HC _ M2 . 5x8 HC _ M3 . 0x22 S8031602 S8031801 S8032001 (2) S8031505 S8031506 Note: The parts from 16 to 20 and 22 to 25 are the same as the product of S800. S8031507 S8031901 Note: (1) Left and right T-Frame are different; (2) Left set, middle set and right set of carbon tube bracket are different. NO. Name 34 Retractable Module(Left) Components S8033401、S8033801、M2.5X5X1.3X1、 M3.0X6.7X1.3X1 S8033501、S8033801、M2.5X5X1.3X1、 35 Retractable Module(Right) M3.0X6.7X1.3X1 HC_M3X8、HC_M2.5X8、HC_M3X22、HC_M2.5X5、 39 Screw Package M2.5X5 X1.3X1、M3.0X6.7X1.3X1、M2.5X8 51 HITEC Servo(Left) ©2012 DJI Innovations. All Rights Reserved. S8035101、HC_M2.5X10 5 ©2012 DJI Innovations. All Rights Reserved. 6


